> ## Documentation Index
> Fetch the complete documentation index at: https://documentation.onesignal.com/llms.txt
> Use this file to discover all available pages before exploring further.
# iOS: Focus modes and interruption levels
> Understanding device settings and how they interact with push
Focus modes help iOS users control when and how they receive notifications by allowing separate modes like Work, Sleep, and Personal. Each mode adjusts notification visibility and delivery behavior.
To support important use cases like emergency alerts or account security, Apple introduced **Interruption Levels** to control how and when notifications appear—even when Focus modes are active.
## Interruption levels
Interruption levels determine the urgency and delivery behavior of notifications. There are four levels:
Standard priority notifications. These include sound, vibration, and screen wake behavior. They do not bypass Focus modes.
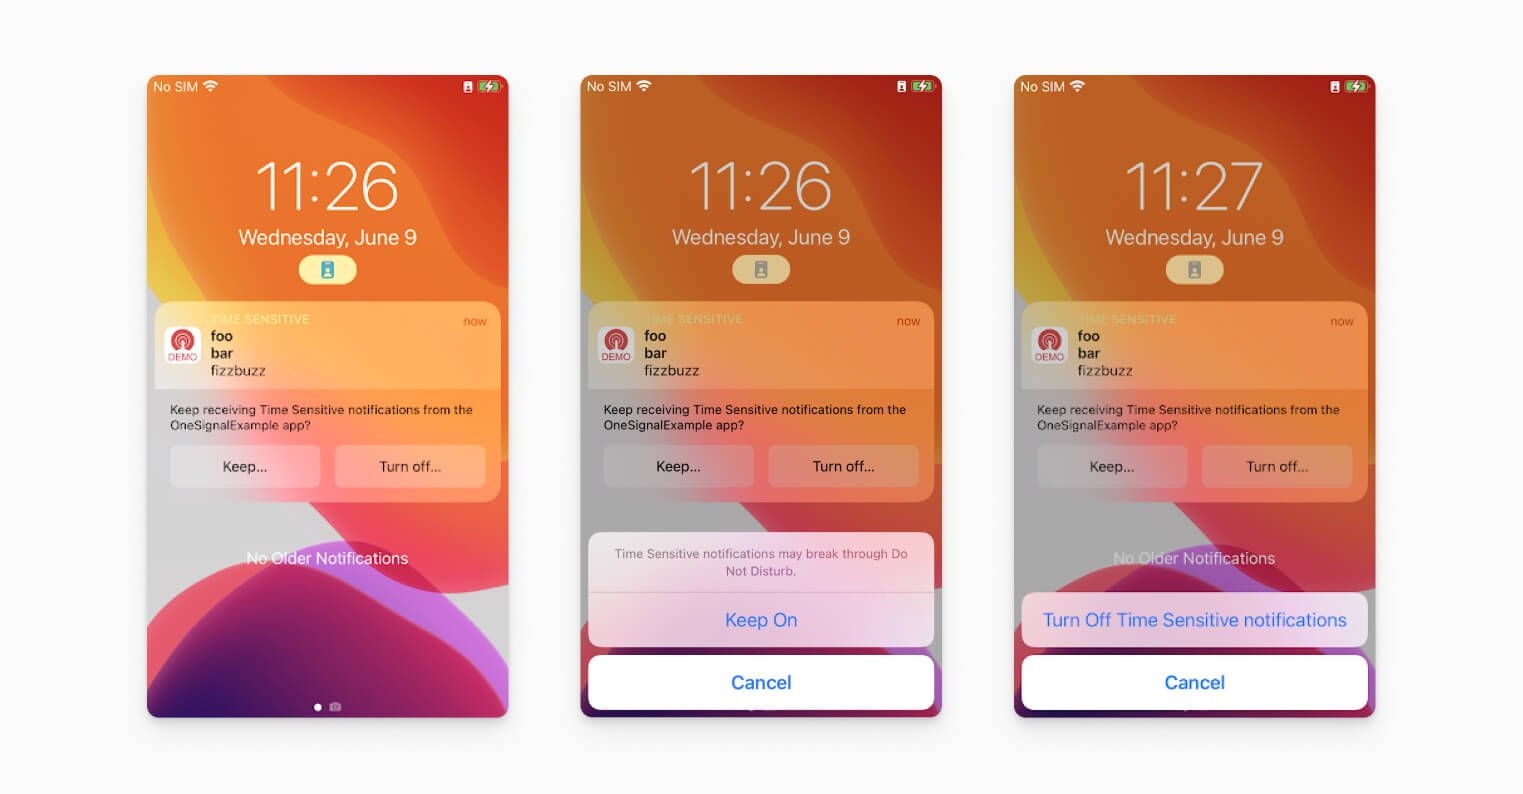
Behaves like Active but includes a special banner. Time Sensitive notifications can break through Focus modes and scheduled delivery. Use only when urgent user attention is required.
Low-priority notifications. No sound or vibration. They do not interrupt the user and do not break through Focus modes.
Highest priority notifications. Bypass all device controls and Focus modes. Used for emergencies like severe weather or health alerts. Requires prior approval from Apple to enable. See [Critical alerts setup](#critical-alerts-setup) for more details.
 ***
## How to set interruption level in OneSignal
When sending a push from the OneSignal Dashboard, you'll find **Notification Interruption Level** under **Apple iOS Settings**. The default is **Active**.
If using the [Create notification API](/reference/create-message), use these parameters:
* `ios_interruption_level`: Set to `"active"`, `"time-sensitive"`, `"passive"`, or `"critical"`
* `ios_relevance_score`: Optional numeric value from 0 to 1 to indicate importance for delivery ordering.
***
## Critical alerts setup
**Critical Alerts:**
* Ignore Do Not Disturb and silent switch.
* Are reserved for high-priority cases (e.g., health, security).
* Require explicit approval from Apple, and users must opt in separately even if they’ve enabled normal push notifications.
### Request Apple entitlement for critical alerts
1. Review [Apple's documentation](https://developer.apple.com/documentation/bundleresources/entitlements/com.apple.developer.usernotifications.critical-alerts/) and click **fill out the request form**.
2. Choose the Critical Alerts Entitlement request.
3. Fill out the form and submit the request.
4. Wait for Apple’s review and approval.
### Add the Critical Alerts entitlement to your app
Once Apple approves your request:
1. Open your `.entitlements` file in Xcode (or create one if you don't have it).
2. Add:
```xml theme={null}
com.apple.developer.usernotifications.critical-alerts
```
3. Ensure your provisioning profile includes this entitlement:
* Regenerate your provisioning profile in the Apple Developer portal if needed.
* Download and re-add it to Xcode.
### Request Critical Alert permission in your app code
Critical Alert permission is separate from standard push permission and must be requested like this (using Swift):
```swift theme={null}
import UserNotifications
UNUserNotificationCenter.current().requestAuthorization(options: [.alert, .sound, .badge, .criticalAlert]) { granted, error in
if let error = error {
print("Authorization error: \(error)")
} else {
print("Critical alert permission granted: \(granted)")
}
}
```
You should request this after getting standard push permission, ideally in your onboarding flow.
### Test Critical Alerts
1. Build and run your app.
2. Send a test push following the steps above in [How to set interruption level in OneSignal](#how-to-set-interruption-level-in-onesignal).
***
## Related docs
* [iOS: Relevance score](./ios-relevance-score)
* [Push overview](./push)
***
***
## How to set interruption level in OneSignal
When sending a push from the OneSignal Dashboard, you'll find **Notification Interruption Level** under **Apple iOS Settings**. The default is **Active**.
If using the [Create notification API](/reference/create-message), use these parameters:
* `ios_interruption_level`: Set to `"active"`, `"time-sensitive"`, `"passive"`, or `"critical"`
* `ios_relevance_score`: Optional numeric value from 0 to 1 to indicate importance for delivery ordering.
***
## Critical alerts setup
**Critical Alerts:**
* Ignore Do Not Disturb and silent switch.
* Are reserved for high-priority cases (e.g., health, security).
* Require explicit approval from Apple, and users must opt in separately even if they’ve enabled normal push notifications.
### Request Apple entitlement for critical alerts
1. Review [Apple's documentation](https://developer.apple.com/documentation/bundleresources/entitlements/com.apple.developer.usernotifications.critical-alerts/) and click **fill out the request form**.
2. Choose the Critical Alerts Entitlement request.
3. Fill out the form and submit the request.
4. Wait for Apple’s review and approval.
### Add the Critical Alerts entitlement to your app
Once Apple approves your request:
1. Open your `.entitlements` file in Xcode (or create one if you don't have it).
2. Add:
```xml theme={null}
com.apple.developer.usernotifications.critical-alerts
```
3. Ensure your provisioning profile includes this entitlement:
* Regenerate your provisioning profile in the Apple Developer portal if needed.
* Download and re-add it to Xcode.
### Request Critical Alert permission in your app code
Critical Alert permission is separate from standard push permission and must be requested like this (using Swift):
```swift theme={null}
import UserNotifications
UNUserNotificationCenter.current().requestAuthorization(options: [.alert, .sound, .badge, .criticalAlert]) { granted, error in
if let error = error {
print("Authorization error: \(error)")
} else {
print("Critical alert permission granted: \(granted)")
}
}
```
You should request this after getting standard push permission, ideally in your onboarding flow.
### Test Critical Alerts
1. Build and run your app.
2. Send a test push following the steps above in [How to set interruption level in OneSignal](#how-to-set-interruption-level-in-onesignal).
***
## Related docs
* [iOS: Relevance score](./ios-relevance-score)
* [Push overview](./push)
***