> ## Documentation Index
> Fetch the complete documentation index at: https://documentation.onesignal.com/llms.txt
> Use this file to discover all available pages before exploring further.
# Mailchimp Setup
> Step-by-step guide to setting up Mailchimp (formerly Mandrill) with OneSignal for transactional email delivery. Includes domain configuration, API key setup, email testing, and subscriber management.
This guide is for users who already have a Mailchimp account and want to integrate it with OneSignal. If you don’t have a Mailchimp account, consider using [OneSignal Email](./email-setup) instead.
## Requirements
* [Mailchimp Account](https://www.mailchimp.com)
* [Mailchimp Transactional Email Plan (formerly Mandrill)](https://mailchimp.com/help/add-or-remove-transactional-email/)
* [OneSignal Account](https://onesignal.com)
* Access to your domain and DNS provider
***
## Setup
### 1. Configure your domain for email
Go to the [Mailchimp Transactional Email Domains page](https://mandrillapp.com/settings/sending-domains) and add your domain if it hasn’t been added already.
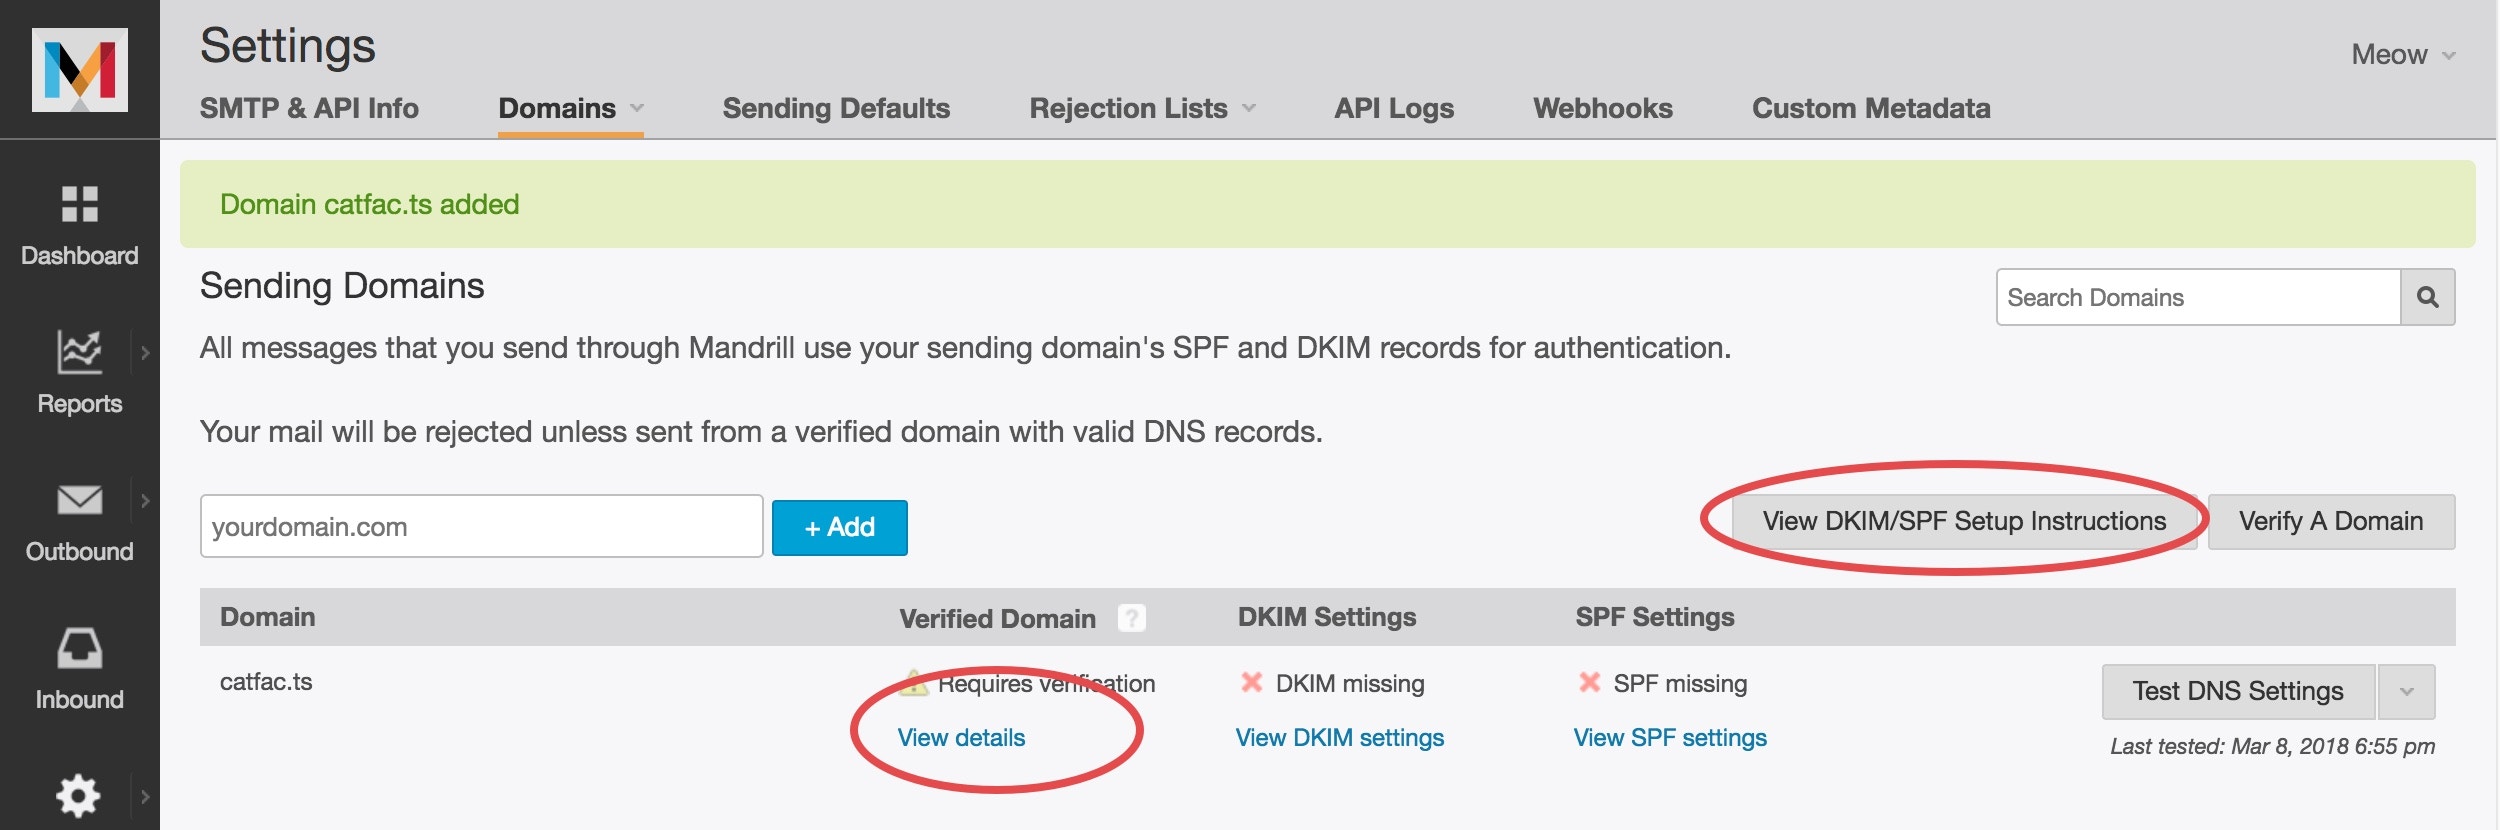
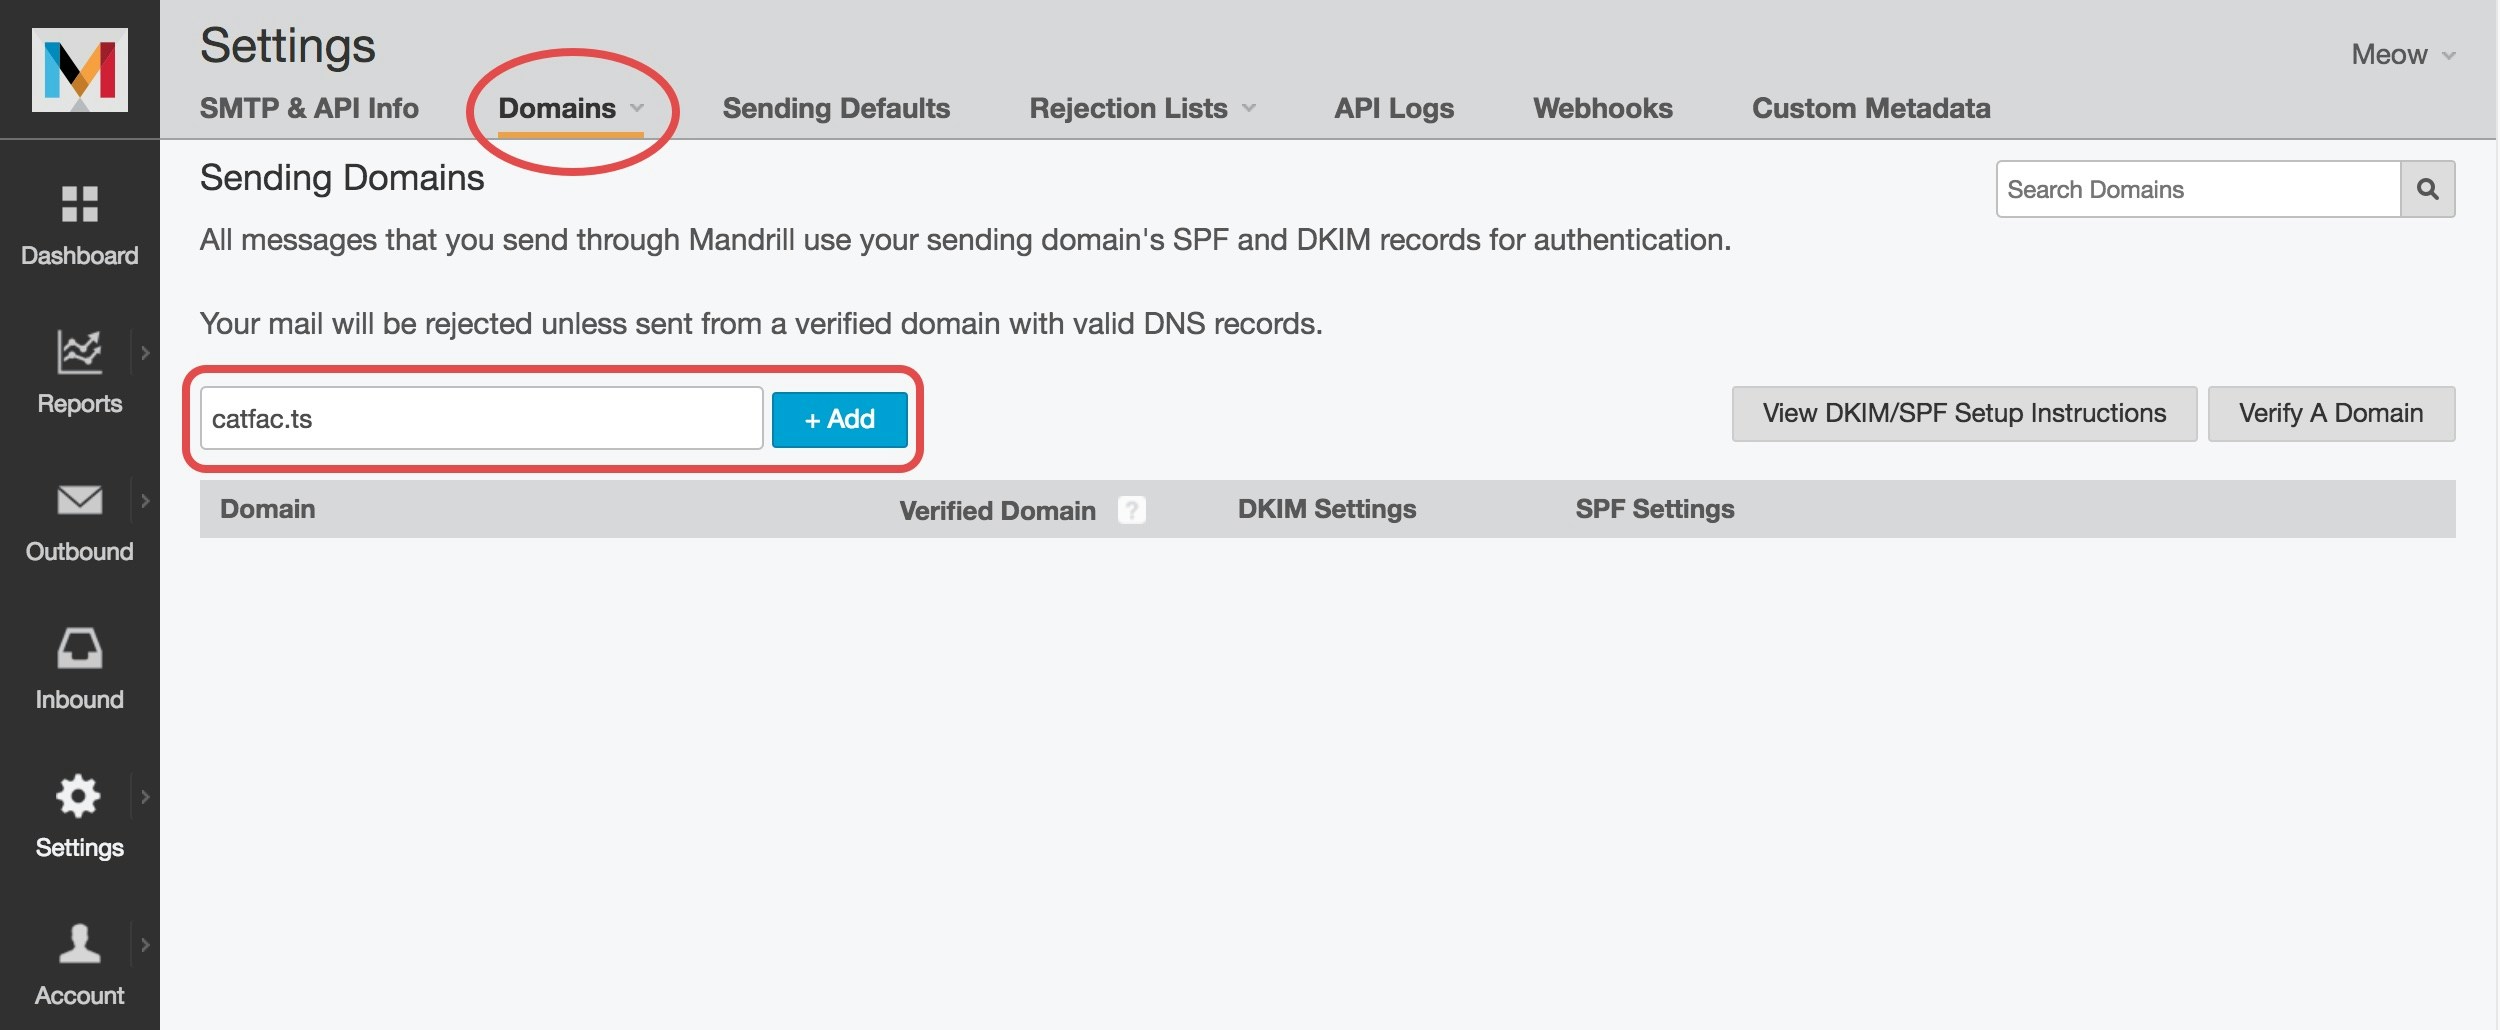 After adding your domain:
* Click **View DKIM/SPF Setup Instructions** to get your DNS records.
* Optionally verify ownership via email under **View details**.
After adding your domain:
* Click **View DKIM/SPF Setup Instructions** to get your DNS records.
* Optionally verify ownership via email under **View details**.
 Update your DNS records with your DNS provider. Follow [Mailchimp’s setup guide](https://mailchimp.com/developer/transactional/docs/authentication-delivery/#configure-your-dns) if needed.
Mailchimp may take up to 48 hours to verify your domain. You’ll receive a confirmation email once complete.
***
### 2. Create API Key
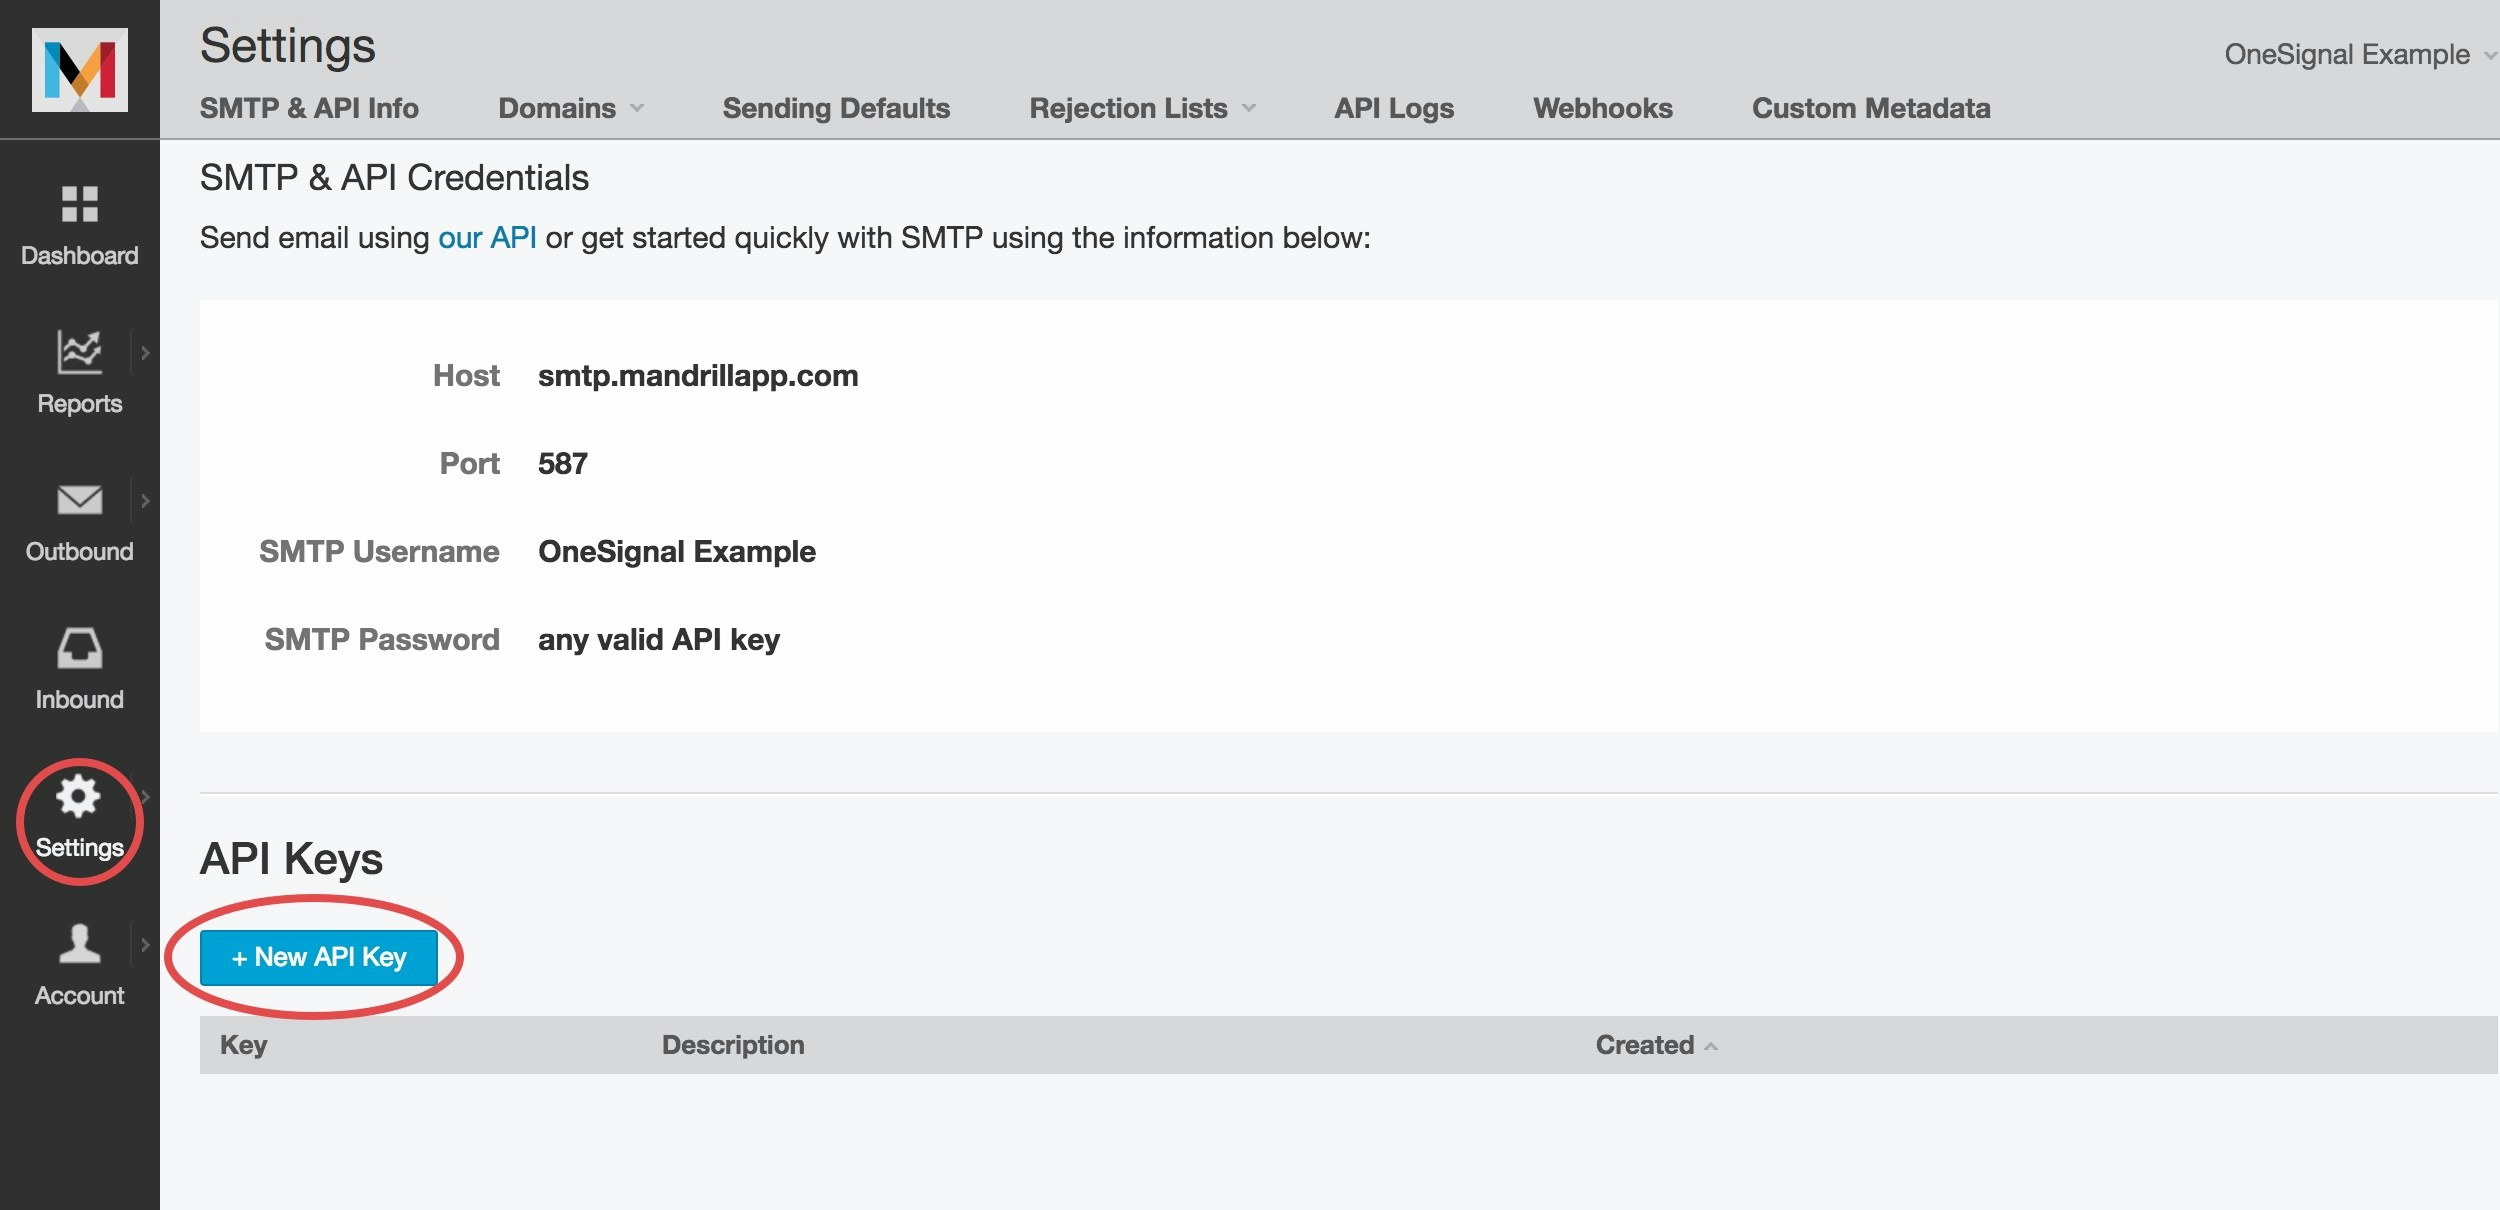
In the [Transactional Email Settings](https://mandrillapp.com/settings), click **+ New API Key**.
Update your DNS records with your DNS provider. Follow [Mailchimp’s setup guide](https://mailchimp.com/developer/transactional/docs/authentication-delivery/#configure-your-dns) if needed.
Mailchimp may take up to 48 hours to verify your domain. You’ll receive a confirmation email once complete.
***
### 2. Create API Key
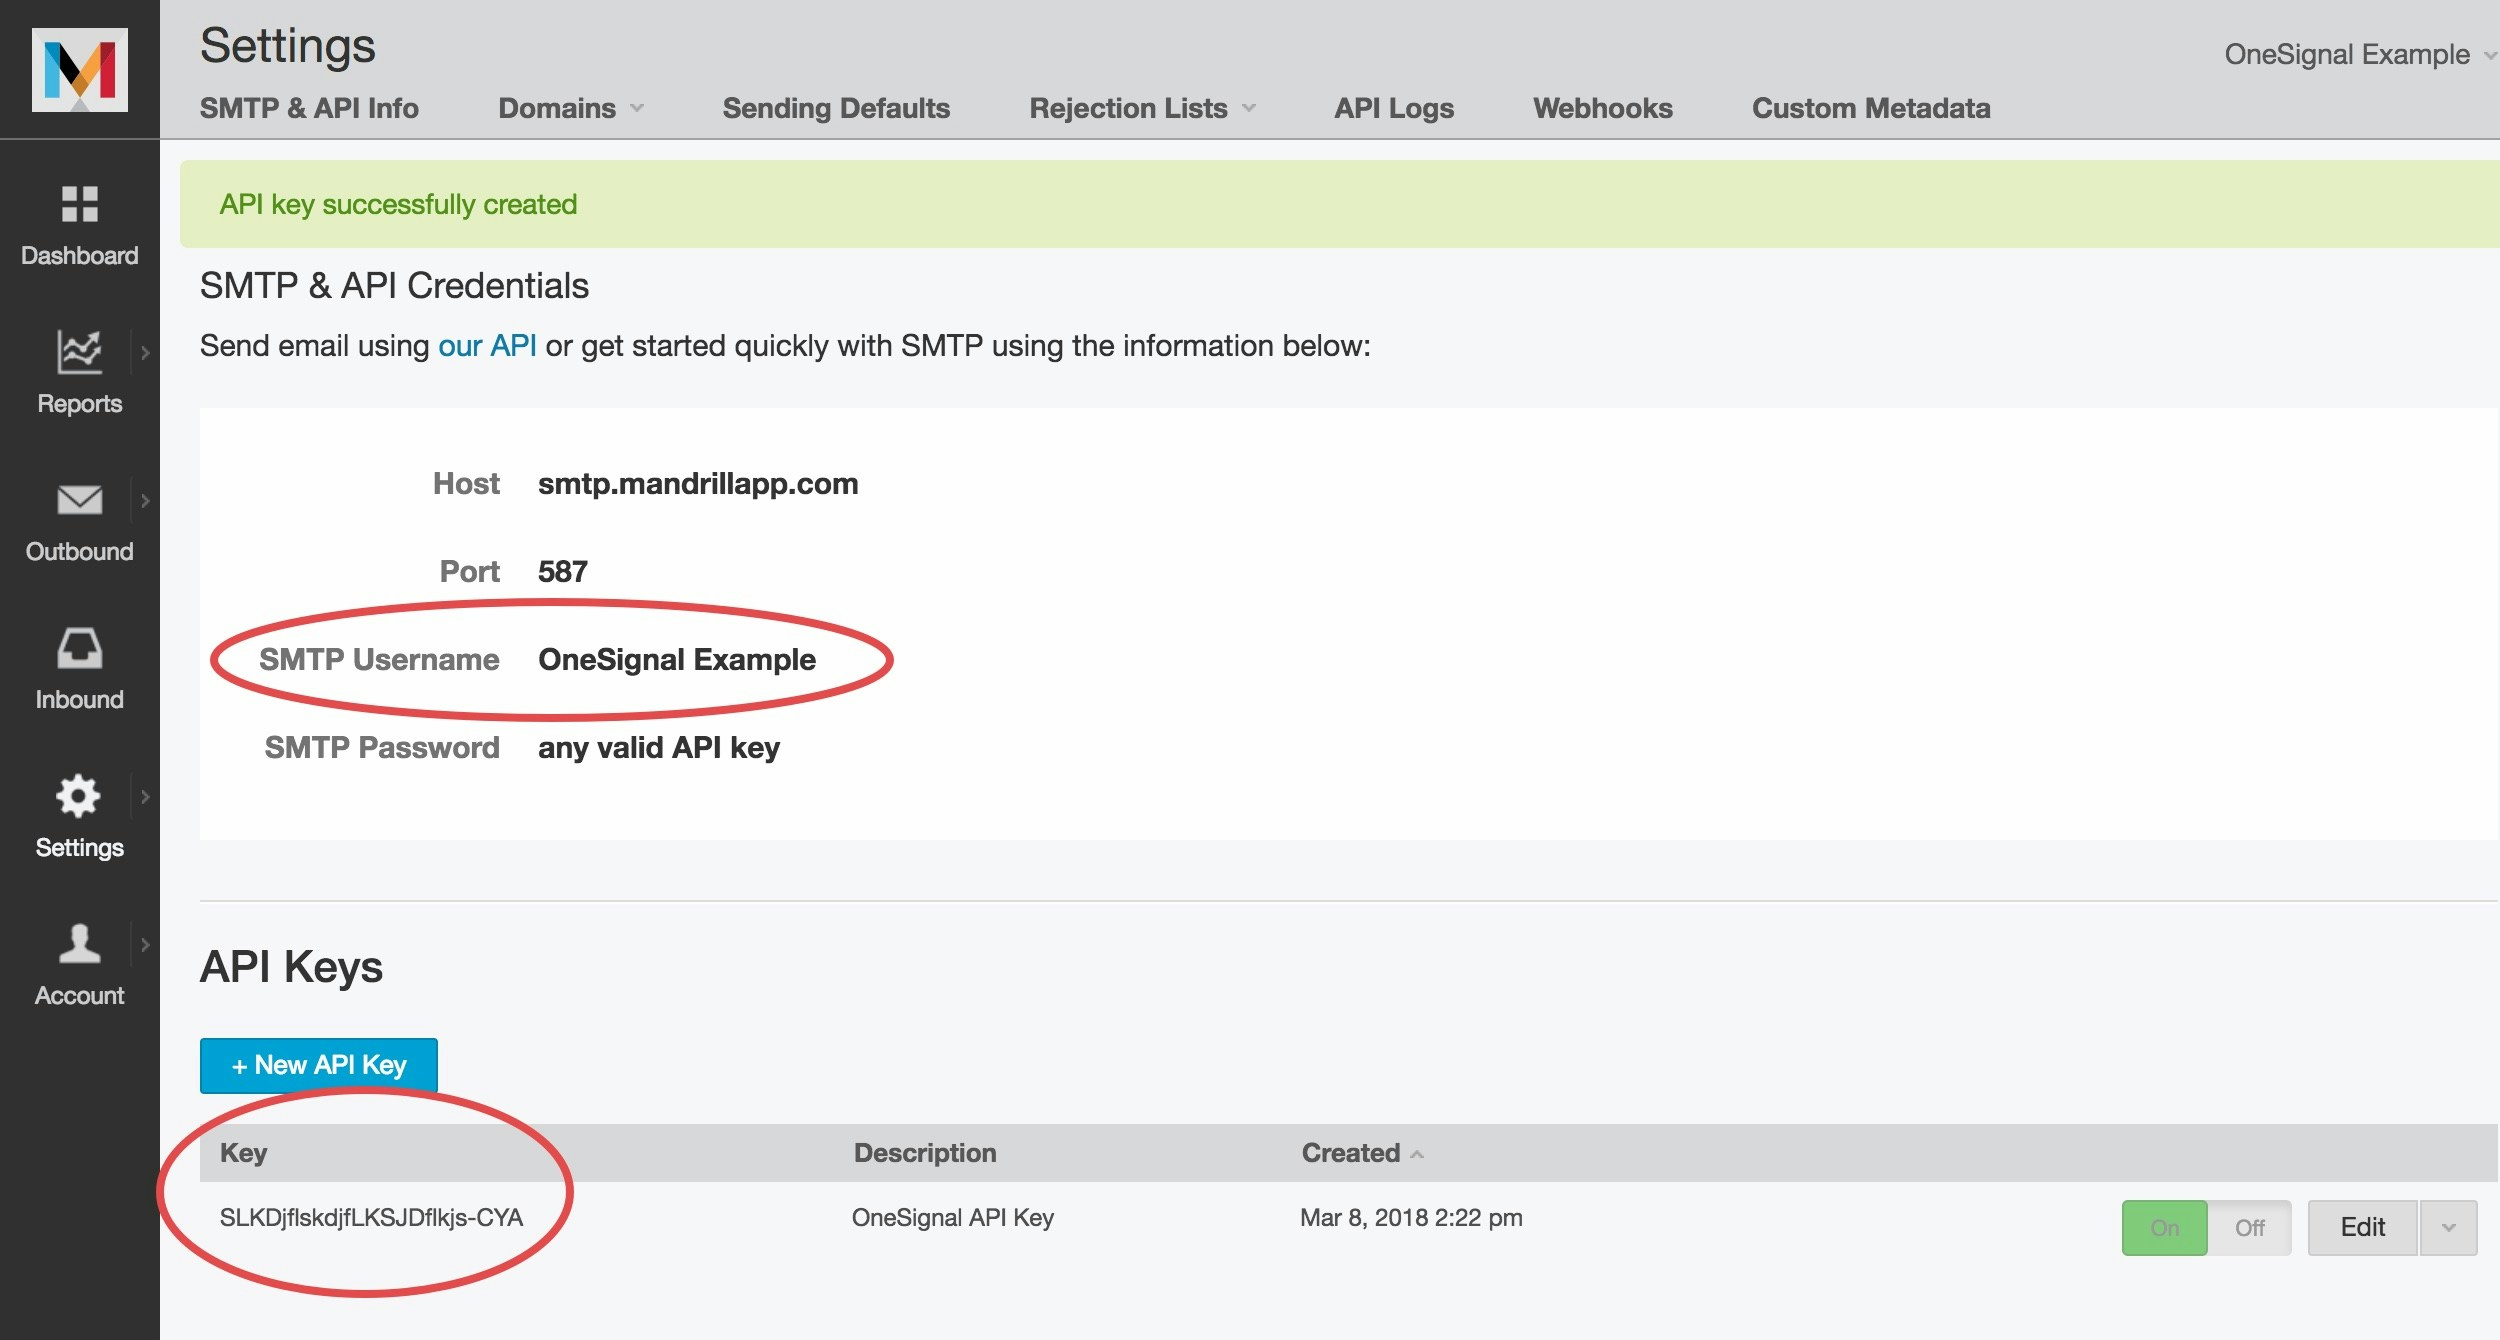
In the [Transactional Email Settings](https://mandrillapp.com/settings), click **+ New API Key**.
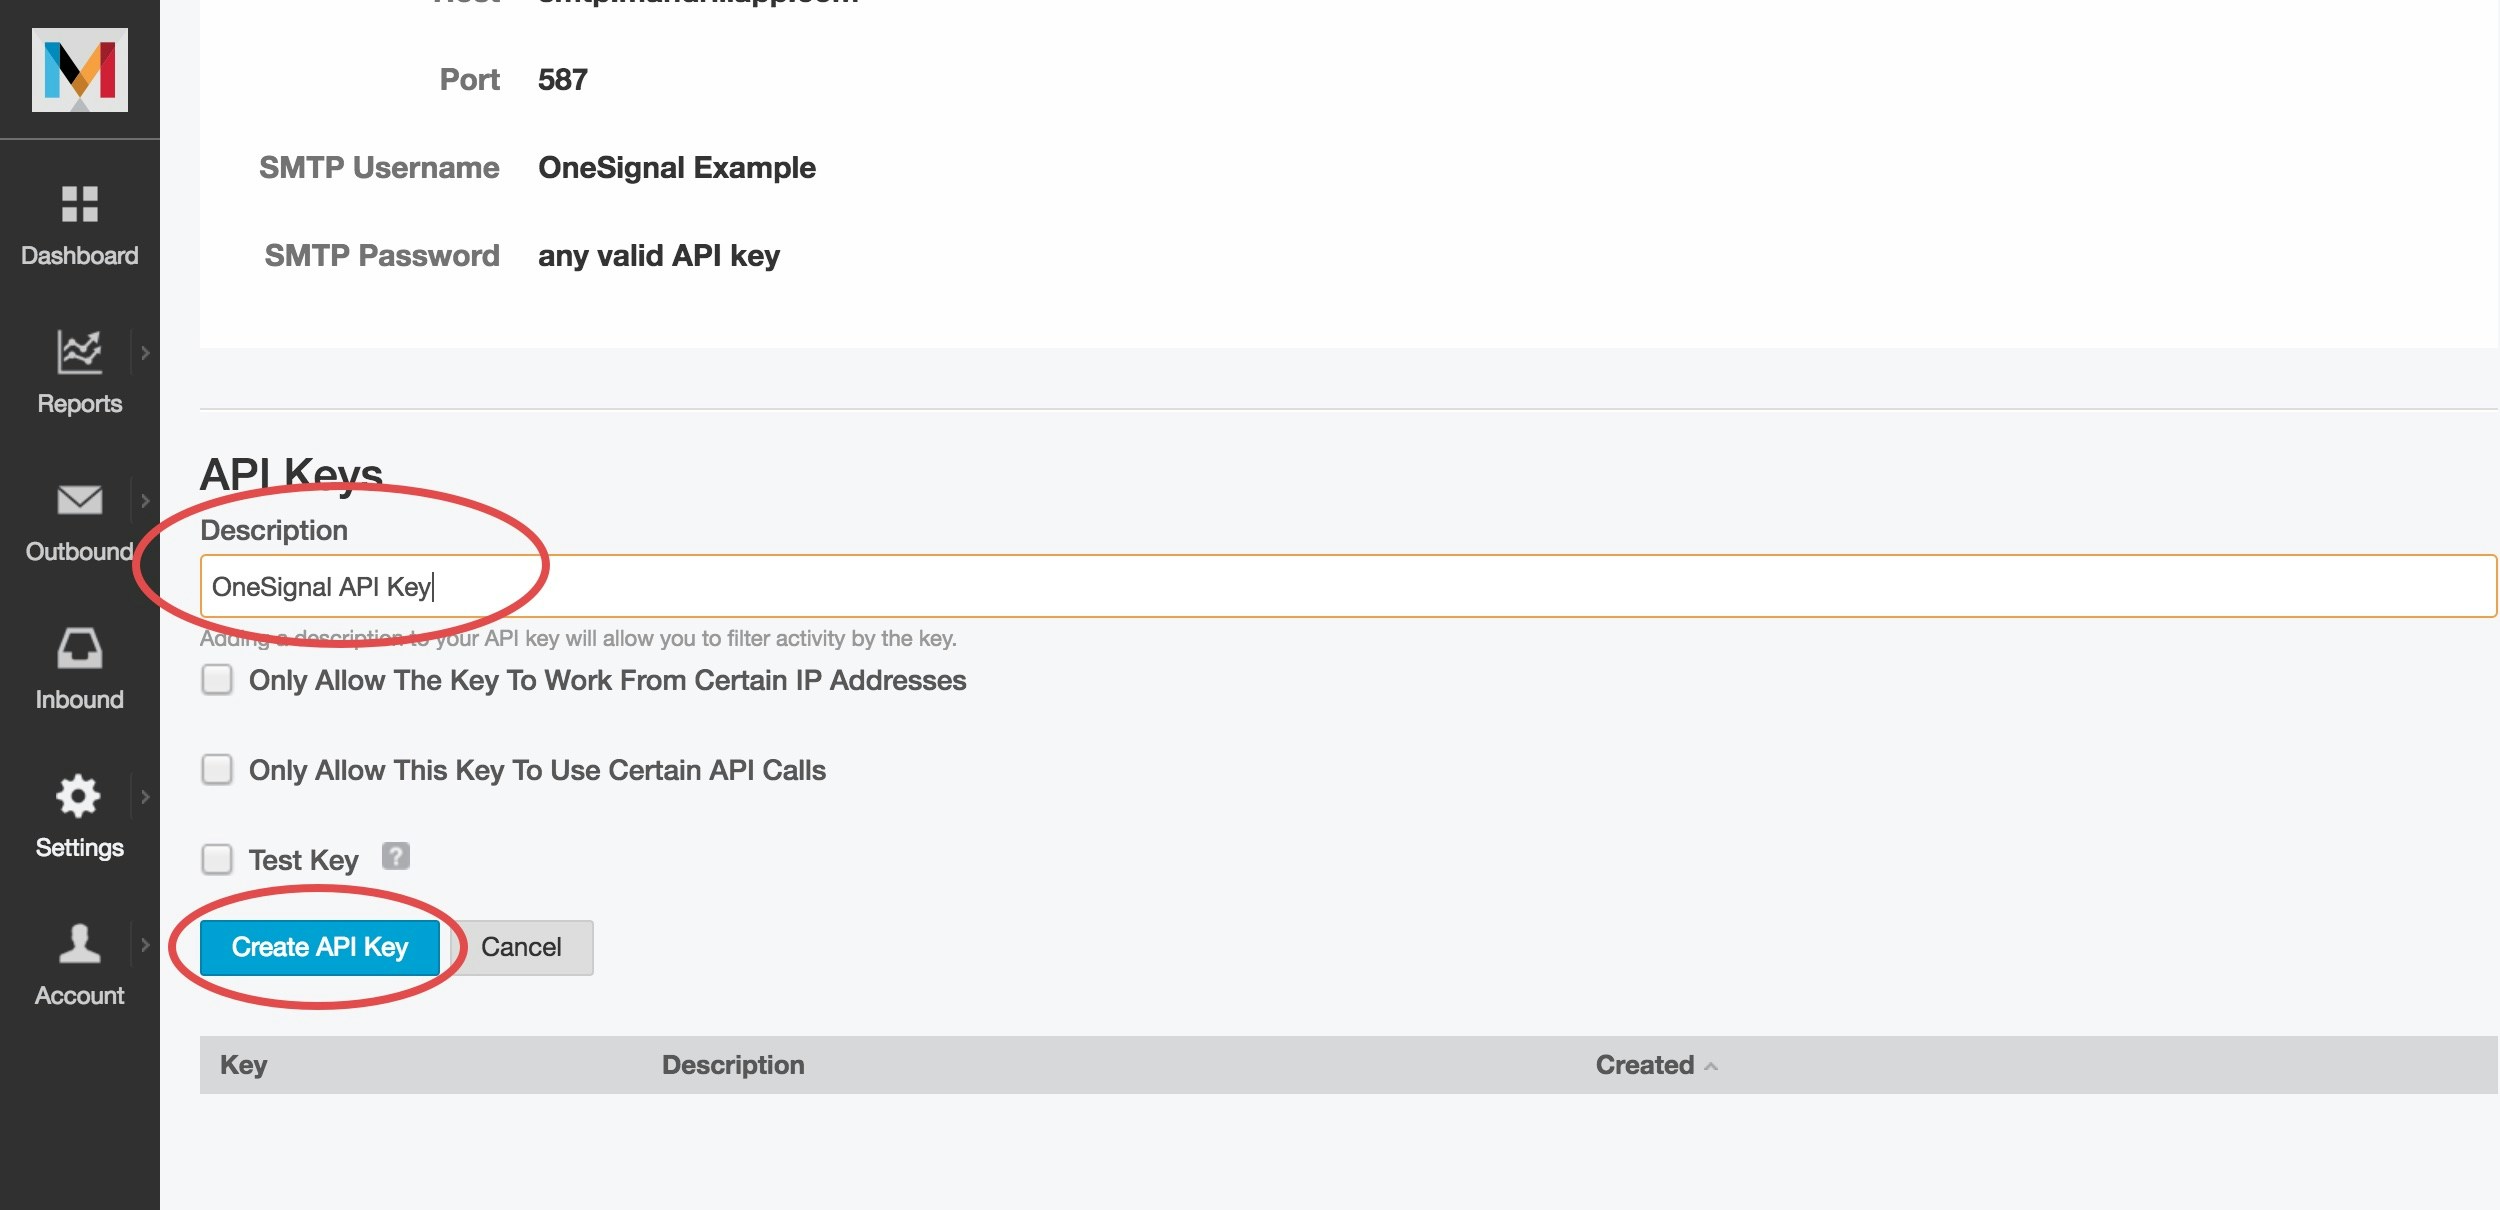
 You can name it something like `OneSignal API Key`.
 Once created:
* Copy the API key securely
* Note your **SMTP Username**
Once created:
* Copy the API key securely
* Note your **SMTP Username**
 Treat your API key like a password — keep it secure and never share it.
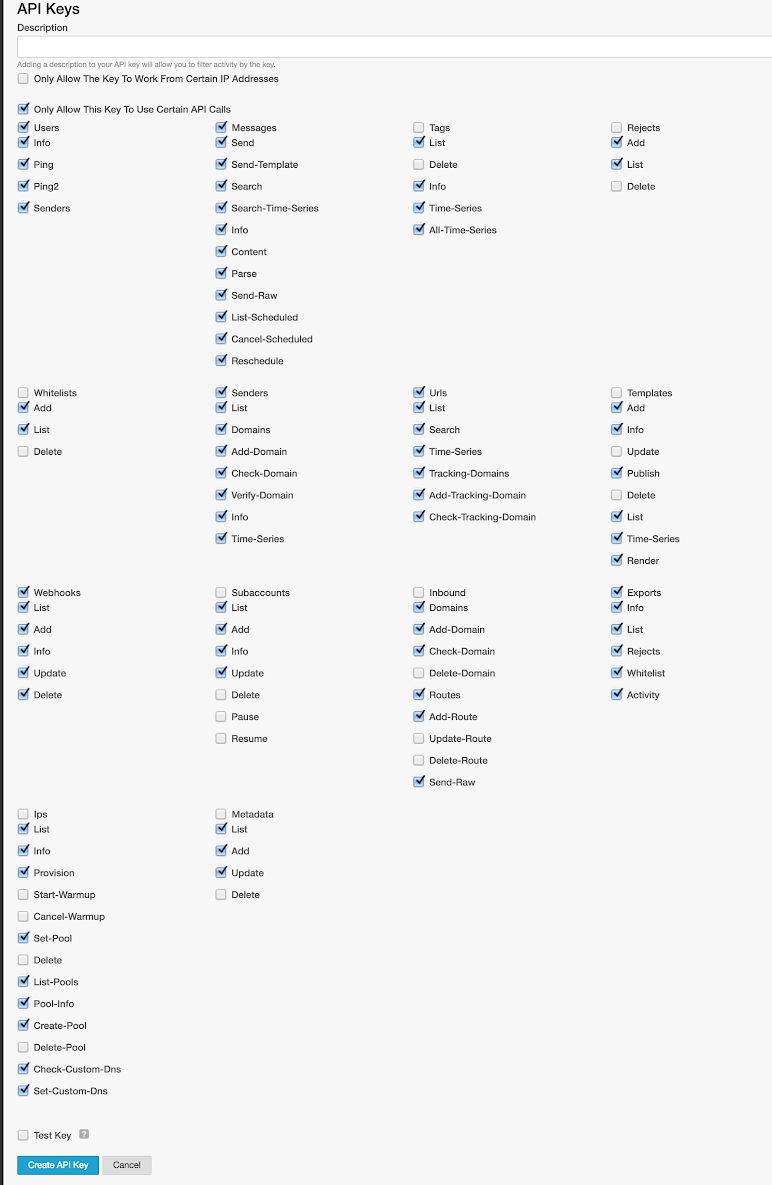
#### Recommended API Key Permissions
Enable the following permissions to ensure compatibility with OneSignal:
Treat your API key like a password — keep it secure and never share it.
#### Recommended API Key Permissions
Enable the following permissions to ensure compatibility with OneSignal:
 ***
### 3. Enable email messaging in OneSignal
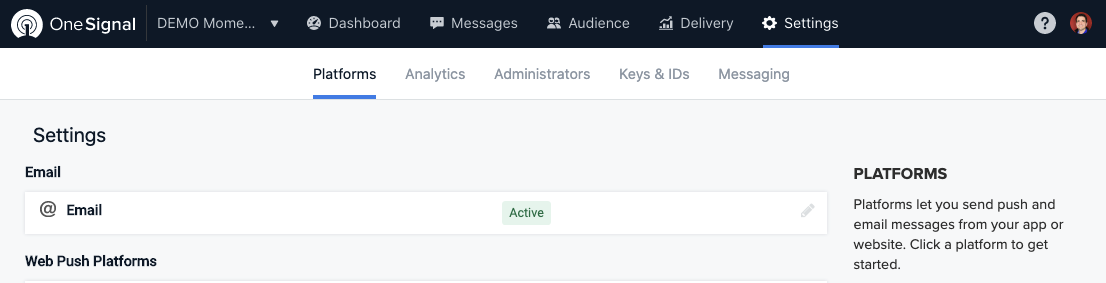
1. In your OneSignal dashboard, go to **Settings > Platforms > Email**.
***
### 3. Enable email messaging in OneSignal
1. In your OneSignal dashboard, go to **Settings > Platforms > Email**.
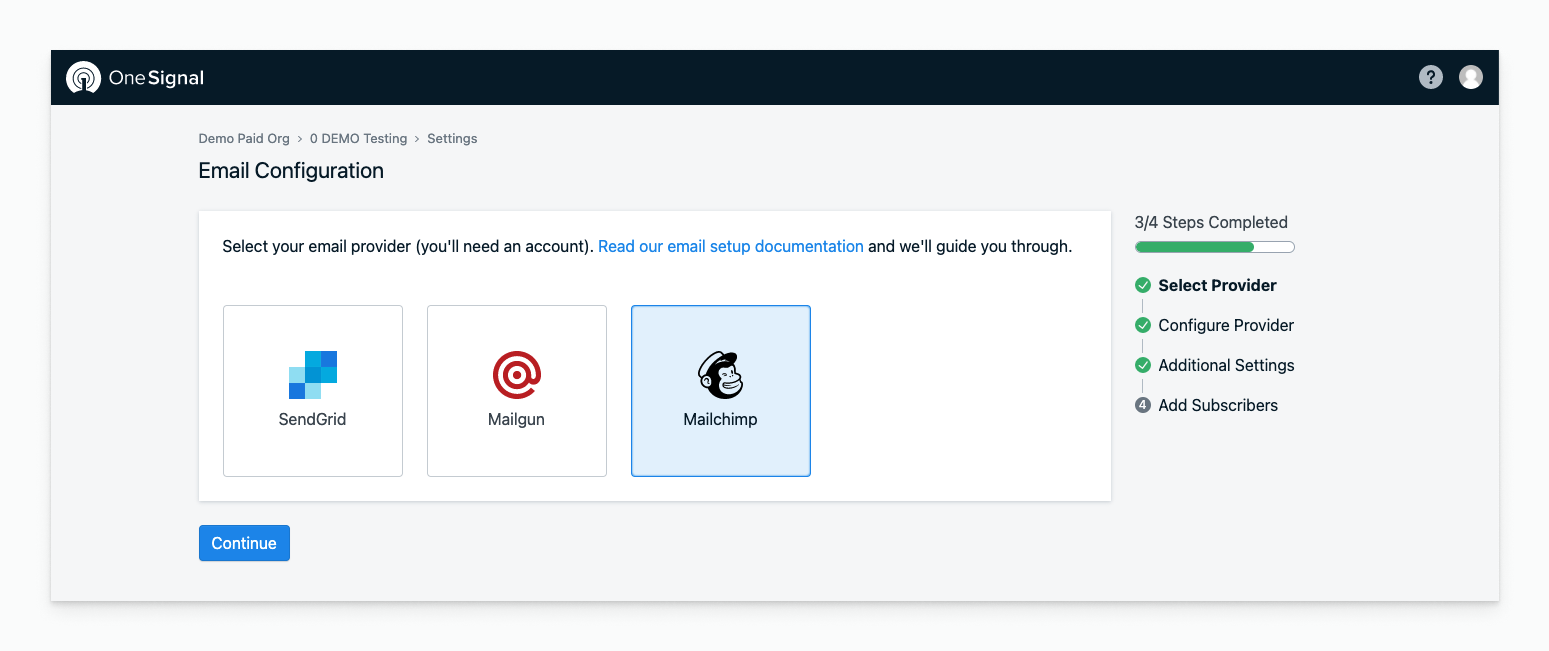
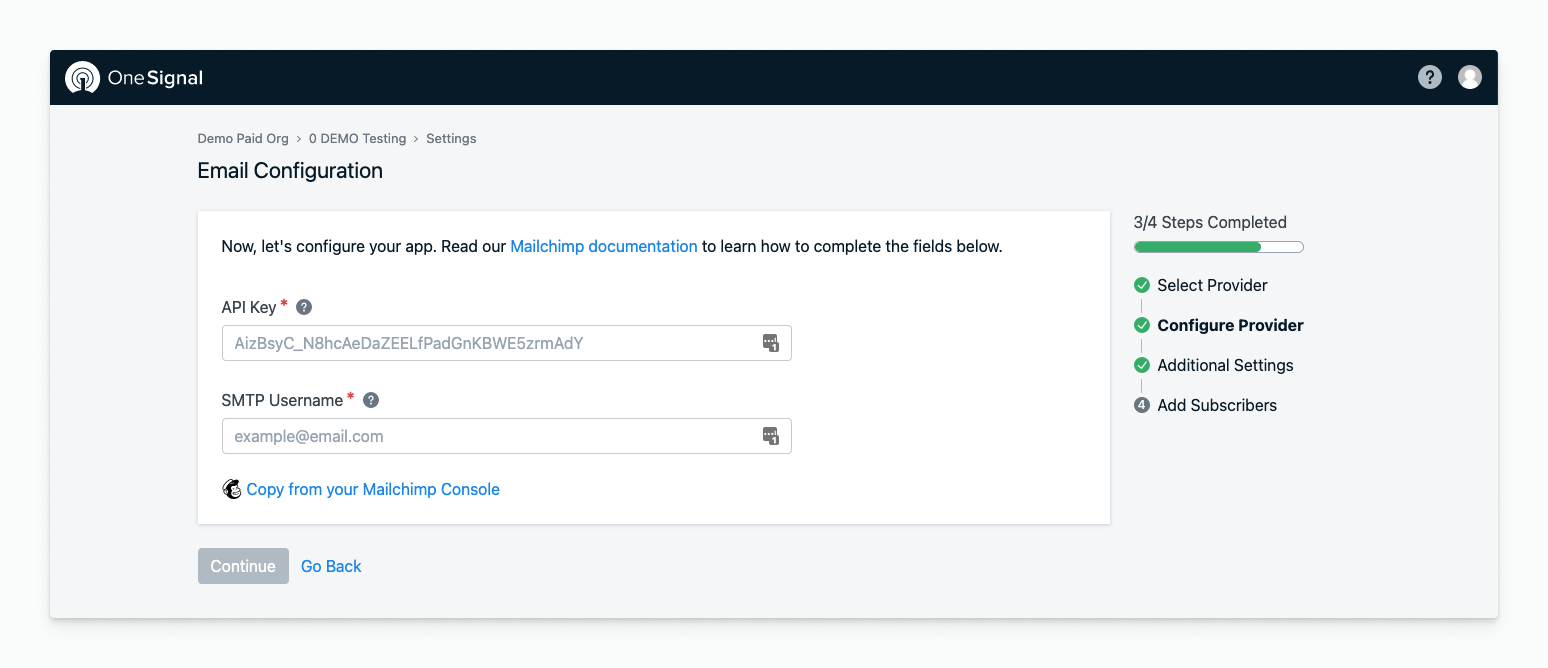
 2. Select **Mailchimp** as your provider and enter the API key and SMTP username.
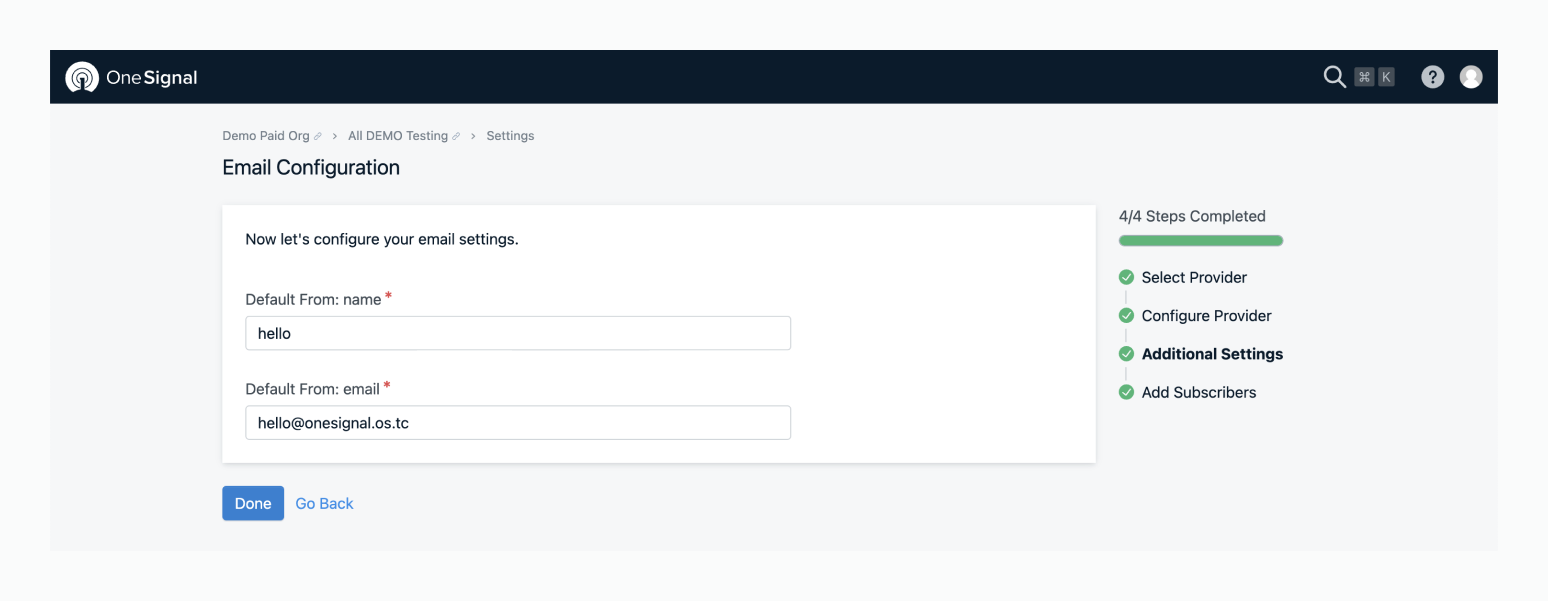
 3. Set your **default sender name** and **email address**.
 ***
### 4. Send a test email
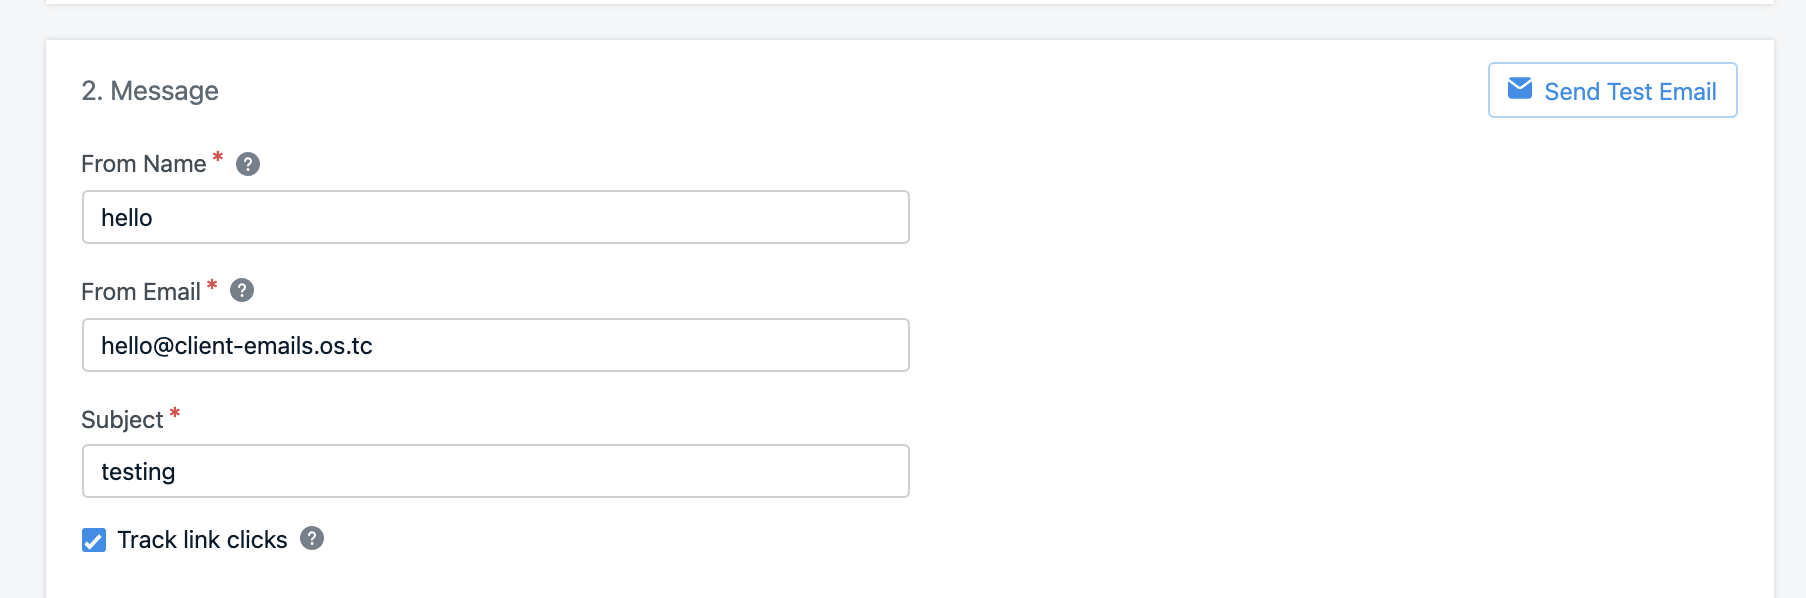
Go to **OneSignal > Messages > Email** and click **New Email**.
* Add a subject line
* Click **Send Test Email**
* Enter your email address and click **Send Test Message**
***
### 4. Send a test email
Go to **OneSignal > Messages > Email** and click **New Email**.
* Add a subject line
* Click **Send Test Email**
* Enter your email address and click **Send Test Message**
 You should receive your test email shortly.
Having issues? Check the [Email FAQ](./email-troubleshooting) or email `support@onesignal.com`.
For faster assistance, include:
* Your OneSignal App ID
* Detailed issue description, logs, and screenshots
* Steps to reproduce
***
## Optional: Generate API key from Mailchimp Dashboard
If you are generating an API key from the main Mailchimp account dashboard:
1. Click your avatar in the top-right corner.
You should receive your test email shortly.
Having issues? Check the [Email FAQ](./email-troubleshooting) or email `support@onesignal.com`.
For faster assistance, include:
* Your OneSignal App ID
* Detailed issue description, logs, and screenshots
* Steps to reproduce
***
## Optional: Generate API key from Mailchimp Dashboard
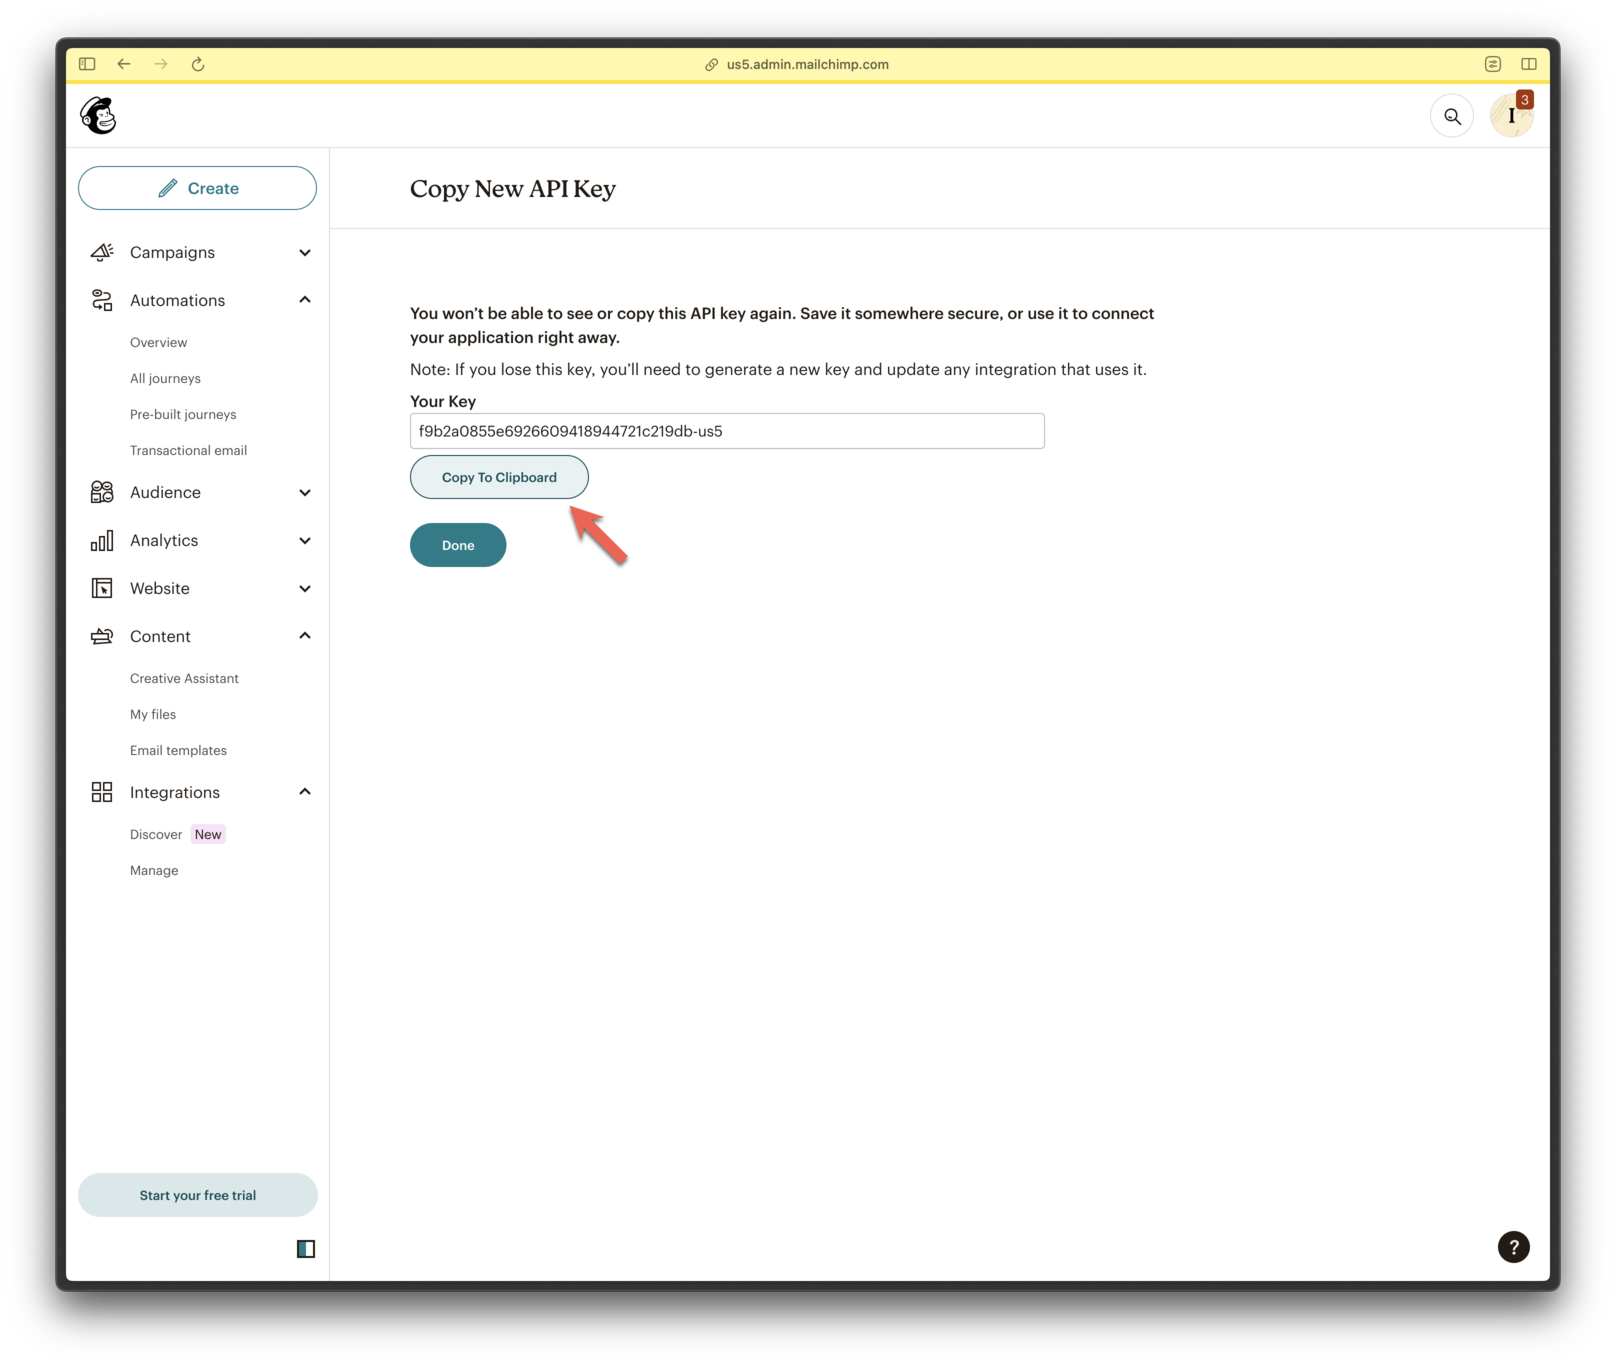
If you are generating an API key from the main Mailchimp account dashboard:
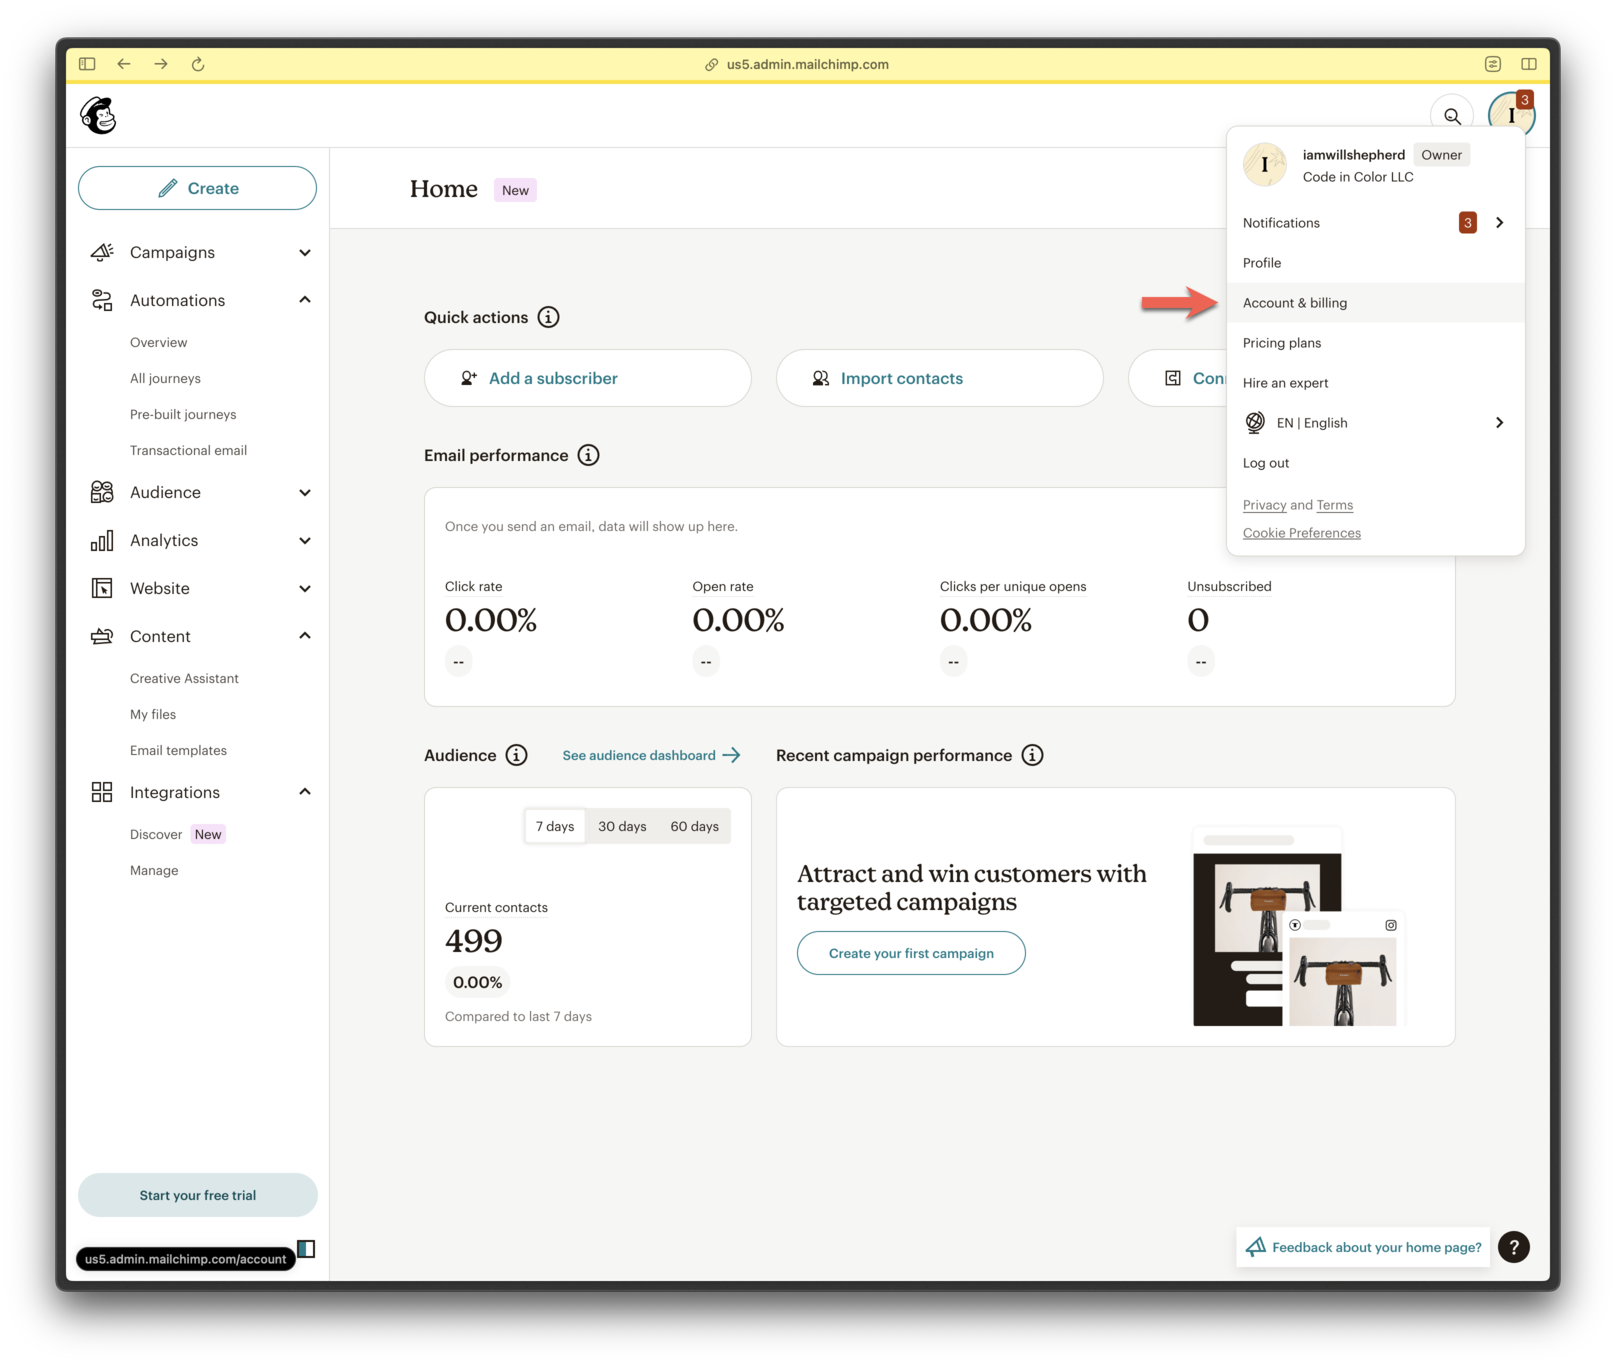
1. Click your avatar in the top-right corner.
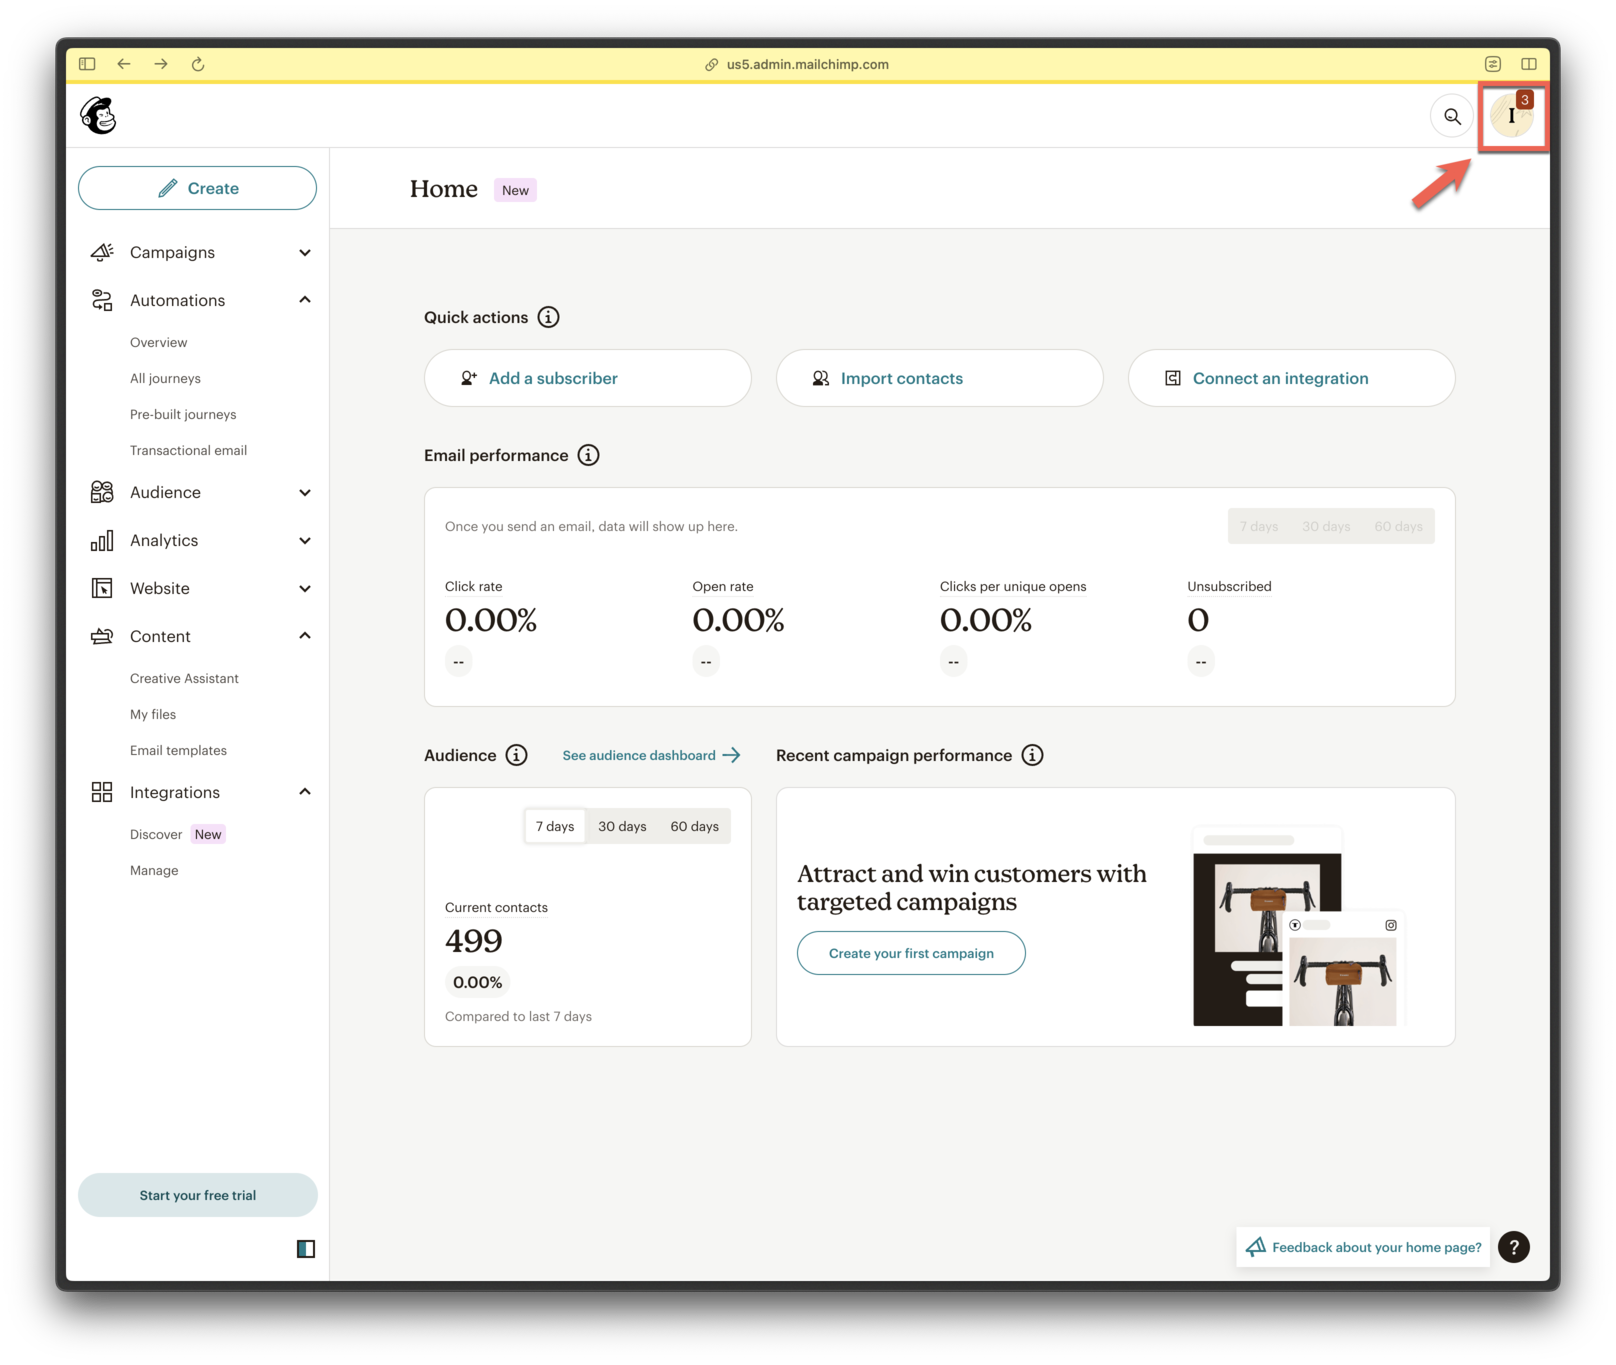 2. Go to **Account & Billing**.
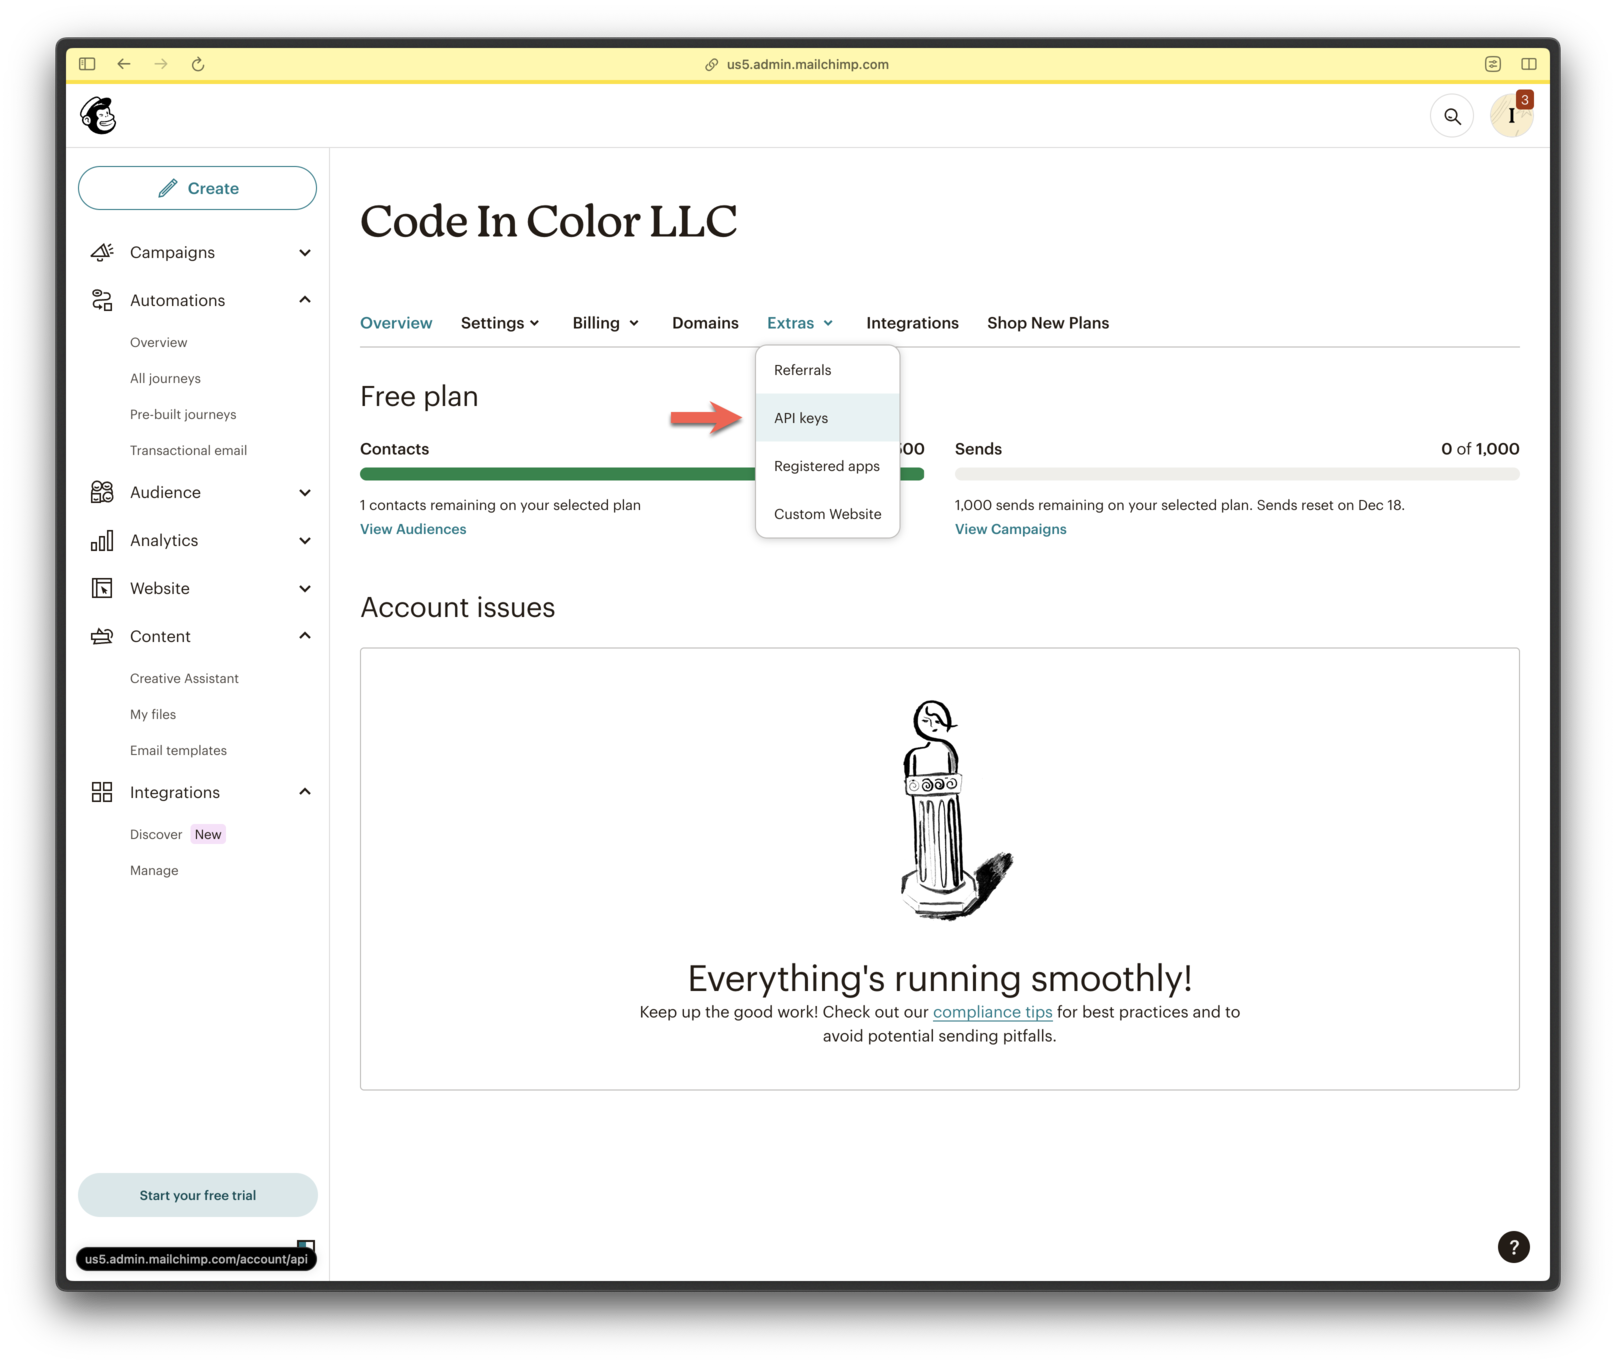
 3. Click **Extras > API Keys**.
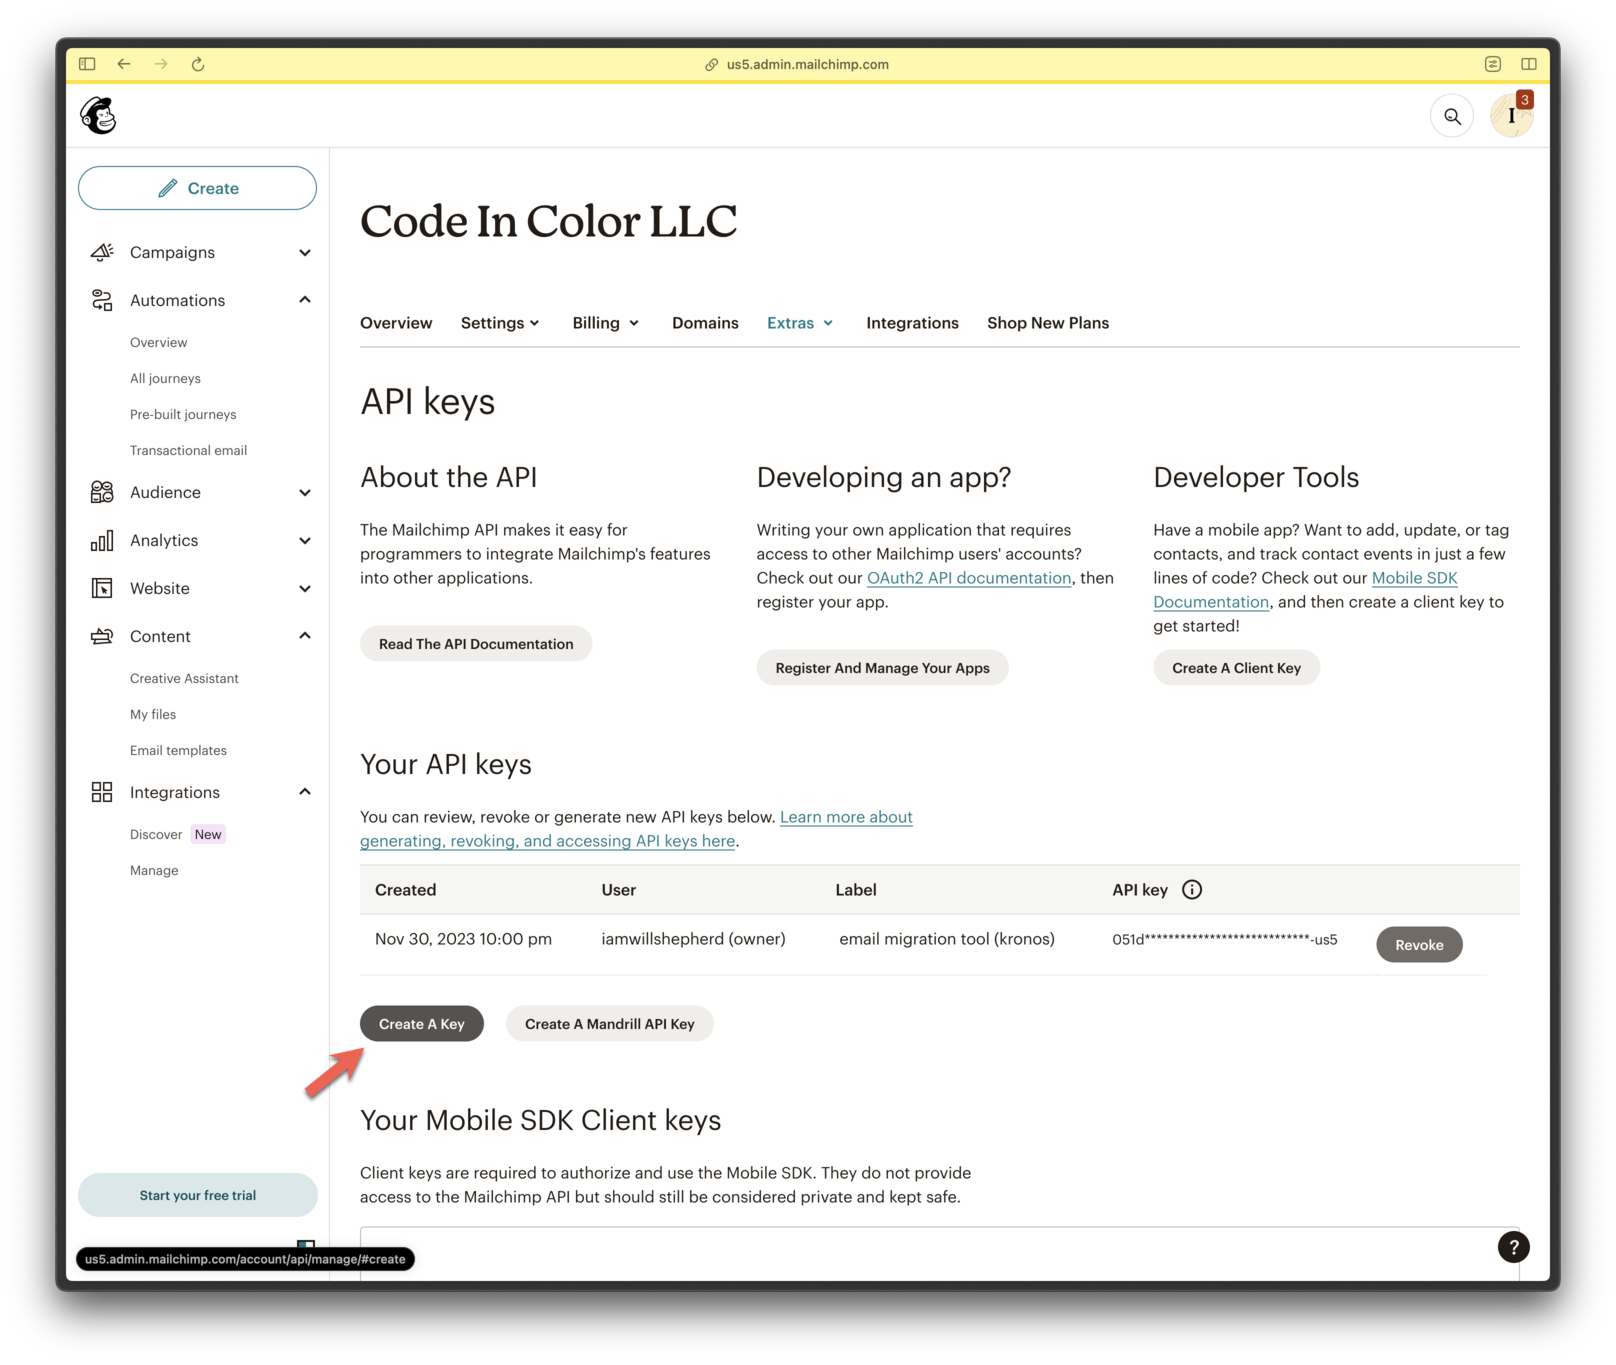
 4. Click **Create A Key**.
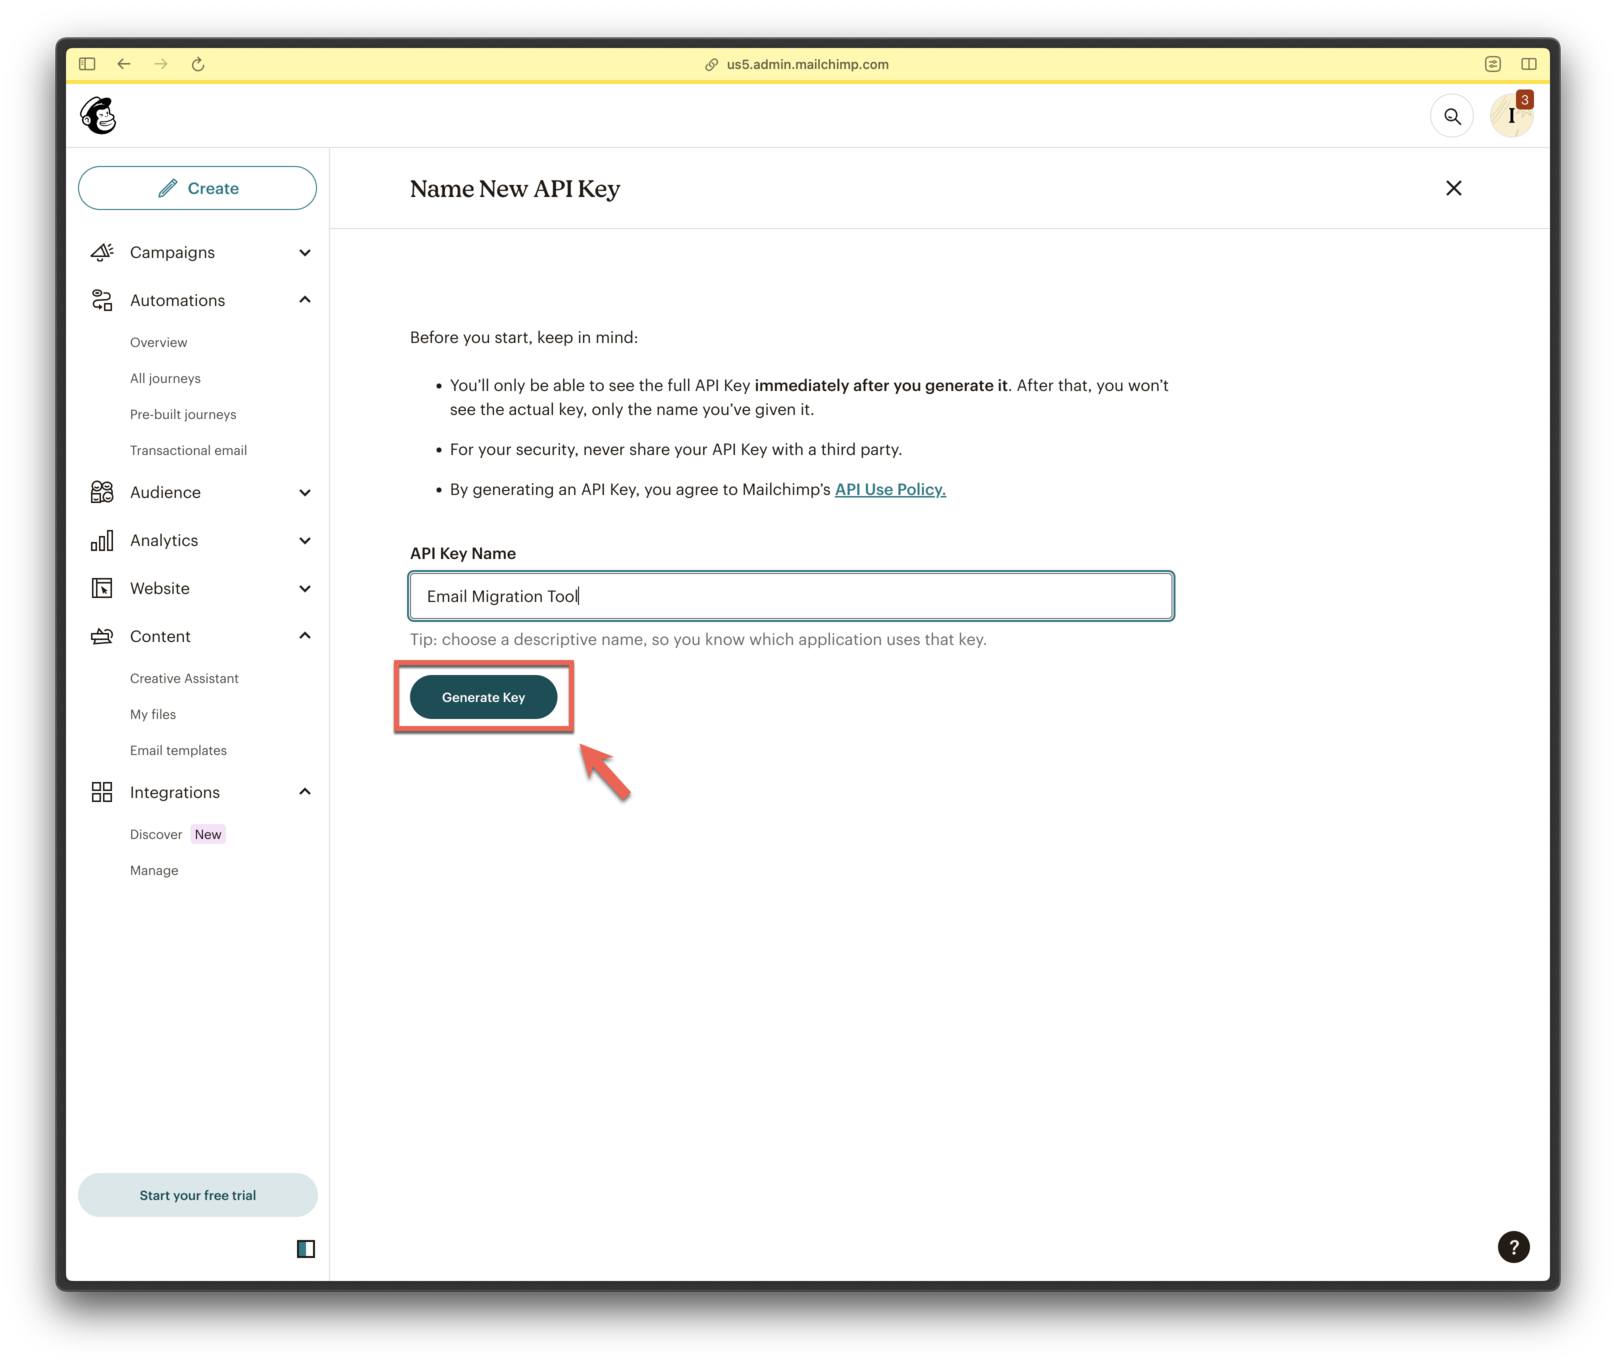
 5. Name your key and click **Generate Key**.
 6. Copy the API key securely.
 ***
✅ Email setup complete!
**Next steps:**
* Return to the [Email Setup guide](./email-setup) to explore more OneSignal Email features.
***
***
✅ Email setup complete!
**Next steps:**
* Return to the [Email Setup guide](./email-setup) to explore more OneSignal Email features.
***