> ## Documentation Index
> Fetch the complete documentation index at: https://documentation.onesignal.com/llms.txt
> Use this file to discover all available pages before exploring further.
# Send WhatsApp Messages via Journey Webhooks
> Send WhatsApp messages automatically using OneSignal Journeys and webhooks.
## Requirements
* Paid plan that supports both Journeys and Webhooks
* [WhatsApp Business Platform](https://developers.facebook.com/docs/whatsapp/) + [Webhooks Setup](https://developers.facebook.com/docs/whatsapp/business-management-api/guides/set-up-webhooks/)
* WhatsApp recipients
While the following guide uses the Facebook/Meta API, Twilio can also be used to Post WhatsApp messages.
## Setup
### 1. Import recipients phone numbers
WhatsApp supporting numbers should be uploaded as a data tag to a User.
**Here's an example:**
 Please add numbers in the E.164 format, but without the + sign. The number +16463938787 should be added as 16463938787.
### 2. Obtain Webhook code
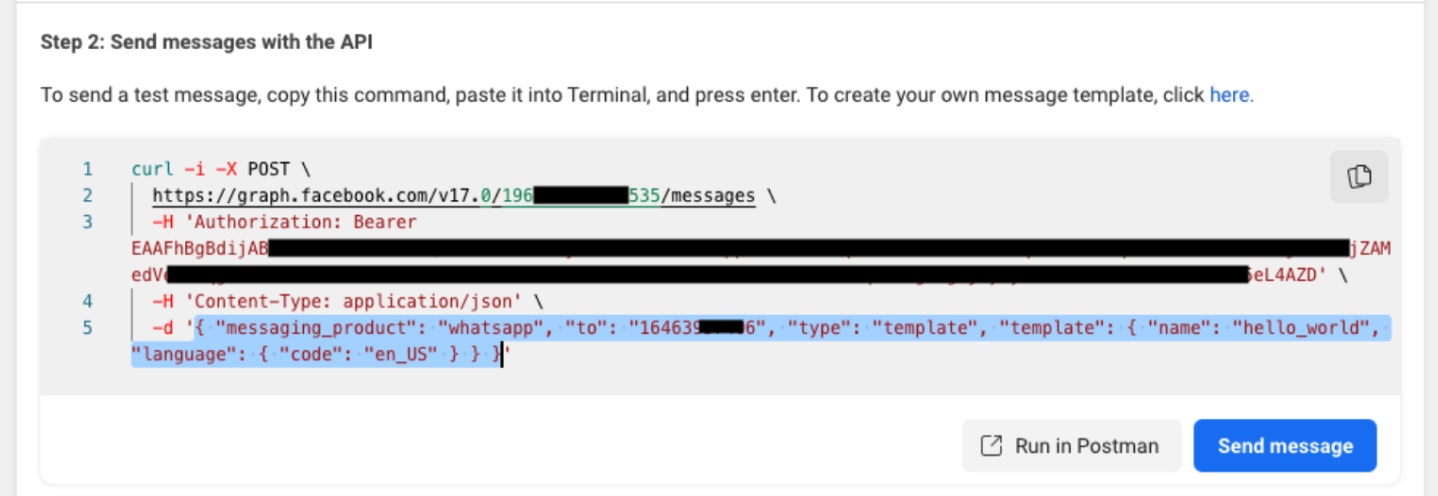
Once you have created your Meta/Facebook Business account and have activated your WhatsApp Module, you'll be given an API access token.
You'll be able to find this information under WhatsApp -> API Setup
Please add numbers in the E.164 format, but without the + sign. The number +16463938787 should be added as 16463938787.
### 2. Obtain Webhook code
Once you have created your Meta/Facebook Business account and have activated your WhatsApp Module, you'll be given an API access token.
You'll be able to find this information under WhatsApp -> API Setup
 ### 3. Create a Webhook Template
* Within OneSignal, click on: **Data > Webhooks > New Webhook**
* Copy over the credentials. It should look like this:
### 3. Create a Webhook Template
* Within OneSignal, click on: **Data > Webhooks > New Webhook**
* Copy over the credentials. It should look like this:
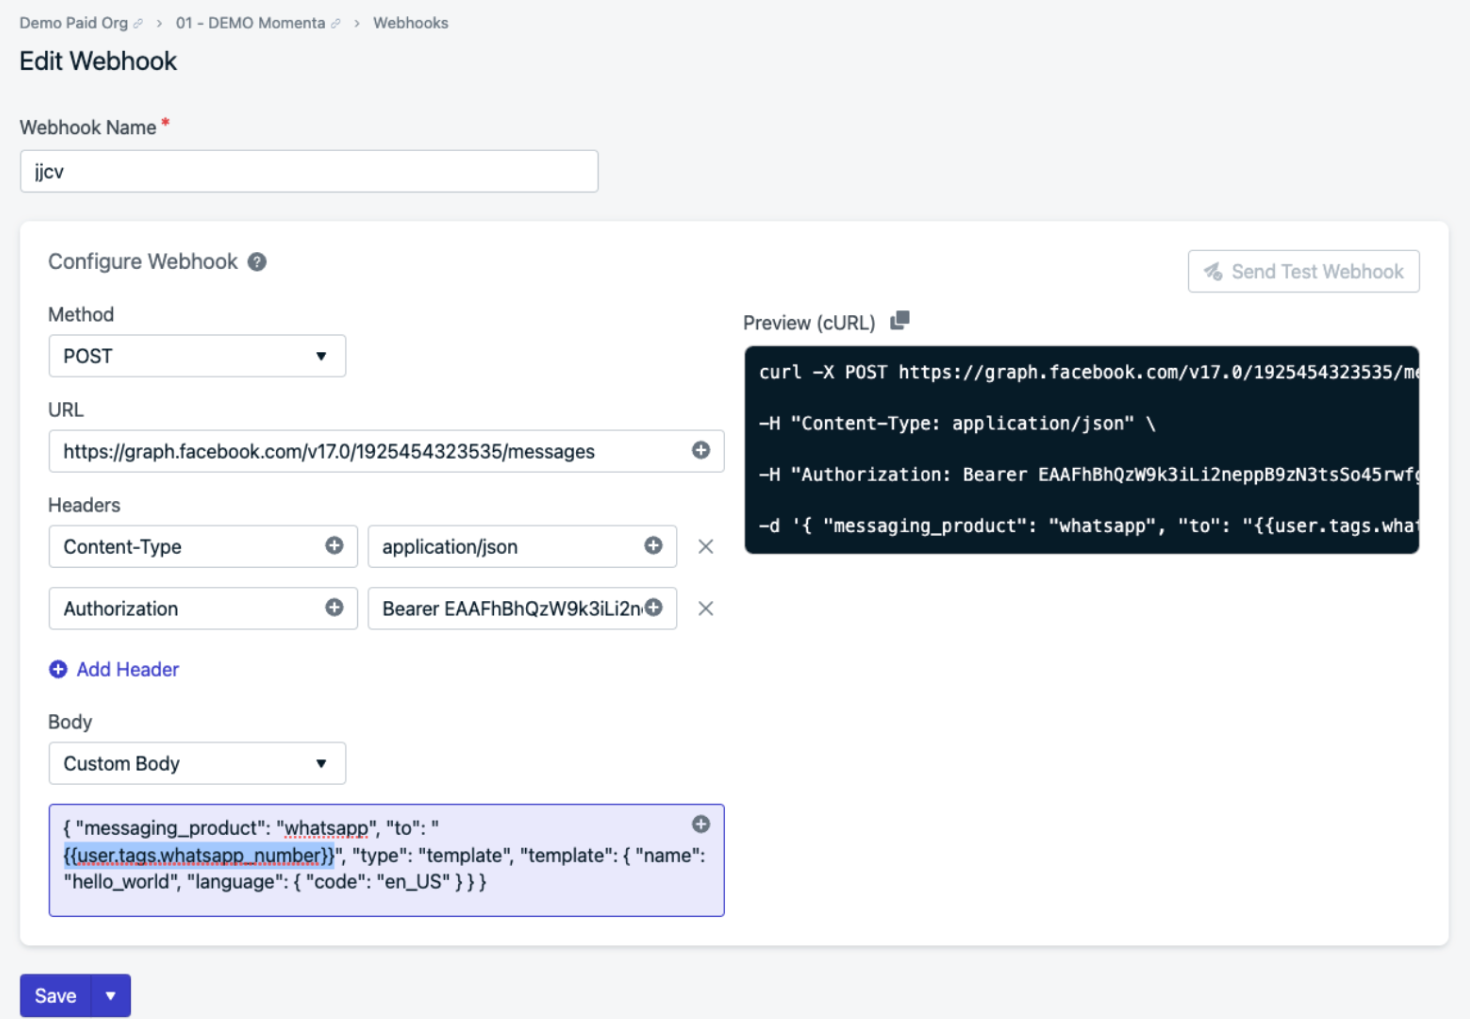 `{{user.tags.WhatsApp_number}}` tag key is added as the "to" number as highlighted above.
### 4. Create a Journey
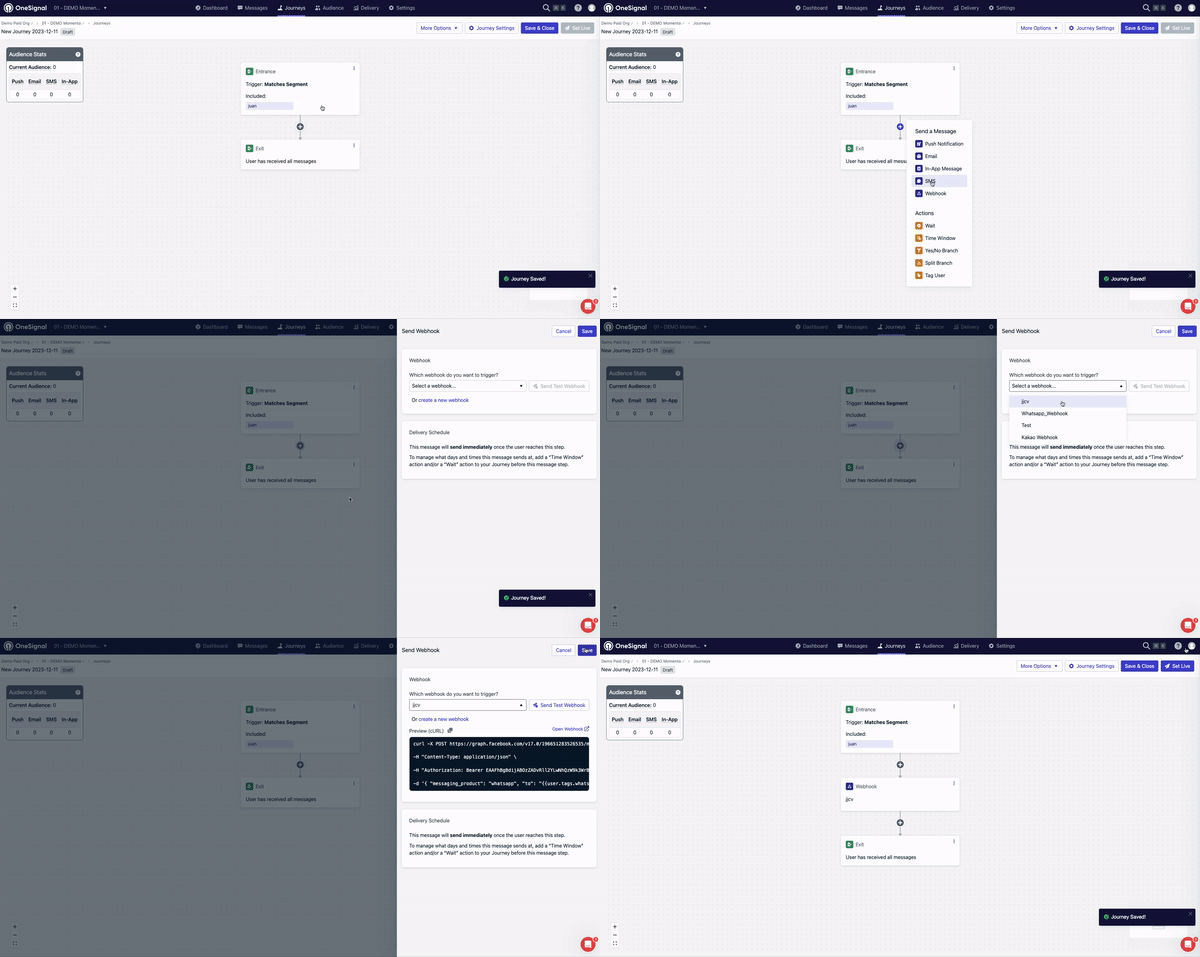
You can now create your Journey and add your new WhatsApp Webhook.
`{{user.tags.WhatsApp_number}}` tag key is added as the "to" number as highlighted above.
### 4. Create a Journey
You can now create your Journey and add your new WhatsApp Webhook.
 When testing, please make sure of the following:
* The subscription id in which you have added the WhatsApp number has an external id
* The subscription id matches the Journey included segment(s)
***
When testing, please make sure of the following:
* The subscription id in which you have added the WhatsApp number has an external id
* The subscription id matches the Journey included segment(s)
***