> ## Documentation Index
> Fetch the complete documentation index at: https://documentation.onesignal.com/llms.txt
> Use this file to discover all available pages before exploring further.
# WordPress
> Complete setup and migration guide for OneSignal WordPress Web Push Plugin v3+. Configure push notifications, prompts, and segmentation through the OneSignal dashboard with streamlined setup process.
## Overview
This guide covers how to set up and configure OneSignal WordPress Web Push Plugin v3+.
For the older version 2.x.x WordPress documentation, see [WordPress Legacy plugin](./wordpress-legacy).
### What's New in Version 3+
This release marks a significant upgrade by streamlining the setup and configuration process. With Version 3+, you can handle all your prompt settings in one place—the OneSignal Dashboard.
* 🚀 **SDK Upgrade**: Updates OneSignal Web SDK from version 15 to 16
* 💬 **Dashboard Prompts**: Configure all [permission prompts](./permission-requests) directly in the OneSignal dashboard—no custom code required
* ⏩ **One-Click Publishing**: Check "Send notification when post is published" to automatically send push notifications
* 🧑🤝🧑 **Audience Targeting**: Choose which [segments](./segmentation) receive notifications for each post
* 📲 **Mobile App Integration**: Send to mobile app subscribers with optional [deep linking](./deep-linking)
***
## Setup
Before you begin, ensure you have:
* [OneSignal account](https://dashboard.onesignal.com/signup) (free to create)
* WordPress admin access to install and configure plugins
* HTTPS-enabled website (required for web push notifications)
### 1. Configure WordPress in OneSignal Dashboard
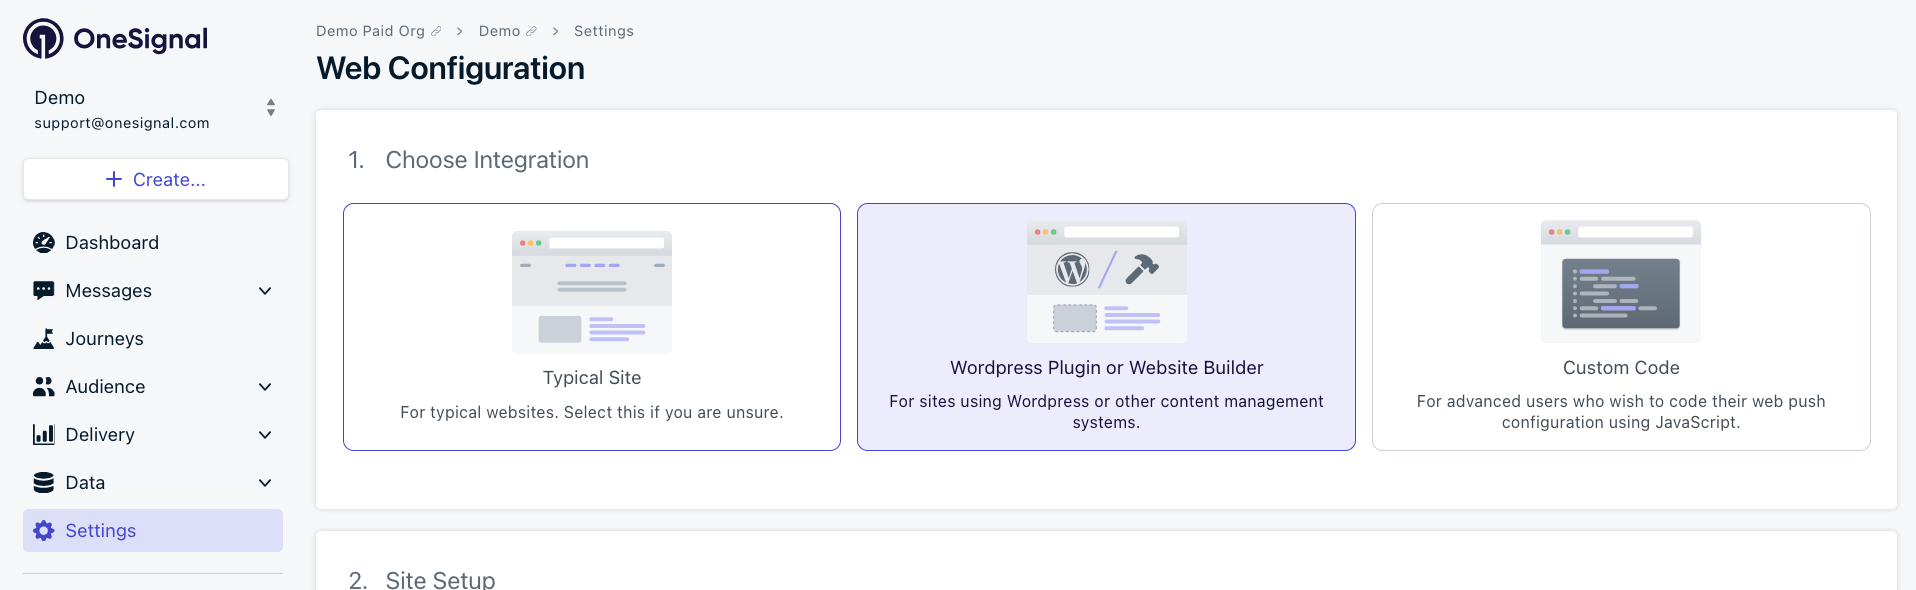
Navigate to **Settings > Push & In-App > Web > WordPress Plugin or Website Builder**
 #### Site setup
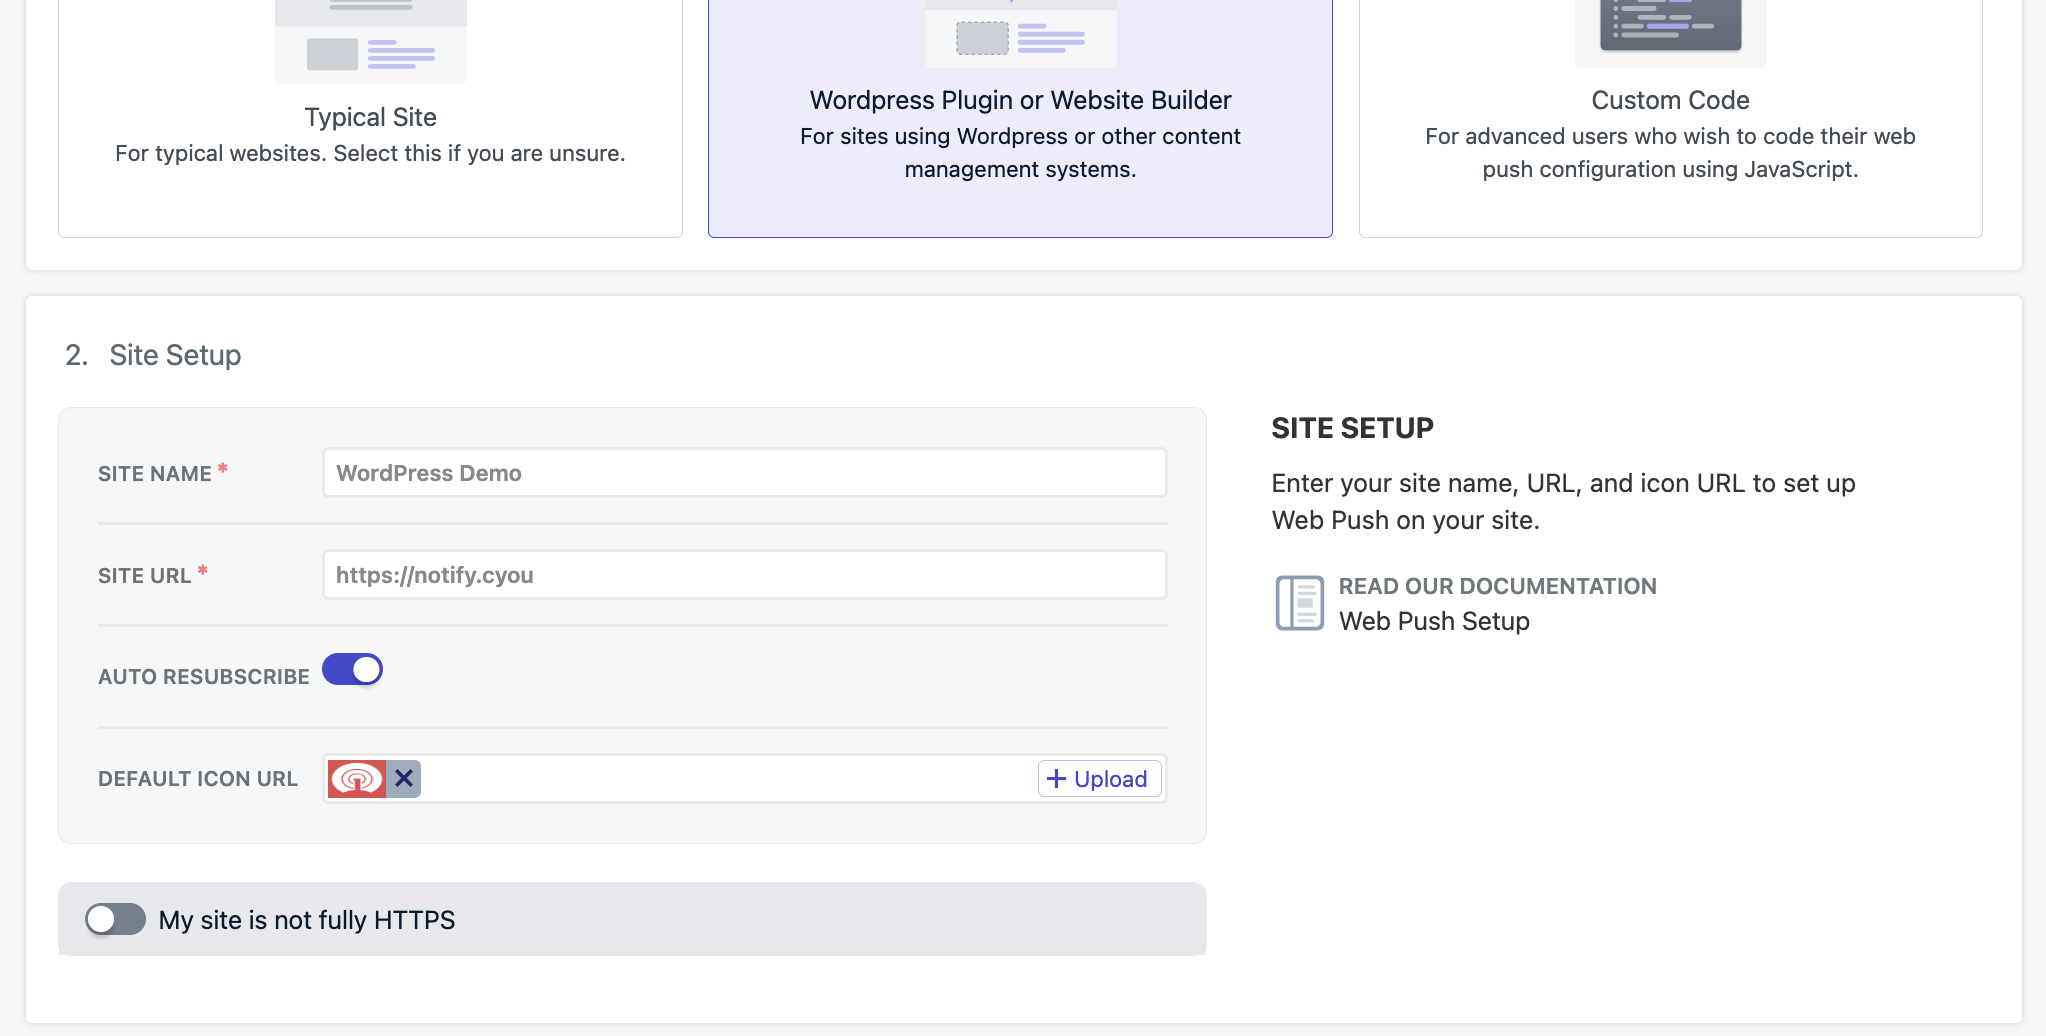
* **Site Name**: The name of your site and default notification title.
* **Site URL**: Must match your WordPress site's exact URL (follow [Same-origin policy](https://developer.mozilla.org/en-US/docs/Web/Security/Same-origin_policy))
* **Auto Resubscribe**: Enable this to automatically resubscribe users who clear their browser data when they return to your site (no new permission prompt required)
* **Default Icon URL**: Square `256x256px` PNG or JPG file for notifications and prompts – **macOS Safari** will not show a notification prompt without an icon.
#### Site setup
* **Site Name**: The name of your site and default notification title.
* **Site URL**: Must match your WordPress site's exact URL (follow [Same-origin policy](https://developer.mozilla.org/en-US/docs/Web/Security/Same-origin_policy))
* **Auto Resubscribe**: Enable this to automatically resubscribe users who clear their browser data when they return to your site (no new permission prompt required)
* **Default Icon URL**: Square `256x256px` PNG or JPG file for notifications and prompts – **macOS Safari** will not show a notification prompt without an icon.
 Testing locally? See [Local Testing Guide](./web-sdk-setup#local-testing) for localhost development
#### Permission prompts
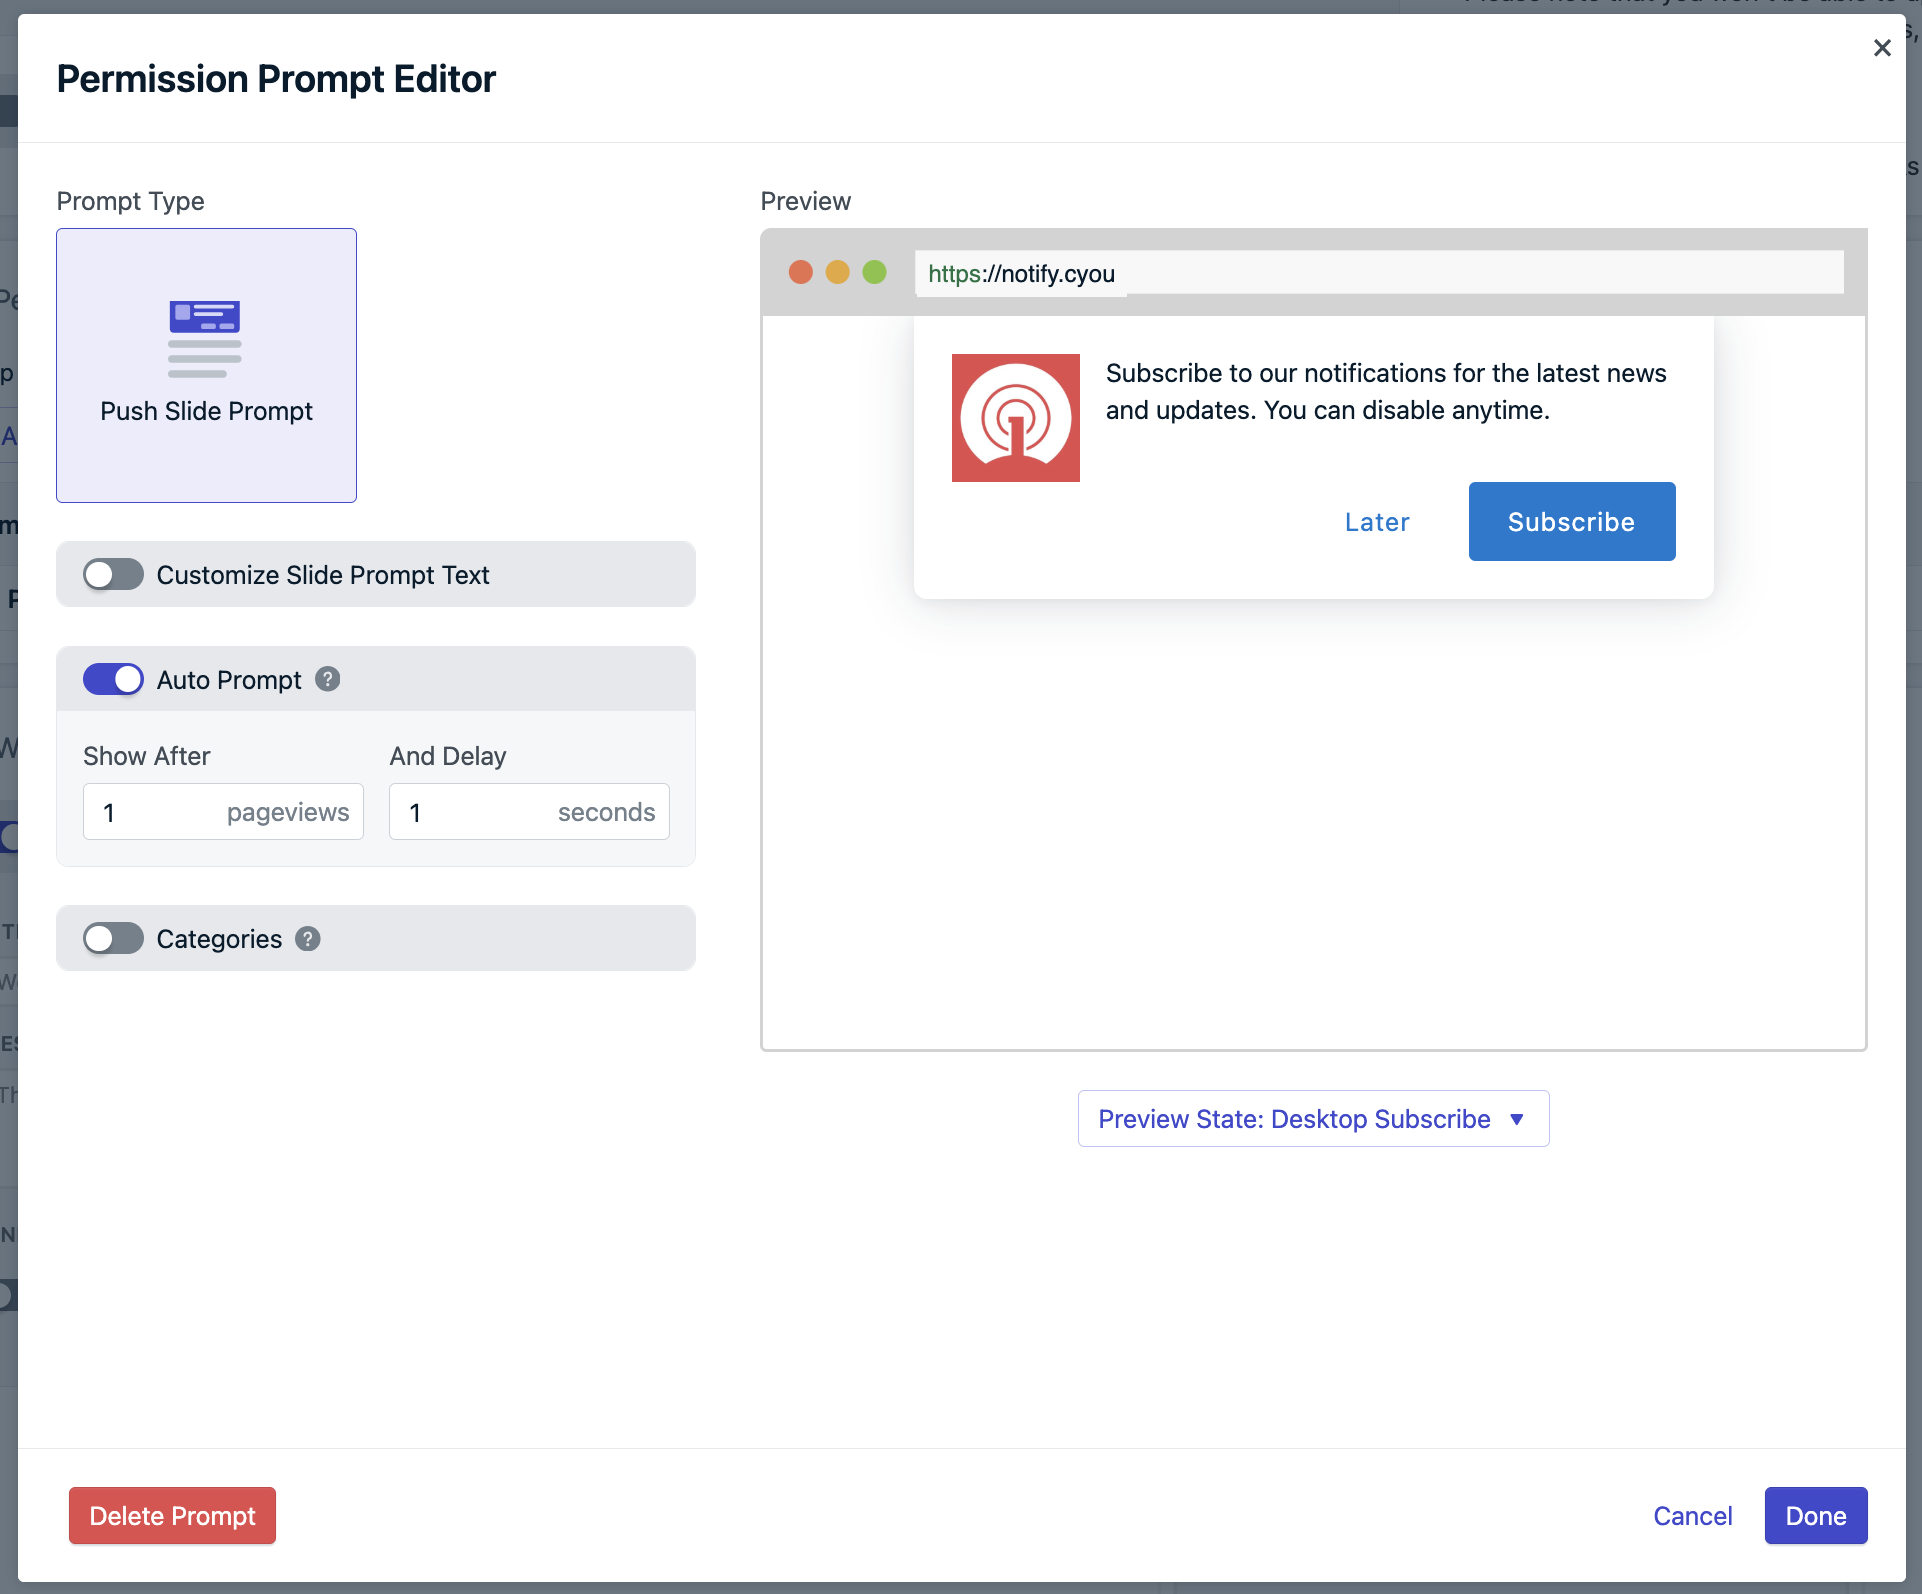
Set up your [permission prompts](./permission-requests) for Push, Email, and/or SMS. The Push Slide Prompt is enabled by default, but you can customize or add additional prompts.
**Pro Tip**: Start with simple prompts and gradually add complexity. You can
modify all prompt settings anytime through the OneSignal dashboard. Explore
all available options in [Web permission prompts](./permission-requests).
Testing locally? See [Local Testing Guide](./web-sdk-setup#local-testing) for localhost development
#### Permission prompts
Set up your [permission prompts](./permission-requests) for Push, Email, and/or SMS. The Push Slide Prompt is enabled by default, but you can customize or add additional prompts.
**Pro Tip**: Start with simple prompts and gradually add complexity. You can
modify all prompt settings anytime through the OneSignal dashboard. Explore
all available options in [Web permission prompts](./permission-requests).
 * Set **Auto Prompt** to `1` pageview and `1` second for initial testing
* Customize prompt text and appearance
* Adjust timing based on user behavior after launch
* Set **Auto Prompt** to `1` pageview and `1` second for initial testing
* Customize prompt text and appearance
* Adjust timing based on user behavior after launch
 For targeted messaging based on user interests, set up categories:
* **Label**: What users see in the prompt
* **Tag Key**: Internal [tag key](./add-user-data-tags) for segmentation
For targeted messaging based on user interests, set up categories:
* **Label**: What users see in the prompt
* **Tag Key**: Internal [tag key](./add-user-data-tags) for segmentation
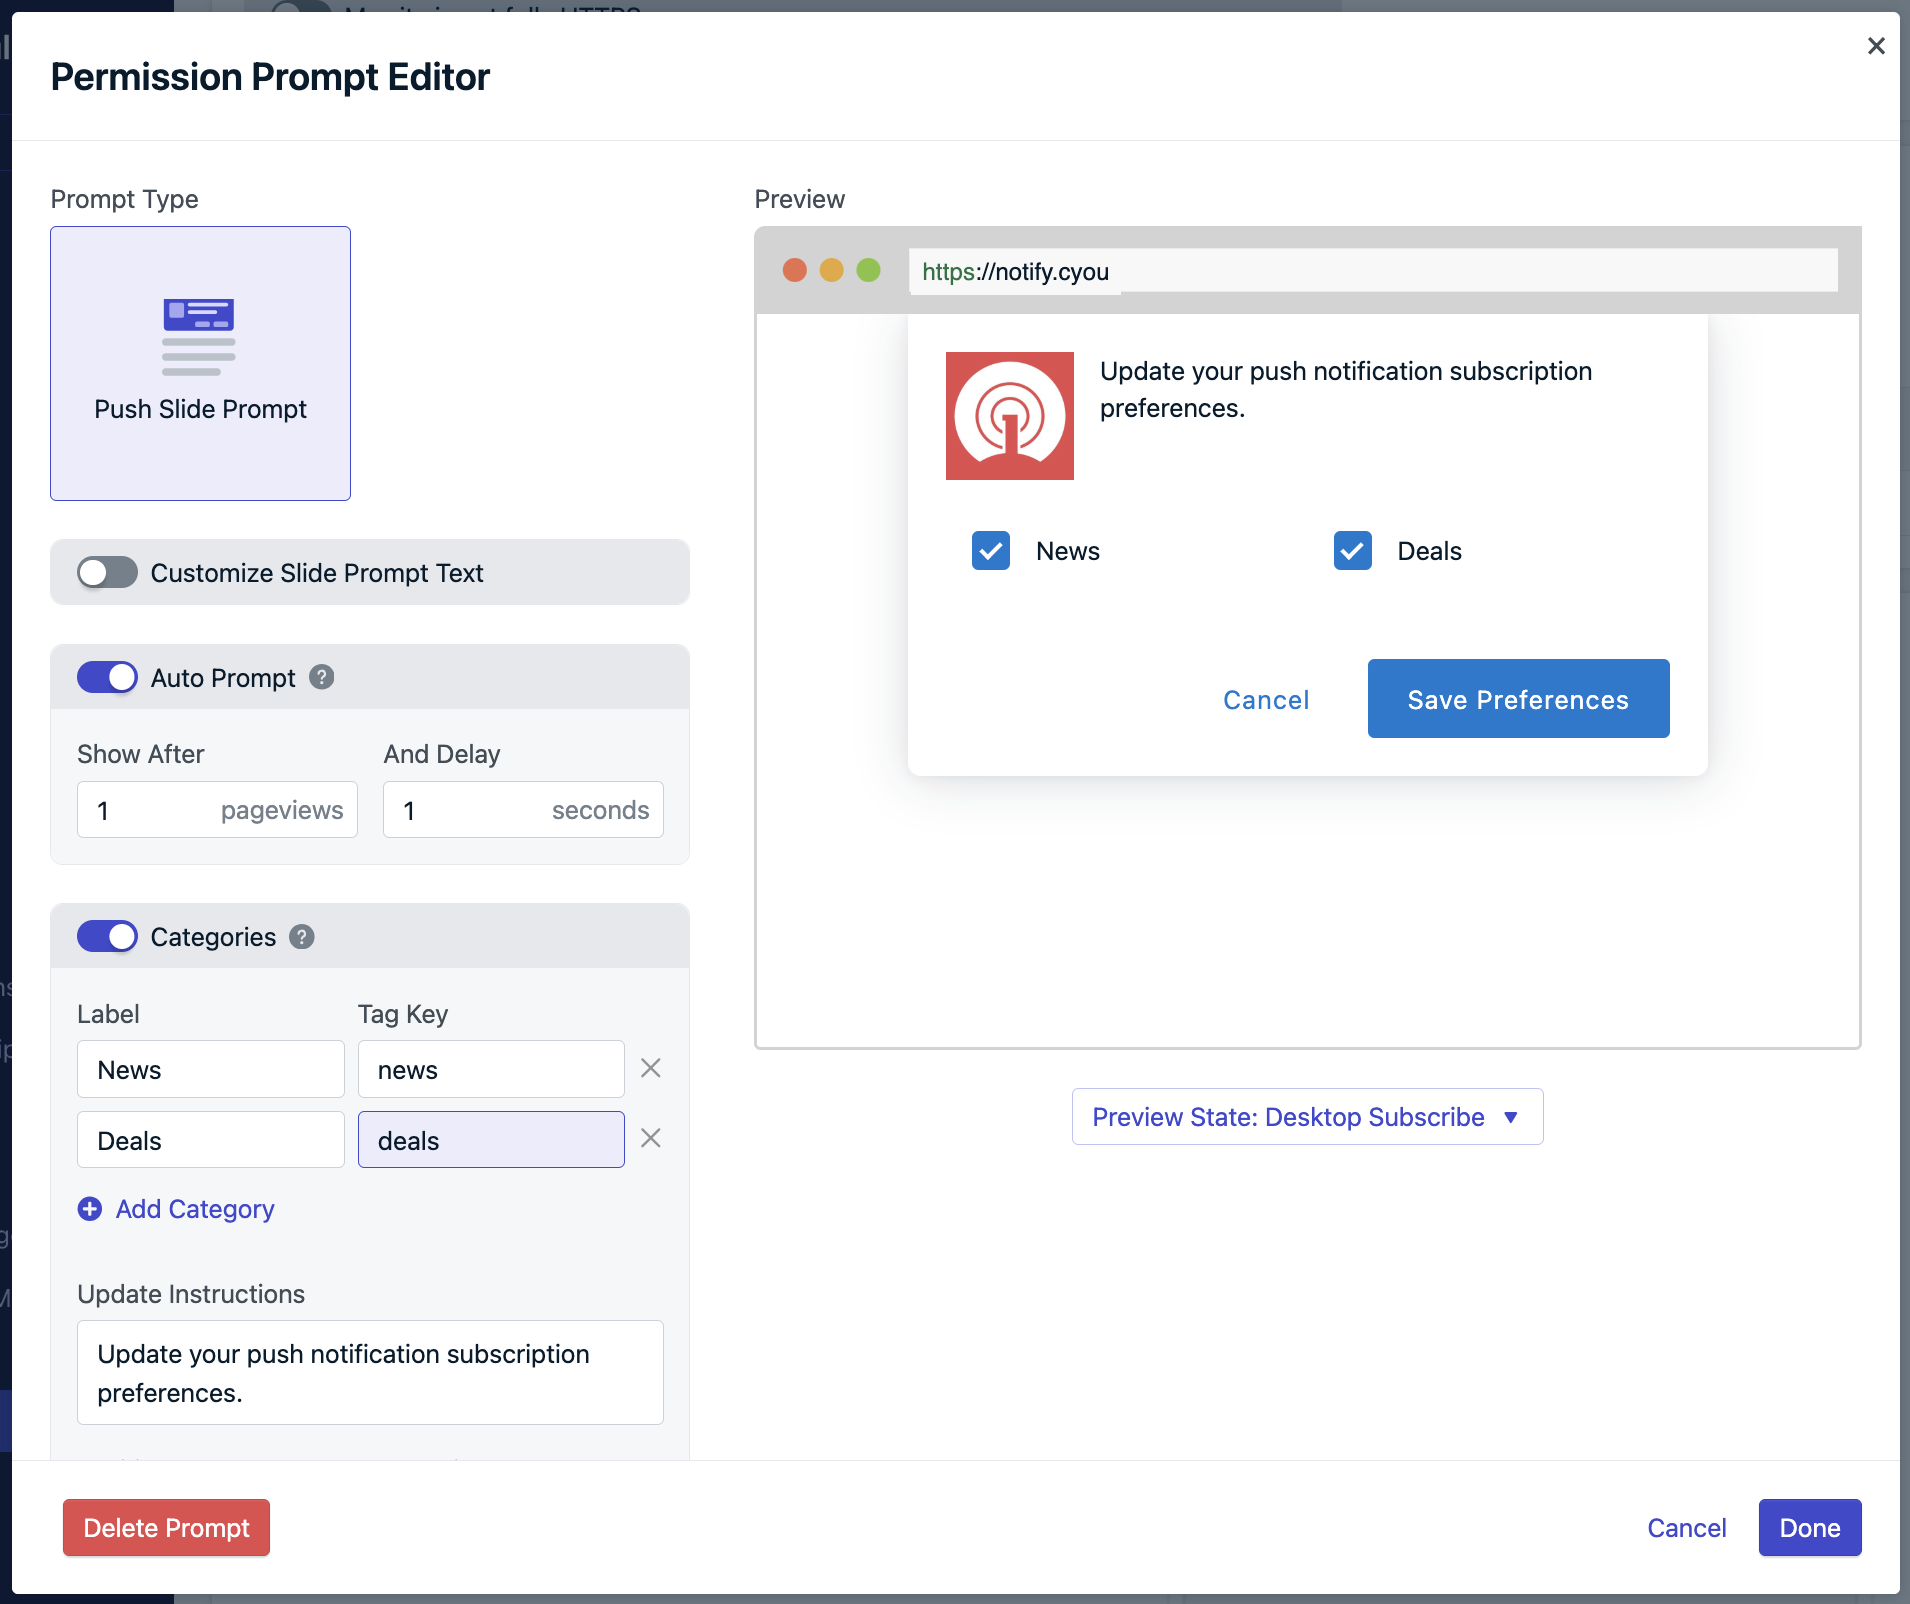 **Tag Logic**: Checked categories set tag value to `1`, unchecked to `0`. These tags enable targeted messaging to specific user interests.
#### Welcome notification
Set up an immediate notification sent after users first subscribe. This:
* Thanks users for subscribing
* Demonstrates how notifications appear
* Increases engagement and reduces unsubscribes
Configure your welcome message text and timing, then scroll down and click **Save**.
Skip the **Advanced Push Settings** section in the OneSignal Dashboard for now — these are for custom [Web SDK setup](./web-sdk-setup). Click **Save** to continue.
### 2. Configure WordPress plugin
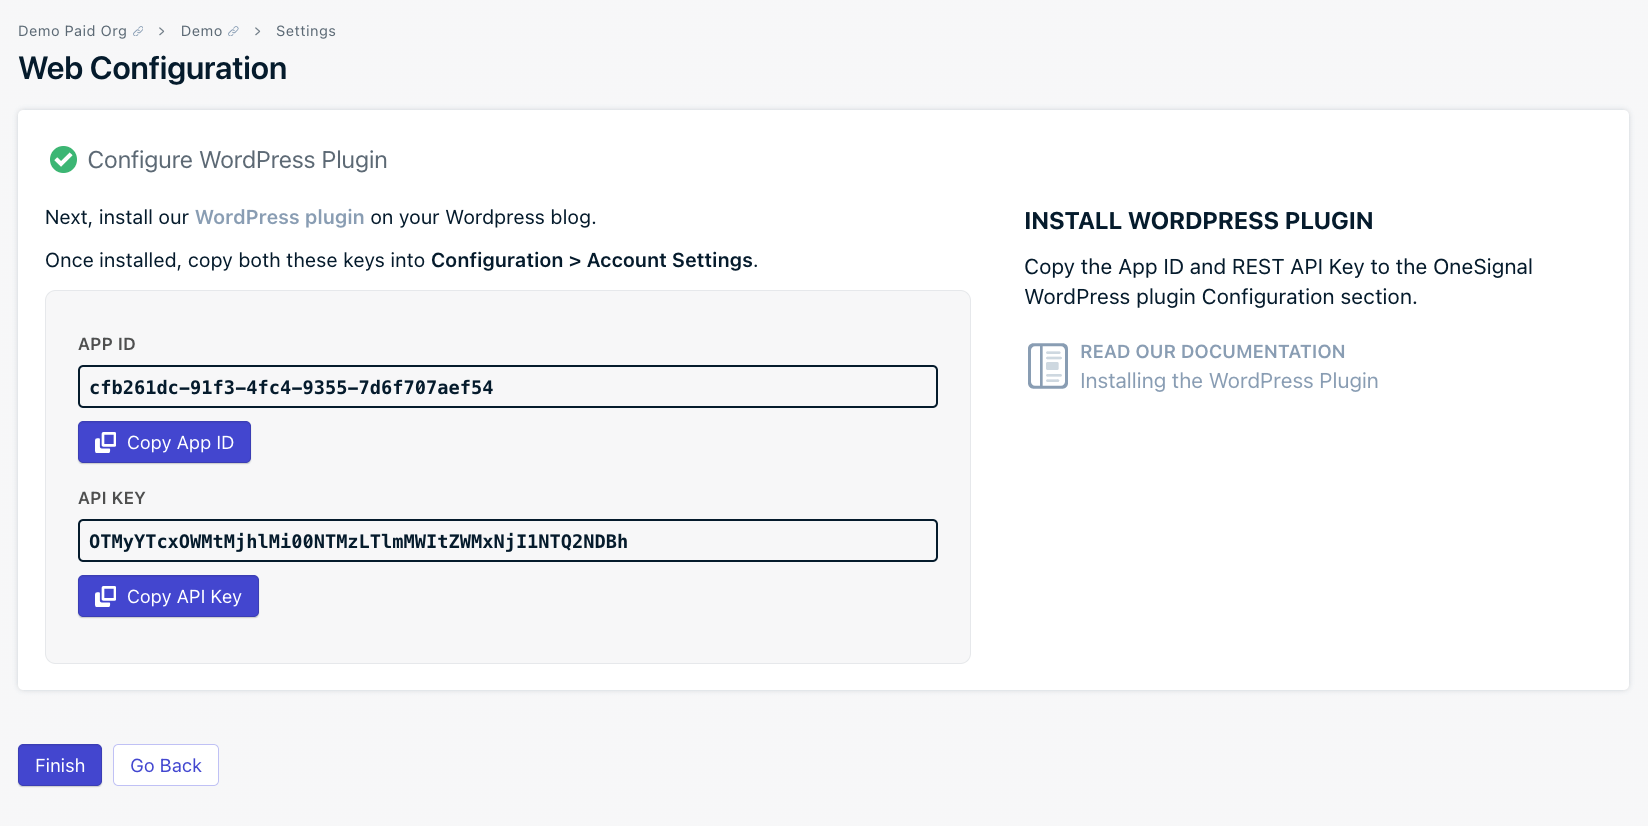
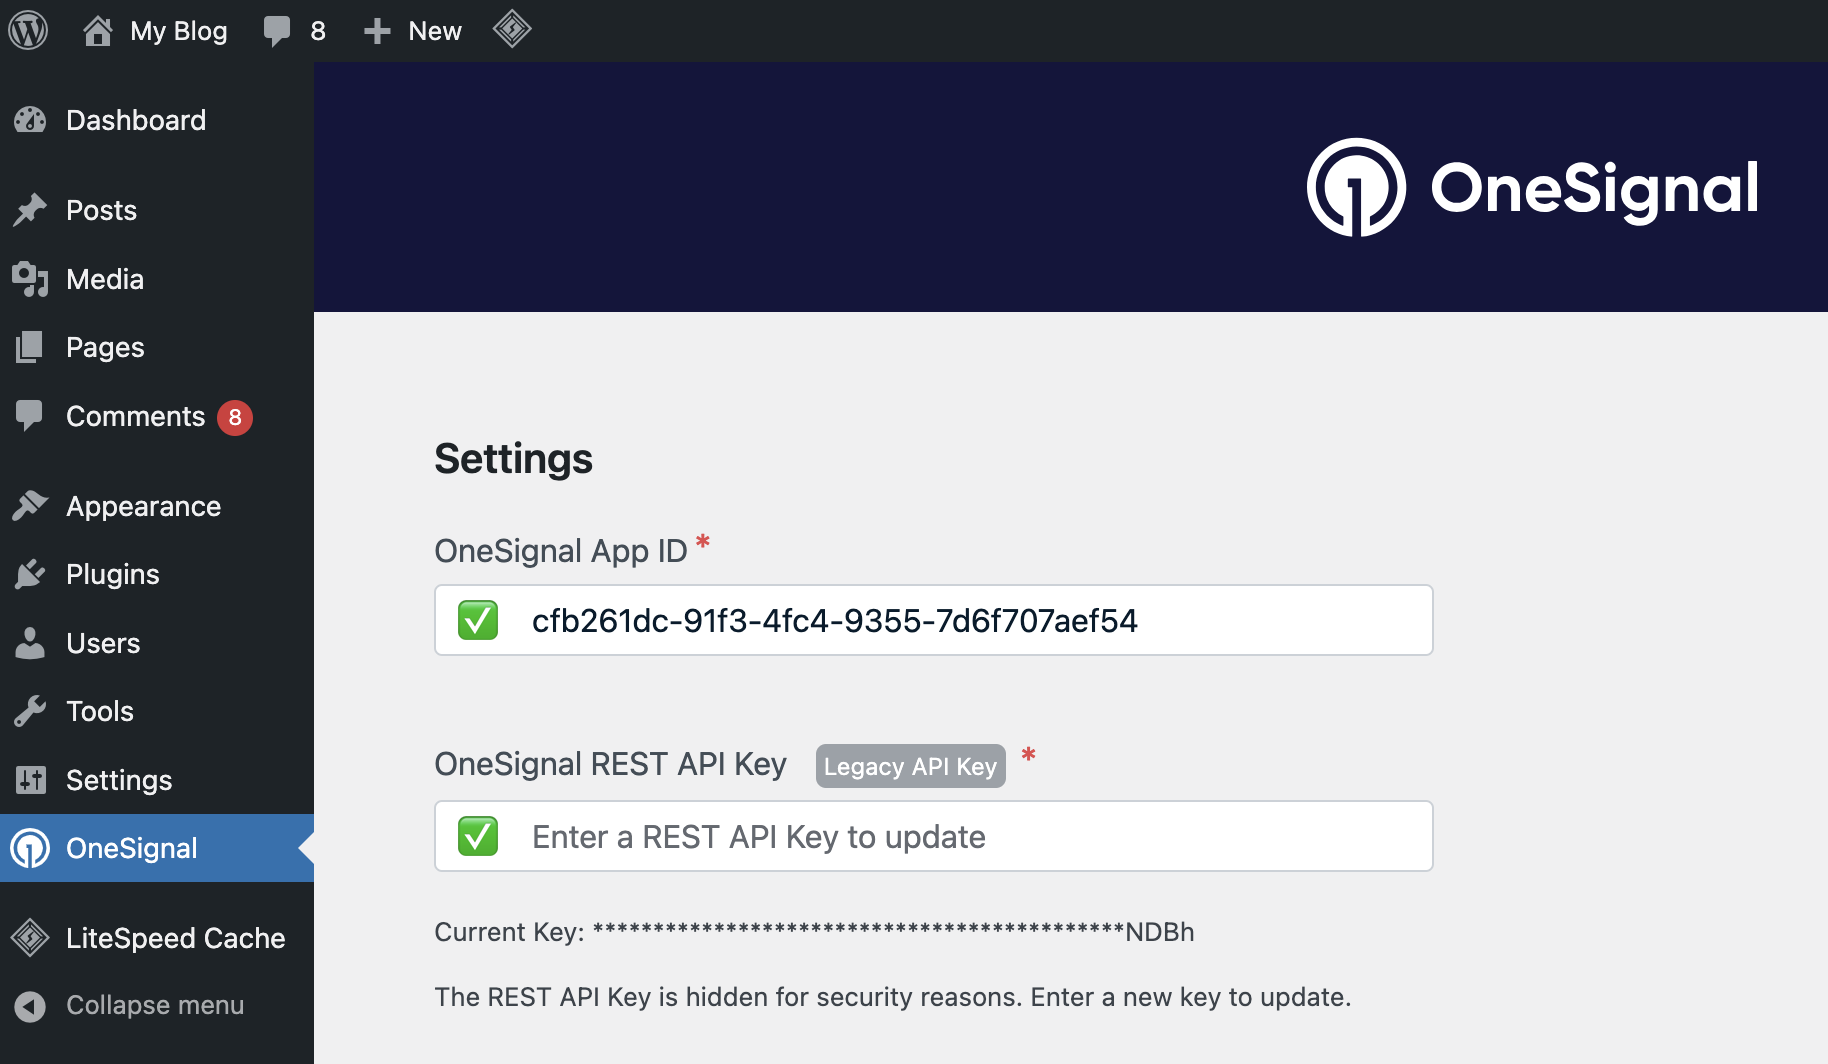
After saving your dashboard configuration, you'll see your **App ID** and **API Key** (the same REST API key documented in [Keys & IDs](./keys-and-ids)). Copy these values to your WordPress plugin:
**Tag Logic**: Checked categories set tag value to `1`, unchecked to `0`. These tags enable targeted messaging to specific user interests.
#### Welcome notification
Set up an immediate notification sent after users first subscribe. This:
* Thanks users for subscribing
* Demonstrates how notifications appear
* Increases engagement and reduces unsubscribes
Configure your welcome message text and timing, then scroll down and click **Save**.
Skip the **Advanced Push Settings** section in the OneSignal Dashboard for now — these are for custom [Web SDK setup](./web-sdk-setup). Click **Save** to continue.
### 2. Configure WordPress plugin
After saving your dashboard configuration, you'll see your **App ID** and **API Key** (the same REST API key documented in [Keys & IDs](./keys-and-ids)). Copy these values to your WordPress plugin:
 **Don't see an API Key?** Follow our [Keys & IDs guide](./keys-and-ids) to
create one.
**Don't see an API Key?** Follow our [Keys & IDs guide](./keys-and-ids) to
create one.
 #### Advanced settings
Configure additional plugin options based on your needs:
#### Advanced settings
Configure additional plugin options based on your needs:
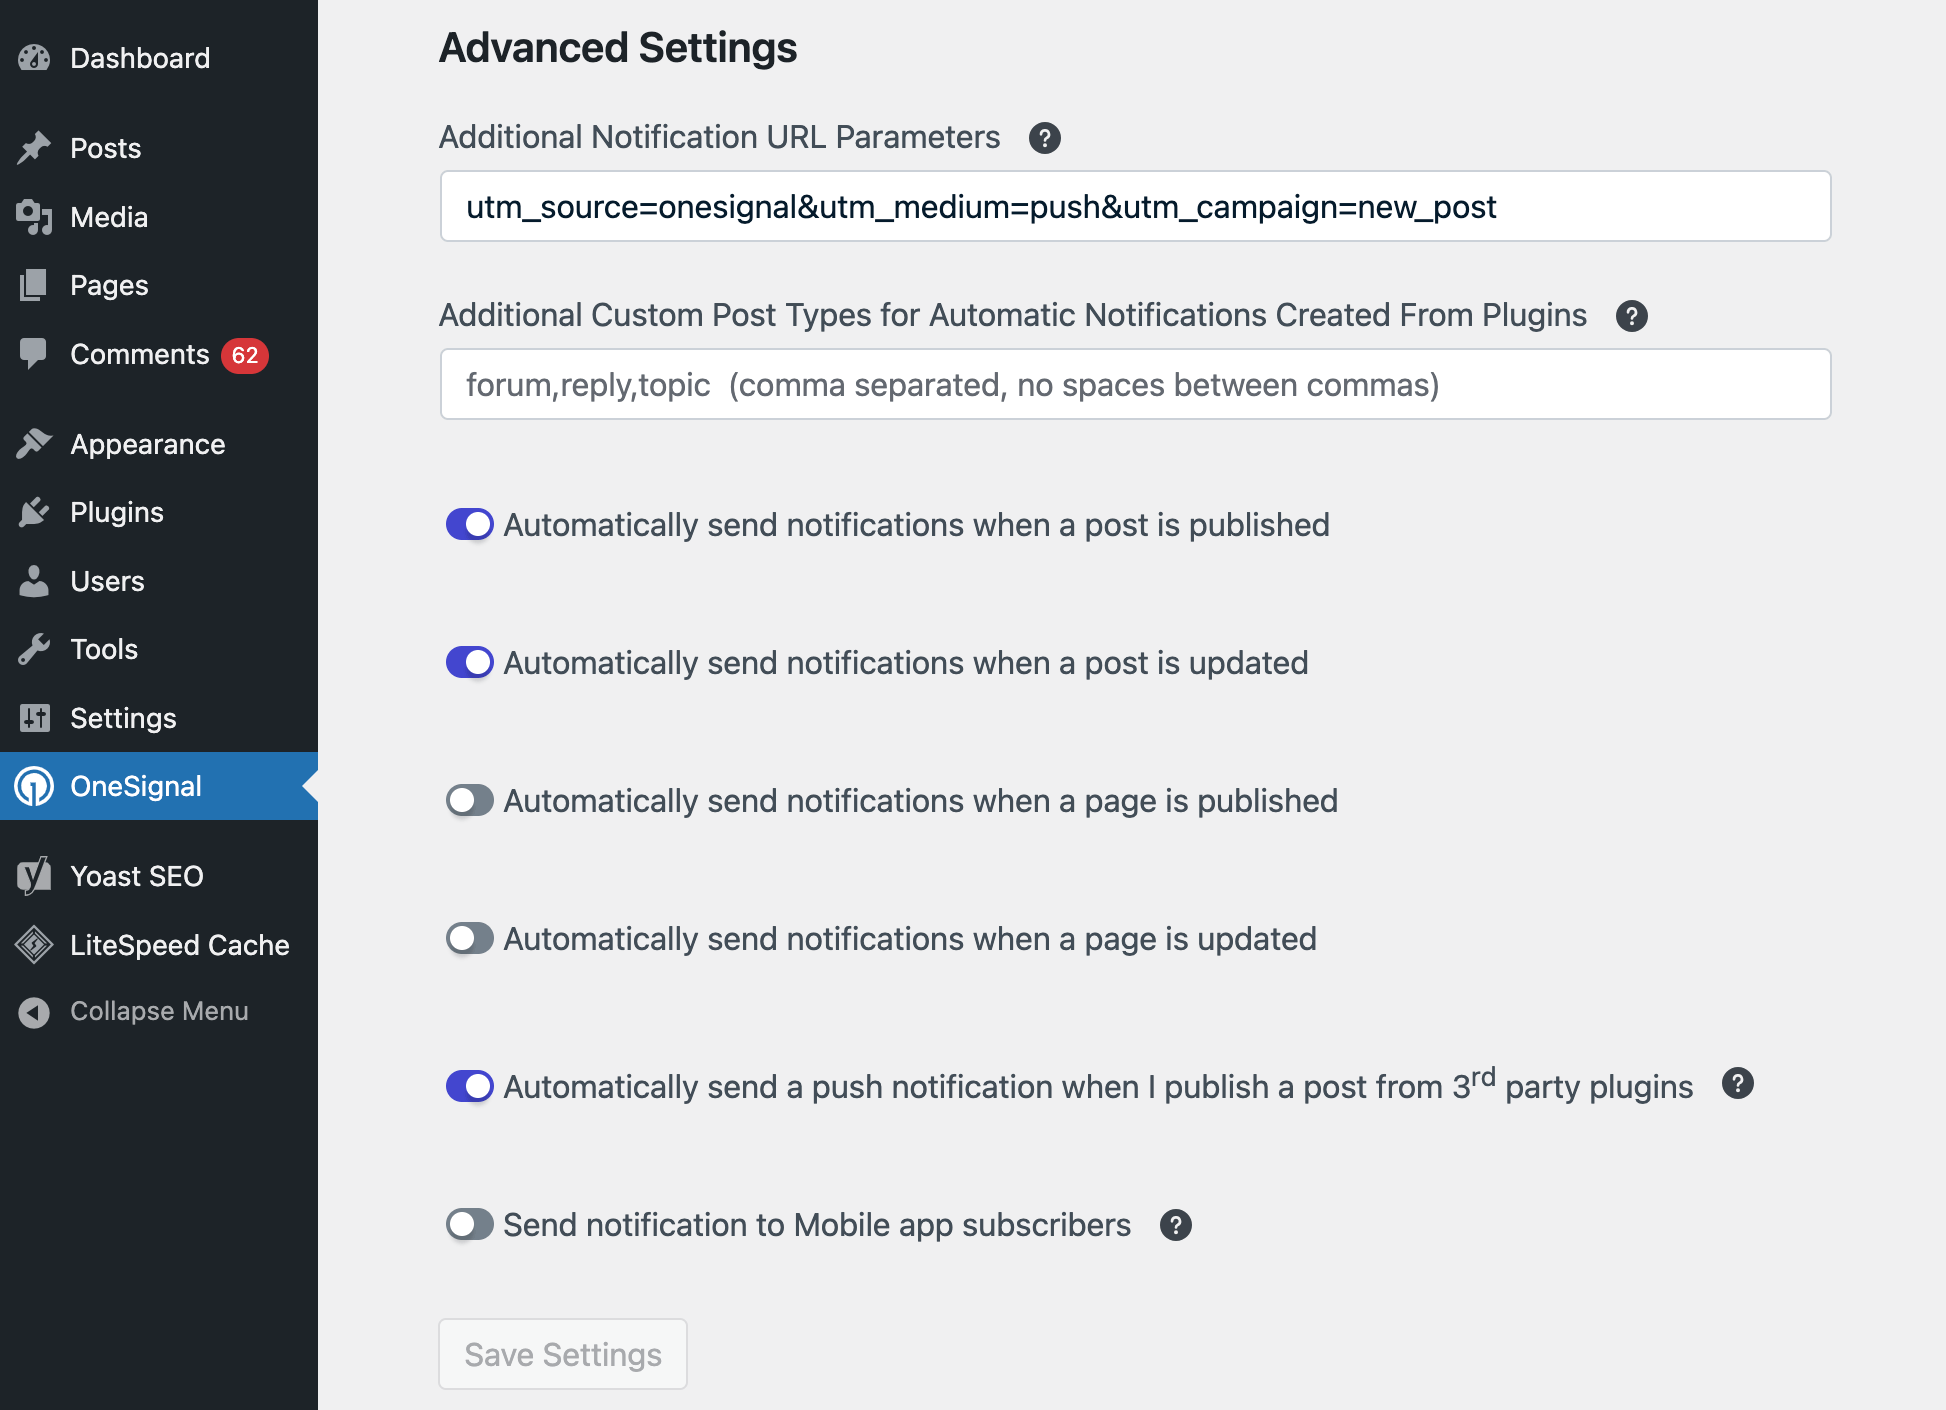 **URL parameter tracking**
Add analytics parameters to notification URLs for tracking. **Important**: Escape special characters—input is added as-is to URLs.
**Example for Google Analytics:**
```
utm_medium=push&utm_source=onesignal&utm_campaign=wordpress-plugin
```
**Example with special characters:**
```
utm_medium=ppc&utm_source=adwords&utm_campaign=snow%20boots&utm_content=durable%20snow%20boots
```
**Additional settings**
* **Custom Post Types**: Add post types from plugins to enable notification options
* **Automatically send notifications when a post is published**: Automatically checks notification box when publishing posts so notifications are sent without having to check the box manually
* **Automatically send notifications when a post is updated**: Automatically checks notification box when updating posts so notifications are sent without having to check the box manually
* **Automatically send notifications when a page is published**: Automatically checks notification box when publishing pages so notifications are sent without having to check the box manually
* **Automatically send notifications when a page is updated**: Automatically checks notification box when updating pages so notifications are sent without having to check the box manually
* **Automatically send a push notification when I publish a post from 3rd party plugins**: Auto-send notifications from external publishing plugins
* **Mobile App Integration**: Send notifications to your mobile app subscribers using the same OneSignal App ID
### 3. Complete migration (Upgrading Users Only)
**New installations can skip this step. If you're upgrading from v2+, follow
along...**
**Time-Sensitive**: Complete these steps ASAP to avoid users missing
notifications during the transition.
**URL parameter tracking**
Add analytics parameters to notification URLs for tracking. **Important**: Escape special characters—input is added as-is to URLs.
**Example for Google Analytics:**
```
utm_medium=push&utm_source=onesignal&utm_campaign=wordpress-plugin
```
**Example with special characters:**
```
utm_medium=ppc&utm_source=adwords&utm_campaign=snow%20boots&utm_content=durable%20snow%20boots
```
**Additional settings**
* **Custom Post Types**: Add post types from plugins to enable notification options
* **Automatically send notifications when a post is published**: Automatically checks notification box when publishing posts so notifications are sent without having to check the box manually
* **Automatically send notifications when a post is updated**: Automatically checks notification box when updating posts so notifications are sent without having to check the box manually
* **Automatically send notifications when a page is published**: Automatically checks notification box when publishing pages so notifications are sent without having to check the box manually
* **Automatically send notifications when a page is updated**: Automatically checks notification box when updating pages so notifications are sent without having to check the box manually
* **Automatically send a push notification when I publish a post from 3rd party plugins**: Auto-send notifications from external publishing plugins
* **Mobile App Integration**: Send notifications to your mobile app subscribers using the same OneSignal App ID
### 3. Complete migration (Upgrading Users Only)
**New installations can skip this step. If you're upgrading from v2+, follow
along...**
**Time-Sensitive**: Complete these steps ASAP to avoid users missing
notifications during the transition.
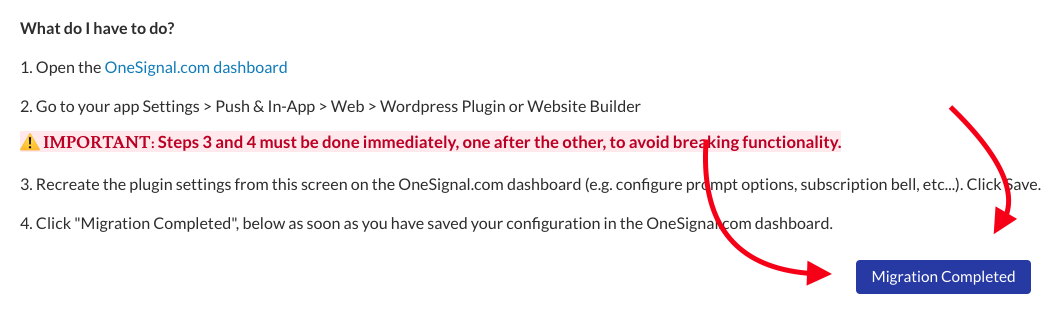 Setup complete! Click **Save Settings** to finish plugin configuration.
***
## Testing your setup
1. **Visit your website** in a normal (non-incognito) window for the most reliable test. Private browsing may show prompts but subscriptions often do not persist—see [WordPress troubleshooting](./troubleshooting-wordpress-web-push).
2. **Look for the slidedown prompt** you configured.
Setup complete! Click **Save Settings** to finish plugin configuration.
***
## Testing your setup
1. **Visit your website** in a normal (non-incognito) window for the most reliable test. Private browsing may show prompts but subscriptions often do not persist—see [WordPress troubleshooting](./troubleshooting-wordpress-web-push).
2. **Look for the slidedown prompt** you configured.
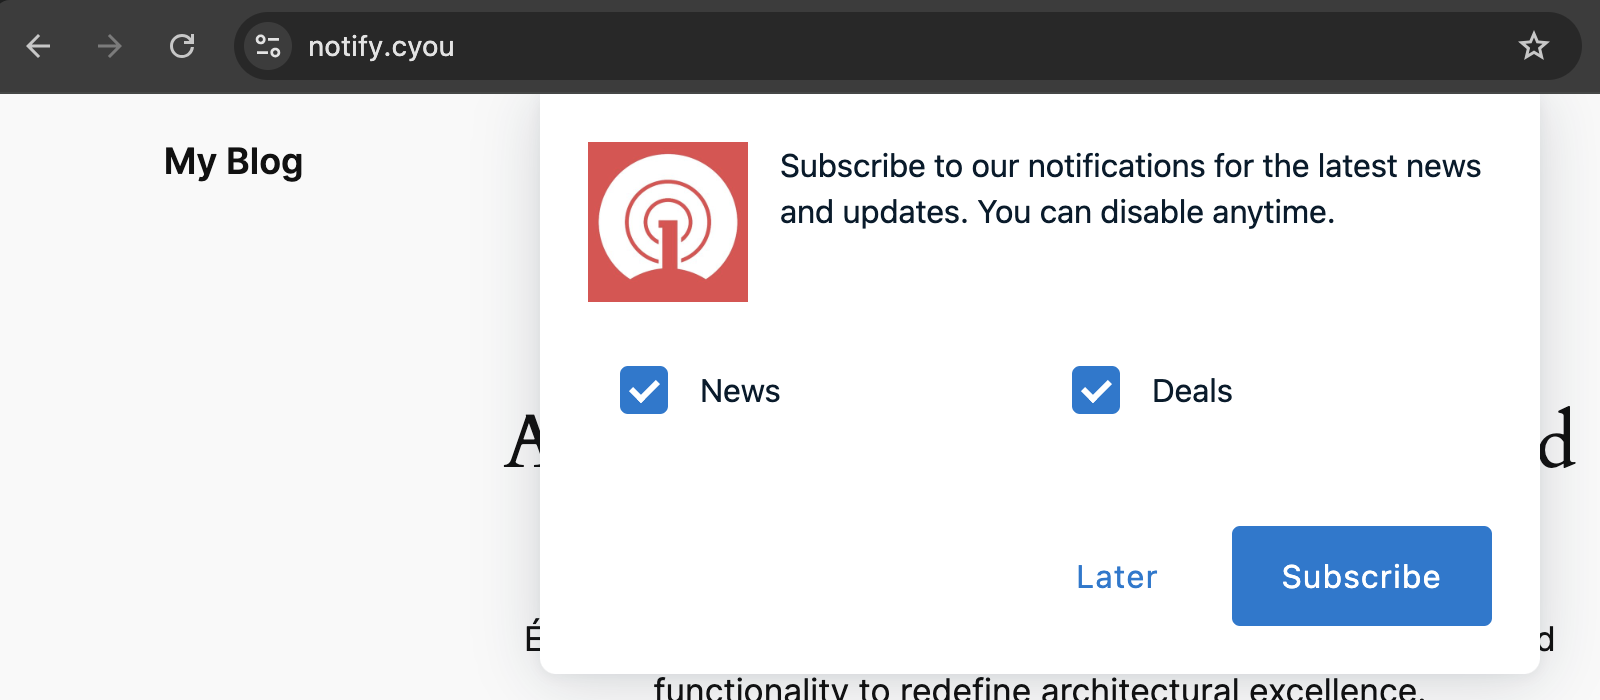 3. **Click the subscribe button** (labeled as **Subscribe** in this example).
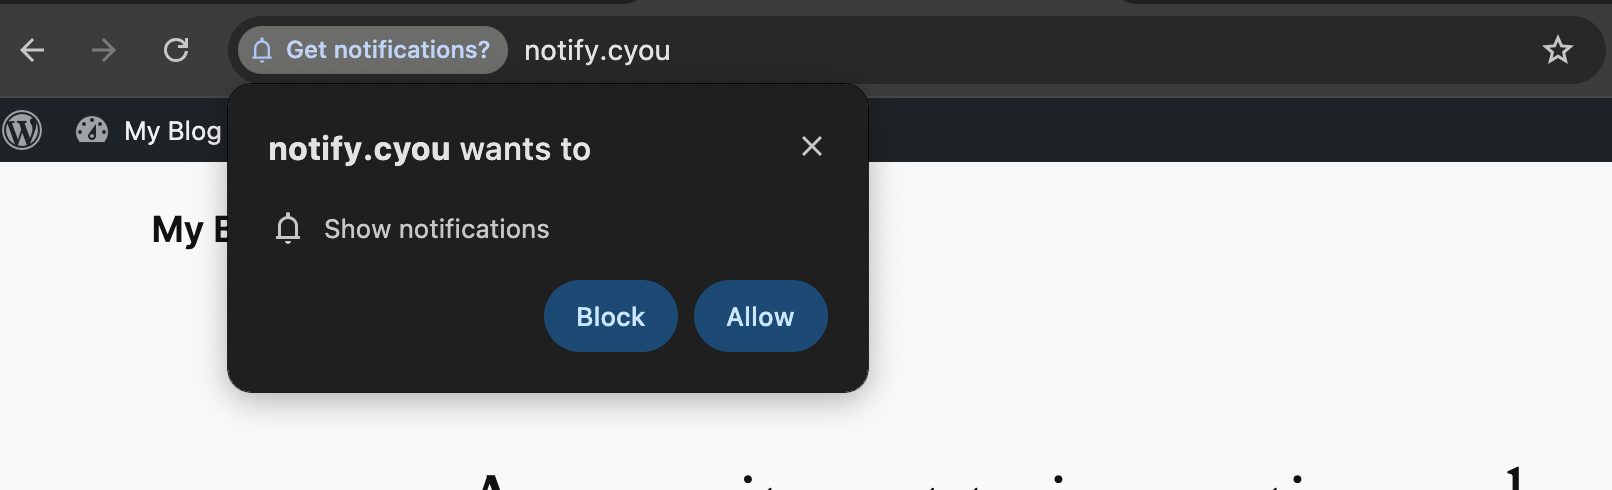
4. **Accept the browser permission** when prompted.
3. **Click the subscribe button** (labeled as **Subscribe** in this example).
4. **Accept the browser permission** when prompted.
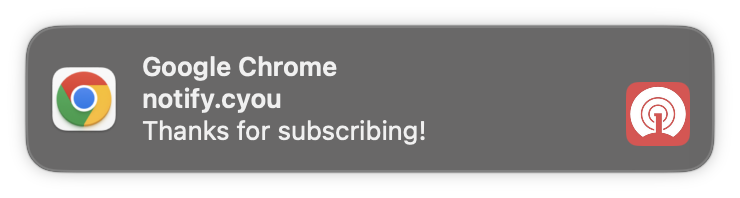
 5. **Check for welcome notification** (if configured).
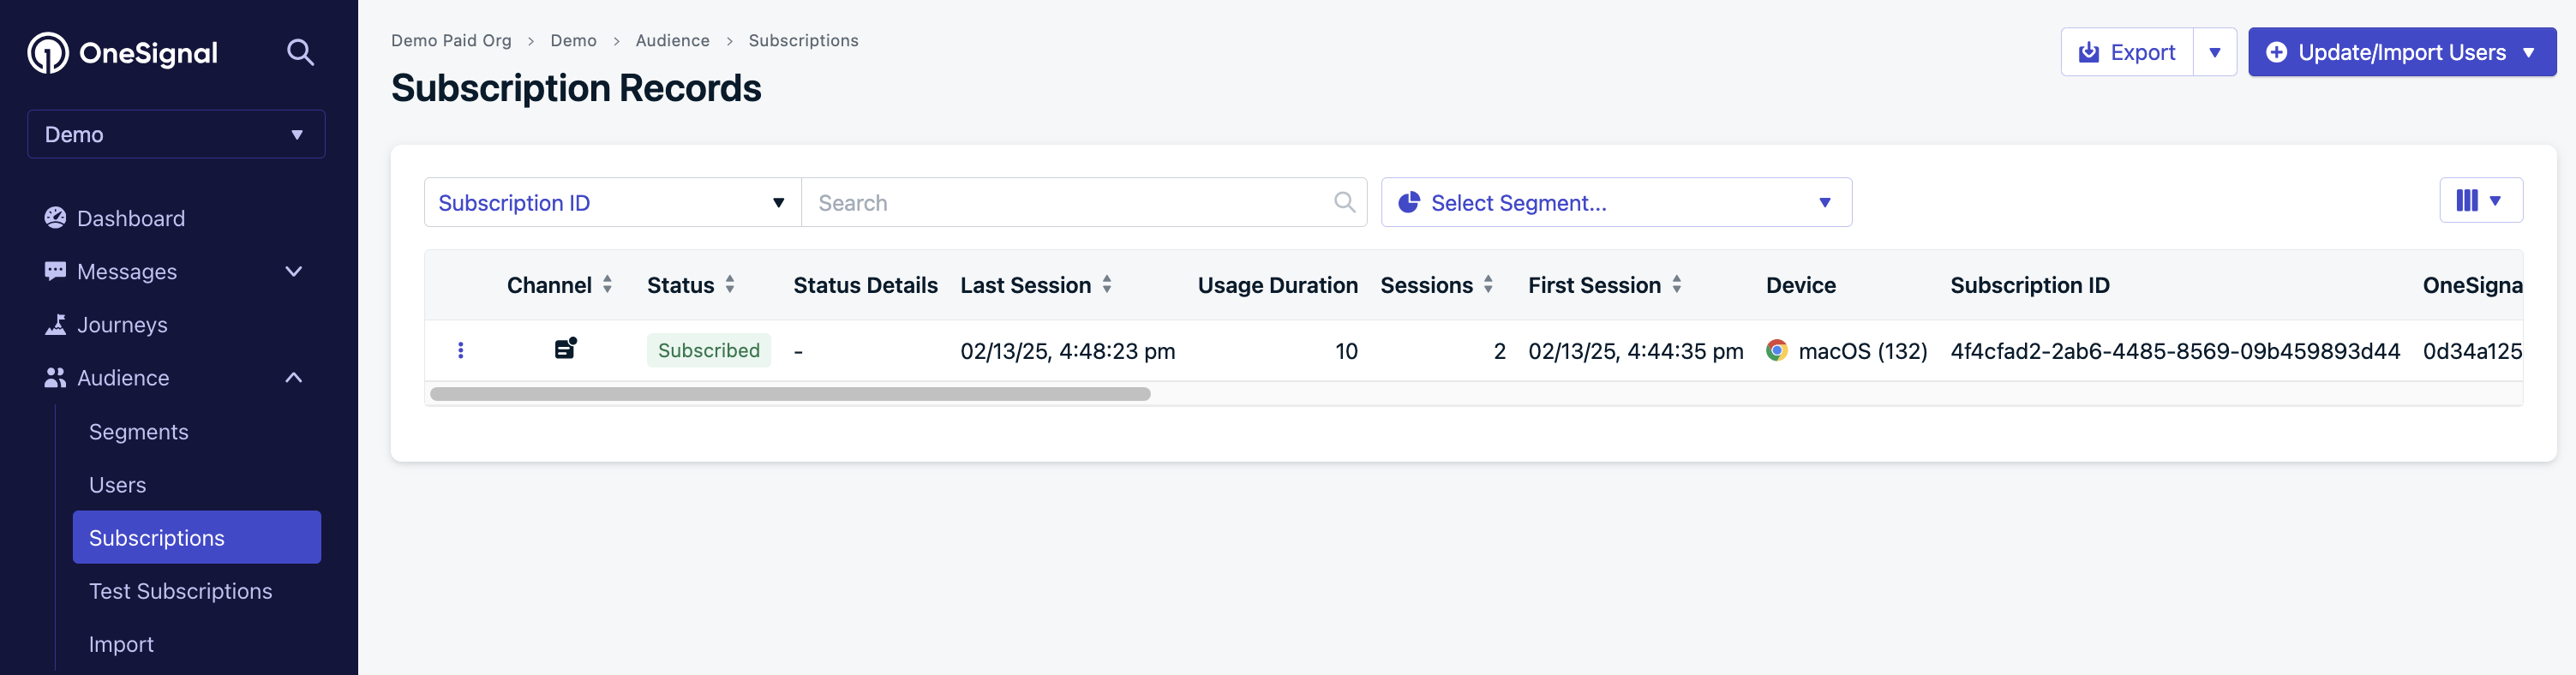
 1. In your OneSignal dashboard, go to **Audience > Subscriptions**.
2. You should see your web push [subscription](./subscriptions) marked as **Subscribed**.
1. In your OneSignal dashboard, go to **Audience > Subscriptions**.
2. You should see your web push [subscription](./subscriptions) marked as **Subscribed**.
 1. Navigate to **Messages > Push** in your OneSignal dashboard.
2. Create a **New Message**.
3. Send a test notification to yourself.
4. Verify the notification appears correctly.
See our [Push messaging guide](./push) for detailed instructions.
**Success!** Your WordPress site is now configured for web push notifications.
Users will start appearing in your Subscriptions as they subscribe.
**Next Steps:**
* Review [Web permission prompts](./permission-requests) for advanced customization
* Explore [Channel setup](./channel-setup) for email and SMS integration
* Set up [segmentation strategies](./segmentation) for targeted messaging
**Having Issues?** Check our [WordPress troubleshooting
guide](./troubleshooting-wordpress-web-push) for common solutions.
***
## Publishing notifications
When you schedule a post to be published, OneSignal will also schedule a push notification to be sent to your subscribers at the scheduled time. If you reschedule the post, the push notification will be canceled and a new push will be scheduled for the new time.
You can view your scheduled and cancelled notifications in the OneSignal dashboard under **Delivery > Scheduled Messages**. See [Push message reports](./push-notification-message-reports) for more details.
### Basic post notifications
When creating or editing a WordPress post, locate the **OneSignal Push Notifications** metabox (usually at the bottom or sidebar of the post editor).
1. Navigate to **Messages > Push** in your OneSignal dashboard.
2. Create a **New Message**.
3. Send a test notification to yourself.
4. Verify the notification appears correctly.
See our [Push messaging guide](./push) for detailed instructions.
**Success!** Your WordPress site is now configured for web push notifications.
Users will start appearing in your Subscriptions as they subscribe.
**Next Steps:**
* Review [Web permission prompts](./permission-requests) for advanced customization
* Explore [Channel setup](./channel-setup) for email and SMS integration
* Set up [segmentation strategies](./segmentation) for targeted messaging
**Having Issues?** Check our [WordPress troubleshooting
guide](./troubleshooting-wordpress-web-push) for common solutions.
***
## Publishing notifications
When you schedule a post to be published, OneSignal will also schedule a push notification to be sent to your subscribers at the scheduled time. If you reschedule the post, the push notification will be canceled and a new push will be scheduled for the new time.
You can view your scheduled and cancelled notifications in the OneSignal dashboard under **Delivery > Scheduled Messages**. See [Push message reports](./push-notification-message-reports) for more details.
### Basic post notifications
When creating or editing a WordPress post, locate the **OneSignal Push Notifications** metabox (usually at the bottom or sidebar of the post editor).
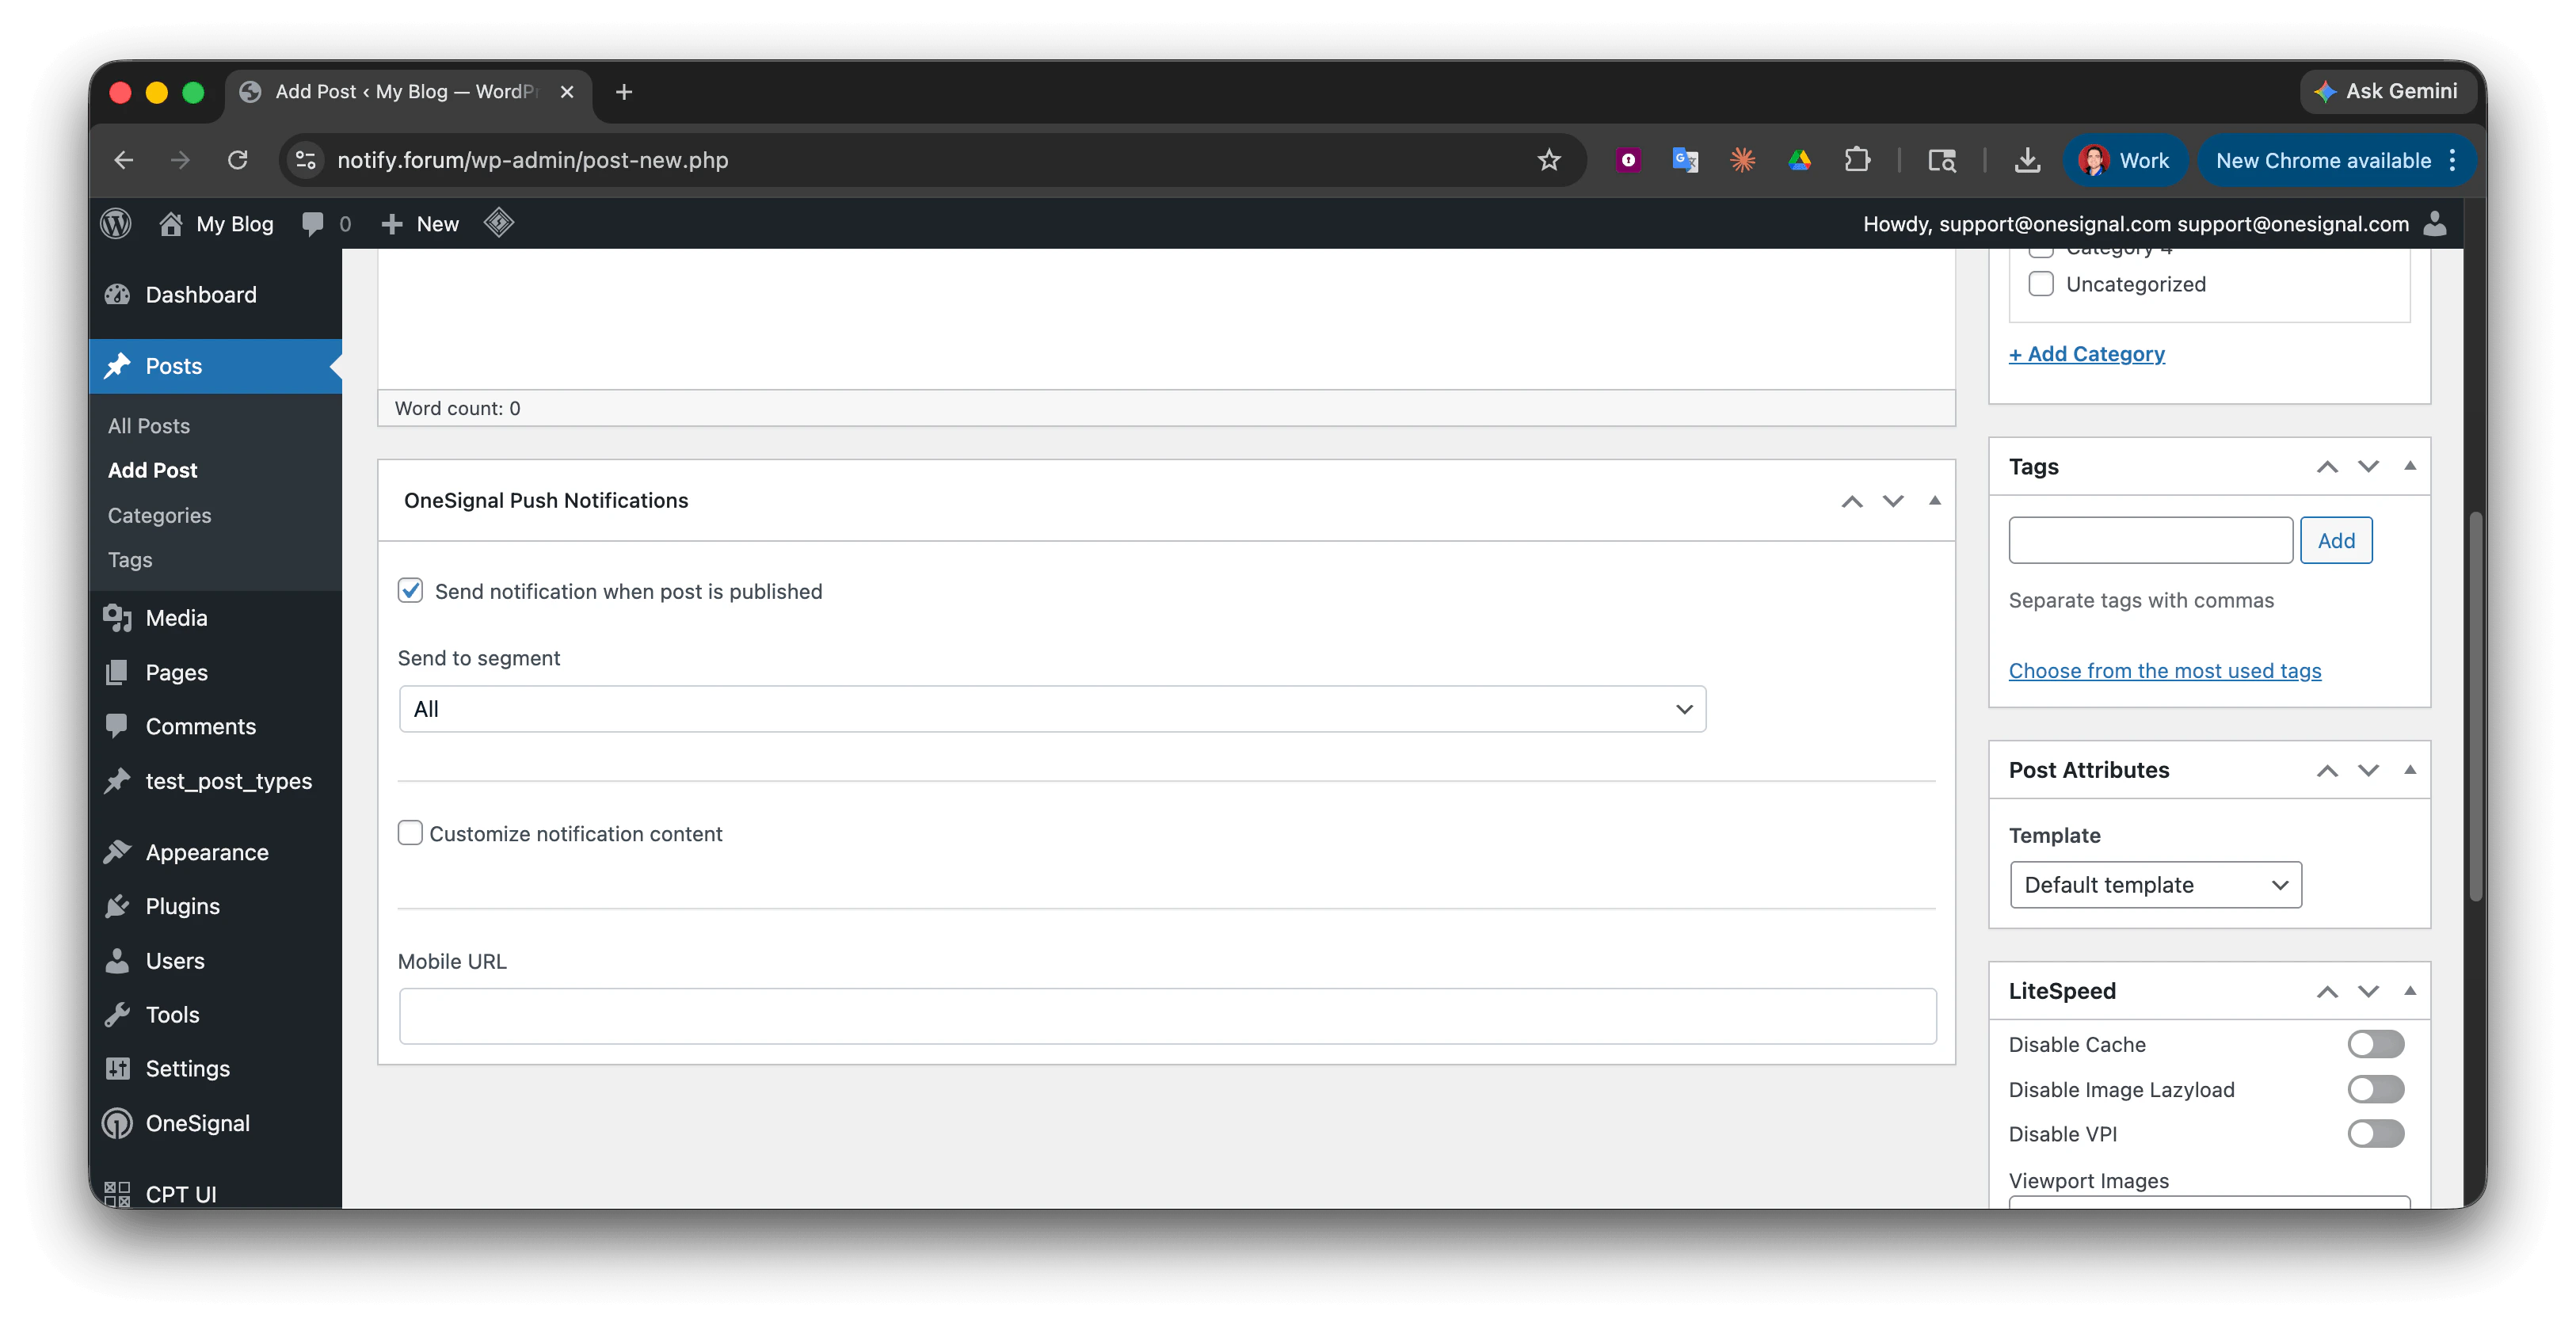 **To send a notification:**
* Check **"Send notification when post is published or updated"**
* Uncheck to skip sending a notification for that post
### Audience targeting
#### Send to all subscribers (default)
By default, notifications go to all push [subscribers](./subscriptions).
#### Send to specific segments
Target specific audiences using [segments](./segmentation) you create in **OneSignal Dashboard > Audience > Segments**.
**If you set up category-based prompts** in the dashboard (see **Advanced: Category-Based Segmentation** under [Setup](#setup)), create corresponding segments:
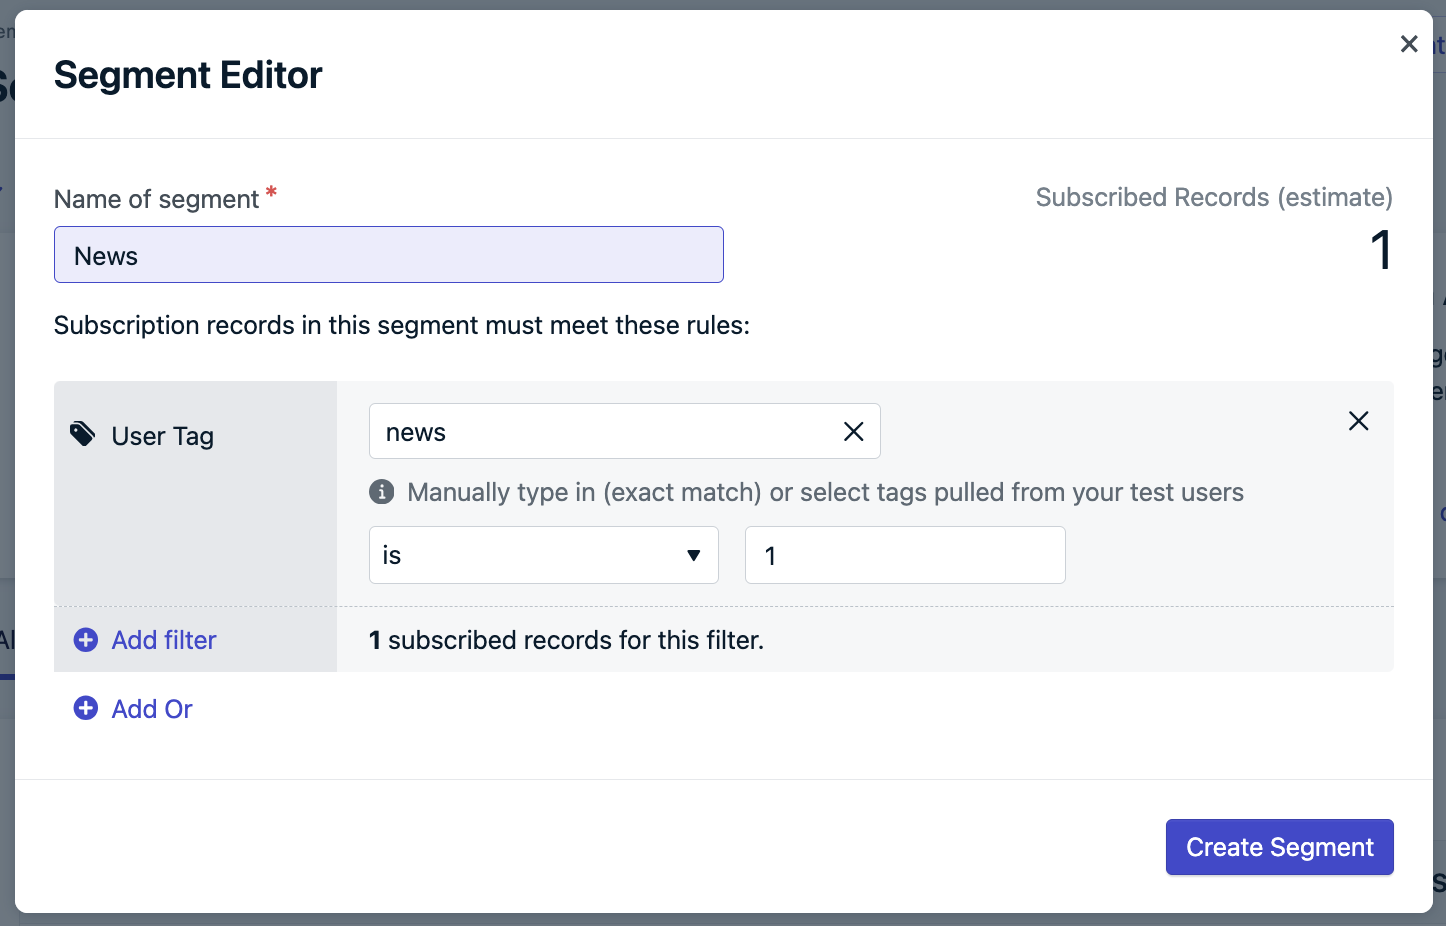
1. Go to **Audience > Segments** in your OneSignal dashboard
2. Create segments using your tag keys, eg:
* **News Segment**: Tag `news` is `1`
* **Deals Segment**: Tag `deals` is `1`
**To send a notification:**
* Check **"Send notification when post is published or updated"**
* Uncheck to skip sending a notification for that post
### Audience targeting
#### Send to all subscribers (default)
By default, notifications go to all push [subscribers](./subscriptions).
#### Send to specific segments
Target specific audiences using [segments](./segmentation) you create in **OneSignal Dashboard > Audience > Segments**.
**If you set up category-based prompts** in the dashboard (see **Advanced: Category-Based Segmentation** under [Setup](#setup)), create corresponding segments:
1. Go to **Audience > Segments** in your OneSignal dashboard
2. Create segments using your tag keys, eg:
* **News Segment**: Tag `news` is `1`
* **Deals Segment**: Tag `deals` is `1`
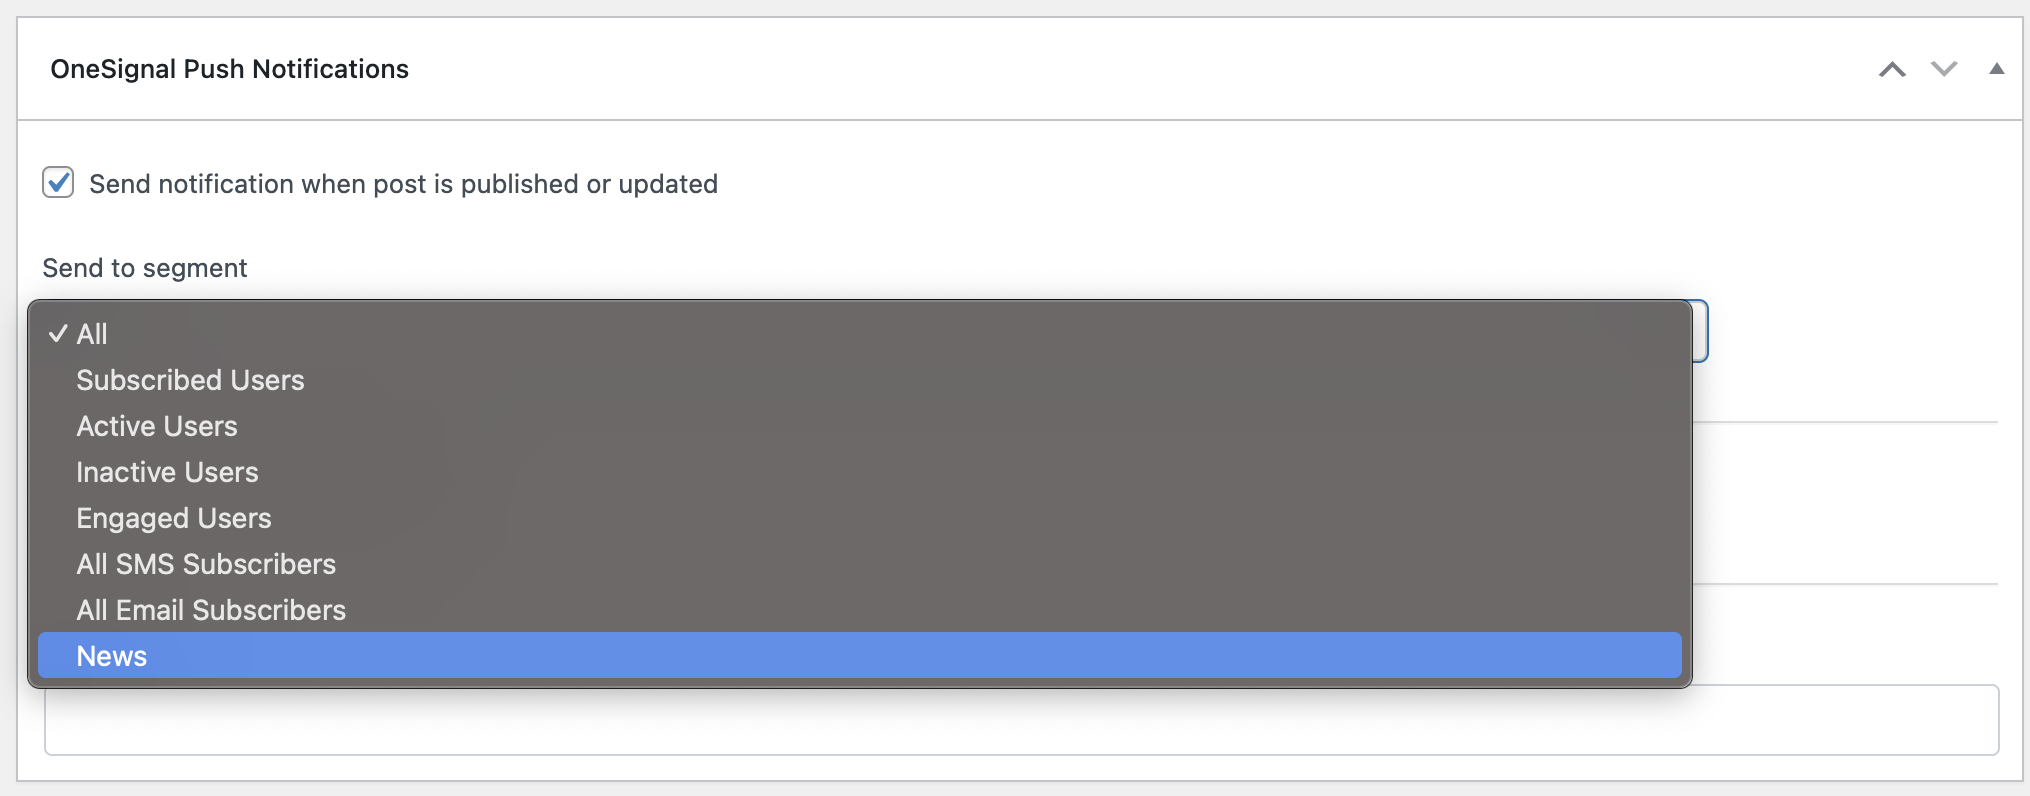
 3. After creating segments, refresh your WordPress post editor
4. Select your target segment from the dropdown
3. After creating segments, refresh your WordPress post editor
4. Select your target segment from the dropdown
 **Advanced Segmentation**: Create segments based on user behavior, location,
device type, and more. [Tags](./add-user-data-tags) provide the most
flexibility for custom user data and personalization.
### Customizing notification content
#### Default behavior
* **Title**: Uses your WordPress site title (Settings > General)
* **Message**: Uses the post title
* **Image**: Uses the post's featured image (if set)
* **URL**: Links to the published post
#### Custom content
Check **"Customize notification content"** to override defaults:
**Advanced Segmentation**: Create segments based on user behavior, location,
device type, and more. [Tags](./add-user-data-tags) provide the most
flexibility for custom user data and personalization.
### Customizing notification content
#### Default behavior
* **Title**: Uses your WordPress site title (Settings > General)
* **Message**: Uses the post title
* **Image**: Uses the post's featured image (if set)
* **URL**: Links to the published post
#### Custom content
Check **"Customize notification content"** to override defaults:
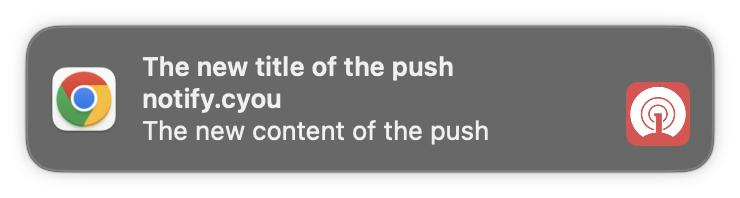
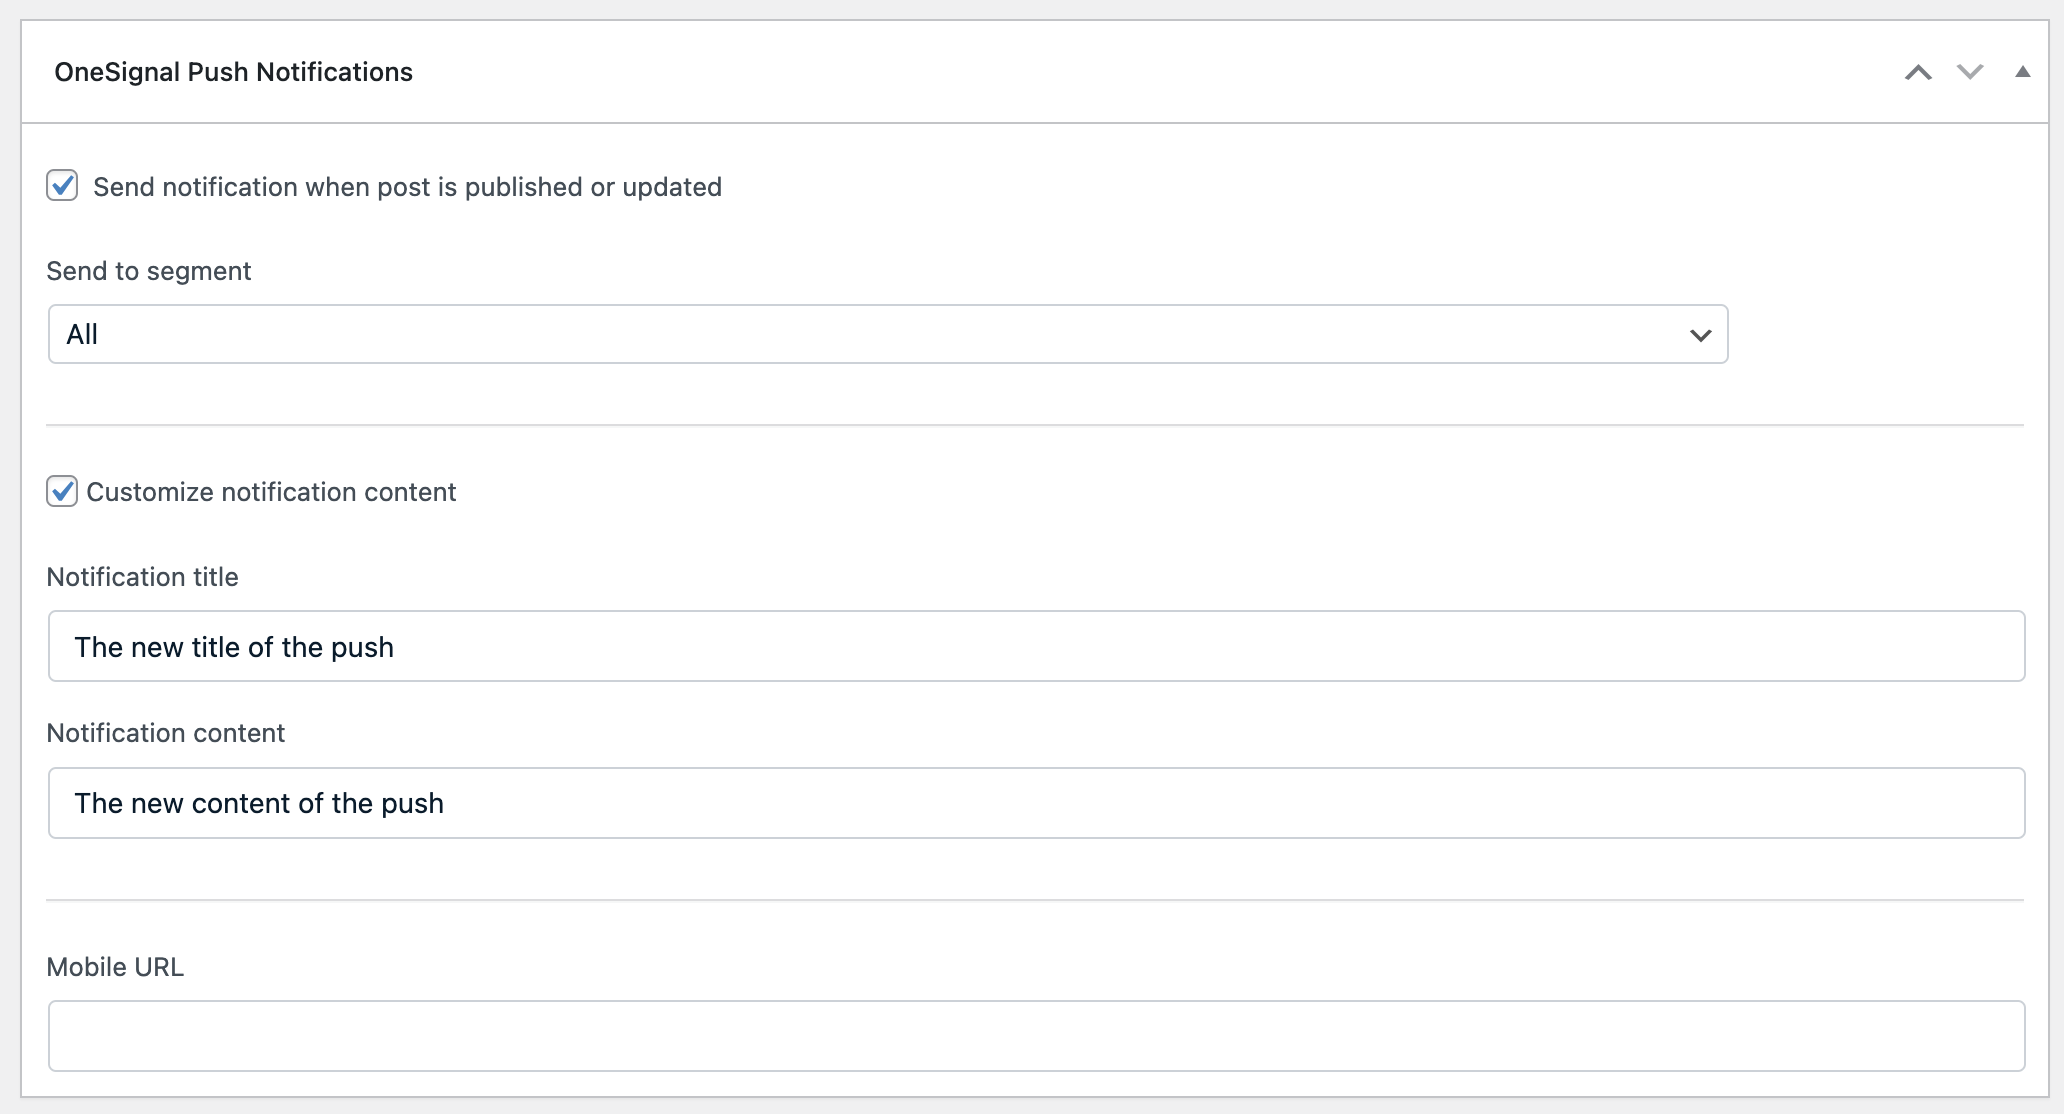 **Example result:**
 ### Add a Custom Post Type to OneSignal WordPress Plugin
#### Find your custom post type name
Look at your browser's address bar when creating a new post. The URL will look like:
```
https://yoursite.com/wp-admin/post-new.php?post_type=your_custom_type
```
The value of the `post_type` parameter (for example, `your_custom_type`) is the exact name you'll need to add in the OneSignal plugin's settings.
#### Add to OneSignal settings
1. Go to **OneSignal > Settings** in WordPress admin
2. In **Advanced Settings**, add your custom post type names to the **Custom Post Types** field
3. Save settings
**Common examples:** `product` (WooCommerce), `tribe_events` (The Events Calendar), `portfolio`.
## Mobile app integration
If you have a mobile app using the same OneSignal App ID:
1. Enable **"Send notification to Mobile app subscribers"** in plugin settings
2. In the post metabox, add a **Mobile URL** for [deep linking](./deep-linking)
3. Mobile users will be directed to your app instead of the web browser
**Ready to Scale**: Explore [advanced push strategies](./push) and
[automated journeys](./journeys-overview) for sophisticated notification
campaigns.
**Notifications Not Appearing?** Check our [Web push troubleshooting
guide](./notifications-not-shown-web-push) for solutions.
***
## FAQ
**Note**: This method only works with slidedown and native permission prompts, not bell or custom link prompts.
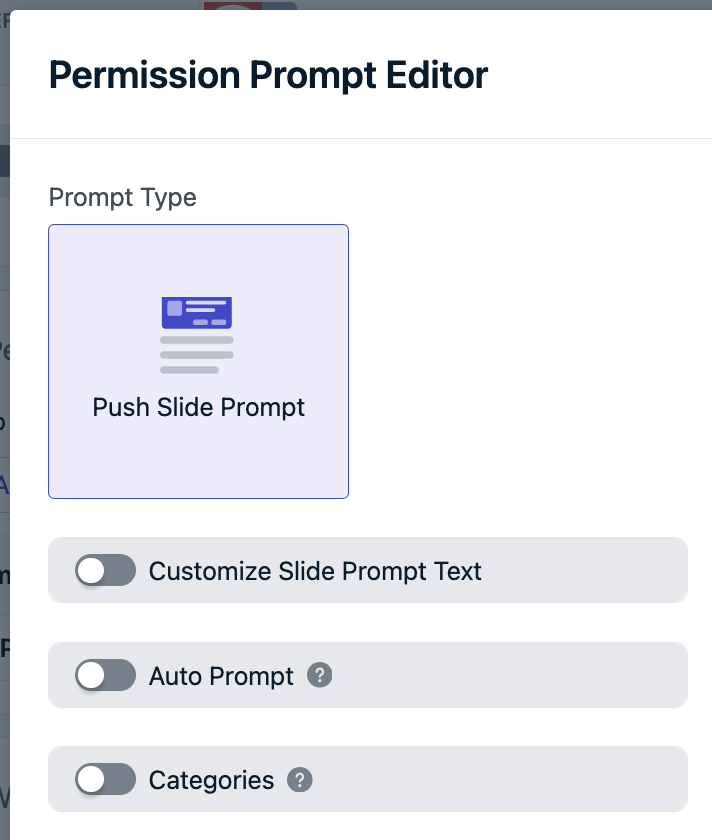
1. In your OneSignal dashboard, go to **Settings > Push & In-App > Web Settings**
2. Select your prompt from the **Permission Prompt Setup** table
3. Uncheck **Auto Prompt** and click **Done**
### Add a Custom Post Type to OneSignal WordPress Plugin
#### Find your custom post type name
Look at your browser's address bar when creating a new post. The URL will look like:
```
https://yoursite.com/wp-admin/post-new.php?post_type=your_custom_type
```
The value of the `post_type` parameter (for example, `your_custom_type`) is the exact name you'll need to add in the OneSignal plugin's settings.
#### Add to OneSignal settings
1. Go to **OneSignal > Settings** in WordPress admin
2. In **Advanced Settings**, add your custom post type names to the **Custom Post Types** field
3. Save settings
**Common examples:** `product` (WooCommerce), `tribe_events` (The Events Calendar), `portfolio`.
## Mobile app integration
If you have a mobile app using the same OneSignal App ID:
1. Enable **"Send notification to Mobile app subscribers"** in plugin settings
2. In the post metabox, add a **Mobile URL** for [deep linking](./deep-linking)
3. Mobile users will be directed to your app instead of the web browser
**Ready to Scale**: Explore [advanced push strategies](./push) and
[automated journeys](./journeys-overview) for sophisticated notification
campaigns.
**Notifications Not Appearing?** Check our [Web push troubleshooting
guide](./notifications-not-shown-web-push) for solutions.
***
## FAQ
**Note**: This method only works with slidedown and native permission prompts, not bell or custom link prompts.
1. In your OneSignal dashboard, go to **Settings > Push & In-App > Web Settings**
2. Select your prompt from the **Permission Prompt Setup** table
3. Uncheck **Auto Prompt** and click **Done**
 4. Scroll down, click **Save**, then **Finish**
5. Add [custom JavaScript code](./web-sdk-reference#slidedown-prompts) to specific pages where you want prompts to appear
This gives you complete control over prompt timing and placement. See [Web permission prompts](./permission-requests) for implementation details.
Yes! If your mobile app uses the same OneSignal App ID:
1. Enable **"Send notification to Mobile app subscribers"** in the WordPress plugin settings
2. When publishing posts, use the **Mobile URL** field in the OneSignal metabox to specify deep links
3. Without a custom Mobile URL, users will be directed to your website
This feature enables cross-platform messaging from a single WordPress interface.
The WordPress plugin currently supports push notifications only. For email and SMS:
1. **Email**: Follow our [Email setup guide](./email-setup), then use [Email messaging tools](./email-messaging)
2. **SMS**: Follow our [SMS setup guide](./sms-setup), then use [SMS messaging tools](./sms-messaging)
Both channels can be managed from the same OneSignal dashboard alongside your push notifications.
**Caching Issues**: WordPress caching may delay migration changes.
**Solution:**
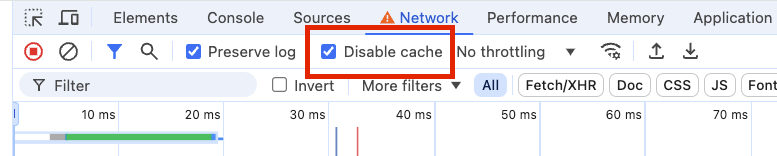
**Step 1:** Right-click on your website and select **Inspect**
**Step 2:** Go to the **Network** tab
**Step 3:** Check **"Disable cache"**
4. Scroll down, click **Save**, then **Finish**
5. Add [custom JavaScript code](./web-sdk-reference#slidedown-prompts) to specific pages where you want prompts to appear
This gives you complete control over prompt timing and placement. See [Web permission prompts](./permission-requests) for implementation details.
Yes! If your mobile app uses the same OneSignal App ID:
1. Enable **"Send notification to Mobile app subscribers"** in the WordPress plugin settings
2. When publishing posts, use the **Mobile URL** field in the OneSignal metabox to specify deep links
3. Without a custom Mobile URL, users will be directed to your website
This feature enables cross-platform messaging from a single WordPress interface.
The WordPress plugin currently supports push notifications only. For email and SMS:
1. **Email**: Follow our [Email setup guide](./email-setup), then use [Email messaging tools](./email-messaging)
2. **SMS**: Follow our [SMS setup guide](./sms-setup), then use [SMS messaging tools](./sms-messaging)
Both channels can be managed from the same OneSignal dashboard alongside your push notifications.
**Caching Issues**: WordPress caching may delay migration changes.
**Solution:**
**Step 1:** Right-click on your website and select **Inspect**
**Step 2:** Go to the **Network** tab
**Step 3:** Check **"Disable cache"**
 **Step 4:** Refresh your website to see current configuration
**Step 5:** Clear your WordPress cache plugin settings if applicable
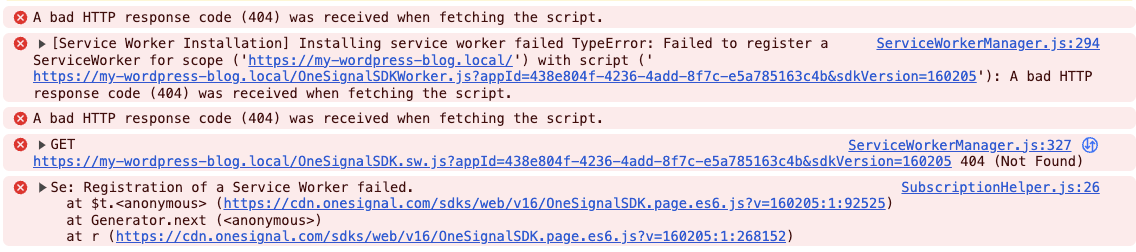
This error indicates incomplete migration:
**Step 4:** Refresh your website to see current configuration
**Step 5:** Clear your WordPress cache plugin settings if applicable
This error indicates incomplete migration:
 **Solution:**
1. Ensure you've saved your OneSignal dashboard configuration
2. In WordPress, click **"Migration Completed"** in the plugin settings
3. Click **Save Settings** to finalize the upgrade
**This error only affects users upgrading from version 2.x.x.**
Yes, you can use the `onesignal_send_notification` filter.
Place custom PHP code in `wp-content/mu-plugins/onesignal-custom.php`. This
ensures it loads correctly and prevents it from being overwritten by updates.
```php theme={null}
'read-more',
'text' => 'Read More',
'url' => get_permalink($post_id),
),
);
return $fields;
}, 10, 2);
```
***
**Solution:**
1. Ensure you've saved your OneSignal dashboard configuration
2. In WordPress, click **"Migration Completed"** in the plugin settings
3. Click **Save Settings** to finalize the upgrade
**This error only affects users upgrading from version 2.x.x.**
Yes, you can use the `onesignal_send_notification` filter.
Place custom PHP code in `wp-content/mu-plugins/onesignal-custom.php`. This
ensures it loads correctly and prevents it from being overwritten by updates.
```php theme={null}
'read-more',
'text' => 'Read More',
'url' => get_permalink($post_id),
),
);
return $fields;
}, 10, 2);
```
***