> ## Documentation Index
> Fetch the complete documentation index at: https://documentation.onesignal.com/llms.txt
> Use this file to discover all available pages before exploring further.
# Zapier
> Learn how to integrate OneSignal with Zapier to automate notifications, connect with 3,000+ apps, and streamline your workflow without code. Step-by-step guide for setting up Zaps, sending push notifications, and using advanced features.
OneSignal integrates with [Zapier](https://zapier.com/zapbook/onesignal/) to automate manual tasks like sending out notifications or sharing sent notifications with the team—without any code. Connect OneSignal to 3,000+ other apps with workflows called Zaps and you can fire off notifications when you tweet, post on your blog, add a row to your spreadsheet, and more.
You can create automations from scratch on [Zapier](https://zapier.com/zapbook/onesignal/), or try one of these examples to get started right now:
## Trigger a scheduled recurring notification
This example uses the Schedule by Zapier trigger. Select how often you would like to send this message.
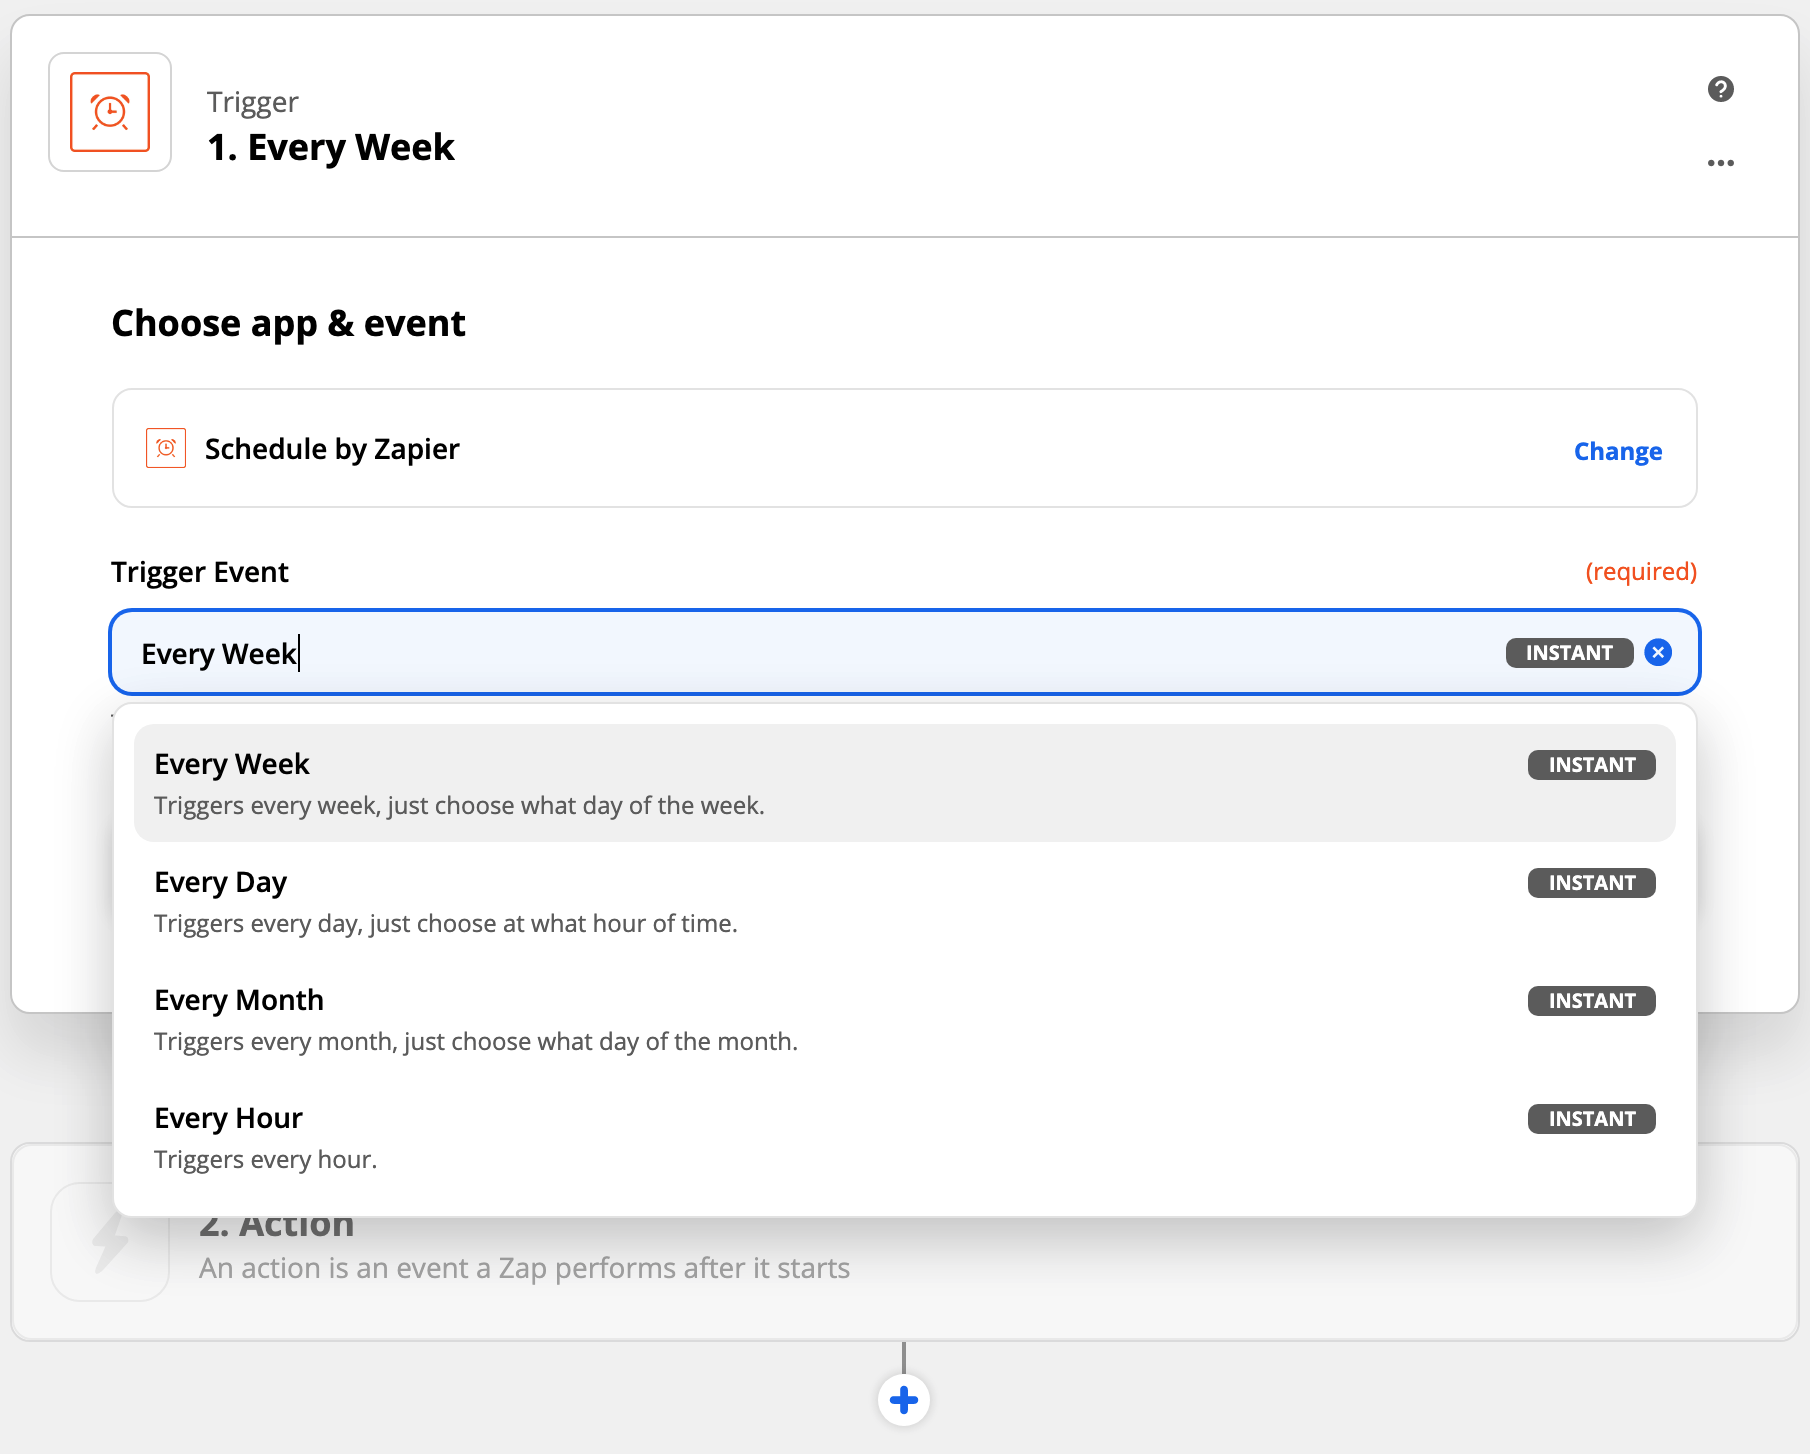 The Schedule by Zapier trigger allows setting "Day Of the Week" and "Time of Day".
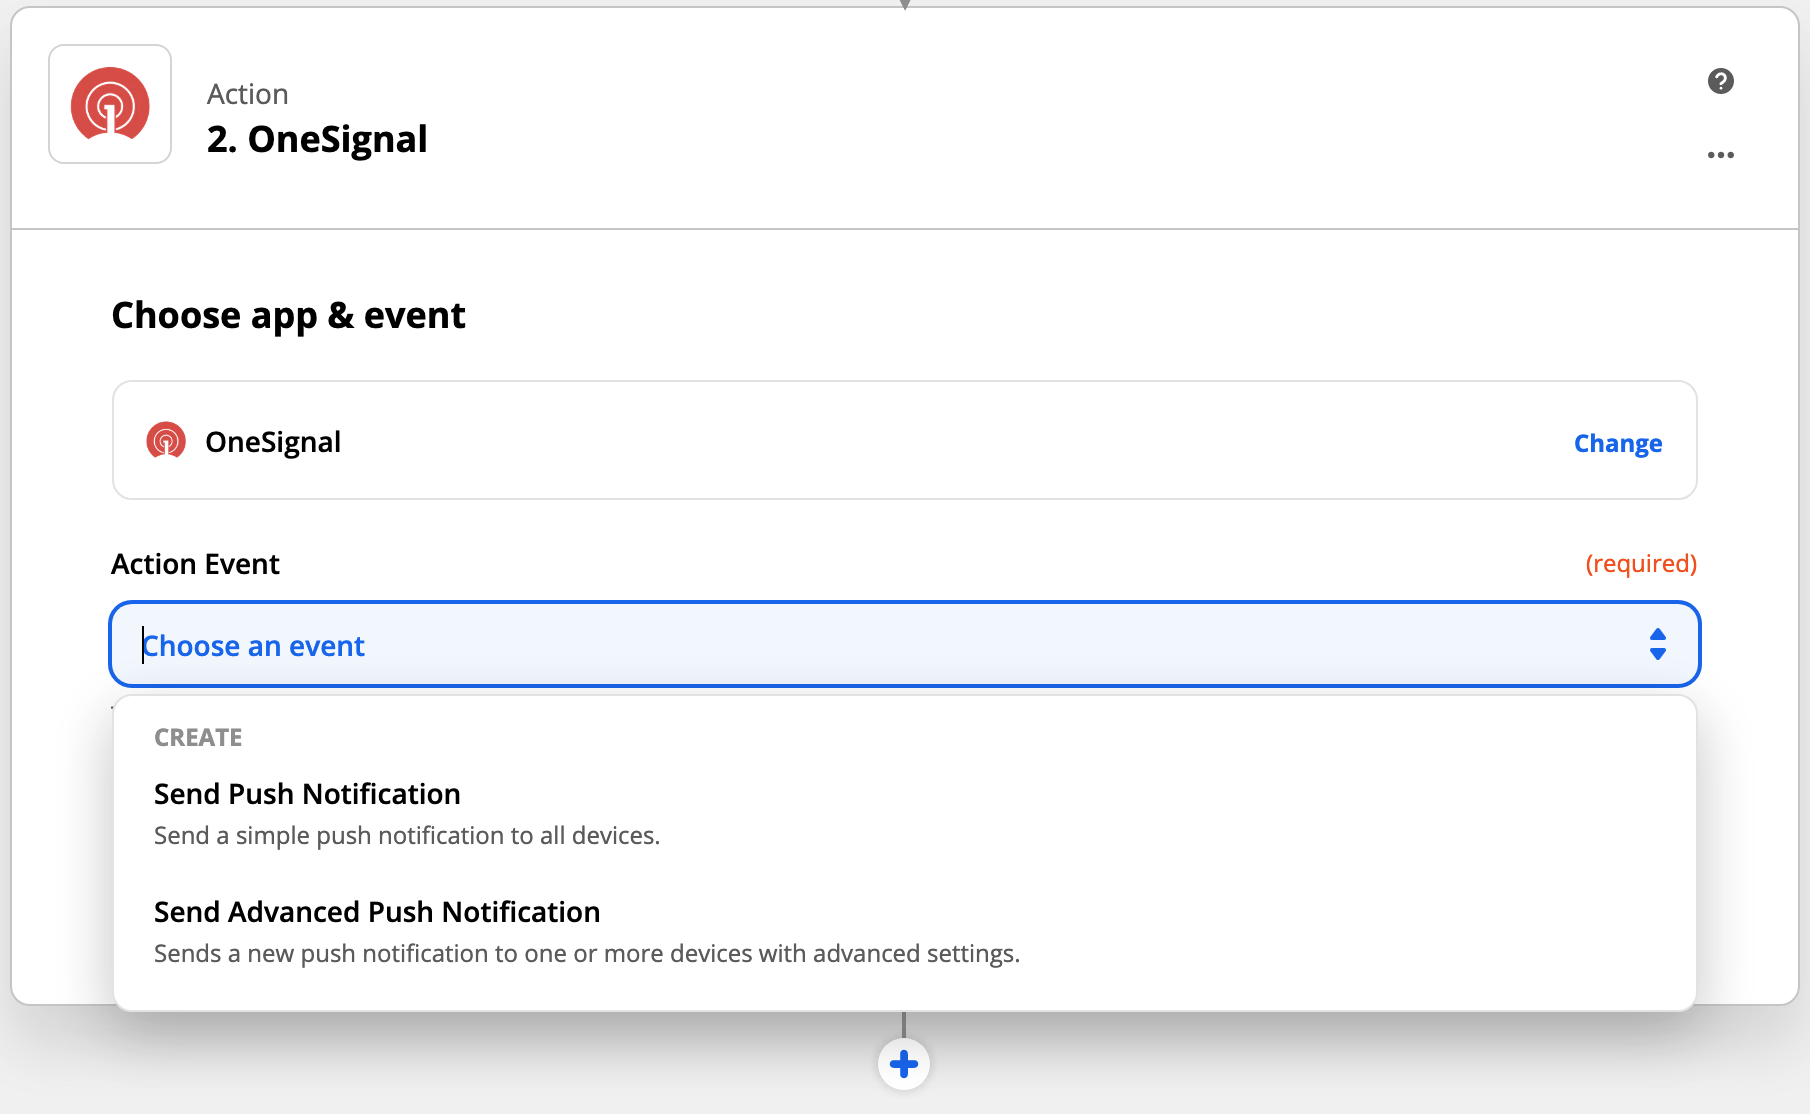
 You get the choice to do two types of notifications:
| Action event | Description |
| ------------------------------- | --------------------------------------------------------------- |
| Send push notification | Limited/Easier Push Data: Message, Title, Launch URL, Send Time |
| Send advanced push notification | All push notification options available. |
You get the choice to do two types of notifications:
| Action event | Description |
| ------------------------------- | --------------------------------------------------------------- |
| Send push notification | Limited/Easier Push Data: Message, Title, Launch URL, Send Time |
| Send advanced push notification | All push notification options available. |
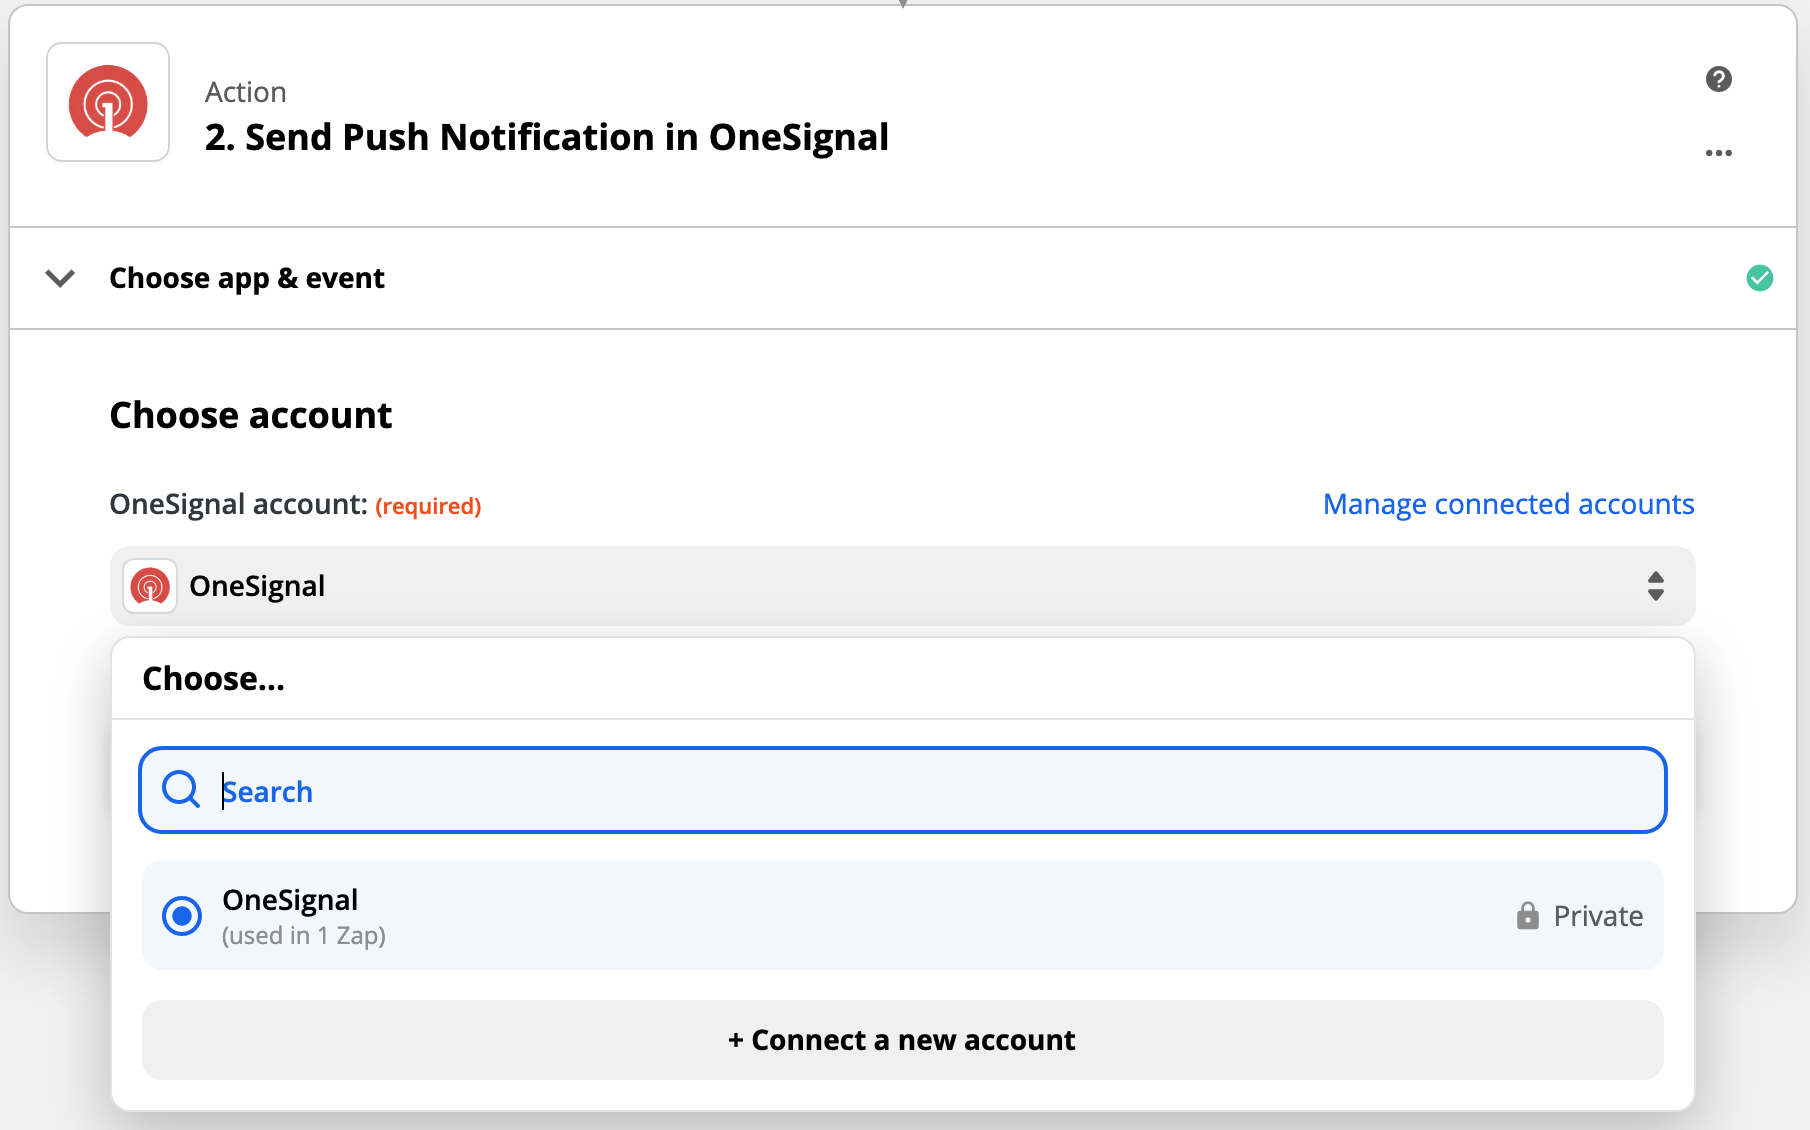
 Select Connect a new account if you have not done so.
You will need your OneSignal App ID and REST API Key.
Select Connect a new account if you have not done so.
You will need your OneSignal App ID and REST API Key.
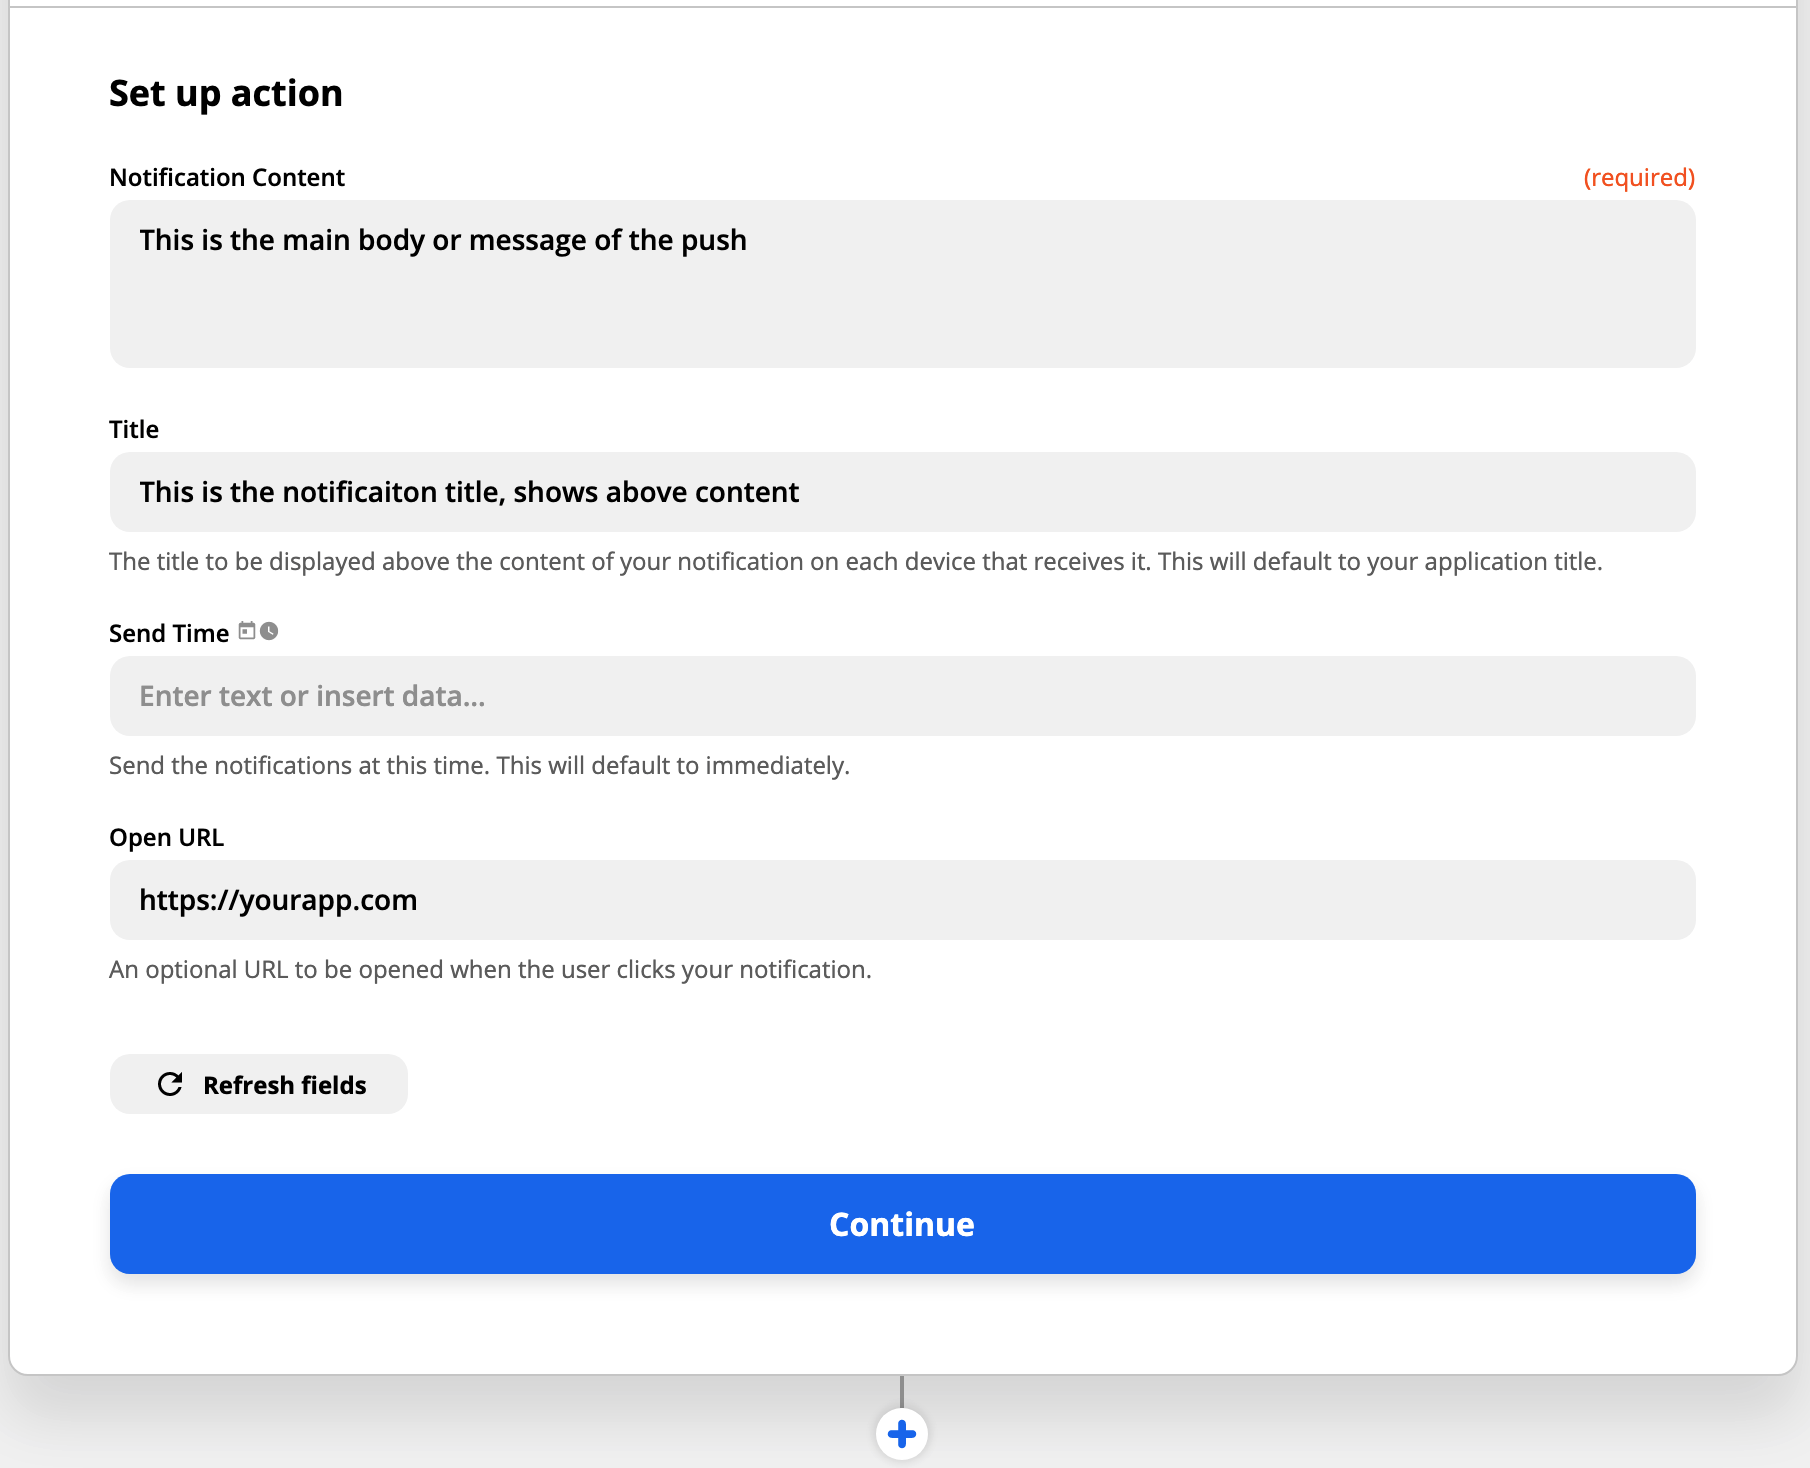
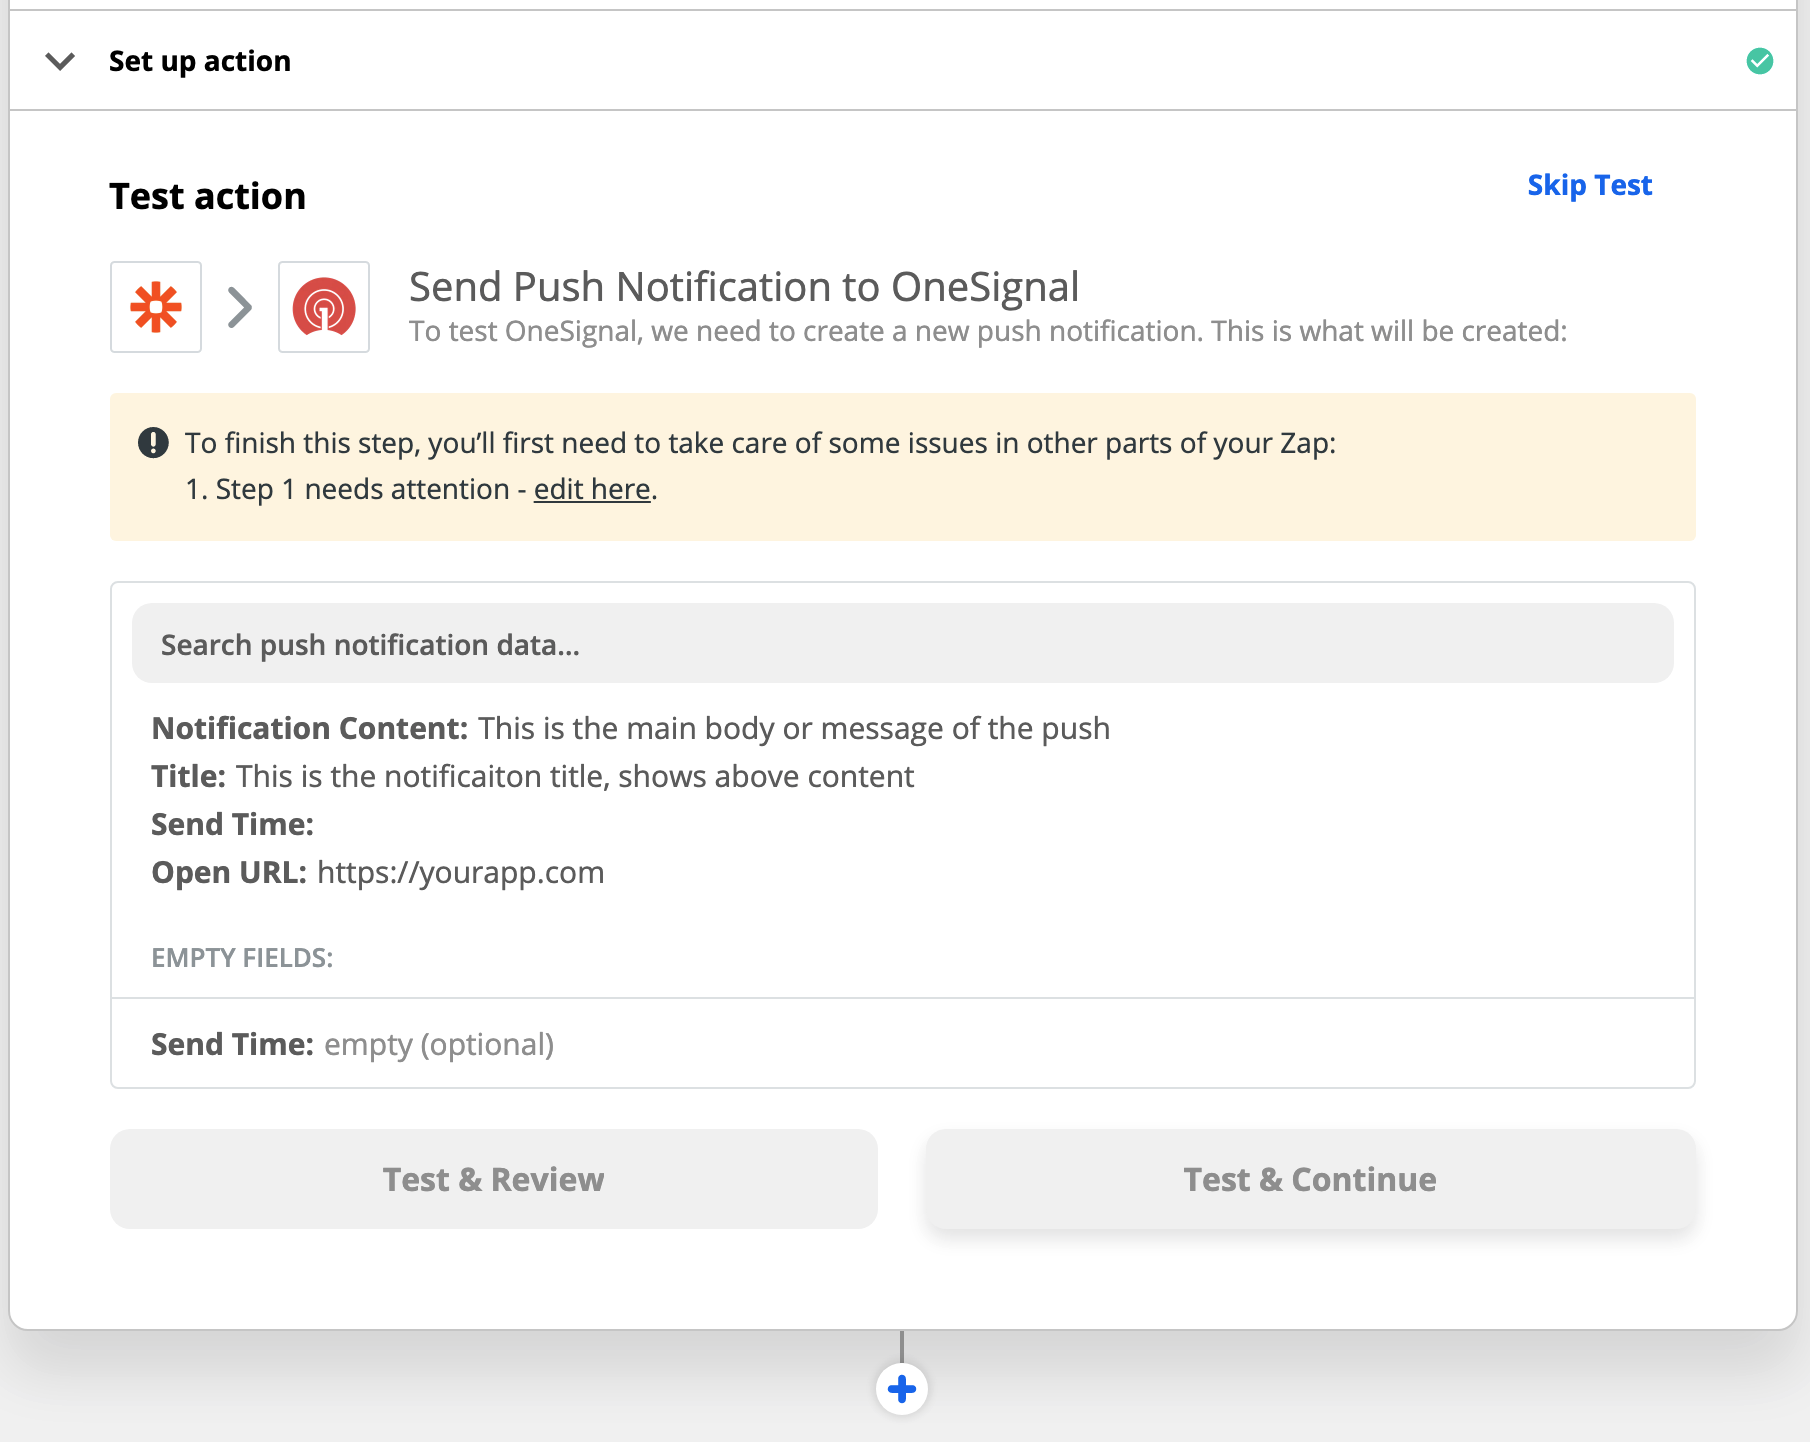
 There are a lot of settings depending on the push type selected. Details on all of them in Sending Push Messages.
 You can add more zaps as you need!
***
## FAQ
### Can I add a template to a Zap?
Yes you can!
First create a template in your OneSignal dashboard. See our [Templates](./templates) section for more details on templates.
Inside Zapier on your OneSignal action, under "Send push notification" choose "Send advanced push notification".
Continue to the "Set up template" step and find the "Template ID" section.
You can find the Template ID inside your OneSignal.com dashboard > Templates > Click the template you want to use and the ID is the last set of numbers after the last / in the URL.
For example:
When you are viewing your template, your URL will look like this:
`https://onesignal.com/apps/3beb3078-e0f1-4629-af17-fde833b9f716/templates/589b29b0-e107-4c6b-a60d-951416eb3b9a`
In this case, the Template ID is: `589b29b0-e107-4c6b-a60d-951416eb3b9a`
### Can I override the template if I add other data to the fields in my Zap?
Yes you will. All data that you enter into the Zap will override any data you added to your template. So if you added a message to your template and to your Zap, the Zap message will override the template message, meaning you will not see the message on your template.
### How do I set timezone and intelligent delivery options in Zapier?
First make sure you selected "Send advanced push notification" on Step 2 above.
Then on the "Edit template" section of Zapier, find "Scheduling per-user delay option".
You can add more zaps as you need!
***
## FAQ
### Can I add a template to a Zap?
Yes you can!
First create a template in your OneSignal dashboard. See our [Templates](./templates) section for more details on templates.
Inside Zapier on your OneSignal action, under "Send push notification" choose "Send advanced push notification".
Continue to the "Set up template" step and find the "Template ID" section.
You can find the Template ID inside your OneSignal.com dashboard > Templates > Click the template you want to use and the ID is the last set of numbers after the last / in the URL.
For example:
When you are viewing your template, your URL will look like this:
`https://onesignal.com/apps/3beb3078-e0f1-4629-af17-fde833b9f716/templates/589b29b0-e107-4c6b-a60d-951416eb3b9a`
In this case, the Template ID is: `589b29b0-e107-4c6b-a60d-951416eb3b9a`
### Can I override the template if I add other data to the fields in my Zap?
Yes you will. All data that you enter into the Zap will override any data you added to your template. So if you added a message to your template and to your Zap, the Zap message will override the template message, meaning you will not see the message on your template.
### How do I set timezone and intelligent delivery options in Zapier?
First make sure you selected "Send advanced push notification" on Step 2 above.
Then on the "Edit template" section of Zapier, find "Scheduling per-user delay option".
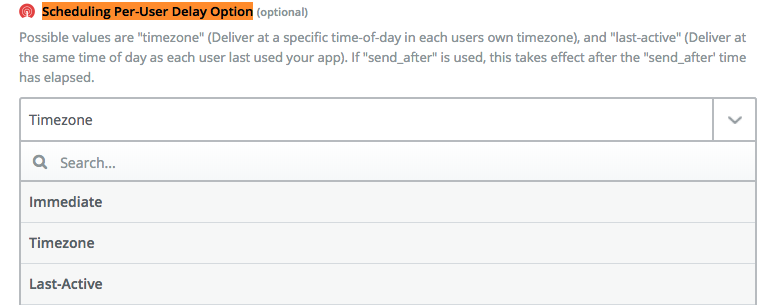 * Immediate means at the time you specify to everyone
* Timezone will only send during each device's timezone
* Last-active is the same as [Intelligent Delivery](./push)
***
* Immediate means at the time you specify to everyone
* Timezone will only send during each device's timezone
* Last-active is the same as [Intelligent Delivery](./push)
***