> ## Documentation Index
> Fetch the complete documentation index at: https://documentation.onesignal.com/llms.txt
> Use this file to discover all available pages before exploring further.
# Demander les permissions de localisation avec les messages intégrés
> Guidez les utilisateurs pour activer le suivi de localisation dans votre application mobile en utilisant une pré-invitation douce dans OneSignal avant de déclencher la demande de permission de localisation native Android ou iOS.
Demandez facilement l'accès à la localisation aux utilisateurs en utilisant un message intégré OneSignal comme pré-invitation douce avant d'afficher la boîte de dialogue de permission de localisation native au niveau du système requise. Cela améliore les taux d'acceptation et vous donne plus de contrôle sur quand et comment demander. Alternativement, vous pouvez déclencher directement l'invite système en utilisant nos [méthodes de localisation du SDK mobile](./mobile-sdk-reference#location).
***
## Exigences
Before creating your in-app message:
* Add location tracking permissions to your app (for both Android and iOS).
* Refer to our [Mobile SDK location reference](./mobile-sdk-reference#location) for platform-specific setup instructions.
* Enable location sharing with OneSignal in your app code.
***
## Créer votre message
In the OneSignal dashboard, go to: **Messages > In-App > New In-App**
* If all users should see the prompt, select **Show to all users**.
* Otherwise, target a specific Segment.
* Clearly explain why location access benefits the user. E.g., "Enable location to receive relevant local updates."
* Be concise but specific to increase opt-in likelihood.
 ***
## Add the Location Permission Prompt Click Action
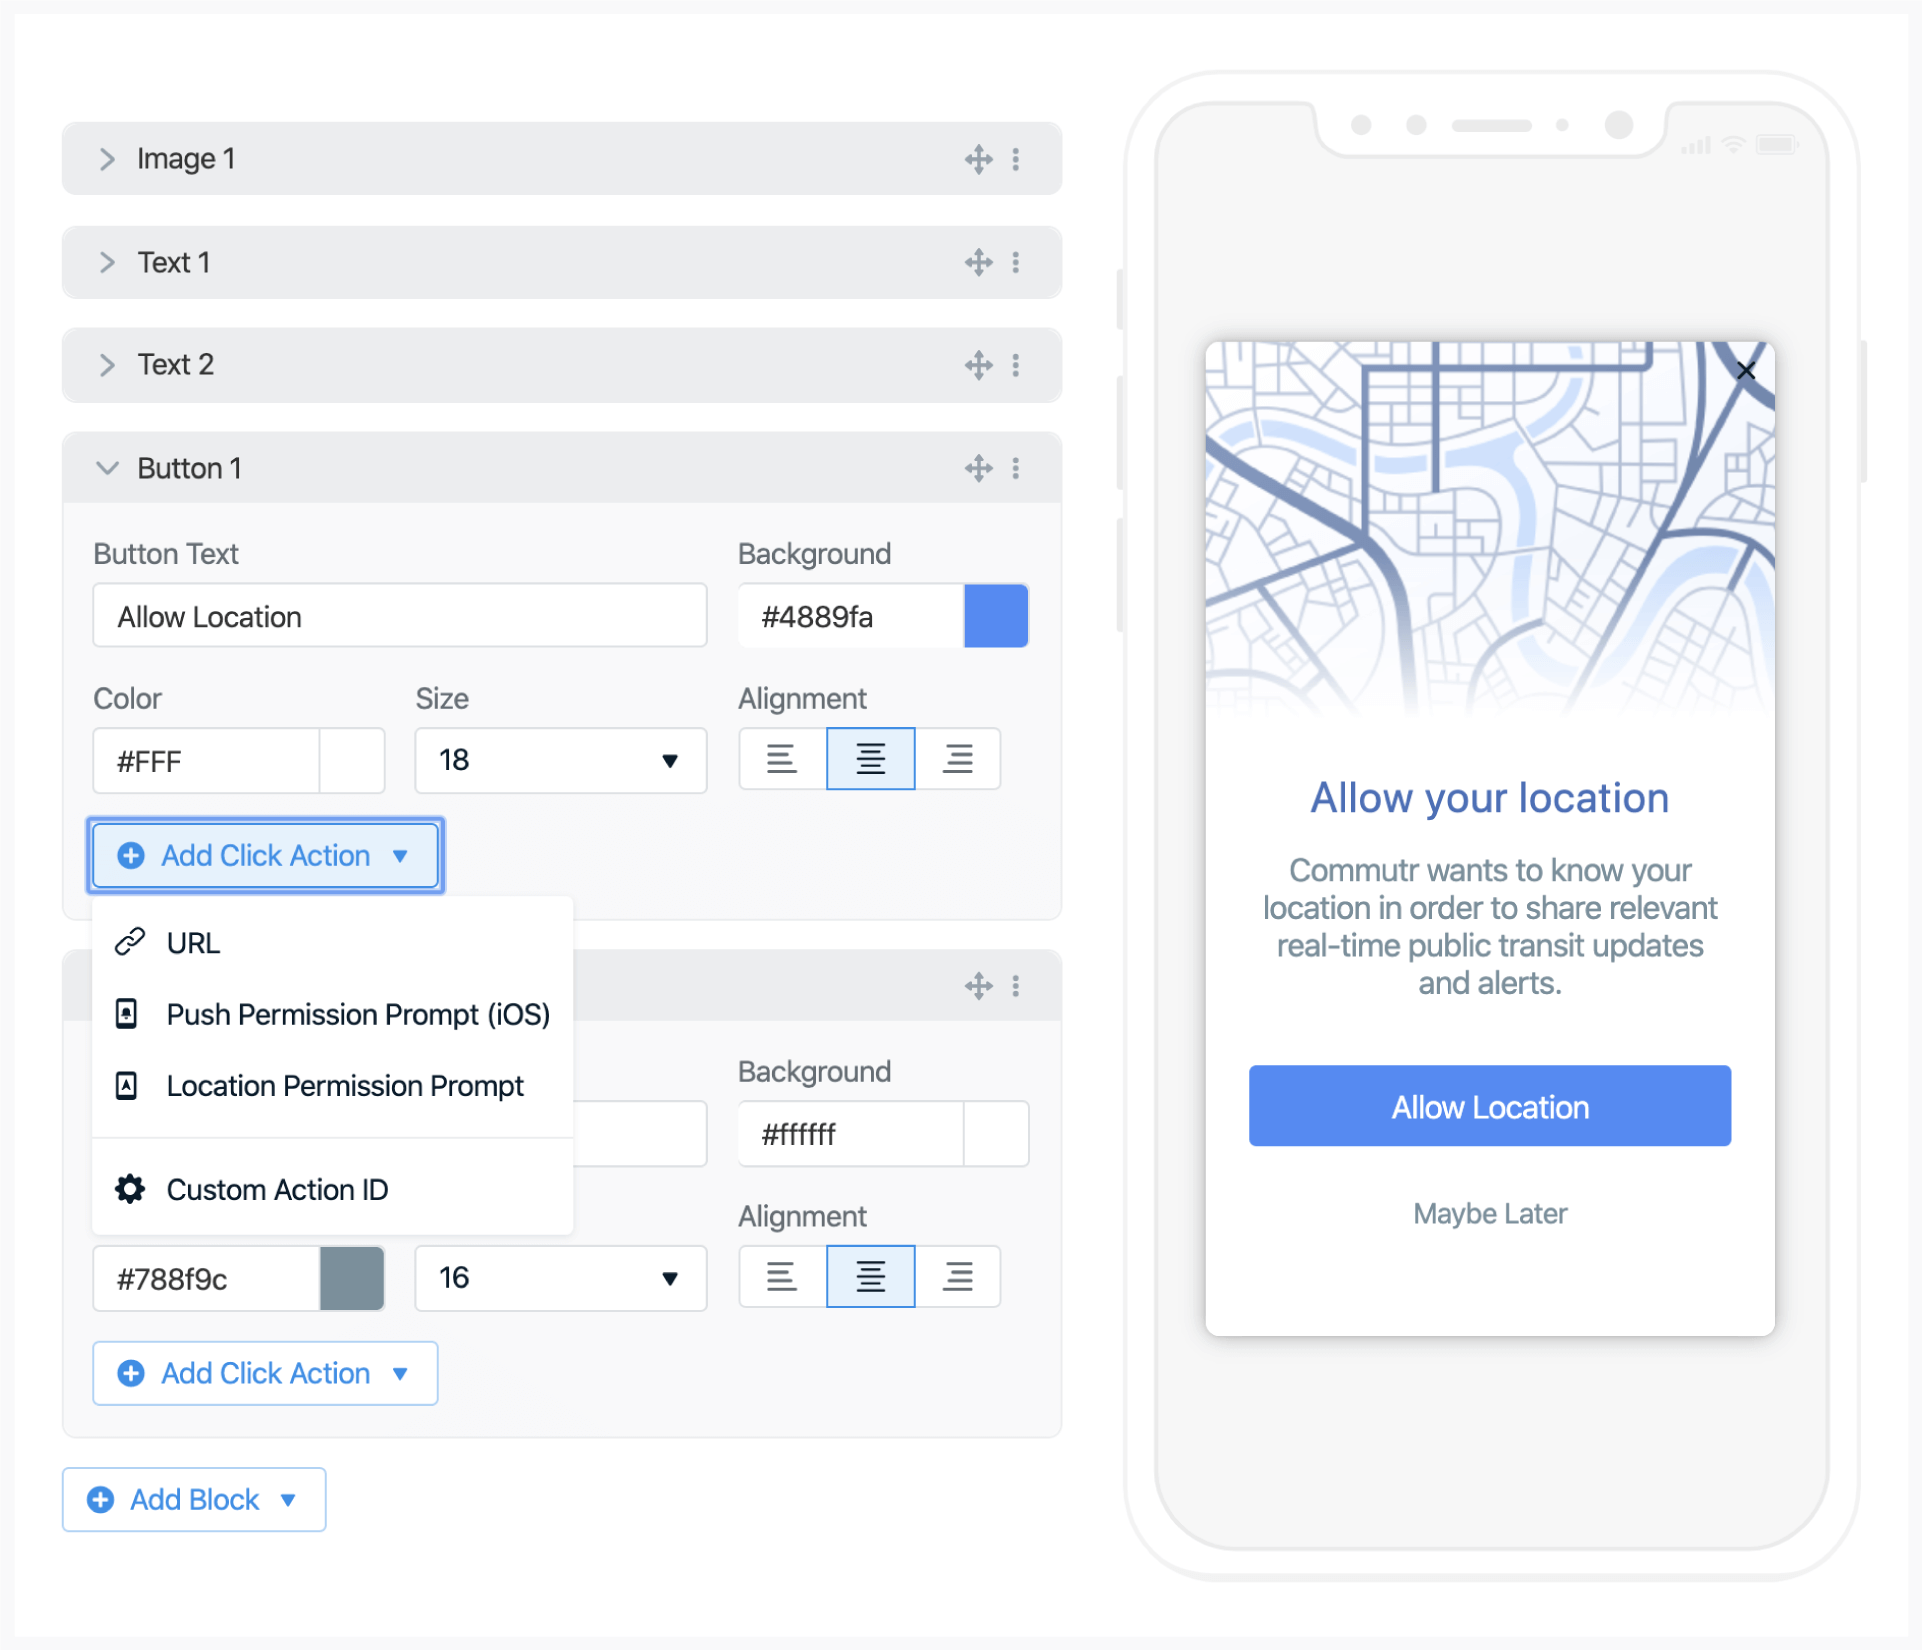
Add a button or image with a clear call to action (e.g., “Enable Location”).
In the options:
* Click **Add Click Action**
* Select **Location Permission Prompt**
When clicked, OneSignal will trigger the native, required system-level location prompt.
**If location is already enabled, the message won’t show to avoid unnecessary prompts.**
Both Android and iOS limit how frequently system-level prompts can appear. Using this soft pre-prompt helps avoid those limitations and allows for repeat attempts if needed.
***
## Add the Location Permission Prompt Click Action
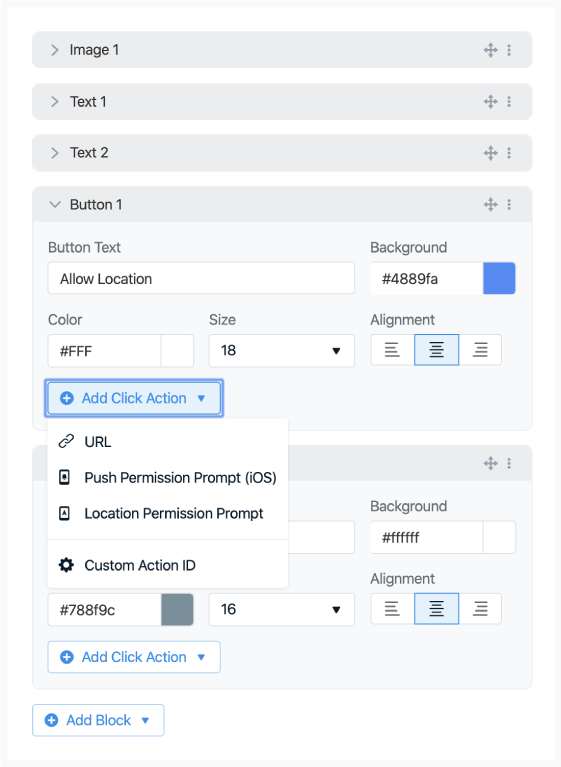
Add a button or image with a clear call to action (e.g., “Enable Location”).
In the options:
* Click **Add Click Action**
* Select **Location Permission Prompt**
When clicked, OneSignal will trigger the native, required system-level location prompt.
**If location is already enabled, the message won’t show to avoid unnecessary prompts.**
Both Android and iOS limit how frequently system-level prompts can appear. Using this soft pre-prompt helps avoid those limitations and allows for repeat attempts if needed.
 ***
## Trigger the in-app message
You can control when and how the prompt is shown.
### Option 1: Time-based triggers
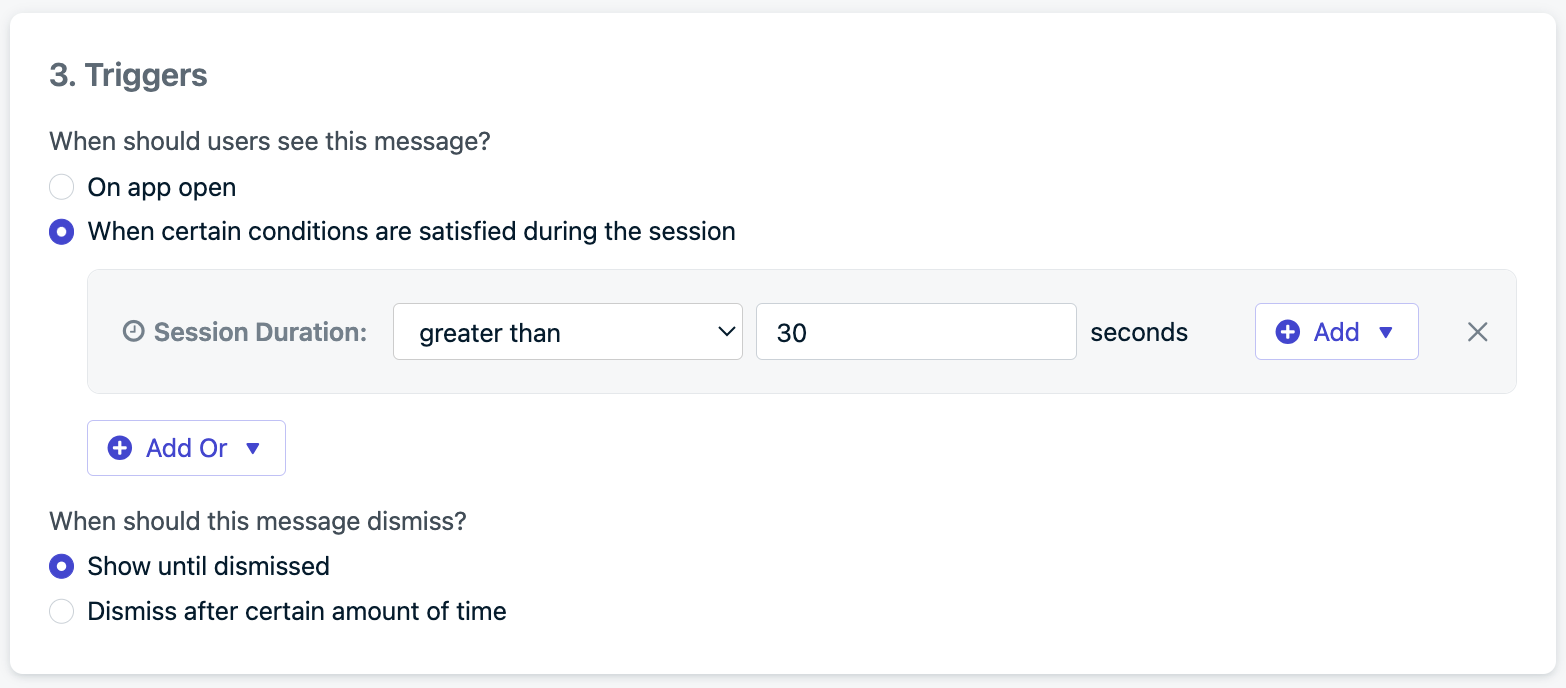
Show the message after a user has been in the app for a set amount of time (e.g., after 30 seconds).
***
## Trigger the in-app message
You can control when and how the prompt is shown.
### Option 1: Time-based triggers
Show the message after a user has been in the app for a set amount of time (e.g., after 30 seconds).
 ### Option 2: Programmatic triggers
Control exactly when the prompt appears via the SDK:
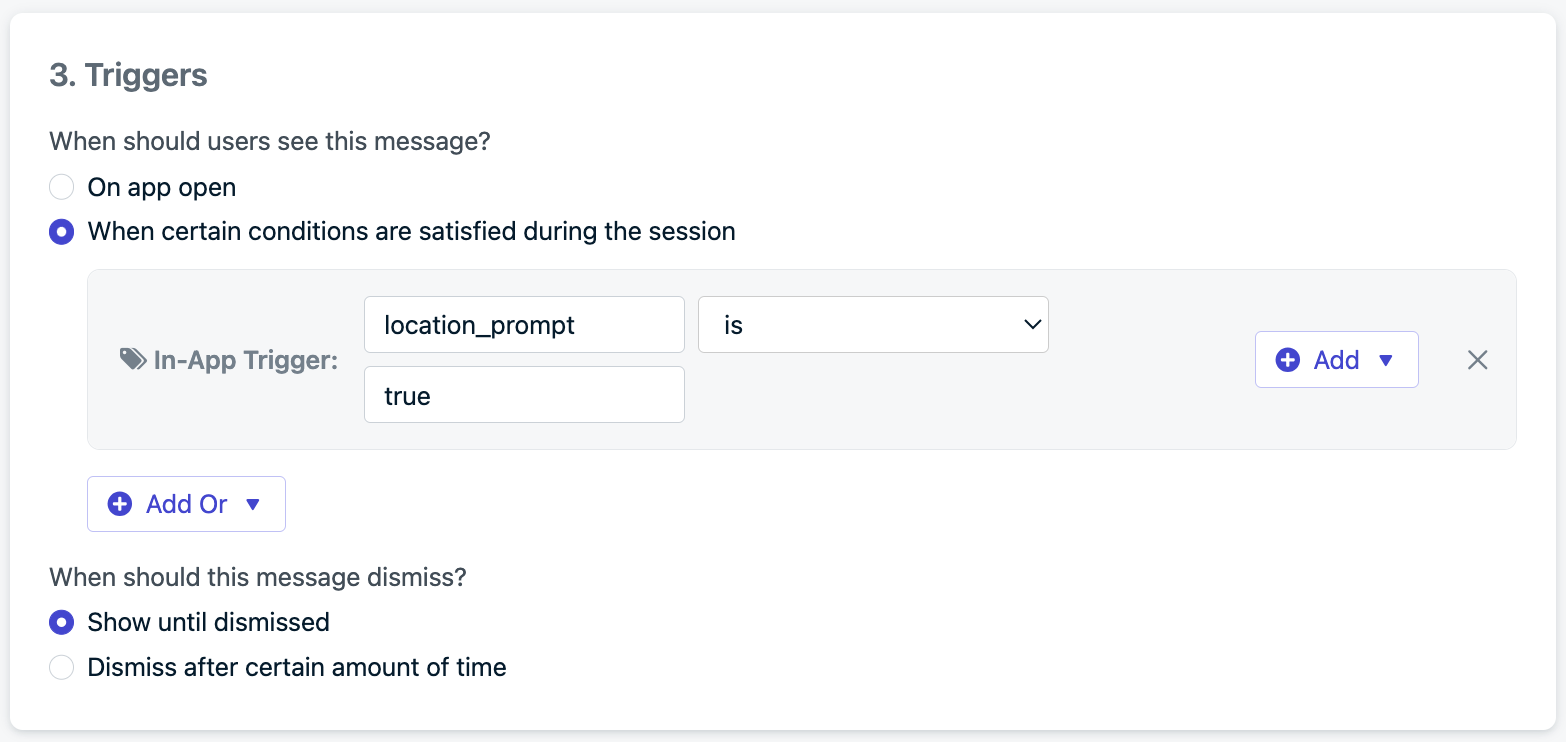
Use our SDK's [`addTrigger` method](./mobile-sdk-reference#in-app-messages) to set a key like `location_prompt` and value like `true`. Then call this whenever you want inside your app.
Set the same trigger key (`location_prompt`) and value (`true`) in your in-app message settings.
### Option 2: Programmatic triggers
Control exactly when the prompt appears via the SDK:
Use our SDK's [`addTrigger` method](./mobile-sdk-reference#in-app-messages) to set a key like `location_prompt` and value like `true`. Then call this whenever you want inside your app.
Set the same trigger key (`location_prompt`) and value (`true`) in your in-app message settings.
 ***
## Set the message frequency
To avoid spamming users:
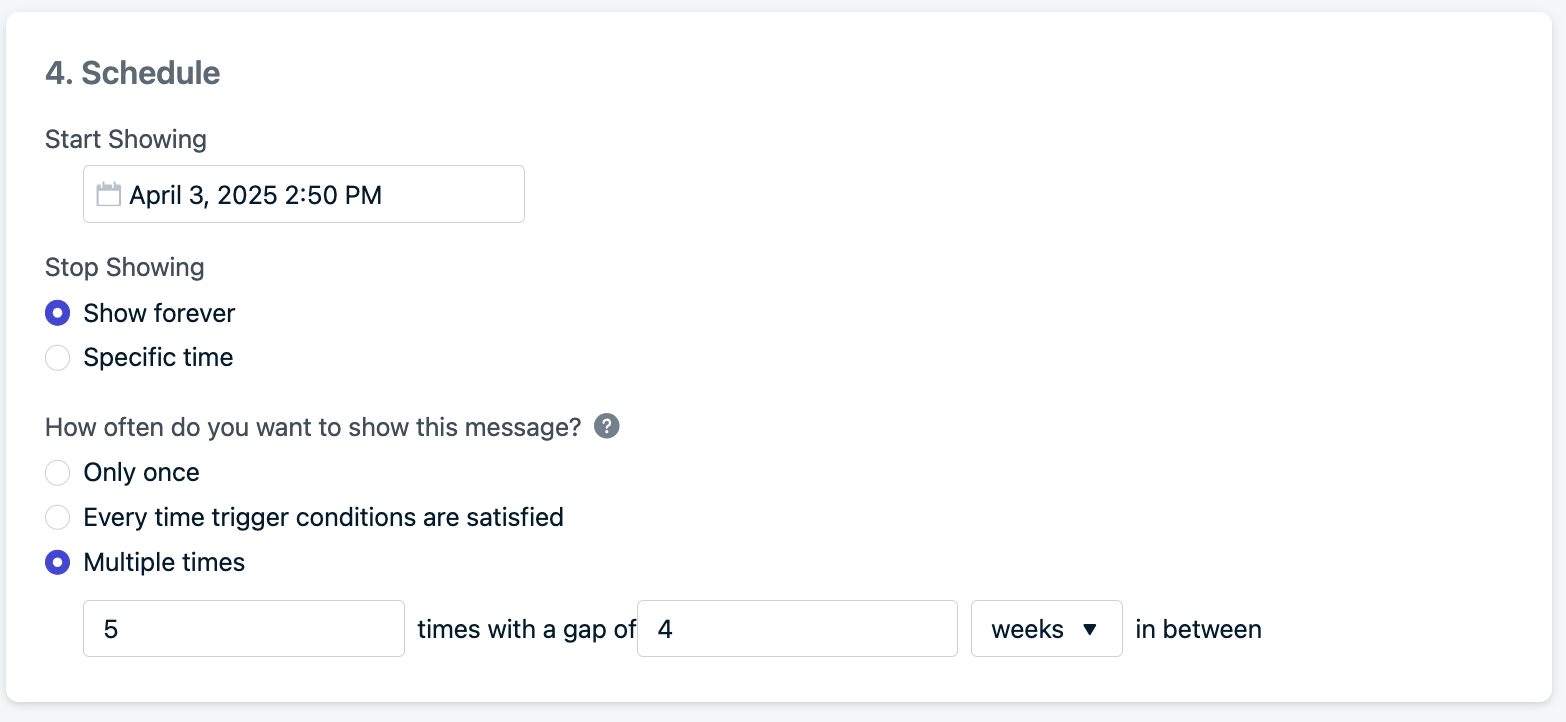
* Choose **Multiple times**
* Set a number of times to show the message
* Set a gap between each attempt
Example setting: show up to 5 times, with a 4-week gap between each attempt
This allows monthly reminders for up to 5 months, striking a balance between persistence and user experience.
***
## Set the message frequency
To avoid spamming users:
* Choose **Multiple times**
* Set a number of times to show the message
* Set a gap between each attempt
Example setting: show up to 5 times, with a 4-week gap between each attempt
This allows monthly reminders for up to 5 months, striking a balance between persistence and user experience.
 ***
## Best Practices
* Always explain the benefit of location access to users.
* Use segmentation or triggers to avoid asking at a bad time.
* Pre-prompts increase opt-in rates and avoid operating system limits.
* Ensure location permissions are correctly configured in your app before triggering the in-app message.
***
You will start to see location points being tracked in your Users and Subscriptions pages.
Create [Location-triggered messages](./location-triggered-event).
***
***
## Best Practices
* Always explain the benefit of location access to users.
* Use segmentation or triggers to avoid asking at a bad time.
* Pre-prompts increase opt-in rates and avoid operating system limits.
* Ensure location permissions are correctly configured in your app before triggering the in-app message.
***
You will start to see location points being tracked in your Users and Subscriptions pages.
Create [Location-triggered messages](./location-triggered-event).
***