> ## Documentation Index
> Fetch the complete documentation index at: https://documentation.onesignal.com/llms.txt
> Use this file to discover all available pages before exploring further.
# Event Streams와 Google Sheets 통합
> 이 가이드는 OneSignal의 Event Webhooks와 사용자 지정 Google Sheets 문서 간의 연결을 설정하여 OneSignal에서 생성된 메시지 이벤트를 분석하는 데 필요한 단계를 설명합니다.
## 이벤트 스트림 전환
OneSignal 애플리케이션에 대해 유료 플랜의 추가 기능인 [이벤트 스트림](./event-streams)을 활성화합니다. 이 기능에 액세스할 수 없는 경우 주저하지 말고 Success Manager 또는 Account Executive에게 문의하세요.
## 앱 스크립트 배포 생성
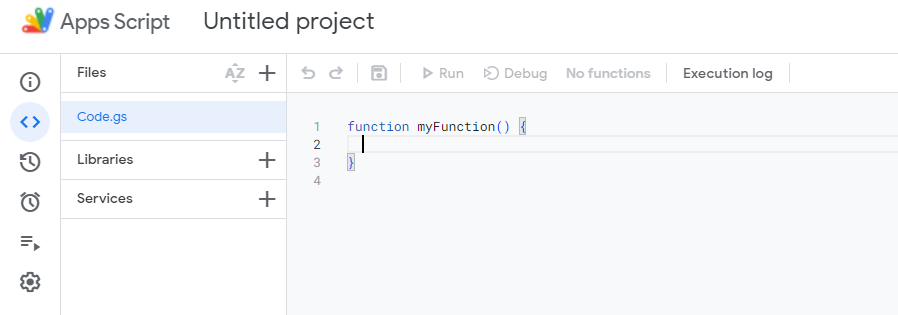
OneSignal 메시지 이벤트를 추가하려는 Google Sheet에서 **확장 프로그램 > Apps Script**로 이동합니다. 다음으로 코드 편집기 내에서 기존 코드를 다음으로 바꿉니다:
 ```javascript javascript theme={null}
function doPost(e) {
// Log the full request for debugging purposes
Logger.log("Request received: " + JSON.stringify(e));
const sheet = SpreadsheetApp.getActiveSpreadsheet().getActiveSheet();
let jsonData;
try {
// Log the postData.contents before parsing
Logger.log("Post Data Contents: " + e.postData.contents);
// Attempt to parse the JSON data
jsonData = JSON.parse(e.postData.contents);
} catch (error) {
// Log the error and return an error response
Logger.log("Failed to parse JSON: " + error);
return ContentService.createTextOutput(
JSON.stringify({ status: "error", message: "Invalid JSON" }),
).setMimeType(ContentService.MimeType.JSON);
}
// Check if the sheet is empty and set headers if necessary
if (sheet.getLastRow() === 0) {
sheet.appendRow([
"User ID",
"Event ID",
"Event",
"Message ID",
"Message Name",
"Message Title",
"Message Contents",
"Template ID",
"Subscription ID",
"Subscription Device Type",
"Source",
"Original Timestamp",
]);
}
// Prepare the row data from the JSON object
const row = [
jsonData.user_id || "",
jsonData.event_id || "",
jsonData.event || "",
jsonData.properties ? jsonData.properties.message_id || "" : "",
jsonData.properties ? jsonData.properties.message_name || "" : "",
jsonData.properties ? jsonData.properties.message_title || "" : "",
jsonData.properties ? jsonData.properties.message_contents || "" : "",
jsonData.properties ? jsonData.properties.template_id || "" : "",
jsonData.properties ? jsonData.properties.subscription_id || "" : "",
jsonData.properties
? jsonData.properties.subscription_device_type || ""
: "",
jsonData.properties ? jsonData.properties.source || "" : "",
jsonData.originalTimestamp || "",
];
try {
// Append the new row to the sheet
sheet.appendRow(row);
} catch (error) {
// Log the error if appending the row fails
Logger.log("Failed to append row: " + error);
return ContentService.createTextOutput(
JSON.stringify({ status: "error", message: "Failed to append row" }),
).setMimeType(ContentService.MimeType.JSON);
}
// Return a success response
return ContentService.createTextOutput(
JSON.stringify({ status: "success" }),
).setMimeType(ContentService.MimeType.JSON);
}
```
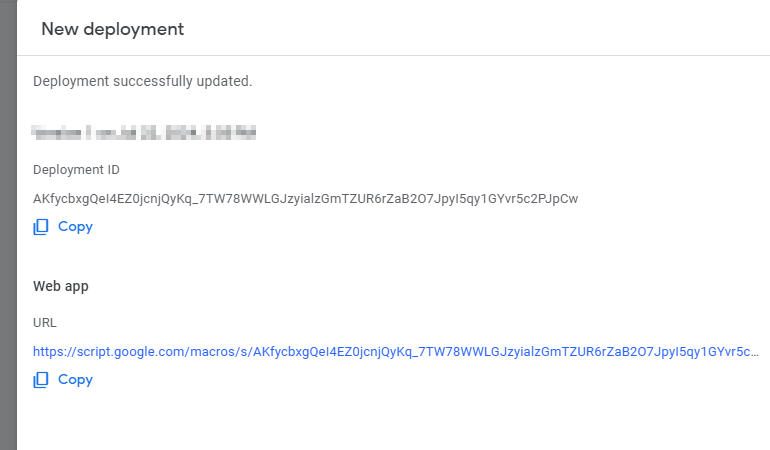
다음으로 프로젝트를 배포합니다. 오른쪽 상단에서 배포를 클릭하고 배포 유형으로 "웹 앱"을 선택합니다. 설명을 제공하고 프로젝트에 액세스할 수 있는 사람을 선택합니다. 다음 단계에서 필요한 URL을 생성하기 위해 "모든 사용자"를 선택합니다.
```javascript javascript theme={null}
function doPost(e) {
// Log the full request for debugging purposes
Logger.log("Request received: " + JSON.stringify(e));
const sheet = SpreadsheetApp.getActiveSpreadsheet().getActiveSheet();
let jsonData;
try {
// Log the postData.contents before parsing
Logger.log("Post Data Contents: " + e.postData.contents);
// Attempt to parse the JSON data
jsonData = JSON.parse(e.postData.contents);
} catch (error) {
// Log the error and return an error response
Logger.log("Failed to parse JSON: " + error);
return ContentService.createTextOutput(
JSON.stringify({ status: "error", message: "Invalid JSON" }),
).setMimeType(ContentService.MimeType.JSON);
}
// Check if the sheet is empty and set headers if necessary
if (sheet.getLastRow() === 0) {
sheet.appendRow([
"User ID",
"Event ID",
"Event",
"Message ID",
"Message Name",
"Message Title",
"Message Contents",
"Template ID",
"Subscription ID",
"Subscription Device Type",
"Source",
"Original Timestamp",
]);
}
// Prepare the row data from the JSON object
const row = [
jsonData.user_id || "",
jsonData.event_id || "",
jsonData.event || "",
jsonData.properties ? jsonData.properties.message_id || "" : "",
jsonData.properties ? jsonData.properties.message_name || "" : "",
jsonData.properties ? jsonData.properties.message_title || "" : "",
jsonData.properties ? jsonData.properties.message_contents || "" : "",
jsonData.properties ? jsonData.properties.template_id || "" : "",
jsonData.properties ? jsonData.properties.subscription_id || "" : "",
jsonData.properties
? jsonData.properties.subscription_device_type || ""
: "",
jsonData.properties ? jsonData.properties.source || "" : "",
jsonData.originalTimestamp || "",
];
try {
// Append the new row to the sheet
sheet.appendRow(row);
} catch (error) {
// Log the error if appending the row fails
Logger.log("Failed to append row: " + error);
return ContentService.createTextOutput(
JSON.stringify({ status: "error", message: "Failed to append row" }),
).setMimeType(ContentService.MimeType.JSON);
}
// Return a success response
return ContentService.createTextOutput(
JSON.stringify({ status: "success" }),
).setMimeType(ContentService.MimeType.JSON);
}
```
다음으로 프로젝트를 배포합니다. 오른쪽 상단에서 배포를 클릭하고 배포 유형으로 "웹 앱"을 선택합니다. 설명을 제공하고 프로젝트에 액세스할 수 있는 사람을 선택합니다. 다음 단계에서 필요한 URL을 생성하기 위해 "모든 사용자"를 선택합니다.
 ## 이벤트 스트림 생성
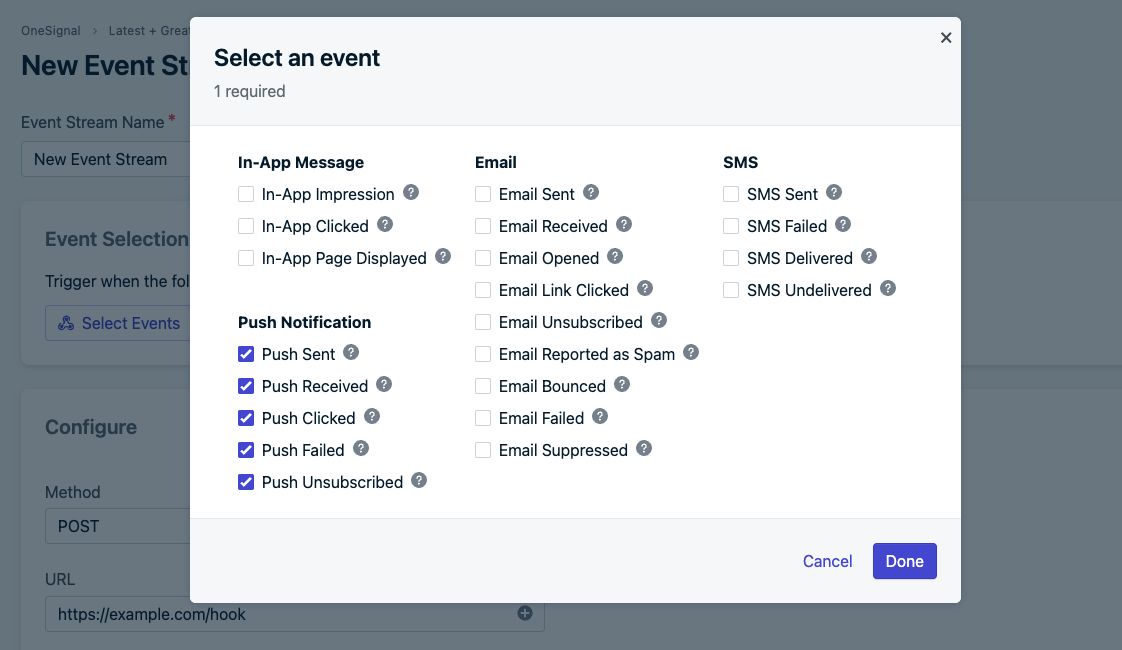
OneSignal 대시보드에서 \*\*설정 > 이벤트 스트림(추가 기능 적용)\*\*으로 이동합니다. 거기서 새 이벤트 스트림을 생성하고 "다음 이벤트 중 하나가 발생할 때 트리거"를 선택합니다. Google Sheets와 동기화하려는 메시지 이벤트를 팝업에서 선택합니다. 아래 예에서는 모든 푸시 알림 이벤트를 캡처합니다.
## 이벤트 스트림 생성
OneSignal 대시보드에서 \*\*설정 > 이벤트 스트림(추가 기능 적용)\*\*으로 이동합니다. 거기서 새 이벤트 스트림을 생성하고 "다음 이벤트 중 하나가 발생할 때 트리거"를 선택합니다. Google Sheets와 동기화하려는 메시지 이벤트를 팝업에서 선택합니다. 아래 예에서는 모든 푸시 알림 이벤트를 캡처합니다.
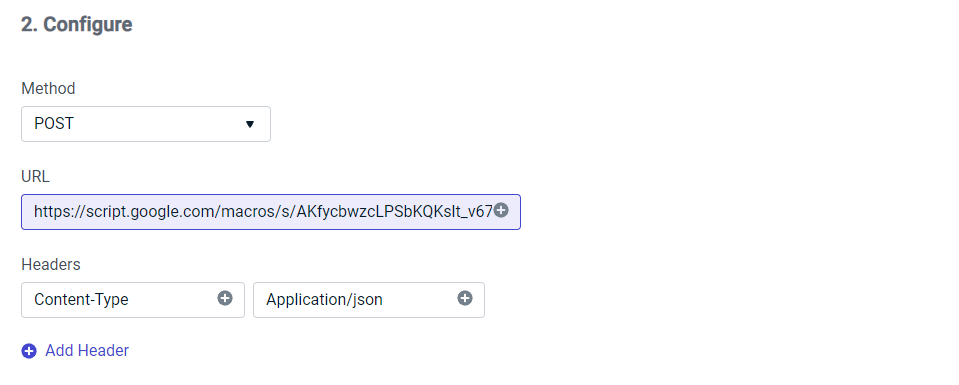
 다음으로 구성 단계에서 POST를 선택하고 이전 단계의 URL을 붙여넣고 JSON을 수락하는 헤더를 생성합니다.
 그런 다음 3단계 드롭다운에서 "사용자 지정 본문"을 선택하고 다음 코드를 복사/붙여넣기합니다. 아래 예에 표시된 대로 동기화하려는 속성과 이벤트를 변경할 수 있습니다. 이벤트 스트림 이벤트 속성에 대한 자세한 내용은 [문서](./event-streams#personalization)를 참조하세요
```json json theme={null}
{
"user_id": "{{ event.external_user_id }}",
"event_id": "{{ event.id }}",
"event": "{{ event.kind }}",
"properties": {
"message_id": "{{ message.id }}",
"message_name": "{{ message.name }}",
"message_title": "{{ message.title.en }}",
"message_contents": "{{ message.contents.en }}",
"template_id": "{{ message.template_id }}",
"subscription_id": "{{ event.subscription_id }}",
"subscription_device_type": "{{ event.subscription_device_type }}",
"source": "onesignal"
},
"originalTimestamp": "{{ event.datetime }}"
}
```
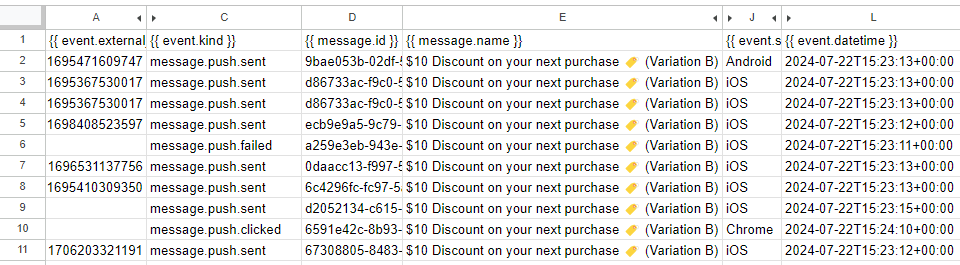
마지막으로 "저장 및 활성화"를 선택하여 선택한 메시지 이벤트를 Google Sheet에 동기화합니다. 다음은 위의 샘플 코드가 렌더링되는 방법의 예입니다:
그런 다음 3단계 드롭다운에서 "사용자 지정 본문"을 선택하고 다음 코드를 복사/붙여넣기합니다. 아래 예에 표시된 대로 동기화하려는 속성과 이벤트를 변경할 수 있습니다. 이벤트 스트림 이벤트 속성에 대한 자세한 내용은 [문서](./event-streams#personalization)를 참조하세요
```json json theme={null}
{
"user_id": "{{ event.external_user_id }}",
"event_id": "{{ event.id }}",
"event": "{{ event.kind }}",
"properties": {
"message_id": "{{ message.id }}",
"message_name": "{{ message.name }}",
"message_title": "{{ message.title.en }}",
"message_contents": "{{ message.contents.en }}",
"template_id": "{{ message.template_id }}",
"subscription_id": "{{ event.subscription_id }}",
"subscription_device_type": "{{ event.subscription_device_type }}",
"source": "onesignal"
},
"originalTimestamp": "{{ event.datetime }}"
}
```
마지막으로 "저장 및 활성화"를 선택하여 선택한 메시지 이벤트를 Google Sheet에 동기화합니다. 다음은 위의 샘플 코드가 렌더링되는 방법의 예입니다:
 ***
***