.NET MAUI SDK Setup
Instructions for adding OneSignal .NET SDK to your cross-platform MAUI app for iOS, Android, and Desktop.
Requirements
- .NET 7.0+
- Visual Studio 2019 or newer
- iOS: iOS 11+ or iPadOS 11+ device (iPhone, iPad, iPod Touch) to test on. Xcode 14+ simulator works running iOS 16+
- iOS: mac with Xcode 12+
- Android: Android 5.0+ device or emulator with "Google Play Store (Services)" installed
- Configured OneSignal App and Platform
Configure your OneSignal App and Platform
Details on configuring your OneSignal App and Platform (click to expand)
If you haven't already, sign up for a free account on onesignal.com.
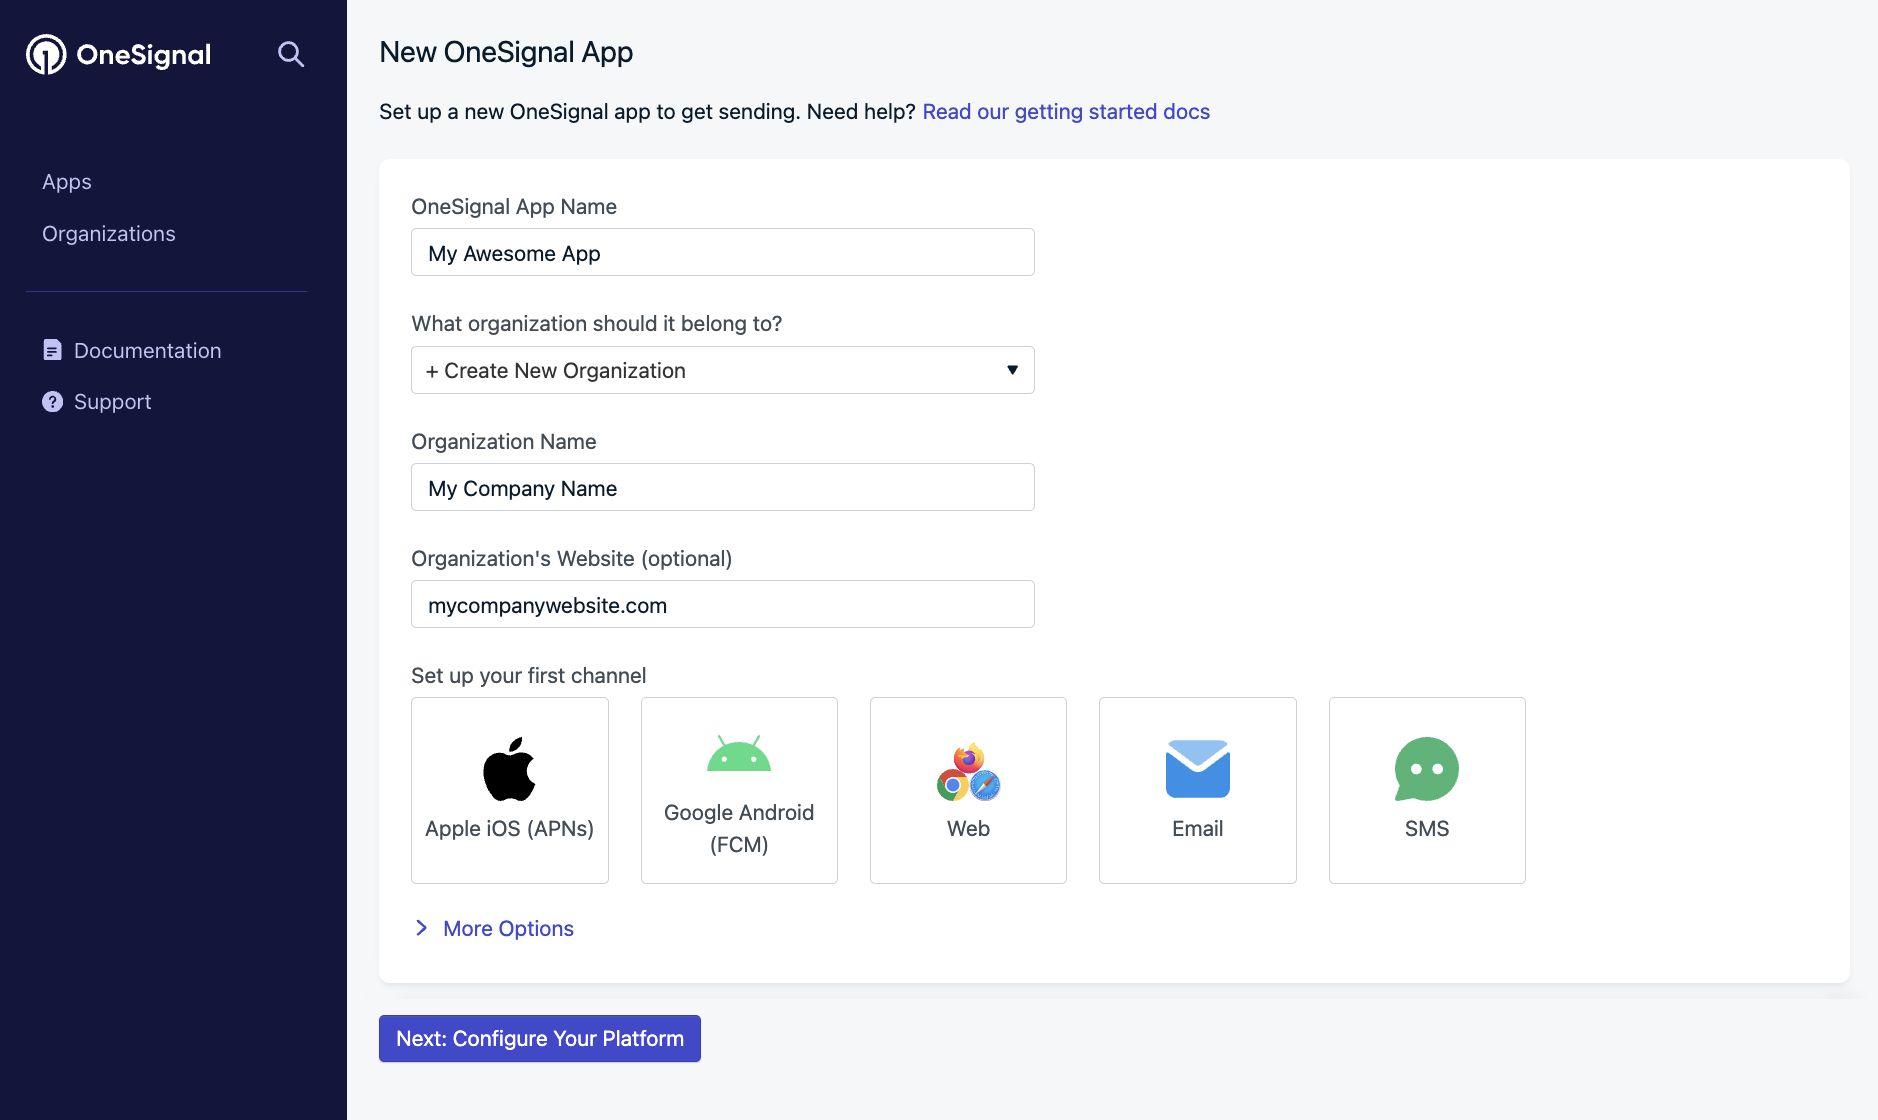
You can setup multiple platforms (iOS, Android, Web, Email, SMS) within the same OneSignal App under Settings > Platforms. If you want to create a new app select New App/Website. If this is your first OneSignal app, you will see the next page.
Name your app and organization something recognizable, then select the platform to setup. You can always set up more platforms in this OneSignal App later within Settings > Platforms.
Click Next: Configure Your Platform.
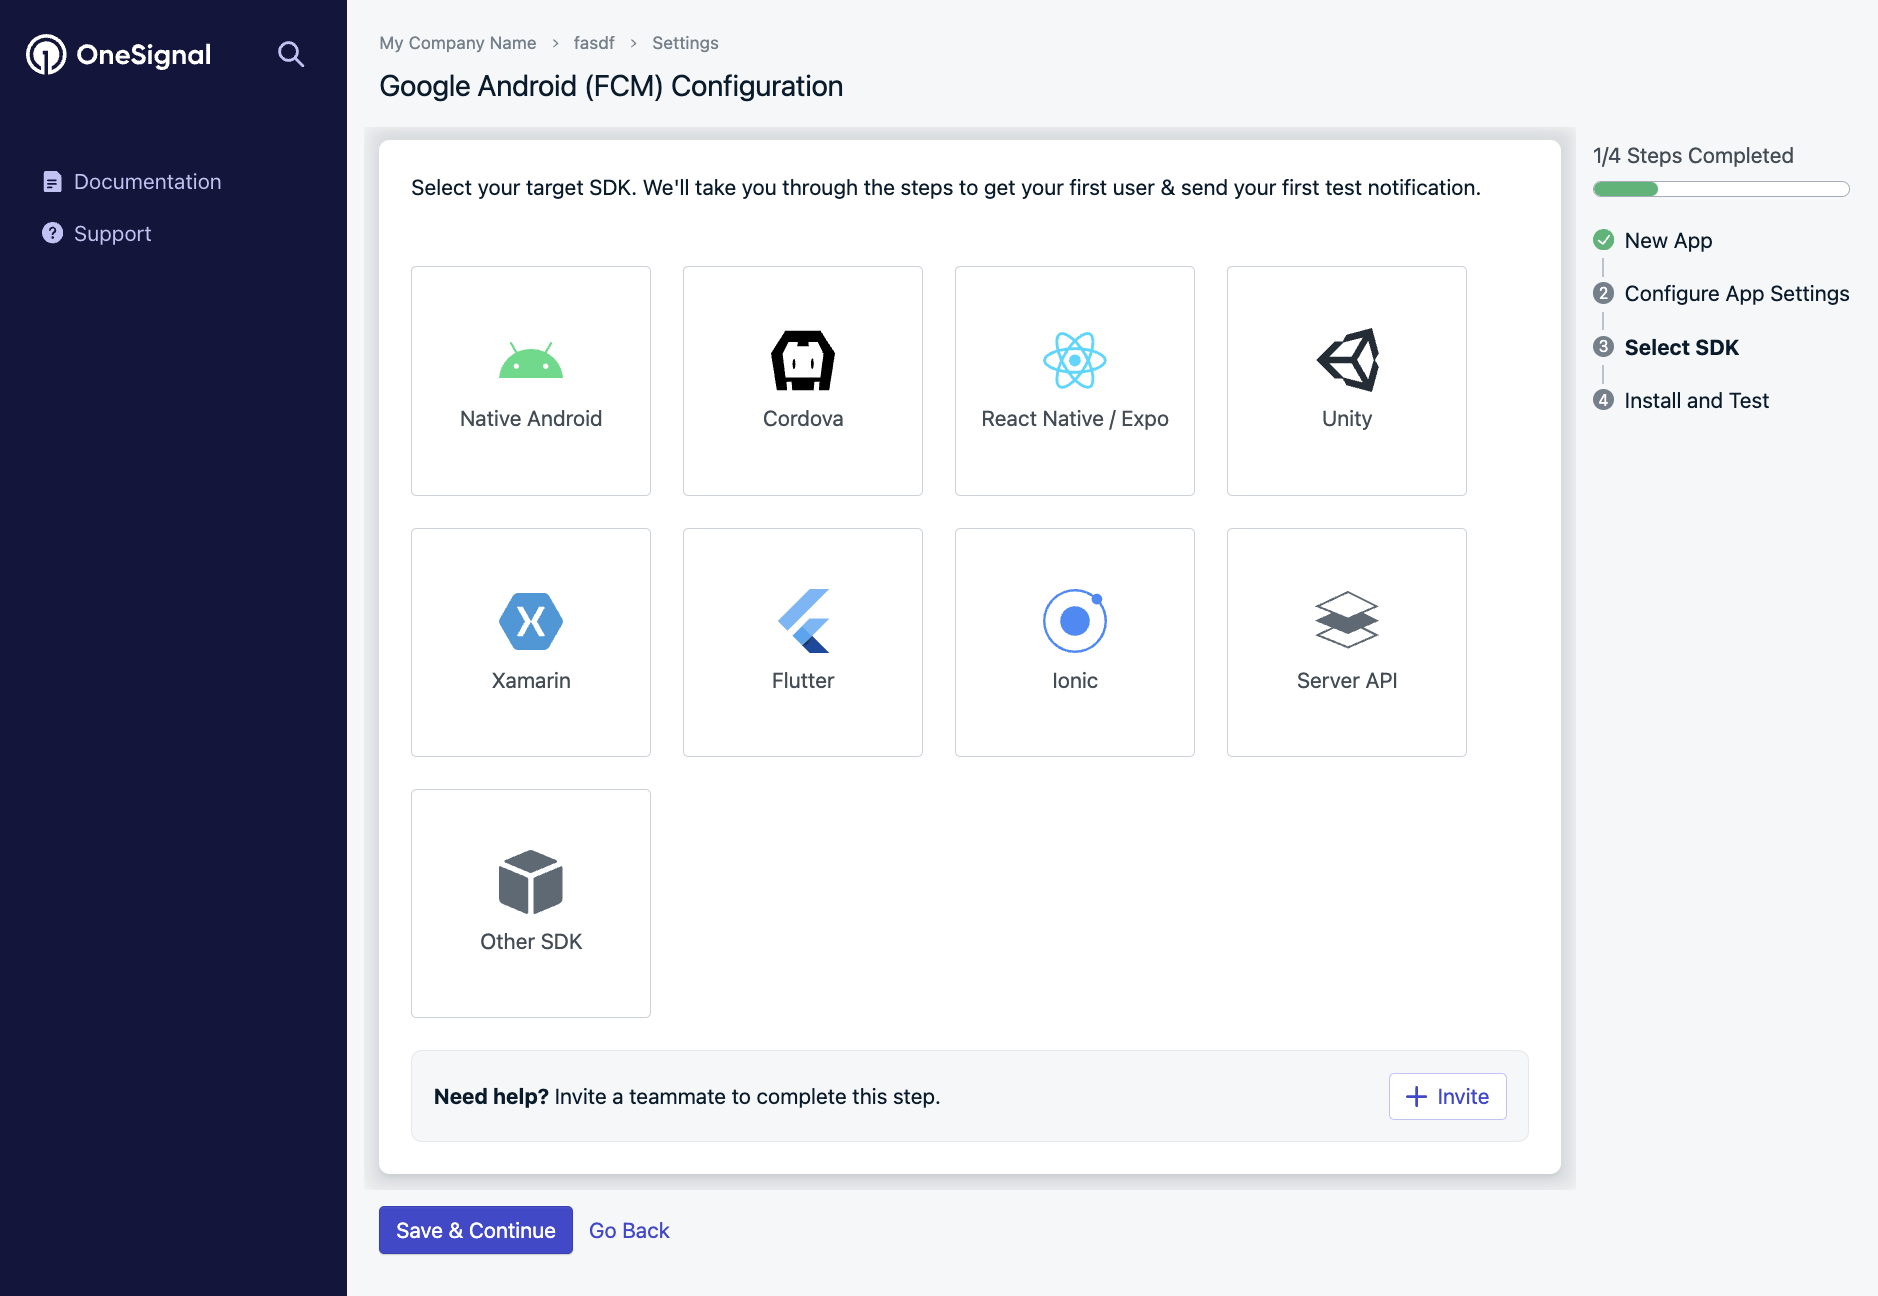
To configure your app, follow the prompts based on the platforms you support.
- Android: Set up your Android Firebase Credentials
- iOS: p8 Authentication Token or p12 Push Notification Certificate
- Amazon: Generate an Amazon API Key
- Huawei: Authorize OneSignal to send Huawei Push
After you setup your credentials, click Save & Continue.
Choose your Apps Target SDK, the click Save & Continue.
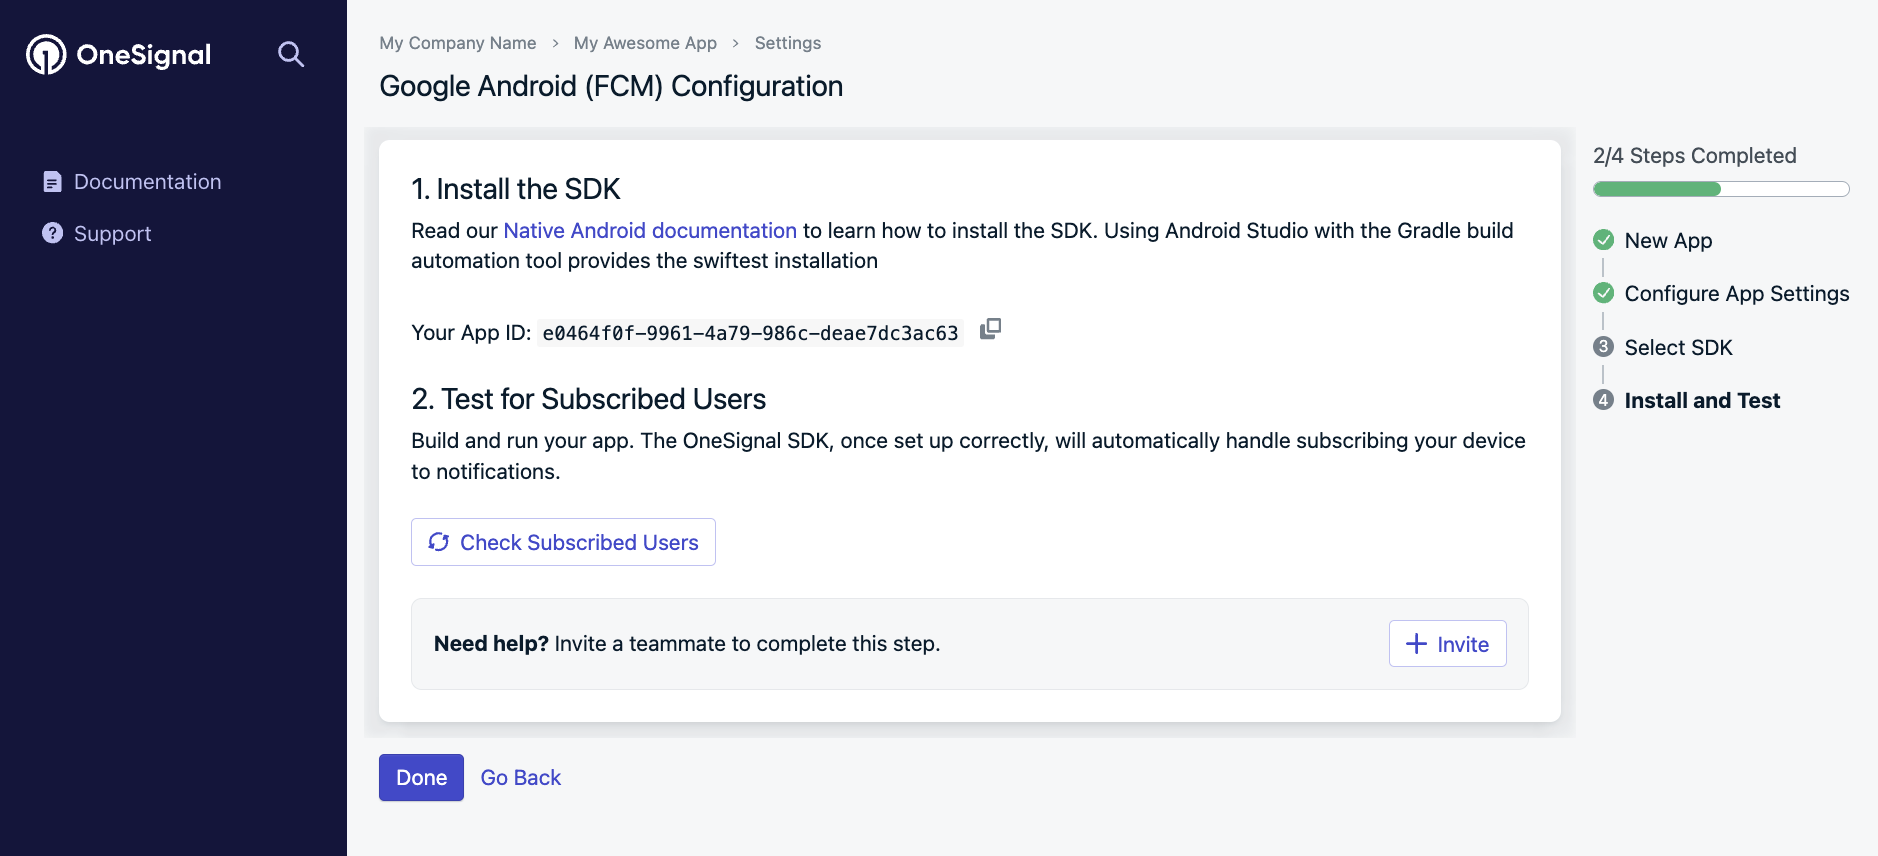
Finally, you will be directed to install the SDK and provided your OneSignal App ID. Make sure to save your App ID as you will need it later.
If you need a teammate or your developer to assist, you can click Invite them to the app and select Done when finished.
Continue through the documentation to finish adding OneSignal to your app.
Choosing your IDE
With the deprecation of Visual Studio for Mac, the official suggestion from Microsoft is to use VSCode along with the newly released .NET maui extension (please keep in mind this extension is currently in "preview"). Another option available to Mac users is Rider.
Setup
1. Add The OneSignal SDK
Using the .NET CLI :
dotnet add package OneSignalSDK.DotNet
2. Initialization
Note on Xamarin Forms
Xamarin Forms is no longer supported beyond version 5.0.2 of our .NET SDK. Microsoft has guides on migrating to Maui here, if needed.
.NET MAUI
Initialize OneSignal in App.xaml.cs in your MAUI project as follows:
using OneSignalSDK.DotNet;
using OneSignalSDK.DotNet.Core;
using OneSignalSDK.DotNet.Core.Debug;

public App() {
  InitializeComponent();

  // Enable verbose OneSignal logging to debug issues if needed.
  OneSignal.Debug.LogLevel = LogLevel.VERBOSE;

  // OneSignal Initialization
  OneSignal.Initialize("YOUR_ONESIGNAL_APP_ID");

  // RequestPermissionAsync will show the notification permission prompt.
  // We recommend removing the following code and instead using an In-App Message to prompt for notification permission (See step 5)
  OneSignal.Notifications.RequestPermissionAsync(true);

  MainPage = new AppShell();
}
3. Adding A Service Extension
Microsoft has a guide on generating a Notification Service Extension here, using Visual Studio and Visual Studio for Mac, but does not have any guidance on how you would create this for VSCode at this time.
If you generate a service extension following the guide above, you can follow this the code in our sample project found on Github
using System;
using Foundation;
using OneSignalSDK.DotNet;
using OneSignalSDK.DotNet.iOS;
using UIKit;
using UserNotifications;

namespace OneSignalNotificationServiceExtension
{
    [Register("NotificationService")]
    public class NotificationService : UNNotificationServiceExtension
    {
        Action<UNNotificationContent> ContentHandler { get; set; }
        UNMutableNotificationContent BestAttemptContent { get; set; }
        UNNotificationRequest ReceivedRequest { get; set; }

        protected NotificationService(IntPtr handle) : base(handle)
        {
            // Note: this .ctor should not contain any initialization logic.
        }

        public override void DidReceiveNotificationRequest(UNNotificationRequest request, Action<UNNotificationContent> contentHandler)
        {
            ReceivedRequest = request;
            ContentHandler = contentHandler;
            BestAttemptContent = (UNMutableNotificationContent)request.Content.MutableCopy();

            (OneSignal.Default as OneSignalImplementation).DidReceiveNotificationExtensionRequest(request, BestAttemptContent, contentHandler);
        }

        public override void TimeWillExpire()
        {
            // Called just before the extension will be terminated by the system.
            // Use this as an opportunity to deliver your "best attempt" at modified content, otherwise the original push payload will be used.

            (OneSignal.Default as OneSignalImplementation).ServiceExtensionTimeWillExpireRequest(ReceivedRequest, BestAttemptContent);

            ContentHandler(BestAttemptContent);
        }
    }
}
4. Testing
Run your app on a physical device to make sure it builds correctly.
If you used the provided code, then the RequestPermissionAsync method, should prompt you to subscribe to push notifications. You can change this later.
Check your OneSignal Dashboard Audience > Subscriptions to see your User & Subscription Record.
Then head over to Messages > New Push to Send your first Push Notification from OneSignal.
Troubleshooting
If running into issues, see our Mobile Troubleshooting Guide.
Try our example projects on our Github repository.
If stuck, contact support directly or email [email protected] for help.
For faster assistance, please provide:
- Your OneSignal App ID
- Details, logs, and/or screenshots of the issue.
- Steps to reproduce
Recommended
Push permission with In-App Message
You can continue to opt-in users to push via the RequestPermissionAsync method. However, Apple's Human Interface Guidelines recommends that apps "Create an alert, modal view, or other interface that describes the types of information they want to send and gives people a clear way to opt in or out."
OneSignal provides In-App Messages to meet this recommendation and have a better user experience. This also permits you to ask for permission again in the future, since the native permission prompt is limited to how many times it can show and cannot be shown again if the user clicks deny.
See How to Prompt for Push Permissions with In-App Messages for details on implementing this.

Identify Users
Required if using integrations.
Recommended for messaging across multiple channels (push, email, sms).
OneSignal creates subscription-level records under a unique ID called the subscription_id. A single user can have multiple subscription_id records based on how many devices, email addresses, and phone numbers they use to interact with your app.
If your app has its own login system to track users, call login at any time to link all channels to a single user. For more details, see Aliases & External ID.
Set Email & Phone Number
Recommended for messaging across multiple channels (push, email, sms).
Use the provided SDK methods to capture one or more email/phone numbers for the user. Follow the channel quickstart guides for setup:
Add Data Tags
Optional
Tags are custom key : value pairs of String data used for tracking user events and properties. Setting tags is required for more complex segmentation and message personalization.
- See Data Tags for more details.
Updated about 2 months ago