Requirements
To manually configure DNS records, you must:- Own the sending domain.
- Have access to DNS settings via your provider.
Registering your domain with Cloudflare
Registering your domain with Cloudflare
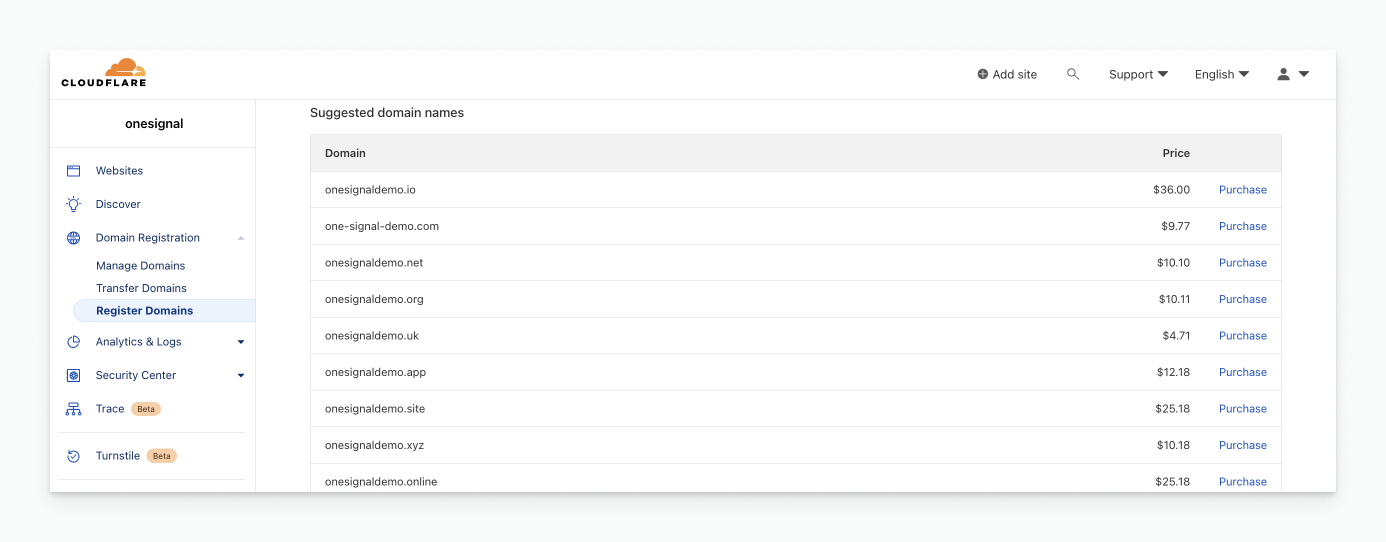
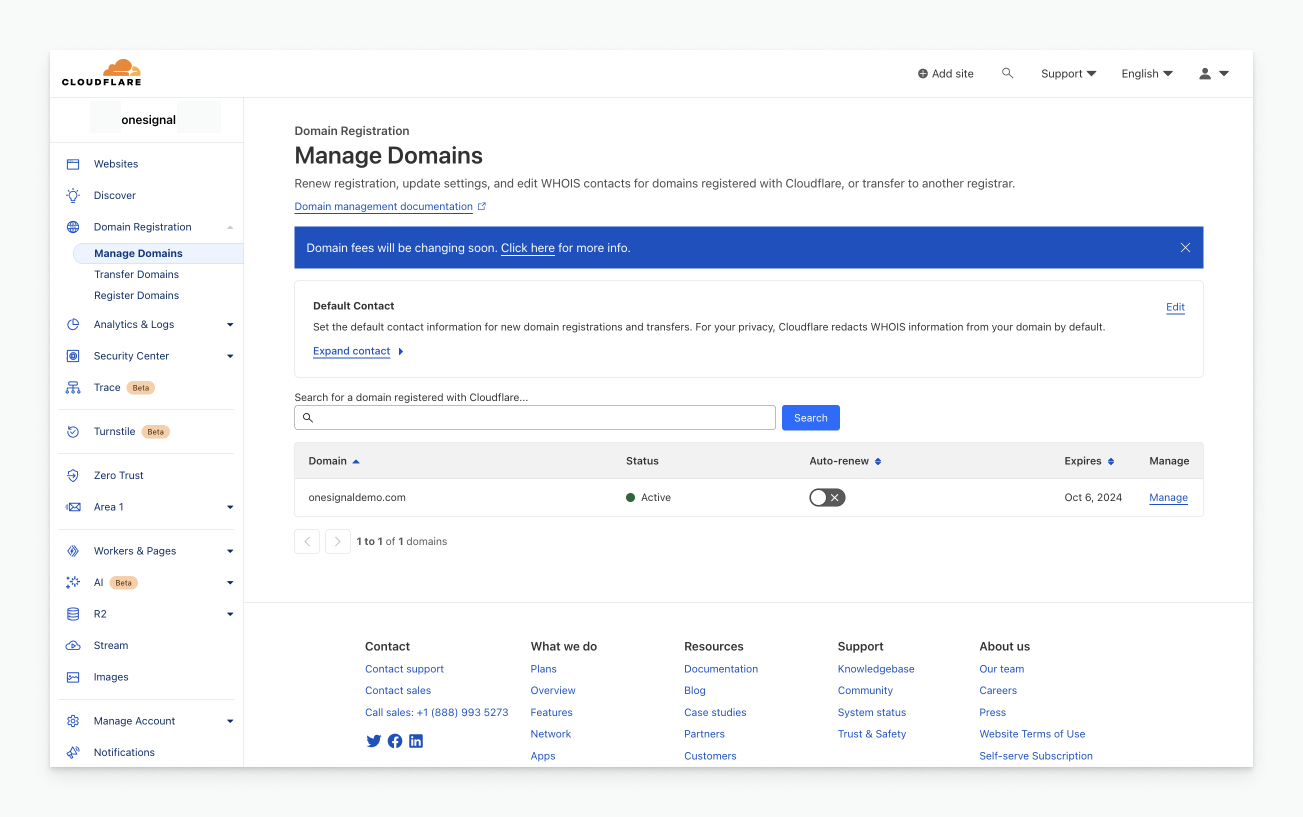
Create an account at Cloudflare.com.Go to Domain Registration > Register Domains.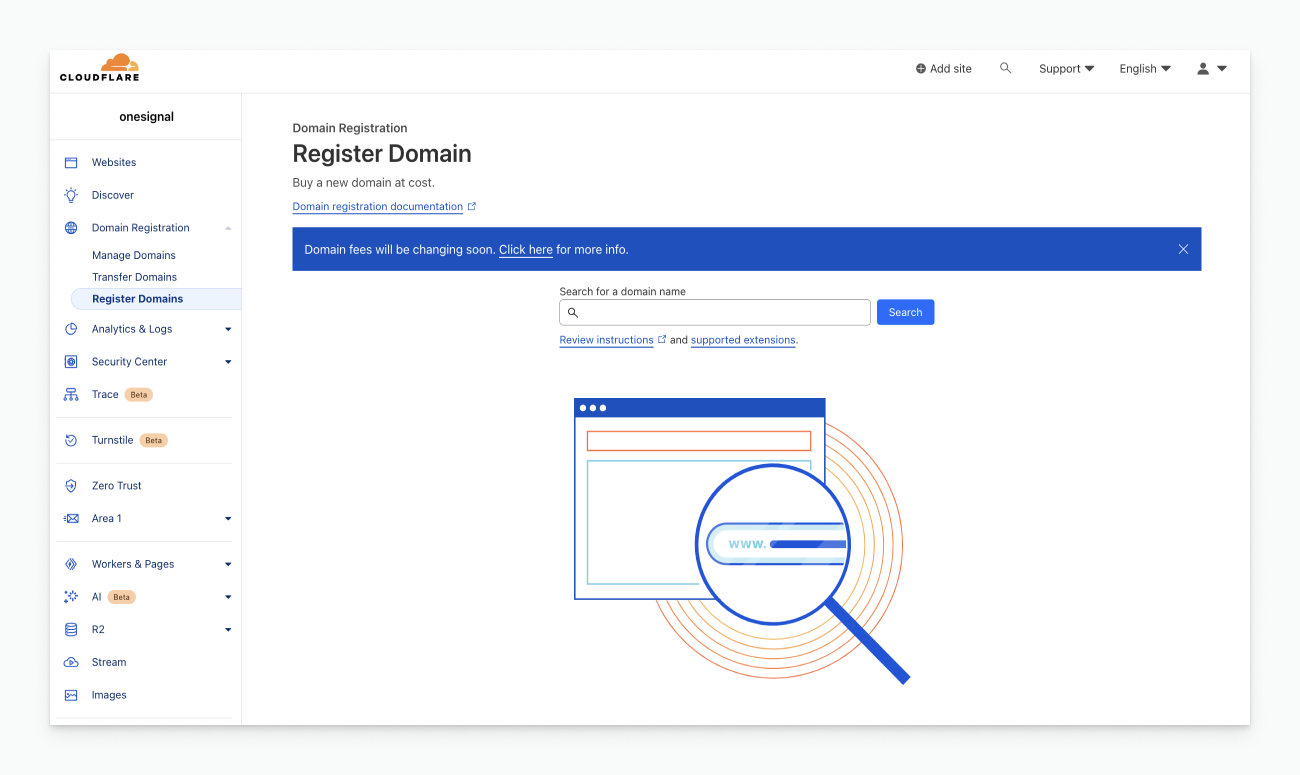
Add DNS records
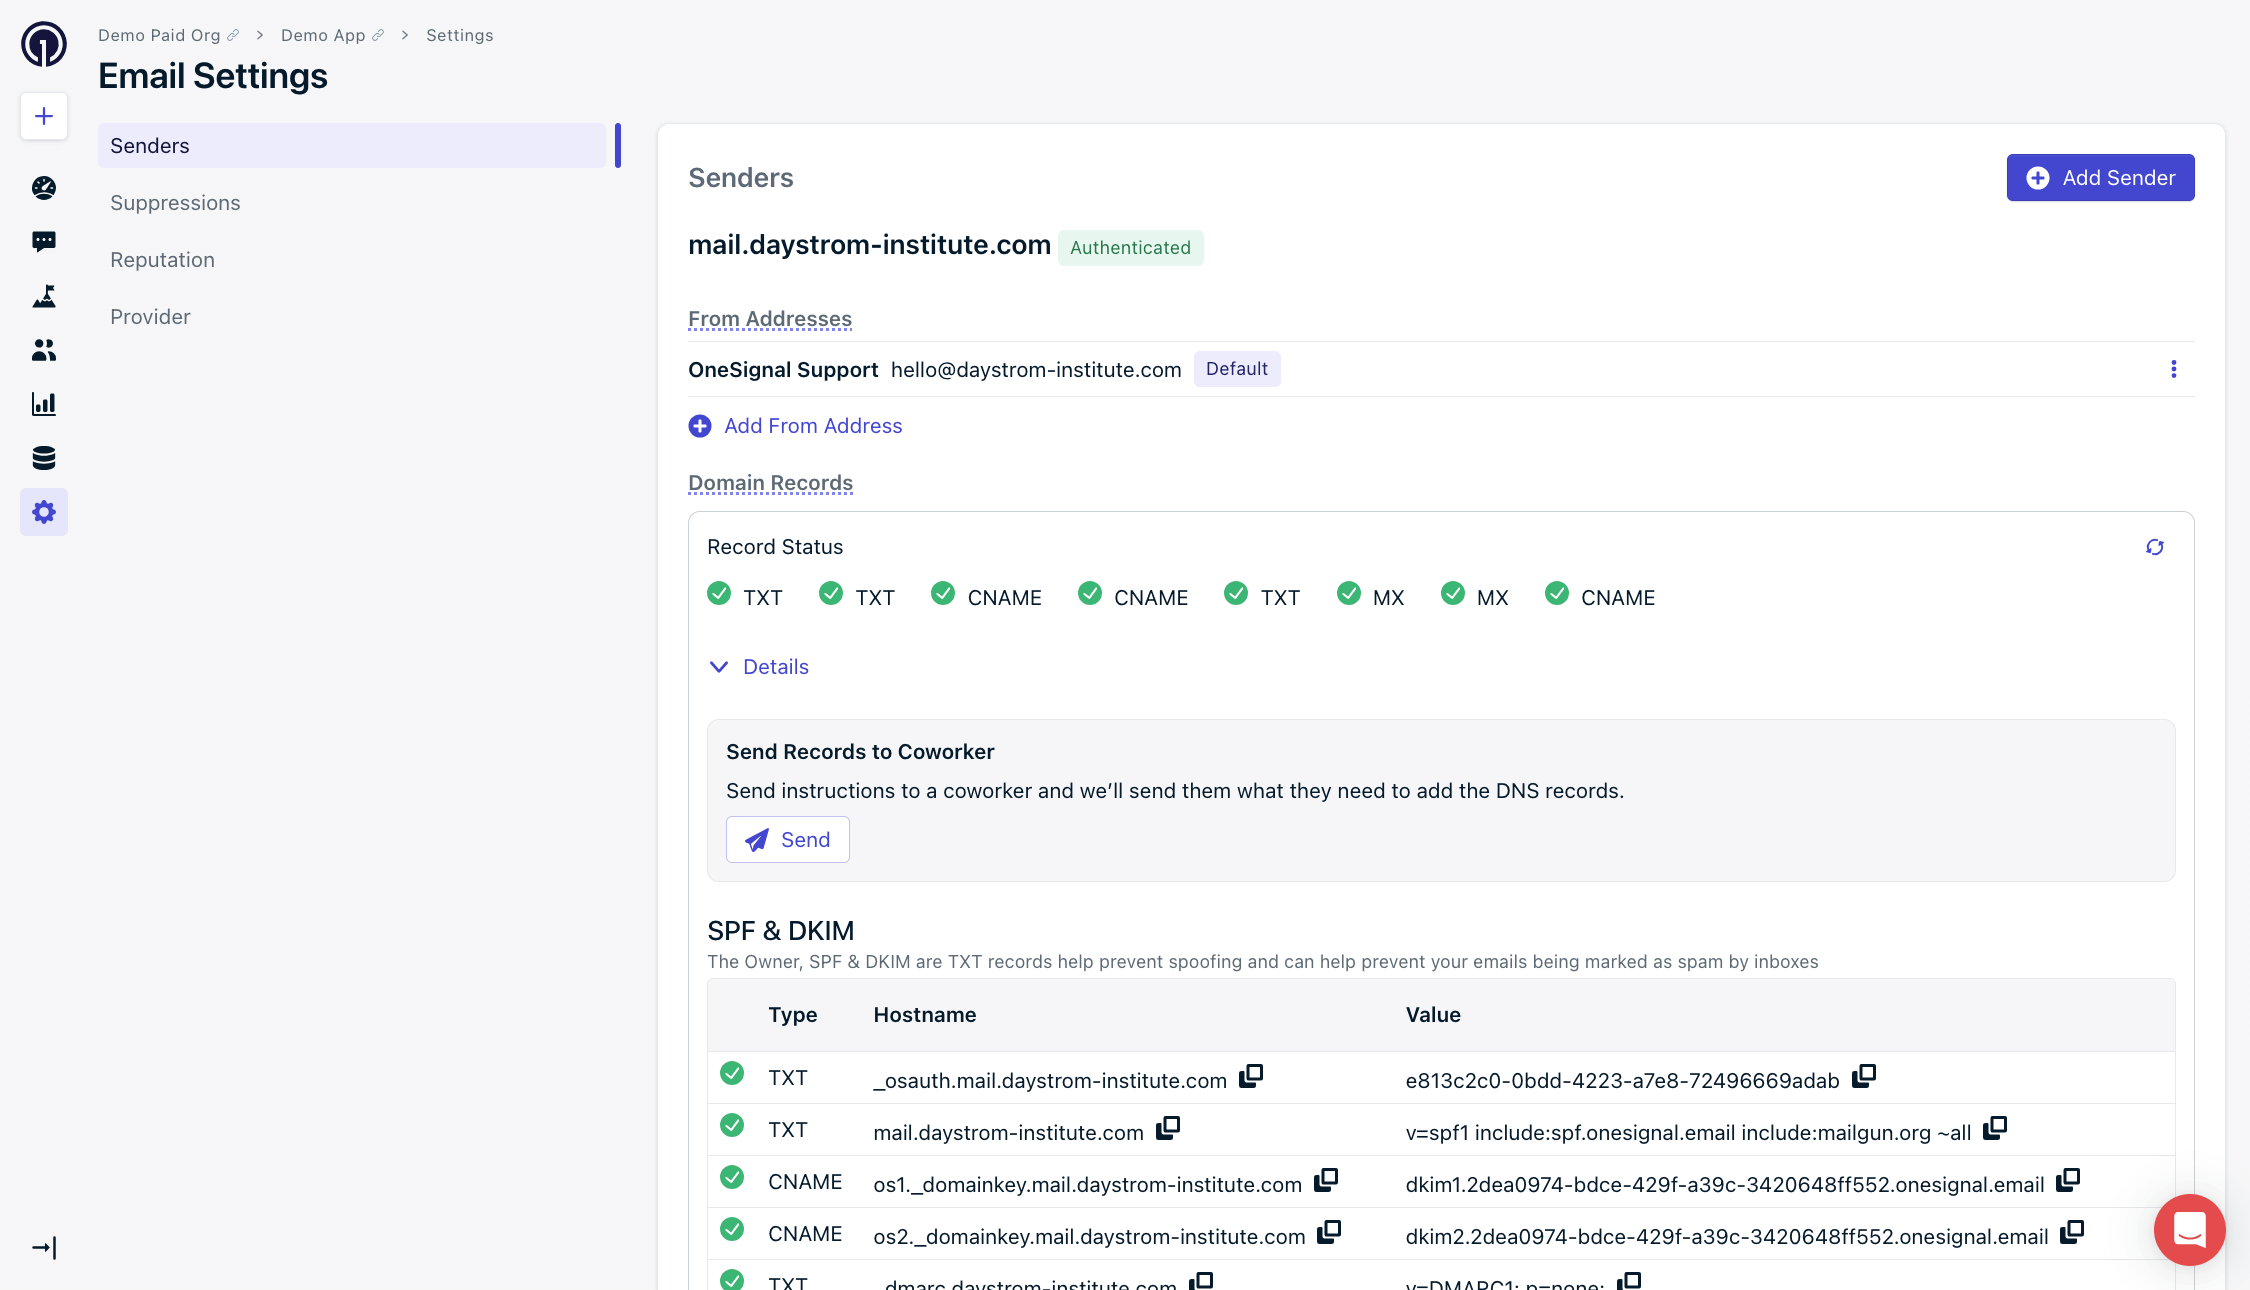
Complete the Email setup steps until you’re prompted to add DNS records, then return here or use the Auto-Configure DNS button. From the OneSignal dashboard:- ⚠️ means the current DNS record does not match
- ✅ means the current DNS record matches
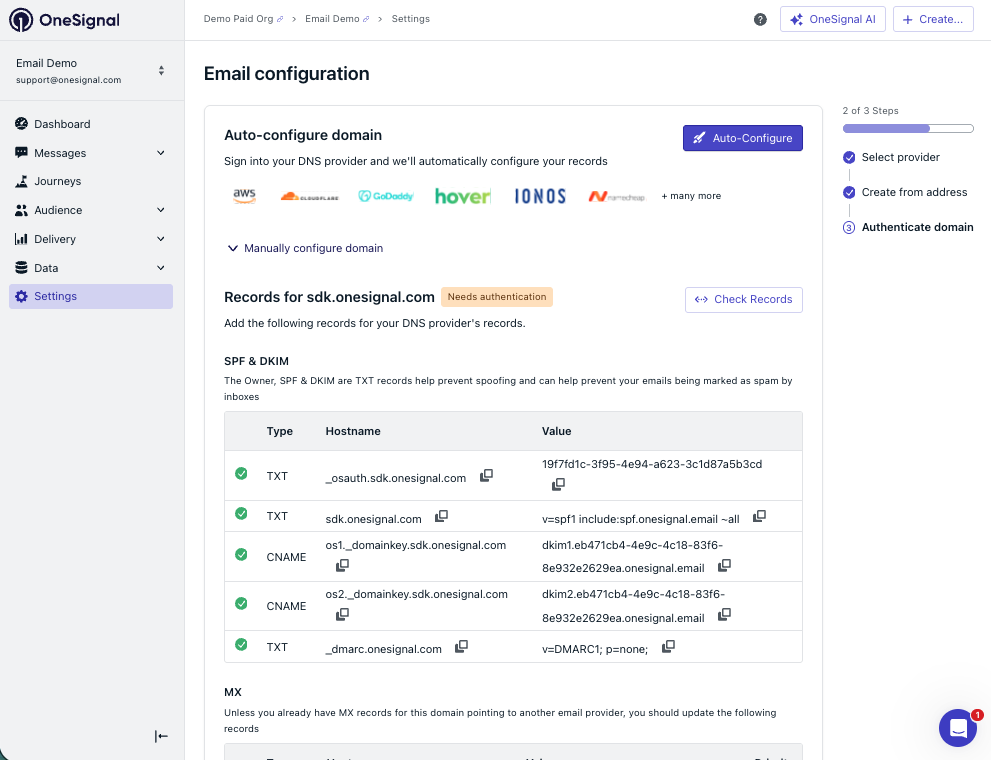
TXT records
- Type:
TXT - Name: OneSignal “Hostname”
- Content: OneSignal “Value”
- TTL: Auto or lowest
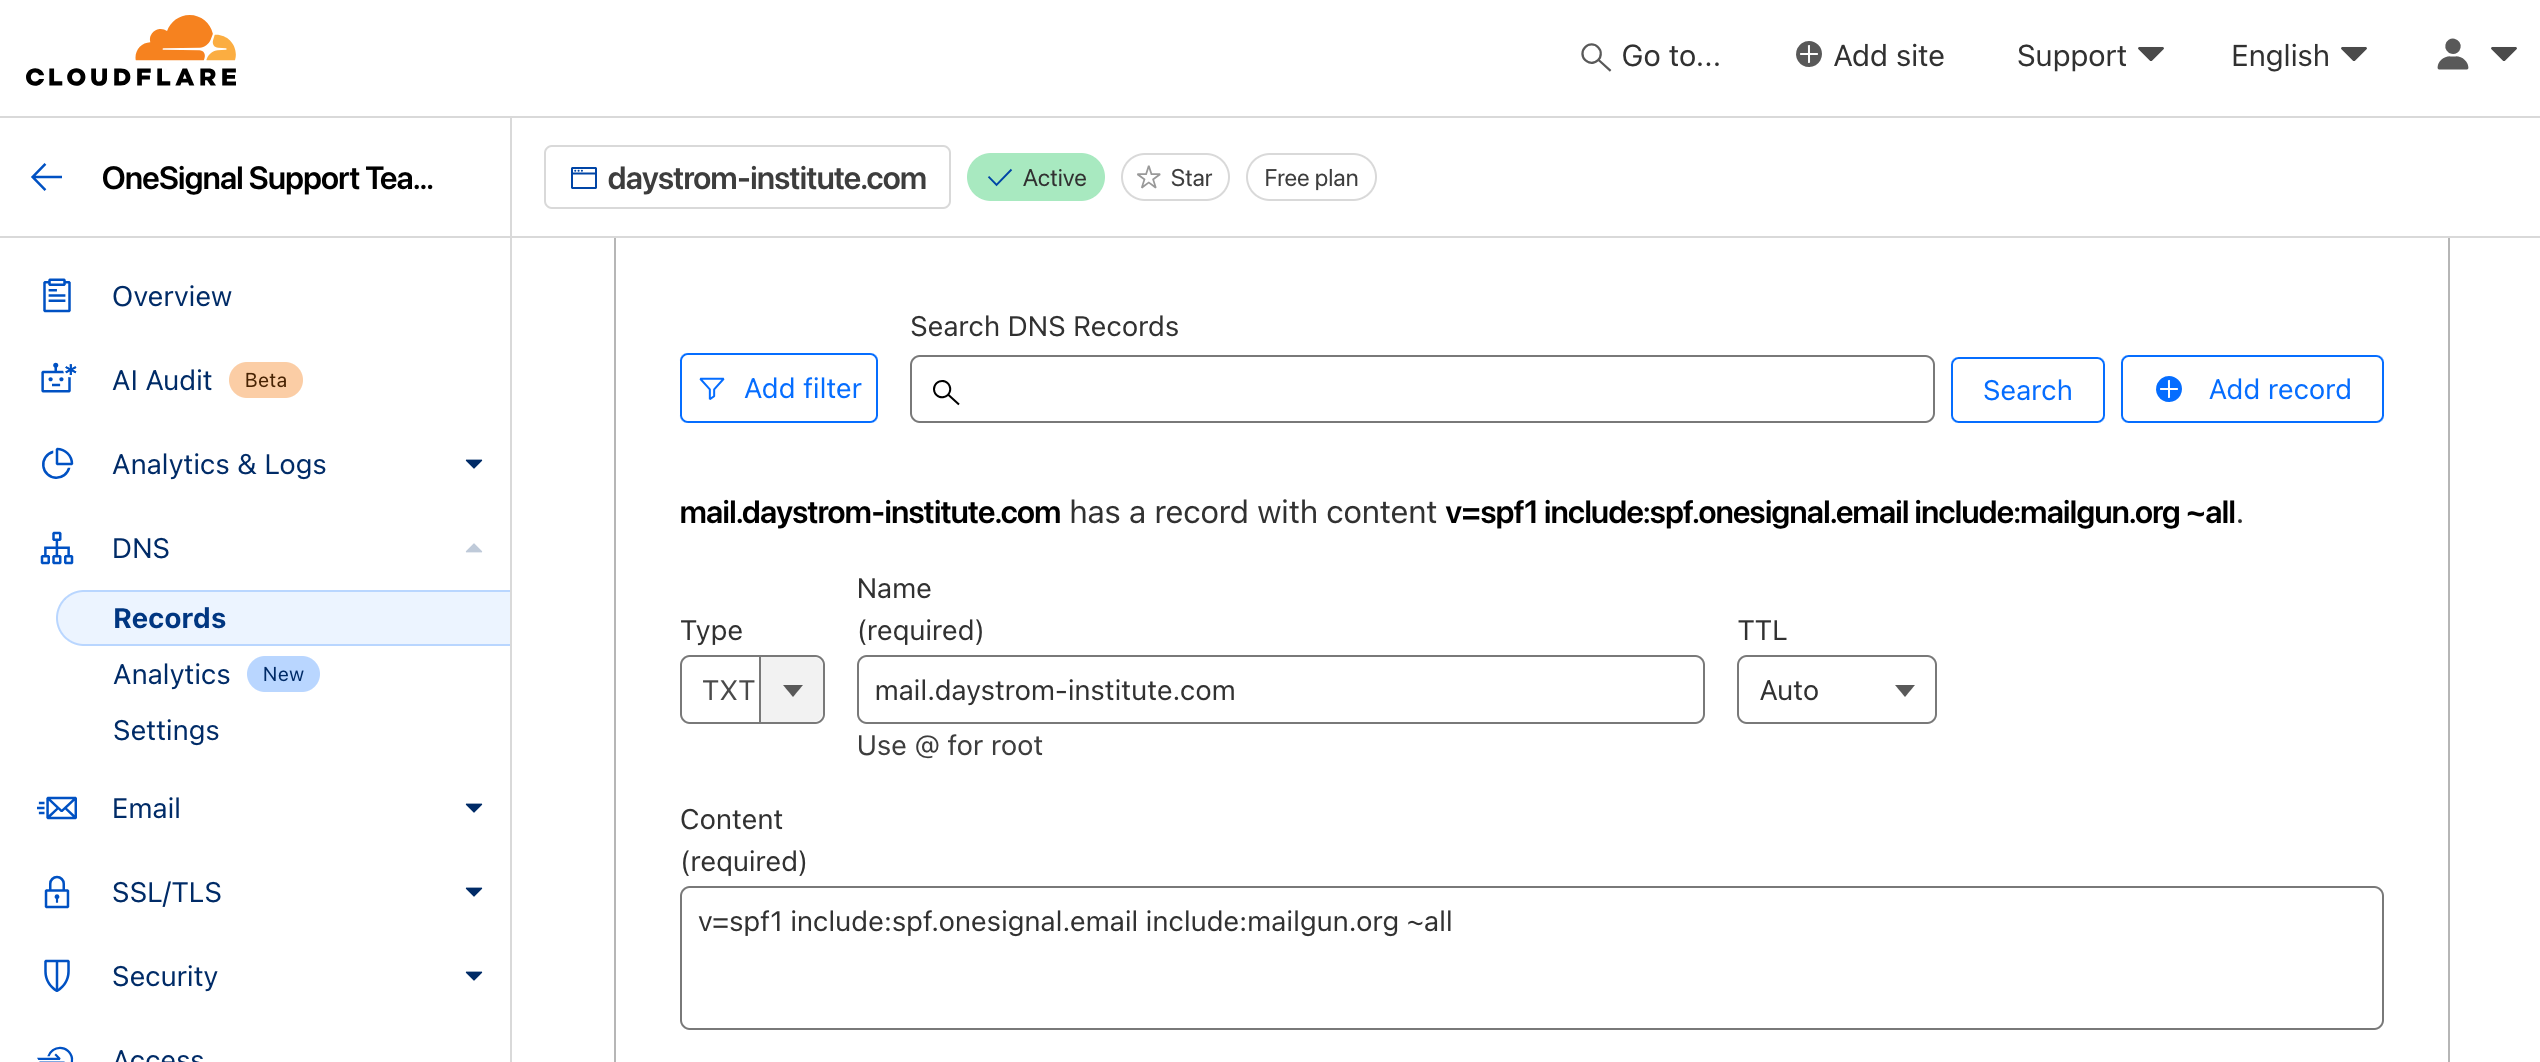
SPF (Sender Policy Framework)
Verifies the sending IP is authorized to send emails on your domain’s behalf.DMARC
Adds policy enforcement for SPF and DKIM failures. DMARC is required for any domain that sends 5,000 or more emails per day to Gmail or Yahoo (the bulk sender threshold), and is strongly recommended for all senders. See Google’s Email Sender Guidelines and Google and Yahoo email sender requirements for the OneSignal-specific setup.CNAME records
Used for open, click, and unsubscribe tracking.- Type:
CNAME - Name: OneSignal “Hostname”
- Target: OneSignal “Value”
- TTL: Auto or lowest
If using Cloudflare, set Proxy to “DNS only” and Flattening to “Off” for CNAME records. Other DNS providers typically do not require these settings.
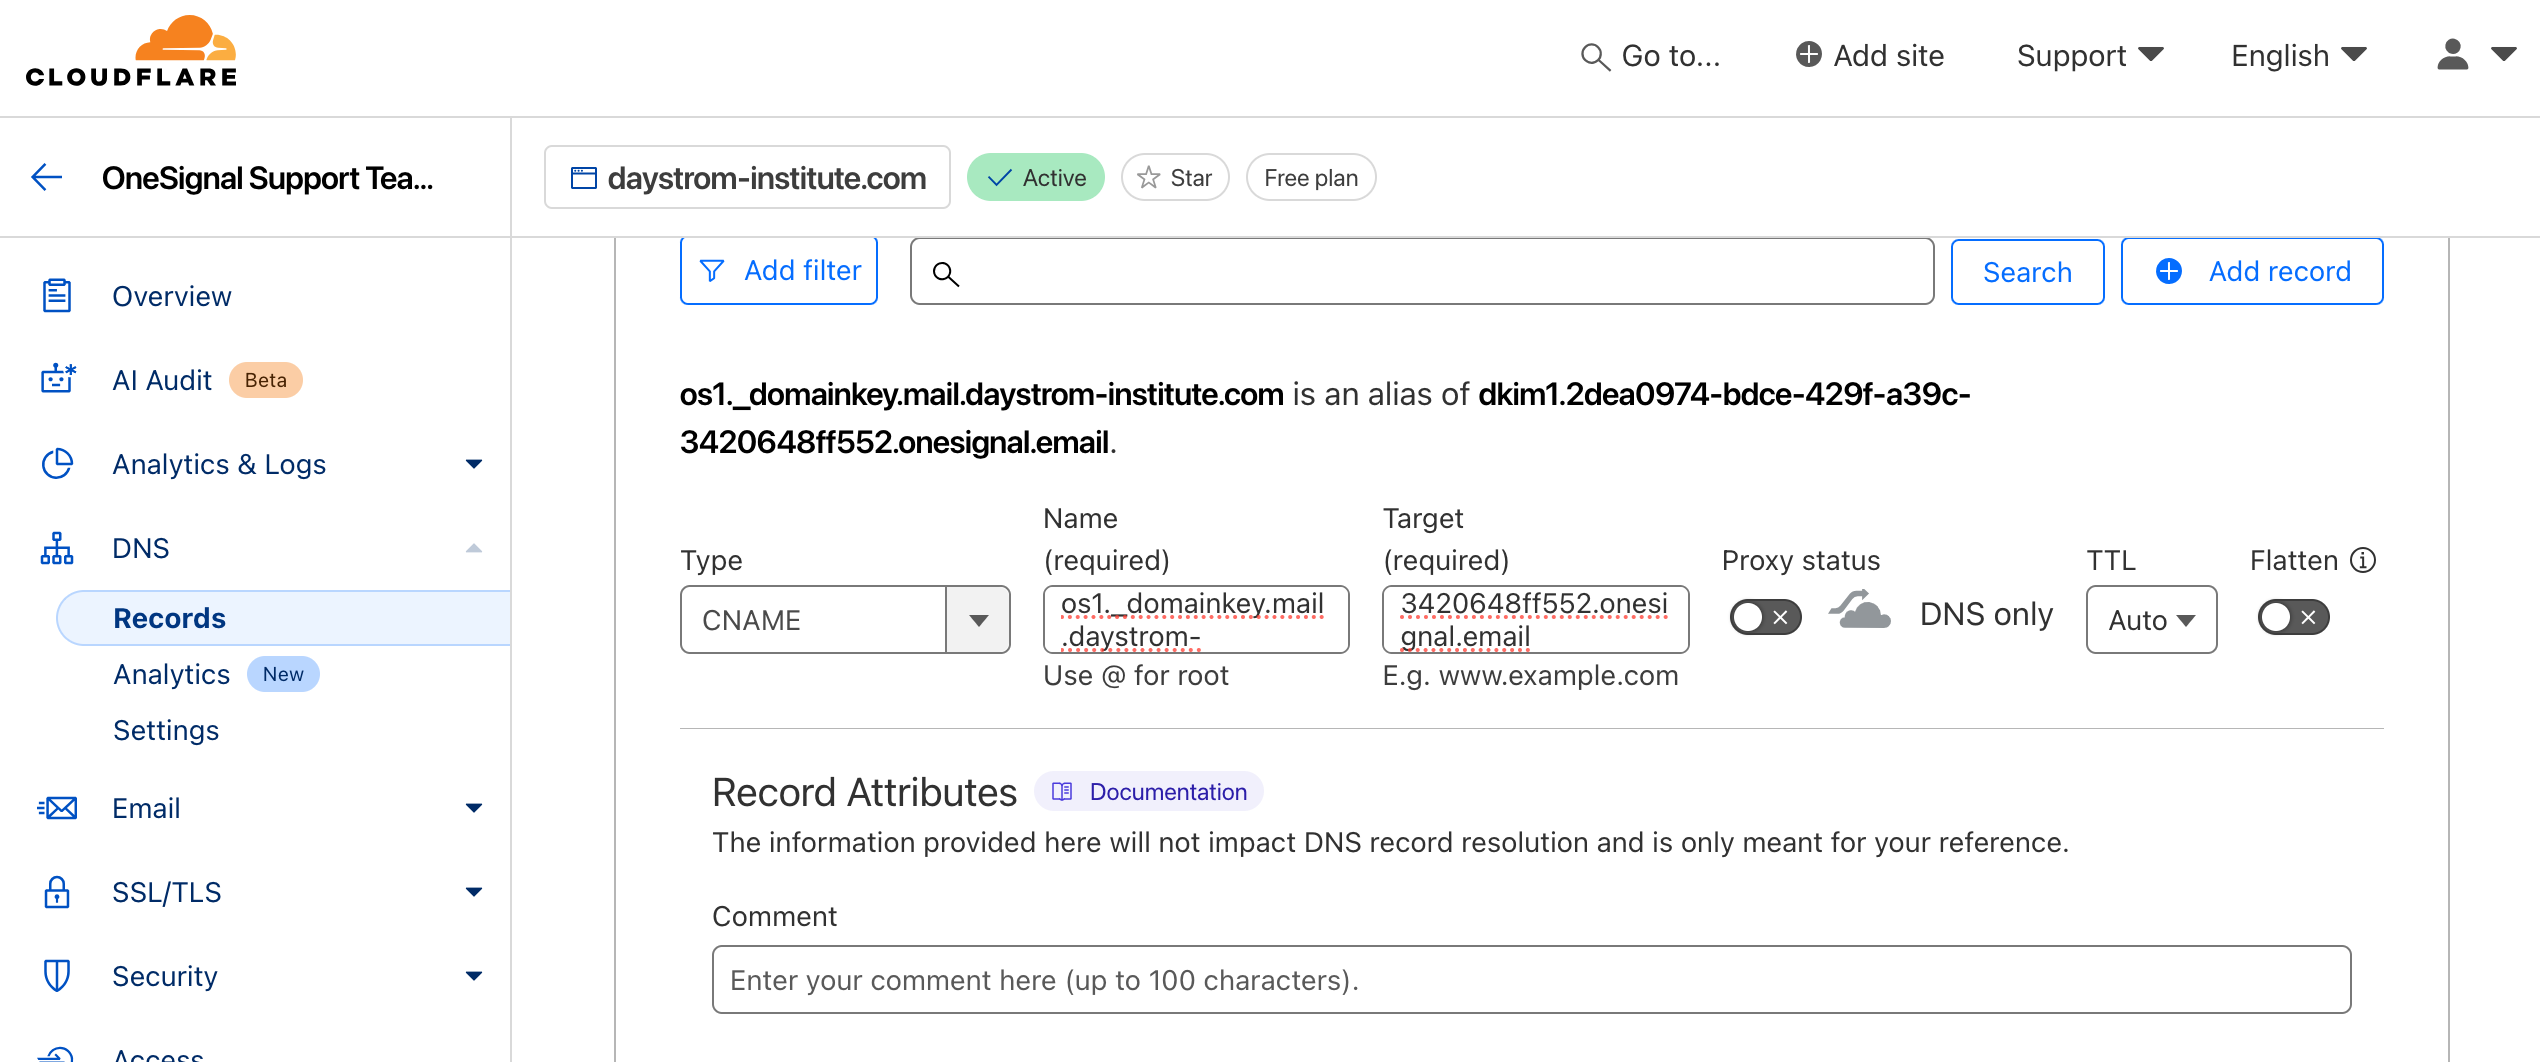
DKIM (DomainKeys Identified Mail)
Verifies the message content was not altered and was sent by you. The public key is included in the CNAME DNS record provided by OneSignal.MX records
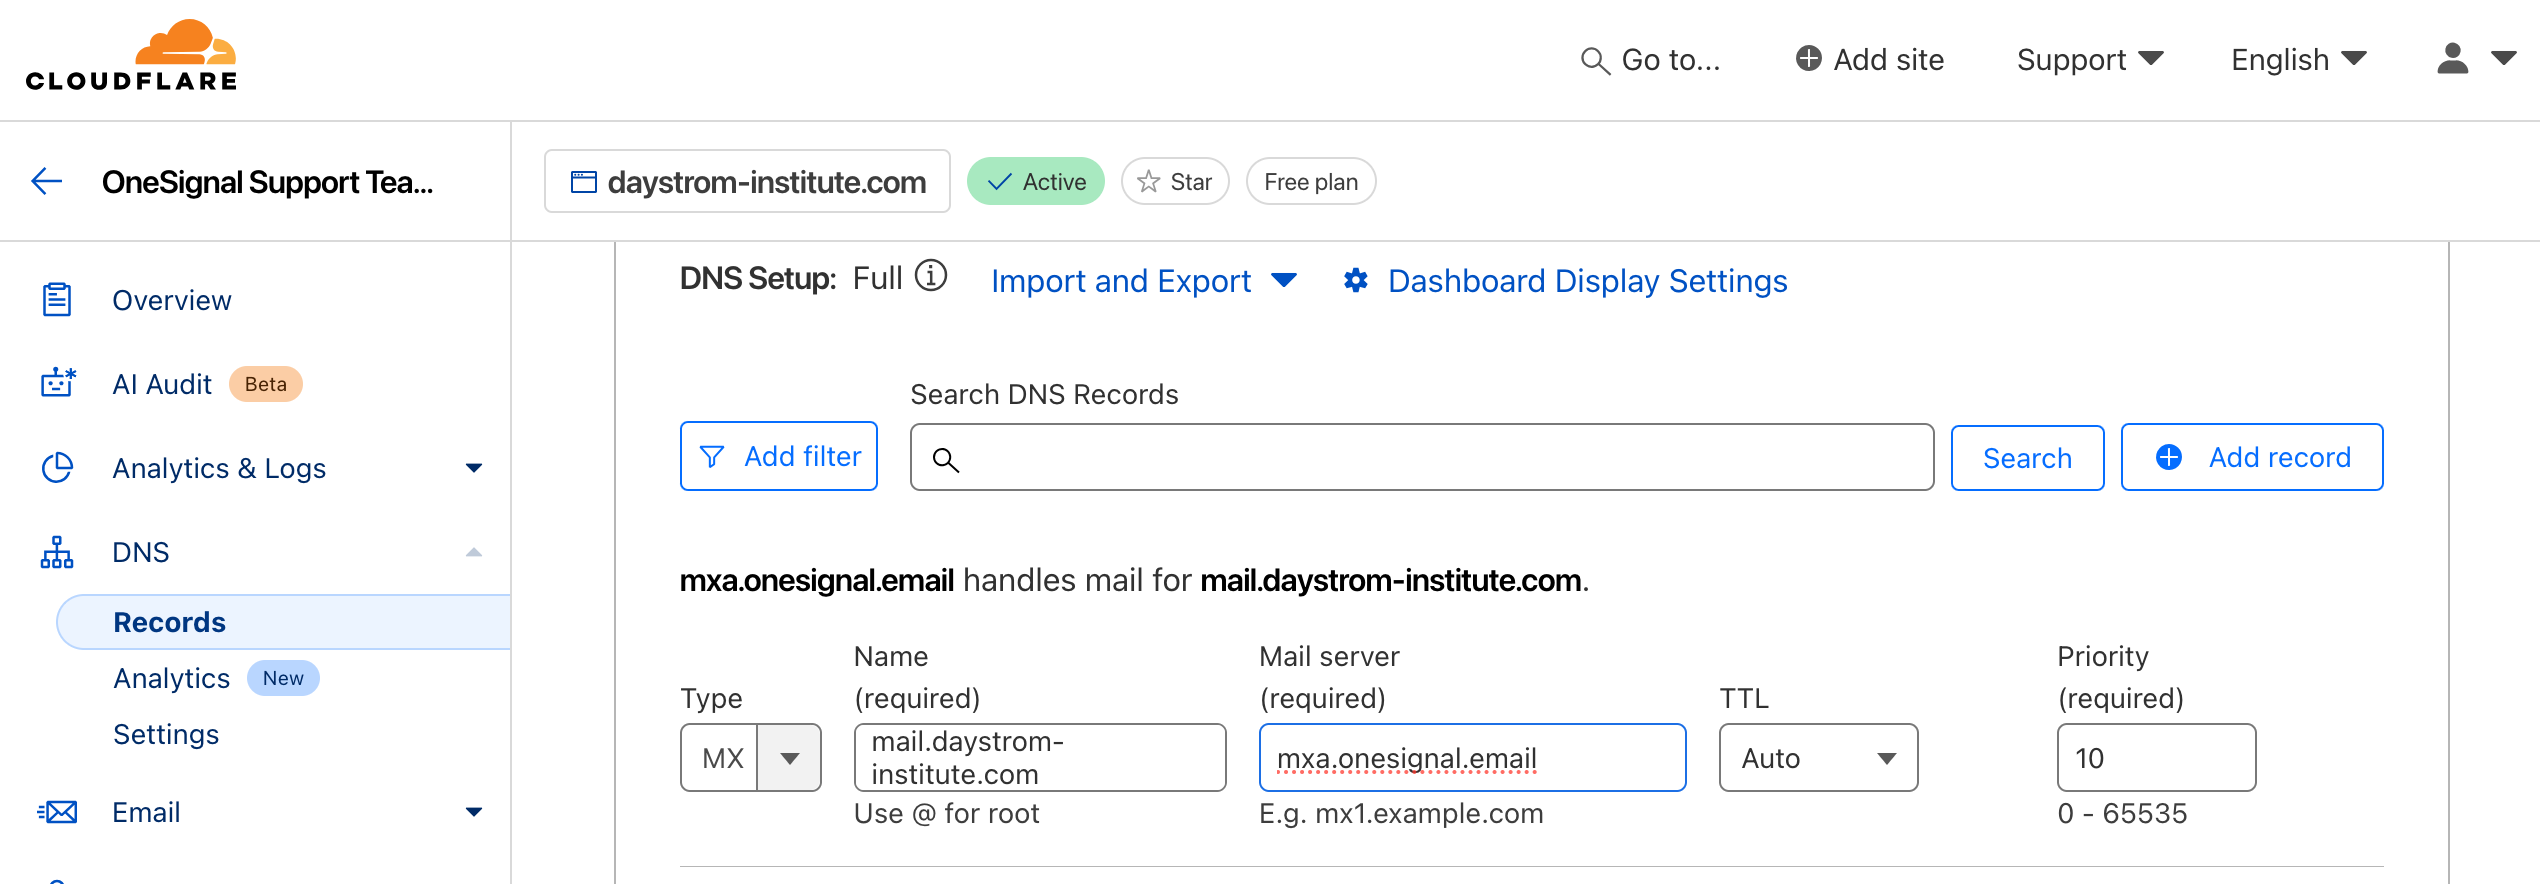
Receives email responses and bounces. Even if you’re only sending, MX records help avoid domain verification errors.- Type:
MX - Name: OneSignal “Hostname”
- Mail server: OneSignal “Value”
- TTL: Auto or lowest
- Priority:
10
DNS verification & troubleshooting
After adding records:- Return to your OneSignal dashboard.
- Click Check Records or the refresh button.
Troubleshoot DNS propagation
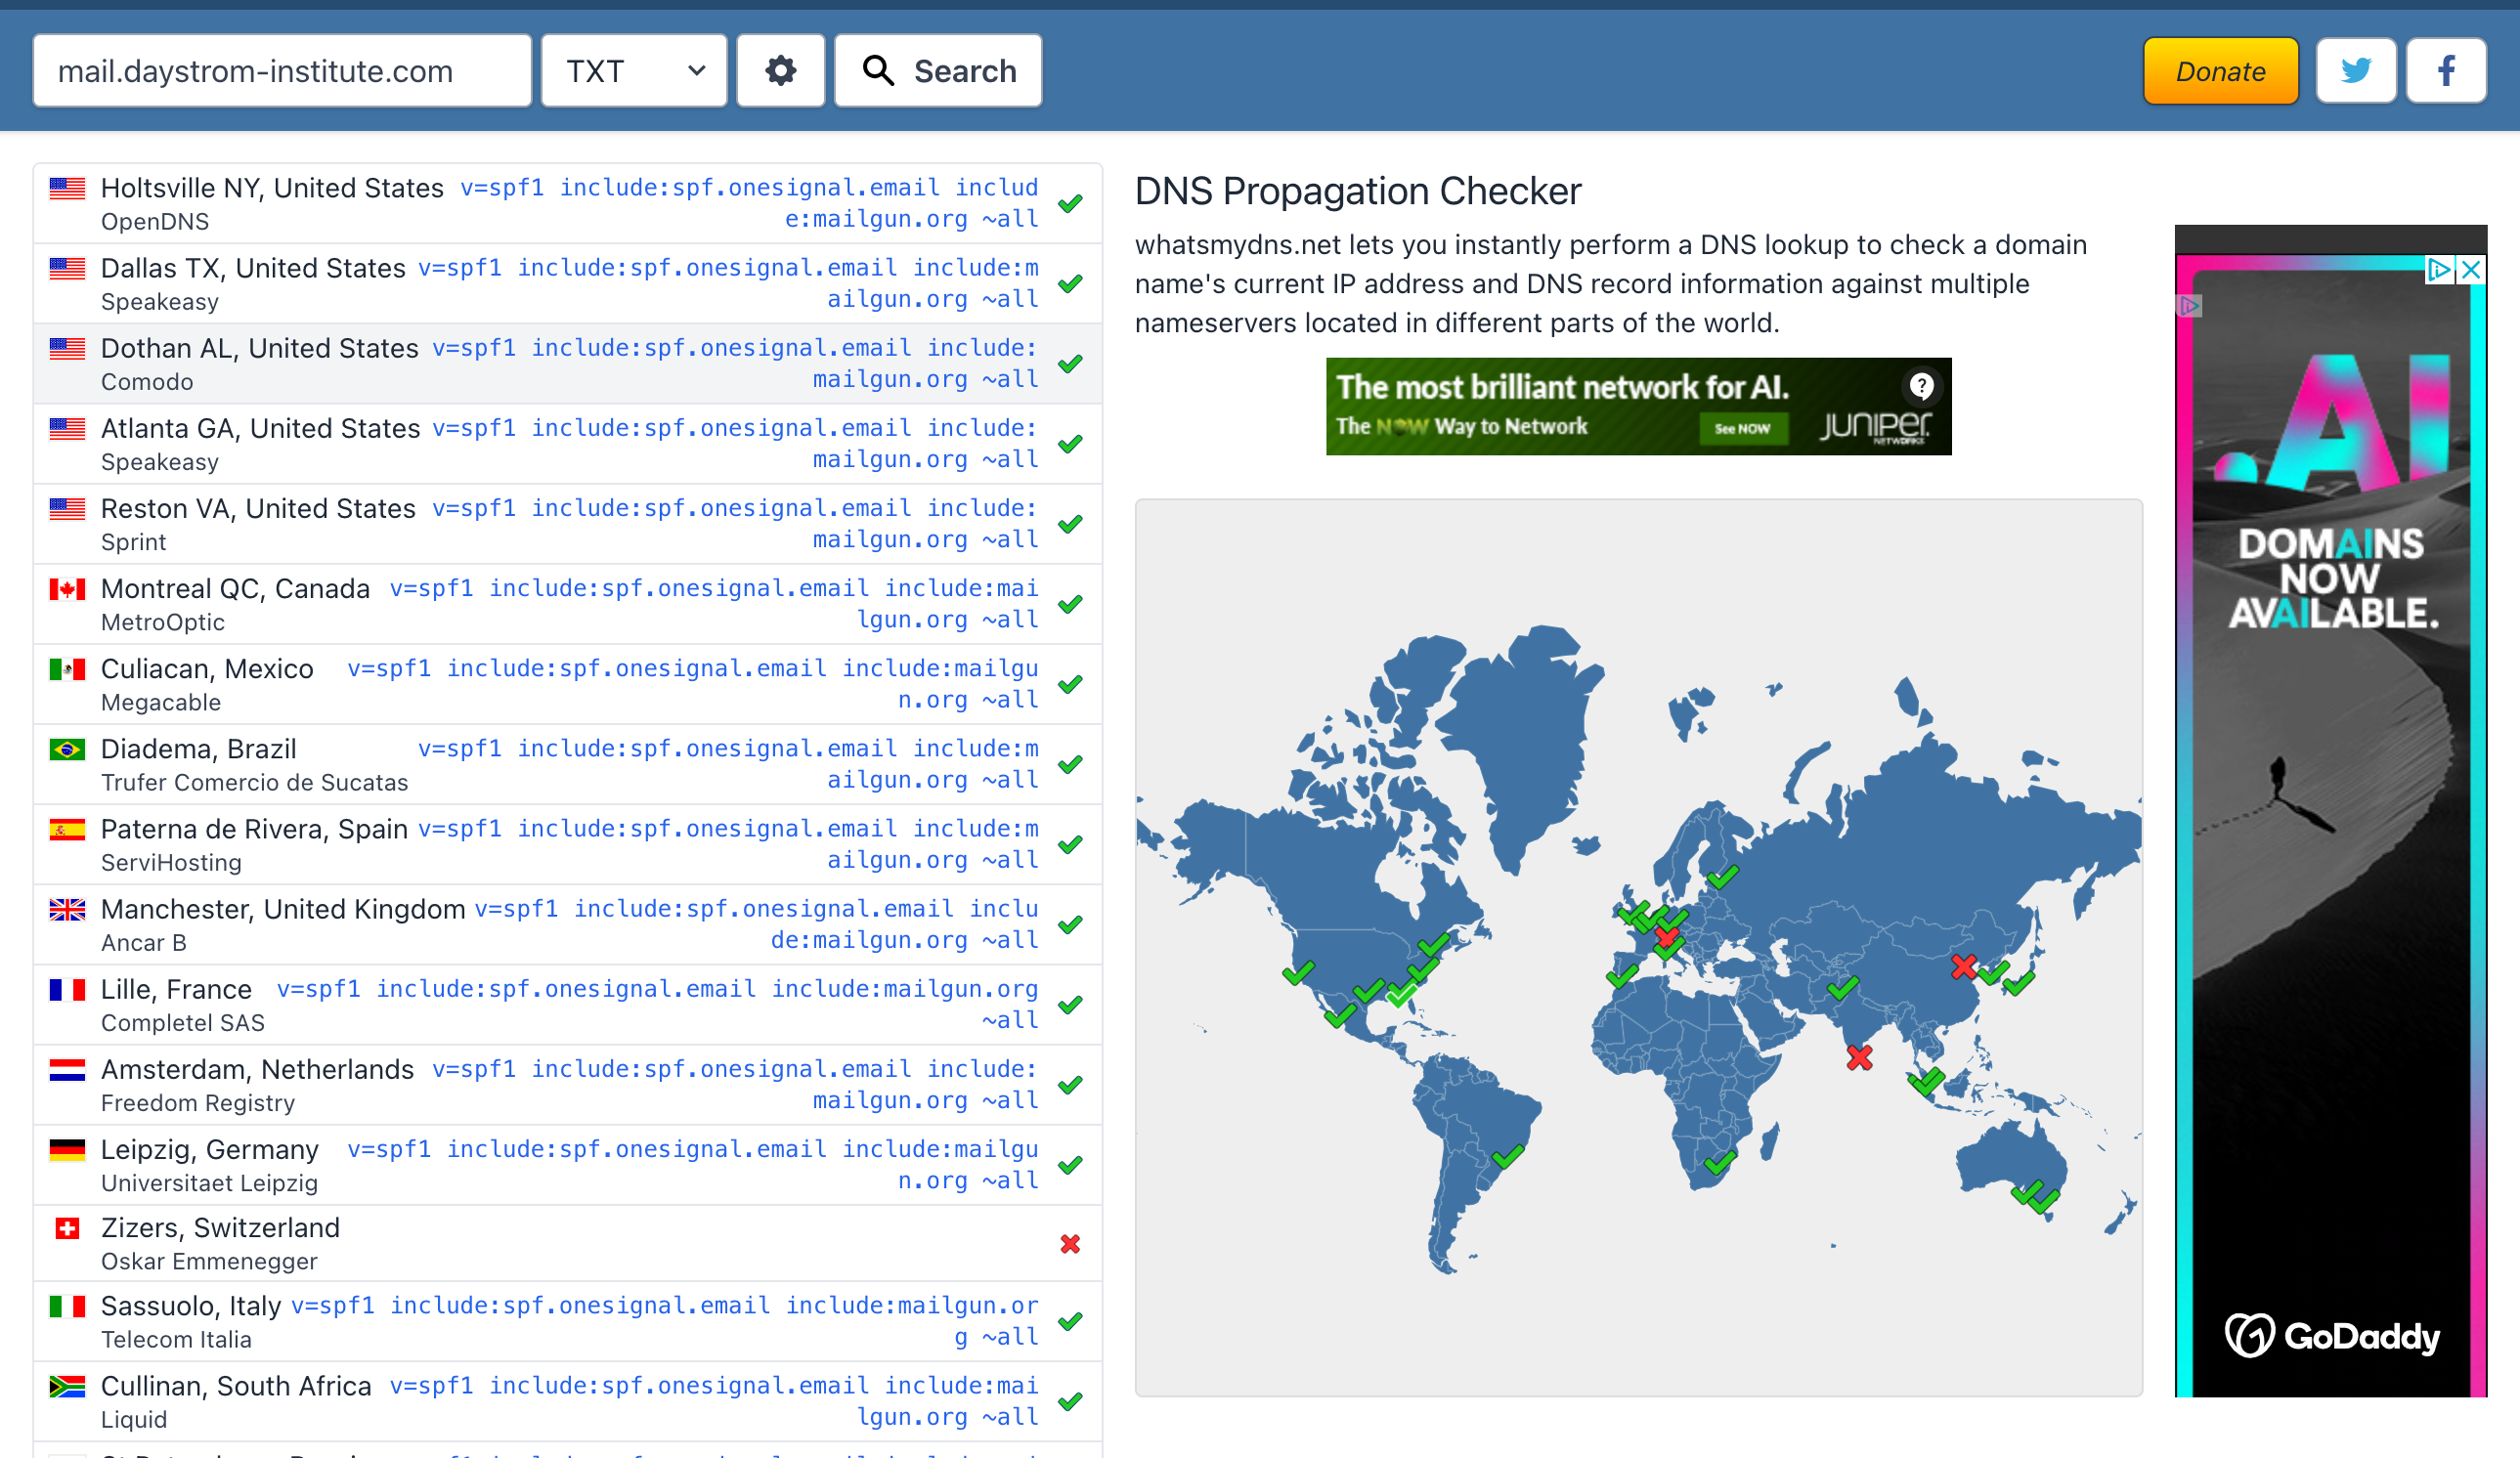
- Use whatsmydns.net to check propagation if any records are pending.
- For records that show ⚠️, copy the hostname from the OneSignal dashboard into the search bar and set the DNS type.
- Check the results: ✅ means the record is verified globally, ❌ means it has not propagated to that server yet.
Common errors & solutions
- TXT SPF record isn’t verified
- You likely have an existing SPF record. You should only have one SPF TXT record. Append additional
include:directives to its value. See the TXT records section above.
- You likely have an existing SPF record. You should only have one SPF TXT record. Append additional
- DNS not fully propagated
- If whatsmydns.net shows a mix of ✅ and ❌, the records have not fully propagated. This can take up to 48 hours. Wait and check again, or contact your DNS provider.
- DNS value not matching OneSignal
- If the values on whatsmydns.net don’t match what OneSignal provides:
- MX records pointing elsewhere (e.g., Google Mail) are expected. This is fine as long as they show ✅ on whatsmydns.net.
- Verify the hostname is correct.
mail.yourdomain.comis not the same asyourdomain.com. - Contact your DNS provider for help.
- If the values on whatsmydns.net don’t match what OneSignal provides:
FAQ
How long does DNS verification take?
Verification typically completes within minutes, but DNS propagation can take up to 48 hours depending on your provider and TTL settings. Use whatsmydns.net to check progress.What if I already have SPF or DMARC records?
Do not create duplicate records. For SPF, append OneSignal’sinclude:spf.onesignal.email to your existing SPF TXT record. For DMARC, verify your existing record includes v=DMARC1; p=none; or a stricter policy.
Do I need MX records if I’m only sending emails?
MX records help avoid domain verification errors even for send-only configurations. If you already use a mail provider like Gmail or Google Workspace, keep your existing MX records. You do not need to overwrite them with OneSignal’s values.My SPF record looks correct on external DNS checkers, but OneSignal still shows a warning. What should I check?
External DNS checkers confirm that a TXT record exists for your domain, but they do not verify that its value matches what OneSignal expects. A record can exist and still fail OneSignal’s check if the value is wrong or incomplete. To diagnose the mismatch:- In the OneSignal dashboard, find the SPF record showing a warning and note the exact Hostname and Value shown.
- Open your DNS provider and locate the TXT record for that hostname.
- Compare the record value character-for-character against what OneSignal shows.
v=spf1 include:spf.onesignal.email ~all
If you use other senders, append their include: directives to the same record rather than creating a second SPF record. See What if I already have SPF or DMARC records? above.
Return to Email setup to complete configuration and begin sending emails.
Related pages
Email setup
Complete email channel setup including provider selection and auto-DNS configuration.
Senders
Manage sending domains, reply-to addresses, and sender identities.
Email warm-up
Gradually increase email volume to build sender reputation and improve deliverability.
Email messaging
Compose and send email campaigns with templates, personalization, and scheduling.