Exigences
- Mailgun Account
- Mailgun US API (EU region is not supported)
- OneSignal Account
- A domain you own and access to its DNS provider
Setup
1. Add a new domain in Mailgun
Skip this step if your domain is already set up in the US region.- Go to the Domains page in the Mailgun dashboard.
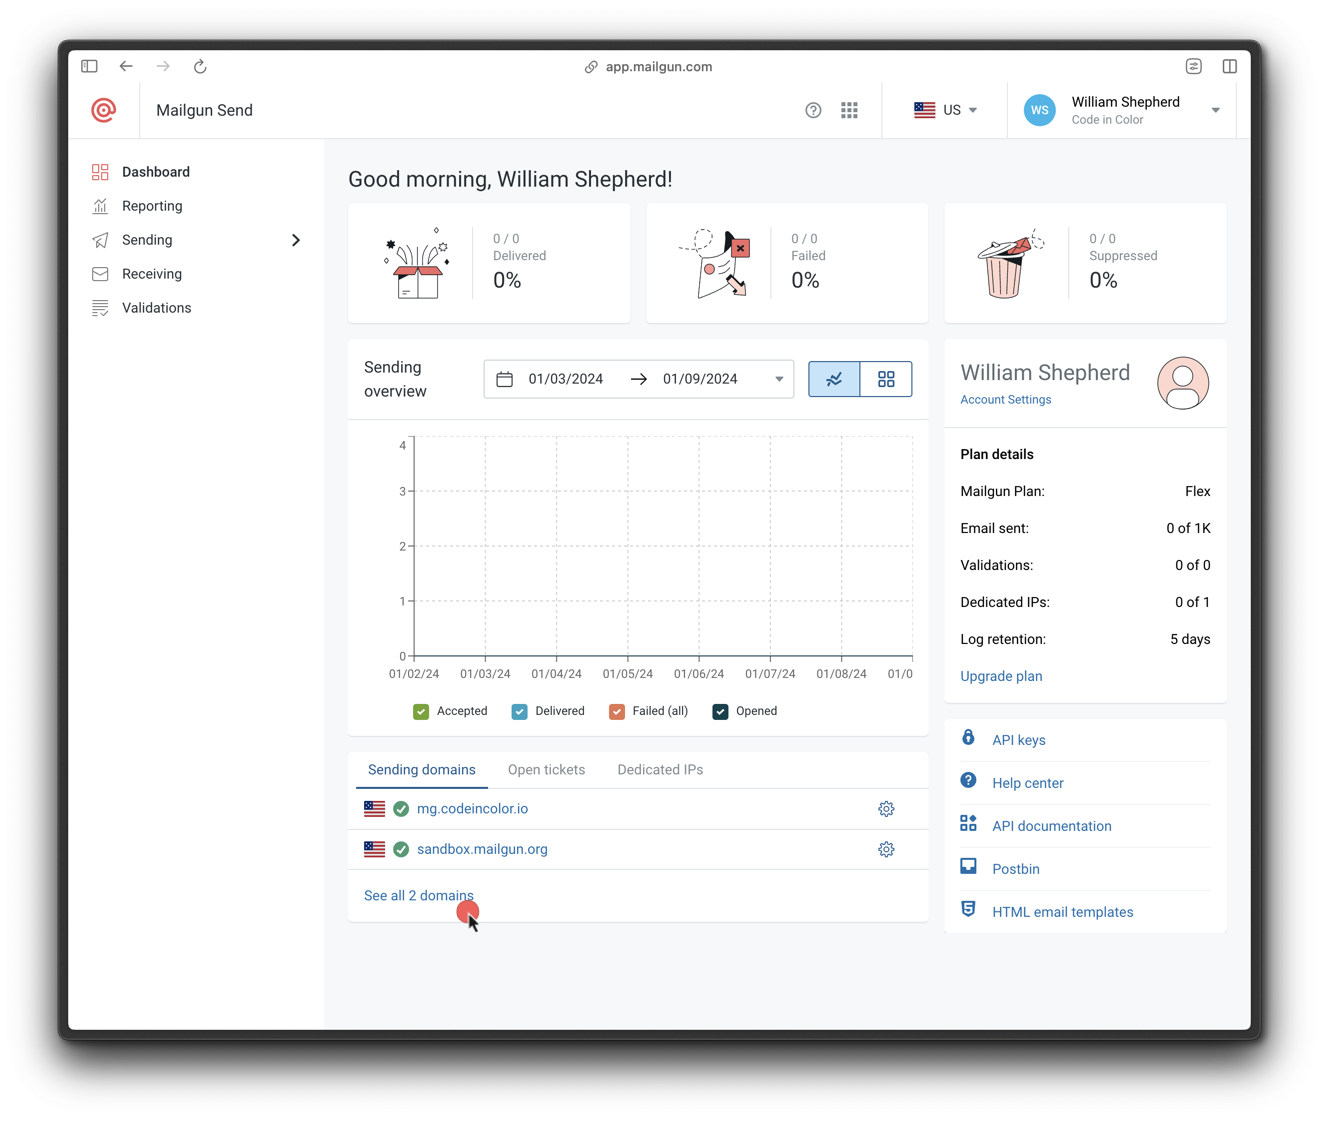
Navigate to the Domains page
- Click Add new domain.
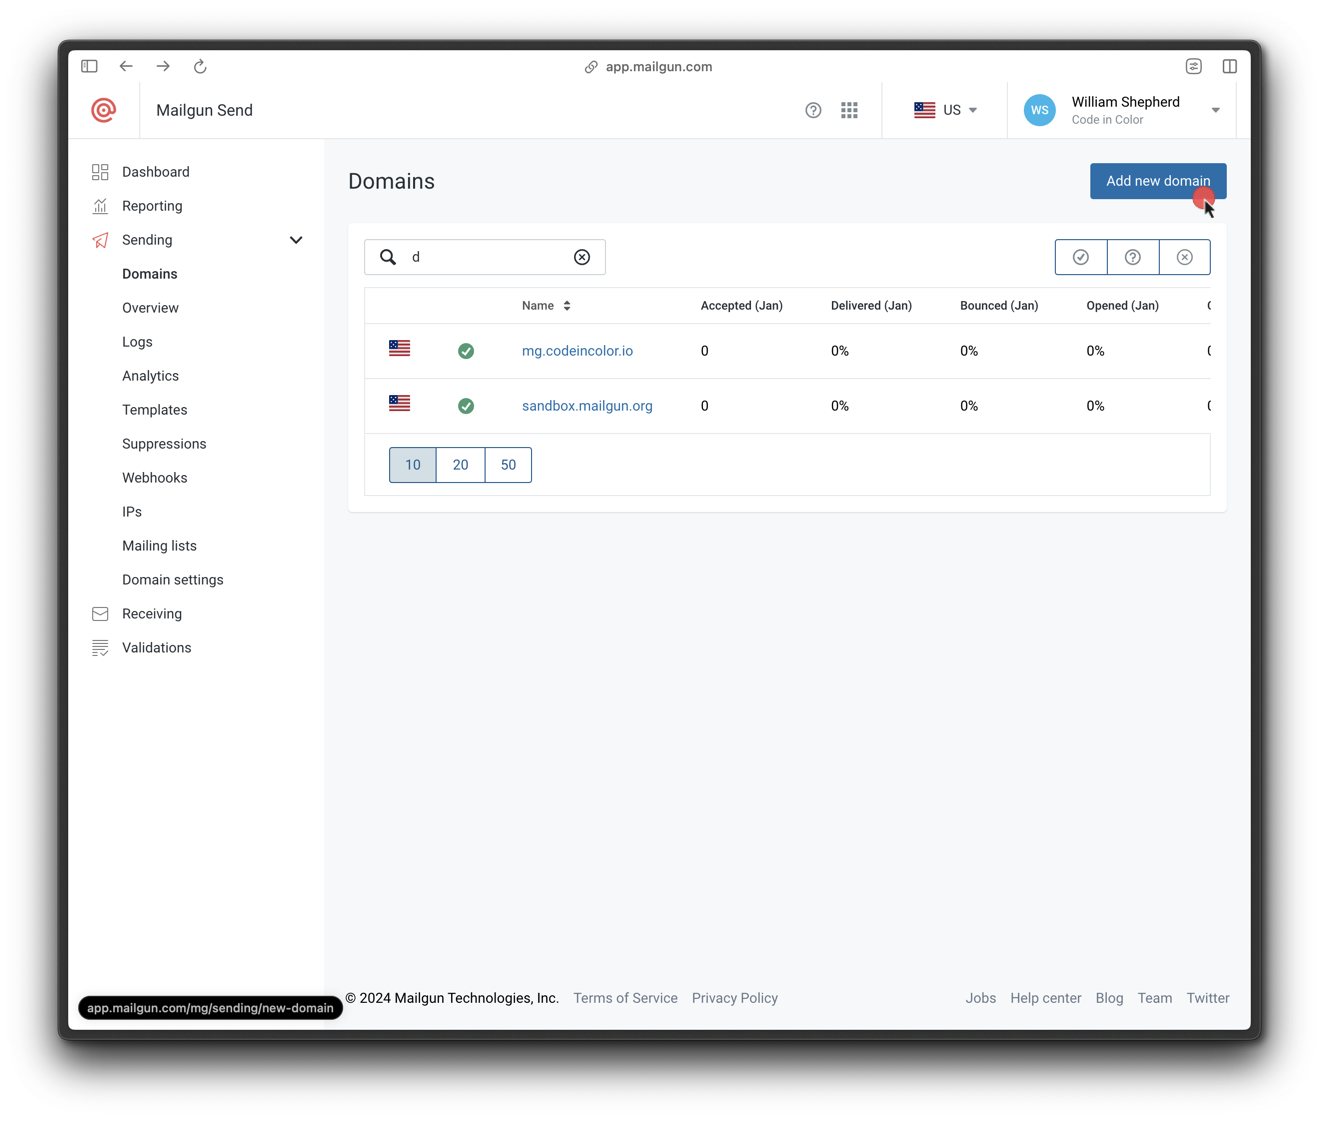
Open Add New Domain form
- Enter a subdomain (e.g.,
mail.yourdomain.com) and ensure the region is US.
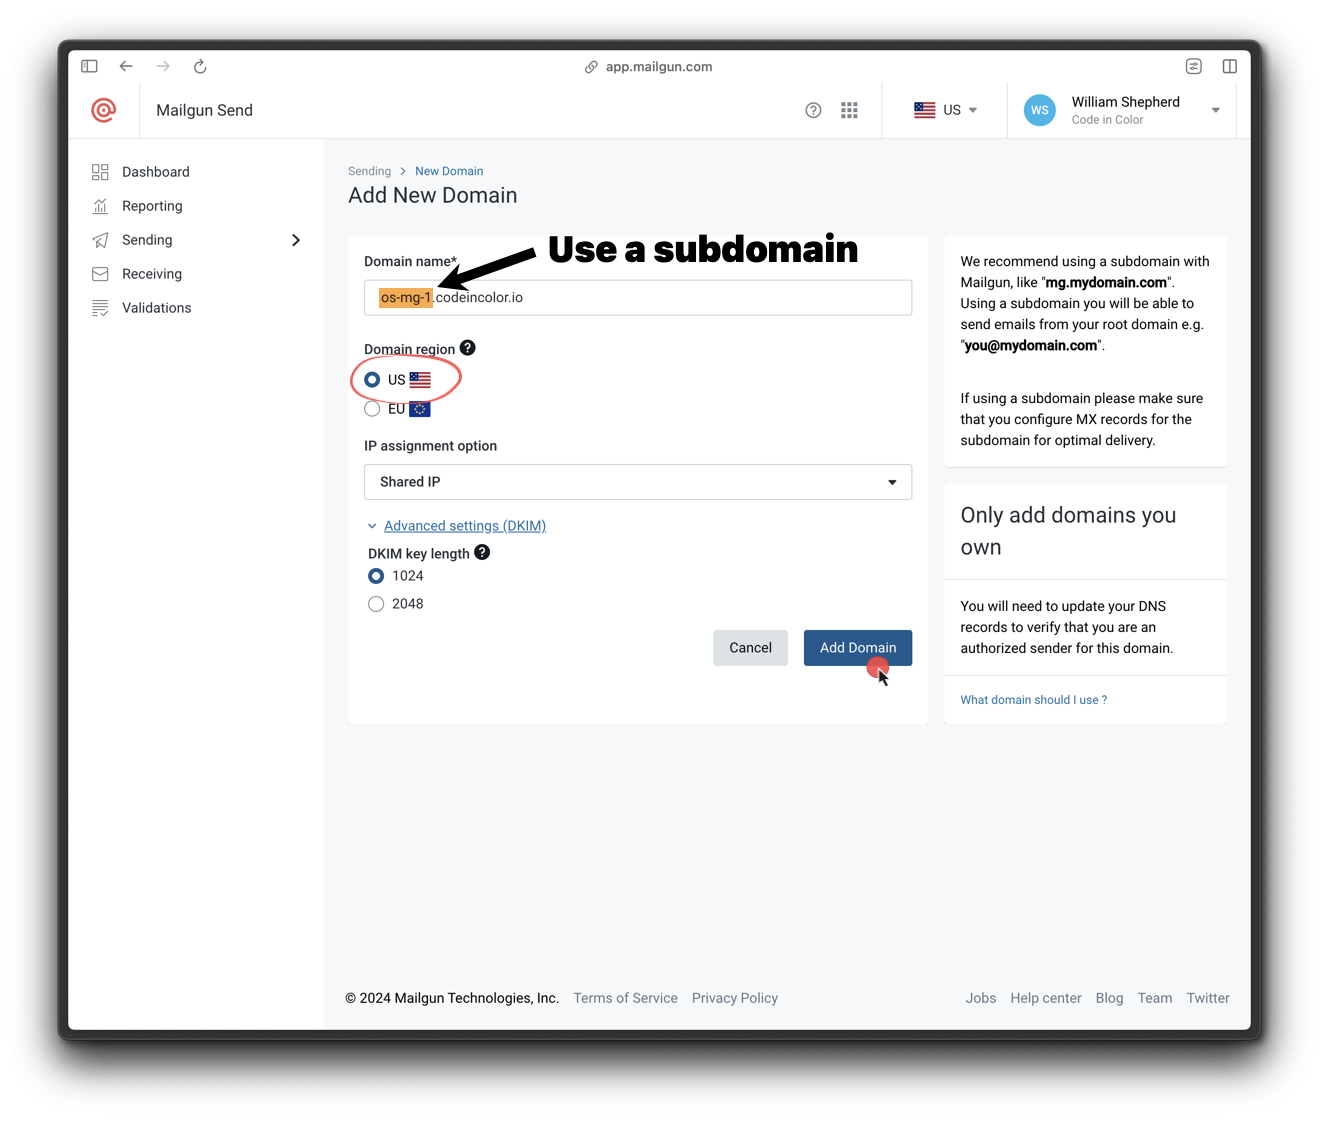
Specify subdomain and select US region
2. Verify DNS settings
Mailgun provides the following DNS records:- 2 TXT (SPF & DKIM)
- 2 MX
- 1 CNAME
- Go to Mailgun > Sending > Domain Settings > Your Domain > DNS Records
- Look for green checkmarks next to each record
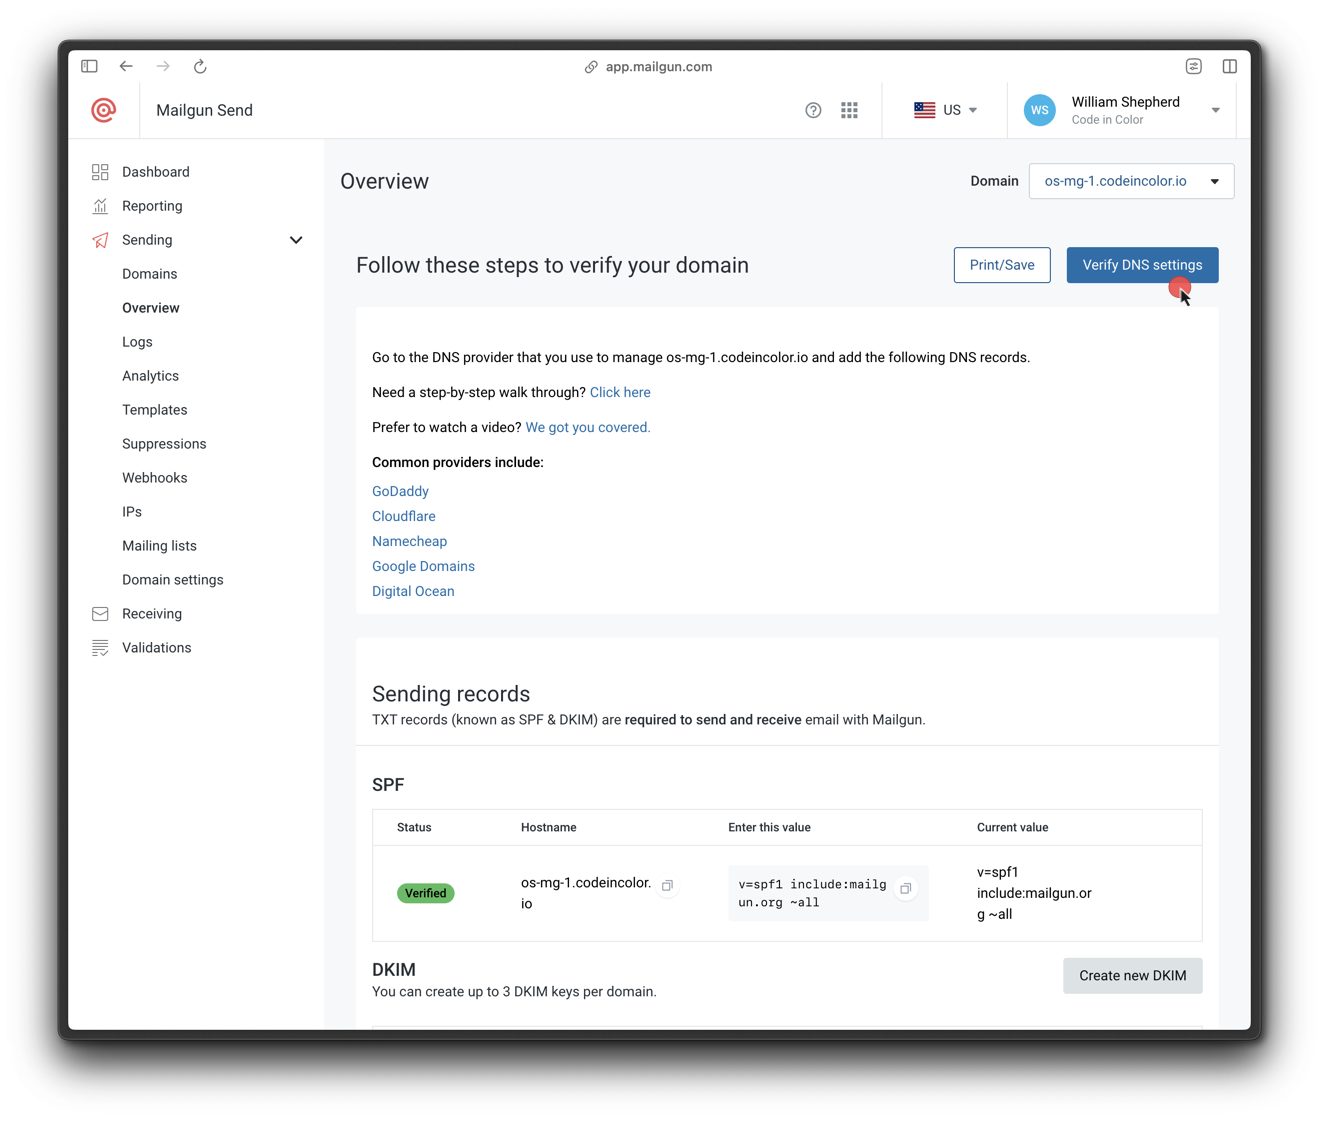
Verify DNS setup
If CNAME is not set correctly, email click, open, and unsubscribe tracking will not work.
3. Set up SMTP credentials
- Go to Sending > Domain Settings > SMTP credentials in Mailgun.
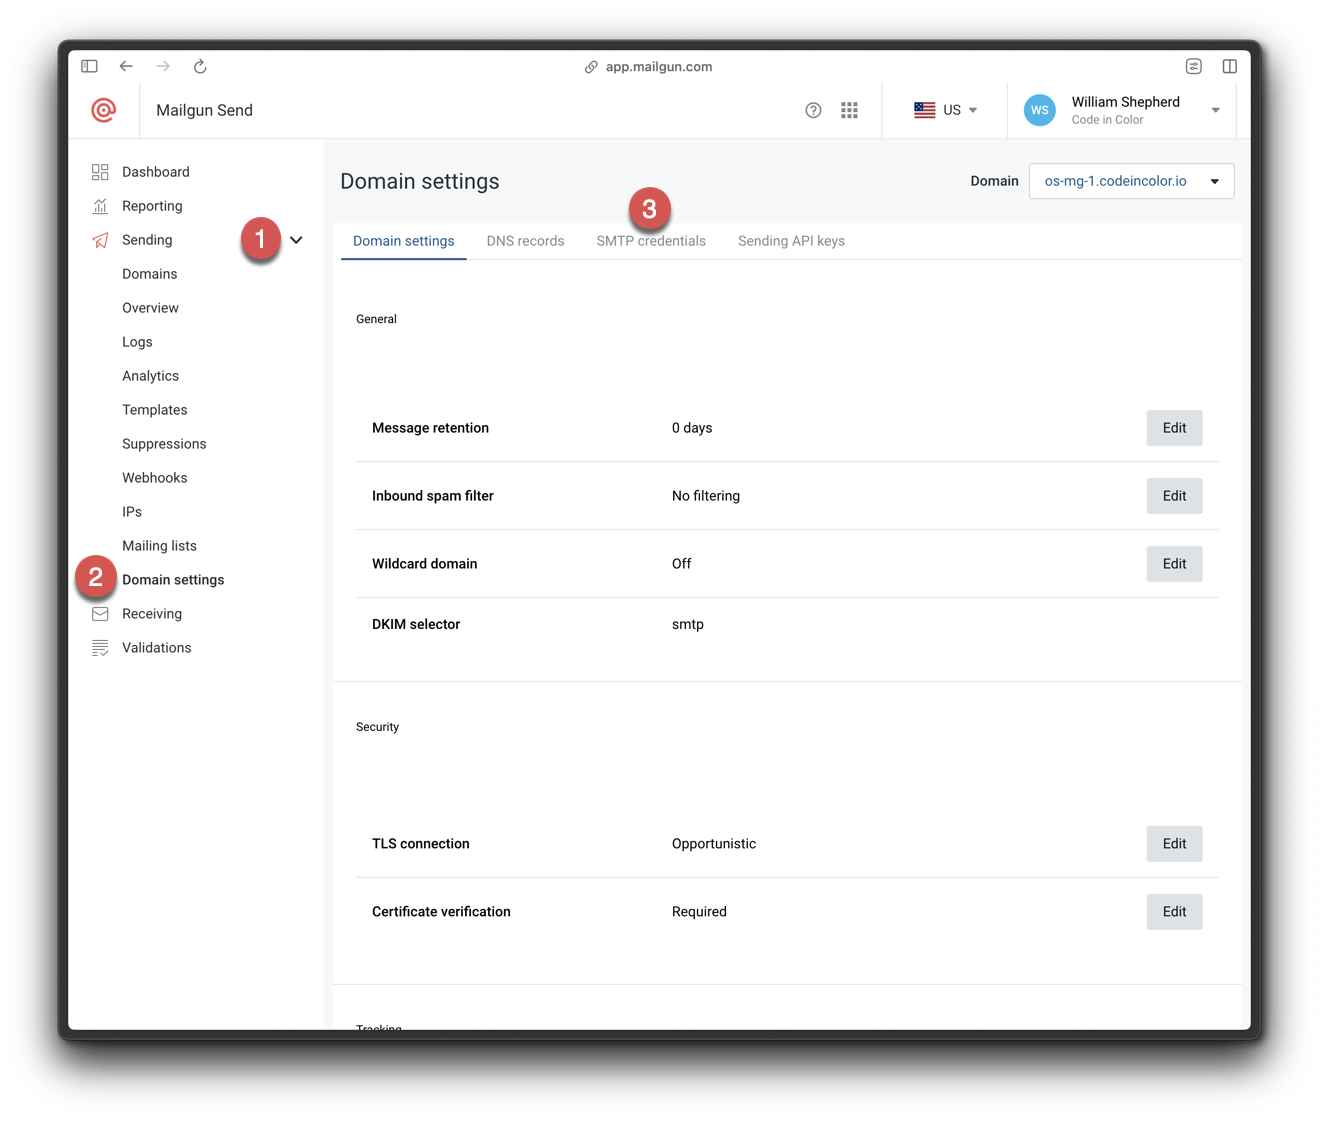
Navigate to SMTP Credentials
- Click Add new SMTP user.
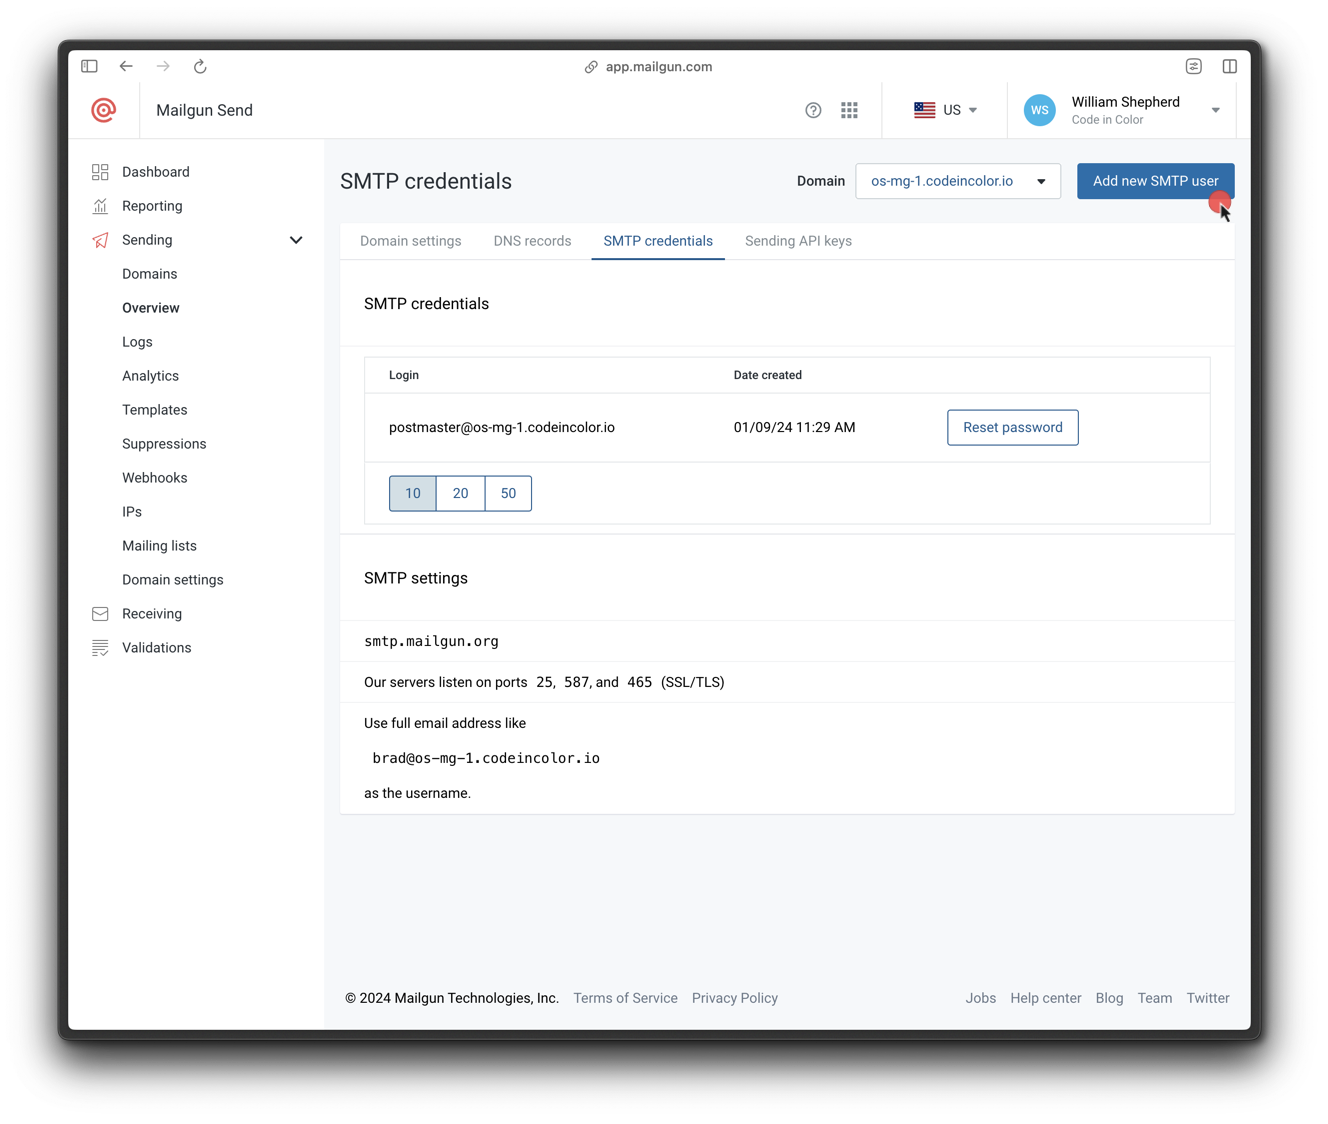
Add new SMTP credentials
- Set a login name and save the credentials.
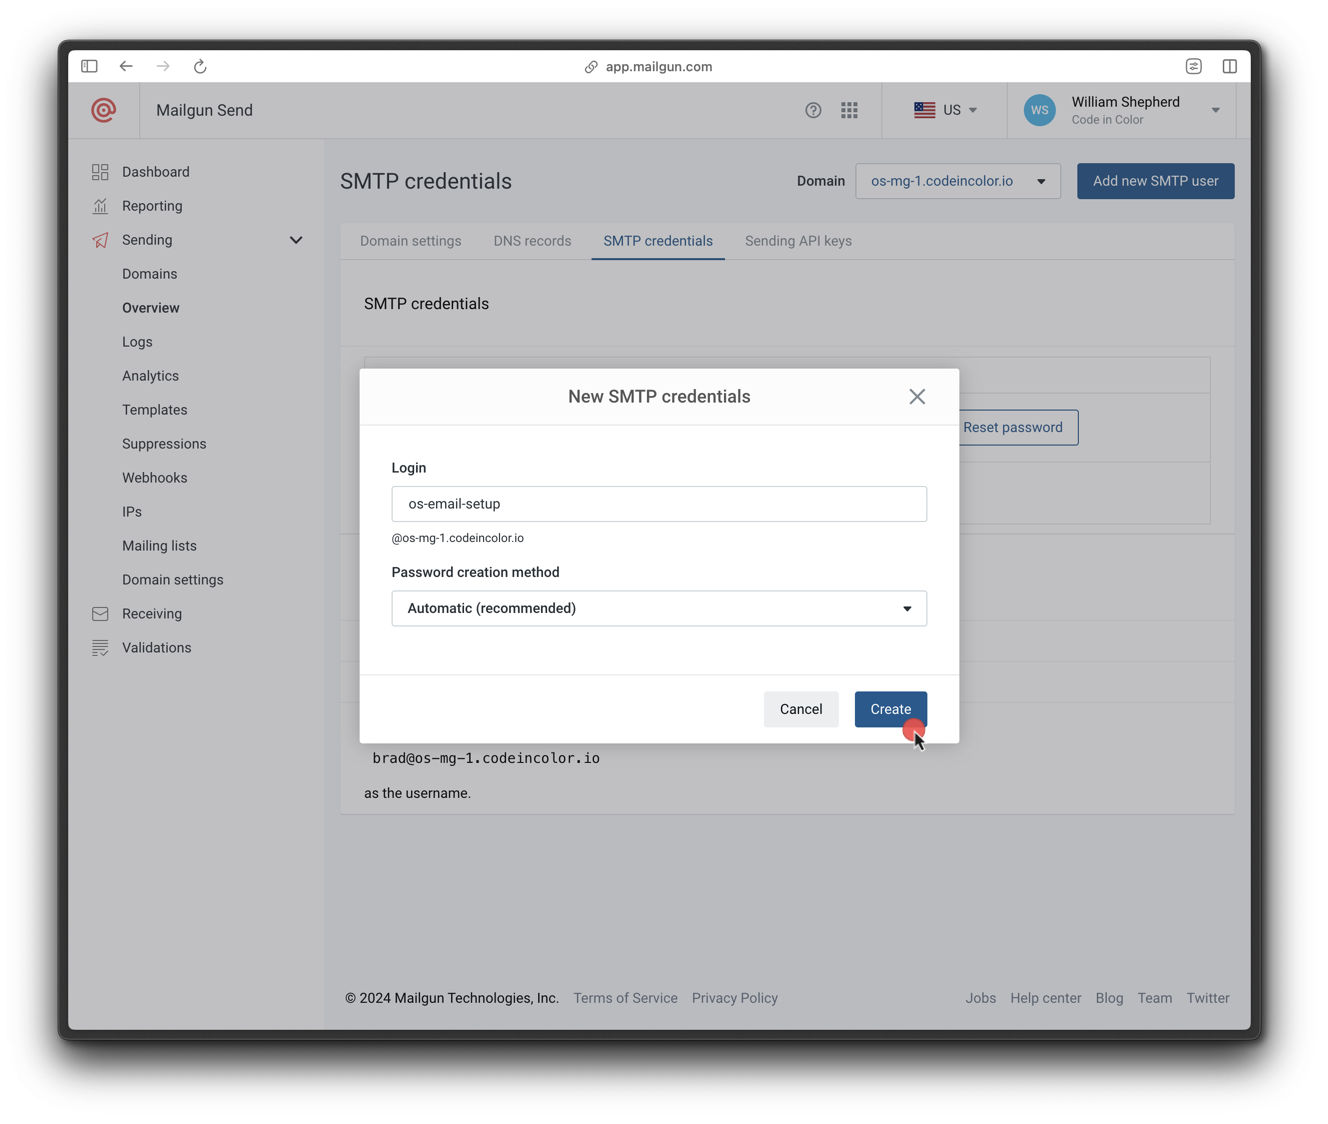
Create SMTP user
- Click the copy icon to save the password securely.
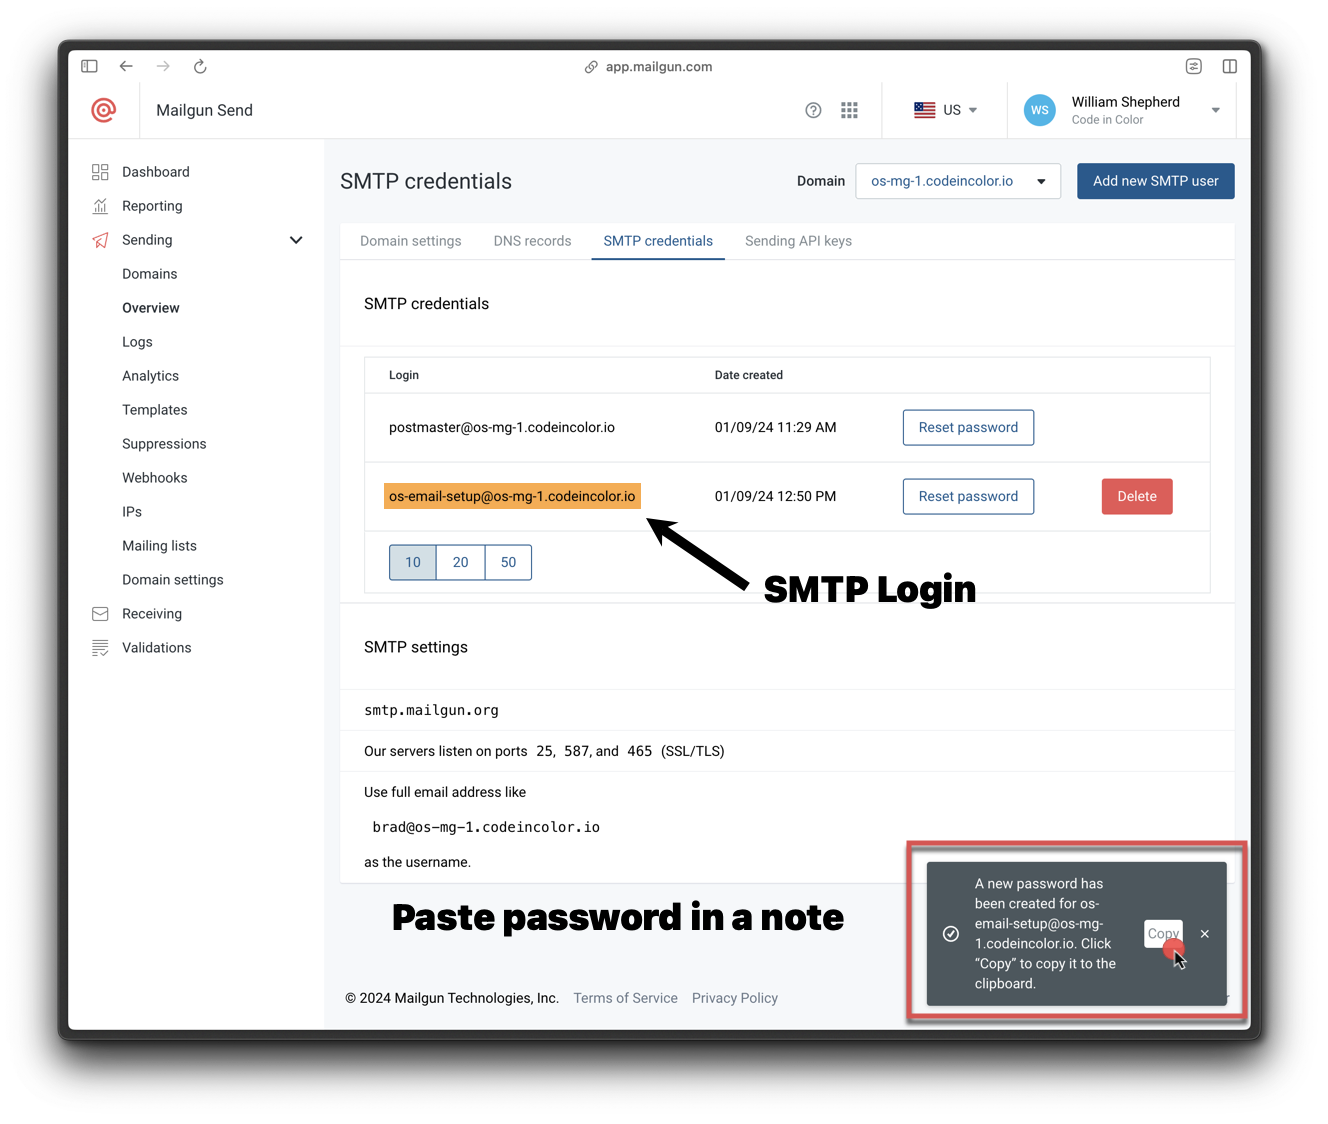
Copy SMTP password
4. Get a Mailgun API key
- In the Mailgun dashboard, scroll to the bottom and click API Keys.
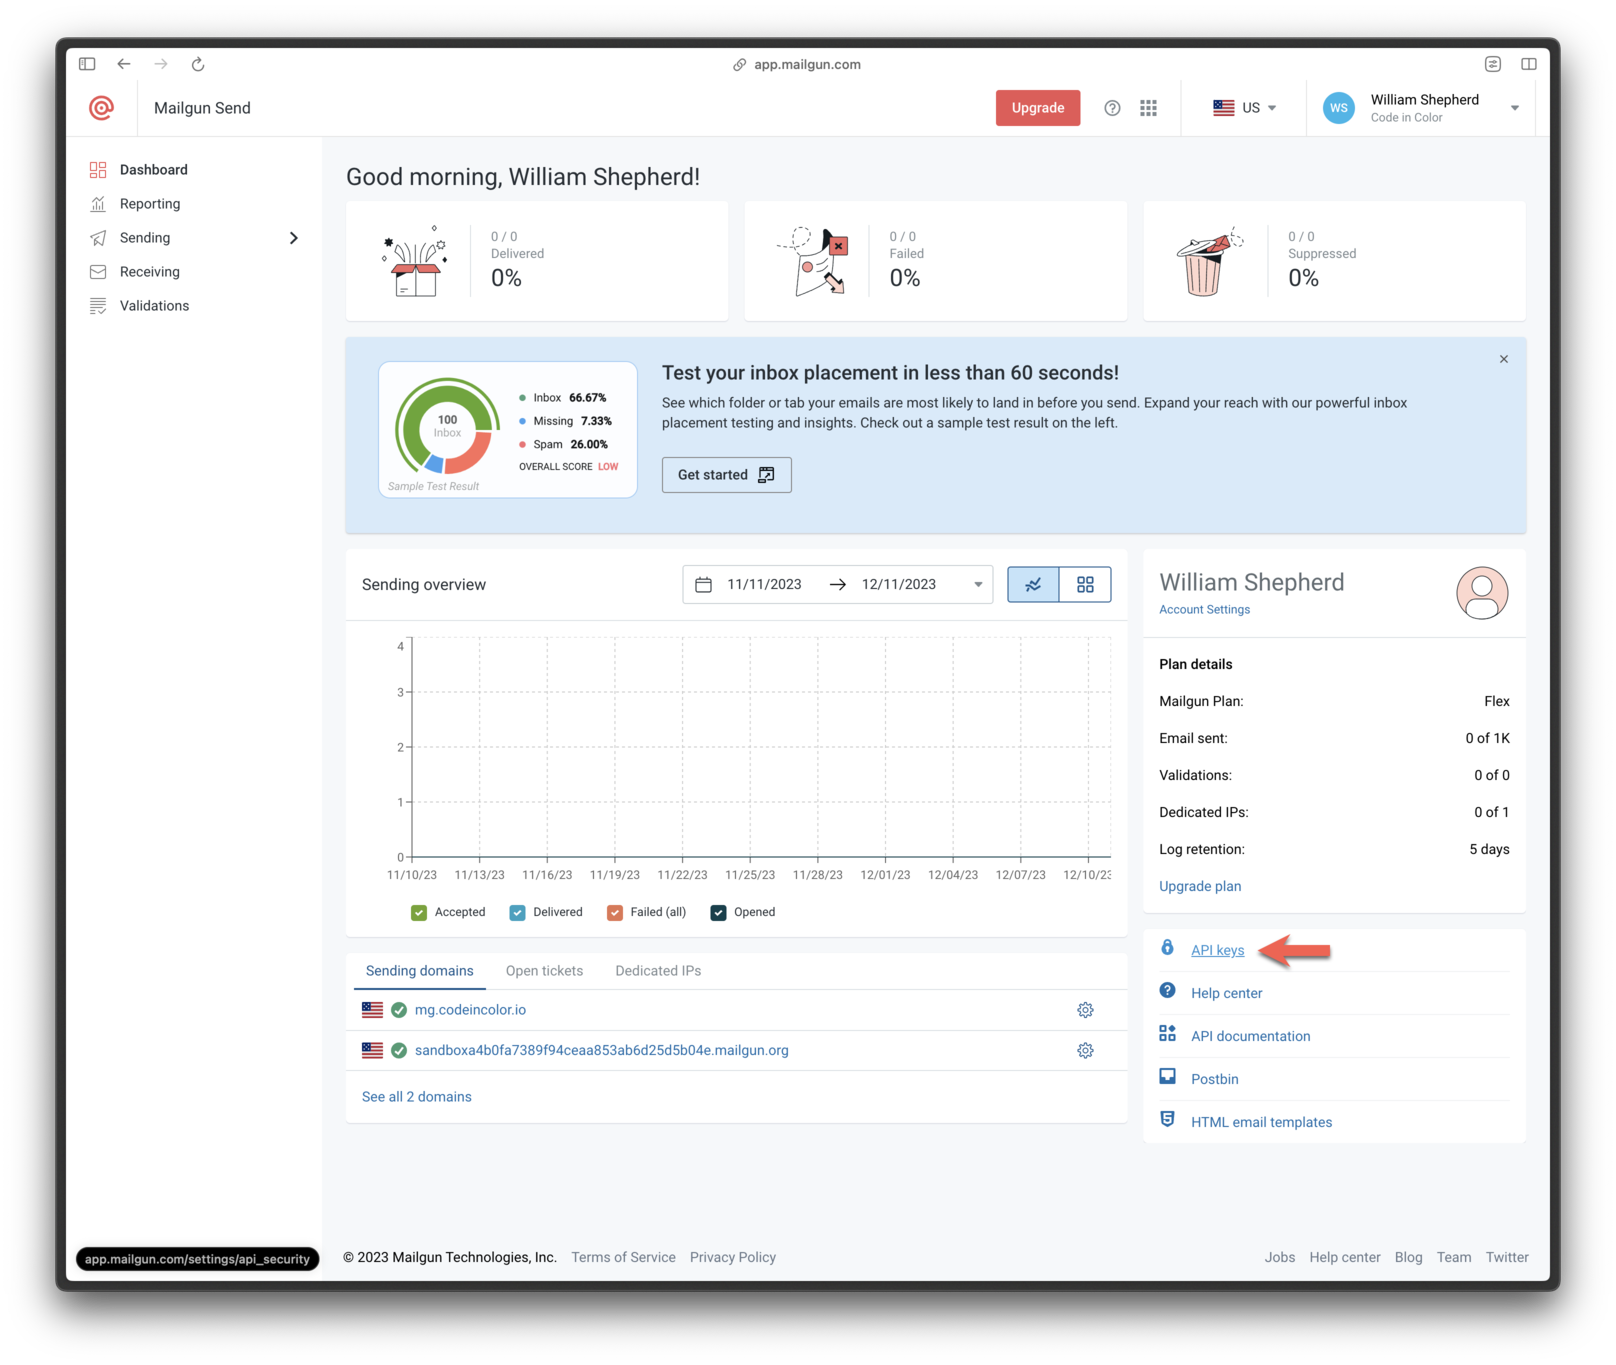
Navigate to API Keys
- Click Add new key

Add new key
- Name the key and click Create Key.
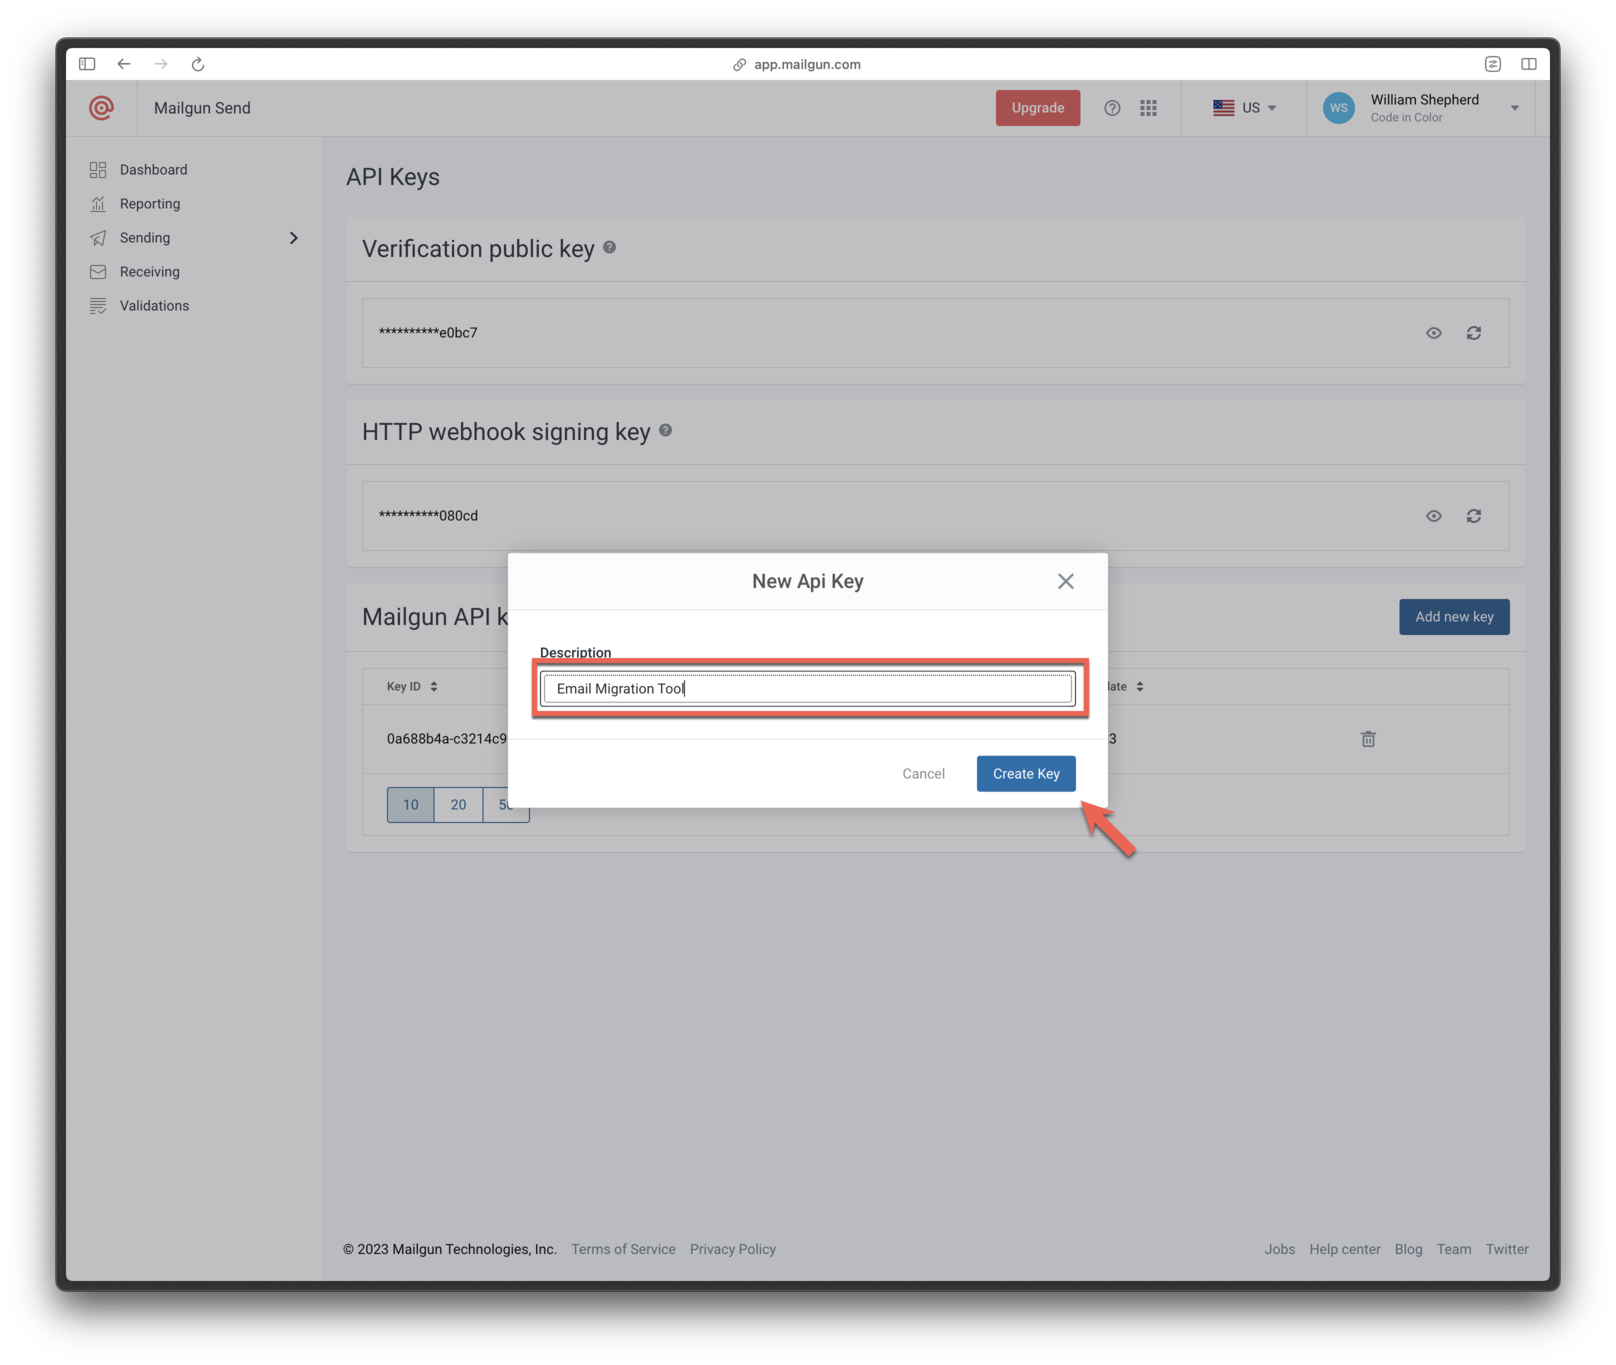
Create key
- Copy the generated API key and save it securely.
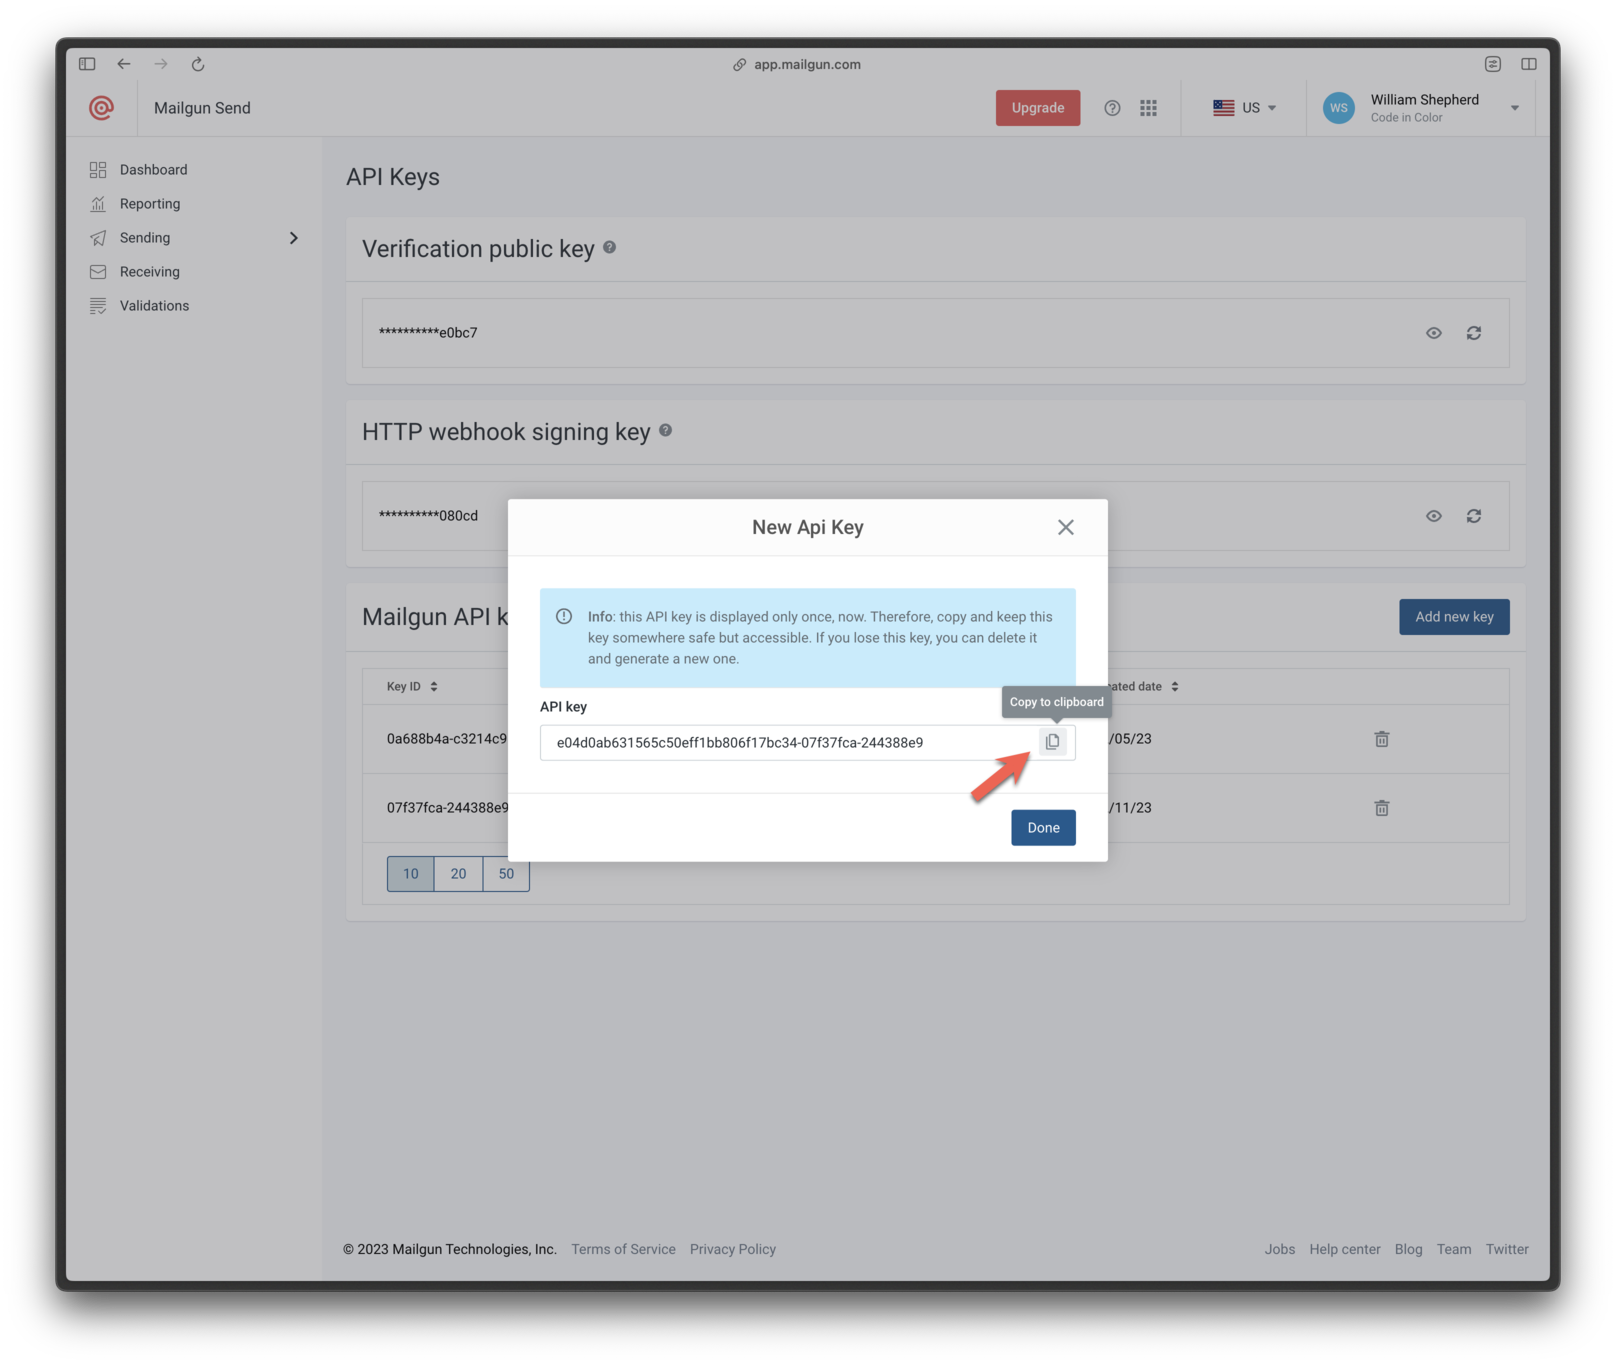
Copy API key
5. Configure Mailgun in OneSignal
- In OneSignal, go to Settings > Platforms > Email and choose Mailgun.
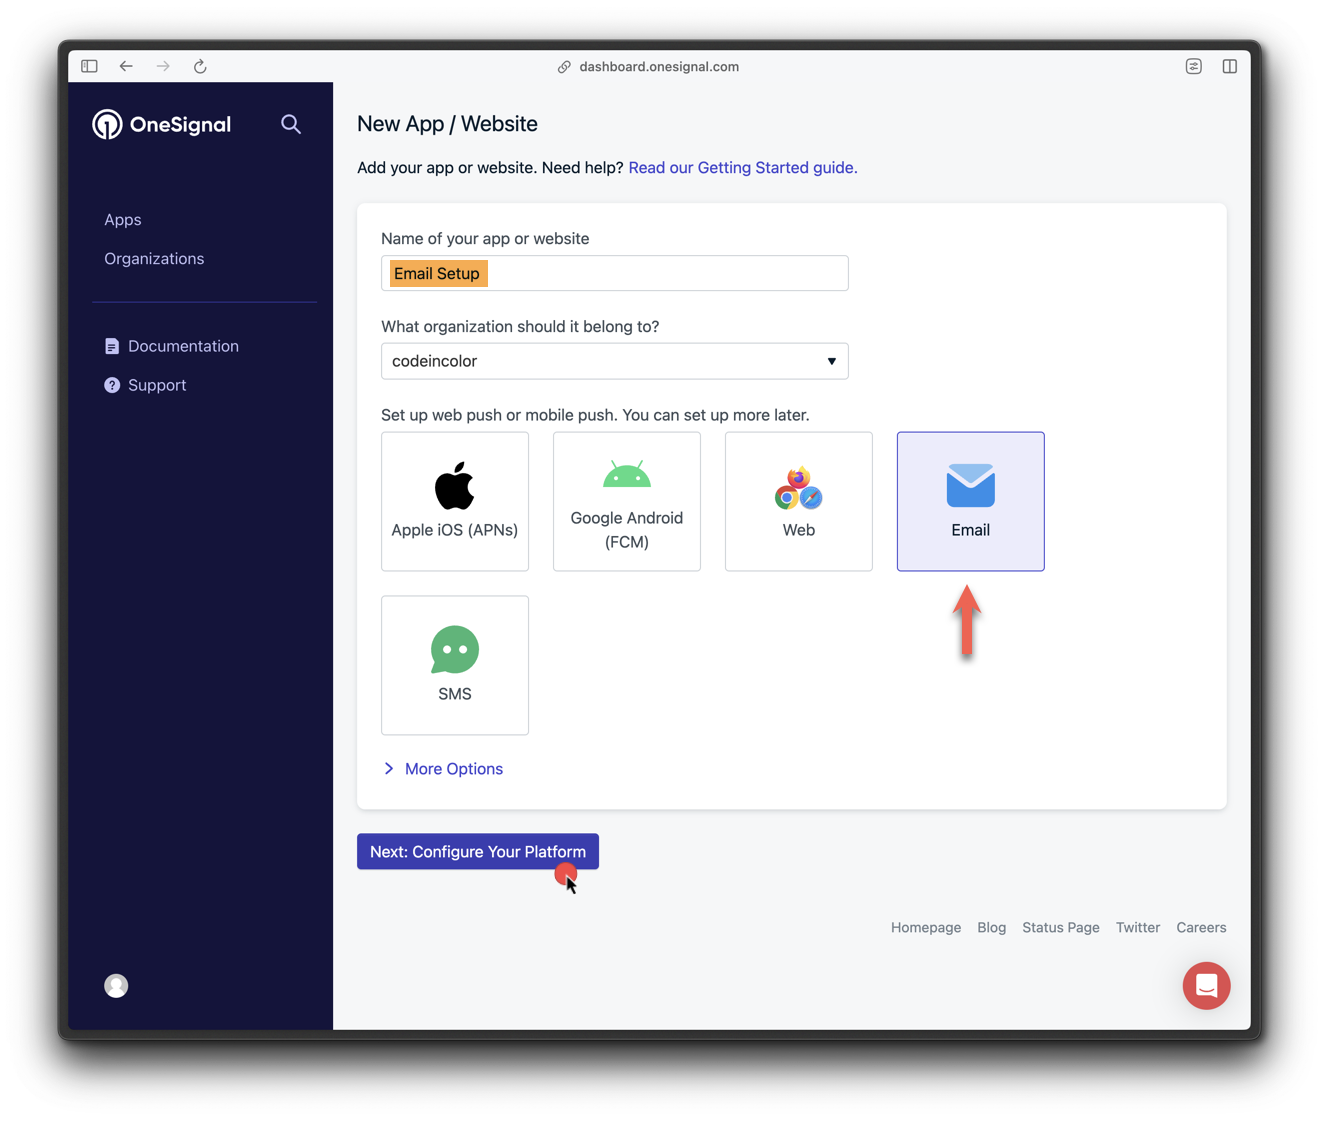
App setup email
- Select Mailgun as the provider.
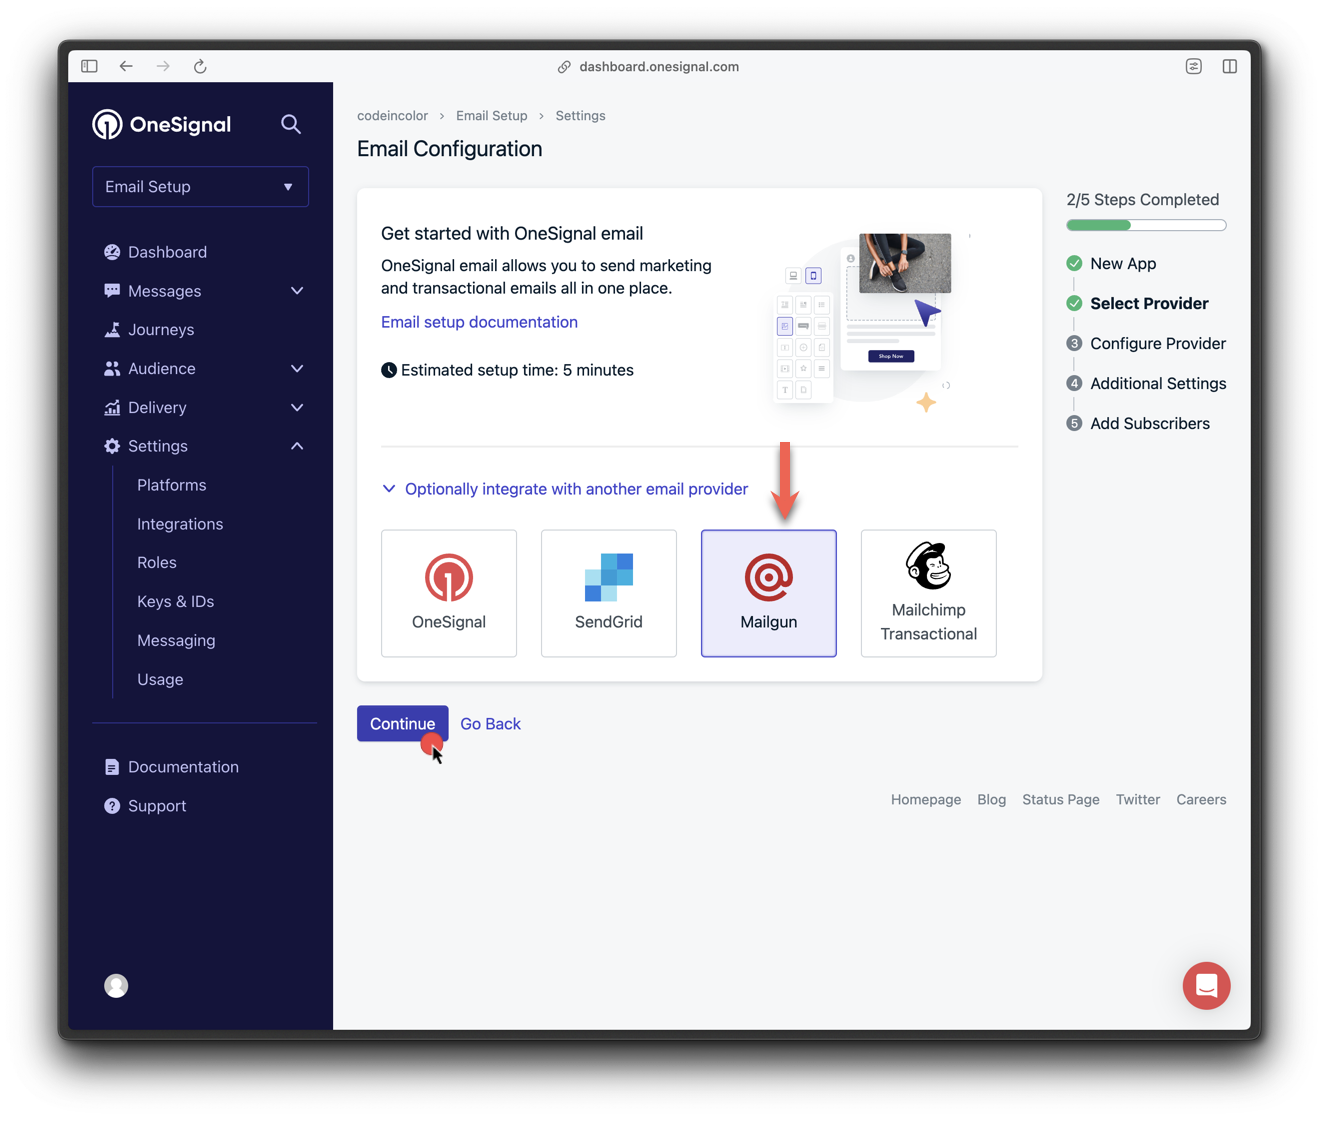
App setup email
- Enter:
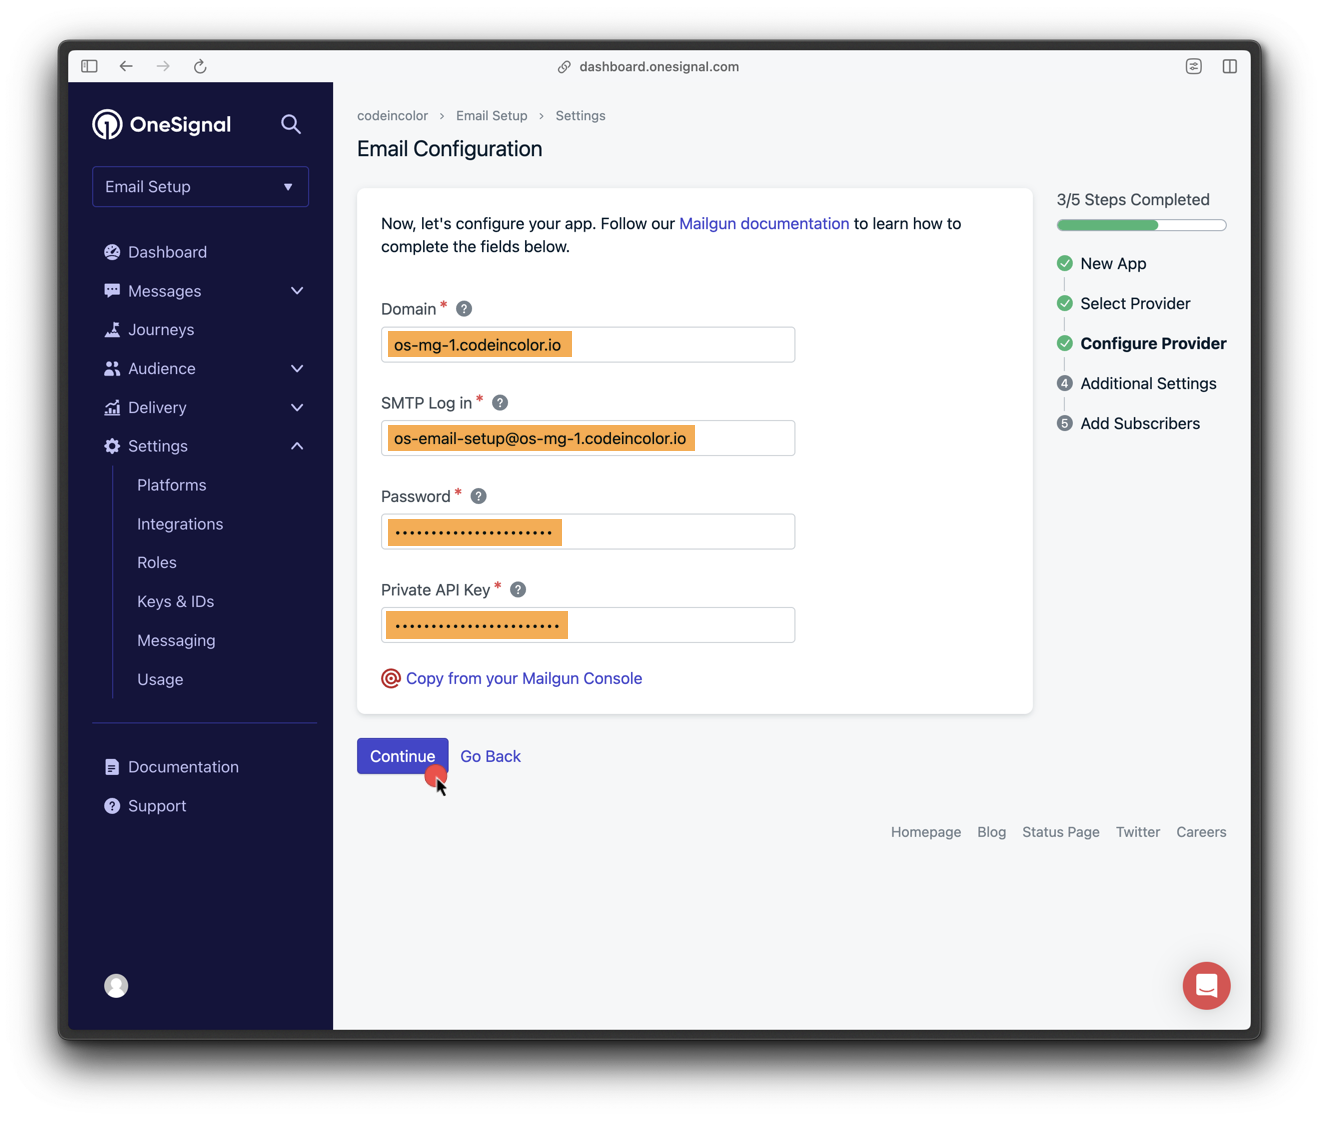
Configure provider
- Set default sender name and
fromemail address.

Configure additional settings
6. Add OneSignal webhooks to Mailgun
Navigate to Mailgun > Sending > Webhooks > Your Domain > Webhooks and add: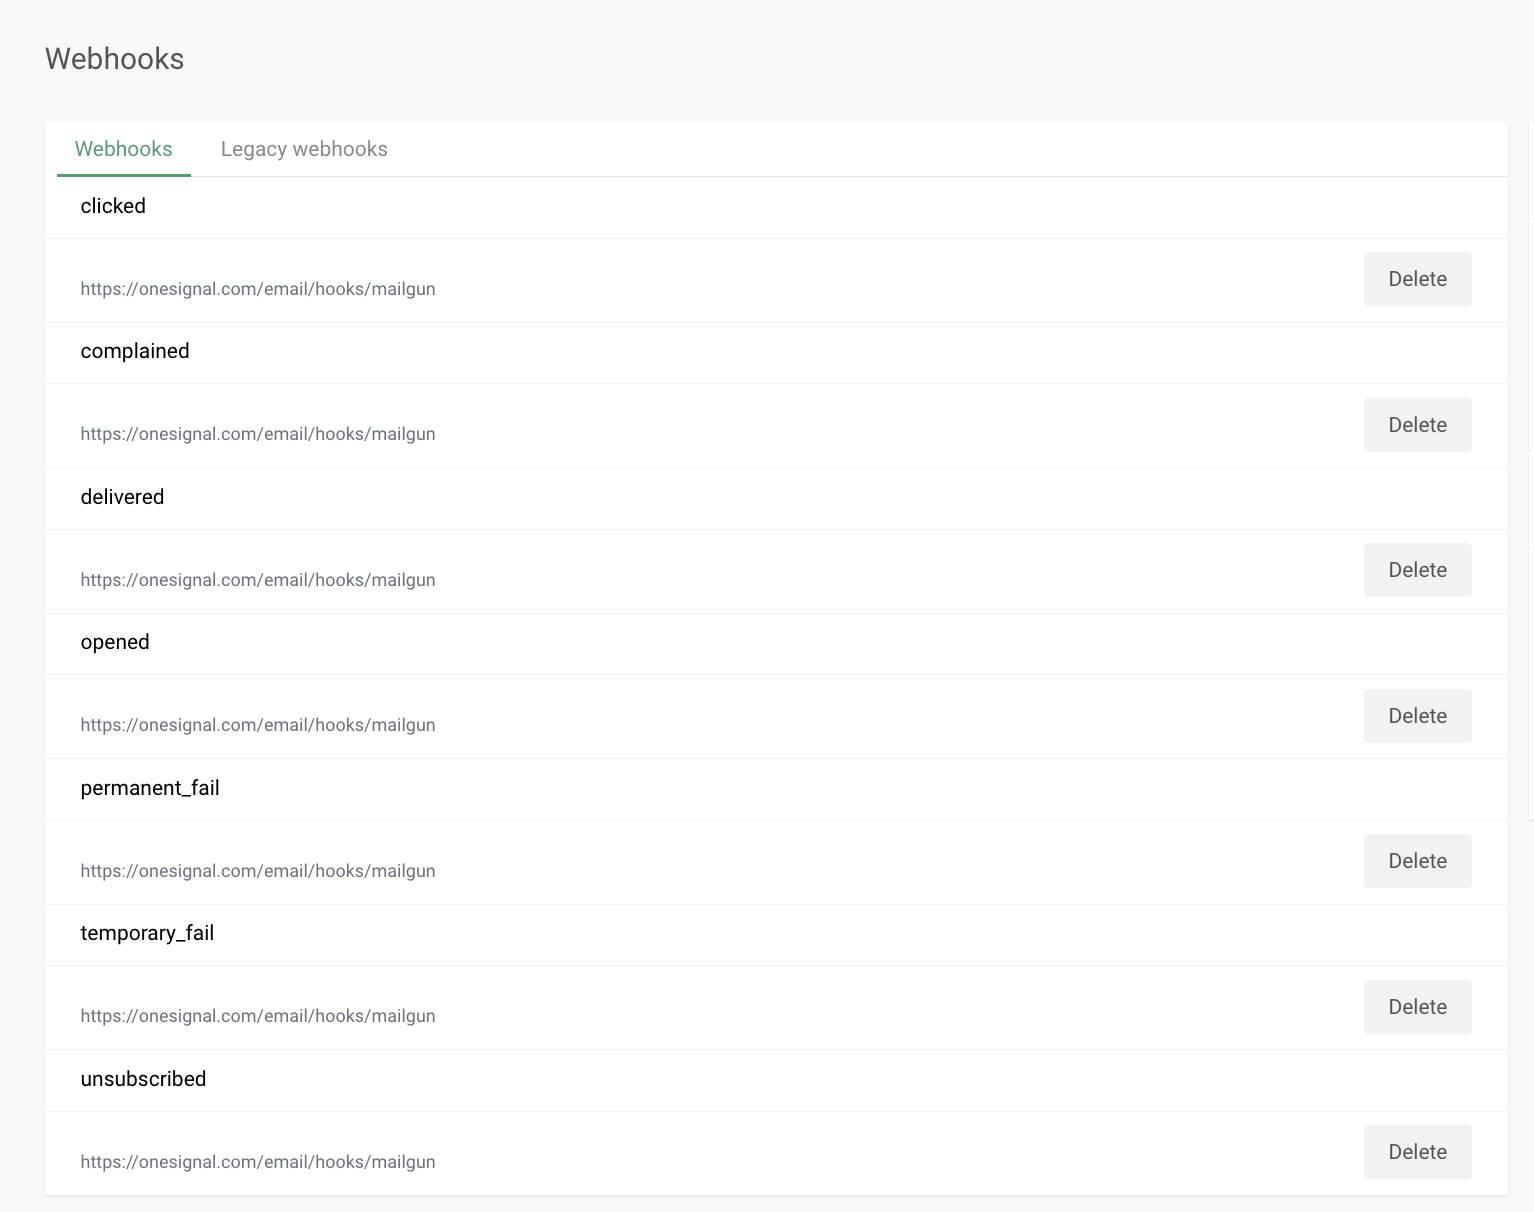
Add webhook
7. Change tracking protocol to HTTPS
Ensure recipients are directed to secure URLs.- Go to your domain settings in Mailgun.
- Under Tracking > Tracking Protocol, change from HTTP to HTTPS.
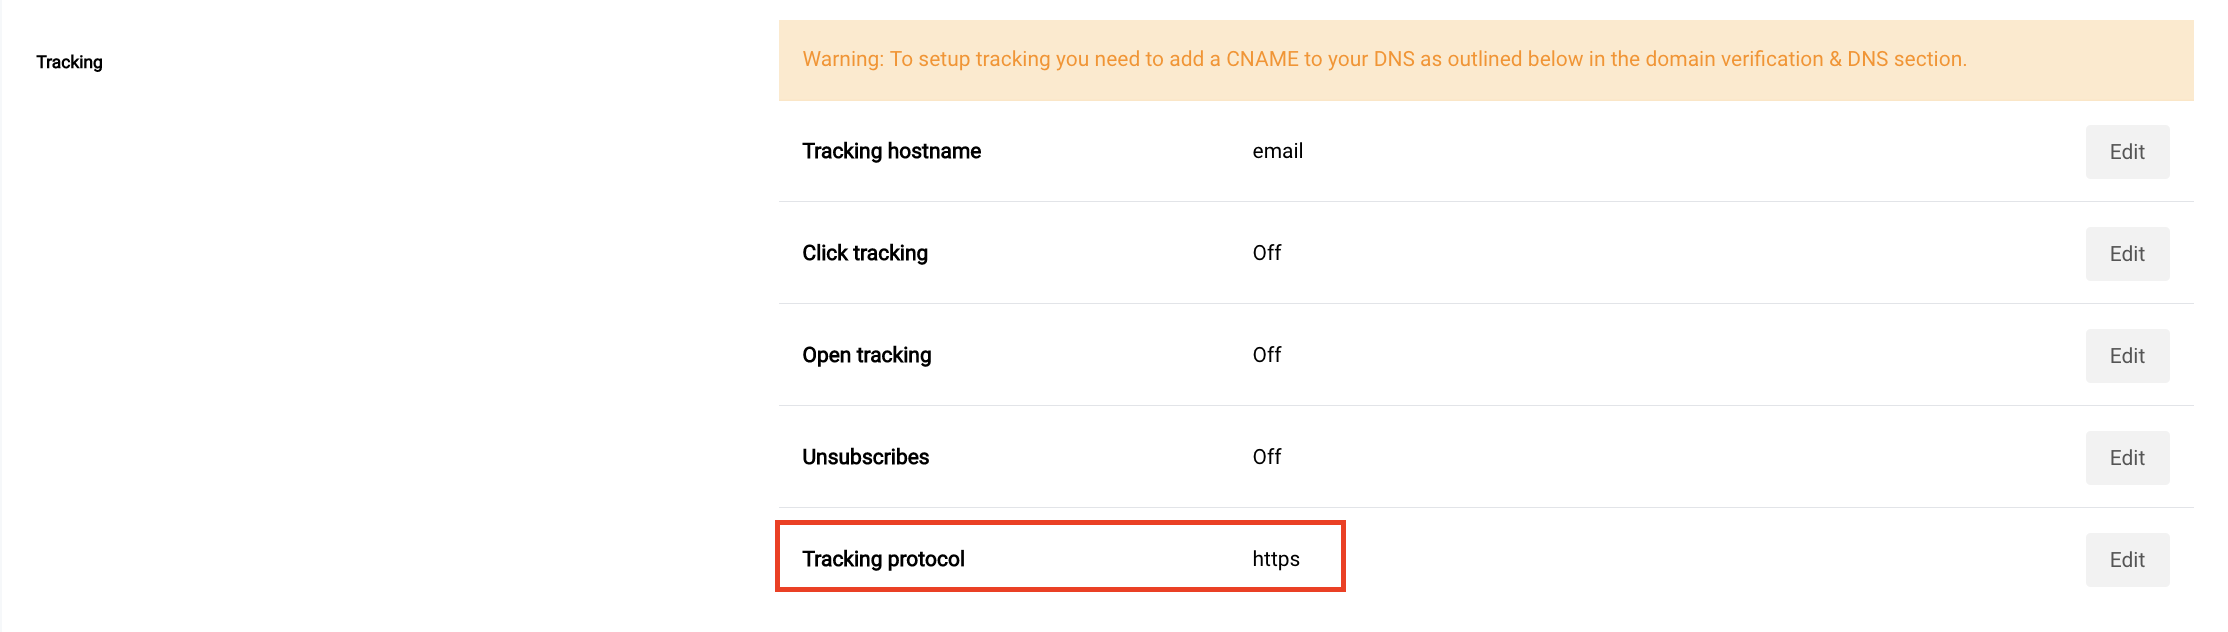
Change tracking protocol
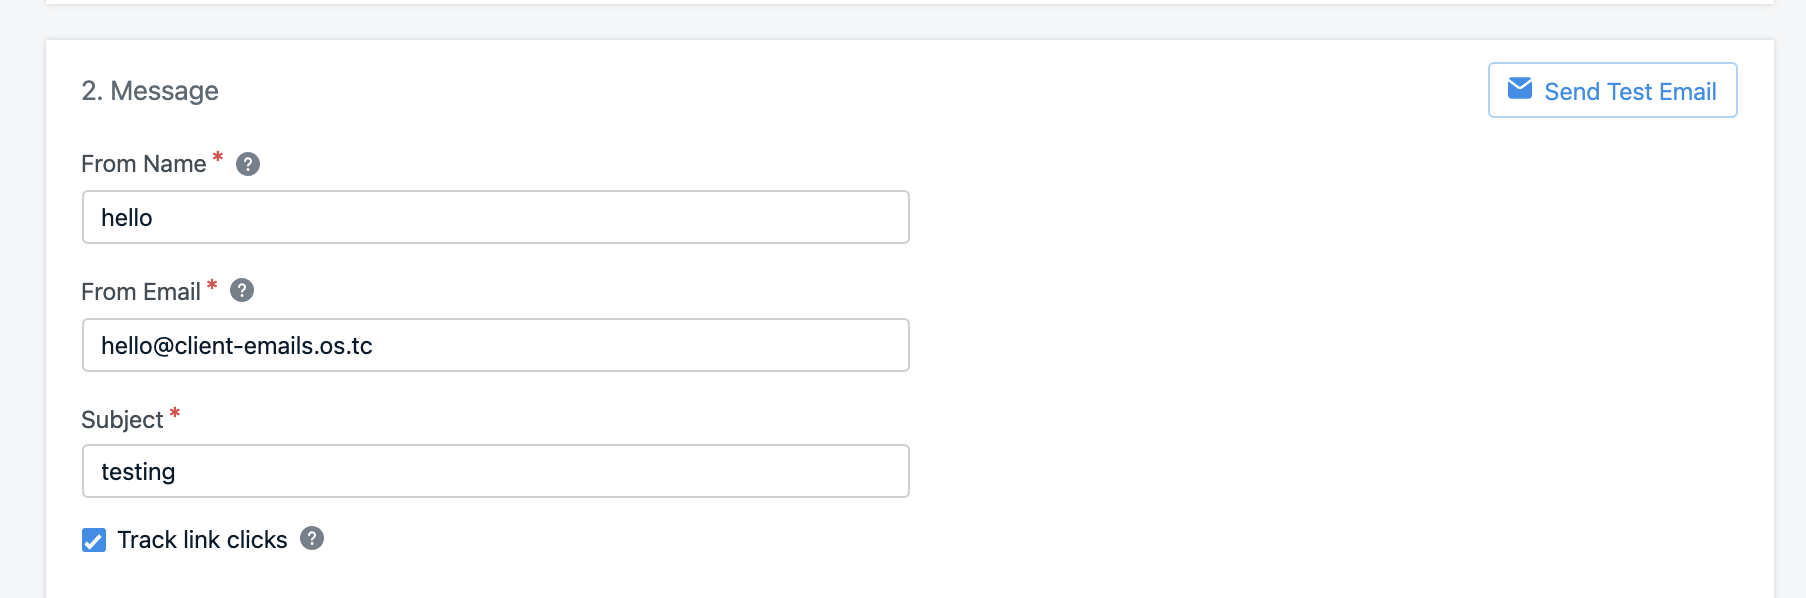
8. Send a test email
- Go to OneSignal > Messages > Email, click New Email.
- Add a subject, click Send Test Email, input your email, and hit Send Test Message.
Send test email
Troubleshooting
See our Email FAQBesoin d’aide ?Discutez avec notre équipe d’assistance ou envoyez un e-mail à
support@onesignal.comVeuillez inclure :- Les détails du problème que vous rencontrez et les étapes de reproduction si disponibles
- Votre OneSignal App ID
- L’External ID ou le Subscription ID le cas échéant
- L’URL du message que vous avez testé dans le OneSignal Dashboard le cas échéant
- Tous les journaux ou messages d’erreur pertinents
Email setup complete!
Next steps:
- Return to the Email Setup guide to explore OneSignal Email capabilities.