概要
このガイドでは、onesignal-ngxパッケージを使用してAngularアプリケーションでプッシュ通知を設定する方法を説明します。インストールから設定、サービスワーカーの管理まで、すべてをカバーしています。
要件
- 設定済みのOneSignalアプリとプラットフォーム。開始するには、Web Push Setupを参照してください。
インストール
お好みのパッケージマネージャーを使用してonesignal-ngxパッケージをインストールします:
初期化
OneSignalサービスをインポートし、ルートコンポーネントで初期化します:初期化の待機
init()が返すPromiseは2つの方法で処理できます:
初期化オプションのカスタマイズ
追加のinitパラメータを使用して初期化をカスタマイズできます。
サービスワーカーの設定
Angularの独自のサービスワーカー(PWAセットアップで使用)との競合を避けるため、OneSignalサービスワーカーに固有のスコープとパスを指定します。 まだ行っていない場合は、OneSignalサービスワーカーファイルをダウンロードしてサイトに追加する必要があります。OneSignalSDKWorker.jsファイルは公開アクセス可能である必要があります。publicディレクトリ、トップレベルのルート、またはサブディレクトリに配置できます。ただし、サブディレクトリに配置する場合や、サイトに別のサービスワーカーがある場合は、必ずパスを指定してください。詳細については、OneSignal Service Workerを参照してください。
ワーカーのホスティング
- パブリックルート(デフォルト):
/OneSignalSDKWorker.js - カスタムフォルダ(推奨):例:前のステップで設定した
/onesignal/OneSignalSDKWorker.js
サービスワーカーのホスティングを確認する
ブラウザでパスにアクセスして、アクセス可能であることを確認します。 ルートを使用した場合:Angular CLIユーザーにとって重要
ファイルが提供されていない場合は、angular.jsonのassets配列にリストされていることを確認してください:
重要な注意事項
- 開発環境での重複初期化を避ける
- 開発環境でテストする際、OneSignal SDKが2回初期化され、コンソールエラーが発生することがあります。
- これは、
<React.StrictMode>により、開発環境でエフェクトが2回実行されるために発生します。解決するには、開発中にルートコンポーネントから<React.StrictMode>を削除してください。
Testing the OneSignal SDK integration
This guide helps you verify that your OneSignal SDK integration is working correctly by testing push notifications and subscription registration.Check web push subscriptions
Launch your site on a test device.
- Use Chrome, Firefox, Edge, or Safari while testing.
- Do not use Incognito or private browsing mode. Users cannot subscribe to push notifications in these modes.
- The prompts should appear based on your permission prompts configuration.
- Click Allow on the native prompt to subscribe to push notifications.
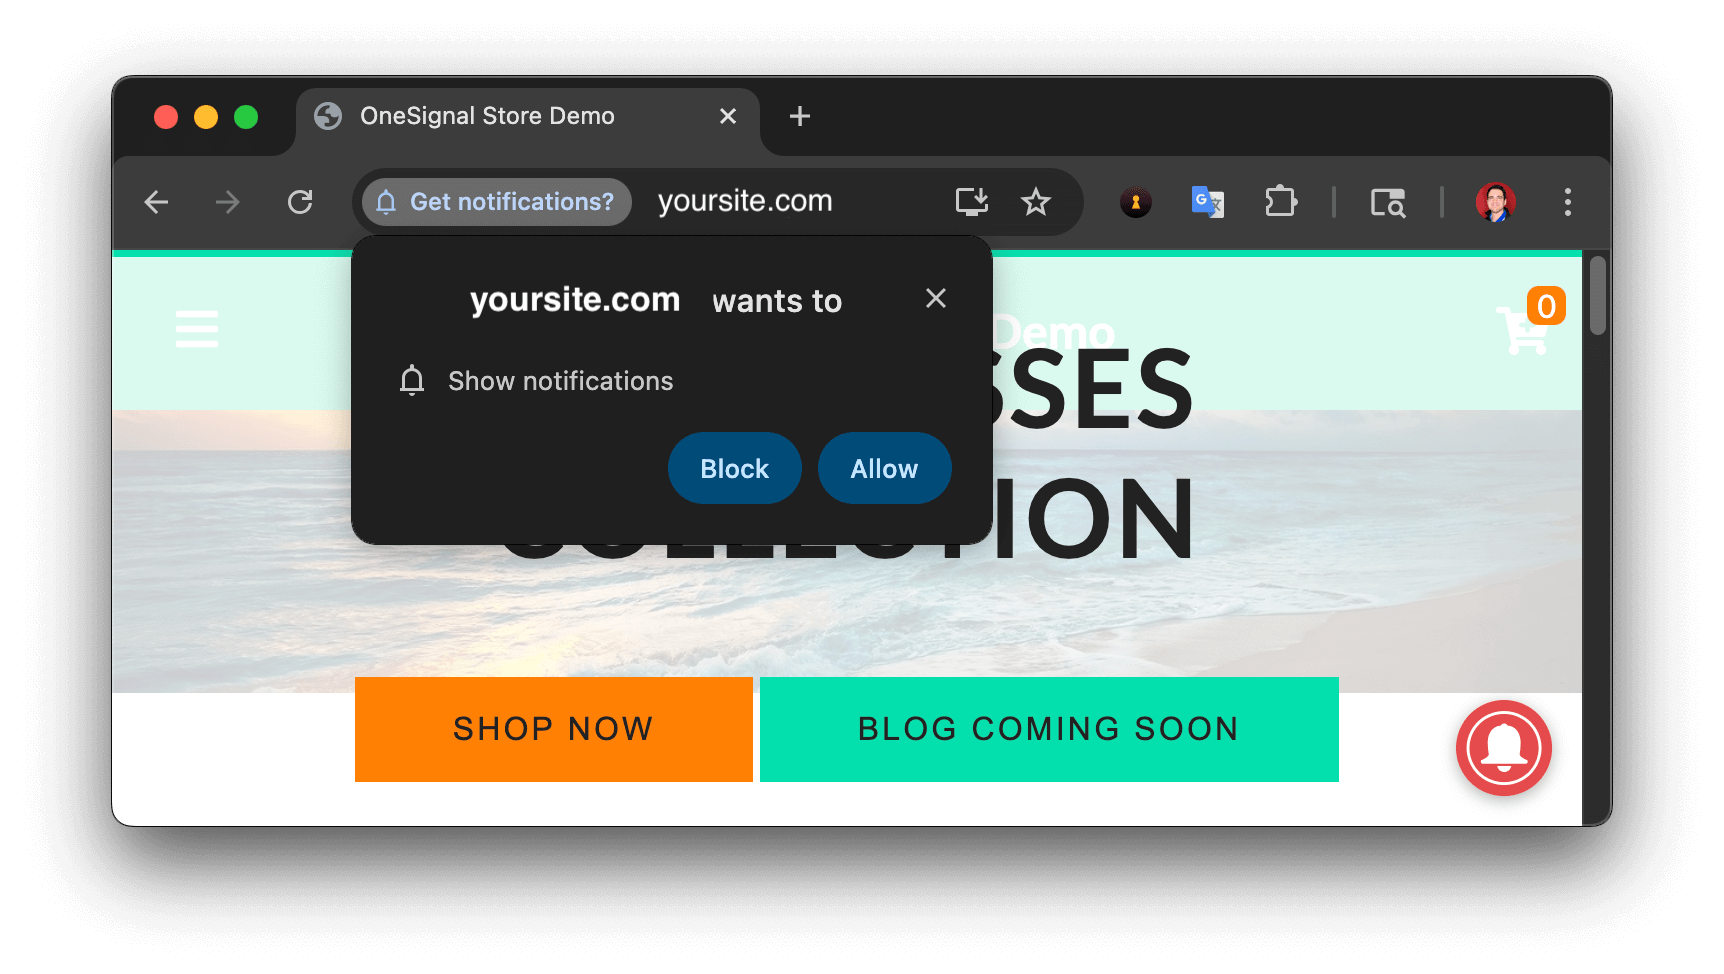
Web push native permission prompt
Check your OneSignal dashboard
- Go to Audience > Subscriptions.
- You should see a new entry with the status Subscribed.
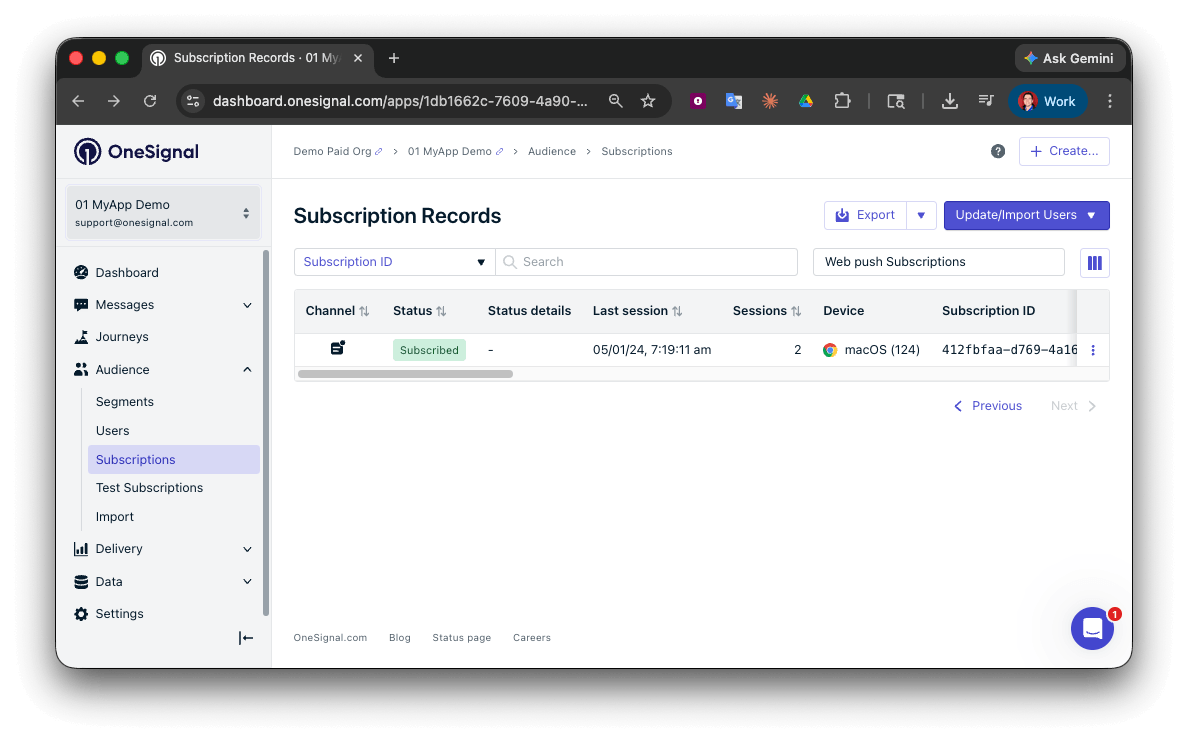
Dashboard showing subscription with 'Subscribed' status
Set up test users
test users are helpful for testing a push notification before sending a message.Add to Test Users.

Adding a device to Test Users
Name your subscription.
Create a test users segment.
Name the segment.
Test Users (the name is important because it will be used later).Add the Test Users filter and click Create Segment.

Creating a 'Test Users' segment with the Test Users filter
Send test push via API
Get your App API Key and App ID.
Update the provided code.
YOUR_APP_API_KEY and YOUR_APP_ID in the code below with your actual keys. This code uses the Test Users segment created earlier.Run the code.
Check images and confirmed receipt.
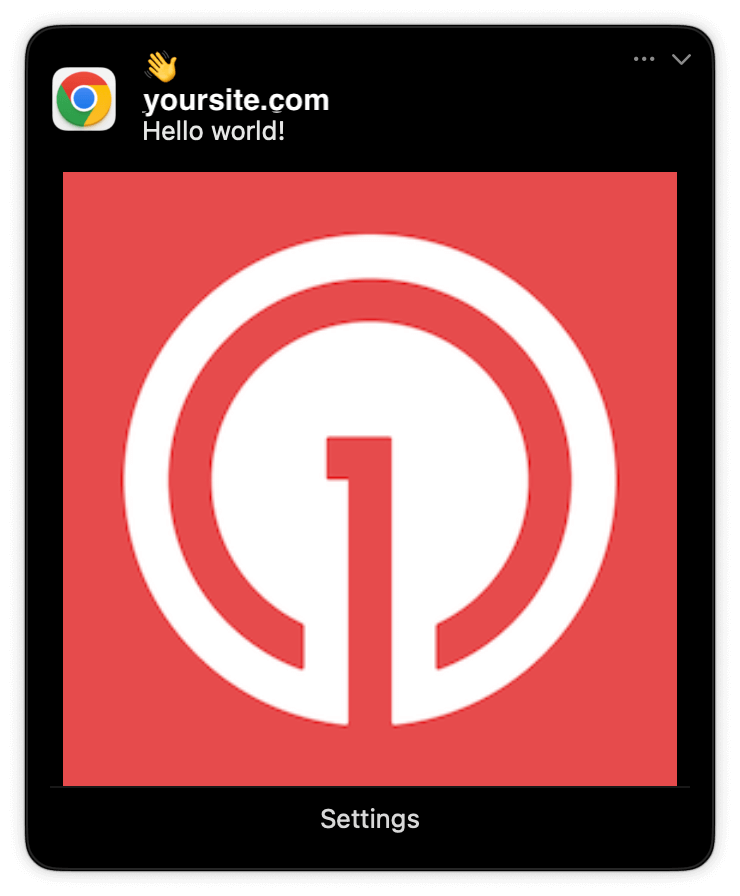
Expanded push notification with image on Chrome macOS
Check for confirmed receipt.
Push notification message reports
support@onesignal.com with the following:
- The API request and response (copy-paste into a
.txtfile) - Your Subscription ID
- Your website URL with the OneSignal code
User identification
The previous section covered creating web push Subscriptions. This section expands to identifying Users across all their subscriptions (including push, email, and SMS) using the OneSignal SDK. It covers External IDs, tags, multi-channel subscriptions, privacy, and event tracking to help you unify and engage users across platforms.Assign External ID
Use an External ID to identify users consistently across devices, email addresses, and phone numbers using your backend’s user identifier. This ensures your messaging stays unified across channels and 3rd party systems (especially important for Integrations). Set the External ID with the SDK’slogin method each time a user is identified by your app.
Add Tags
Tags are key-value pairs of string data you can use to store user properties (likeusername, role, or preferences) and events (like purchase_date, game_level, or user interactions). Tags power advanced Message Personalization and Segmentation allowing for more advanced use cases.
Set tags with the SDK’s addTag and addTags methods as events occur in your app.
In this example, the user reached level 6 identifiable by the tag called current_level set to a value of 6.
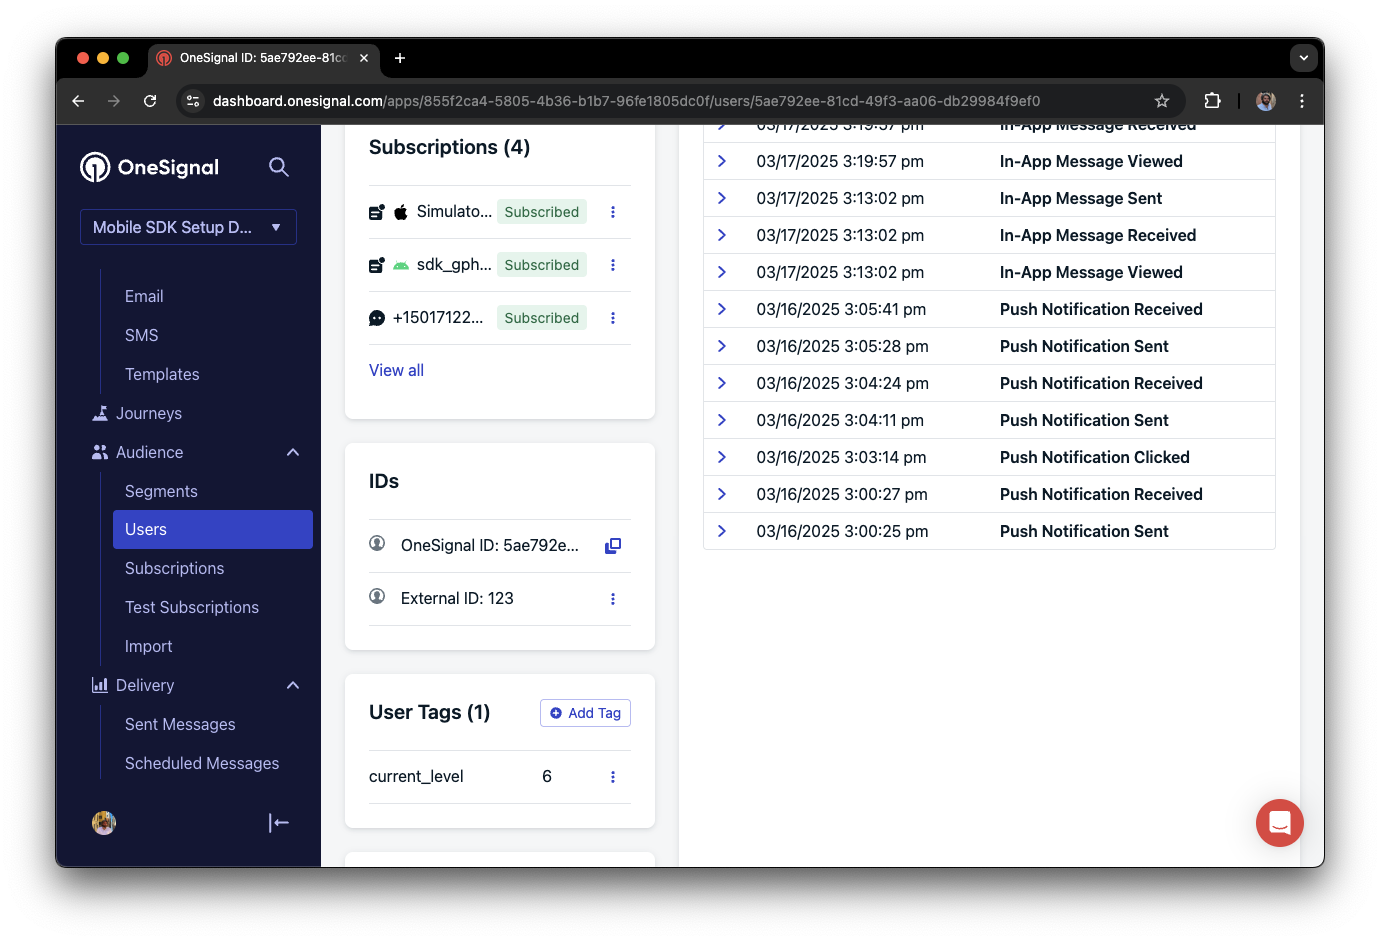
A user profile in OneSignal with a tag called "current_level" set to "6"
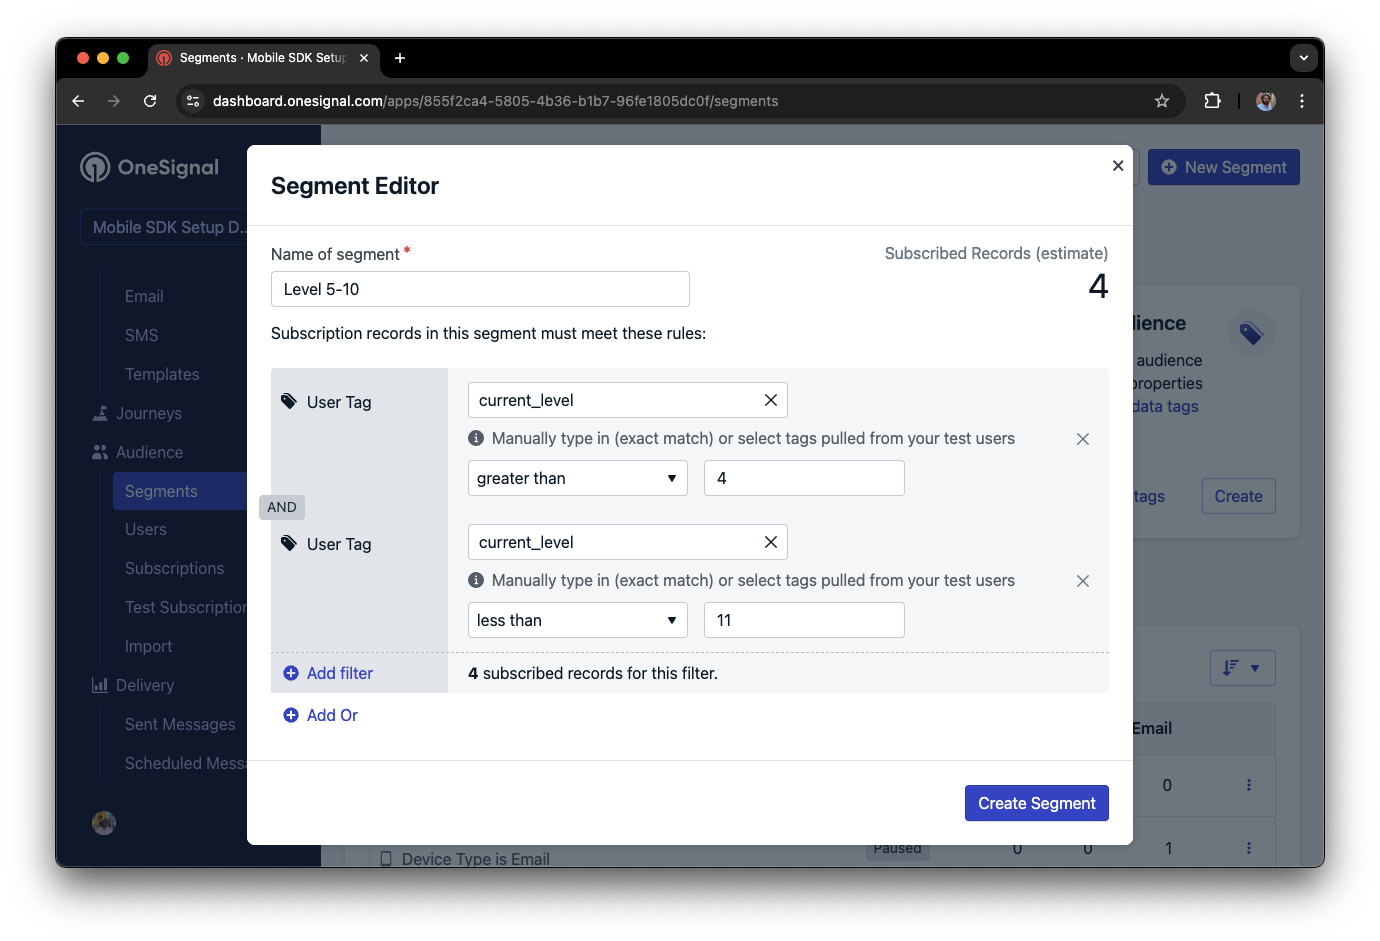
Segment editor showing a segment targeting users with a current_level value of greater than 4 and less than 10
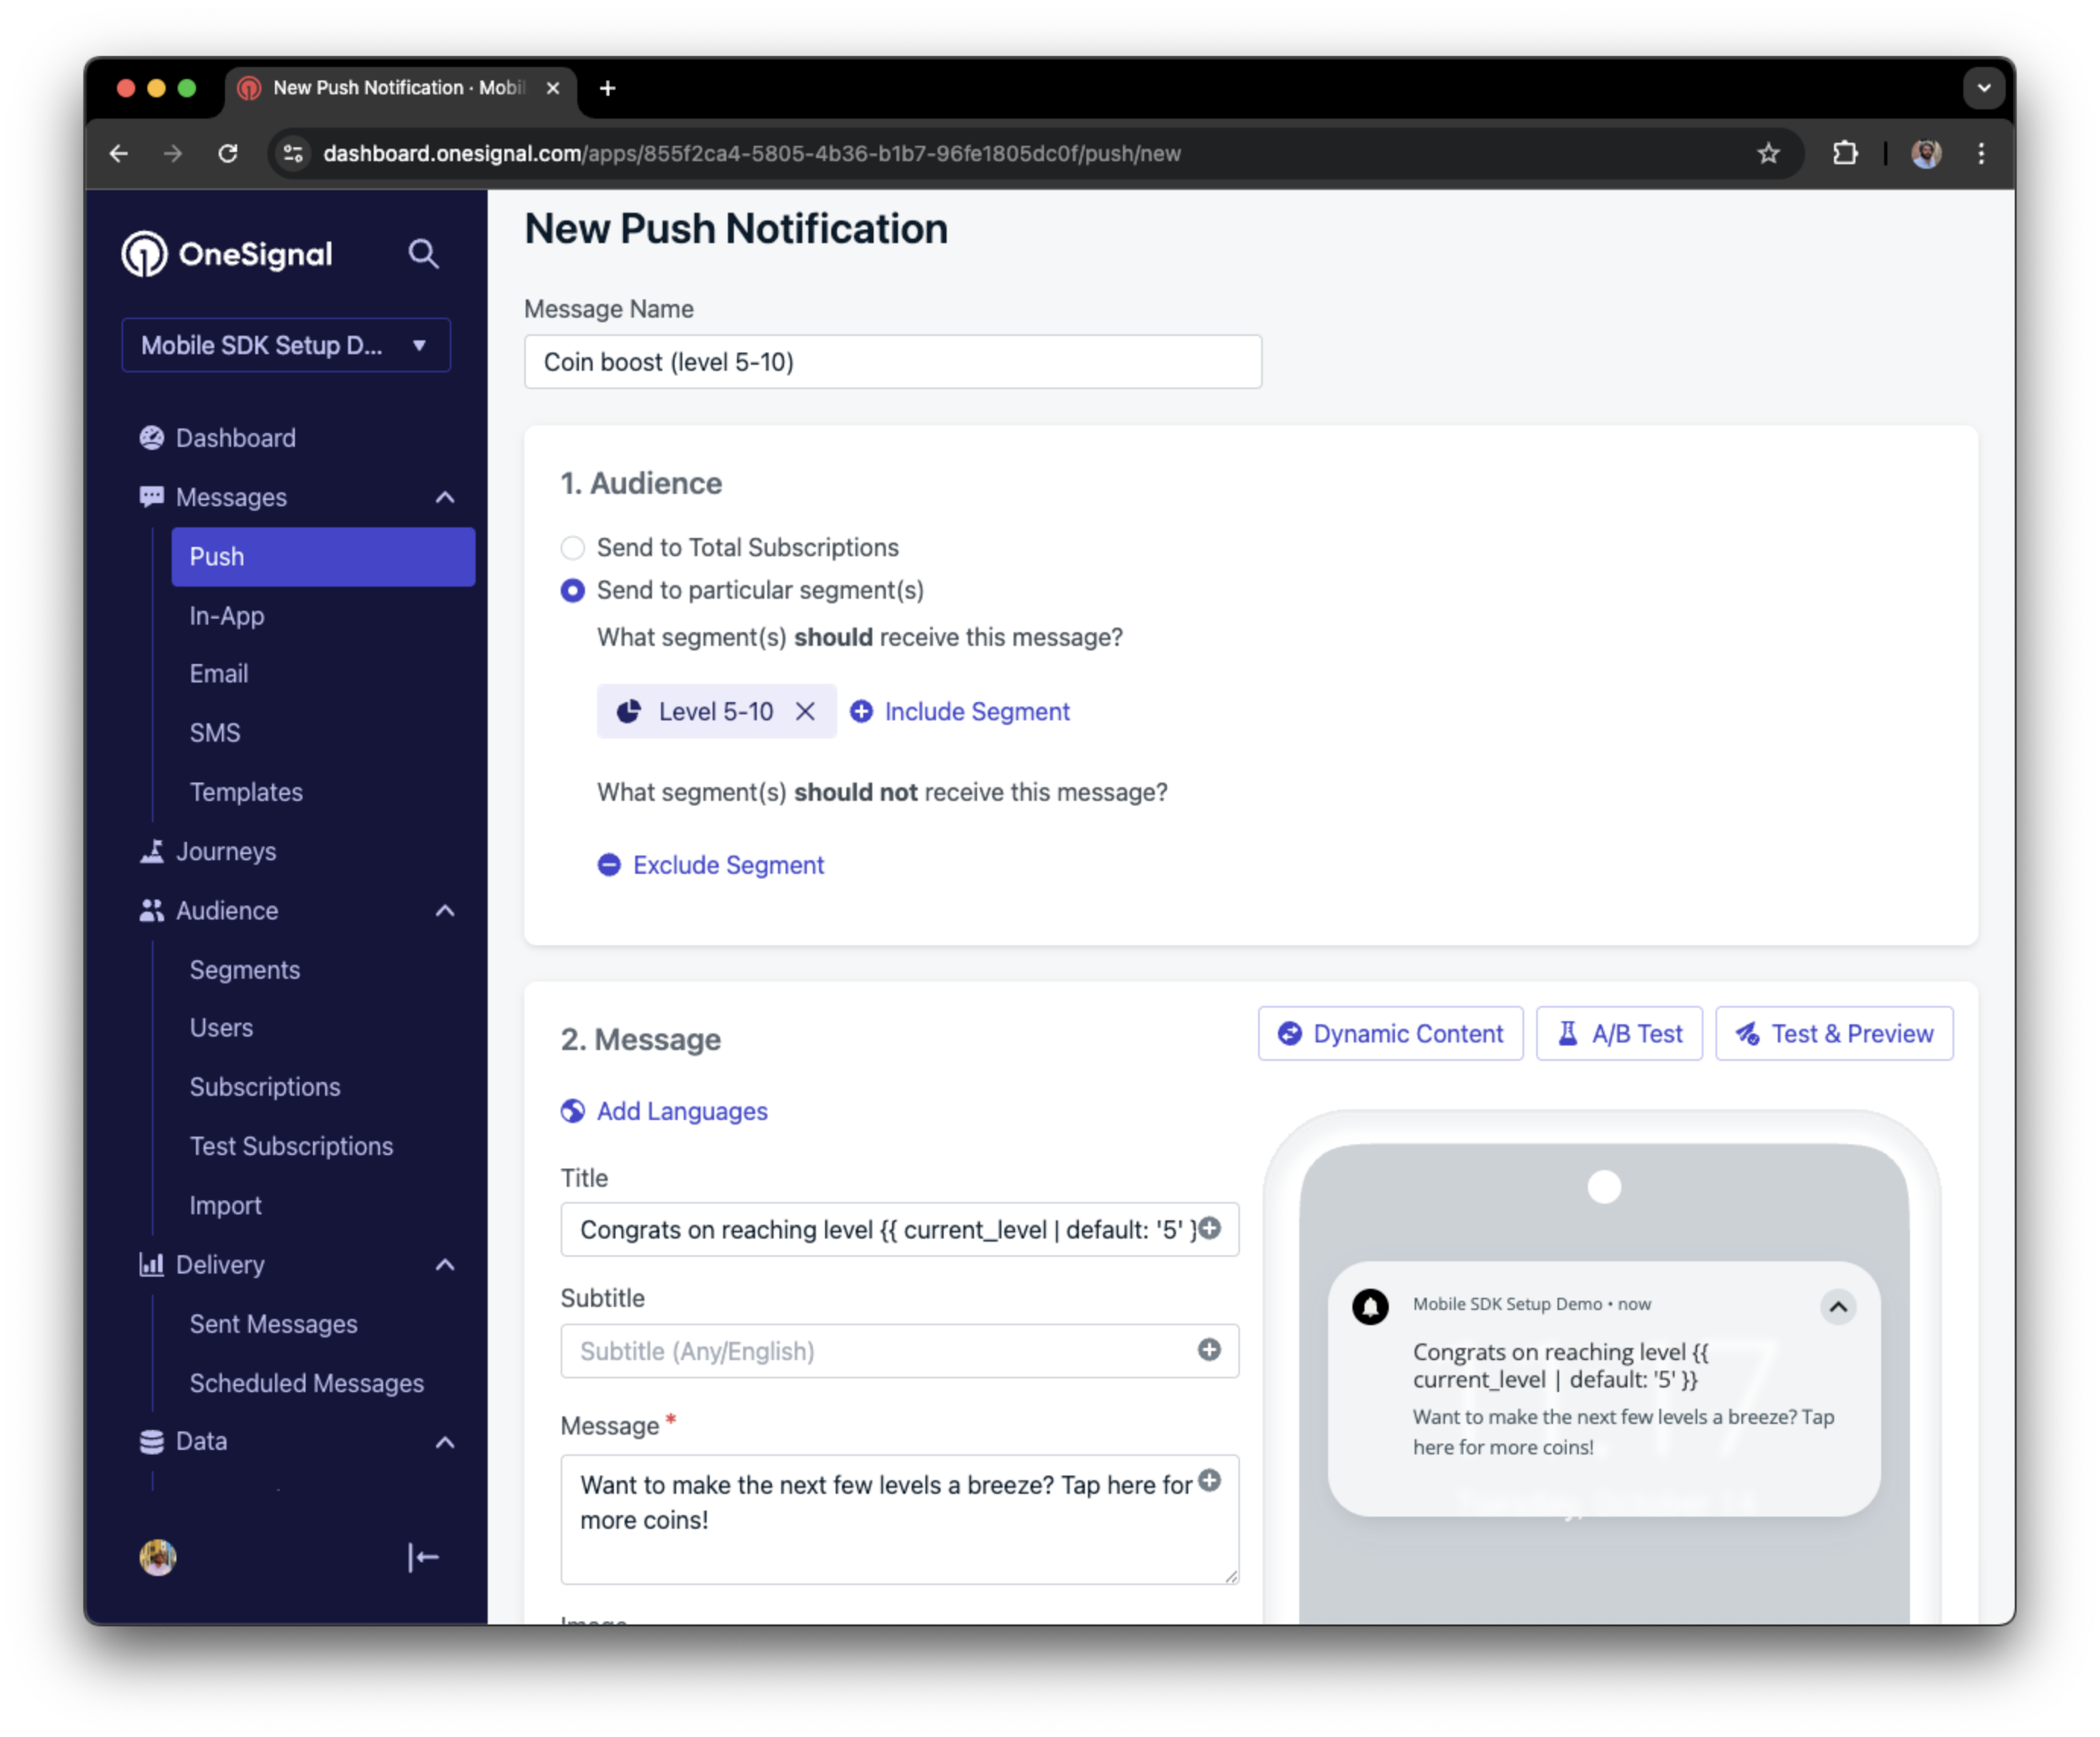
Push notification targeting the Level 5-10 segment with a personalized message
Add email and/or SMS subscriptions
The OneSignal SDK creates web push subscriptions automatically when users opt in. You can also reach users through email and SMS channels by creating the corresponding subscriptions.- Use the
addEmailmethod to create email subscriptions. - Use the
addSmsmethod to create SMS subscriptions.
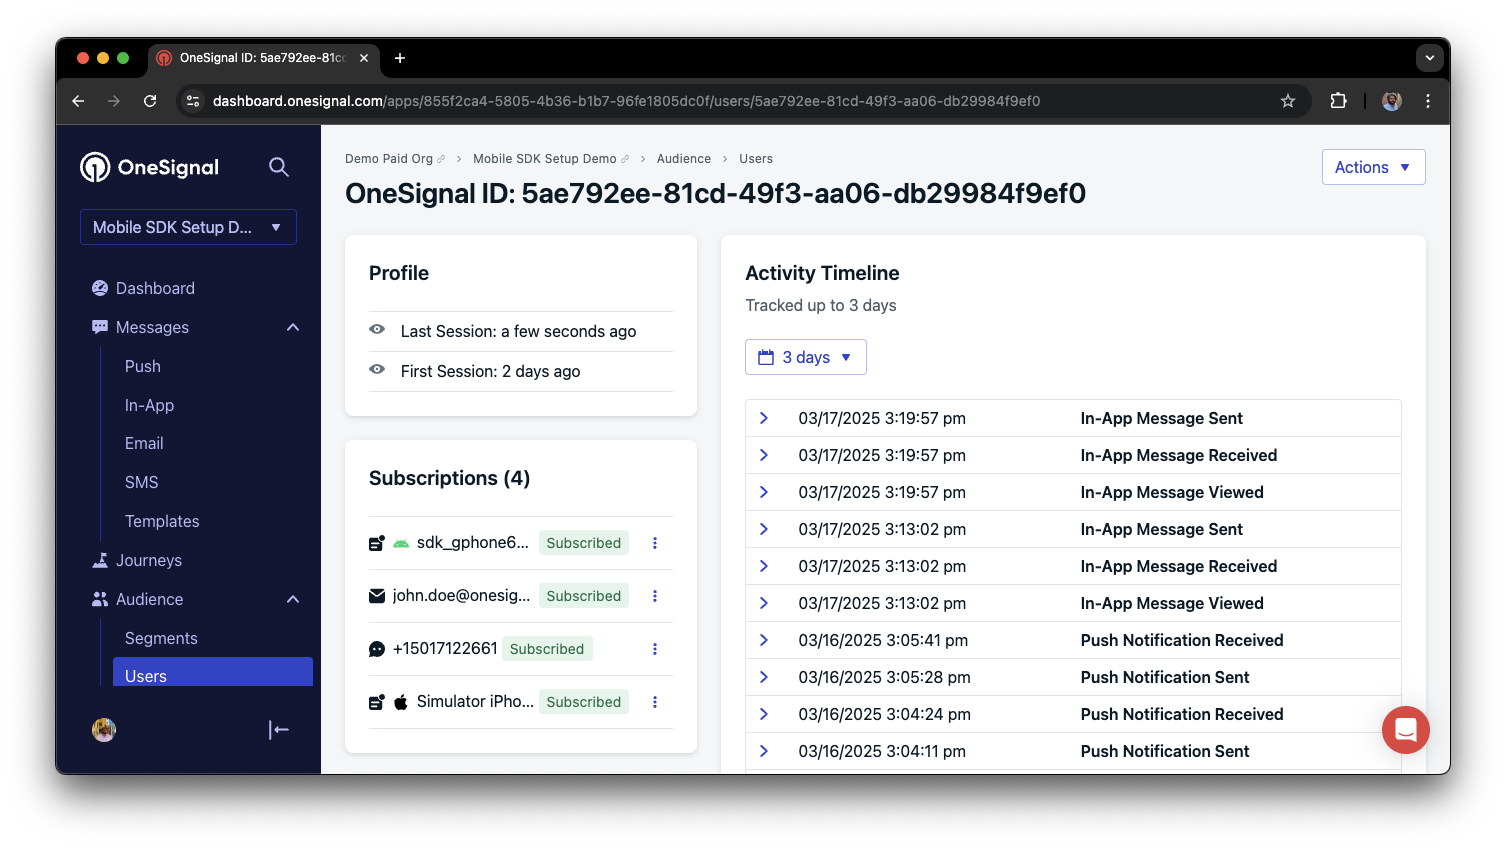
A user profile with push, email, and SMS subscriptions unified by External ID
- Obtain explicit consent before adding email or SMS subscriptions.
- Explain the benefits of each communication channel to users.
- Provide channel preferences so users can select which channels they prefer.
Privacy & user consent
To control when OneSignal collects user data, use the SDK’s consent gating methods:setConsentRequired(true): Prevents data collection until consent is given.setConsentGiven(true): Enables data collection once consent is granted.
Data collected by the SDK
Handling personal data
Listen to push, user, and in-app events
Use SDK listeners to react to user actions and state changes. The SDK provides several event listeners you can hook into. See the SDK reference guide for more details.Push notification events
- Click event listener: Detect when a notification is tapped.
- Foreground lifecycle listener: Control how notifications behave in foreground.
User state changes
- User state change event listener: Detect when the External ID is set.
- Permission observer: Track the user’s specific interaction with the native push permission prompt.
- Push subscription change observer: Track when the push subscription status changes.
Advanced setup & capabilities
Explore more capabilities to enhance your integration:Migrating to OneSignal
Integrations
Action buttons
Multi-language messaging
Identity Verification
Custom Outcomes
Web SDK setup & reference
Web push setup
Web SDK reference
support@onesignal.comPlease include:- Details of the issue you’re experiencing and steps to reproduce if available
- Your OneSignal App ID
- The External ID or Subscription ID if applicable
- The URL to the message you tested in the OneSignal Dashboard if applicable
- Any relevant logs or error messages