Secure logins so a client cannot impersonate another user’s External ID or claim email and SMS subscriptions they do not own. Generally available on the native Android SDK 5.9.0+ and iOS SDK 5.8.0+. Not yet supported on the Web SDK or cross-platform SDKs.
Generate a JWT on your server and pass it to OneSignal.login so a client cannot impersonate another External ID. The same token can authorize adding email and SMS subscriptions and selected User REST API calls.Identity Verification is generally available on the native Android and iOS SDKs. It does not work yet on the Web SDK or on cross-platform SDKs.
React Native and Expo, Flutter, Unity, Cordova and Ionic, Capacitor, .NET MAUI
Not yet supported
Unsupported SDKs have no way to pass a JWT to login. Support for them is coming soon.Enable Identity Verification to secure:
Logging in users
Adding email subscriptions
Adding SMS subscriptions
Modifying user identities and aliases
The dashboard lets you turn on Token Identity Verification for any app, even if your app uses an SDK that cannot send a JWT. The toggle applies to the whole app, across every platform.If any client in the app uses the Web SDK or a cross-platform SDK, do not turn on the toggle. Once it is on, OneSignal rejects requests from those clients that create or update users and subscriptions. login, addEmail, and addSms fail, and new devices on those clients cannot register a push subscription.You can still generate keys and build JWT signing on your server now. Only the toggle enforces verification.
An existing OneSignal app with a configured push platform.
Every client that calls login uses a supported SDK: the native Android SDK 5.9.0+ or the native iOS SDK 5.8.0+.
A backend that authenticates your users and can sign JWTs.
Access to Settings > Keys & IDs in the OneSignal dashboard. The Identity Verification section is available for every app. You do not need to contact support.
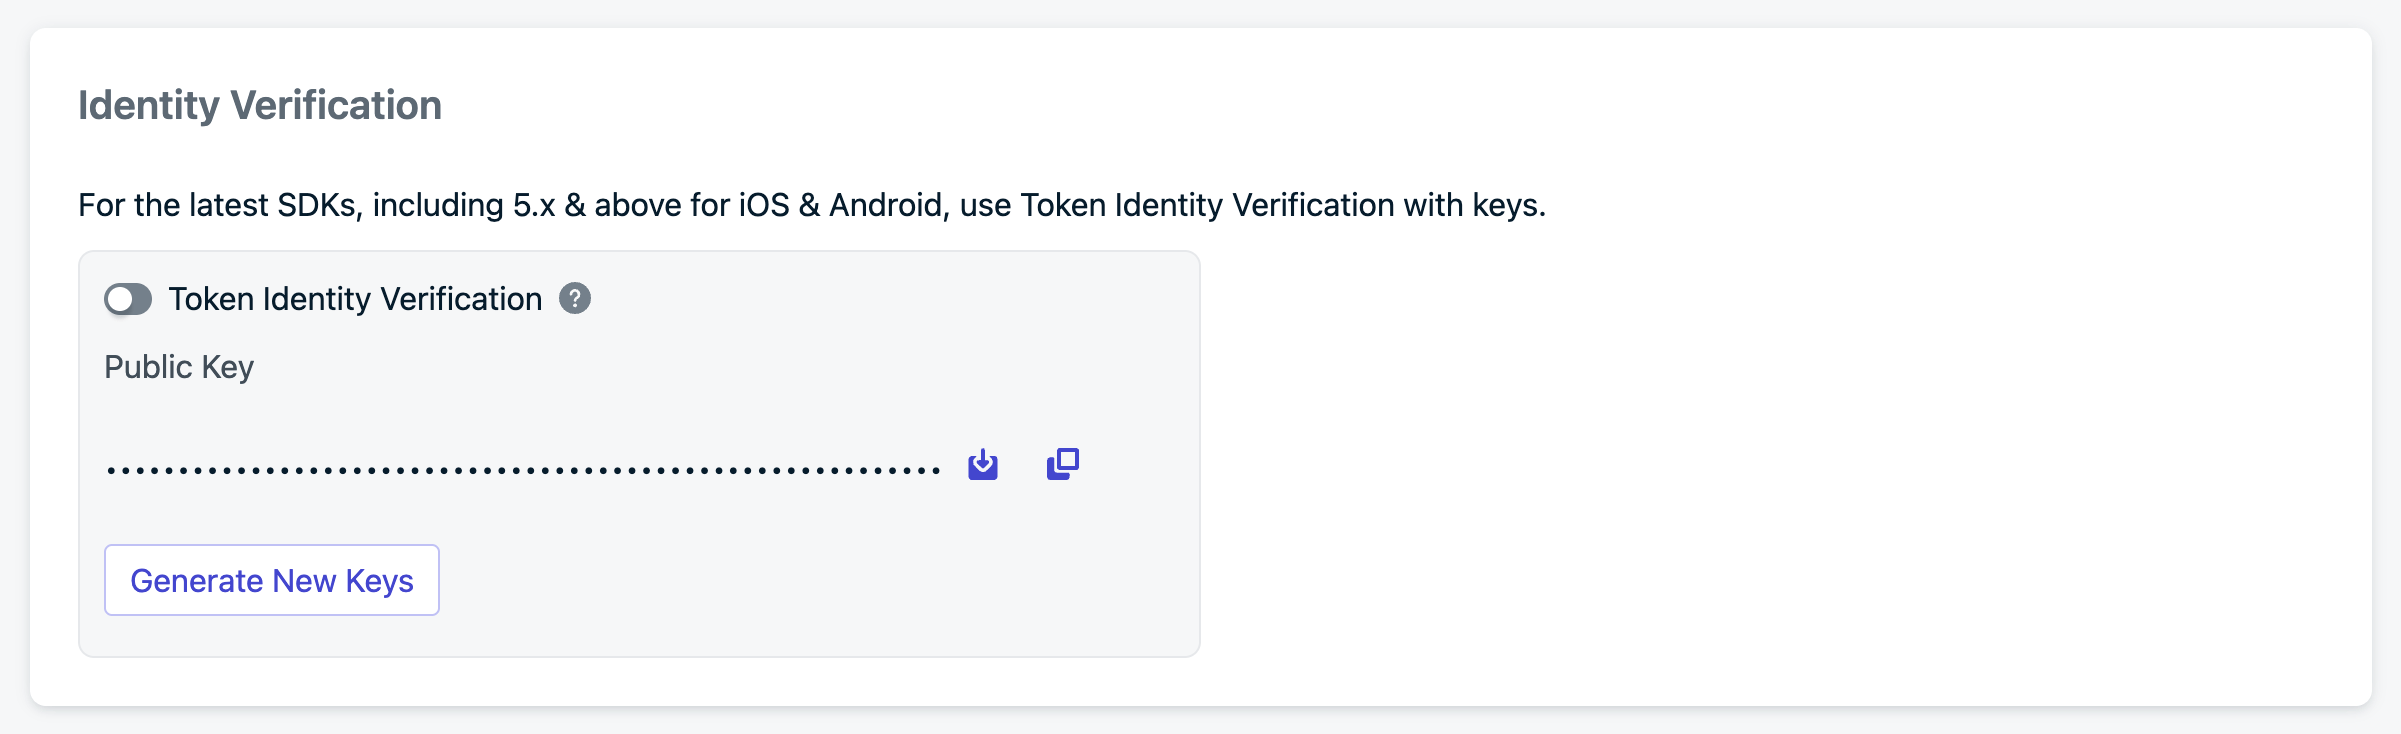
Complete these steps in order: generate keys, create the JWT, then add it to your app. Do not turn on the Token Identity Verification toggle until your backend can mint JWTs and your app can pass them to login.Log in to your OneSignal account and go to Settings > Keys & IDs > Identity Verification.
Identity Verification configuration
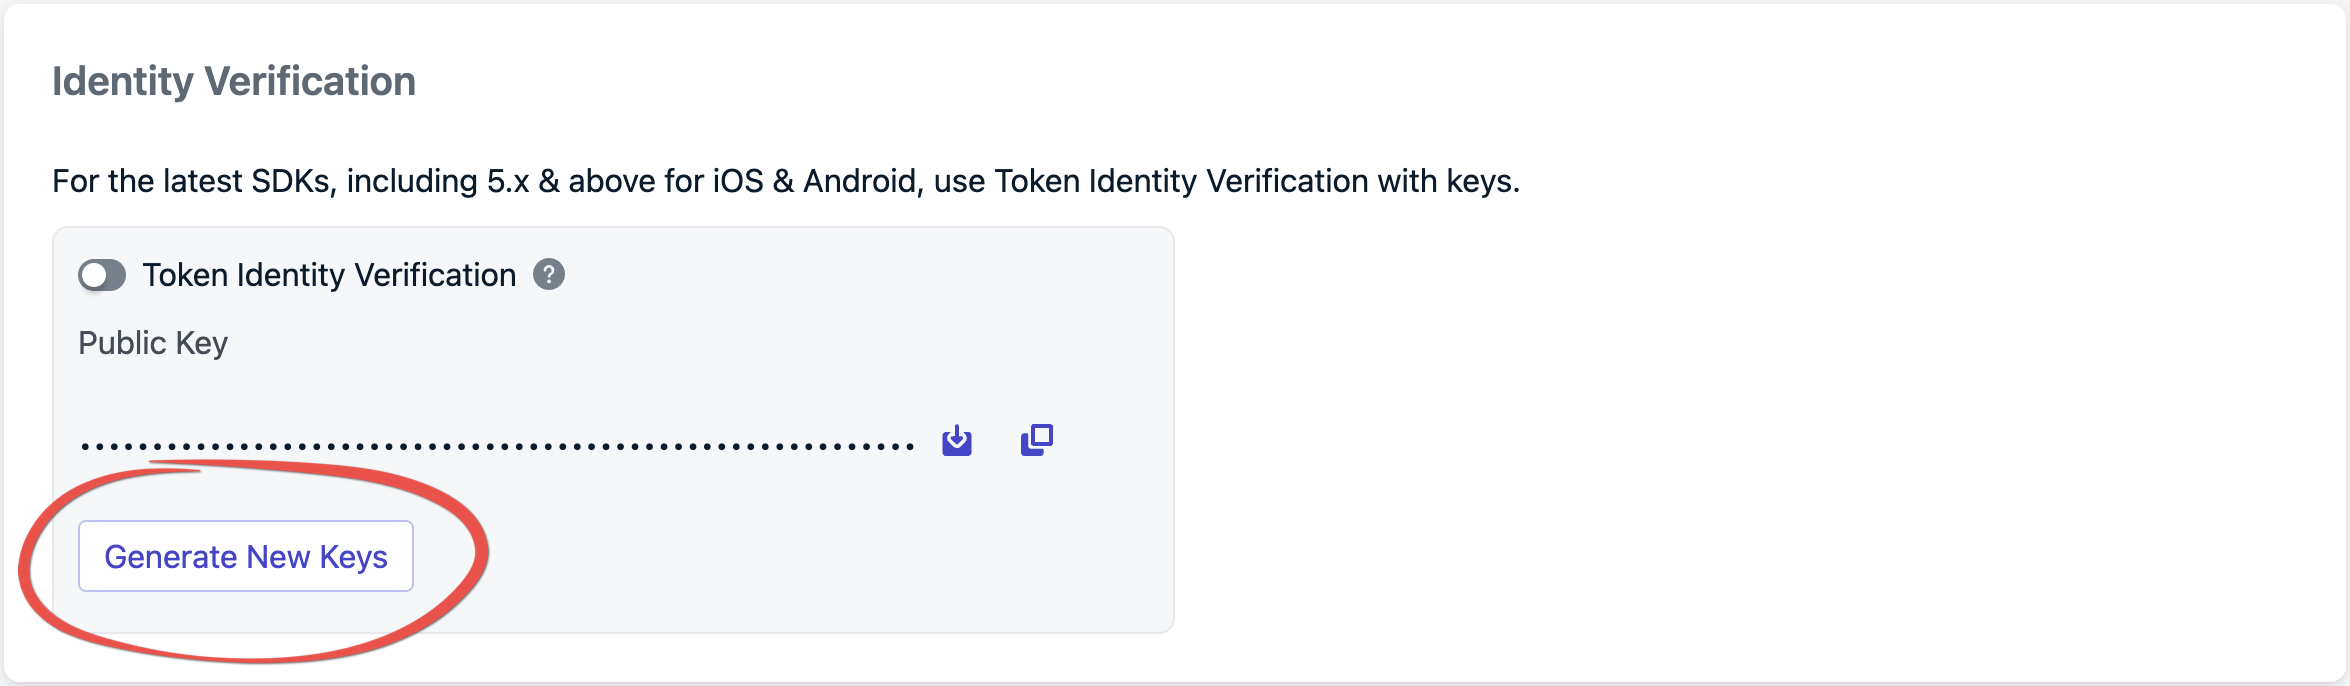
Click Generate New Keys to create a new key pair.
Creating new key pair
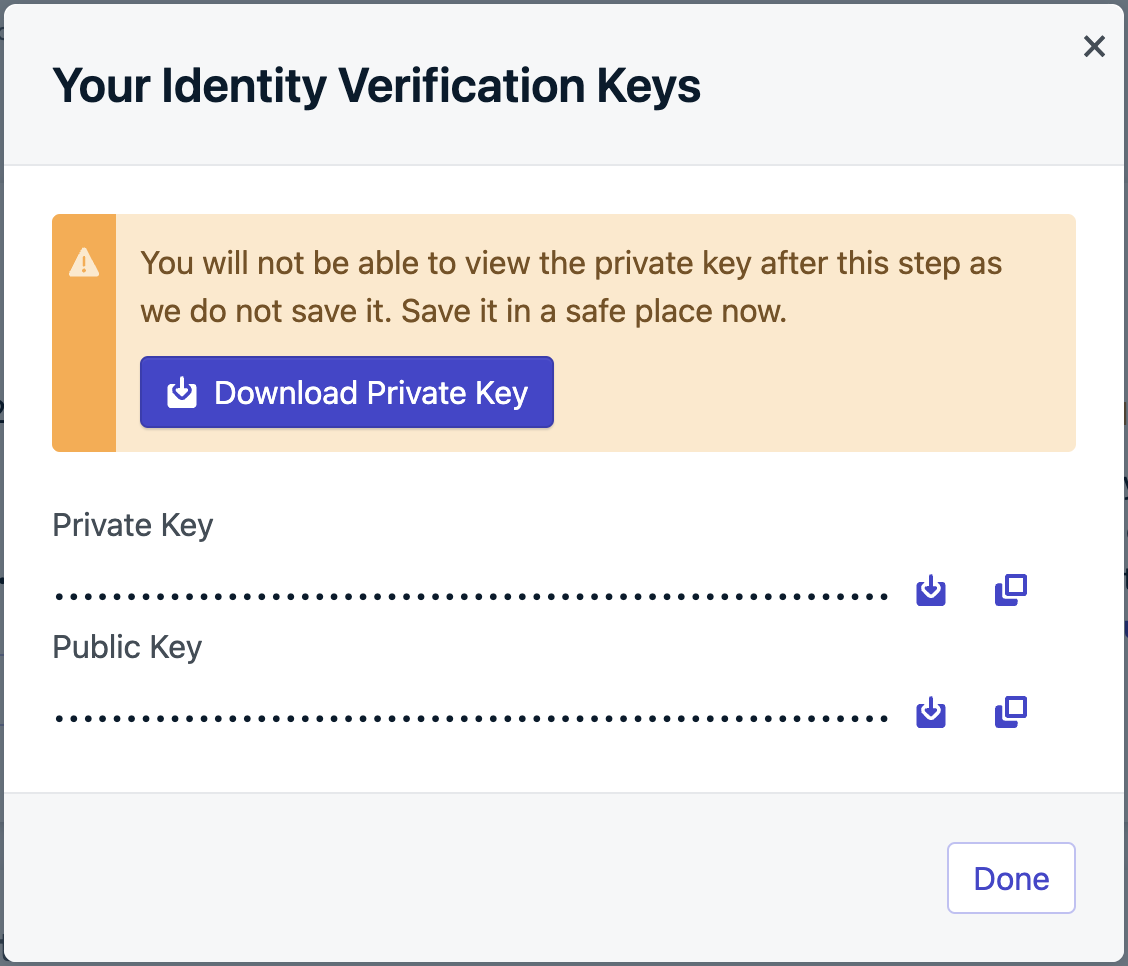
Download the PEM file or copy the private key and store it securely. This private key is not an App API key. Use it only to sign Identity Verification JWTs.
Identity Verification key pair
Always store private keys in a secure environment, such as a key management system. Never expose private keys in client-side code, public repositories, or logs.
You now have a private key stored on your server and a public key held by OneSignal.
Authenticate the user with your own server before you sign a token. When that auth succeeds, sign an ES256 JWT with the claims below and return it to the device in your auth response. If your app has no backend, stand up a small server whose only job is to verify users and sign these tokens. Never sign JWTs on the device.
Expiration as a Unix timestamp in seconds, not milliseconds. OneSignal rejects expired tokens.
identity
Yes
Object that includes external_id. This value must match the External ID you pass to OneSignal.login().
subscriptions
No
Array of objects with type (Email or SMS) and token. Here token is the email address or E.164 phone number, not the JWT. Include this claim before you call addEmail or addSms.
Sign the JWT with the ES256 algorithm (ECDSA using P-256 and SHA-256). Other algorithms are rejected. Use a JWT library rather than assembling the token by hand.Example using jsonwebtoken. Pass the PEM private key you downloaded in the previous step:
Store the PEM private key with its line breaks intact. Many environment variable systems strip newlines, which makes ES256 signing fail. Preserve the literal \n characters, or base64-encode the key and decode it at runtime.
Log or return the string from signOneSignalJWT(), then decode it to confirm the payload. jwt.io decodes tokens in your browser, but treat a real user’s token as a secret and use a test token when pasting into third-party tools. The decoded payload must look like this:
Include email and SMS in the JWT at login when you already have those values. If they arrive later, mint a new JWT that includes the subscriptions claim and pass it to updateUserJwt before you call addEmail or addSms. See Adding subscriptions.
Call login with the External ID and the JWT. Until Token Identity Verification is enabled in the dashboard, the SDK does not send the JWT, so you can ship this app update before you turn on the toggle. After you enable the toggle, login without a valid JWT fails.
On success, OneSignal associates the device’s subscription with your External ID and the user becomes an identified user.
2
Handle JWT lifecycle events
When OneSignal rejects a JWT (for example, because it expired), the SDK fires a JWT invalidated event. Fetch a new token from your backend and pass it to updateUserJwt. Requests that need the token wait until you supply it. You can use the same endpoint to mint a token that includes email or SMS if the original login token did not.Add the listener at app startup, before you call login:
Android: add it in Application.onCreate. The listener only receives events that fire after you add it, and it is called on a background thread.
iOS: the SDK holds the listener weakly, so keep a strong reference to it. It is called on the main thread, so fetch the token asynchronously. If an event fired before you added the listener, the SDK delivers it when you add the listener.
// Called on a background thread, so a blocking network call is OK here.OneSignal.addUserJwtInvalidatedListener(event -> { String externalId = event.getExternalId(); String onesignalJWT = fetchOneSignalJwt(externalId); OneSignal.updateUserJwt(externalId, onesignalJWT);});
// Called on a background thread, so a blocking network call is OK here.OneSignal.addUserJwtInvalidatedListener { event -> val externalId = event.externalId val onesignalJWT = fetchOneSignalJwt(externalId) OneSignal.updateUserJwt(externalId, onesignalJWT)}
OneSignal.addUserJwtInvalidatedListener { event -> val externalId = event.externalId appScope.launch { val onesignalJWT = fetchOneSignalJwt(externalId) OneSignal.updateUserJwtSuspend(externalId, onesignalJWT) }}
import OneSignalFramework// The app delegate lives for the whole app session, so the SDK's weak reference stays valid.class AppDelegate: UIResponder, UIApplicationDelegate, OSUserJwtInvalidatedListener { func application(_ application: UIApplication, didFinishLaunchingWithOptions launchOptions: [UIApplication.LaunchOptionsKey: Any]?) -> Bool { OneSignal.addUserJwtInvalidatedListener(self) return true } // Called on the main thread. Fetch the token without blocking it. func onUserJwtInvalidated(event: OSUserJwtInvalidatedEvent) { let externalId = event.externalId Task { let onesignalJWT = try await fetchOneSignalJwt(externalId: externalId) OneSignal.updateUserJwt(externalId: externalId, token: onesignalJWT) } }}
@import OneSignalFramework;@interface MyListener : NSObject <OSUserJwtInvalidatedListener>@end@implementation MyListener// Called on the main thread. Fetch the token without blocking it.- (void)onUserJwtInvalidatedWithEvent:(OSUserJwtInvalidatedEvent * _Nonnull)event { NSString *externalId = event.externalId; [self fetchOneSignalJwt:externalId completion:^(NSString *onesignalJWT) { [OneSignal updateUserJwt:externalId withToken:onesignalJWT]; }];}@end// The SDK holds the listener weakly. Store it in a property that lives as long as your app.self.jwtListener = [MyListener new];[OneSignal addUserJwtInvalidatedListener:self.jwtListener];// To stop listening:[OneSignal removeUserJwtInvalidatedListener:self.jwtListener];
Replace fetchOneSignalJwt with a call to your backend. Do not sign JWTs on the device.With this listener in place, an expired token is replaced automatically and the session continues without forcing the user to log in again.
3
Enable Token Identity Verification in the dashboard
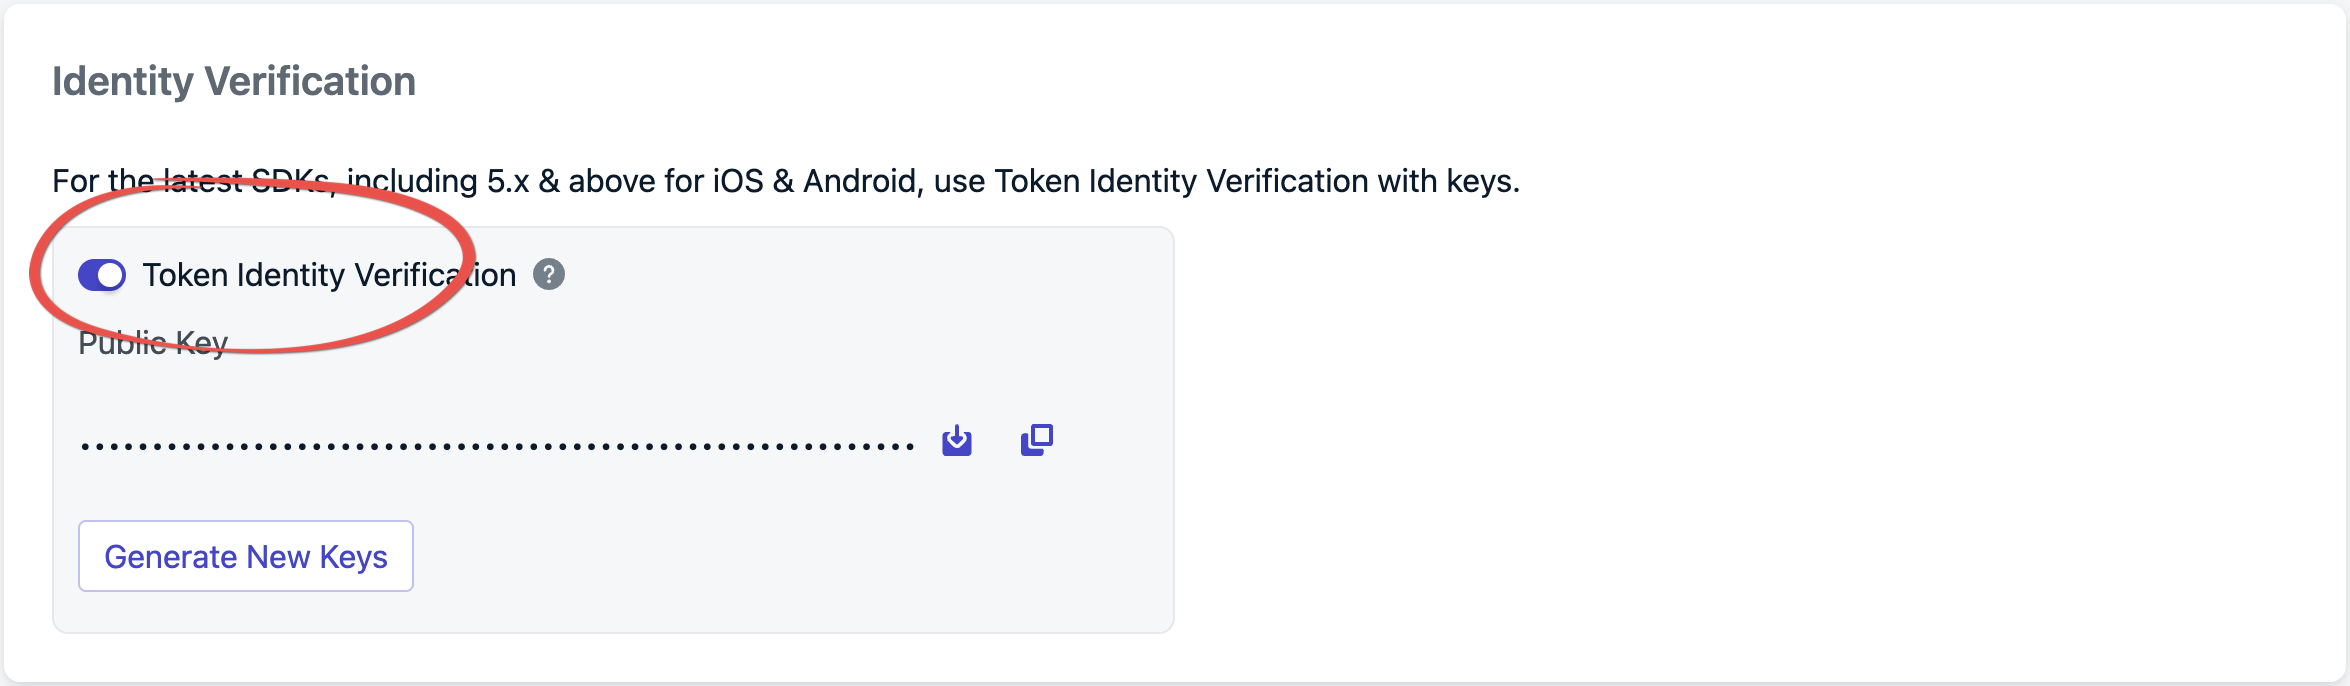
From Settings > Keys & IDs, turn on Token Identity Verification.
Enabling Token Identity Verification
Before you turn it on, confirm:
No client in this app uses the Web SDK or a cross-platform SDK. See Supported SDKs.
Most of your users are on an app version that passes a JWT to login. Older app versions still installed on devices cannot send a JWT, so their requests fail too.
Your server sends a JWT for the User REST APIs it calls.
From now on, OneSignal rejects any login or gated REST API call that does not include a valid JWT. See What changes when the toggle is on.
Login:login requires a valid JWT whose identity.external_id matches the External ID.
Logged-out devices: the SDK does not create anonymous users on OneSignal. On a new install, the device does not register a push subscription until the app calls login with a valid JWT, so it cannot receive push notifications before then. If you send push to users before they log in, plan for this before you turn on the toggle.
Logout:logout() disables the device’s push subscription. Calling login with a JWT restores it. See the FAQ.
Email and SMS:addEmail and addSms require a JWT that includes the address in its subscriptions claim. See Adding subscriptions.
REST API: the User and Subscription endpoints require Authorization: Bearer YOUR_ONESIGNAL_JWT. See REST API.
If the login JWT already includes the email or phone number in subscriptions, login associates those subscriptions with the user. You do not need a second call.If the address is not in the JWT yet, mint a new token that includes it, call updateUserJwt, then call addEmail or addSms. Do this on every platform. addEmail / addSms alone is not enough once Token Identity Verification is on.fetchOneSignalJwtWithEmail and fetchOneSignalJwtWithSms are placeholders for your own backend call that mints a JWT with the subscriptions claim.
Identity Verification JWTs are not App API keys. Other endpoints (for example Create message) still use Authorization: Key YOUR_APP_API_KEY. See Keys & IDs.When Token Identity Verification is enabled, the User and Subscription endpoints below authenticate with the identity JWT instead:
Authorization: Bearer YOUR_ONESIGNAL_JWT
Mint that JWT the same way as for SDK login. The identity.external_id in the token must match the user the request operates on.
No, but it is strongly recommended for production apps. Without it, any client that knows a user’s External ID can impersonate that user and modify their subscriptions or data.
What is the “Identity Verification for email + external_id” toggle?
Legacy Identity Verification toggle in Keys & IDs
That toggle is a separate, legacy setting for OneSignal SDK v3/v4. It is not the JWT-based Identity Verification on this page and does not protect apps on SDK v5. For SDK v5, use Generate New Keys in the Identity Verification section under Settings > Keys & IDs. See Generate keys.
The native Android SDK 5.9.0+ and the native iOS SDK 5.8.0+. The Web SDK and cross-platform SDKs (React Native, Expo, Flutter, Unity, Cordova, Ionic, Capacitor, and .NET MAUI) are not supported yet. See Supported SDKs.
My app uses the Web SDK or a cross-platform SDK. Can I turn on Identity Verification?
Not yet. The dashboard lets you turn on the toggle, but your clients cannot send a JWT, so their logins and subscription updates fail. You can generate keys and build JWT signing on your server now, then turn on the toggle once your SDK is supported.
The SDK fires a JWT invalidation event. Implement addUserJwtInvalidatedListener (see Add the JWT to your app) to fetch a new token and pass it to updateUserJwt.
Only after you enable Token Identity Verification. Then the User and Subscription endpoints require Authorization: Bearer YOUR_ONESIGNAL_JWT. They do not accept the App API key for those calls. Create message and other non-user endpoints still use Authorization: Key YOUR_APP_API_KEY.
When Identity Verification is enabled, logout() disables the push subscription. The subscription stays associated with that user. Calling login with a JWT restores the previous subscription status. You do not need to call optIn() again.On Android (Kotlin), logoutSuspend() is the non-blocking equivalent of logout().