Time Operators let you send messages relative to a specific moment in time—such as after an action happens or before an upcoming date.You store that moment as a Unix timestamp (in seconds) on the user using a Tag. OneSignal then compares the current time to that timestamp and lets you target users based on how much time has passed (or how much time remains).This makes it easy to automate messages like reminders, follow-ups, and deadlines without scheduling messages manually.Common use cases:
Abandoned cart: Remind users who haven’t checked out after a certain time
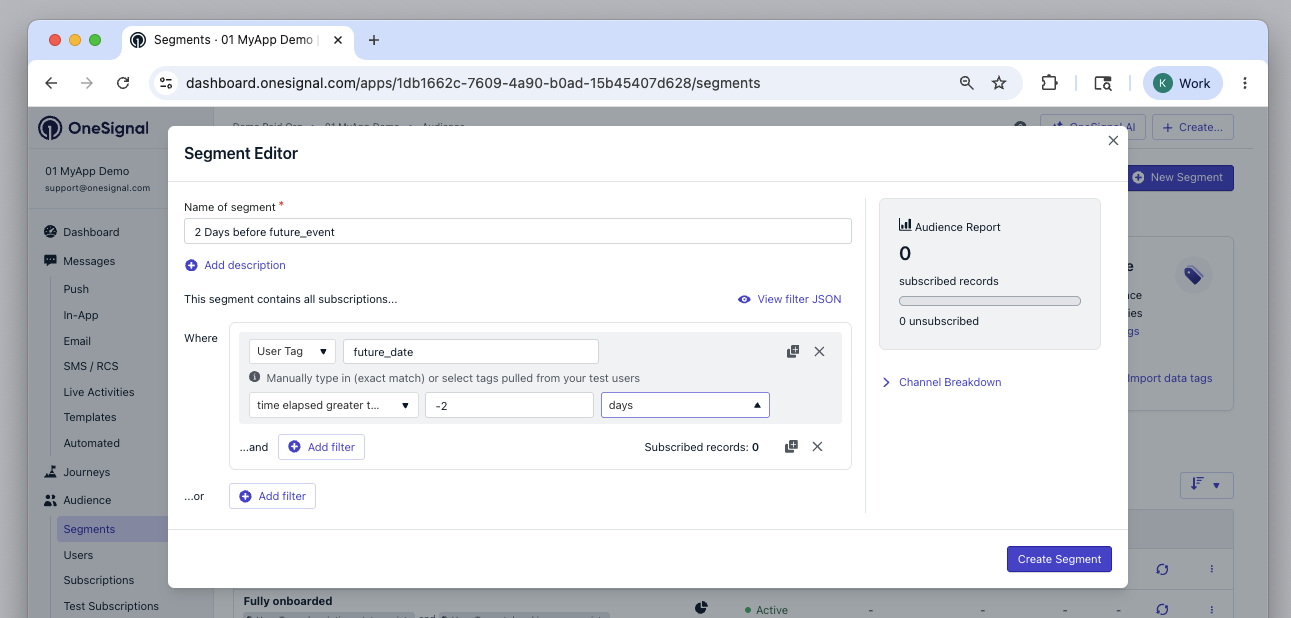
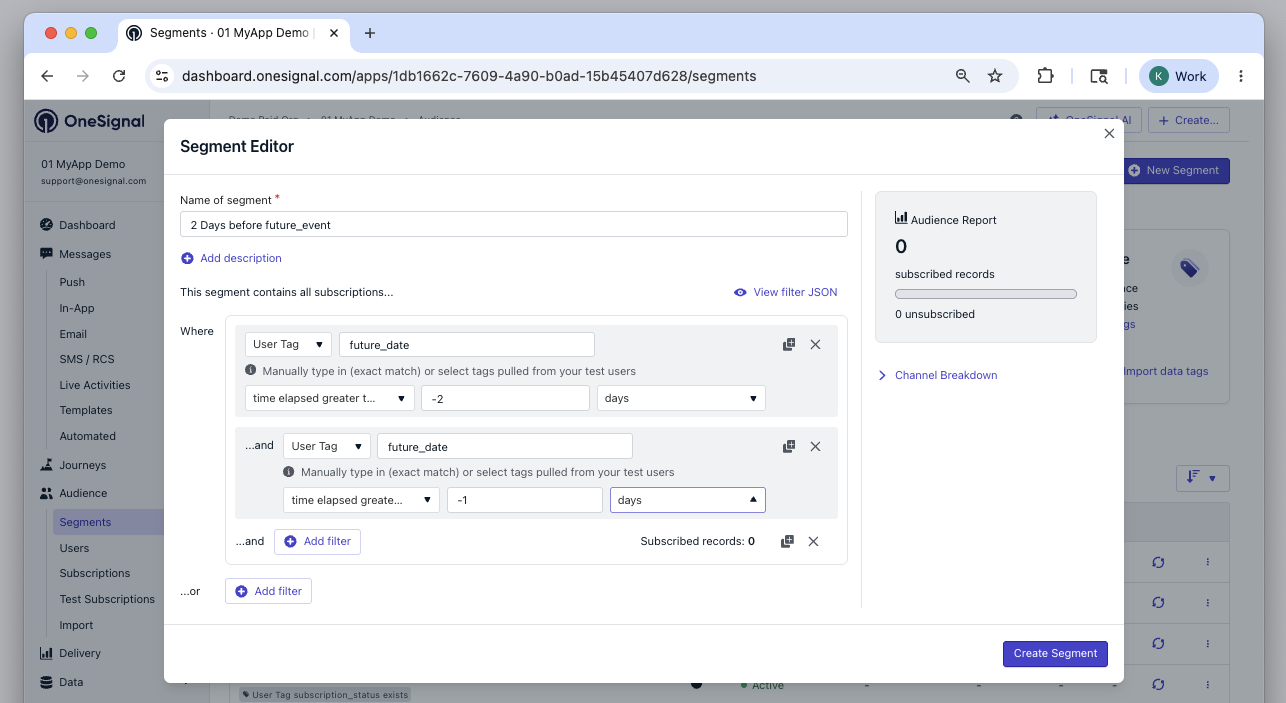
Event reminders: Message users before a scheduled appointment or renewal date
Milestones: Follow up when users haven’t completed an action by a deadline
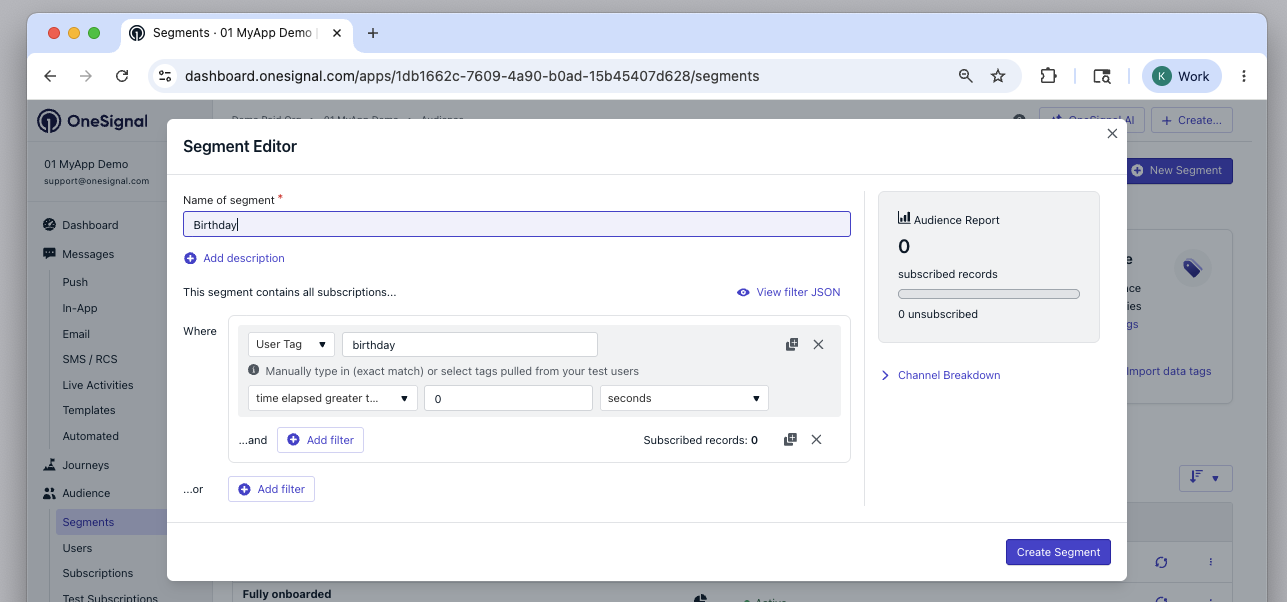
Birthdays: Send messages on (or around) a user’s birthday
Time Operators are only available on paid plans. Free plans can still use
default time-based segment filters like First Session and Last Session.
You can solve many “reminder” use cases with either Tags or Custom Events. The best option depends on what you need to store and how you want to trigger automation.
Use Tags when you want to store the latest known timestamp on the user (for example, cart_updated_at or subscription_expires_at) and segment off that value over time.
Use Custom Events when you want to record each event occurrence (with properties) and trigger Journeys based on real-time behavior.
In practice, many implementations can use both: Custom Events for real-time tracking and Tags for user state you want to segment on later.
Tags and Custom Events are both ways to add data to your users. However, there are some key differences:
Feature
Tags
Custom Events
Data usage
Segmentation and personalization
Trigger Journeys without a Segment, Wait Until steps, personalization directly within Journeys
Journeys and Journey-message-template personalization, Segmentation (Coming soon)
The key distinction between Tags and Custom Events is in their depth and use cases. Tags are properties of a user, such as Name, Account Status, or Location. Events are thing that the user has done, such as Purchasing an Item, Completing a Level, or Inviting a Friend. Both tags and events can be used for segmentation and personalization.In practice, you will likely use both:
Tags for user properties that are static and don’t change often
Custom Events for real-time scenarios, complex segmentation, and more sophisticated journey workflows
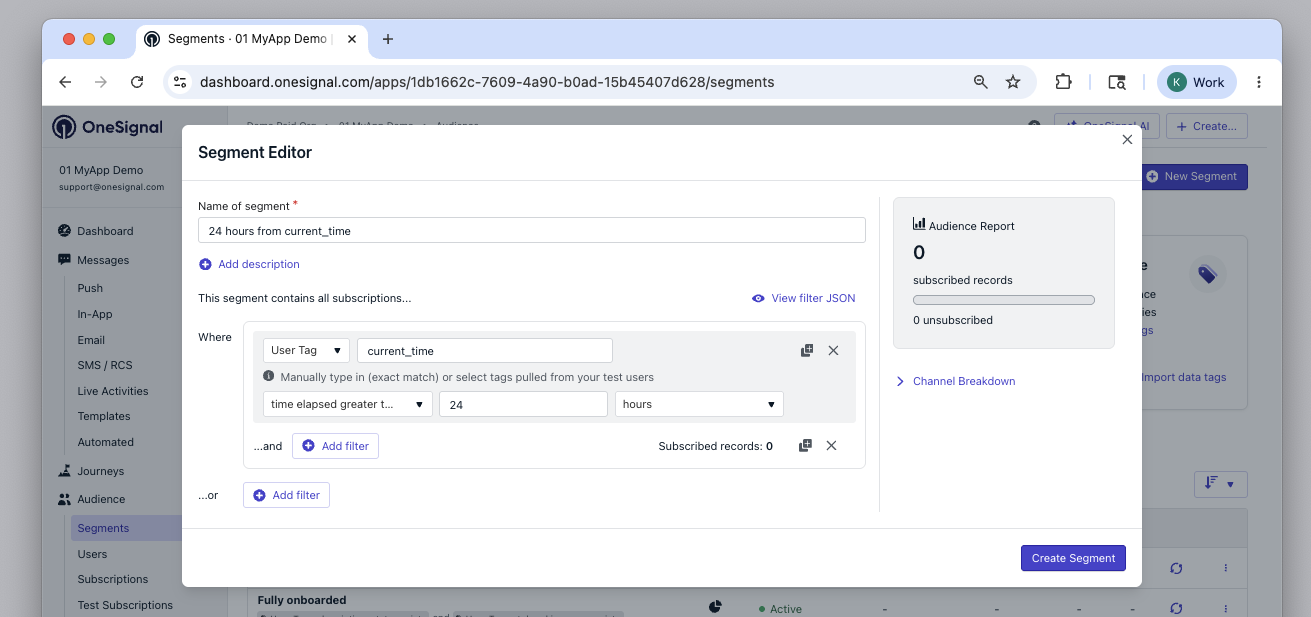
Use this pattern when you want to message users after a certain amount of time has passed since something happened.Example: Abandoned cart reminder 24 hours after the user updated their cart
1
Store the timestamp when the event happens
When the user updates their cart, save the current time as a Unix timestamp (in seconds):
Set re-entry to 52 weeks so users can re-enter next year
Update the birthday tag to next year’s date after sending (in your backend or Journey)
Calculate birthday timestamps using the user’s local timezone when possible.
Using server time only may cause messages to send earlier or later than
expected.
If you want messages to stay accurate year-over-year, update the user’s
birthday tag to the next upcoming birthday after you send the message (for
example, in your backend or in a Journey step). Keep in mind, if you do this,
it may be easier to use Custom Events instead.
Birthday messages will be sent to users around their birthday tag date.
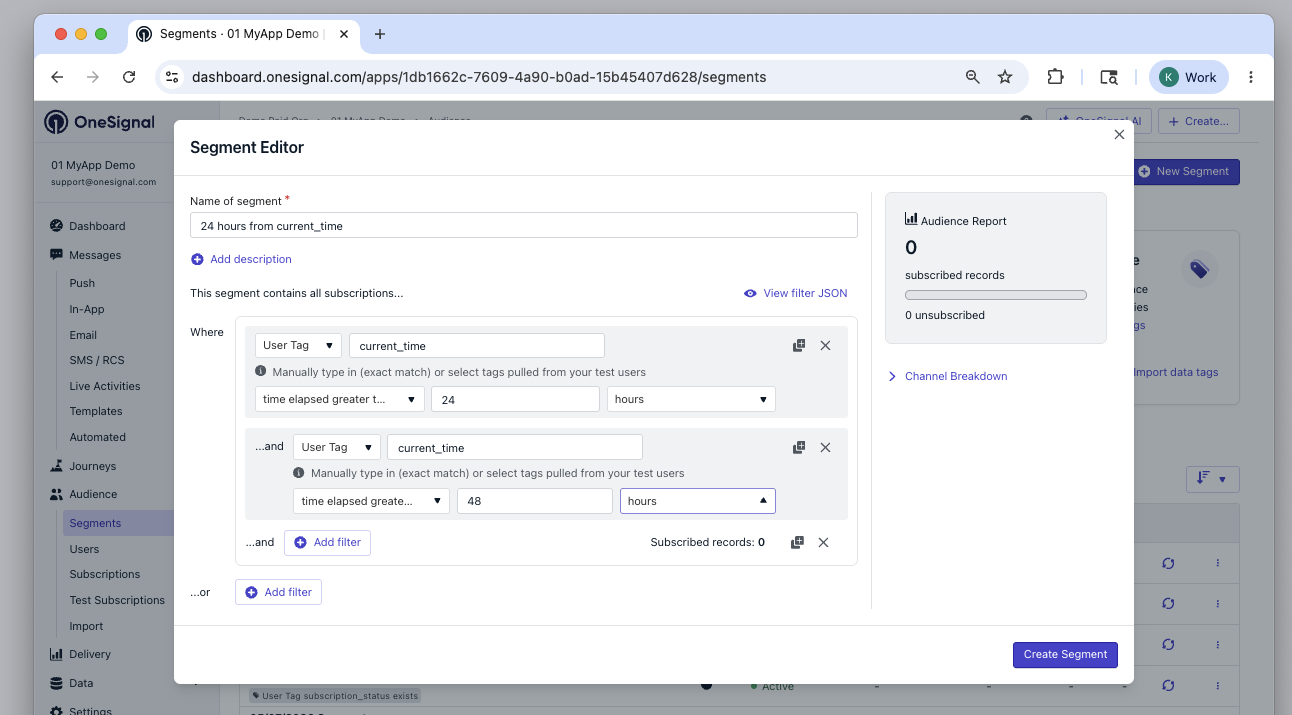
Time Operators exist to let you create relative, moving windows instead of fixed dates.OneSignal calculates elapsed time using this formula:
time_elapsed = current_time - tag_timestamp
Past timestamps → positive values
Future timestamps → negative values
Operators:
Time Elapsed Greater Than X: matches when elapsed > X
Time Elapsed Less Than X: matches when elapsed < X
Why future timestamps match immediately with Less Than:Any negative number is less than any positive number. So time_elapsed_lt 2 days (172,800 seconds) will match a timestamp 30 days in the future because:
-2,592,000 < 172,800 → true (matches)
Because future timestamps always produce negative elapsed time, you must use negative values to define when users should enter and exit segments before an upcoming event. Positive values cannot represent time before a future date.