Exigences
Assurez-vous d’avoir ce qui suit avant de commencer :- Une application iOS ou macOS.
- Un compte Apple Developer payant avec un accès Administrateur.
- Un compte OneSignal.
- Un Mac avec Xcode 14+.
- Le Bundle ID pour votre cible d’application tel que défini dans Xcode.
- Un projet Xcode avec la capacité de notification push activée.
Créer une demande de signature de certificat (CSR)
Vous devez d’abord créer un fichier.certSigningRequest sur macOS.
- Ouvrez Applications > Utilities > Keychain Access.
- Dans la barre de menu, cliquez sur Trousseau d’accès > Assistant de certificat > Demander un certificat à une autorité de certification…
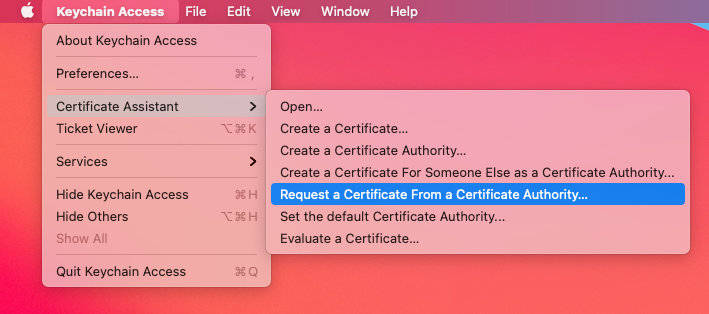
Trousseau d'accès Mac
- Remplissez les champs requis :
- Adresse e-mail de l’utilisateur :
[email protected] - Nom commun : Votre nom ou le nom du certificat
- Adresse e-mail de l’AC : Laissez ce champ vide
- La demande est : Sélectionnez Enregistrée sur le disque
- Adresse e-mail de l’utilisateur :
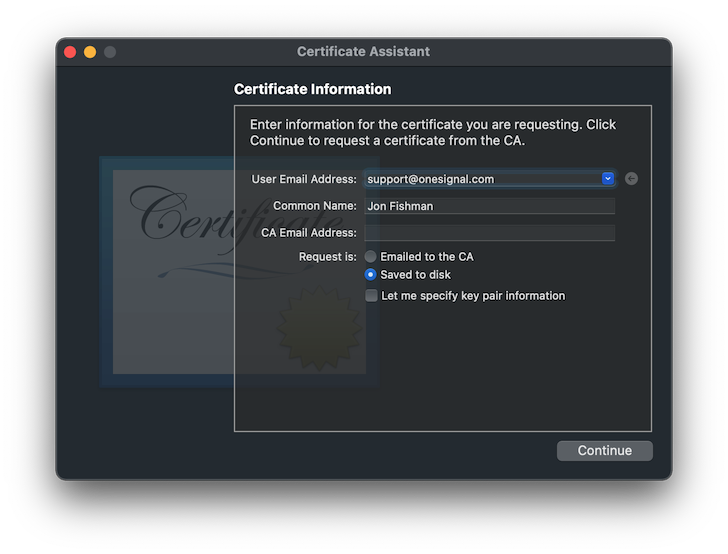
Fenêtre Assistant de certificat
- Cliquez sur Continuer, choisissez un emplacement pour enregistrer le fichier
.certSigningRequest, puis cliquez sur Enregistrer.
Activer les capacités push pour l’application
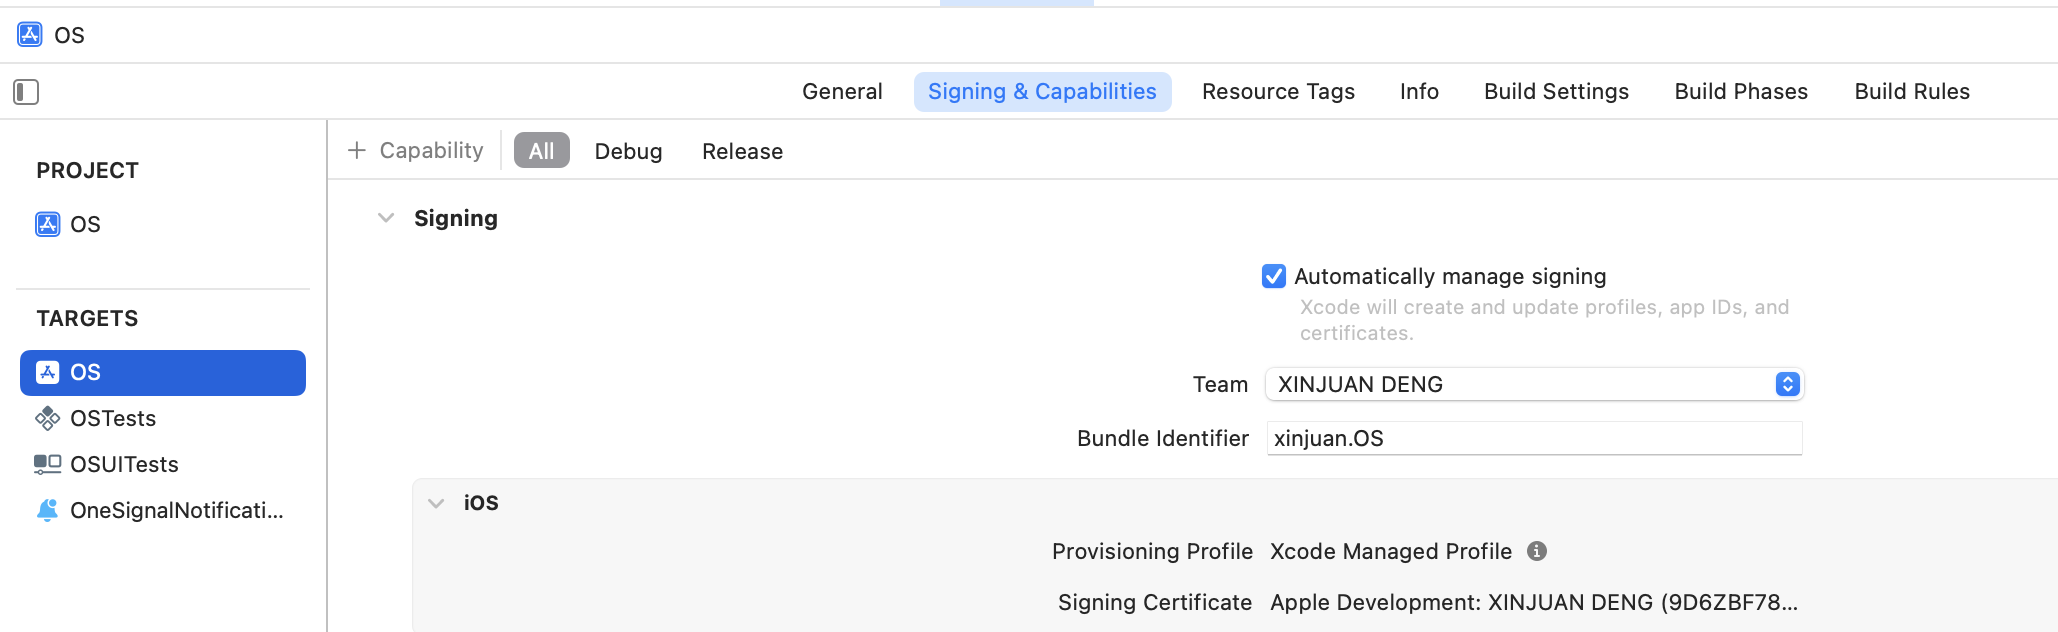
Ignorez cette section si vous utilisez Automatically manage signing dans Xcode.
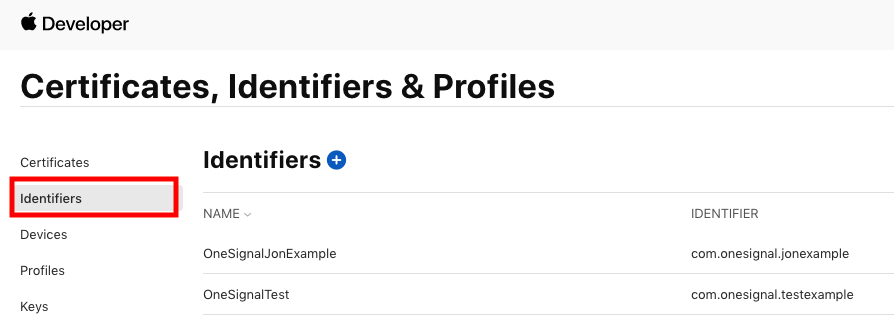
- Accédez à la section Identifiers du portail Apple Developer, localisez et sélectionnez l’App ID de votre application dans la liste.
- Activez la capacité Push Notifications en cochant la case.

Créer un certificat push
Suivez ces étapes pour générer le certificat SSL Apple Push Notification service (APNs) :- Visitez la page des certificats Apple.
- Cliquez sur le bouton plus (+) pour créer un nouveau certificat.
-
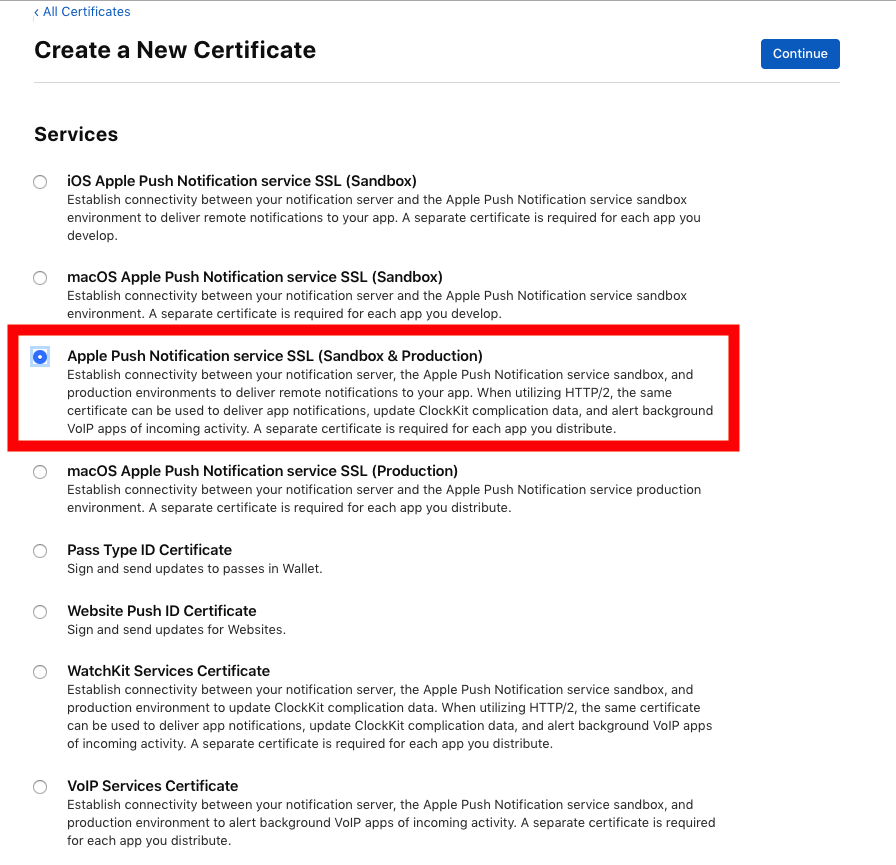
Sous Services, sélectionnez :
- Apple Push Notification service SSL (Sandbox & Production)
- Puis cliquez sur Continue
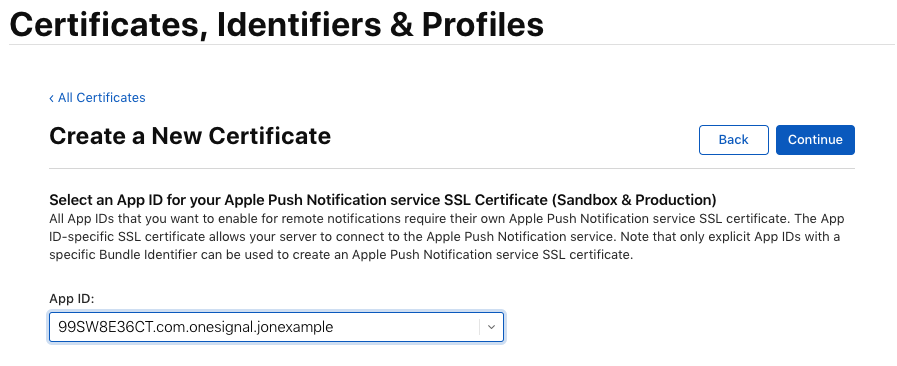
- Sélectionnez votre App ID dans la liste et cliquez sur Continue.
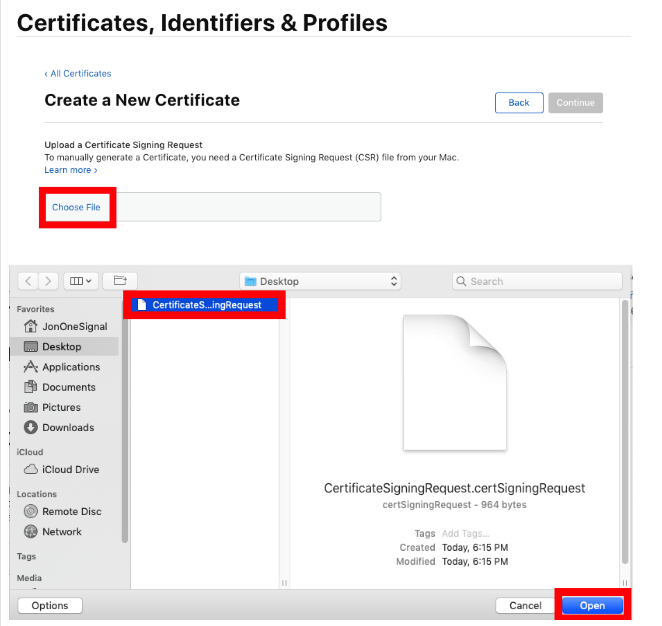
- Importez le fichier
.certSigningRequestque vous avez généré précédemment.
- Cliquez sur Continue, puis sur Download pour enregistrer le fichier
.cersur votre ordinateur.

.cer dans la section suivante pour créer votre certificat .p12.
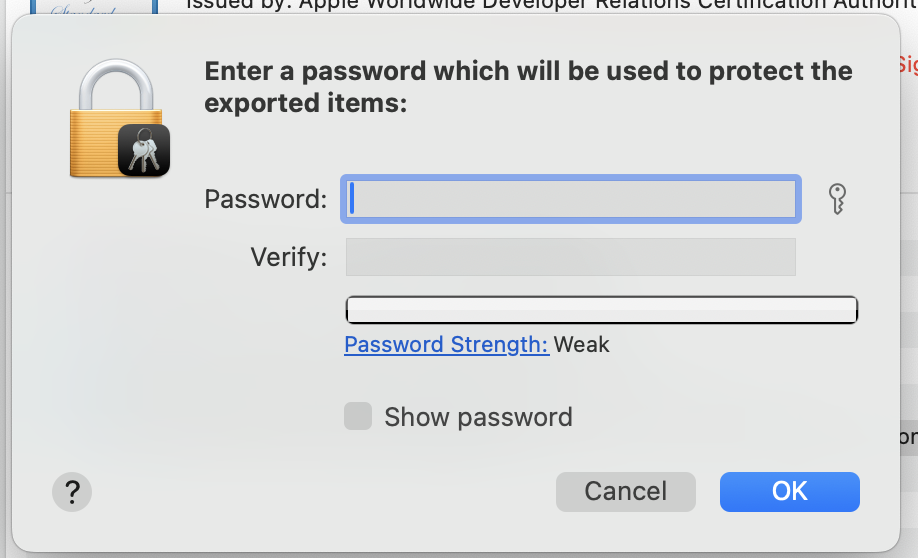
Créer une clé privée et exporter le certificat .p12
-
Double-cliquez sur le fichier
.certéléchargé pour l’importer dans Trousseau d’accès. -
Dans Trousseau d’accès, accédez à :
- Trousseaux > session
- Catégorie > Mes certificats
- Localisez le certificat nommé Apple Push Services.
- Faites un clic droit sur le certificat et sélectionnez Exporter.
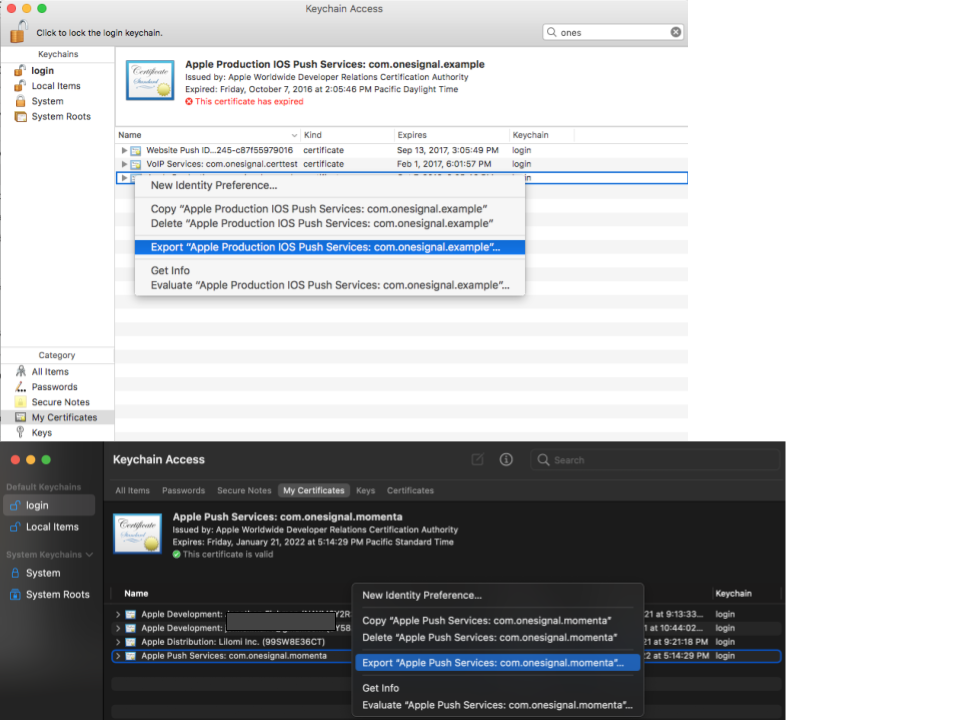
L'export générera un fichier .p12 à l'emplacement de votre choix
-
Choisissez un emplacement pour enregistrer le fichier et sélectionnez le format
.p12. -
Lorsque vous y êtes invité, définissez un mot de passe pour le fichier
.p12. Vous aurez besoin de ce mot de passe lors du téléchargement vers OneSignal.
Télécharger le fichier .p12 vers OneSignal
- Dans votre tableau de bord OneSignal, accédez à votre application > Settings > Push & In-App > Apple iOS.
- Importez le fichier
.p12(et saisissez le mot de passe si vous en avez défini un). Cliquez sur Save.
Vous avez correctement configuré l’authentification APNs via un certificat .p12 dans OneSignal.Votre application iOS est maintenant prête à envoyer et recevoir des notifications push ! 🎉
Dépannage .p12
Erreur de format de certificat invalide
Cause : Le fichier importé n’est pas au format.p12.
Correction : Assurez-vous d’exporter le certificat depuis Trousseau d’accès au format .p12 (et non .cer ou .pem).
« Mot de passe incorrect » lors du téléchargement vers OneSignal
Cause : Le mot de passe a été saisi incorrectement ou n’a pas été défini. Correction :- Essayez d’exporter à nouveau et définissez un nouveau mot de passe.
- Assurez-vous qu’aucun espace supplémentaire n’est ajouté lors du collage.
- Si vous utilisez Provisionator, le mot de passe est affiché dans l’interface.
Clé privée manquante dans le fichier exporté
Cause : Le certificat a été importé mais n’est pas associé à une clé privée. Correction :- Assurez-vous de générer le CSR depuis Trousseau d’accès sur la même machine.
- Après avoir téléchargé le fichier
.cer, double-cliquez pour l’installer et vérifiez si la clé apparaît sous Mes certificats.
Les notifications push ne fonctionnent pas après le téléchargement
Cause : App ID incorrect, ou profil de provisionnement sans les capacités requises. Correction :- Confirmez que le
.p12correspond à l’App ID utilisé dans l’application. - Dans le portail Apple Developer, assurez-vous que l’App ID a Push Notifications activé.
- Assurez-vous que le profil de provisionnement inclut Push.
Certificat expiré
Cause : Le certificat.p12 n’est plus valide.
Correction :
- Accédez à Apple Developer > Certificates et vérifiez la date d’expiration.
- Révoquez l’ancien certificat et créez-en un nouveau.
Prochaines étapes
Configuration du SDK iOS
Installez le SDK OneSignal, initialisez-le dans votre application et envoyez une notification test.
Configuration du SDK mobile
Choisissez votre plateforme et suivez le guide complet d’intégration du SDK pour Android, iOS ou les frameworks multiplateforme.
FAQ
Quand mon certificat .p12 expire-t-il et comment le renouveler ?
Les certificats .p12 expirent un an après leur création. Pour les renouveler, générez un nouveau CSR, créez un nouveau certificat push dans Apple Developer, exportez-le au format .p12 et téléchargez-le à nouveau sur votre tableau de bord OneSignal. Configurez un rappel dans votre calendrier pour éviter toute interruption. Vous pouvez également passer à une clé .p8, qui n’expire pas.Dois-je utiliser .p8 ou .p12 ?
OneSignal recommande les clés .p8 pour la plupart des applications. Une clé .p8 n’expire pas, fonctionne avec toutes les applications de votre compte Apple Developer et est plus simple à gérer. Un certificat .p12 est spécifique à une application et doit être renouvelé annuellement. Consultez le guide de la clé .p8 pour les instructions de configuration.Ai-je besoin d’un profil de provisionnement et comment en créer un ?
Oui, Apple exige différents types de profils pour le développement, les tests (Ad Hoc) et la distribution sur l’App Store. Dans Xcode, sélectionnez Automatically manage signing pour en créer un automatiquement.