Custom Link Prompt
Embed a button on your site to trigger the push prompt.
The custom link prompt provides prompting for push notification permissions through a link or button you can place anywhere on your site. Simply add the "onesignal-customlink-container" CSS class to any div HTML tag on your site to use and enable the prompting option on the OneSignal dashboard or though OneSignal.init if you are using a custom setup. This provides more customization and a less intrusive user experience so this is recommend over other prompting options.
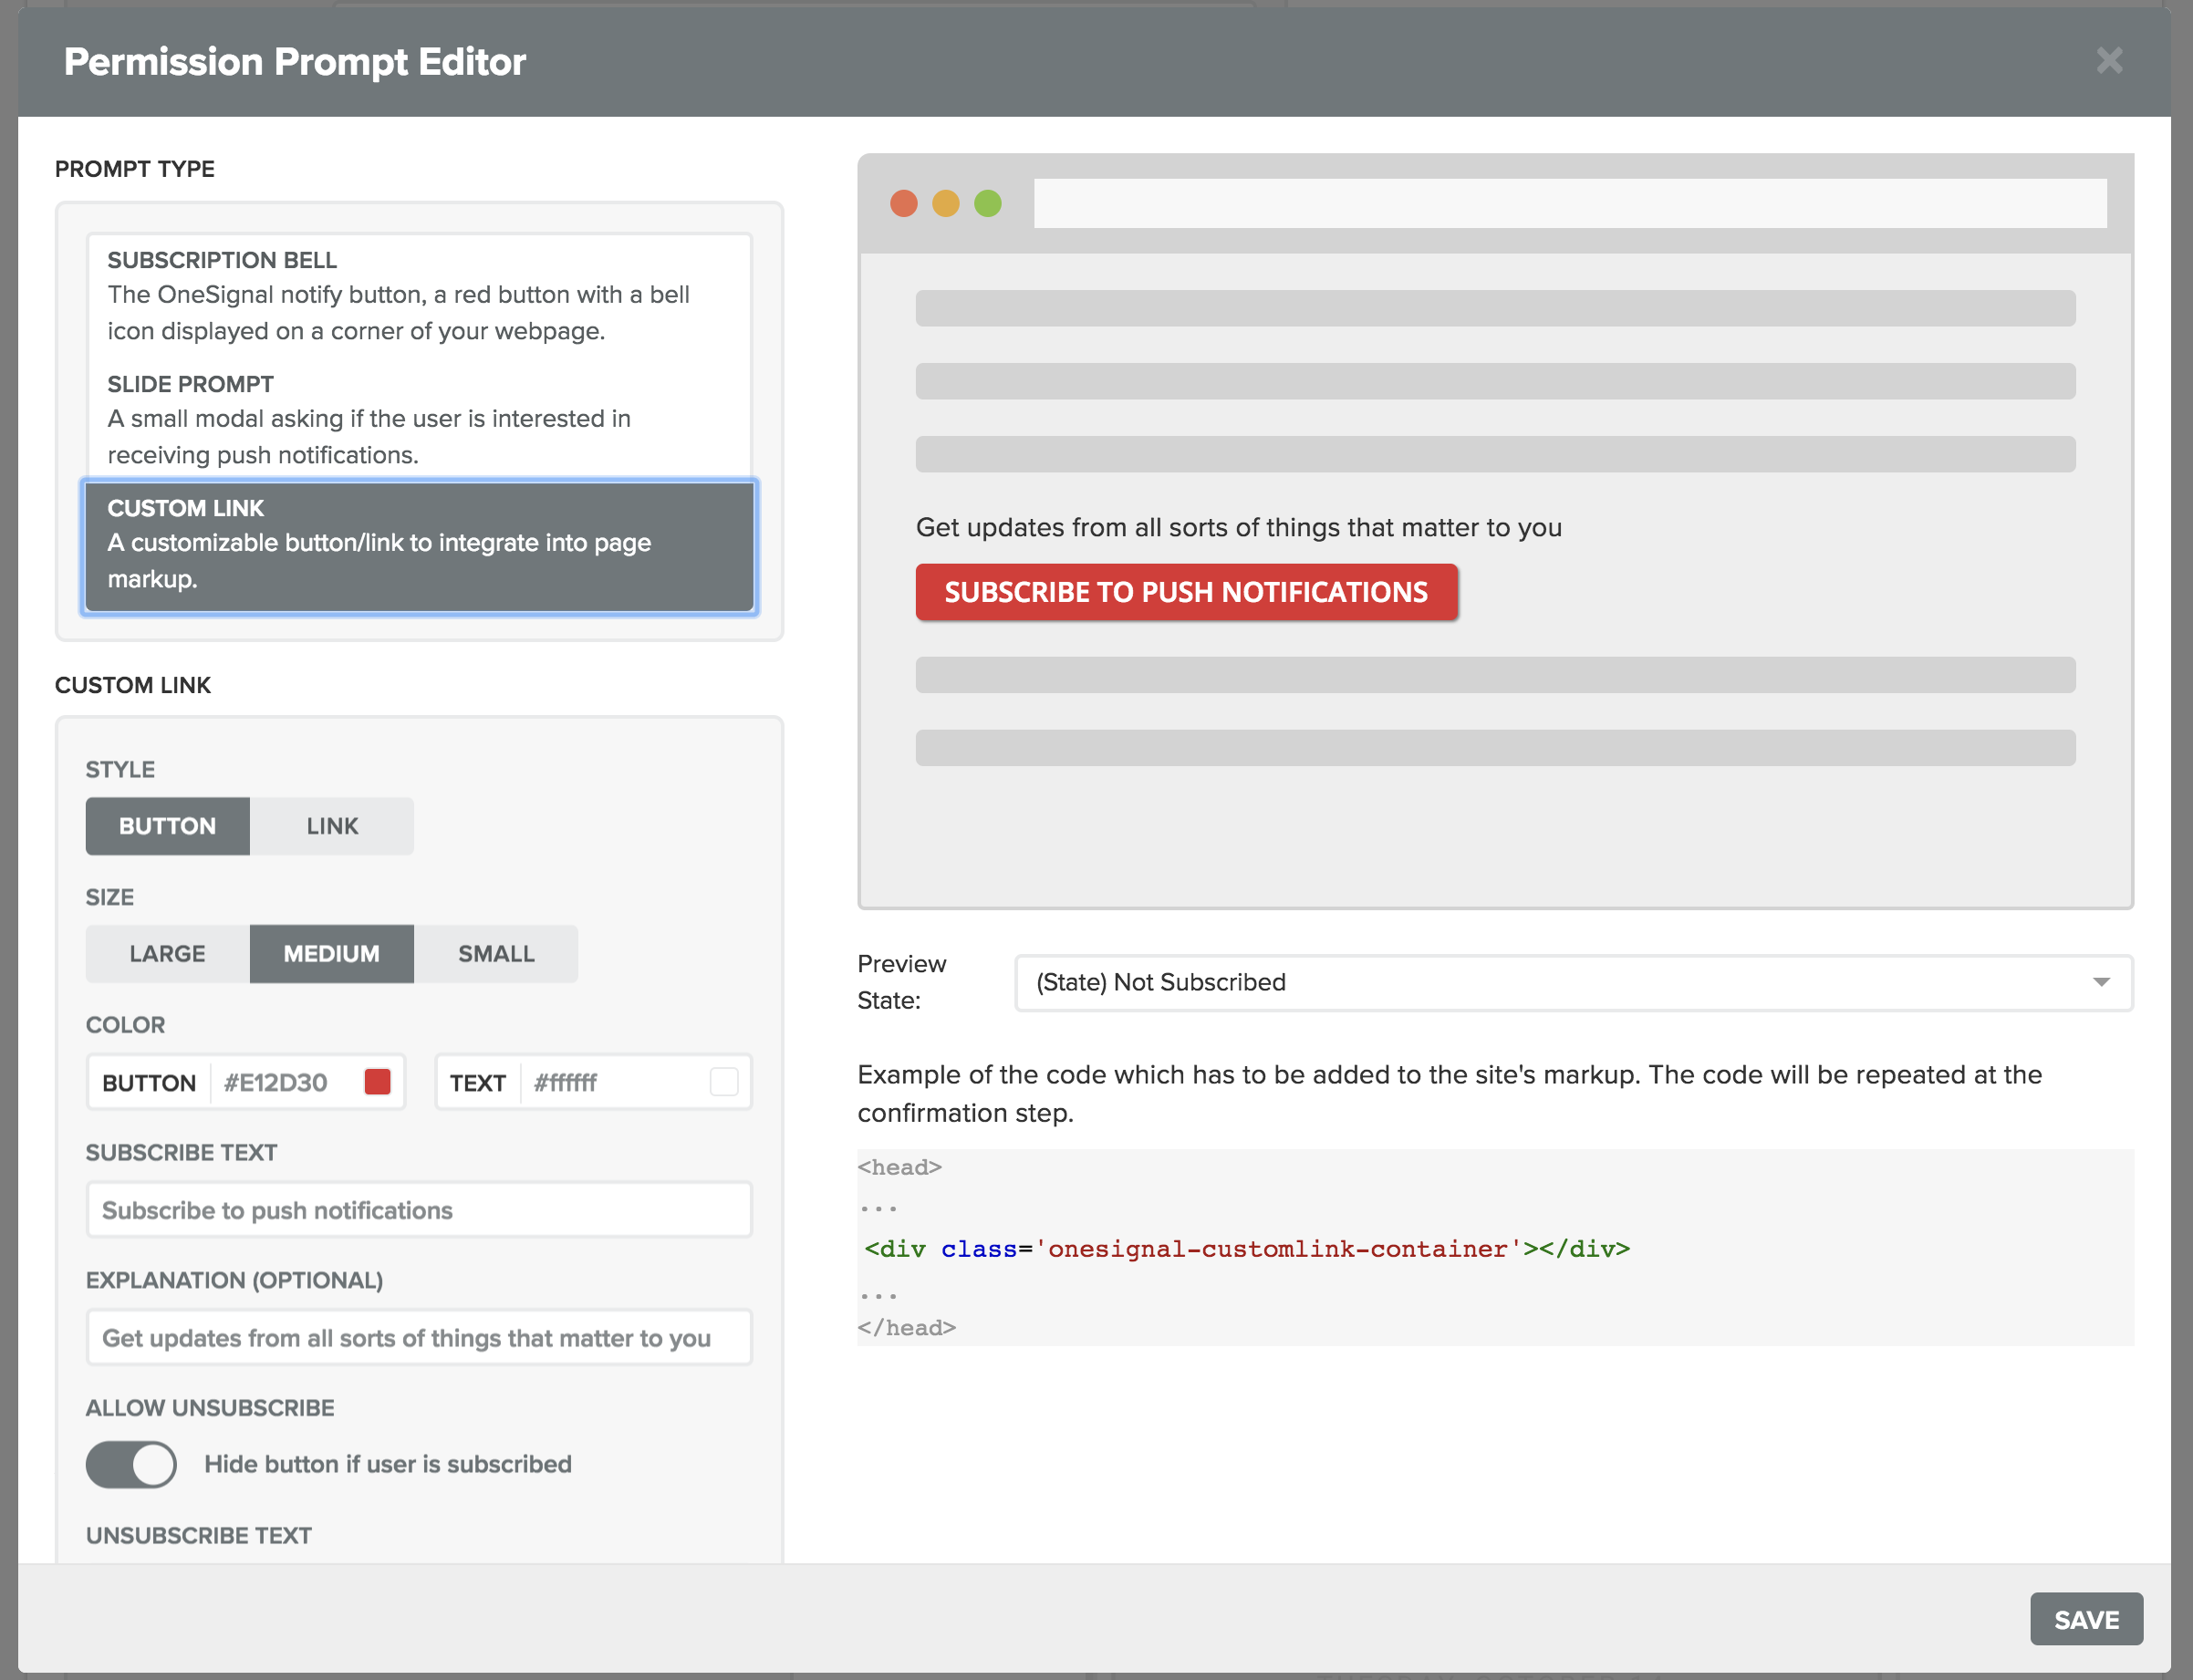
Allows for the following customizations:
- Size
- Explanation text (optional)
- Subscribe text (defaults to "Subscribe to push notifications")
- Flag to show/not to show unsubscribe button (defaults to show)
- Unsubscribe text (defaults to "Unsubscribe from push notifications")
- Colors
- Button color (button mode only)
- Text color
Best practices
This is the recommended way of prompting your users to subscribe. Auto-prompts could be too aggressive if not shown at the right time. Placing a custom link widget in a noticeable spot on your web site will serve its purpose but also will make your users feel like you care about them by not being obtrusive.
A few examples of where it could be a good idea to have a prompt:
- Adding a question right after an article: "Liked this article? Want to get more updates delivered to your desktop?"
- In the footer of your site.
- Having a sign up in a sticky pane at the top/bottom of your site.
- And many more...
And you can combine them as well. Please also note that the approaches may differ based on the device type a user is viewing from.
WordPress Plugin Users
Currently the Custom Link Prompt will only work on the Typical Setup or Custom Code Setup.
Wordpress Users have 3 options:
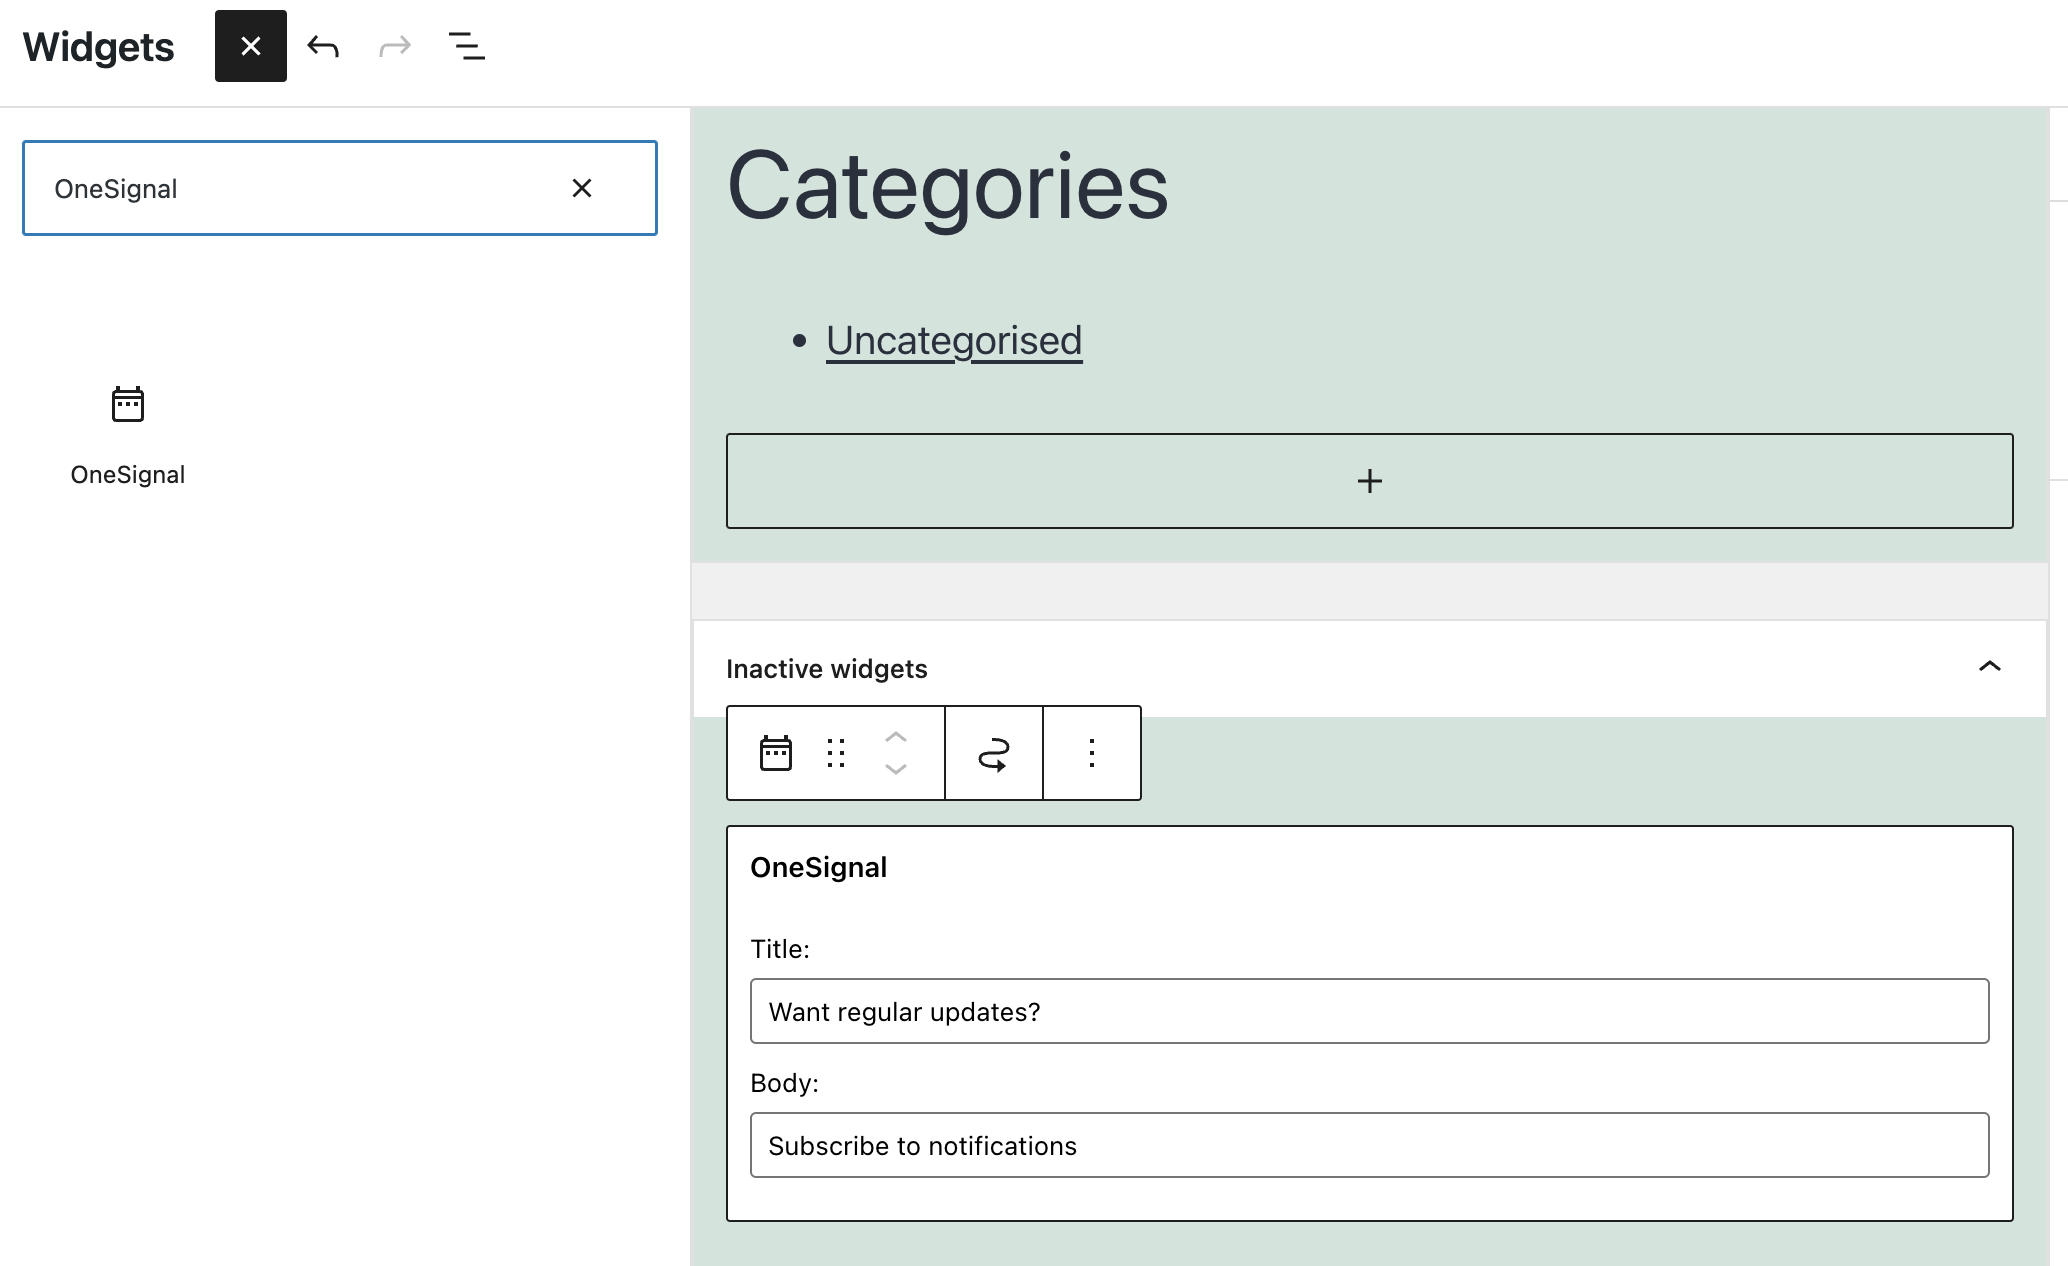
1 - Use the WordPress widget to add the custom link to any 'widgetised' area of your theme.
2 - Switch to the Custom Code Setup and follow the Custom Link Setup below.
3 - Create your own custom link with code provided here
The latter options will require adding code directly to your site.

WordPress Widget
Typical Site Setup
Step 1. Choose Integration Type
OneSignal supports sending web push notifications from a variety of different web technologies. Select Typical Site to continue.

Step 2. Add Prompts
Choose to add a custom link as one of the prompt actions, customize the appearance to fit your color schema and save

Step 3. Add Markup
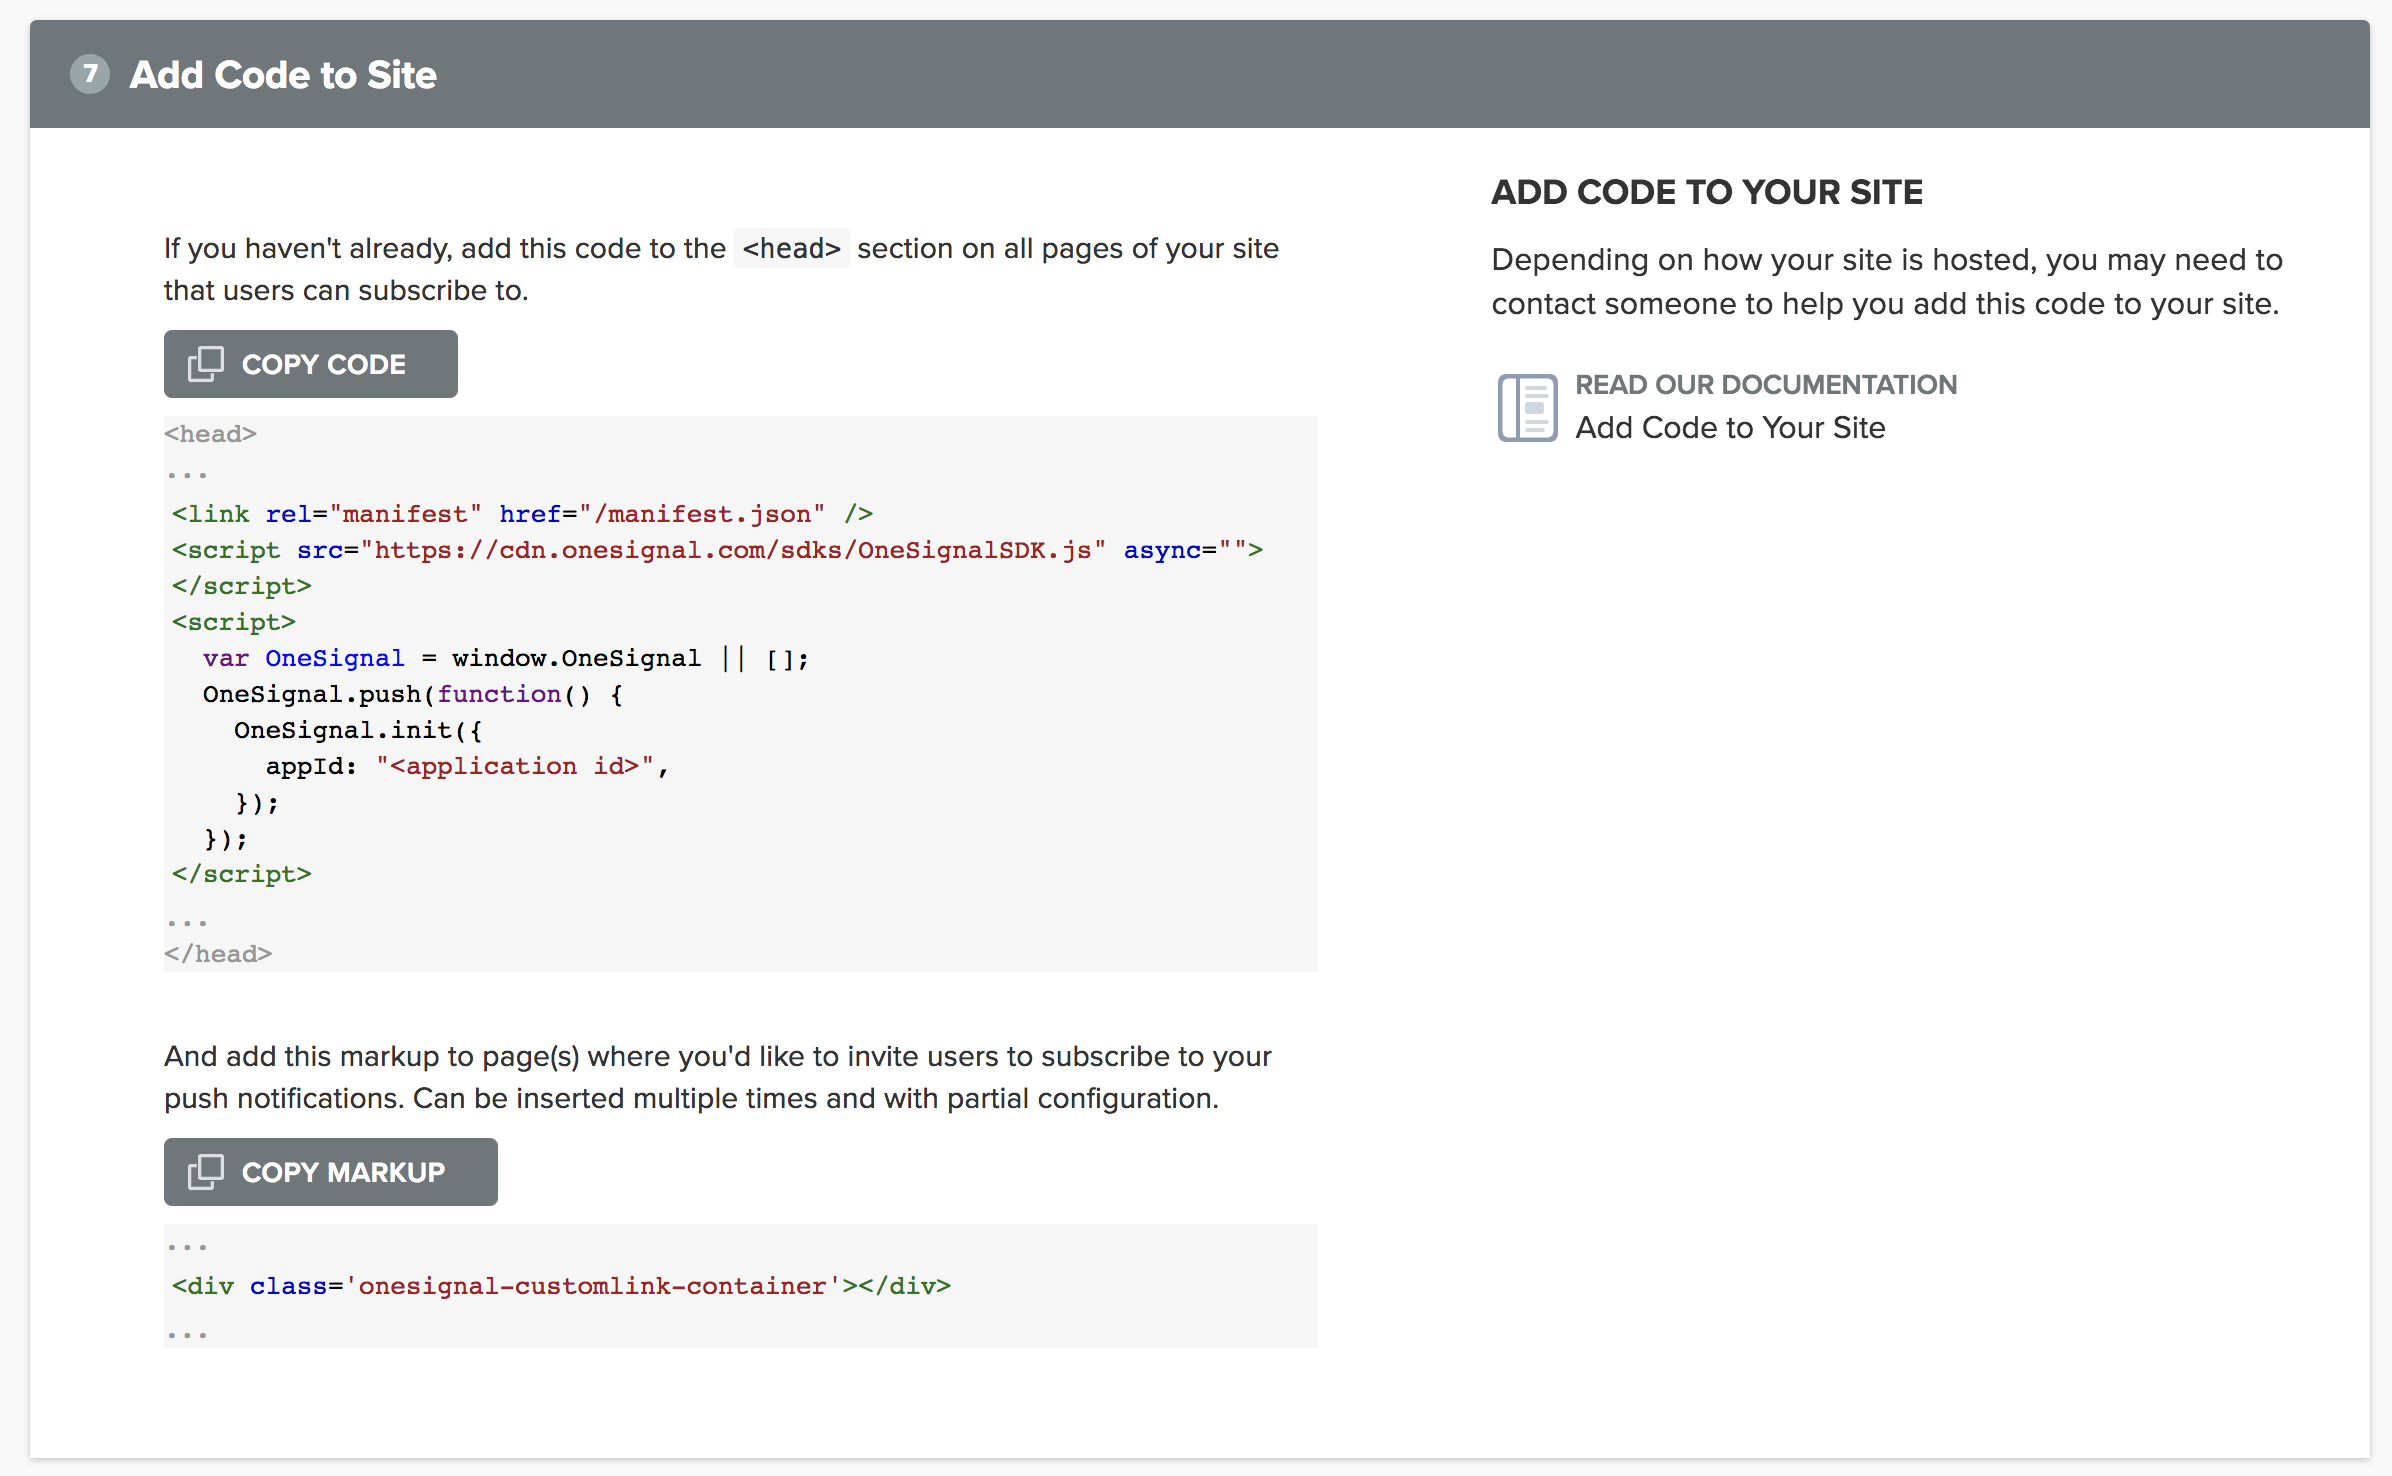
Add the container markup to your page(s). Our dashboard will give you guidance on every step.

You can change the appearance later from the dashboard and the changes will automatically be applied without updating your code again.
Custom Code Setup
Step 1. Choose Integration Type
OneSignal supports sending web push notifications from a variety of different web technologies. Select Custom Code to continue and save.

Step 2. Add Markup
Add the following markup on your page where you want the widget to render.
<div class='onesignal-customlink-container'></div>
Step 3. Provide configuration
Use the promptOptions -> customlink parameter in your web SDK initialization options.
// Your other init options here
promptOptions: {
  customlink: {
    enabled: true, /* Required to use the Custom Link */
    style: "button", /* Has value of 'button' or 'link' */
    size: "medium", /* One of 'small', 'medium', or 'large' */
    color: {
      button: '#E12D30', /* Color of the button background if style = "button" */
      text: '#FFFFFF', /* Color of the prompt's text */
    },
    text: {
      subscribe: "Subscribe to push notifications", /* Prompt's text when not subscribed */
      unsubscribe: "Unsubscribe from push notifications", /* Prompt's text when subscribed */
      explanation: "Get updates from all sorts of things that matter to you", /* Optional text appearing before the prompt button */
    },
    unsubscribeEnabled: true, /* Controls whether the prompt is visible after subscription */
  }
}
Provides fallback defaults in case some settings are missing.
Styling
To keep things simple and to get the flexibility of changing the appearance of the widget at any time through dashboard all you have to add to your markup is a div container with our special class name. If for some reason you find our styling to configurable enough there are a way to customize it further.
All elements have a special class onesignal-reset that removes any prior styling from the element to make sure there are no conflict with our internal styles and that it looks exactly as you've defined it in the dashboard.
If you ever find yourself in need to redefine any OneSignal styles, here is a short reference of the classes used in the Custom Link widget
| Class Name | Applies to |
|---|---|
| onesignal-customlink-container | Main container |
| onesignal-customlink-subscribe | Action button |
| onesignal-customlink-explanation | Paragraph with a custom explanation text |
| state-subscribed | All components internal to the main container |
| state-unsubscribed | All components internal to the main container |
| button | Action button if in button mode |
| link | Action button if in link mode |
| small | All components internal to the main container |
| medium | All components internal to the main container |
| large | All components internal to the main container |
| hide | All components internal to the main container if unsubscribeEnabled is set to false |
To override any of them you have to create a CSS rule with higher specificity, combining the class name with the parent element id should be enough. But beware of the conflicts, our internal styles may change.
Updated 5 months ago
