Swift Package Manager Setup
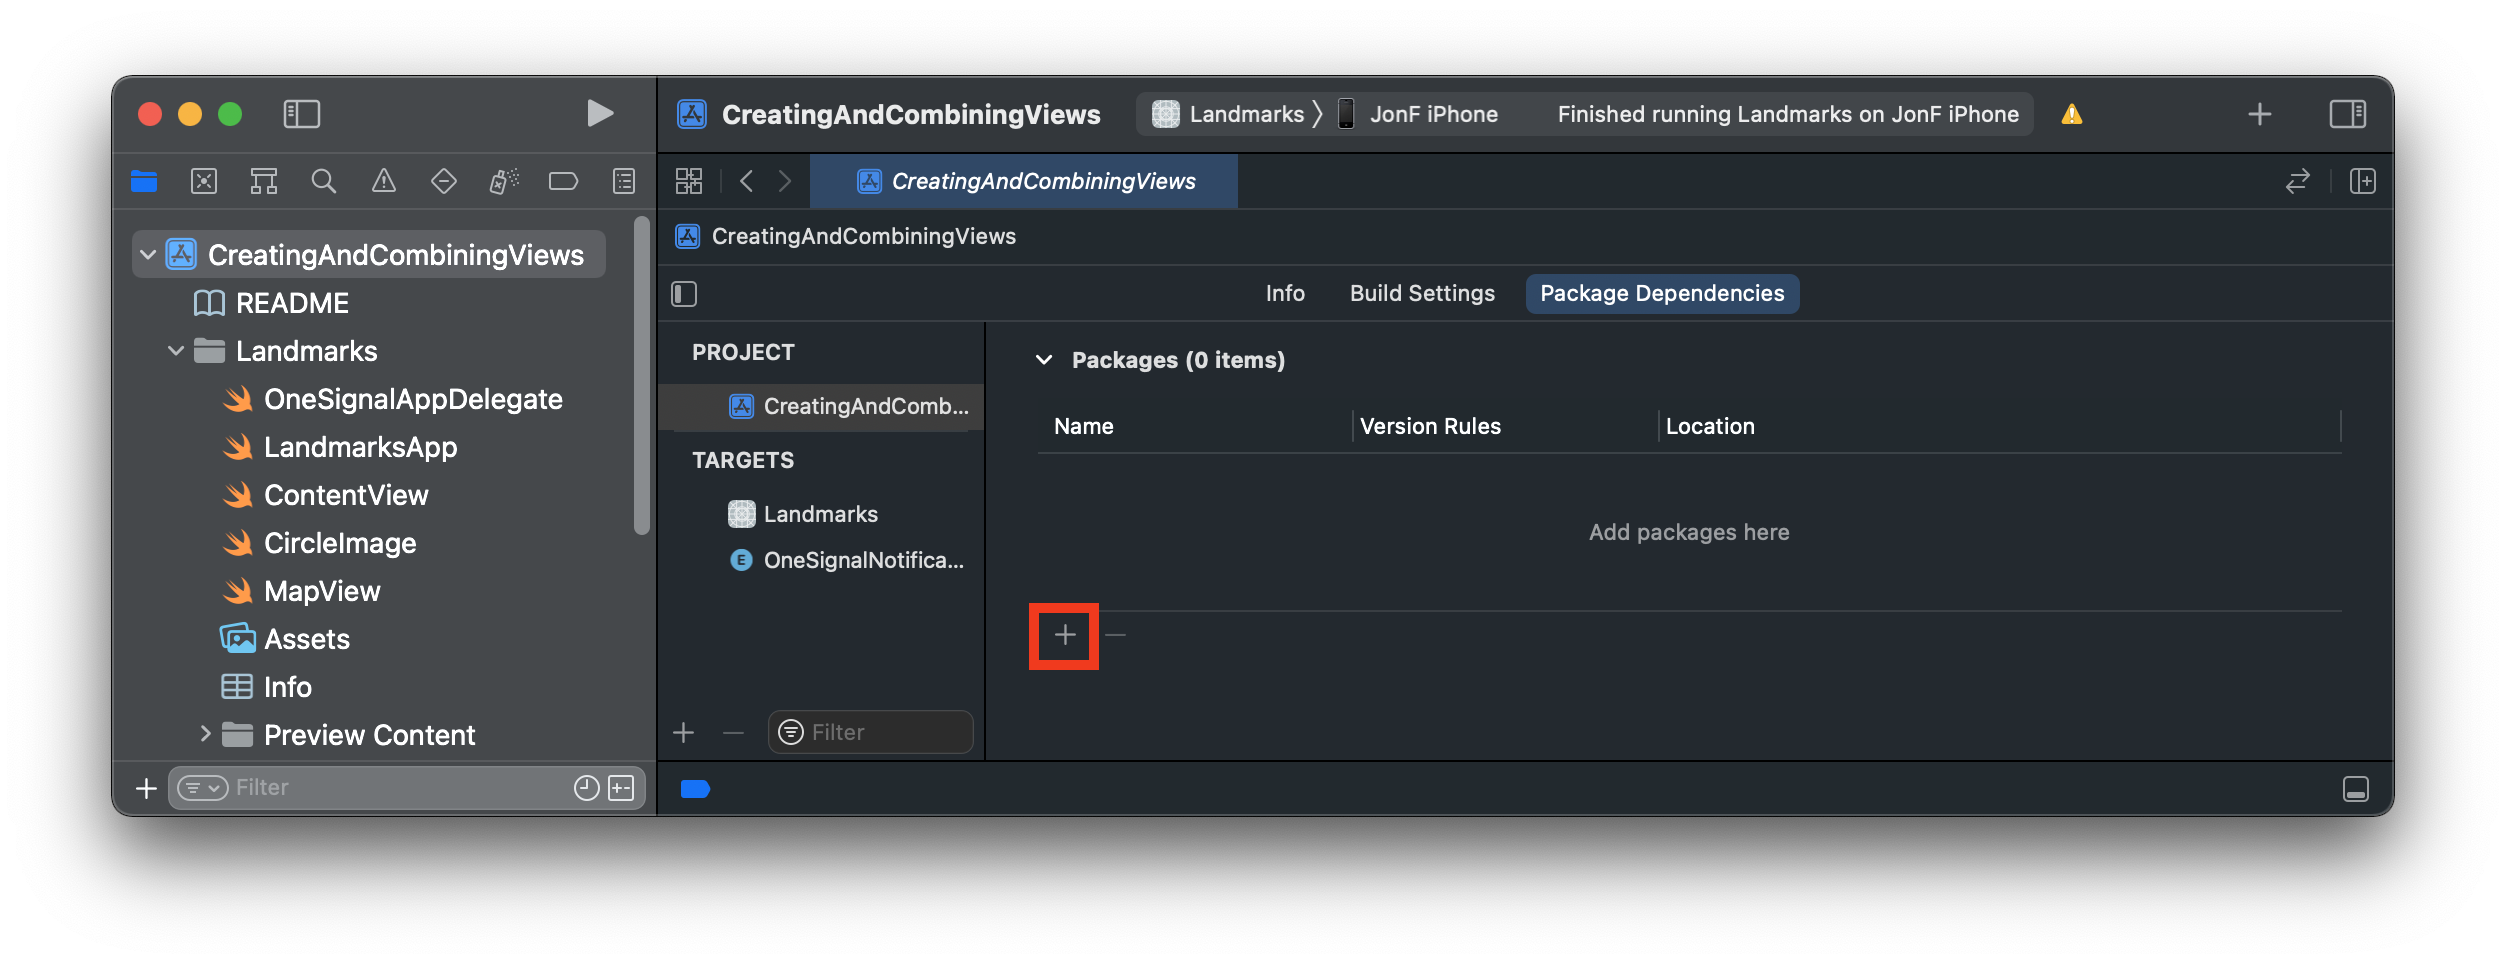
1. Open your project in Xcode and navigate to the project's settings > Package Dependencies and press the + button.
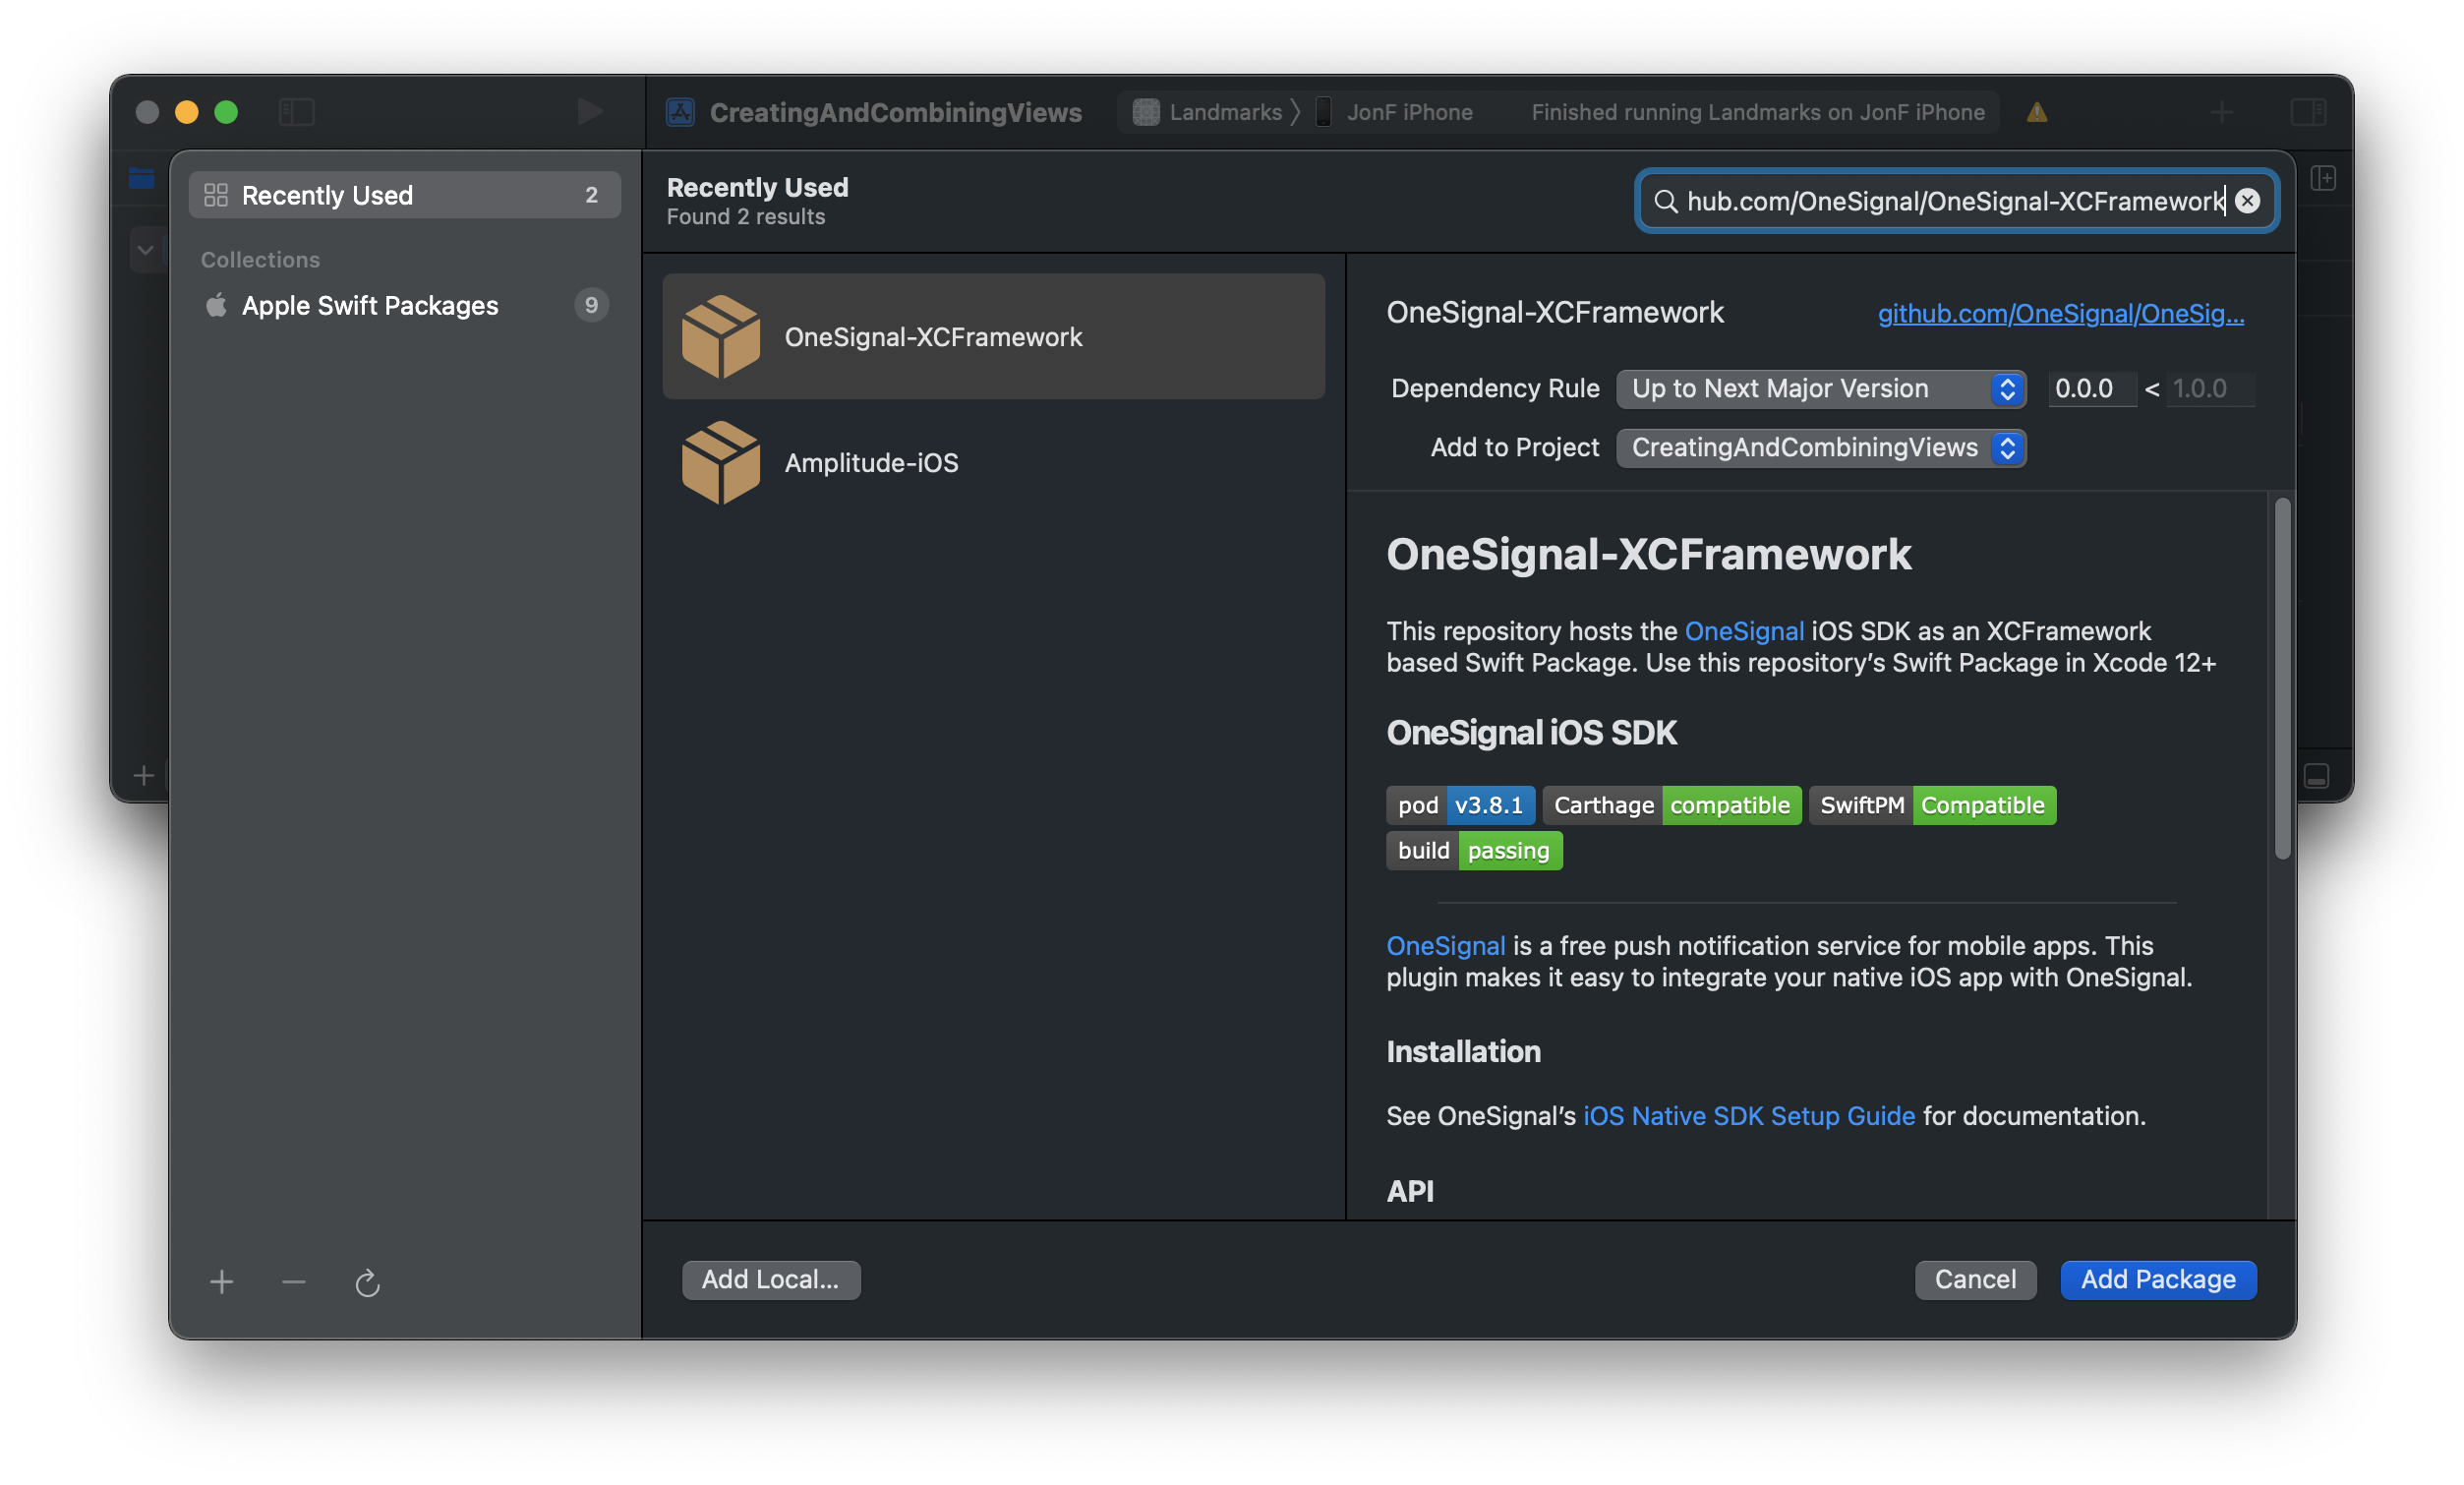
2. enter Package URL: https://github.com/OneSignal/OneSignal-XCFramework
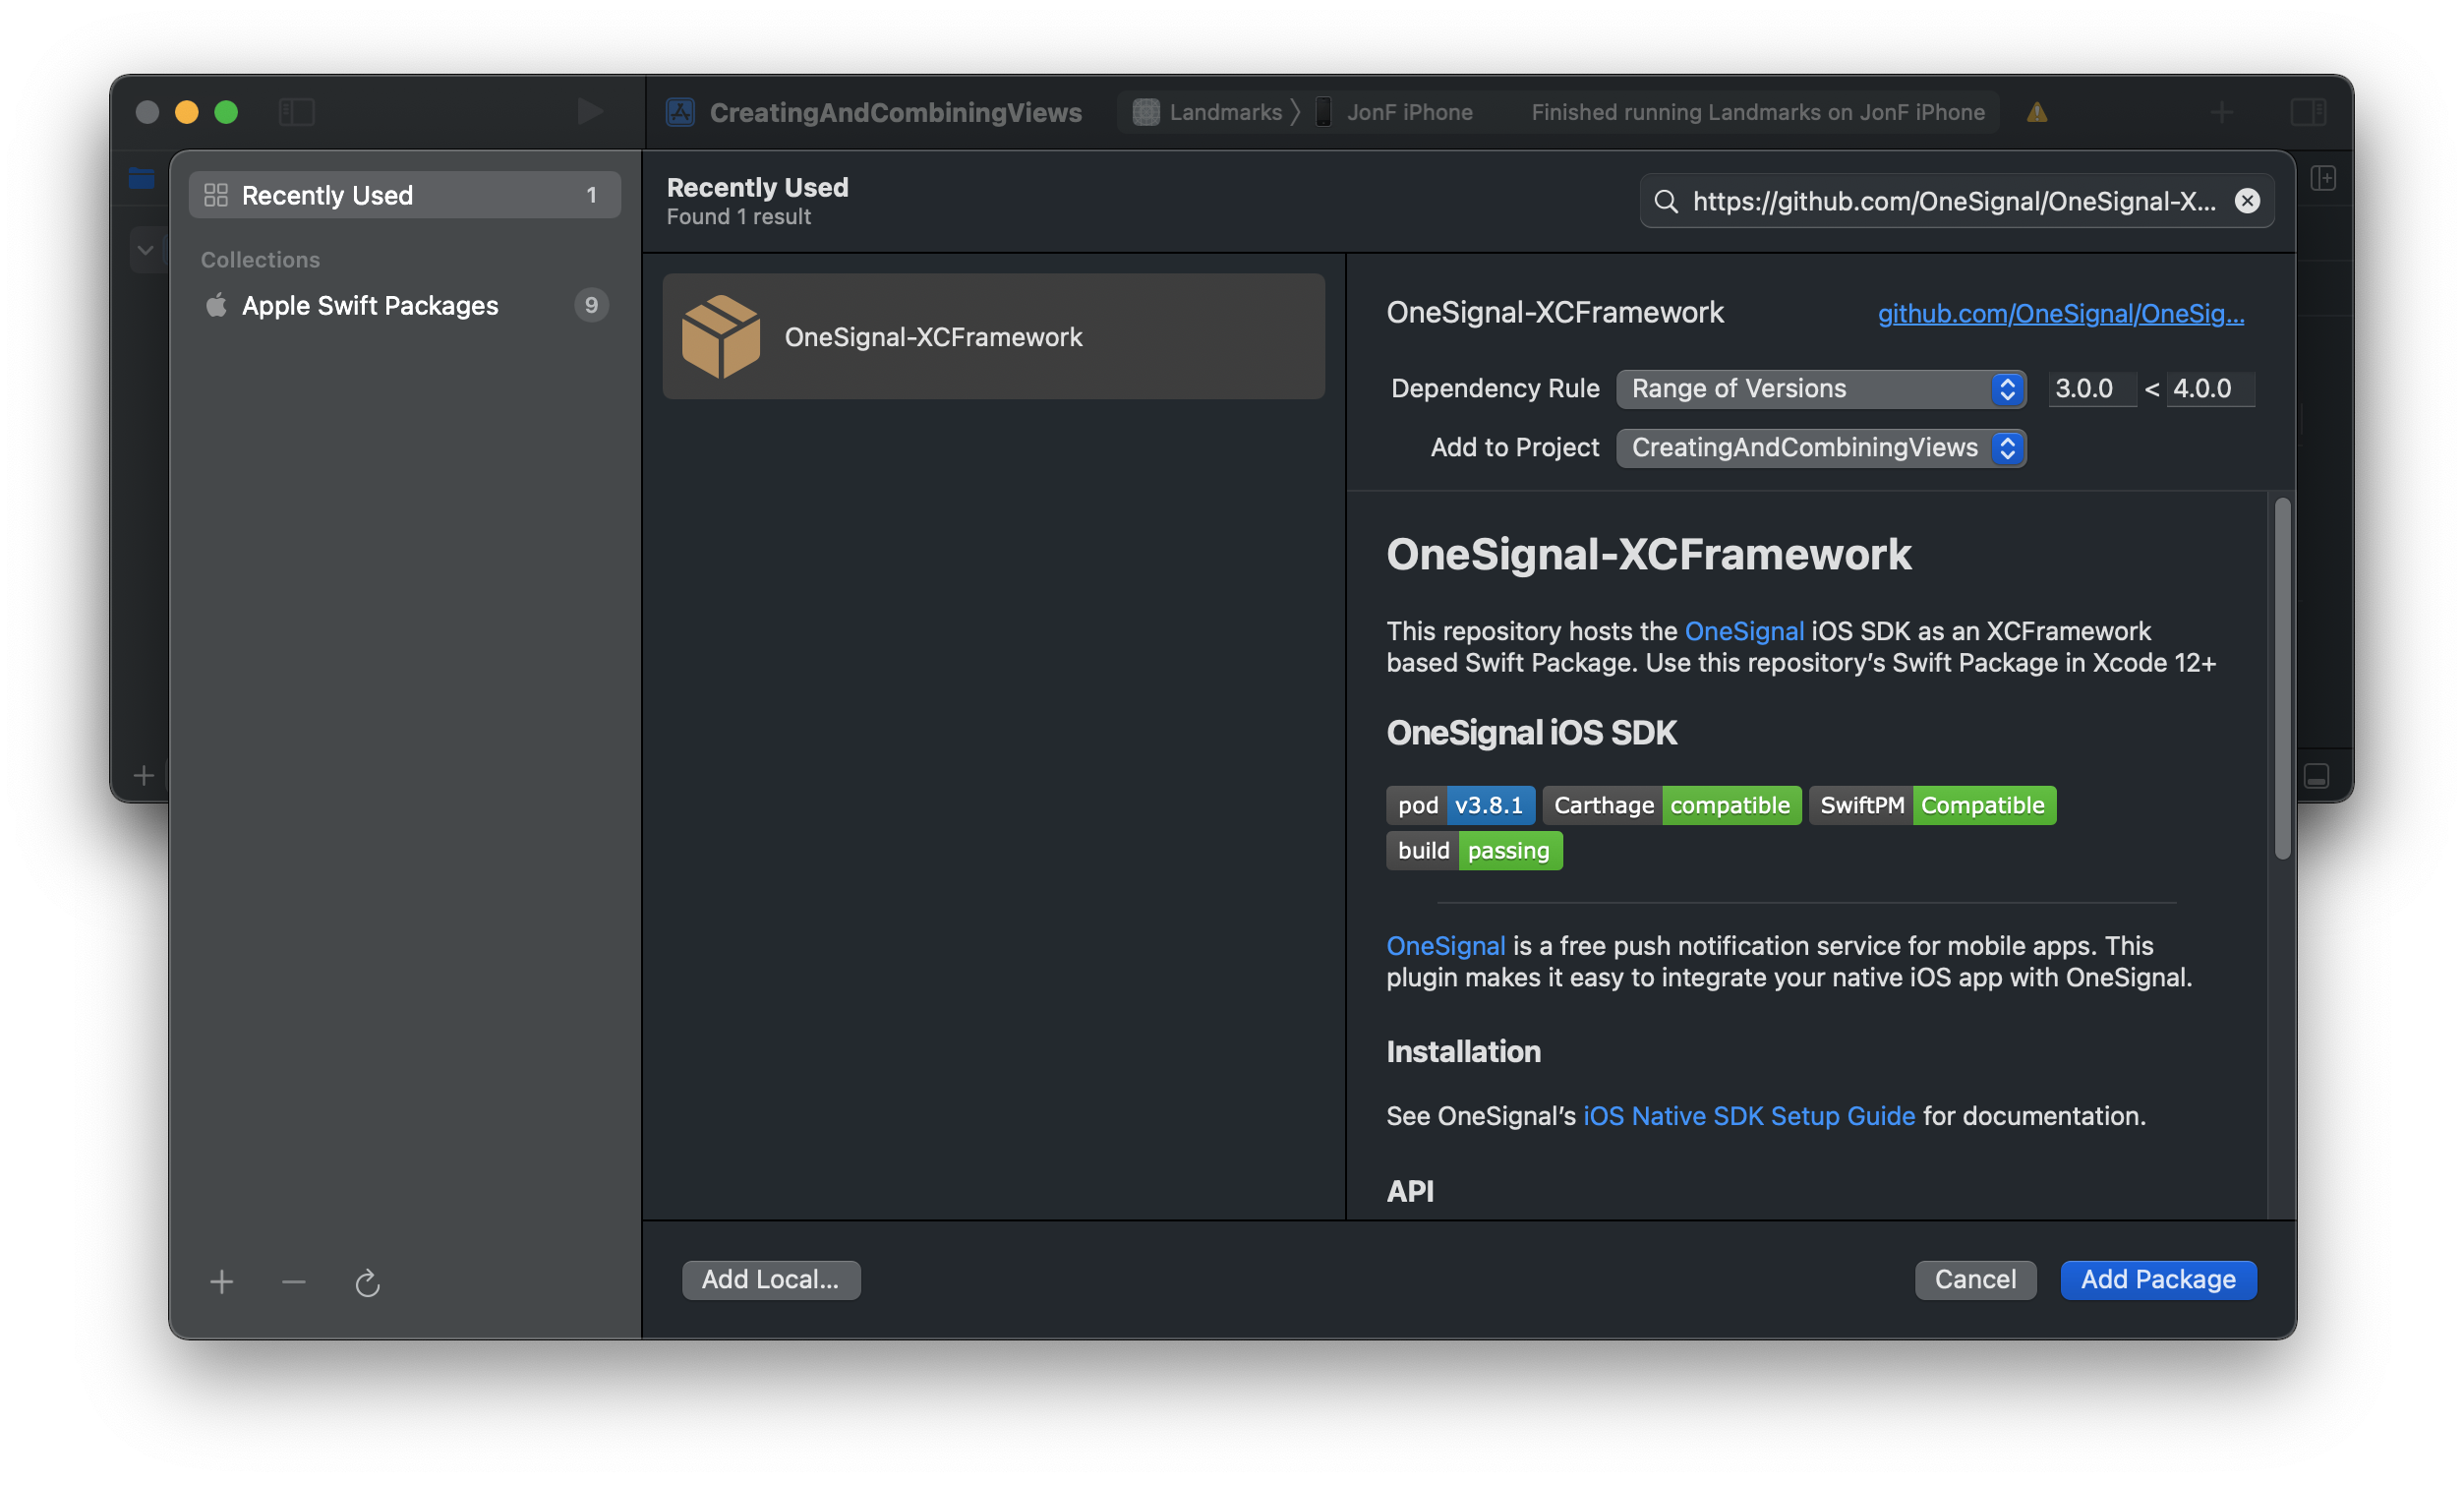
3. Set the Dependency Rule to: Range of Versions and 3.0.0 < 4.0.0
Click Add Package
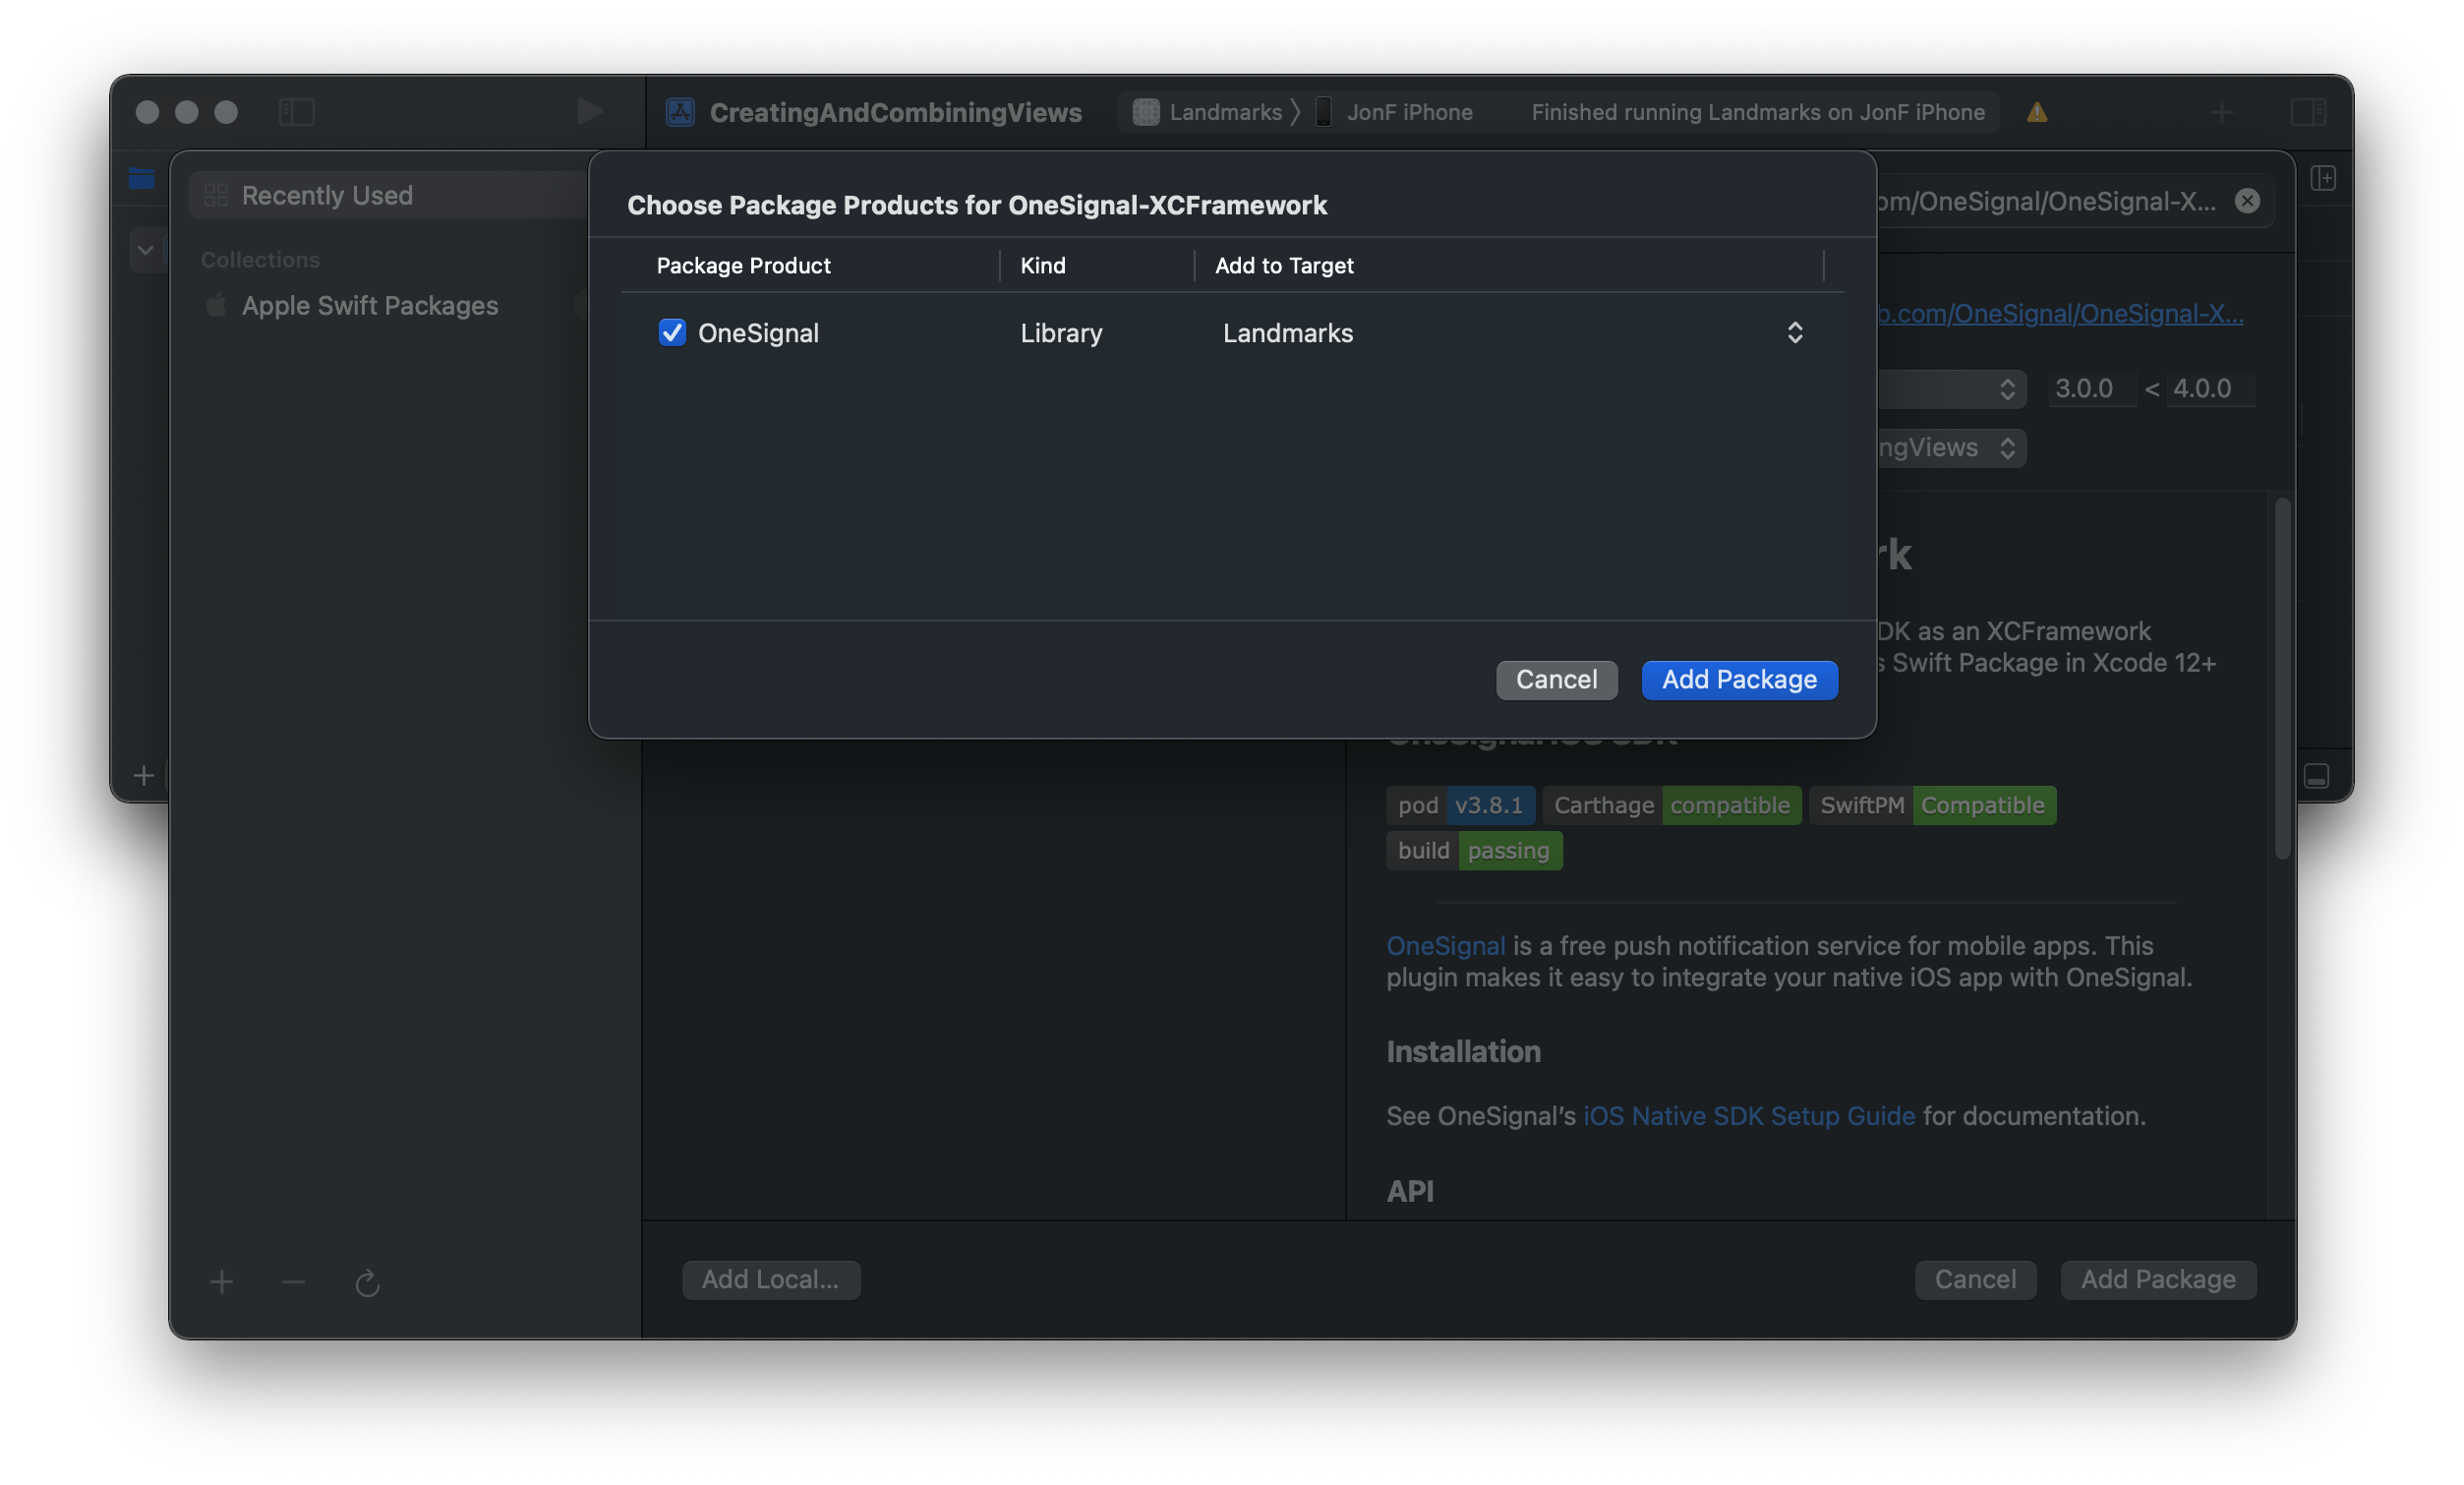
4. On the next screen to choose your Package, select the OneSignal Package and Add Package to your main app Target.
Using the Modularized SDK
If you are looking to resolve the warning "Linking against a dylib which is not safe for use in application extensions", please use SDK version 3.11.0+, and make the following package and import changes.
Use product
OneSignalfor your Main App Target, and productOneSignalExtensionfor your Notification Service Extension target.Then, in your
NotificationServiceclass,import OneSignalExtensioninstead ofimport OneSignaland change references ofOneSignalin method bodies toOneSignalExtension.
5. Open your Main App Target and under "Frameworks, Libraries, and Embedded Content" ensure that the OneSignal SDK has been added.
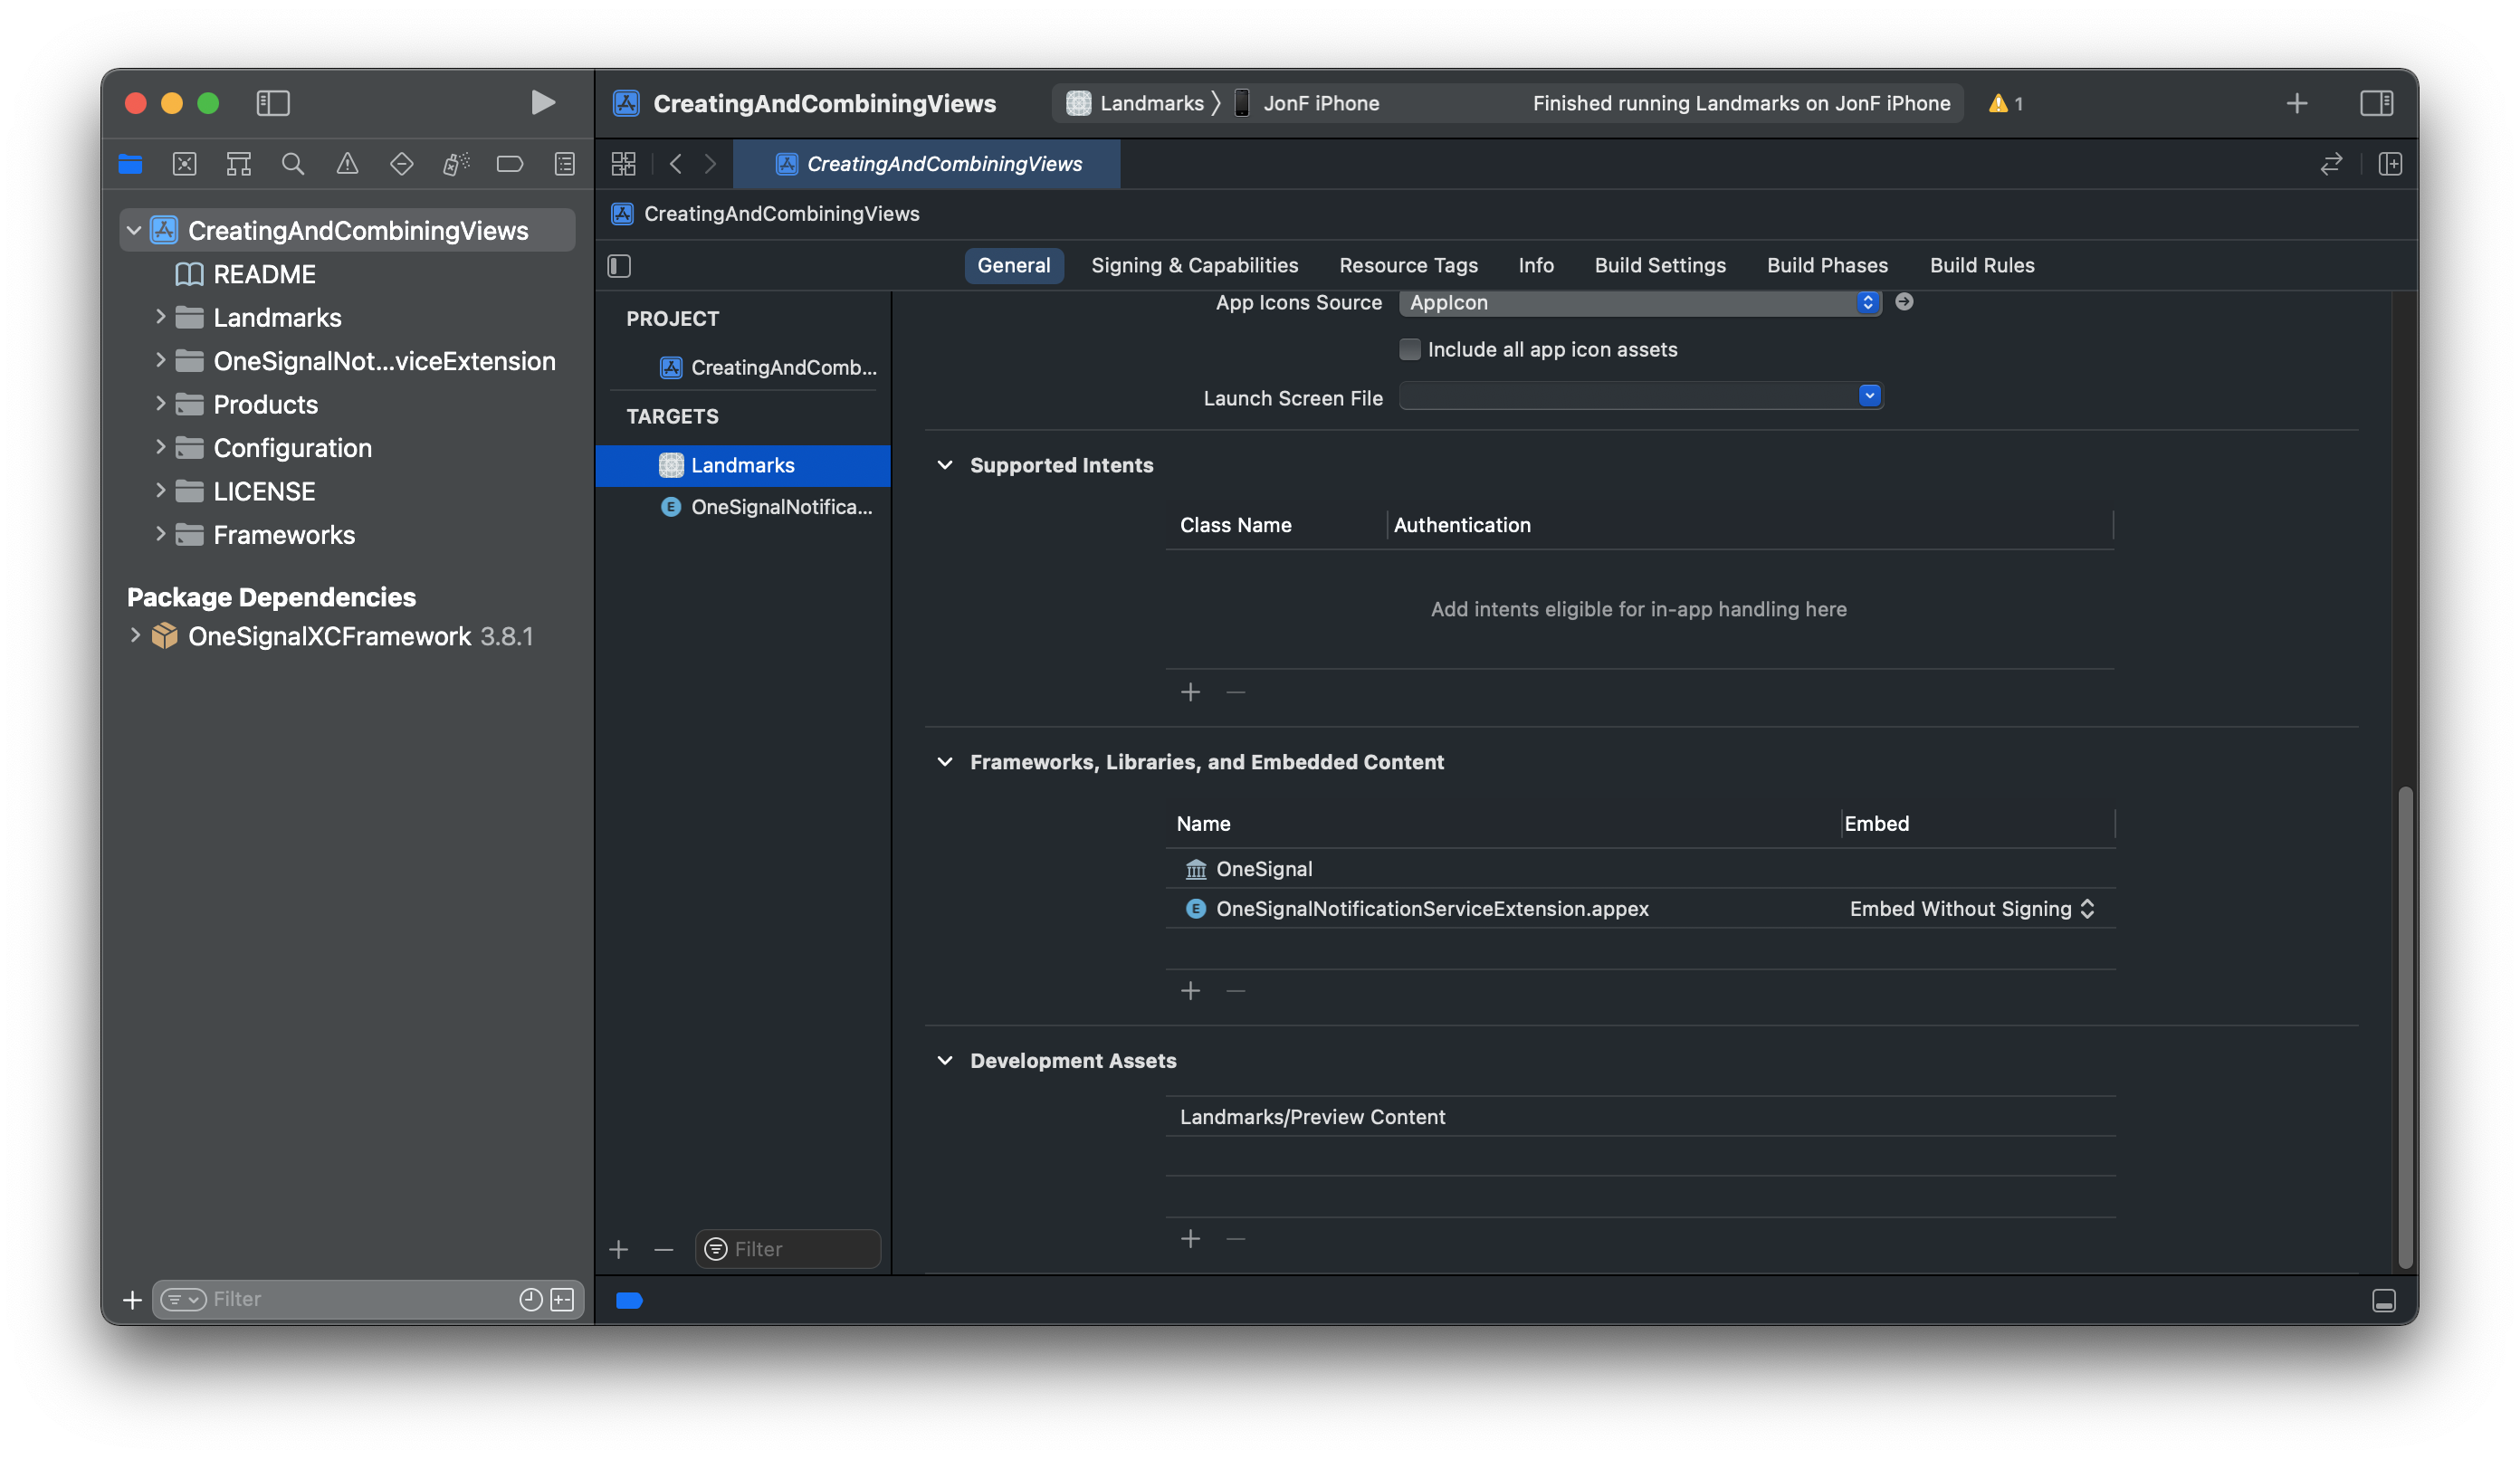
6. Next we will link the library to your App's Notification Service Extension (follow the setup guide if you have not created one yet).
Select the OneSignalNotificationServiceExtension Target > Build Settings > Runpath Search Paths.
The build setting should include the path @executable_path/../../Frameworks. Add this if you do not see it
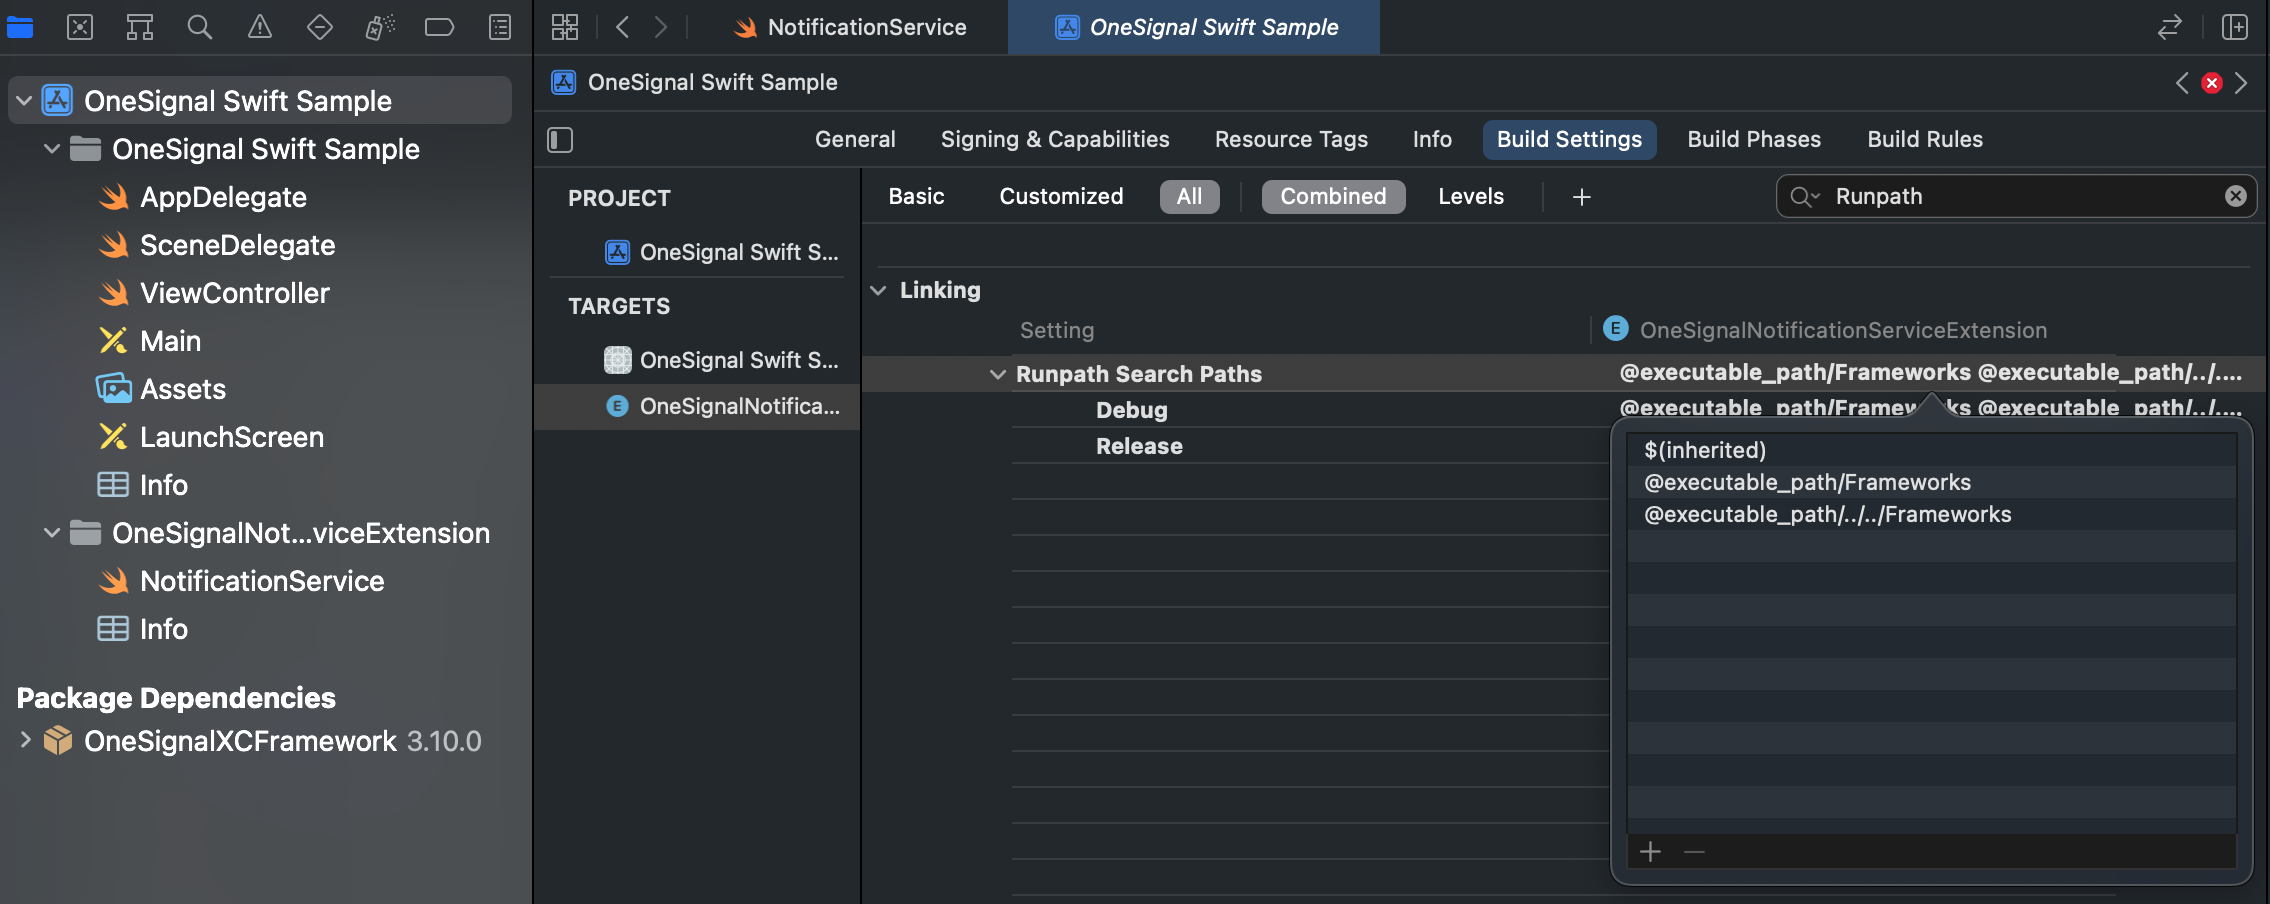
Done! Continue with the rest of your setup guide.
Updated about 2 years ago
