Add iOS Live Activities to a React Native, Flutter, Unity, Cordova, Capacitor, or .NET MAUI app. The setupDefault method lets the OneSignal SDK own the ActivityKit lifecycle, so the only native code you write is the widget layout.
Follow this guide to add Live Activities to an app built with a cross-platform framework such as React Native, Flutter, Unity, Cordova, Capacitor, or .NET MAUI. Live Activities normally require ActivityKit code written in Swift. The OneSignal SDK’s setupDefault method manages the Live Activity lifecycle for you against a built-in DefaultLiveActivityAttributes type, so the only native code you write is the widget layout.
Live Activities are an iOS feature. They are not available on Android, on Huawei devices, or on the web. For a comparable Android experience, see Android Live Updates.
Your framework’s OneSignal SDK, on a release that bundles OneSignal iOS SDK 5.2.0 or higher. That version added setupDefault and push-to-start (for example, react-native-onesignal 5.2.0). Follow Mobile SDK setup first.
OneSignal iOS SDK 5.2.15 or higher for click tracking and confirmed receipt. See Live Activities analytics.
iOS 16.1+ or iPadOS 17+ to start a Live Activity in-app with startDefault.
iOS 17.2+ to start a Live Activity remotely with the Start Live Activity API. Apple added push-to-start in iOS 17.2, so devices below it can only start activities in-app.
A .p8 APNs key. Apple does not support p12 certificates with Live Activities.
setupDefault tells the OneSignal SDK to manage the Live Activity lifecycle for its built-in DefaultLiveActivityAttributes type. Call it once per app launch, right after you initialize the OneSignal SDK. The SDK then registers the device’s push-to-start token, which is what lets you start, update, and end the activity with the Start Live Activity and Update Live Activity APIs.To start an activity from inside your app instead of remotely, call startDefault with an activityId, static attributes, and initial content. Your app must be in the foreground.
import { Platform } from 'react-native';import { OneSignal } from 'react-native-onesignal';// Live Activities are iOS-only, so guard the call.if (Platform.OS === 'ios') { // Register for push-to-start. Run this on every app launch. OneSignal.LiveActivities.setupDefault(); // Optional: start the activity from inside the app instead of with a push. const activityId = 'my_activity_id'; const attributes = { title: 'Sample Title' }; const content = { message: { en: 'message' } }; OneSignal.LiveActivities.startDefault(activityId, attributes, content);}
import 'package:onesignal_flutter/onesignal_flutter.dart';// Register for push-to-start. Run this on every app launch.OneSignal.LiveActivities.setupDefault();// Optional: start the activity from inside the app instead of with a push.const String activityId = "my_activity_id";OneSignal.LiveActivities.startDefault(activityId, { "title": "Welcome!",}, { "message": {"en": "Hello World!"},});
using OneSignalSDK;// Register for push-to-start. Run this on every app launch.OneSignal.LiveActivities.SetupDefault();// Optional: start the activity from inside the app instead of with a push.string activityId = "my_activity_id";OneSignal.LiveActivities.StartDefault( activityId, new Dictionary<string, object>() { { "title", "Welcome!" } }, new Dictionary<string, object>() { { "message", new Dictionary<string, object>() { { "en", "Hello World!"} }}, });
// Register for push-to-start. Run this on every app launch.window.plugins.OneSignal.LiveActivities.setupDefault();// Optional: start the activity from inside the app instead of with a push.const activityId = "my_activity_id";const attributes = { title: "Sample Title" };const content = { message: { en: "message" } };window.plugins.OneSignal.LiveActivities.startDefault( activityId, attributes, content);
import OneSignal from "onesignal-cordova-plugin";// Register for push-to-start. Run this on every app launch.OneSignal.LiveActivities.setupDefault();// Optional: start the activity from inside the app instead of with a push.const activityId = "my_activity_id";const attributes = { title: "Sample Title" };const content = { message: { en: "message" } };OneSignal.LiveActivities.startDefault(activityId, attributes, content);
Live Activities are iOS-only. The Flutter SDK checks the platform internally, so setupDefault does nothing on Android. In React Native, guard the call as shown above.
setupDefault listens for both push-to-start and push-to-update tokens by default. In React Native and Flutter, pass setup options to enable only one of them. For example, if you always start activities from inside the app, you can skip push-to-start registration.
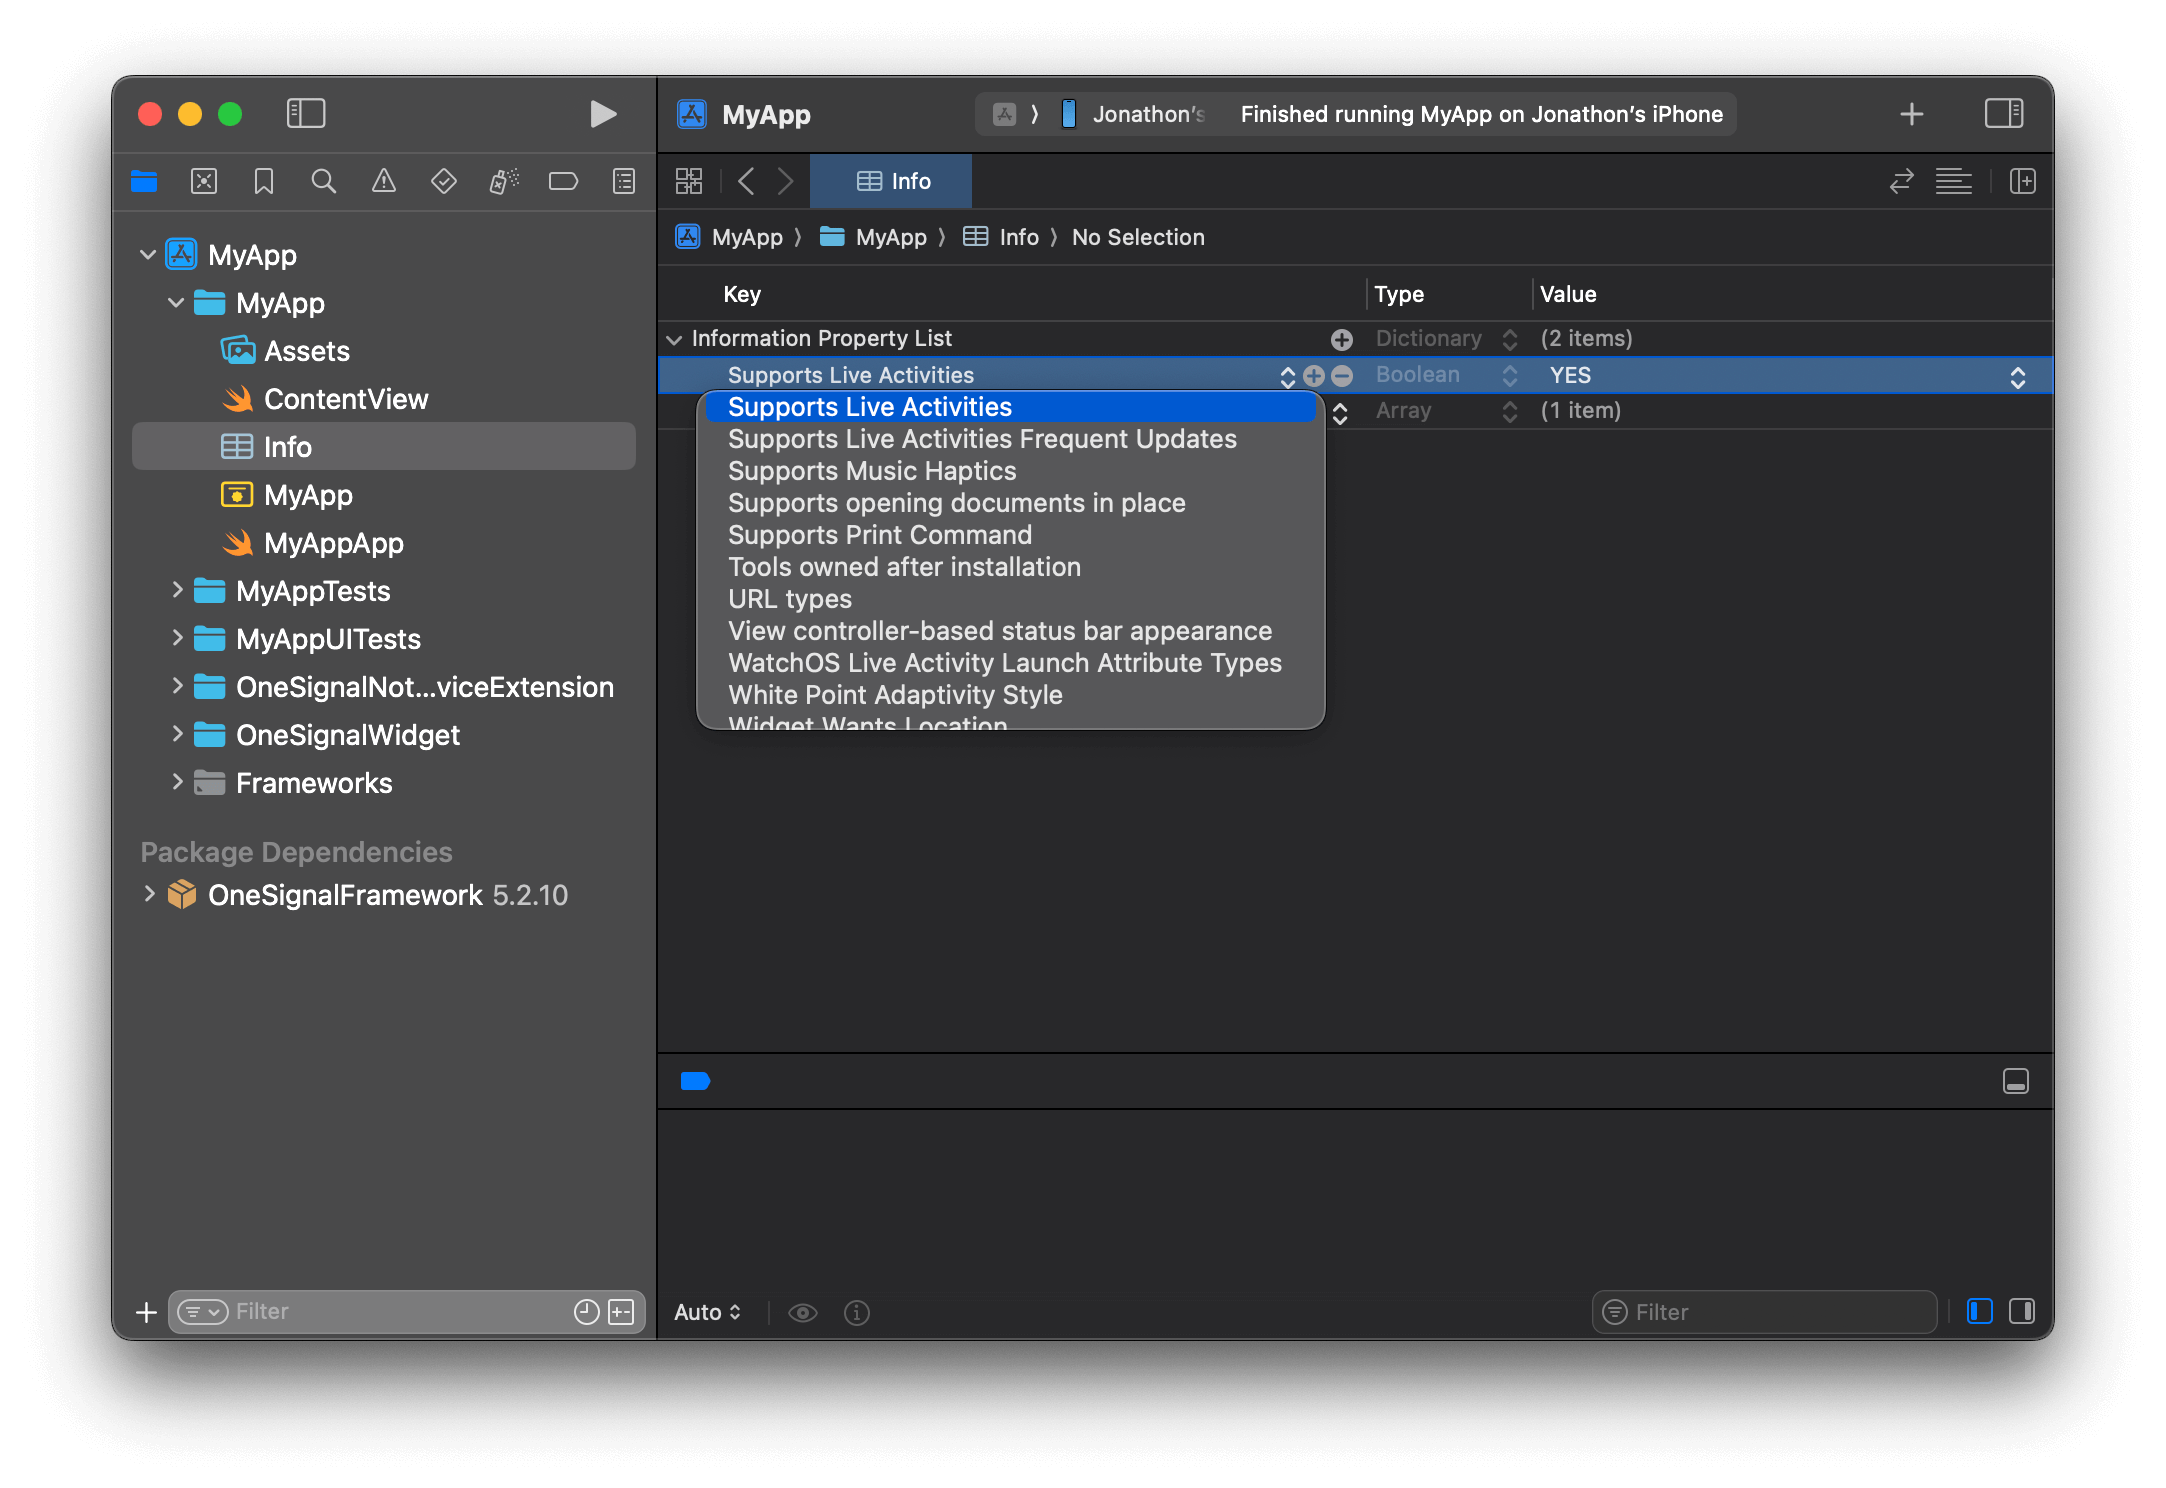
In Xcode, open your main target’s Info.plist, add the key Supports Live Activities as Boolean, and set it to YES. The raw key name is NSSupportsLiveActivities.
Add Supports Live Activities key to Info.plist and set its value to Boolean YES.
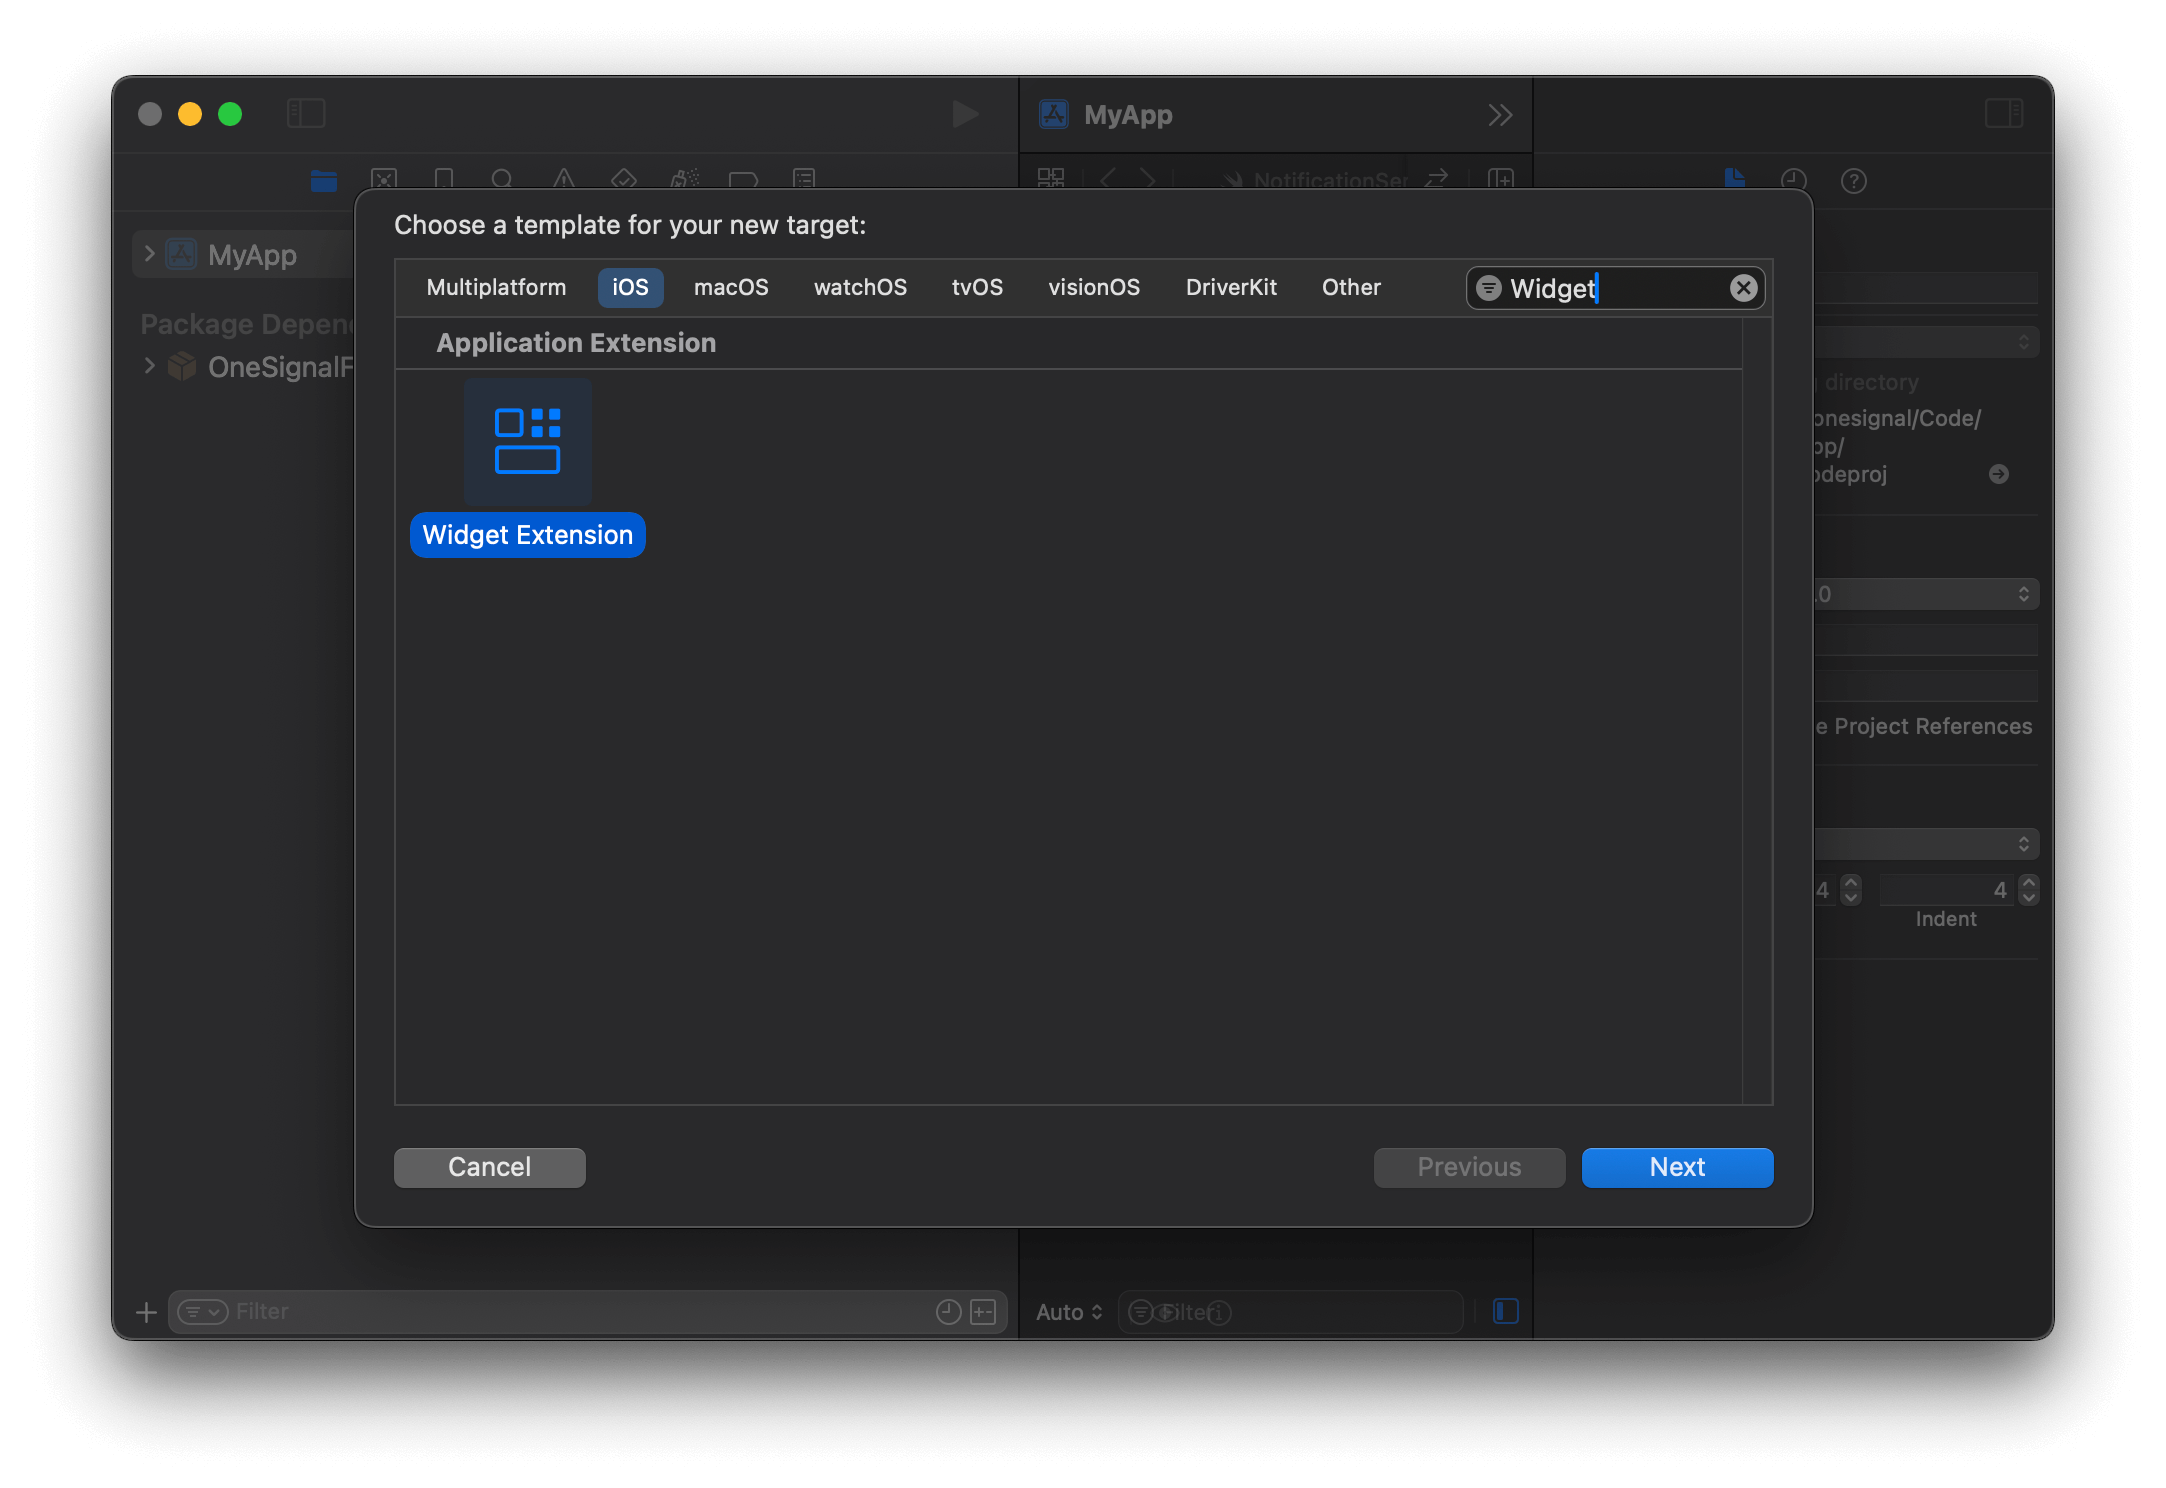
In Xcode, go to File > New > Target… > Widget Extension.
Add a new Widget Extension target for your app in Xcode.
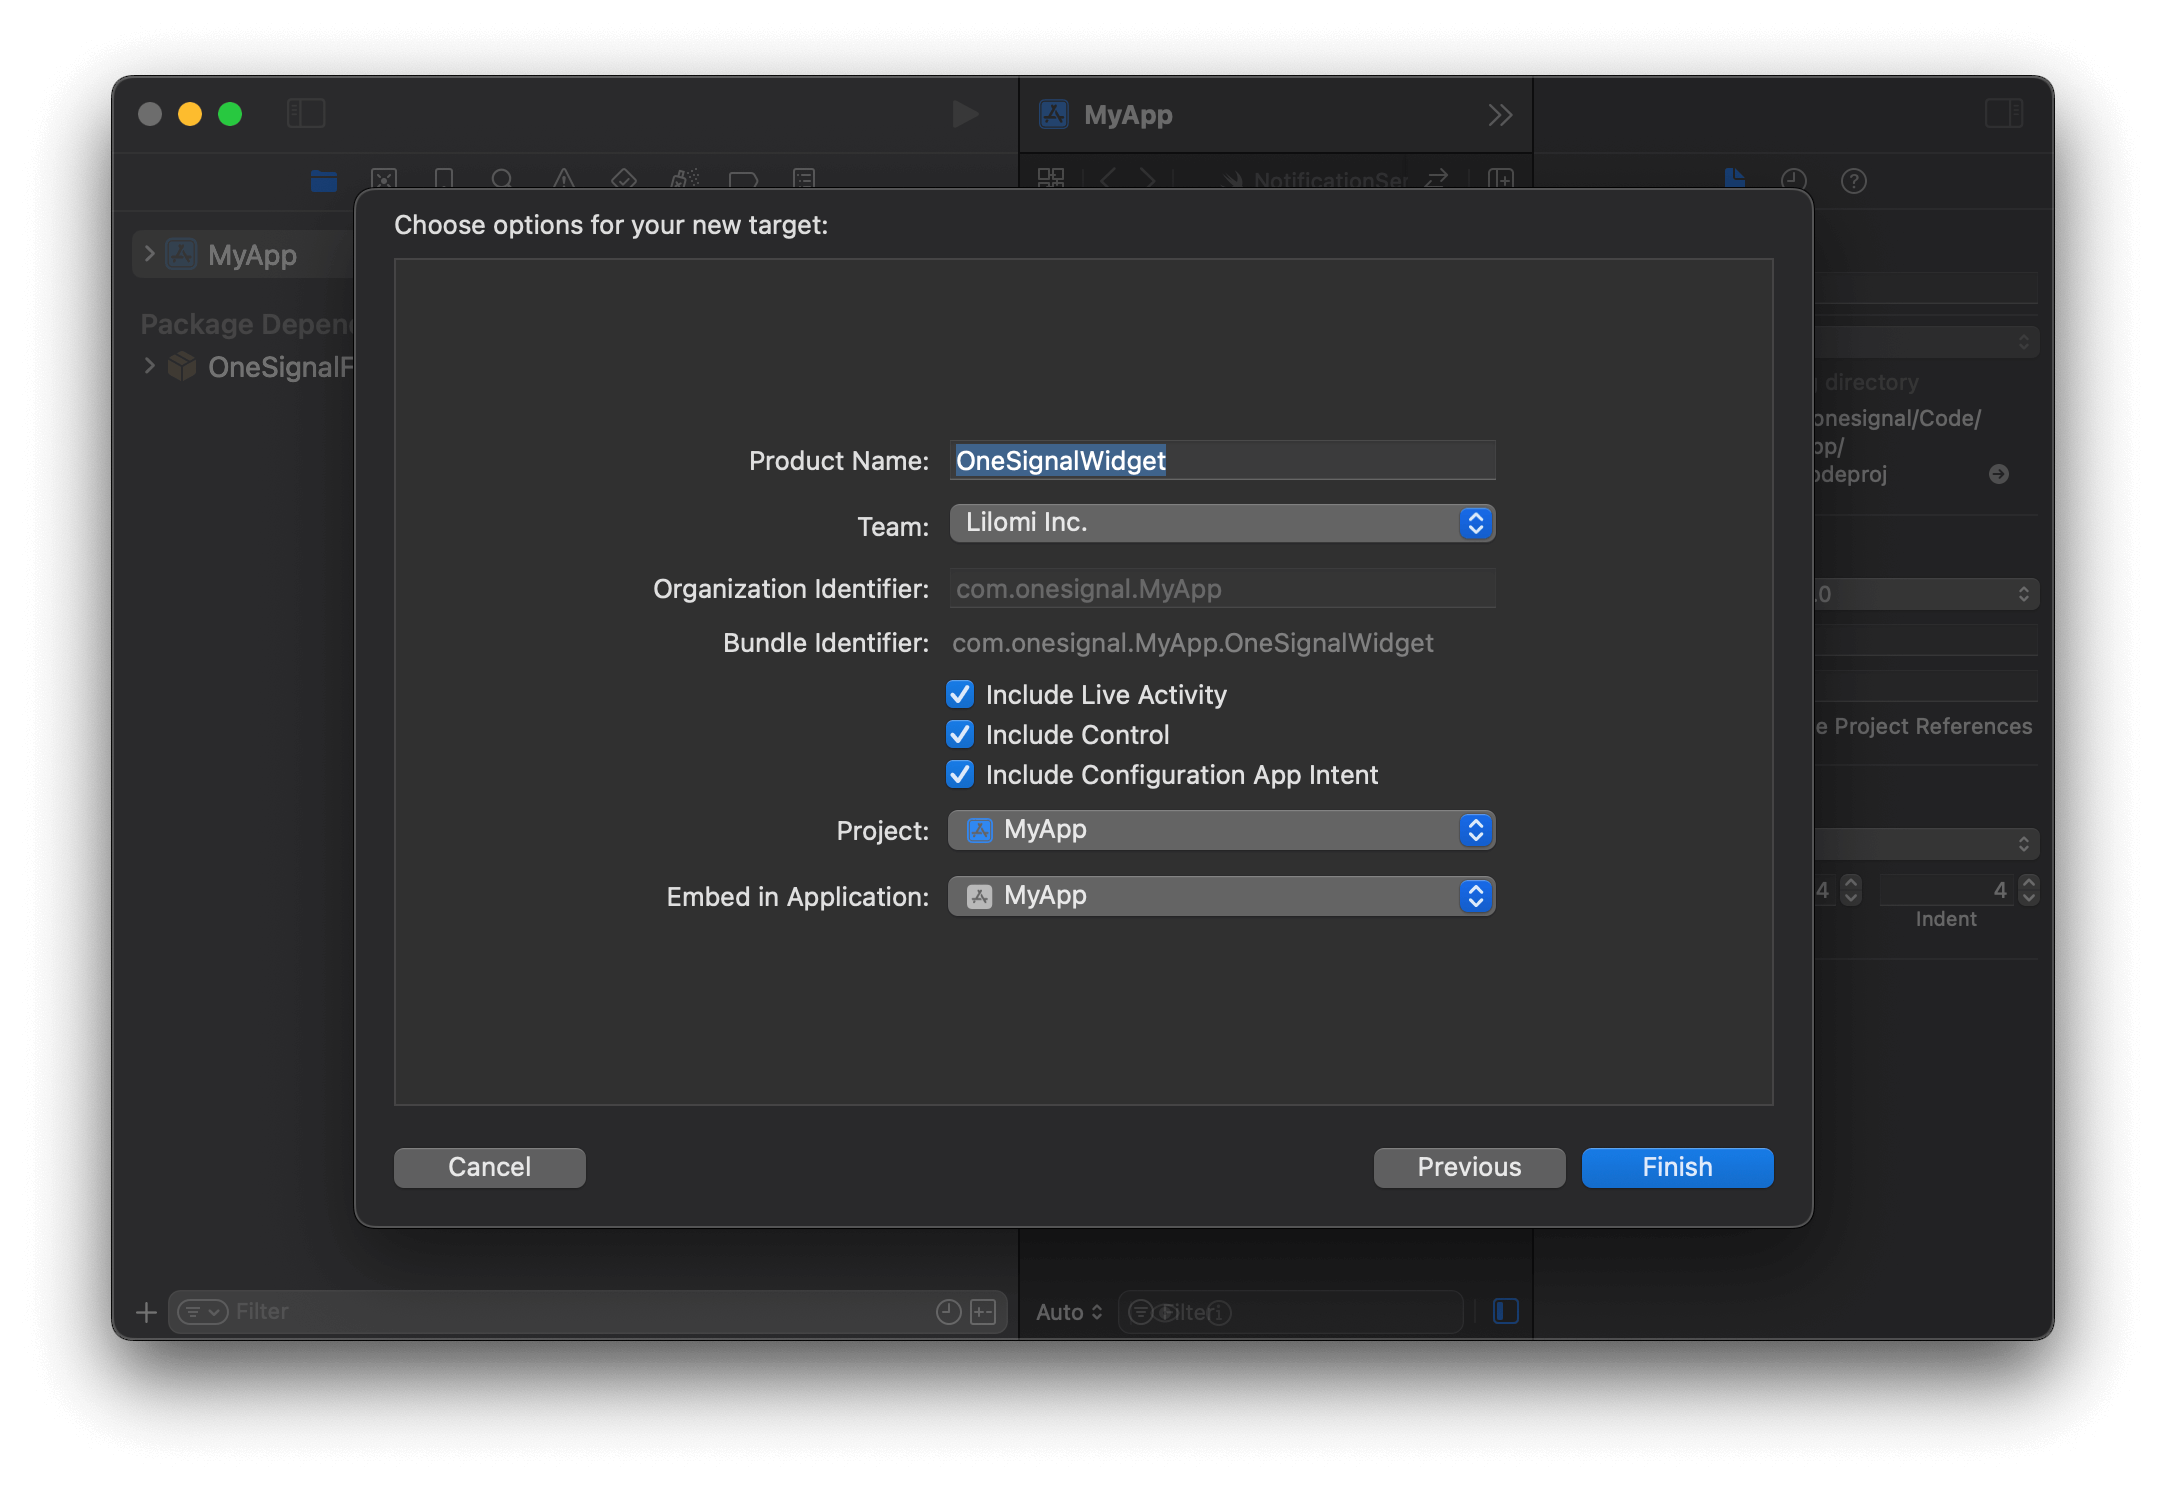
Select and press Next.Configure the Widget Extension by providing a name (example: OneSignalWidget) and ensure Include Live Activity is selected. Then click Finish.
Widget Extension options for a Live Activity.
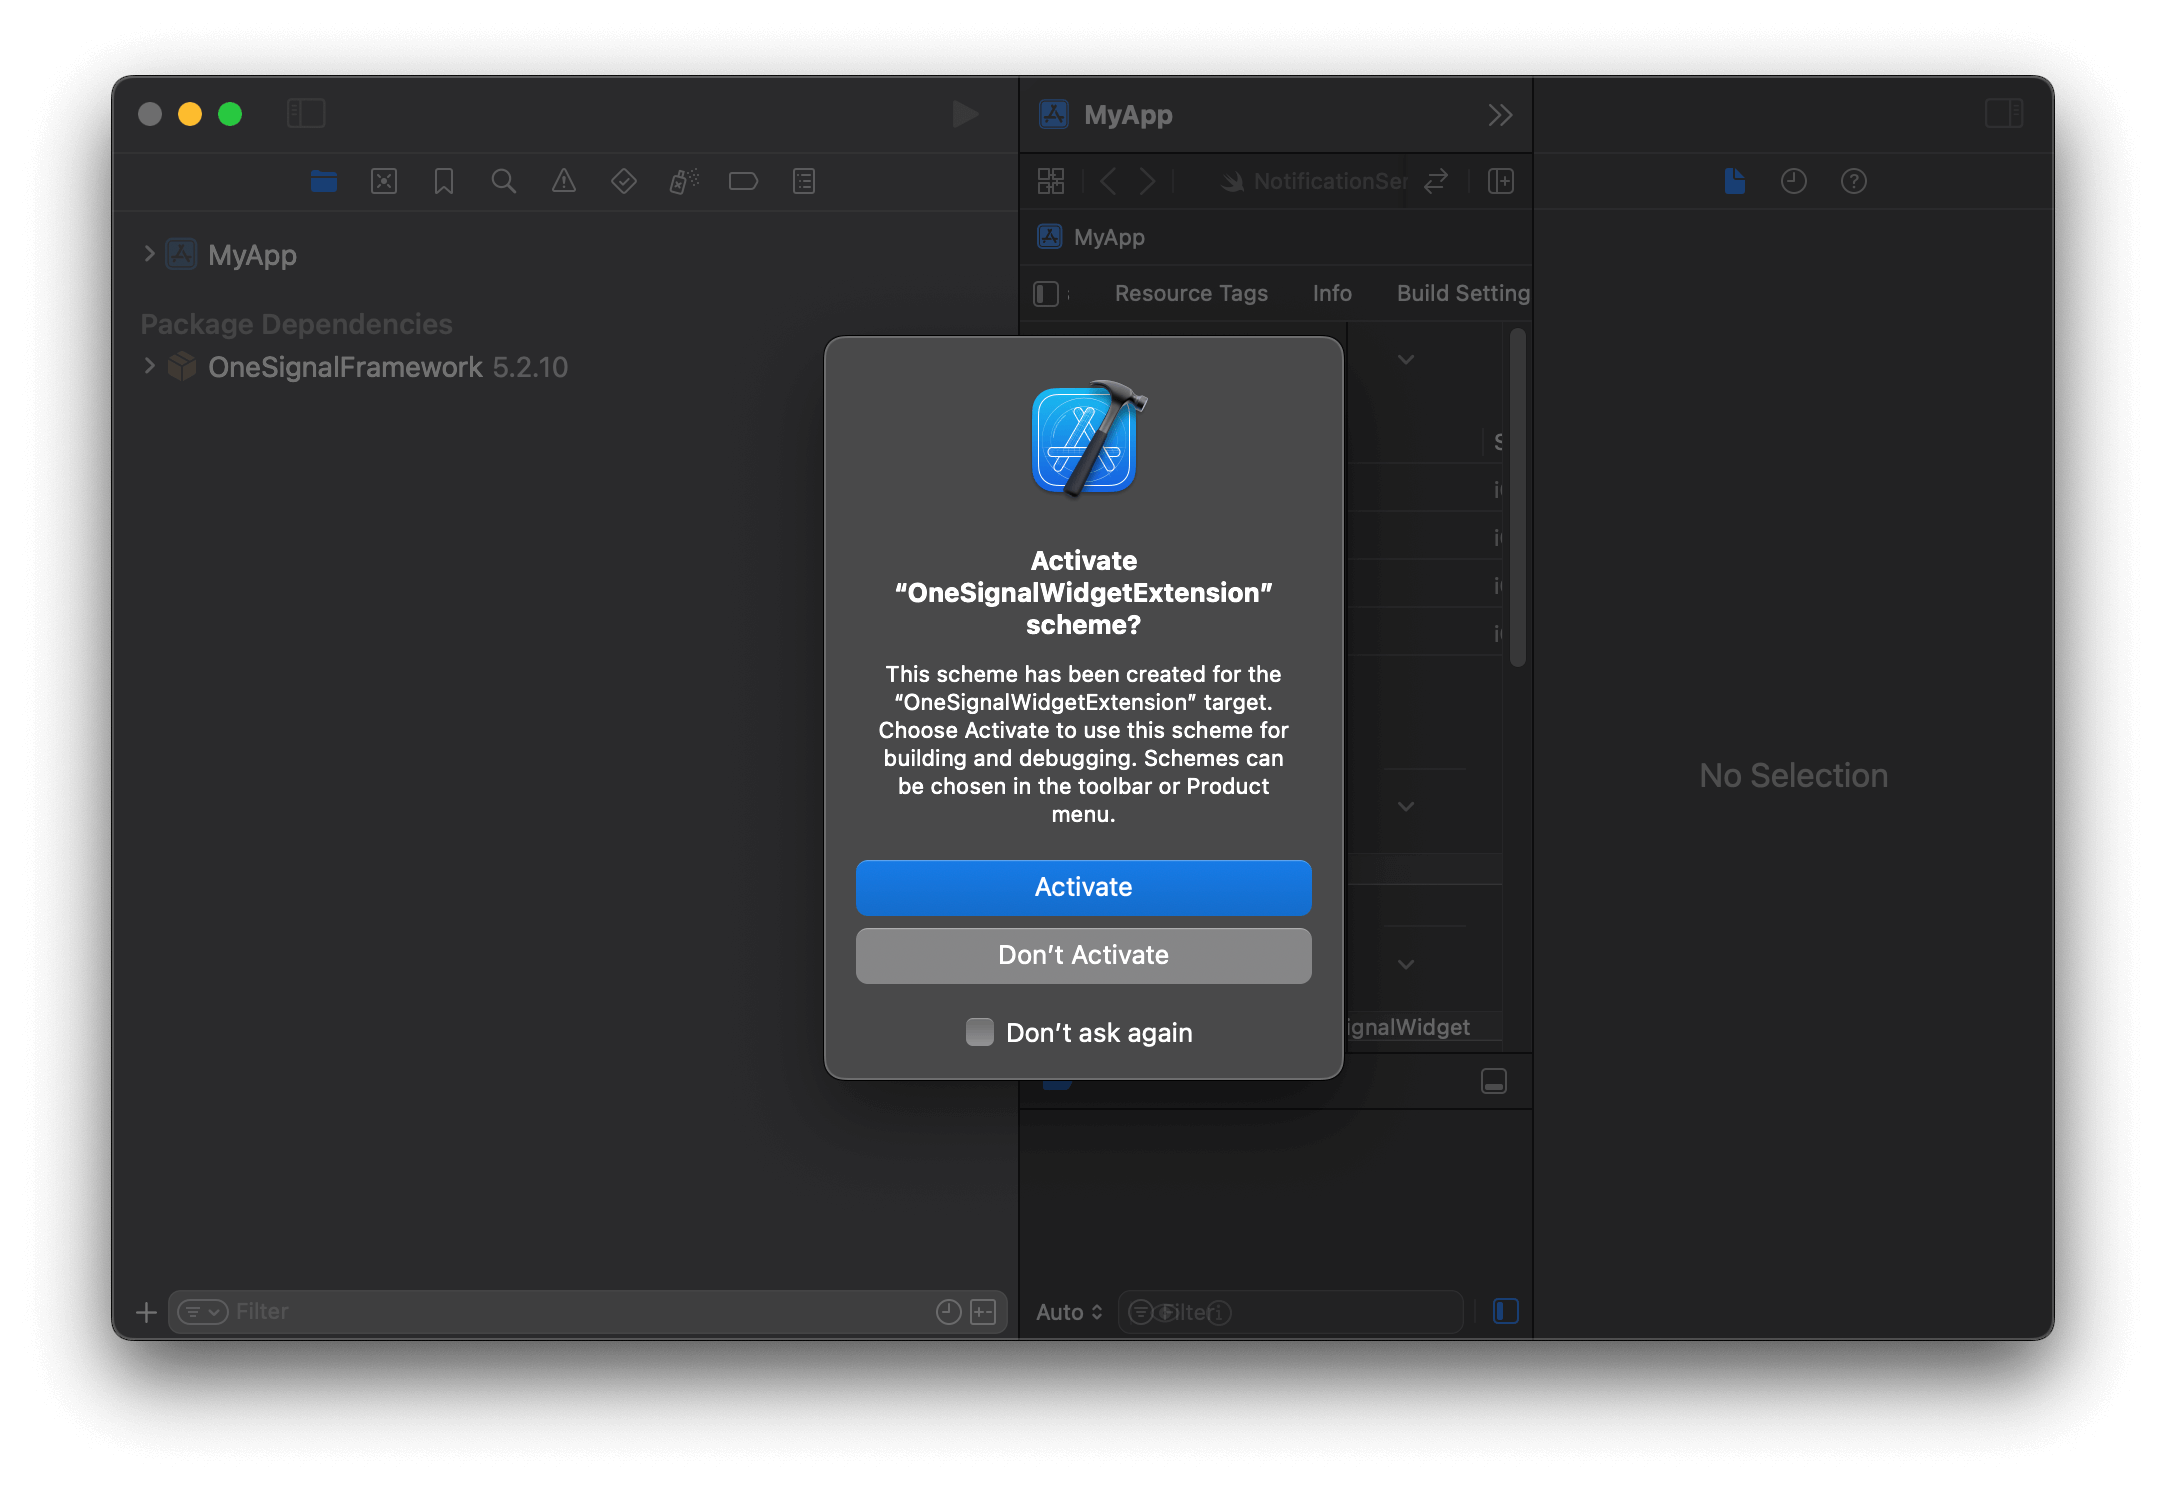
Click Don’t Activate if prompted to activate the scheme.
Scheme activation prompt: select Don't Activate.
3
Add the OneSignalLiveActivities subspec to your Podfile (optional)
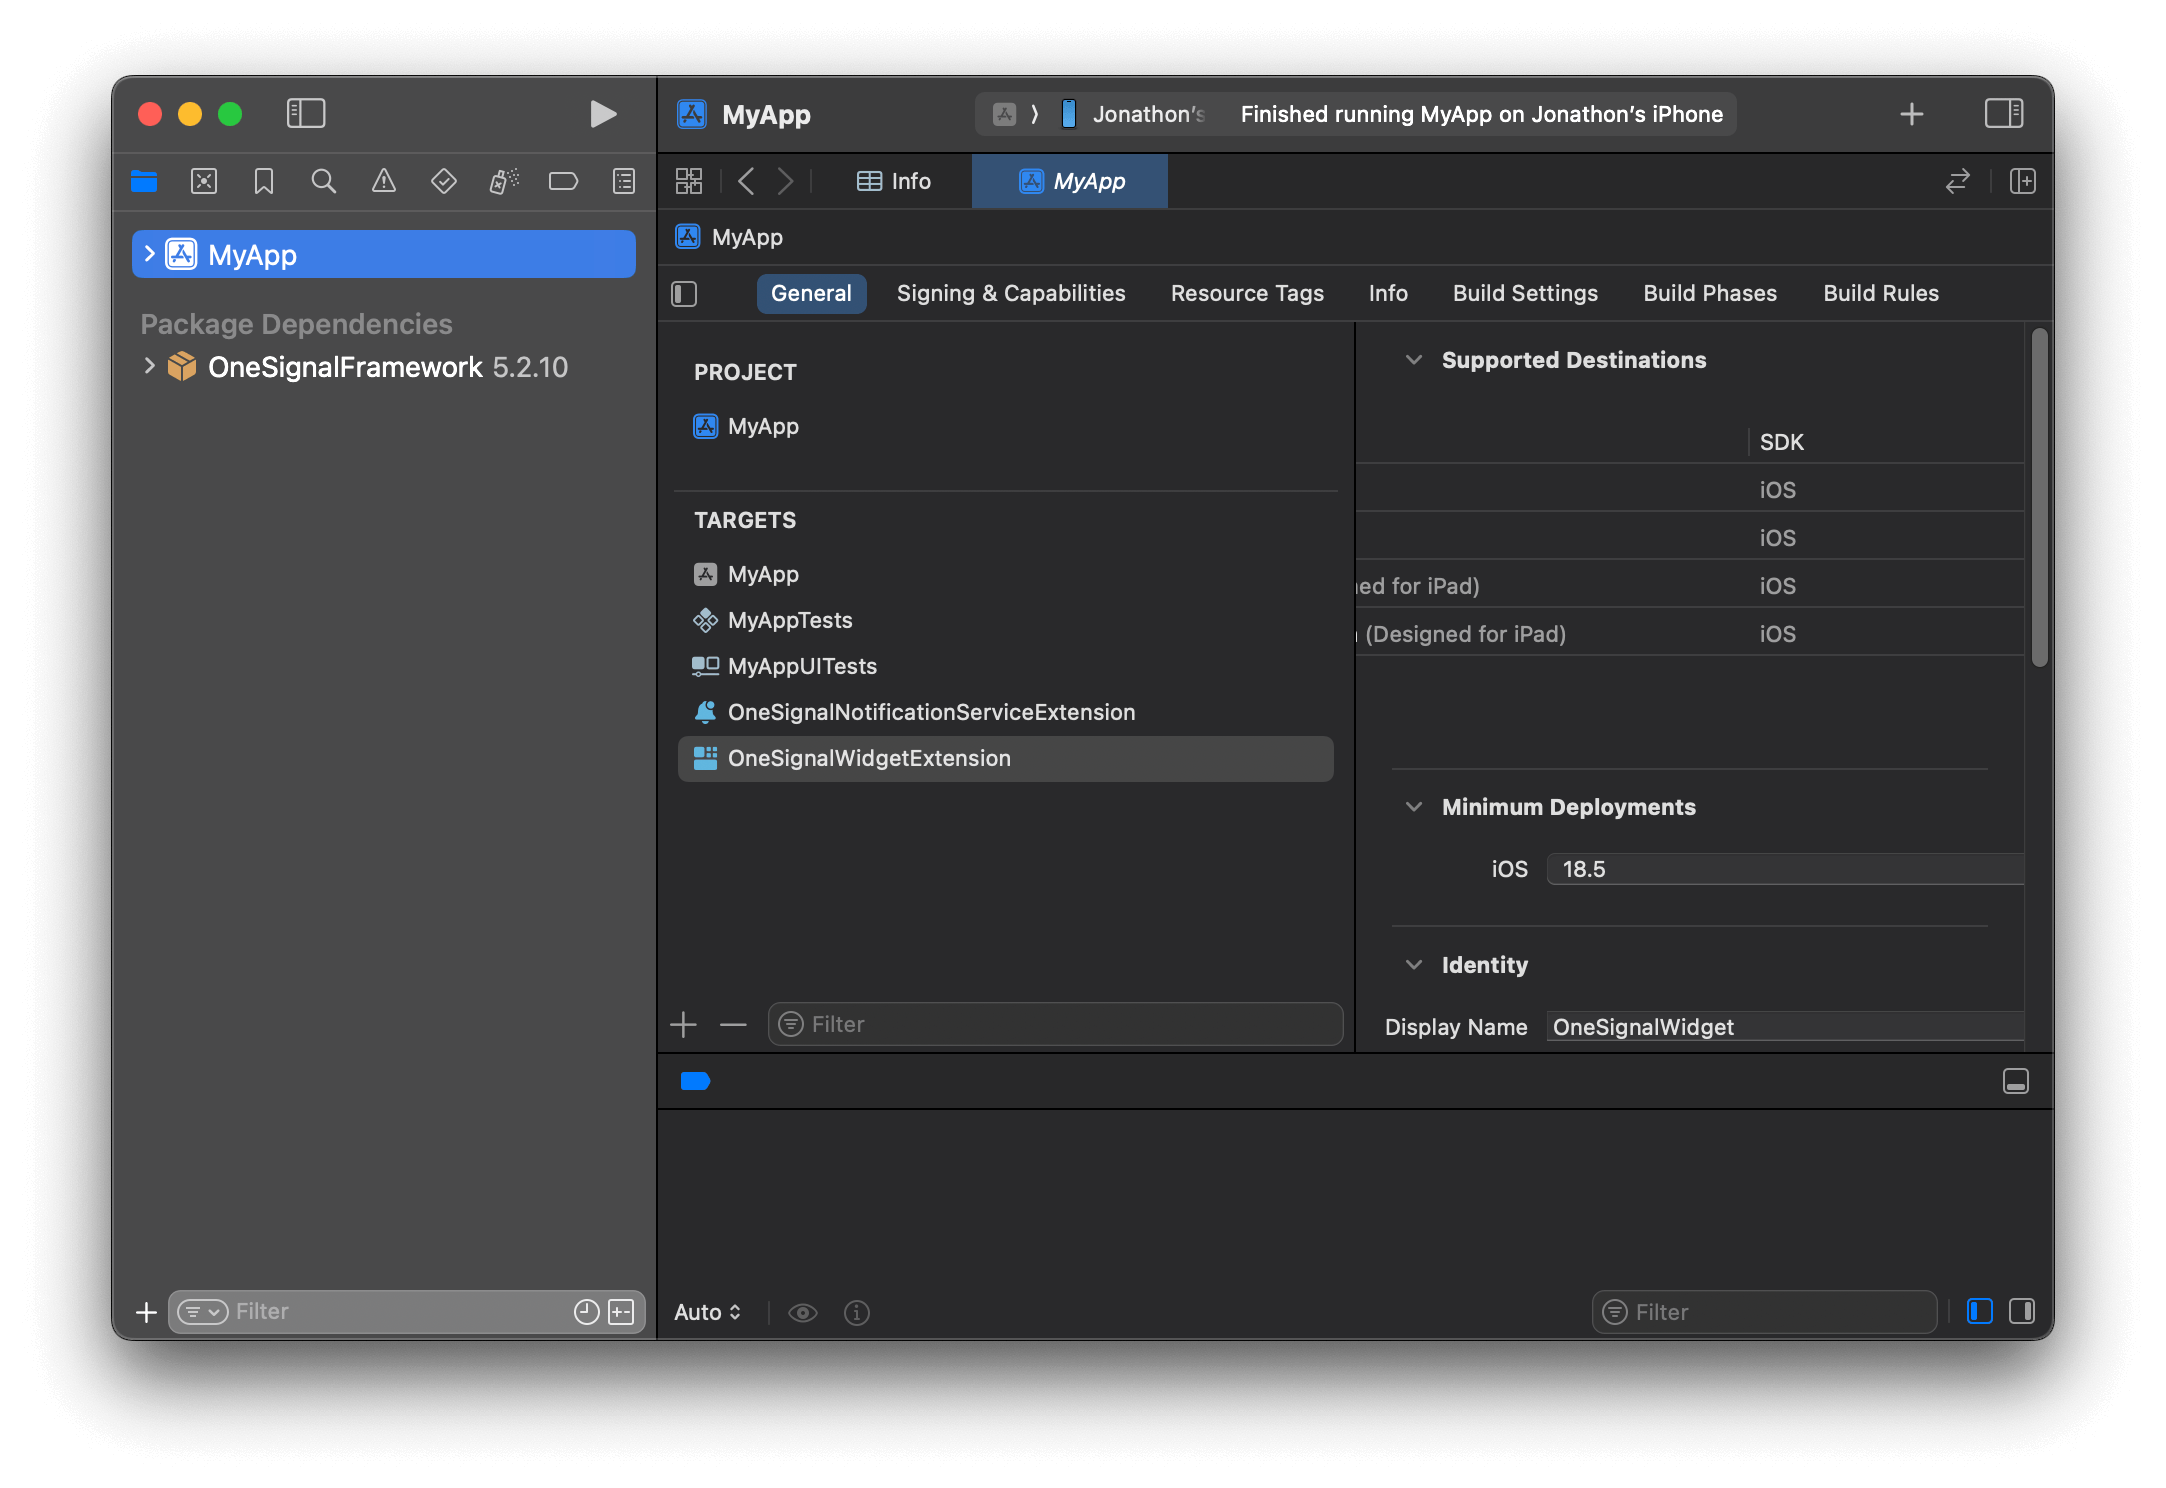
This step is only required if your app uses a Live Activity widget extension with CocoaPods.Find the name of your widget extension target in your project’s Targets list. The example below uses OneSignalWidgetExtension.
Find the name of your widget extension target.
Open your Podfile and add only the OneSignalXCFramework/OneSignalLiveActivities subspec. Replace OneSignalWidgetExtension with the name of your widget extension target. Do not use the aggregate pod 'OneSignalXCFramework' declaration, which resolves OneSignalComplete and includes the location module.
Podfile
target 'OneSignalWidgetExtension' do #use_frameworks! pod 'OneSignalXCFramework/OneSignalLiveActivities', '>= 5.0.0', '< 6.0'end
Close Xcode and run pod repo update && pod install to install the OneSignalLiveActivities pod.
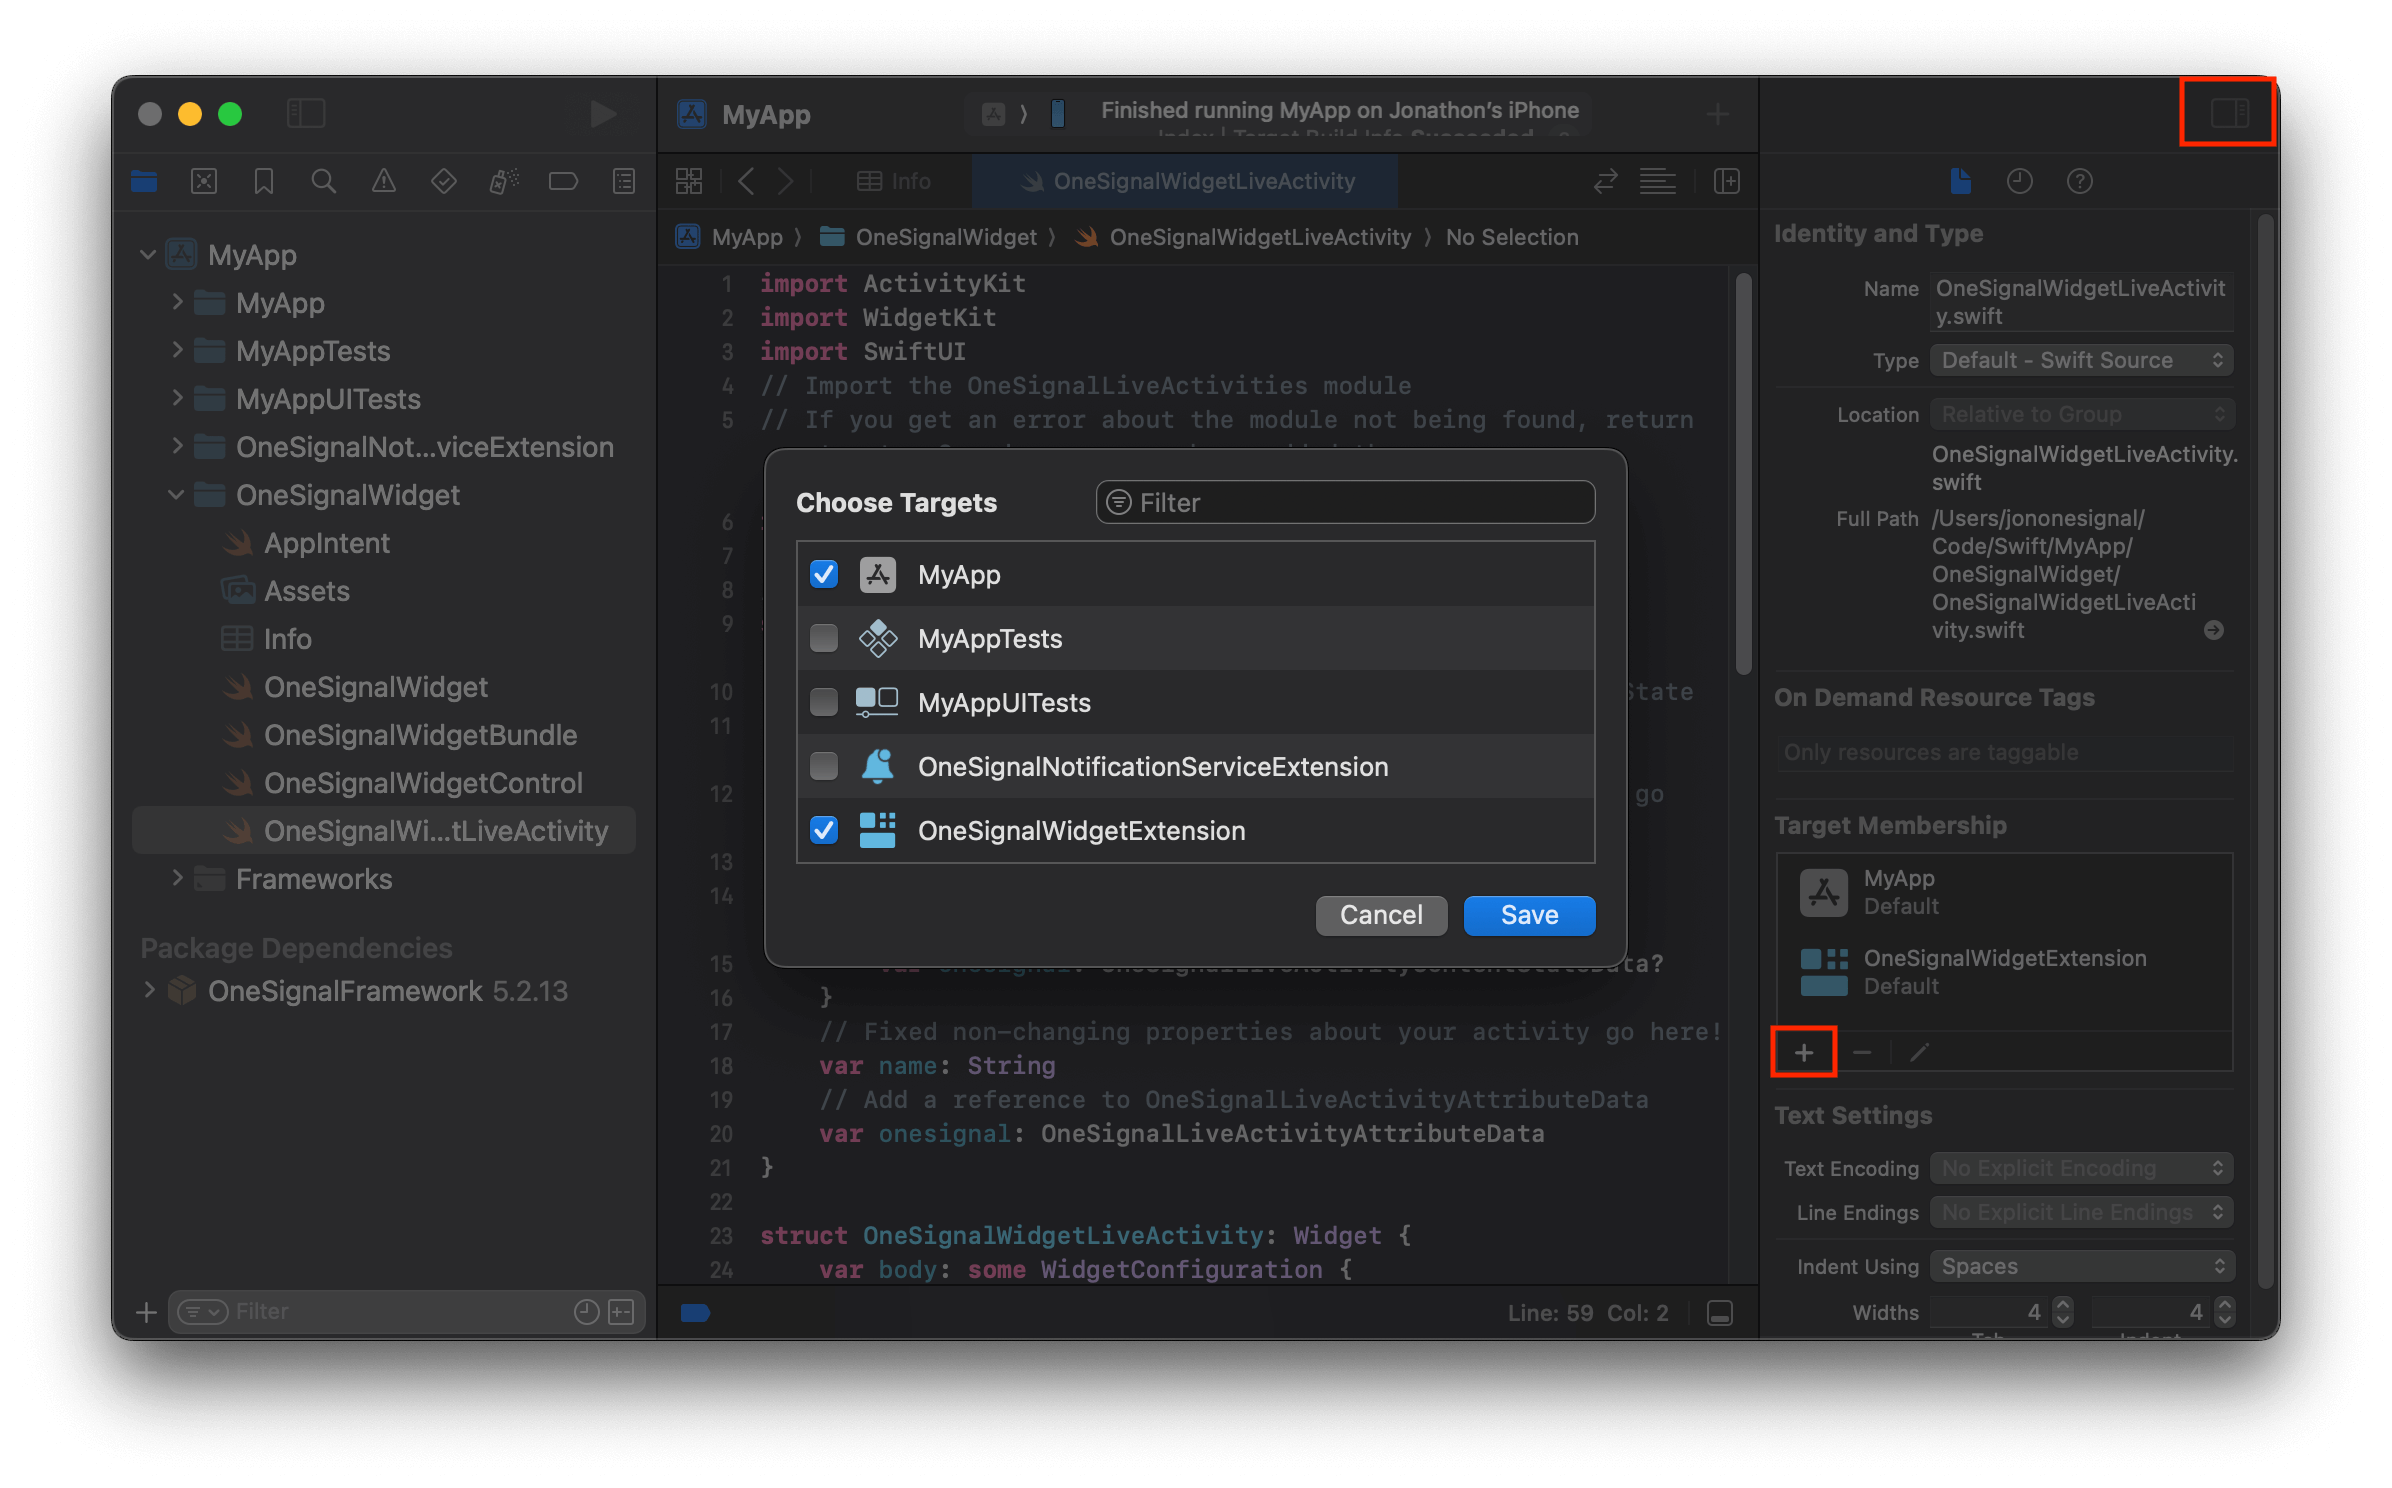
In Xcode, open the WidgetExtensionLiveActivity.swift file that the Widget Extension template generated.Open the Inspector panel on the right side of the screen. Within Target Membership, click the + button and select your main app target. In Flutter this target is named Runner. In other frameworks it matches your app name.
Allow main target membership for the Live Activity file.
Replace the contents of the file with the layout below. Change the displayed values to whatever your activity needs. You do not define an ActivityAttributes struct yourself, because setupDefault supplies DefaultLiveActivityAttributes, which exposes your payload as context.attributes.data and context.state.data.
Keep the @available(iOS 16.2, *) annotation from the template. A widget gated this way does not render on iOS 16.1, so treat 16.2 as the practical floor for this setup. Set widgetURL to your own deep link, since the example points at apple.com.
Build and run your app on a device or simulator running iOS 17.2 or higher, then send a start request.Two fields carry your widget’s data, and both mirror the structure your Swift layout reads:
event_attributes holds static data. You set it in the start request and it stays fixed for the life of the activity. Your widget reads it as context.attributes.data.
event_updates holds dynamic data you change on later updates. Your widget reads it as context.state.data. Nest values exactly as your layout expects, so the message dictionary below arrives as context.state.data["message"]["en"].
activity_id with an identifier of your choice. A new value starts a new Live Activity, and reusing a value updates the activity already using it. See Choose an activity ID.
Leave DefaultLiveActivityAttributes in the URL path as-is. That is the type setupDefault registers, and the path segment is case-sensitive. For every available field, see the Start Live Activity API reference.
curl
curl --request POST \ --url https://api.onesignal.com/apps/YOUR_APP_ID/activities/activity/DefaultLiveActivityAttributes \ --header 'Authorization: key YOUR_REST_API_KEY' \ --header 'Content-Type: application/json' \ --header 'accept: application/json' \ --data '{ "event": "start", "event_updates": { "data": { "message": { "en": "The message is nested in context.state.data[\"message\"] as a dictionary" }, "intValue": 10, "doubleValue": 3.14, "boolValue": true } }, "event_attributes": { "data": { "title": "this is set when the LA starts and does not get updated after" } }, "activity_id": "my-activity-id", "name": "Live Activity test", "headings": { "en": "Your order is on the way" }, "contents": { "en": "Arriving in 15 minutes" }, "ios_sound": "beep.wav", "priority": 10}'
Use these methods only if you want to define your own ActivityAttributes struct in Swift and manage the push-to-start token yourself, instead of letting setupDefault own the lifecycle. You generate the token with ActivityKit in your iOS code, then hand it to OneSignal. For the native side, see the alternative setup notes in the iOS SDK.activityType must be the name of the struct conforming to ActivityAttributes that starts the activity, and it becomes the last segment of the API URL path.
// Setting the push-to-start tokenOneSignal.LiveActivities.setPushToStartToken(activityType, token);// Removing the push-to-start tokenOneSignal.LiveActivities.removePushToStartToken(activityType);
// Setting the push-to-start tokenOneSignal.LiveActivities.setPushToStartToken(activityType, token);// Removing the push-to-start tokenOneSignal.LiveActivities.removePushToStartToken(activityType);
// Setting the push-to-start tokenOneSignal.LiveActivities.SetPushToStartToken(activityType, token);// Removing the push-to-start tokenOneSignal.LiveActivities.RemovePushToStartToken(activityType);
// Setting the push-to-start tokenwindow.plugins.OneSignal.LiveActivities.setPushToStartToken(activityType, token);// Removing the push-to-start tokenwindow.plugins.OneSignal.LiveActivities.removePushToStartToken(activityType);
// Setting the push-to-start tokenOneSignal.LiveActivities.setPushToStartToken(activityType, token);// Removing the push-to-start tokenOneSignal.LiveActivities.removePushToStartToken(activityType);
Why does my Live Activity never start from a push?
The most common cause is a device below iOS 17.2. Apple added push-to-start in iOS 17.2, so older devices can only start activities in-app with startDefault. If the device qualifies, check that setupDefault runs on every app launch after OneSignal.initialize, that the activity type in your URL path is exactly DefaultLiveActivityAttributes, and that your app uses a .p8 APNs key rather than a p12 certificate.
Do I need to define my own ActivityAttributes struct?
No. setupDefault registers the SDK’s DefaultLiveActivityAttributes type, which is why the widget reads values through context.attributes.data and context.state.data instead of named properties. Define your own struct only if you use the low-level methods.
Your payload nesting does not match what the layout reads. event_attributes maps to context.attributes.data and event_updates maps to context.state.data, so a value the widget reads as context.state.data["message"]["en"] must arrive as event_updates.data.message.en. Values that miss the expected path fall back to the defaults in your Swift code.
No. Live Activities are an iOS-only ActivityKit feature, so the calls on this page do nothing on Android. For a comparable Android experience built on push notifications, see Android Live Updates.
Only if your app uses CocoaPods. In that case add the OneSignalXCFramework/OneSignalLiveActivities subspec to your widget extension target, as shown in step 3. Do not add the aggregate OneSignalXCFramework pod to the widget target, because it resolves OneSignalComplete and pulls in the location module.