Category Prompt
Instructions for setting up and using the Category Slide Prompt
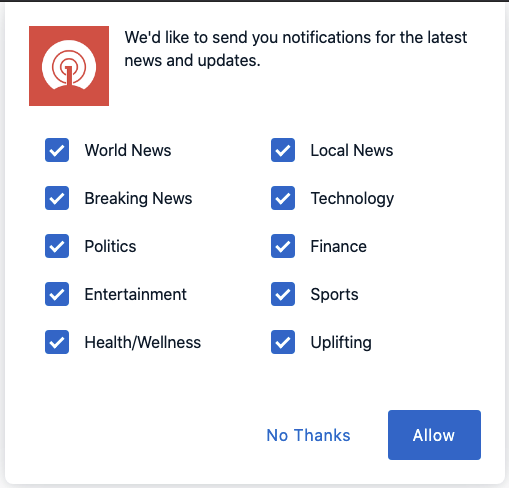
The Category Slide Prompt is a feature of the OneSignal Slide Prompt that allows you to add up to 10 category tags that your users check to opt-in and out of receiving certain notifications. You have full control over which categories are presented to the user.
Upon display and clicking the "accept" button through this prompt, all categories will be set as Data Tags on the device with the tag key provided and a value of 1 for checked and 0 for unchecked.
Step 1. Setup
Follow the below instructions based on your setup:
Typical Setup (click to expand)
Navigate to Settings > All Browsers > Permission Prompt and select Push Slide Prompt. If you don't see it, select Add Prompt > Push Prompt to select it.
Toggle on the Categories section on the left.
Add your categories:
- The "Tag Key" is the data tag key used for segmentation. Tags are case sensitive! Recommended to use lower case letters and underscore (
_) instead of spaces but not required. This will have a value of1if selected and0if not selected by user. - The "Label" is what the user will see when selecting the category.
Update Instructions & Buttons
You can change the message and buttons for the Slide Prompt when Categories are present.
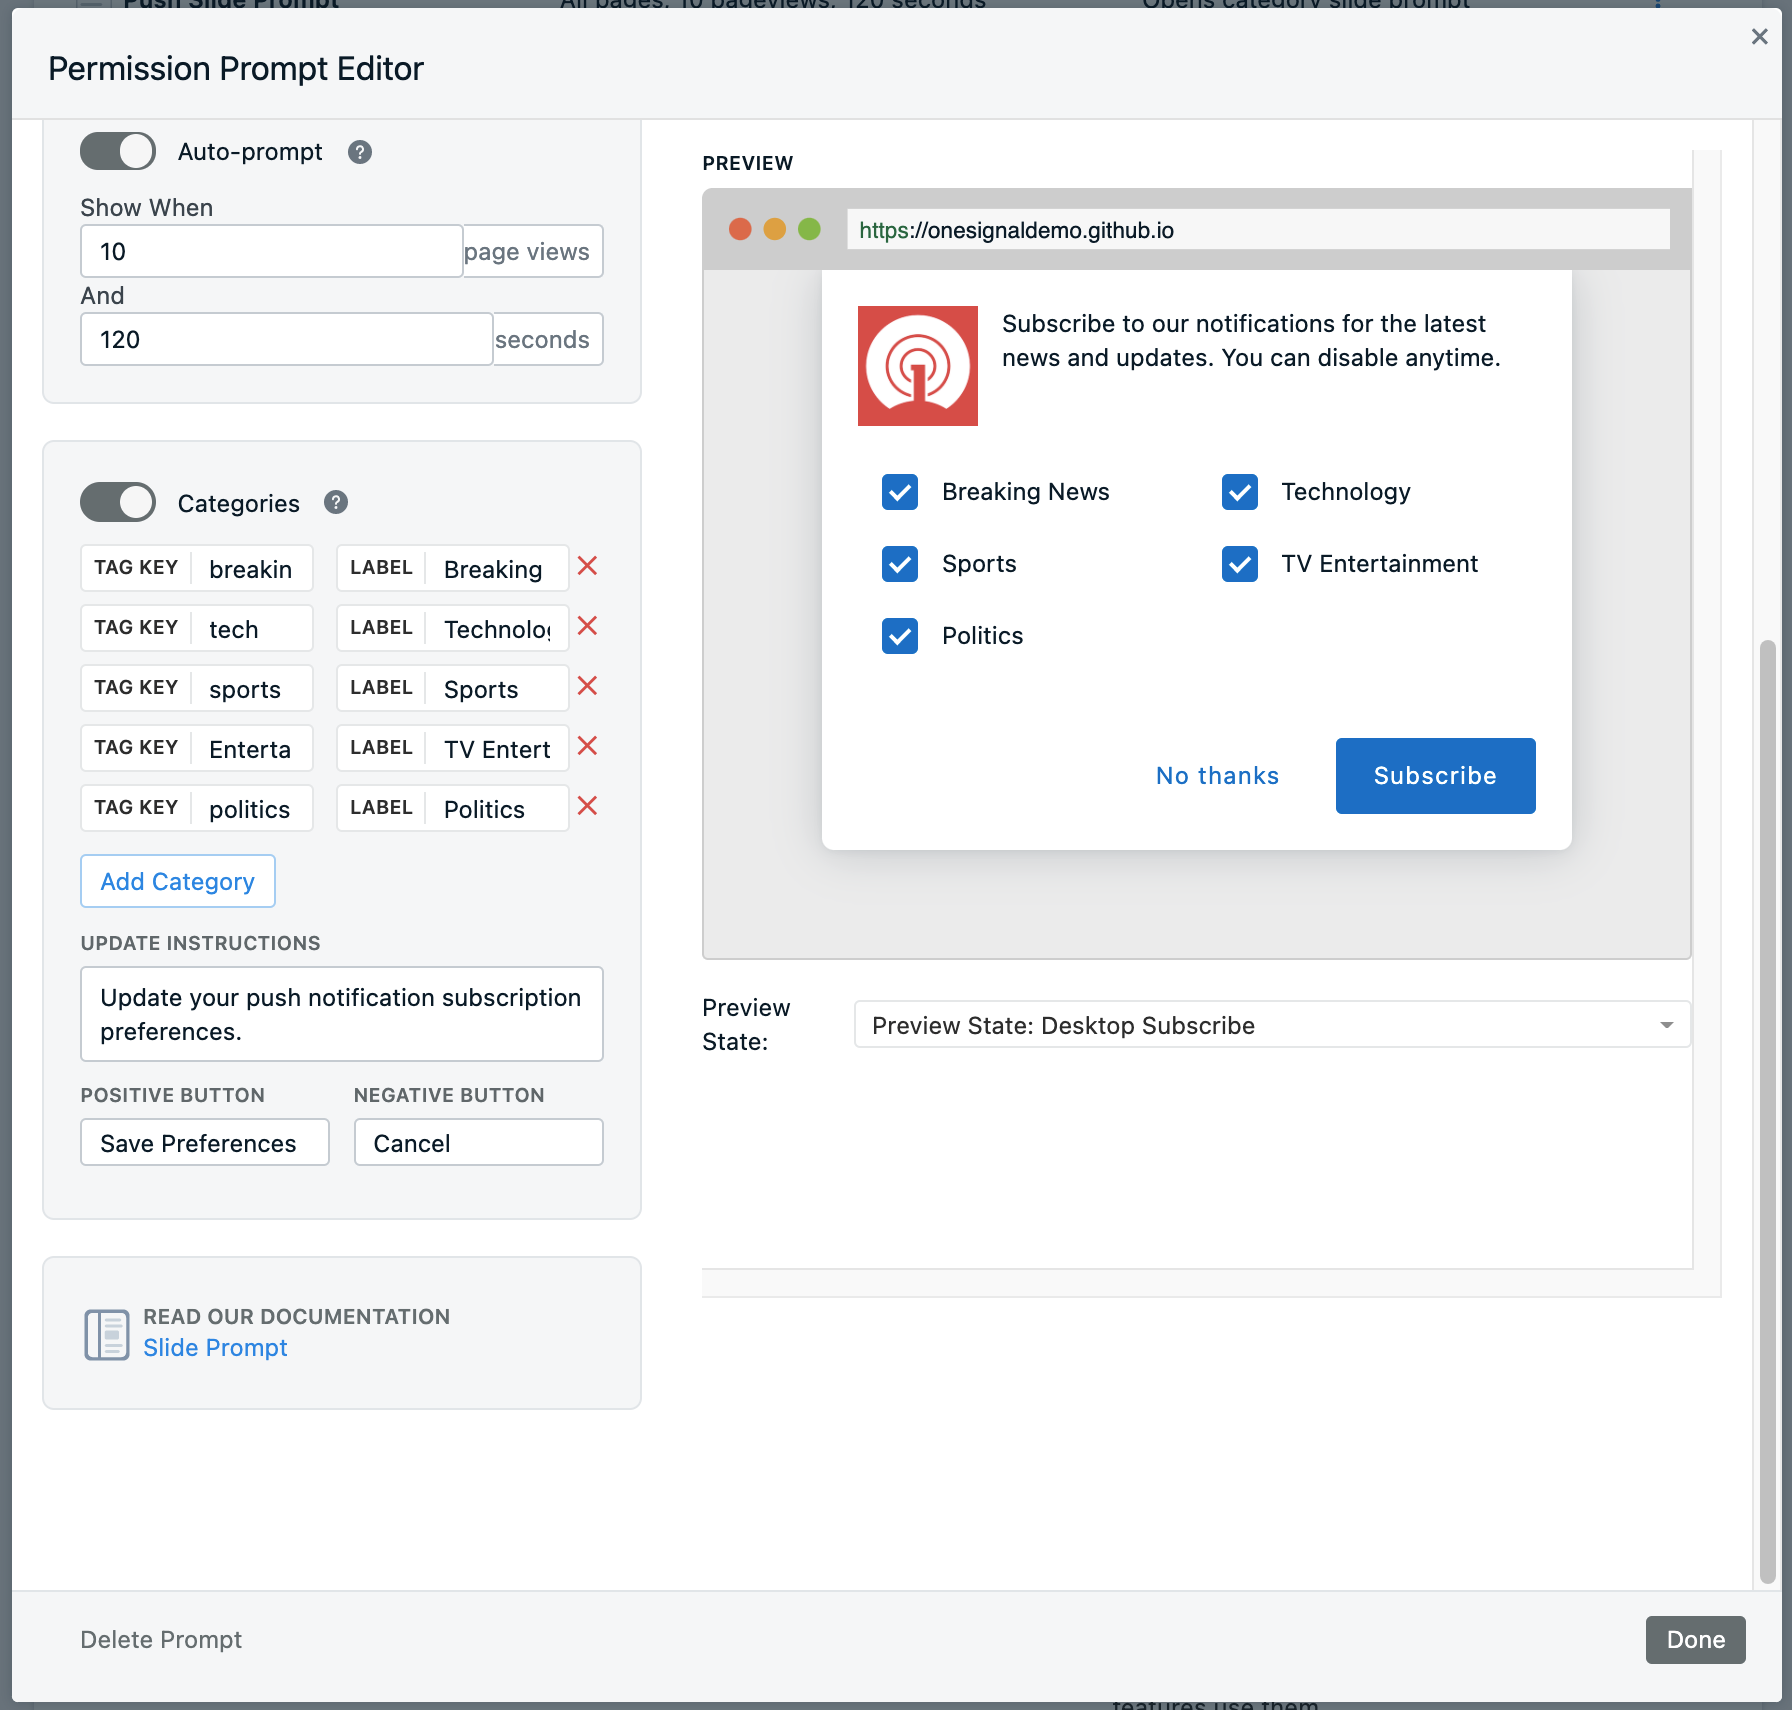
Press Done and Save on the next page to update the settings.
WordPress Setup (click to expand)
Currently you will need to add some Javascript to the site to customize the prompts.
Step 1. Disable the Plugin Prompts
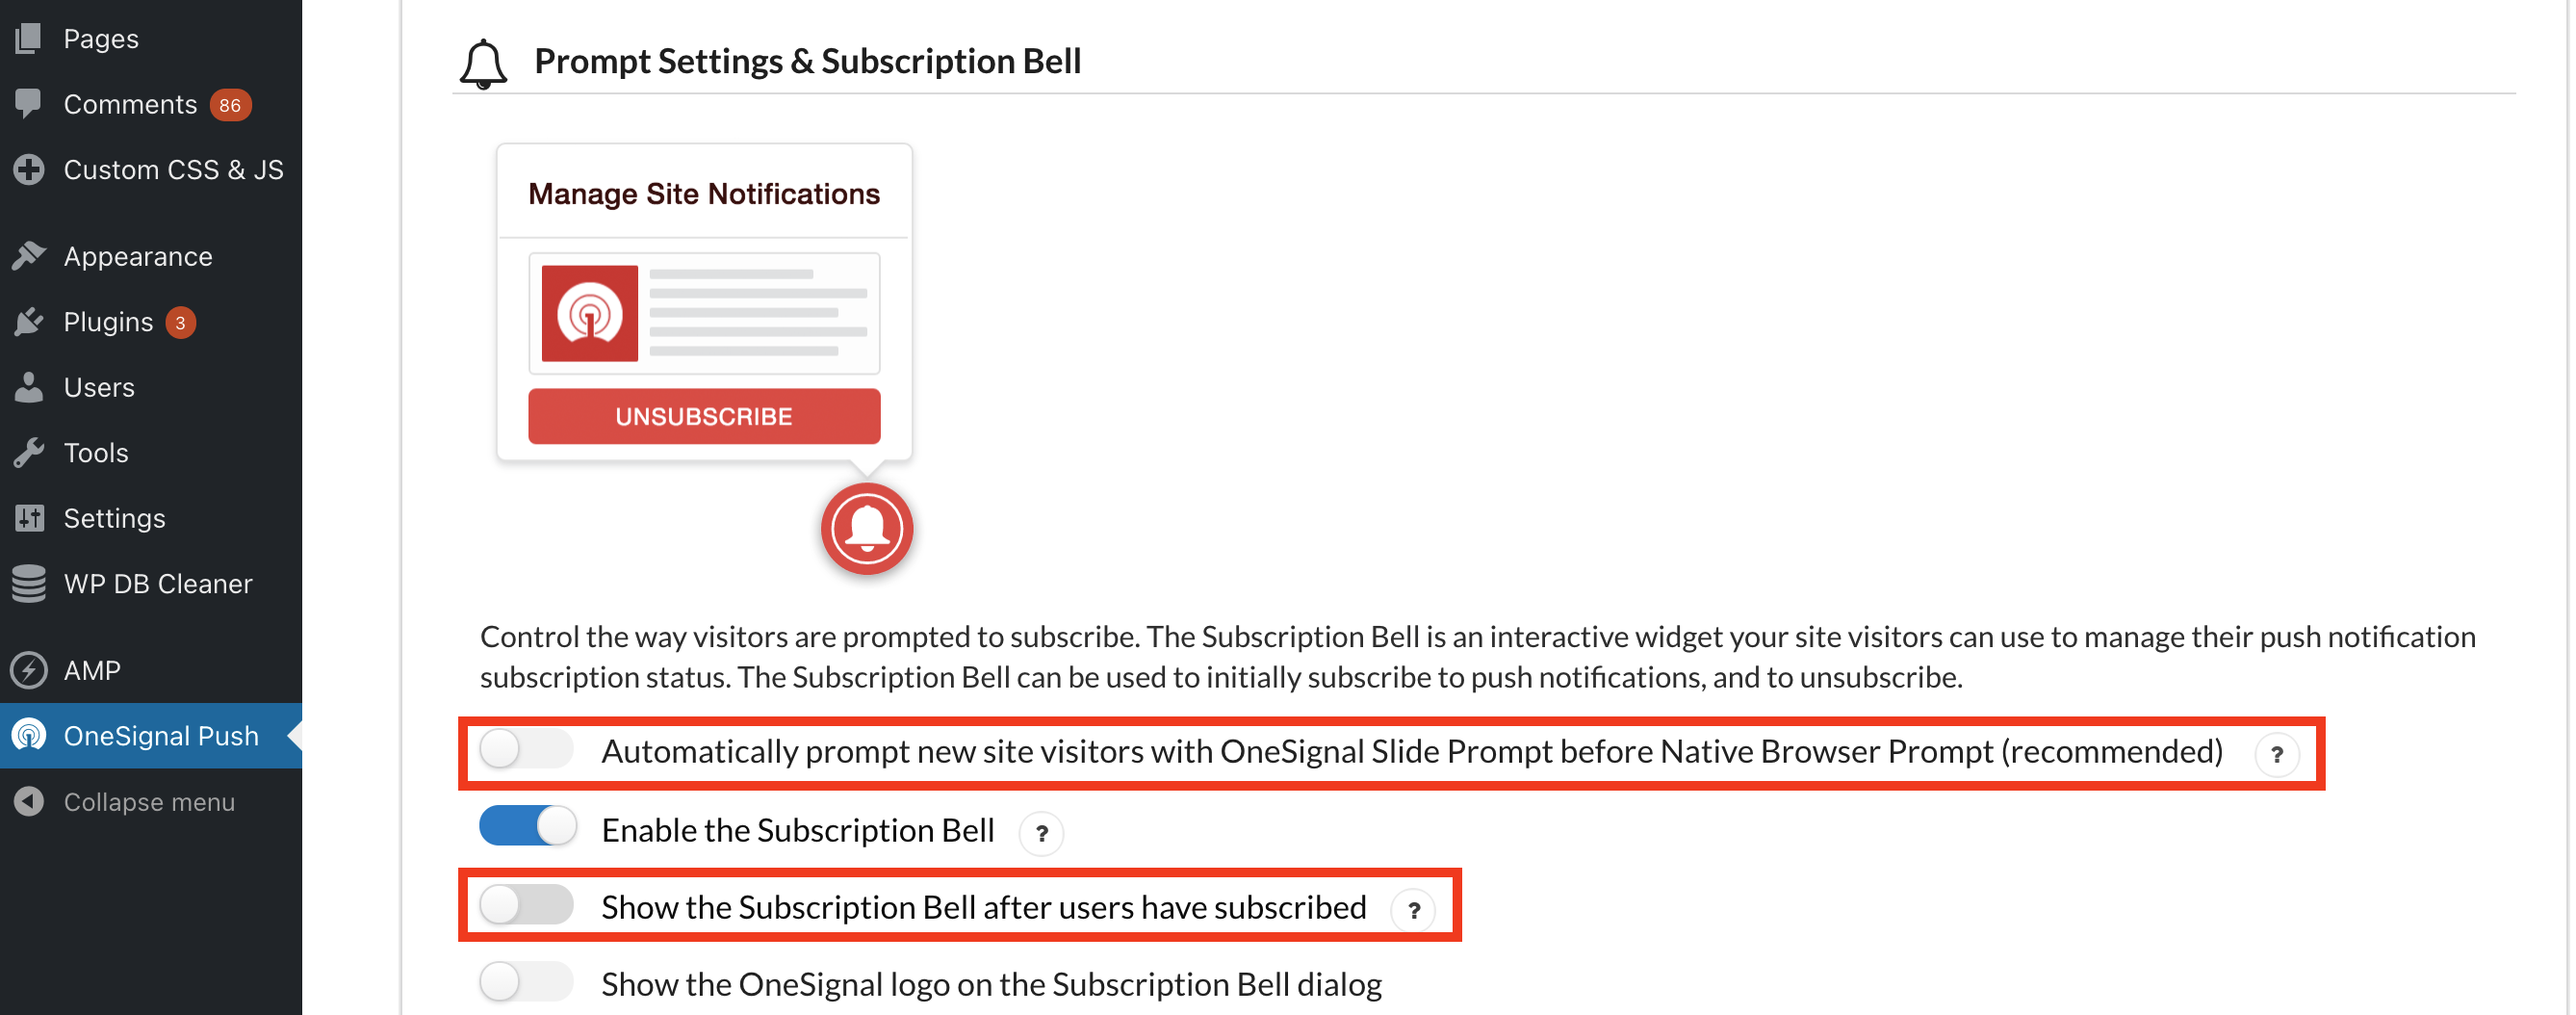
Open OneSignal WordPress Plugin and scroll to "Prompt Settings & Subscription Bell".
Toggle off the Slide and Native Prompt in the OneSignal Plugin. You can keep the Bell enabled if you want.
Step 2. Switch to a manual initialization of OneSignal
Scroll to the bottom of the plugin settings and toggle on "Disable OneSignal initialization".
Press Save.
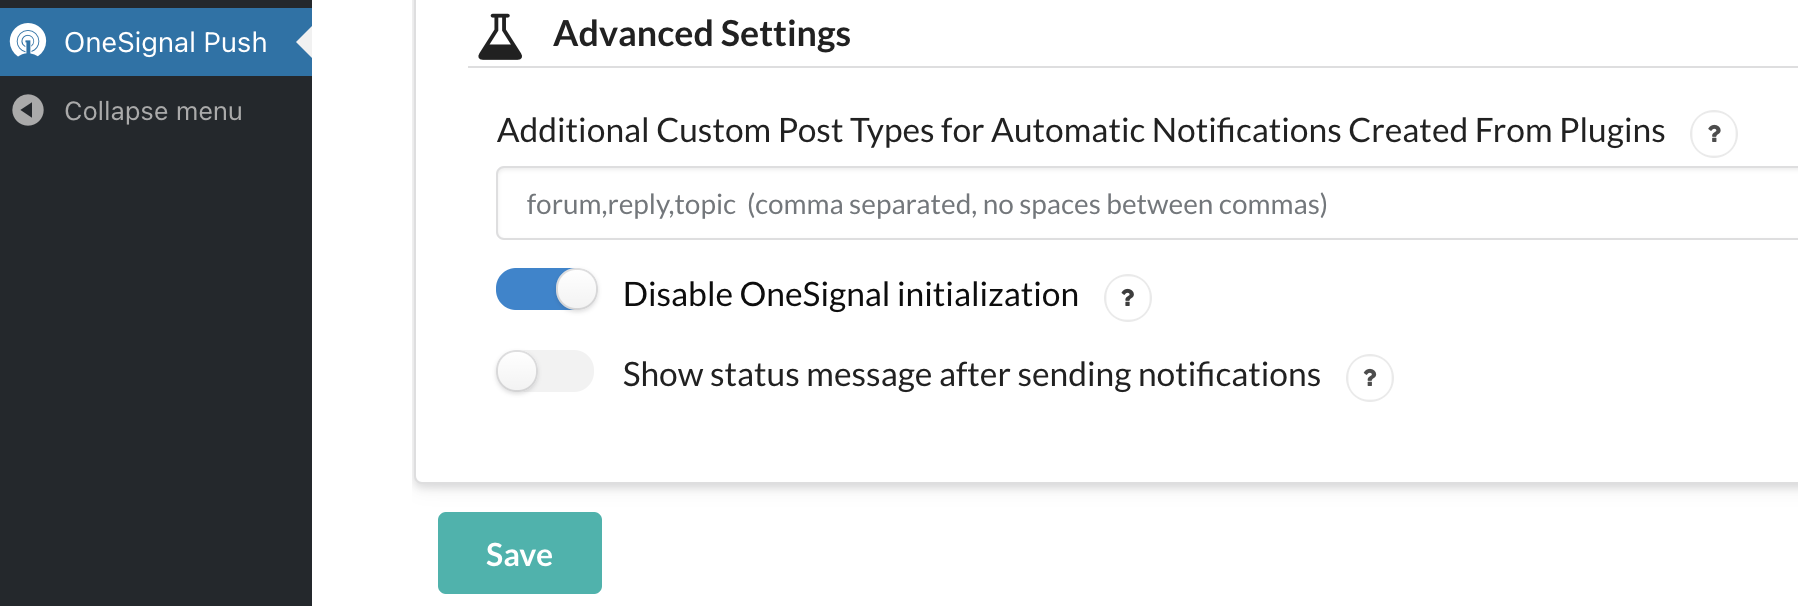
Step 3. Add custom JavaScript code to your site.
If you don't have a way to add JavaScript to your site, try the the Insert Headers and Footers by WPBeginner plugin or Custom CSS & JS WordPress plugin.
Step 4. Code Examples
Example code for adding Categories.
Add your categories:
- The
tagis the data tag key used for segmentation. Tags are case sensitive! Recommended to use lower case letters and underscore (_) instead of spaces but not required. This will have a value of1if selected and0if not selected by user. - The
labelis what the user will see when selecting the category.
setTimeout(function(){
  console.log("about to initialize OneSignal");
  //window.addEventListener('load', function() {
    window._oneSignalInitOptions.promptOptions = {
      slidedown: {
        prompts: [
          {
            type: "category",
            autoPrompt: true,
            text: {
              /* actionMessage limited to 90 characters */
              actionMessage: "Your Custom Action Message",
              /* acceptButton limited to 15 characters */
              acceptButton: "Yes",
              /* cancelButton limited to 15 characters */
              cancelButton: "No",
              /* CATEGORY SLIDEDOWN SPECIFIC TEXT */
              negativeUpdateButton:"Cancel",
              positiveUpdateButton:"Save Preferences",
              updateMessage: "Update your push notification subscription preferences.",
            },
            delay: {
              timeDelay: 1,//seconds to wait for display
              pageViews: 1,//# pageviews for prompt to display
            },
            categories: [
              {
                tag: "politics",
                label: "Politics",
              },
              {
                tag: "local_news",
                label: "Local News",
              },
              {
                tag: "world_news",
                label: "World News",
              },
              {
                tag: "culture",
                label: "Culture",
              }
            ]
          }
        ]
      }
    }
    window.OneSignal = window.OneSignal || [];
    window.OneSignal.push(function() {
      window.OneSignal.init(window._oneSignalInitOptions);
    });
 // });
}, 3000);
Custom Code Setup (click to expand)
You can activate the Category Slidedown via custom code by passing in a special parameter categories to the slidedown option object. This parameter should be an array of objects containing tag and label parameters. Note: make sure the prompt option type is set to "category".
Add your categories:
- The
tagis the data tag key used for segmentation. Tags are case sensitive! Recommended to use lower case letters and underscore (_) instead of spaces but not required. This will have a value of1if selected and0if not selected by user. - The
labelis what the user will see when selecting the category.
OneSignal.init({
    // Your other init options here
    promptOptions: {
      slidedown: {
        prompts: [
          {
            type: "category",
            autoPrompt: true,
            text: {
              actionMessage: "We'd like to show you notifications for the latest news and updates.",
              acceptButton: "Allow",
              cancelButton: "Cancel",

              /* CATEGORY SLIDEDOWN SPECIFIC TEXT */
              negativeUpdateButton:"Cancel",
              positiveUpdateButton:"Save Preferences",
              updateMessage: "Update your push notification subscription preferences.",
            },
            delay: {
              pageViews: 1,
              timeDelay: 20
            },
            categories: [
              {
                tag: "politics",
                label: "Politics"
              },
              {
                tag: "local_news",
                label: "Local News"
              },
              {
                tag: "world_news",
                label: "World News",
              },
              {
                tag: "culture",
                label: "Culture"
              },
            ]
          }
        ]
      }
    }
    // END promptOptions, continue with other init options
}
There are three special text parameters used solely with the Category Slidedown. These are used in the case that the Category Slidedown is reshown (e.g: to allow for the updating of preferences).
text parameter | type | description |
|---|---|---|
updateMessage | string | Optional This is the message shown whenever the Category Slidedown is re-shown (the user is already subscribed). Limit: 90 chars Default: "Update your push notification subscription preferences." |
positiveUpdateButton | string | Optional This is the text that will be displayed on the positive button whenever the Category Slidedown is re-shown (the user is already subscribed). Limit: 15 chars Default: "Save Preferences" |
negativeUpdateButton | string | Optional This is the text that will be displayed on the negative button whenever the Category Slidedown is re-shown (the user is already subscribed). Limit: 15 chars Default: "Cancel" |
Step 2. Segments Setup
Navigate to Audience > Segments and select New Segment.
Select the User Tag filter and set the key field to the name of one of your categories. Then set the value field to 1.
Note: Tags are case sensitive. You need to use the same tag key you setup in the prompt.
Name your segment and click Create Segment.
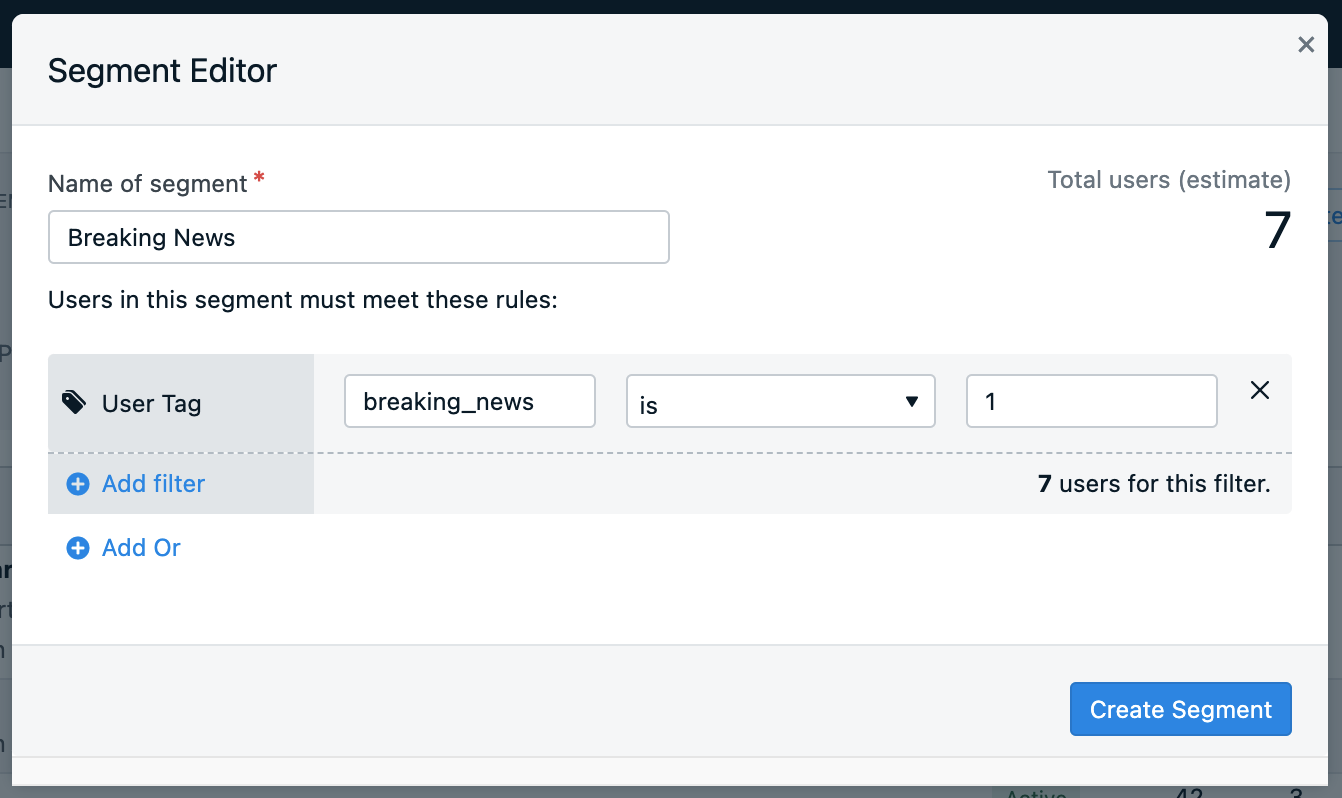
Now, any subscriber that selects the "Breaking News" category will be automatically put inside this segment.
To quickly create your other segments, select Options > Duplicate and update the Segment name and tag key accordingly.

Step 3. Send Messages
Now, whenever you send messages, you can target the users within these segments.
If you are using Create notification API, you can also use filters and target: filters: [{"field": "tag", "key": "breaking_news", "relation": "=", "value": "1"}].
FAQ
Can I change the categories based on page?
Yes! This will require using the Custom Code Setup and adding the categories through code based on the above setup configurations.
How often does the Category Slide Prompt get triggered?
The Category Side Prompt will not automatically show again if the user is subscribed to push. However, you can always trigger it programmatically with our SDK.
If the prompt was dismissed, it will display again after 3 days, then 7 days, then 30 days if the user clicks "Allow" or "Cancel" on it and is still not subscribed.
For instance, if a user clicks "Allow" on the prompt, but "x" on the native prompt, it will not show again for 3 days the first time. After 3 days, it will show again and if the user clicks "Cancel" or "Allow" but "X" on the native prompt, it will not show again for 7 days. After 7 days if the user does this again, it will be every 30 days.
If the user clears cookies or browser data, the cycle resets.
For testing purposes, please follow Clearing Cache and Resetting Push Permissions to access your site as a new first-time user.
How can I trigger the prompt programmatically?
The Category Prompt can be shown to users automatically based on the delay options selected through the dashboard or within the code.
You can also trigger these prompts programmatically if you want more control of when they are shown. Toggle off the Auto-prompt switch in Typical Setup or remove the delay code from Custom Code Setup. Then use the following functions to show the prompts:
| Prompt | Function |
|---|---|
| Show Category Slidedown method | OneSignal.showCategorySlidedown() |
Note: If you need to override back off behavior to prompt the user again you can do so by passing {force: true} example: OneSignal.showCategorySlidedown({force:true}). To provide a good user experience however ONLY do this from an action taken on your site to avoid unexpected prompts.
How to show the category slidedown to users already subscribed?
The category slide prompt, will tag the user with a key you of your choice and value of 1 if user checks or 0 if unchecked.
For example, if you set breaking_news as a tag and the user selects it, the tag will be breaking_news: 1. If they uncheck it, they will have breaking_news: 0.
In either case, if the user is subscribed and selects or does not select this category/tag, it will be active on the device.
Using this knowledge with the OneSignal getTags method, we can detect if the device has any of these categories and present the prompt if not. Using the breaking_news tag for example:
// set how many page visits till show prompt again
var numVisitsTrigger = 13;

if (typeof localStorage !== "undefined") {
    var visitNumber = parseInt(localStorage.getItem("visitNumber"), 10);
    if (!isNaN(visitNumber)) {
        visitNumber += 1;
    } else {
        visitNumber = 0;
    }
    localStorage.setItem("visitNumber", visitNumber)

    if ((numVisitsTrigger % visitNumber) === 0) {
        console.log("visitNumber is a multiple of number of visits")
        OneSignal.push(function() {
            OneSignal.getTags(function(tags) {
                console.log(tags.breaking_news)
                if (!tags.breaking_news) {
                    OneSignal.showCategorySlidedown();
                }
            })
        });
    }
}
Updated 5 months ago
