Huawei Unity SDK Setup
Follow these instructions if your app is distributed on the Huawei AppGallery.
Step 1. Requirements
- OneSignal Account
- OneSignal App ID, available in Settings > Keys & IDs
- Authorize OneSignal to Send Huawei Push
- A Huawei device with "Huawei App Gallery" installed.
Step 2. Setup the OneSignal Unity SDK
Follow the OneSignal Unity SDK setup guide. Firebase / Google setup not required for app builds released to the Huawei AppGallery.
Step 3. Huawei Setup
3.1 Huawei Platform Setup on OneSignal
3.2 Huawei Configuration File (agconnect-services.json)
From the AppGallery Connect Project List select your app.
Click on the "agconnect-services.json" button to download this file.
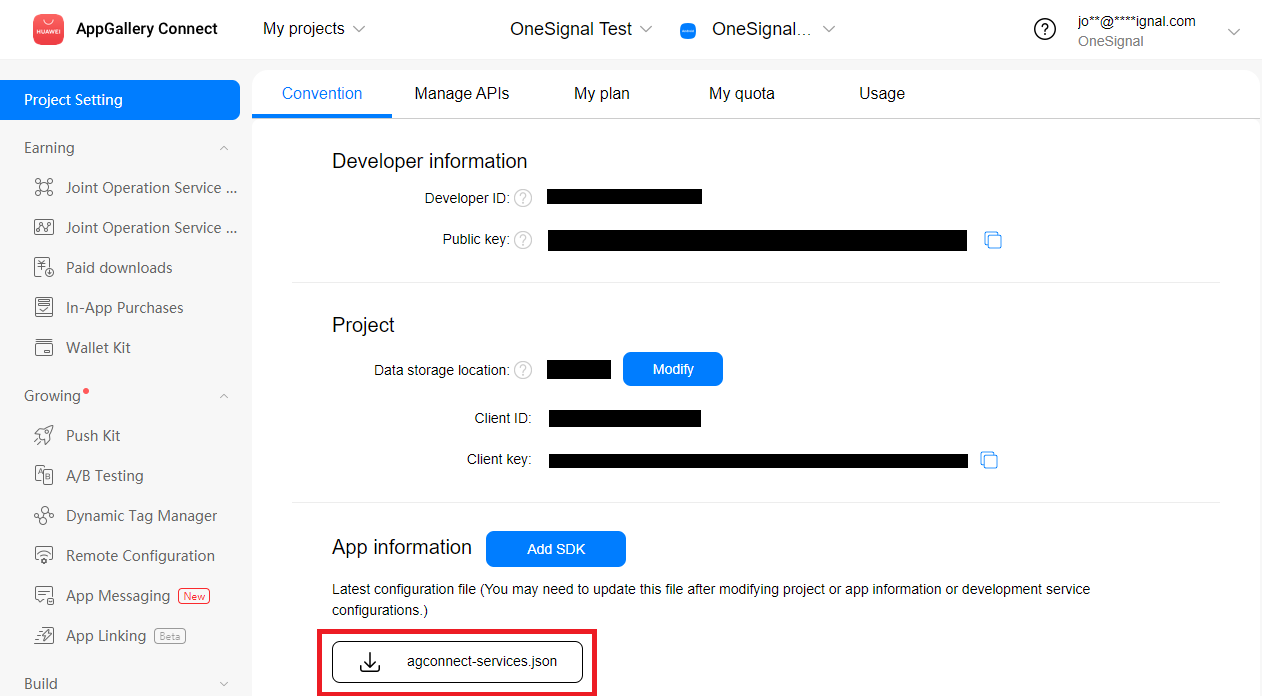
- Place this inside Assets/Plugins/Android/OneSignalConfig
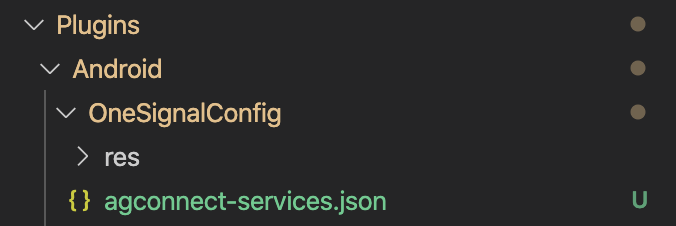
Step 4. Generating a Signing Certificate Fingerprint
You can skip this step if you already have added your SHA-256 certificate fingerprint to Huawei's dashboard for a different Huawei service.
Follow Generating a Signing Certificate Fingerprint
Step 5. Add Huawei Gradle Plugin and Dependencies
Unity 2019.3 Or Newer
5a.1 Go to File -> Build Settings -> Player Settings -> Android -> Publishing Settings and click under
Custom Main Gradle Template. This will create a mainTemplate.gradle.
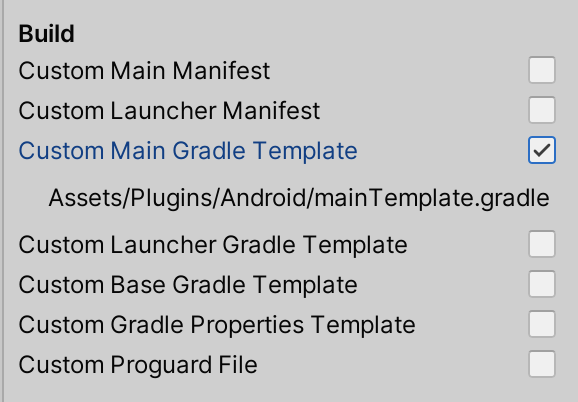
5a.2 On mainTemplate.gradle remove the comment
// GENERATED BY UNITY. REMOVE THIS COMMENT TO PREVENT OVERWRITING WHEN EXPORTING AGAIN
- Under
dependenciesaddimplementation 'com.huawei.hms:push:6.3.0.304'

5a.3 Create a new file named Assets/Plugins/Android/settingsTemplate.gradle with the following contents.
import java.nio.file.Files

// This file contents should be placed at Assets/Plugins/Android/settingsTemplate.gradle
// This works around Unity's 2019.3 bug where their root build.gradle is placing buildscript under allprojects
// On it's own it doesn't create issues however doing so means including a buildscript block in any sub projects
//   such as "unityLibrary" which is generated from the template Assets/Plugins/Android/mainTemplate.gradle does not work.
// It results in a build error of "Configuration with name 'compileClasspath' not found." on a lint task.
// Normally adding "lintOptions { abortOnError false }" bypasses any lint task errors however
//   either due to a bug with the Android Gradle plugin or an order of operations this does seem to be applying in this case.
// Until Unity fixes their root build.gradle we will need to keep using this file to enable any additional Gradle plugins.

static void enableJetifier(Project project) {
    project.ext['android.useAndroidX'] = true
    project.ext['android.enableJetifier'] = true
}

static void addBuildscript(Project project) {
    project.buildscript {
        repositories {
            maven { url 'https://plugins.gradle.org/m2/' } // Gradle Plugin Portal
            maven { url 'http://developer.huawei.com/repo/' }
        }
        dependencies {
            classpath 'com.huawei.agconnect:agcp:1.6.5.300'
        }
    }
}

static void applyPlugins(Project project) {
    // Only apply to the :app project. (Unity calls this :launcher)
    if (project.name != 'launcher')
        return

    project.afterEvaluate {
        it.apply plugin: 'com.huawei.agconnect'
    }
}

static void copyHMSFile(Project project) {
    // Only apply to the :app project. (Unity calls this :launcher)
    if (project.name != 'launcher')
        return

    def newFile = new File("${project.rootDir}/launcher/agconnect-services.json")

    if (newFile.exists())
        return

    def file = new File("${project.rootDir}/unityLibrary/OneSignalConfig/agconnect-services.json")
    Files.copy(file.toPath(), newFile.toPath())
}

gradle.rootProject {
    it.afterEvaluate {
        it.allprojects {
            // Since Unity 2019.3 enabling Jetifier via mainTemplate.gradle is no longer working
            // Enabling it for all gradle projects here.
            enableJetifier(it)

            addBuildscript(it)
            applyPlugins(it)
            copyHMSFile(it)
        }
    }
}


// Per Unity's docs /*/*INCLUDES/*/* should be at the bottom.
// https://docs.unity3d.com/Manual/android-gradle-overview.html

// However it seem to have left out this include line
include ':launcher', ':unityLibrary'
**INCLUDES**
Unity 2019.2 Or Older
5b.1 Go to File -> Build Settings -> Player Settings -> Android -> Publishing Settings and click under
Custom Gradle Template. This will create a mainTemplate.gradle.
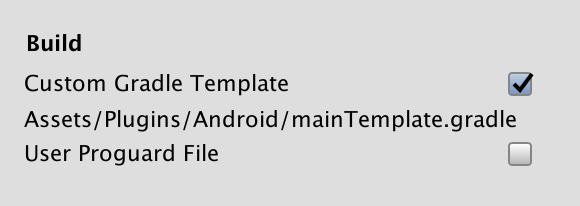
5b.2 On mainTemplate.gradle remove the comment
// GENERATED BY UNITY. REMOVE THIS COMMENT TO PREVENT OVERWRITING WHEN EXPORTING AGAIN
- Under
buildscript { repositories }addmaven { url 'http://developer.huawei.com/repo/' } - Under
buildscript { dependencies }addclasspath 'com.huawei.agconnect:agcp:1.6.5.300' - Under
allprojects { repositories }addmaven { url 'http://developer.huawei.com/repo/' }
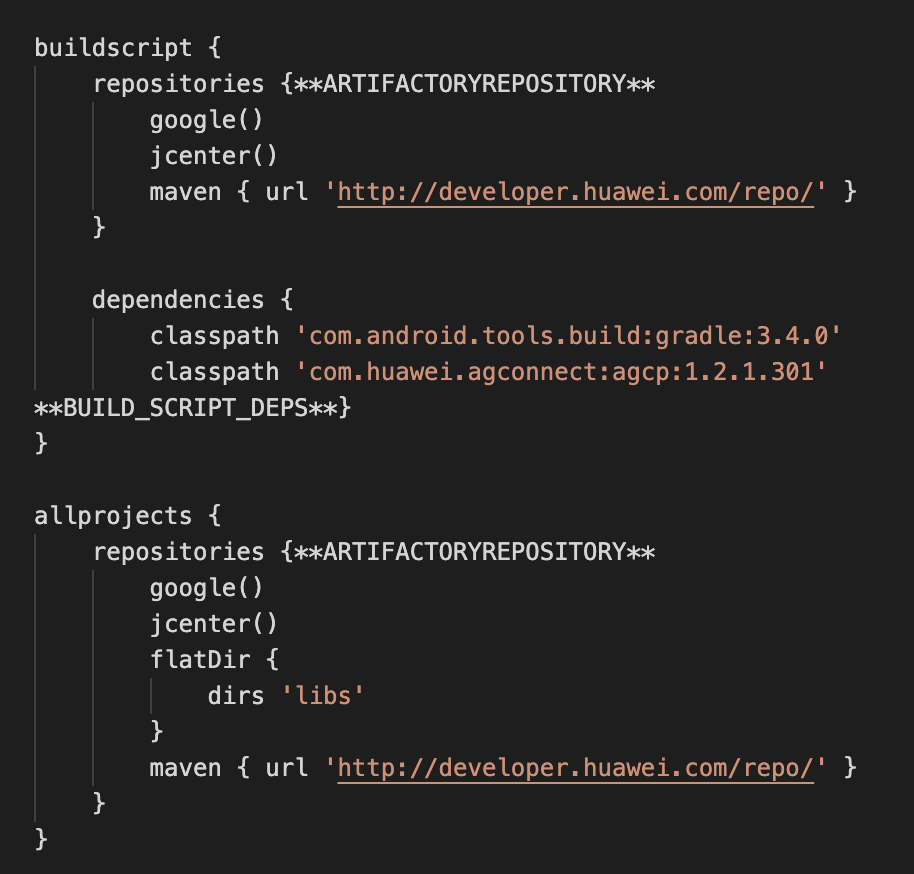
- After adding these dependencies, add below
allprojects {}the following
allprojects {
  ...
}

task copyReport(type: Copy) {
    from file("$projectDir/OneSignalConfig/agconnect-services.json")
    into file("$projectDir")
}

allprojects {
    afterEvaluate {
        for (def task in it.tasks)
            if (task != rootProject.tasks.copyReport)
                task.dependsOn rootProject.tasks.copyReport
    }
}
- Under
dependenciesaddimplementation 'com.huawei.hms:push:6.3.0.304'

- At the bottom of the file add
apply plugin: 'com.huawei.agconnect'
Step 6. Run and test your app
Run your app on a real Huawei device to make sure your device is subscribed to notifications as a Huawei device and can receive notifications sent from the OneSignal dashboard.
Step 7. Configure Huawei Location Service (Optional)
7.1 On mainTemplate.gradle under dependencies add implementation 'com.huawei.hms:location:<HUAWEI HMS VERSION #>

7.2 Make sure to also add the location permission to your AndroidManifest.xml if you don't have this already
<uses-permission android:name="android.permission.ACCESS_FINE_LOCATION"/>
<uses-permission android:name="android.permission.ACCESS_COARSE_LOCATION"/>
- HMS error code reference to help debug logs and successfully integrate HMS Core SDK with the OneSignal SDK.
Updated 5 months ago
