Unity SDK Setup
Instructions for adding the OneSignal Unity SDK to your Unity app for iOS, Android, Amazon, and Huawei
Step 1. Requirements
- OneSignal Account
- OneSignal App ID, available in Settings > Keys & IDs
- Unity 2018.4 or newer
iOS Requirements
- iOS 11+ or iPadOS 11+ device (iPhone, iPad, iPod Touch) to test on. Xcode 14+ simulator works running iOS 16+
- mac with Xcode 12+
- p8 Authentication Token or p12 Push Notification Certificate
Android Requirements
- Android 4.1+ device or emulator with "Google Play Store (Services)" installed
- Set up your Google/Firebase keys in OneSignal
Amazon & Huawei Requirements
Follow these instructions if your app is distributed on the Amazon AppStore and/or the Huawei AppGallery.
Step 2. Import the OneSignal Unity Plugin
There are two methods available for installation of the OneSignal Unity SDK.
Upgrading from 2.13.4 or older
It is recommended to use the Asset Store path for installation if you are upgrading from a version of the OneSignal Unity SDK 2.13.4 or older.
Unity Asset Store (click to expand)
-
Add the OneSignal Unity SDK as an available asset to your account by clicking Add to My Assets from our listing on the Unity Asset Store.
-
Find the package waiting for you to download by clicking Open in Unity from that same page. This will open the Unity Editor and its Package Manager window.
-
On the SDK's listing in the Editor click the Download button. When it finishes click Import.

-
A prompt to import all of the files of the OneSignal Unity SDK will appear. Click Import to continue and compile the scripts into your project.
-
Navigate to Window > OneSignal (or follow the popup if upgrading) in the Unity Editor which will bring up a window with some final steps which need to be completed in order to finalize the installation. The most important of these steps is Import OneSignal packages.
Depending on your project configuration and if you are upgrading from a previous version, some of these steps may already be marked as "completed"

-
After importing the packages Unity will notify you that a new registry has been added and the OneSignal SDK Setup window will have refreshed with a few additional
steps. Following these will finalize your installation of the OneSignal Unity SDK.
Unity Package Manager (click to expand)
-
From within the Unity Editor navigate to Edit > Project Settings and then to the Package Manager settings tab.

-
Create a New Scoped Registry by entering
Name        npmjs
URL         https://registry.npmjs.org
Scope(s)    com.onesignal
and click Save.
-
Open the Window > Package Manager and switch to My Registries via the Packages: dropdown menu. You will see all of the OneSignal Unity SDK packages available
on which you can then click Install for the platforms you would like to include. Dependencies will be added automatically. -
Once the packages have finished importing you will find a new menu under Window > OneSignal. Open it and you will find some final steps which need to be completed
in order to finalize the installation.Depending on your project configuration and if you are upgrading from a previous version, some of these steps may already be marked as "completed"

Step 3. Initialize OneSignal in your Unity scene
3.1 To get started add the following code in an appropriate place such as the Start method of a MonoBehaviour early in your application's lifecycle.
using OneSignalSDK;

void Start () {
  // Replace 'YOUR_ONESIGNAL_APP_ID' with your OneSignal App ID from app.onesignal.com
  OneSignal.Default.Initialize("YOUR_ONESIGNAL_APP_ID");
}
3.2 Replace "YOUR_ONESIGNAL_APP_ID" with your OneSignal app id.
3.3 Follow one or more of the platform specific guides below to support iOS, Android, and / or FireOS push.
Step 4. iOS Setup
After building in Unity open the Xcode Workspace and follow these setups.
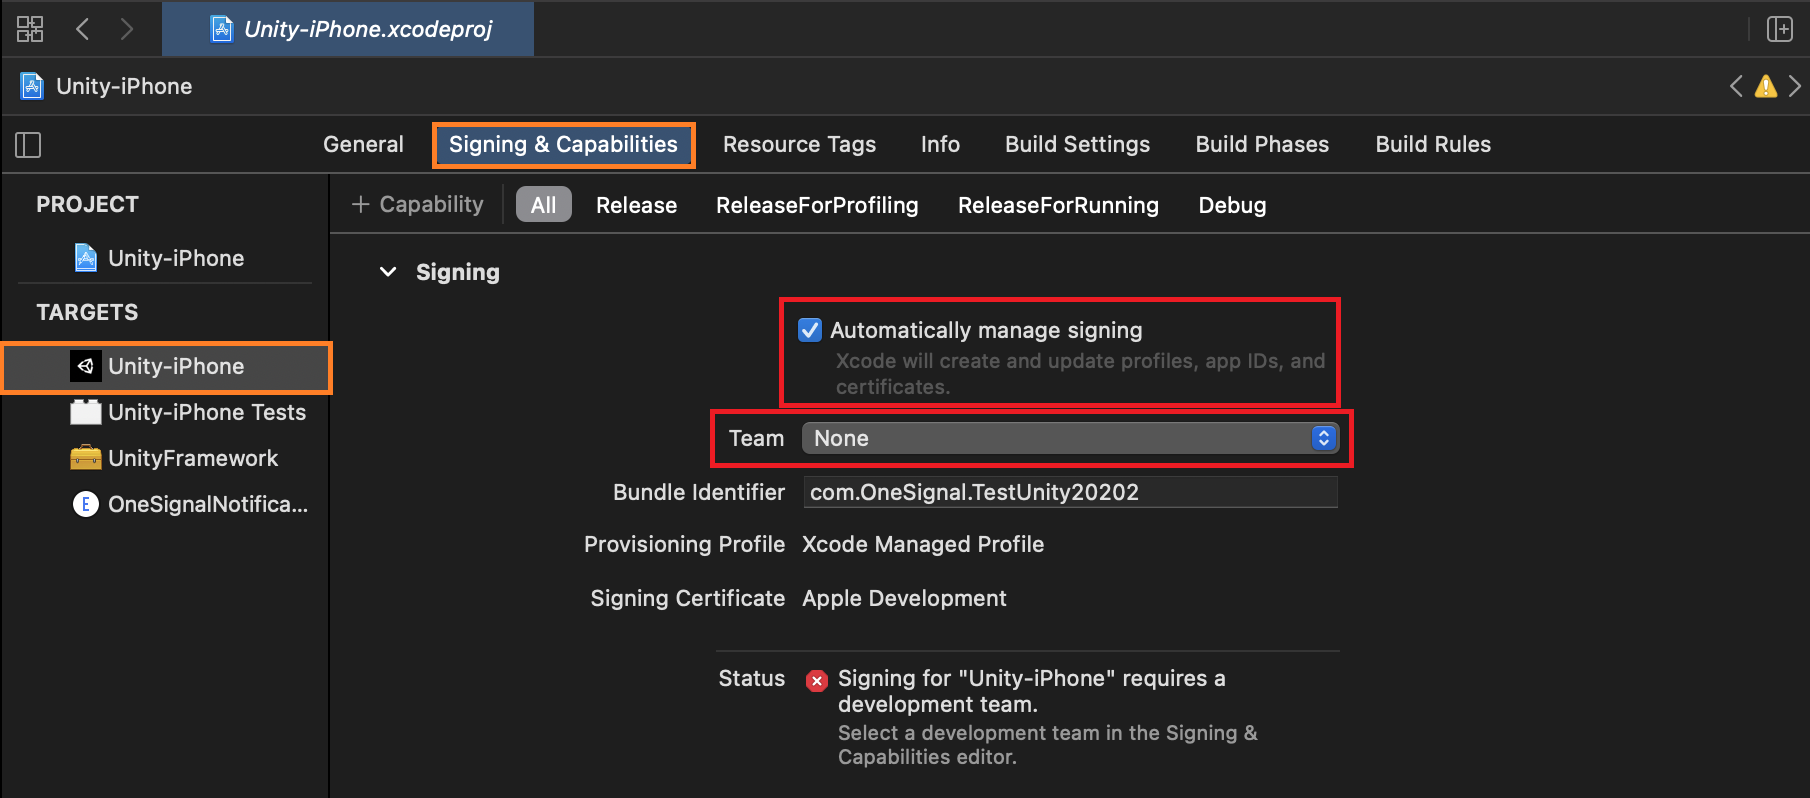
4.1. Click on "Unity-iPhone" on the left and select the "Signing & Capabilities" tab.
4.2 If you'd like to make provisioning your app easier, you can check "Automatically manage signing", on the prompt click "Enable Automatic", and select your Team. Otherwise you can do this manually.

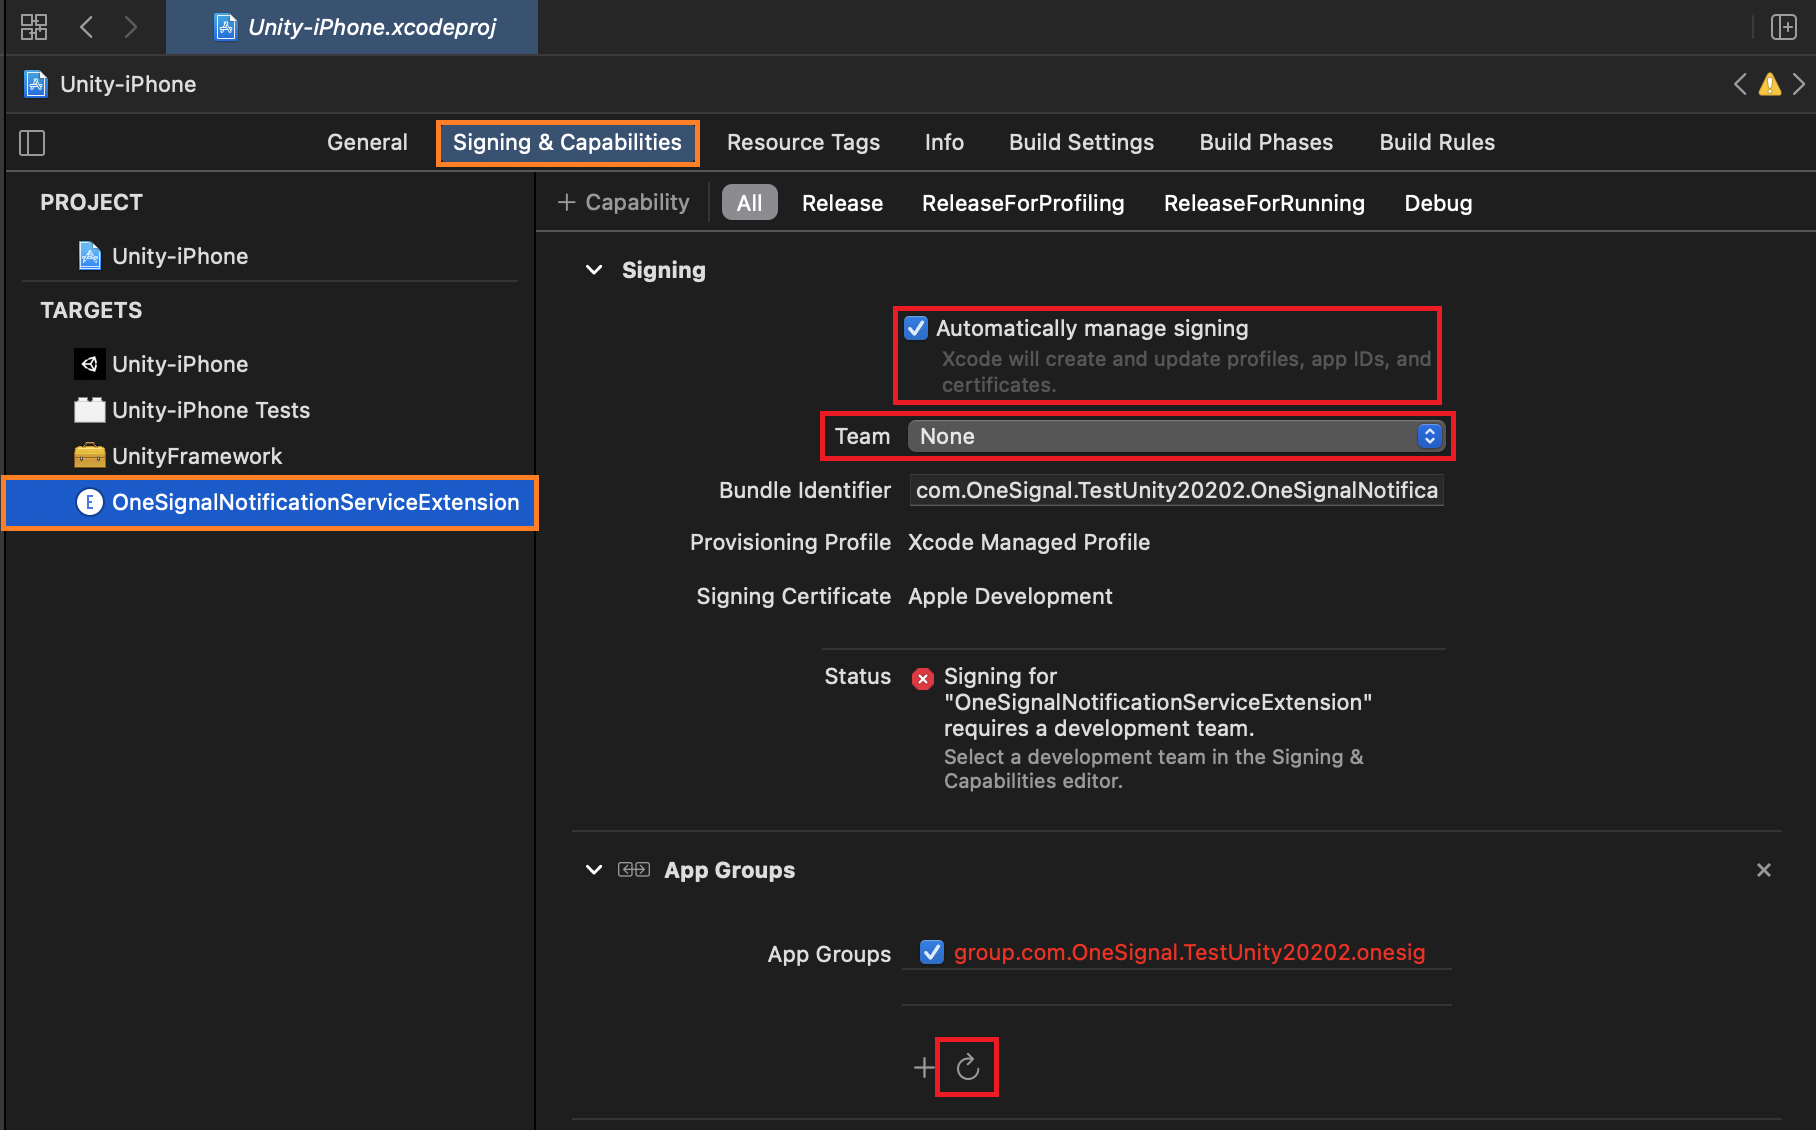
4.3 Scroll down to "App Groups" and click on the refresh button.
- NOTE: You may have to press this a few times as it will ask you for each signing type.

4.4 Repeat the same steps above but for the "OneSignalNotificationServiceExtension" target this time.

4.5 "App Groups" should now be provisioned for you going forward for your iOS bundle id, even on clean builds.
Step 5. Android Setup
Most of the Android setup was already handled during installation!
The only thing remaining is to setup your own notification icons. You can do this be replacing the example icons located at Assets/Plugins/Android/res with your own. The file names must be lowercase and cannot contain anything else except underscores and numbers. See our Customize Notification Icons for more details.
Step 6. Amazon FireOS (ADM) Setup
Only required if you plan to release your app on the Amazon App Store to support Kindle Fire devices.
6.1 Open Plugins/Android/AndroidManifest.xml.
If you don't have one, create this file with the following contents and then skip to step 7.5.
<?xml version="1.0" encoding="utf-8" standalone="no"?>
<manifest xmlns:amazon="http://schemas.amazon.com/apk/res/android" xmlns:android="http://schemas.android.com/apk/res/android" android:installLocation="auto" package="COM.YOUR.PACKAGE_NAME" platformBuildVersionCode="23" >
    <supports-screens android:anyDensity="true" android:largeScreens="true" android:normalScreens="true" android:smallScreens="true" android:xlargeScreens="true"/>
    <application android:debuggable="false" android:icon="@drawable/app_icon" android:isGame="true" android:label="@string/app_name" android:theme="@style/UnityThemeSelector">
        <activity android:configChanges="locale|fontScale|keyboard|keyboardHidden|mcc|mnc|navigation|orientation|screenLayout|screenSize|smallestScreenSize|touchscreen|uiMode" android:label="@string/app_name" android:launchMode="singleTask" android:name="com.unity3d.player.UnityPlayerActivity" android:screenOrientation="fullSensor">
            <intent-filter>
                <action android:name="android.intent.action.MAIN"/>
                <category android:name="android.intent.category.LAUNCHER"/>
                <category android:name="android.intent.category.LEANBACK_LAUNCHER"/>
            </intent-filter>
            <meta-data android:name="unityplayer.UnityActivity" android:value="true"/>
        </activity>

        <amazon:enable-feature android:name="com.amazon.device.messaging" android:required="false"/>
        <service android:name="com.onesignal.ADMMessageHandler" android:exported="false" />
        <receiver android:name="com.onesignal.ADMMessageHandler$Receiver"
                  android:permission="com.amazon.device.messaging.permission.SEND" >
          <intent-filter>
            <action android:name="com.amazon.device.messaging.intent.REGISTRATION" />
            <action android:name="com.amazon.device.messaging.intent.RECEIVE" />
            <category android:name="COM.YOUR.PACKAGE_NAME" />
          </intent-filter>
        </receiver>
    </application>
    <uses-feature android:glEsVersion="0x20000"/>
    <uses-feature android:name="android.hardware.touchscreen" android:required="false"/>
    <uses-feature android:name="android.hardware.touchscreen.multitouch" android:required="false"/>
    <uses-feature android:name="android.hardware.touchscreen.multitouch.distinct" android:required="false"/>

    <uses-permission android:name="com.amazon.device.messaging.permission.RECEIVE" />
    <permission android:name="COM.YOUR.PACKAGE_NAME.permission.RECEIVE_ADM_MESSAGE" android:protectionLevel="signature" />
    <uses-permission android:name="COM.YOUR.PACKAGE_NAME.permission.RECEIVE_ADM_MESSAGE" />
</manifest>
6.2 Add xmlns:amazon="http://schemas.amazon.com/apk/res/android" in the manifest tag right after the xmlns:android property.
<manifest xmlns:android="http://schemas.android.com/apk/res/android"
    xmlns:amazon="http://schemas.amazon.com/apk/res/android"
    package="COM.YOUR.PACKAGE_NAME"
    android:versionCode="1"
    android:versionName="1.0" >
6.3 Add the following permissions.
<uses-permission android:name="com.amazon.device.messaging.permission.RECEIVE" />
<permission android:name="COM.YOUR.PACKAGE_NAME.permission.RECEIVE_ADM_MESSAGE" android:protectionLevel="signature" />
<uses-permission android:name="COM.YOUR.PACKAGE_NAME.permission.RECEIVE_ADM_MESSAGE" />
6.4 In the application tag add the following.
<application>
  <amazon:enable-feature android:name="com.amazon.device.messaging" android:required="false"/>

  <service android:name="com.onesignal.ADMMessageHandler" android:exported="false" />
  <receiver android:name="com.onesignal.ADMMessageHandler$Receiver"
            android:permission="com.amazon.device.messaging.permission.SEND" >
    <intent-filter>
      <action android:name="com.amazon.device.messaging.intent.REGISTRATION" />
      <action android:name="com.amazon.device.messaging.intent.RECEIVE" />
      <category android:name="COM.YOUR.PACKAGE_NAME" />
    </intent-filter>
  </receiver>
</application>
6.5 Replace all 3 of instances of COM.YOUR.PACKAGE_NAME with your package name in AndroidManifest.xml.
6.6 Place your api_key.txt in a new folder named assets under Assets/Plugins/Android/
To create an api_key.txt for your app follow our Generate an Amazon API Key Guide.
Step 7. Run Your App and Send Yourself a Notification
Run your app on a physical device to make sure it builds correctly. Note that the iOS Simulator does not support receiving remote push notifications.
- Android and iOS devices should be prompted to subscribe to push notifications if you used the example setup code provided.
Check your OneSignal Dashboard Audience > All Users to see your Device Record.
Then head over to Messages > New Push to Send your first Push Notification from OneSignal.
Troubleshooting
If you run into any issues please see our Unity troubleshooting guide.
Try the example project on our Github repository.
If stuck, contact support directly or email [email protected] for help.
For faster assistance, please provide:
- Your OneSignal App Id
- Details, logs, and/or screenshots of the issue.
- Steps to reproduce
Step 8. Set Custom User Properties
Recommended
After initialization, OneSignal will automatically collect common user data by default. Use the following methods to set your own custom userIds, emails, phone numbers, and other user-level properties.
Set External User Id
Required if using integrations.
Recommended for messaging across multiple channels (push, email, sms).
OneSignal creates channel-level device records under a unique Id called the player_id. A single user can have multiple player_id records based on how many devices, email addresses, and phone numbers they use to interact with your app.
If your app has its own login system to track users, call setExternalUserId at any time to link all channels to a single user. For more details, see External User Ids.
string externalUserId = "123456789" // You will supply the external user id to the OneSignal SDK

OneSignal.Default.SetExternalUserId(externalUserId);
// or
var result = await OneSignal.Default.SetExternalUserId(externalUserId);
if (result) {
    Debug.Log("success");
}
Set Email and Phone Number
Recommended if using Email and SMS messaging.
Use the provided SDK methods to capture email and phone number when provided. Follow the channel quickstart guides for setup:
OneSignal.Default.SetEmail("[email protected]");

var result = await OneSignal.Default.SetEmail("[email protected]");
if (result) {
    Debug.Log("success");
}
else {
    Debug.Log("error");
}

OneSignal.Default.SetSMSNumber("+12345556789");

var result = await OneSignal.Default.SetSMSNumber("+12345556789");
if (result) {
    Debug.Log("success");
}
else {
    Debug.Log("error");
}
Data Tags
Optional
All other event and user properties can be set using Data Tags. Setting this data is required for more complex segmentation and message personalization.
OneSignal.Default.SendTag("tagName", "tagValue");
Step 9. Implement a Soft-Prompt In-App Message
Optional
It is recommended that apps create an alert, modal view, or other interface that describes the types of information they want to send and gives people a clear way to opt in or out.
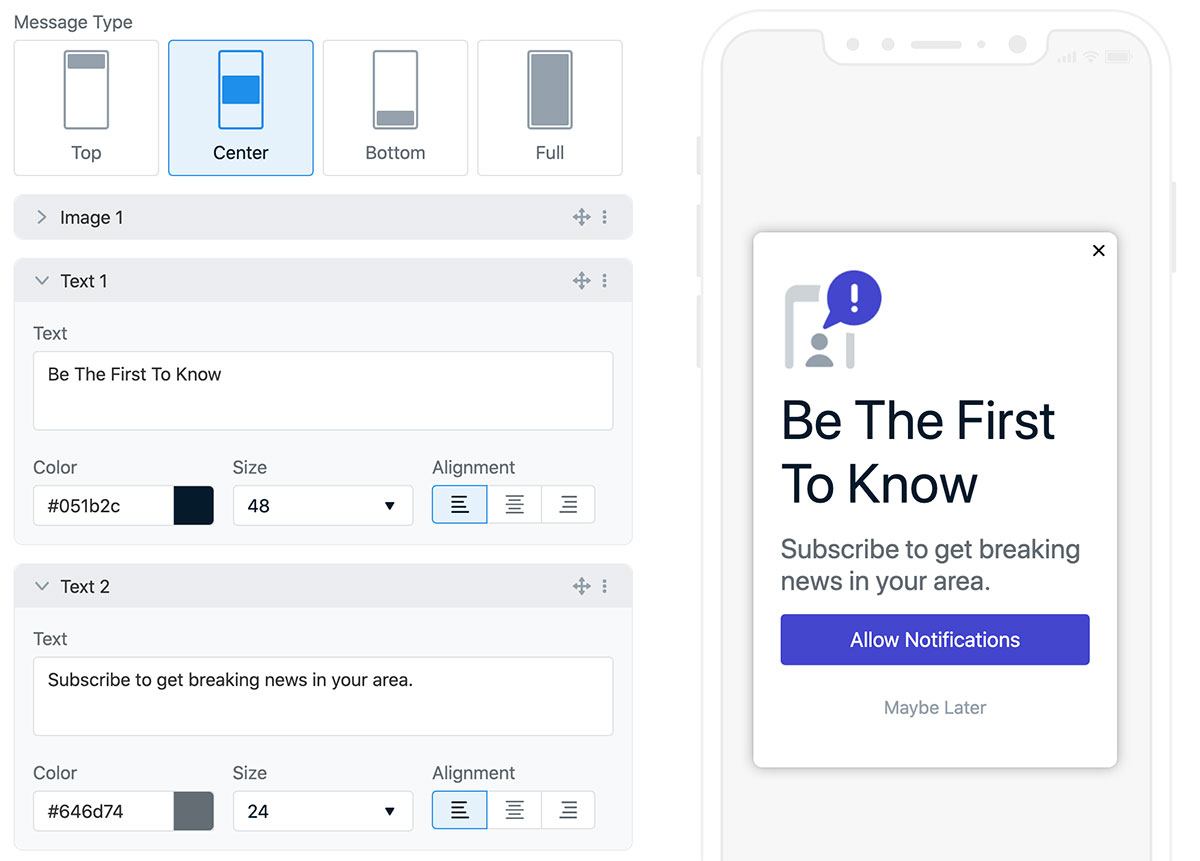
OneSignal provides an easy option for a "soft-prompt" using In-App Messages to meet this recommendation and have a better user experience. This also permits you to ask for permission again in the future, since the native permission prompt can no longer be shown in your app if the user clicks deny.

See our How to Prompt for Push Permissions with an In-App Message Guide for details on implementing this.
Setup Complete!
Visit Mobile Push Tutorials for next steps.
Updated 5 months ago
