- Send messages: trigger push notifications, emails, and SMS/RCS from HubSpot Workflows.
- Create users: sync HubSpot contacts to OneSignal with email and SMS/RCS subscriptions.
- Manage tags: set or delete OneSignal Tags based on HubSpot contact properties.
- Target in-app messages: use tags set by HubSpot to build segments that control in-app message delivery.
Prerequisites
- HubSpot Super Admin role or App Marketplace Permissions
- A paid OneSignal plan (not available on free plans)
HubSpot deprecated the original third-party OneSignal app in December 2024. OneSignal now provides its own HubSpot app with expanded functionality. If you used the previous integration, see the migration steps below.
Migrating from the legacy HubSpot integration
Migrating from the legacy HubSpot integration
Install the new integrationActivate the HubSpot integration from the OneSignal dashboard under Data > Integrations as described in Connect HubSpot to OneSignal below.Migrate your workflowsWe recommend creating a new workflow to test the new integration before replacing actions in your existing workflows.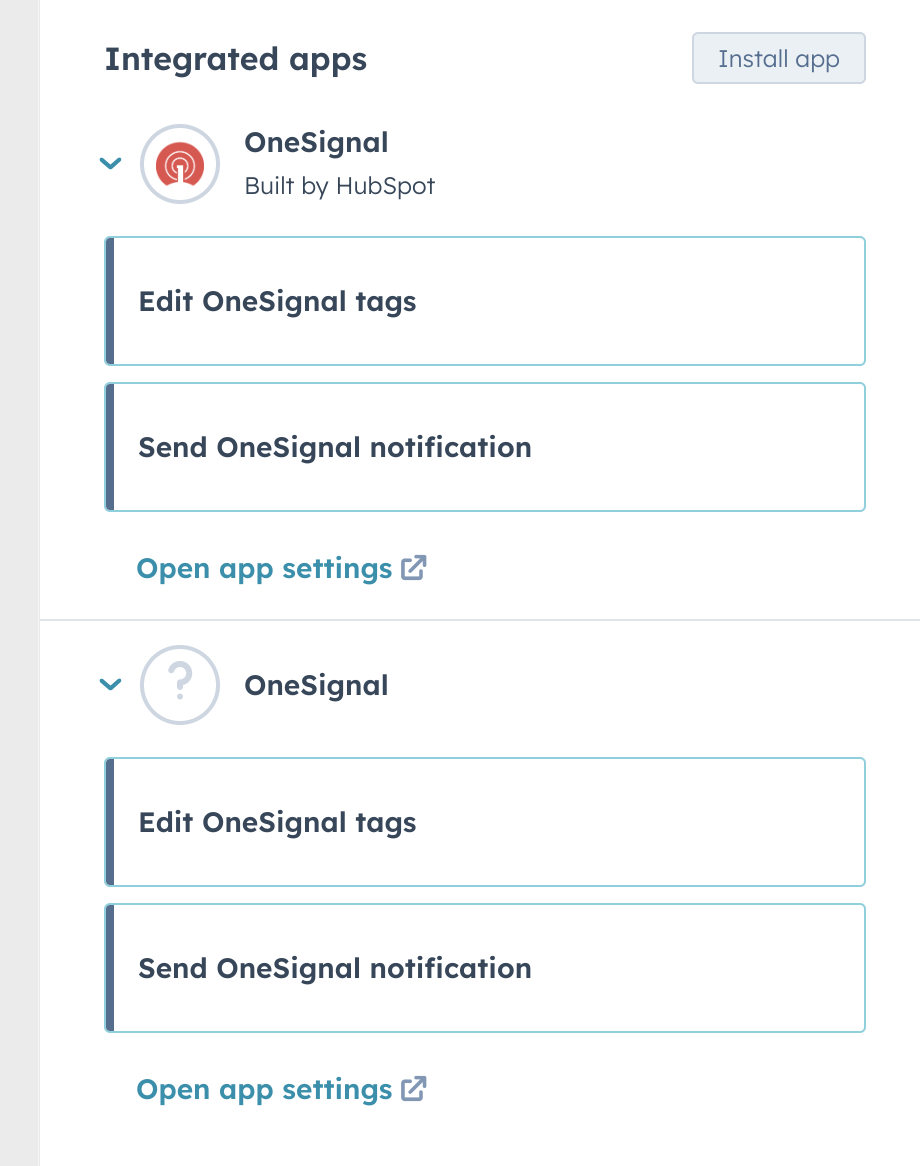
- Clone your workflow: On the HubSpot Workflows page, click Clone next to your existing workflow.
- Remove triggers: In the cloned workflow, remove all enrollment triggers so it does not fire automatically when published.
- Replace legacy actions: Remove each legacy OneSignal action and replace it with the new version. If both apps are installed, the legacy app shows “Built by HubSpot”. Use the one that does not.
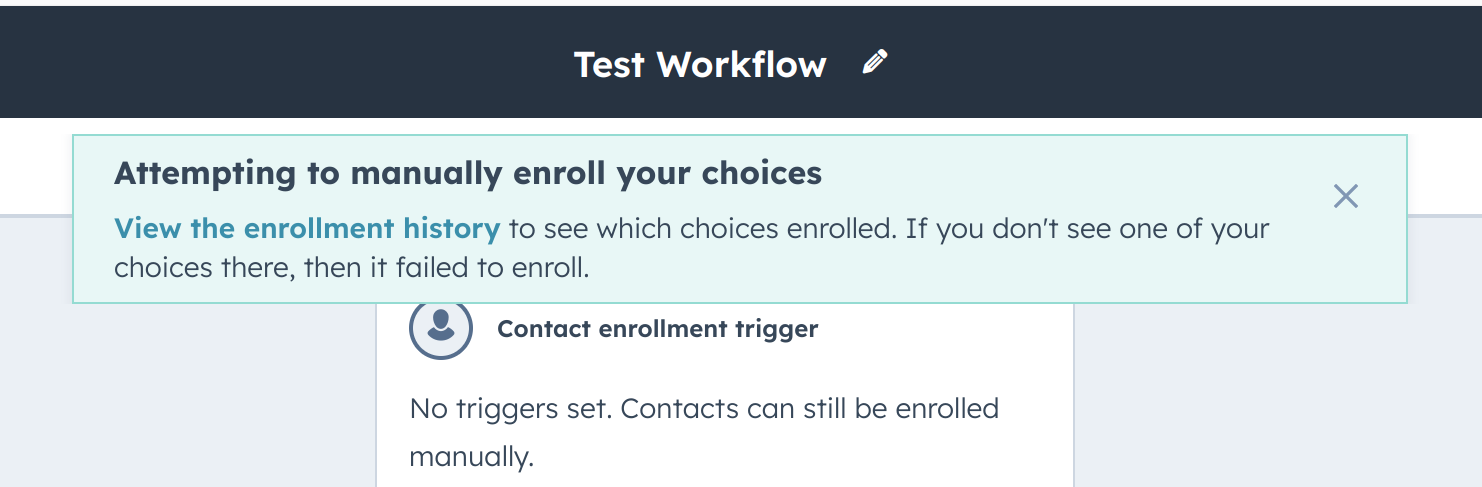
- Test with a single contact: Save and publish the workflow, then manually enroll one test contact. Check the enrollment history to verify actions completed successfully.
- Replace or update: After confirming the workflow works correctly, either replace the original workflow with the clone or apply the same changes to the original.
support@onesignal.com.Connect HubSpot to OneSignal
Activate the integration
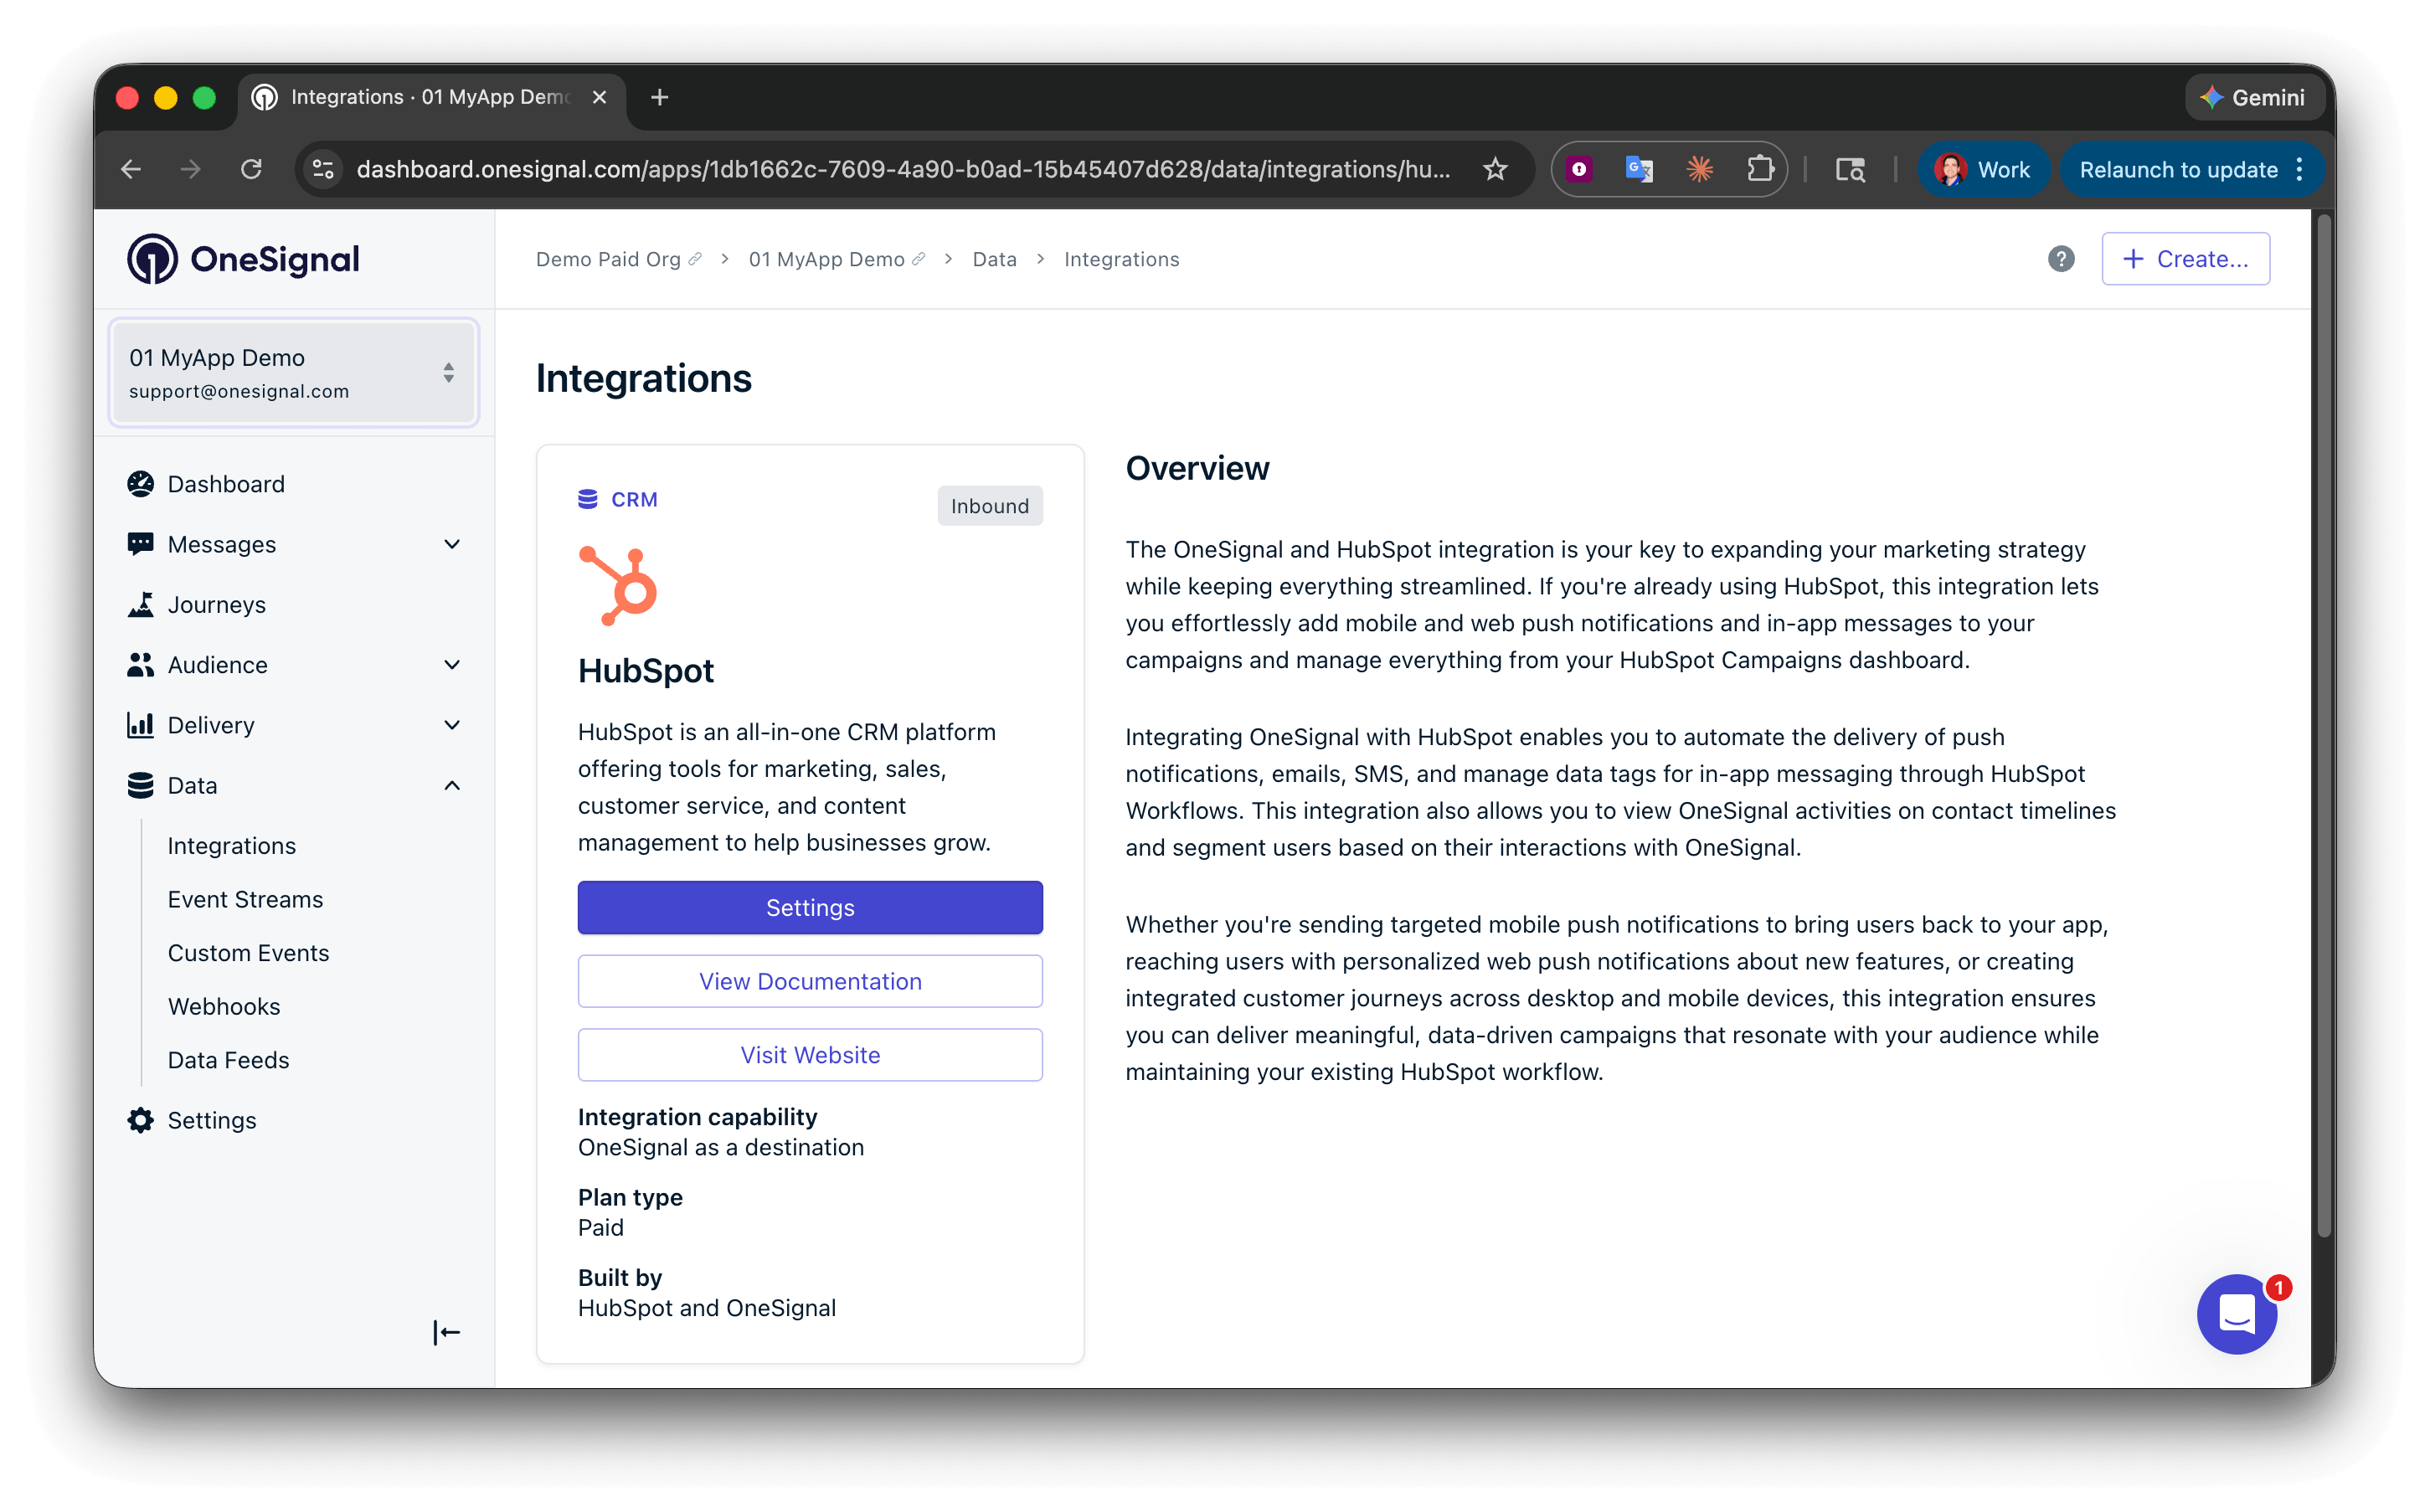
In OneSignal, go to Data > Integrations > Catalog and select HubSpot.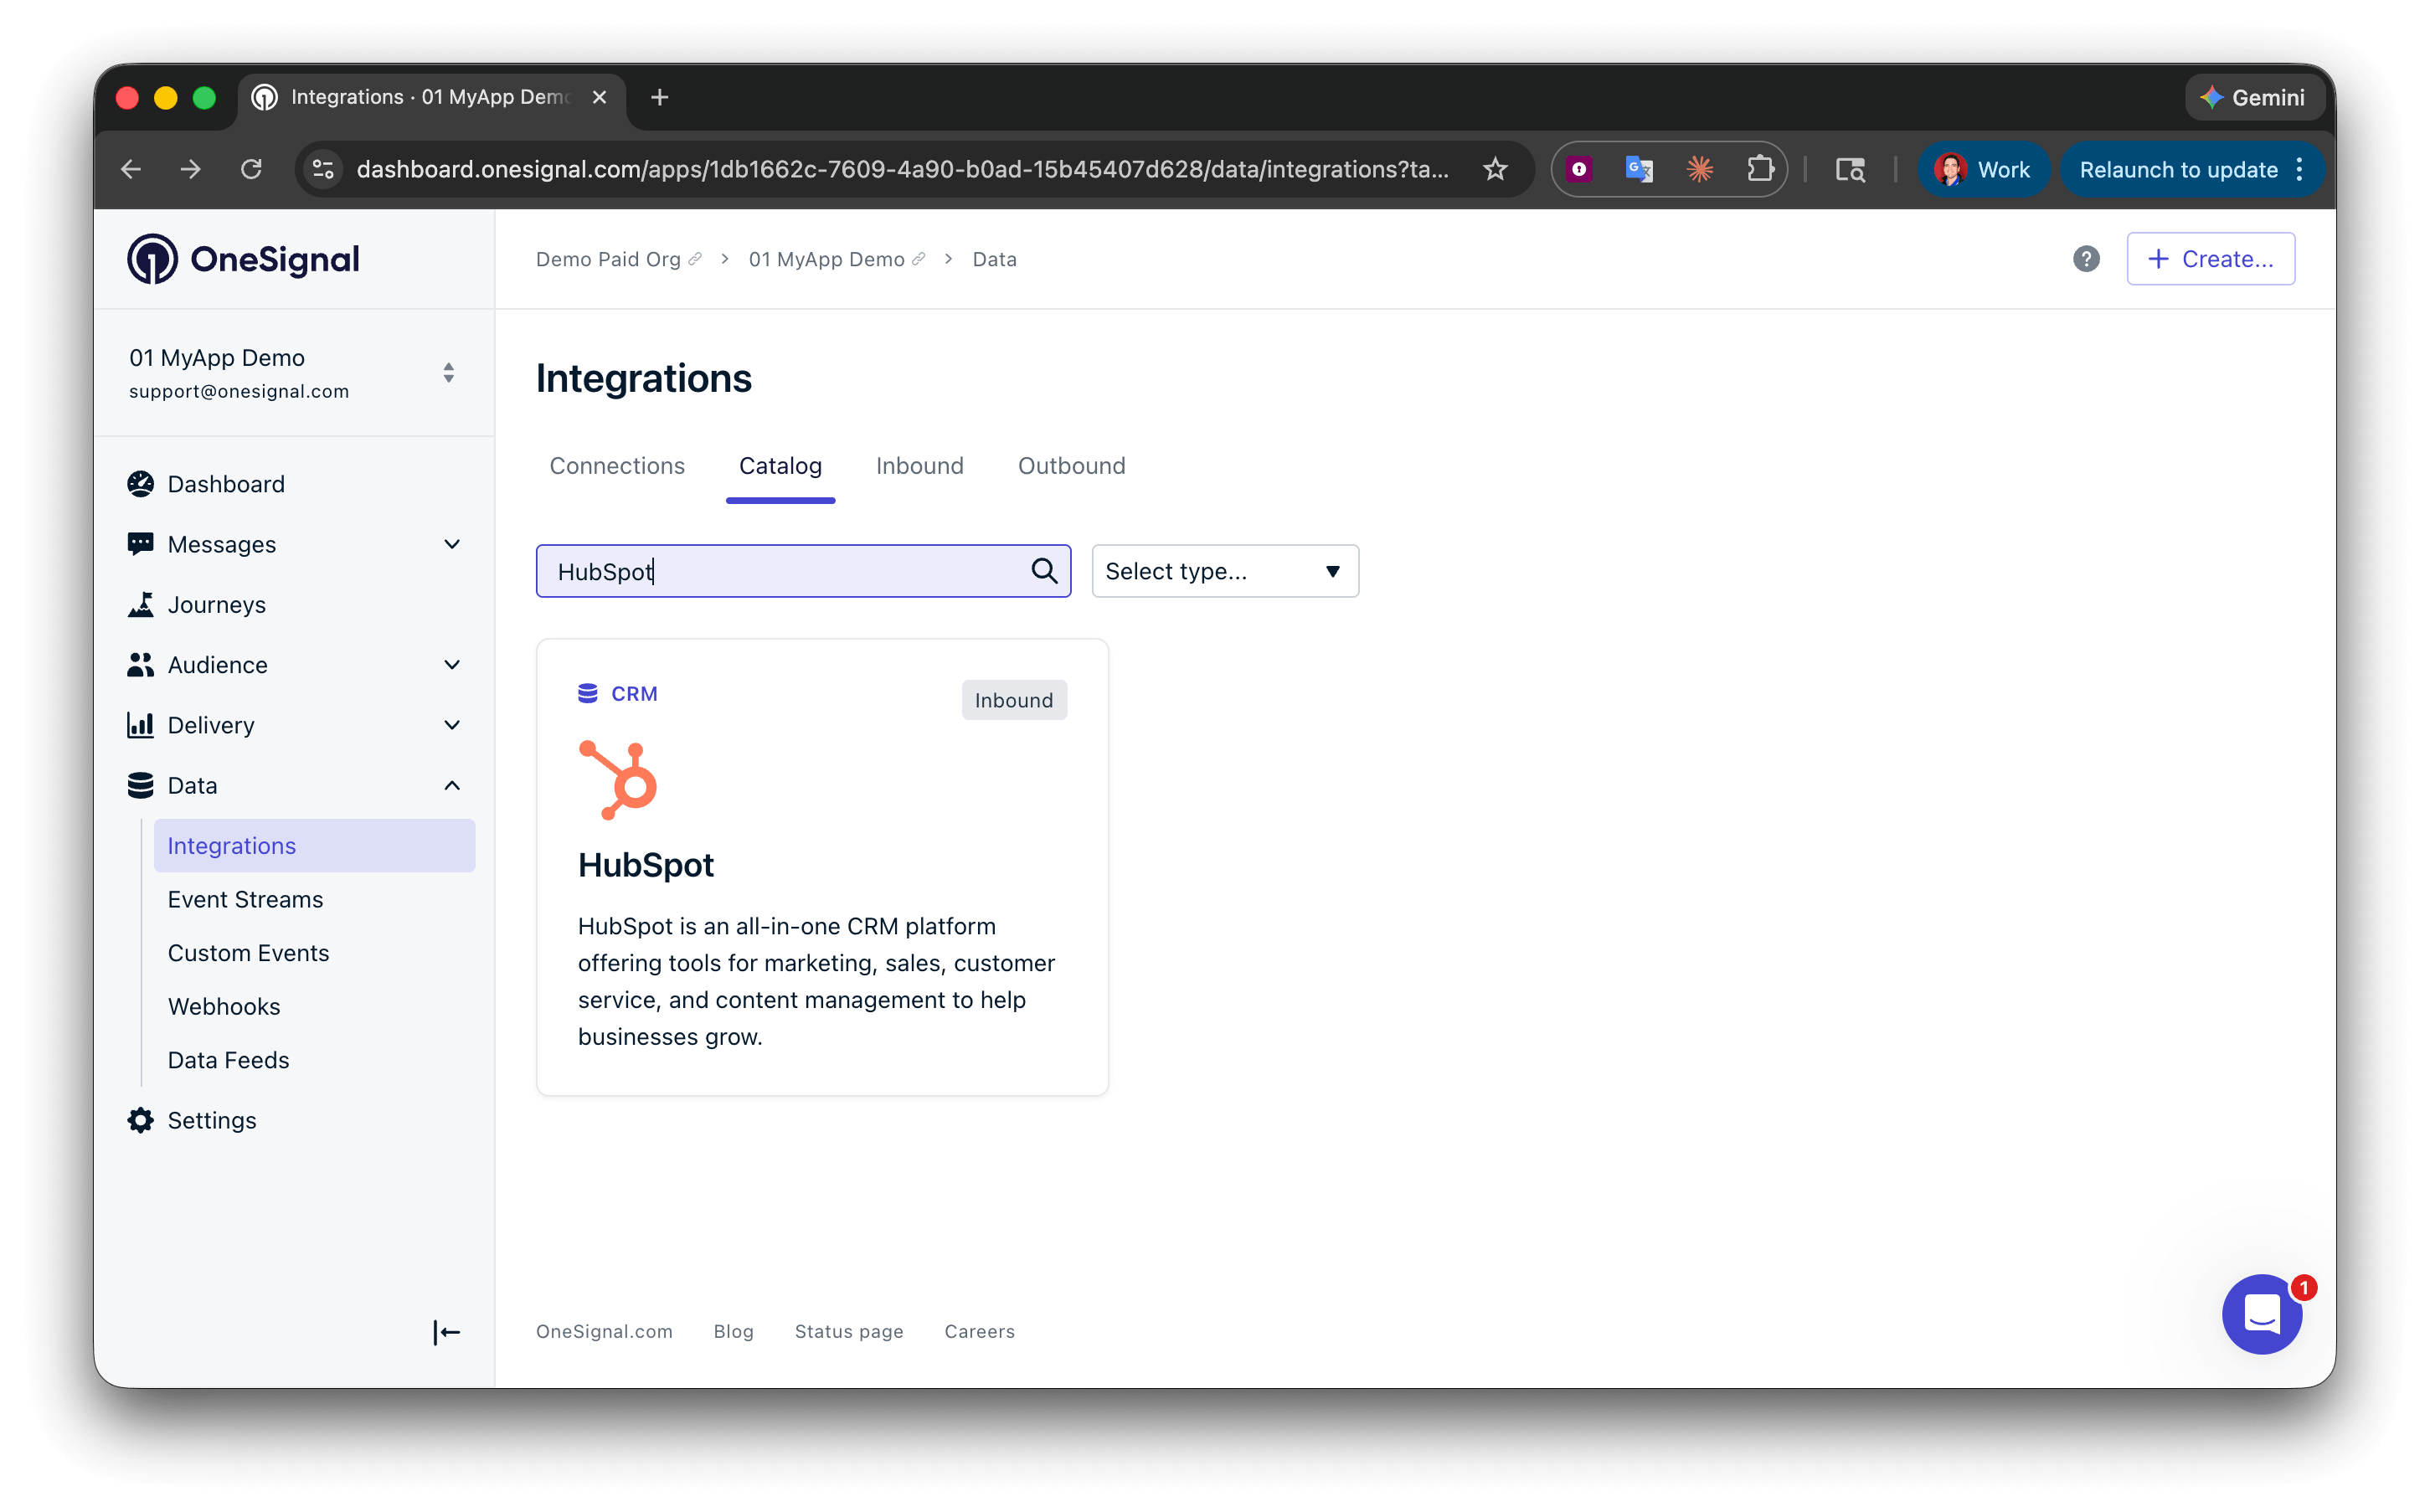
Match users with External ID
To link HubSpot contacts to OneSignal users, set the External ID in OneSignal to a value that matches a unique property in HubSpot (e.g., a user ID or email address). Set External ID using the SDKlogin method in your app or website. Choose a property that is readily available in both your app and HubSpot so matching is reliable.
See Users and Subscriptions for details on identity and subscription management.
Create a HubSpot workflow
In HubSpot, go to Automation > Workflows and click Create workflow. Select Contact-based and configure your enrollment triggers. To add a OneSignal action, click + in the workflow editor and search for “OneSignal”.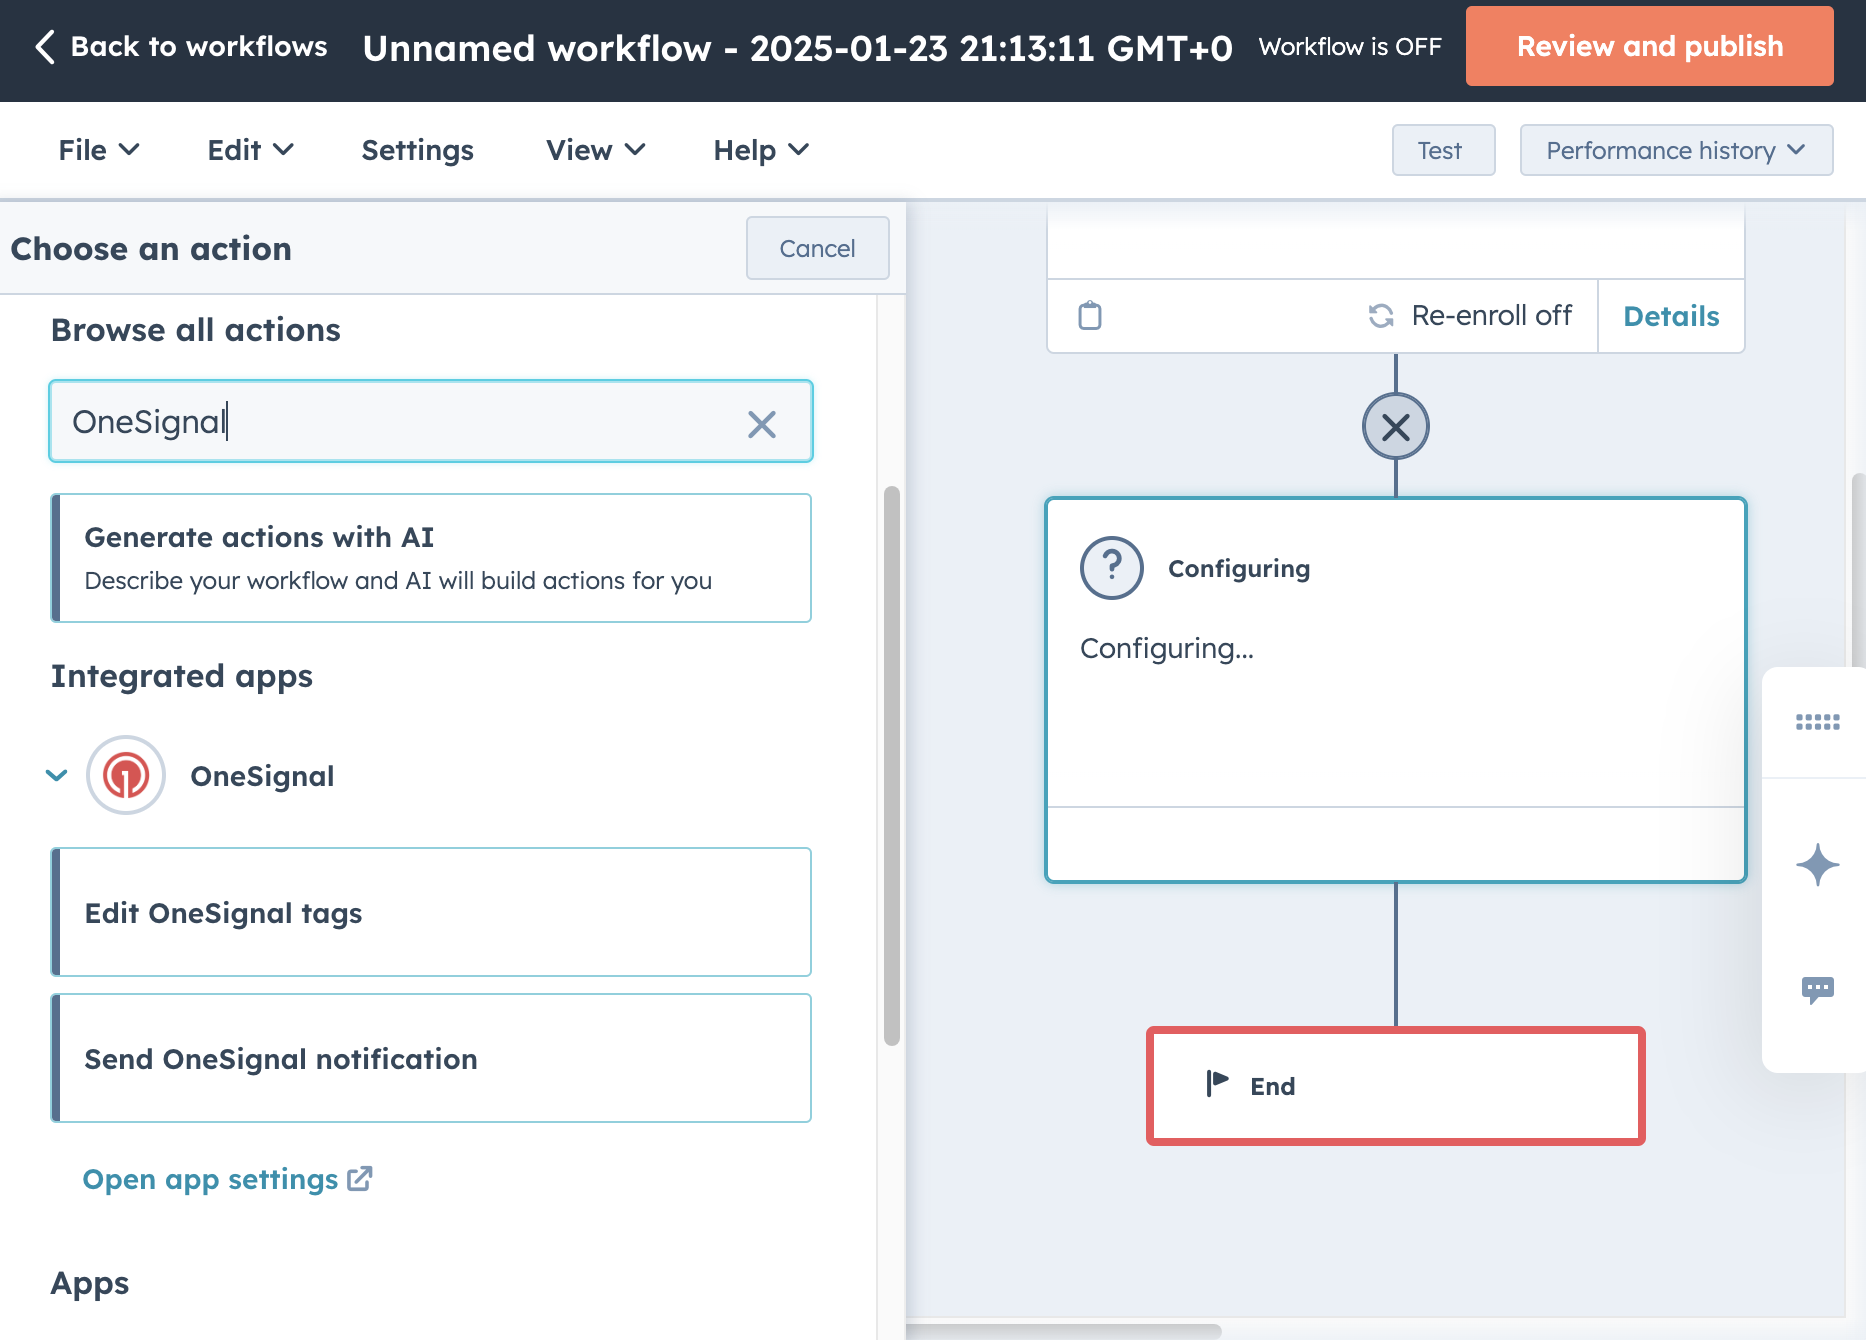

- OneSignal App: the app you connected during setup.
- External ID: the HubSpot contact property whose value matches the OneSignal user’s External ID (set via the SDK
loginmethod).
OneSignal actions
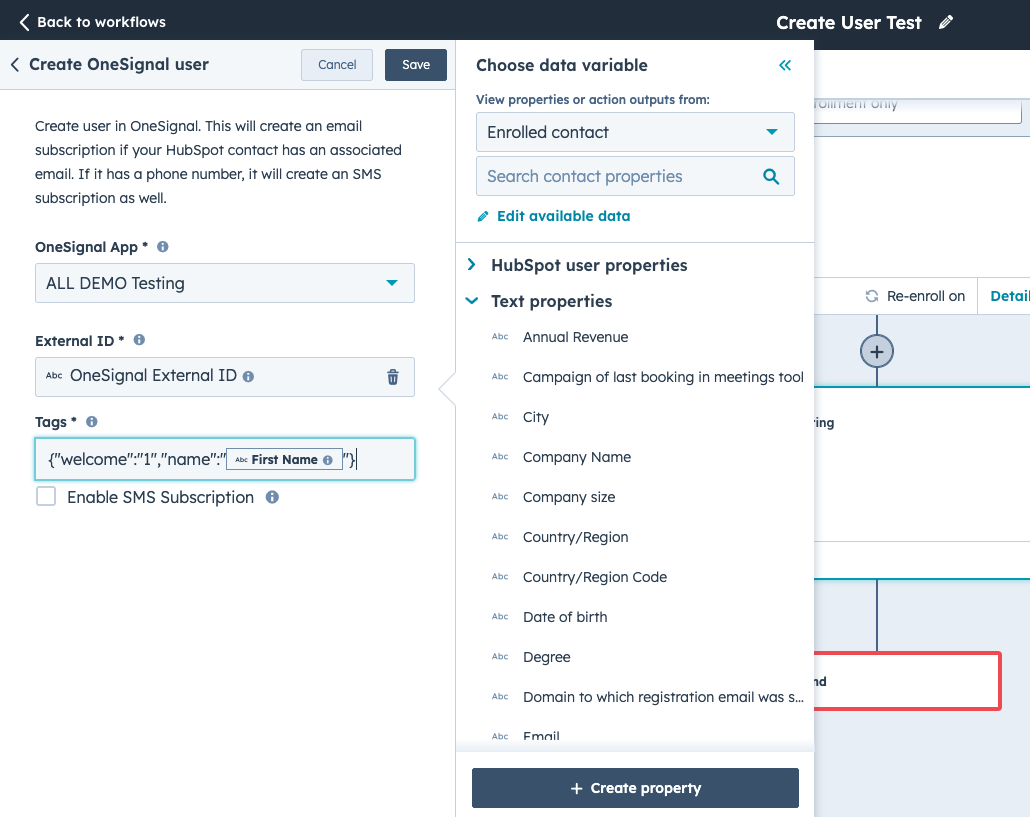
Create users
The Create User action creates a User in OneSignal when a contact passes through the workflow. Use this to keep OneSignal and HubSpot in sync as new contacts are added. If the following HubSpot properties are set, OneSignal automatically creates corresponding Subscriptions:- Email → creates an email Subscription in OneSignal
- Phone number → creates an SMS Subscription in OneSignal
Edit tags
The Edit Tags action sets or deletes Tags on the matched OneSignal user. Tags enable Message Personalization and Segmentation, and are the mechanism for targeting in-app messages from HubSpot.Set tags
Enter a JSON object in the Tags field:Delete tags
Set the value to an empty string to remove a tag: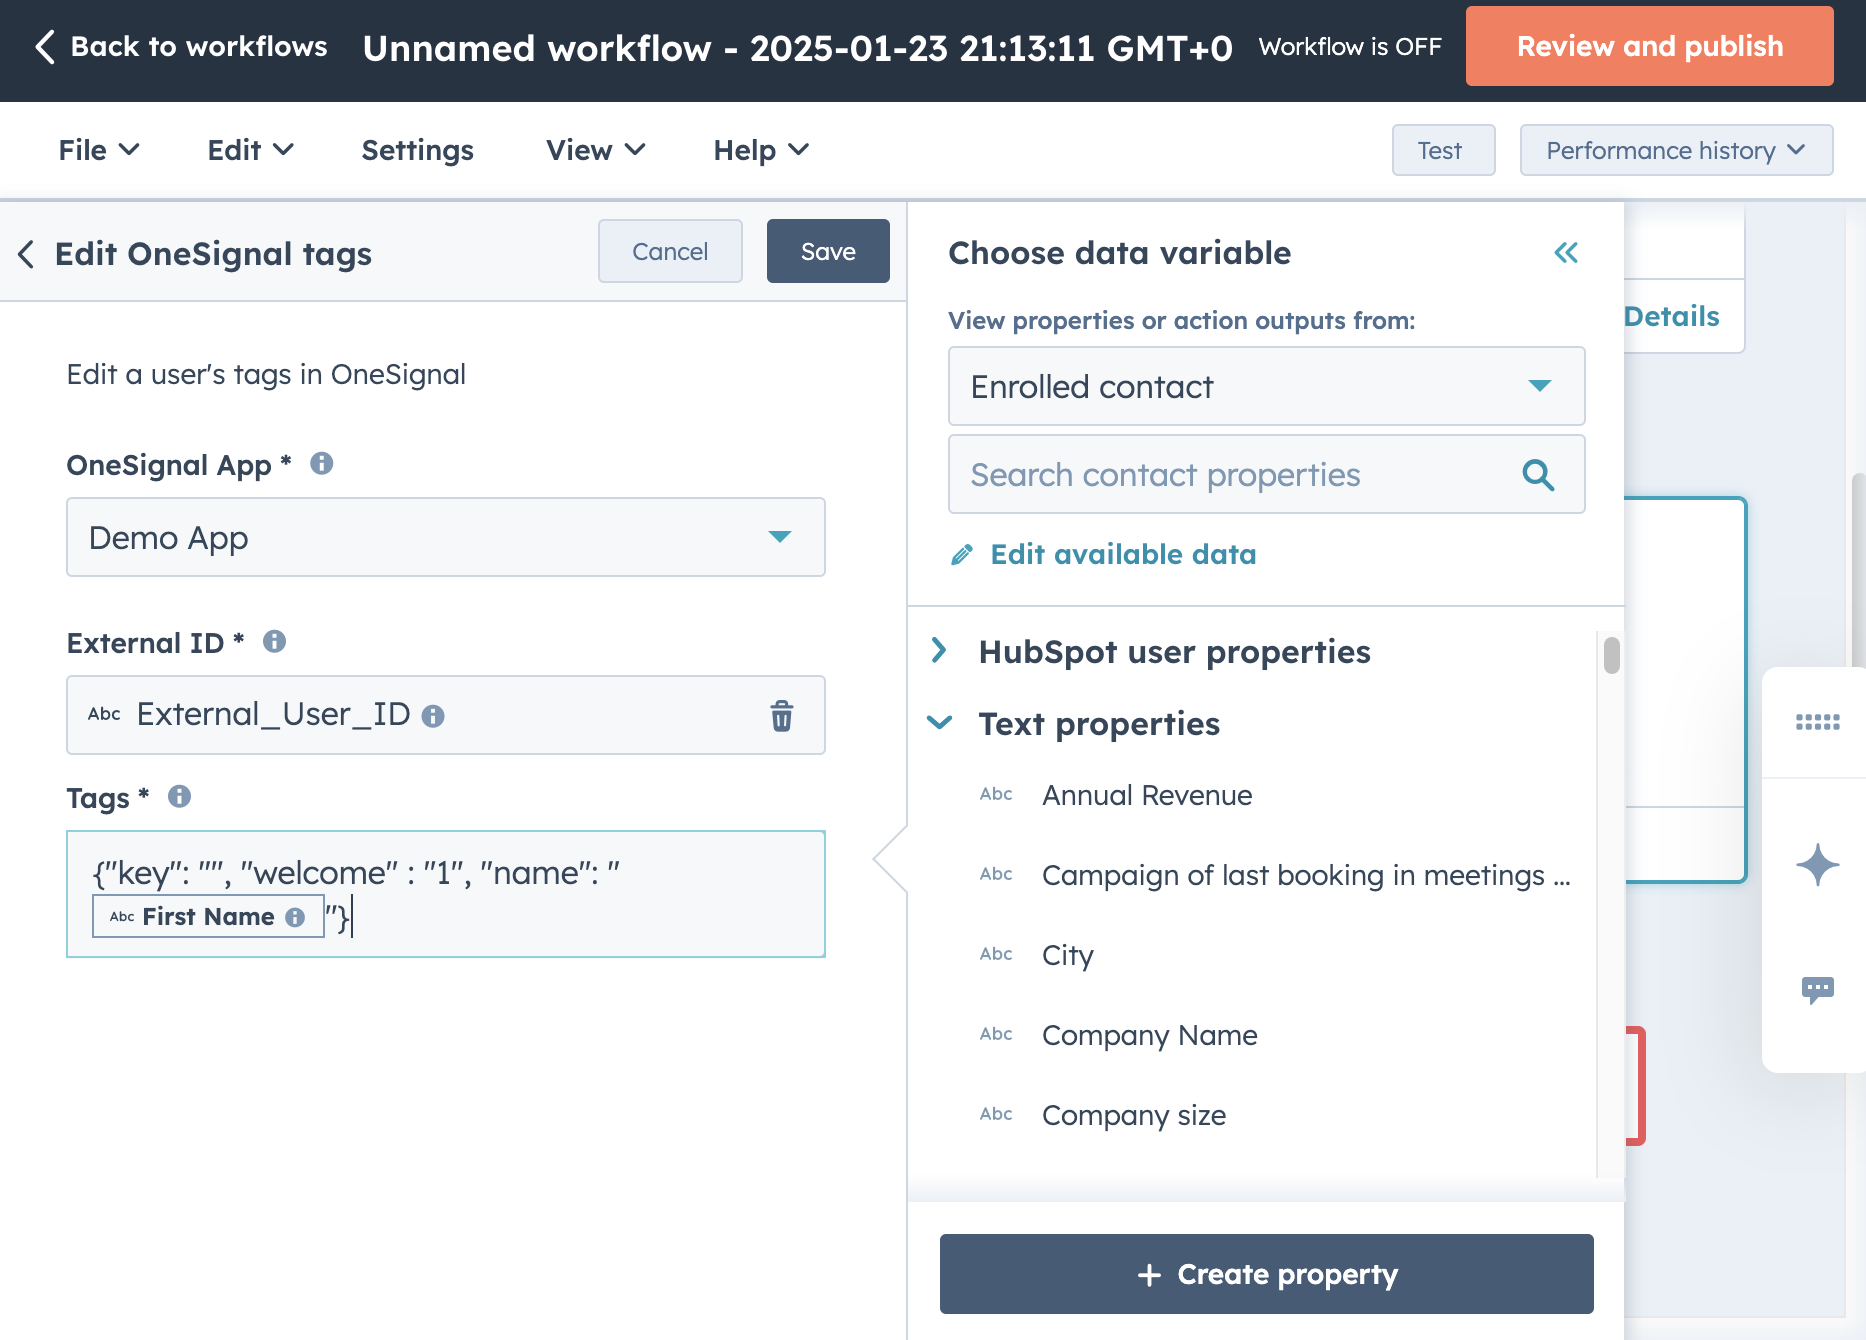
Send messages
The Send Notification action delivers a push notification, email, or SMS/RCS message to the matched OneSignal user.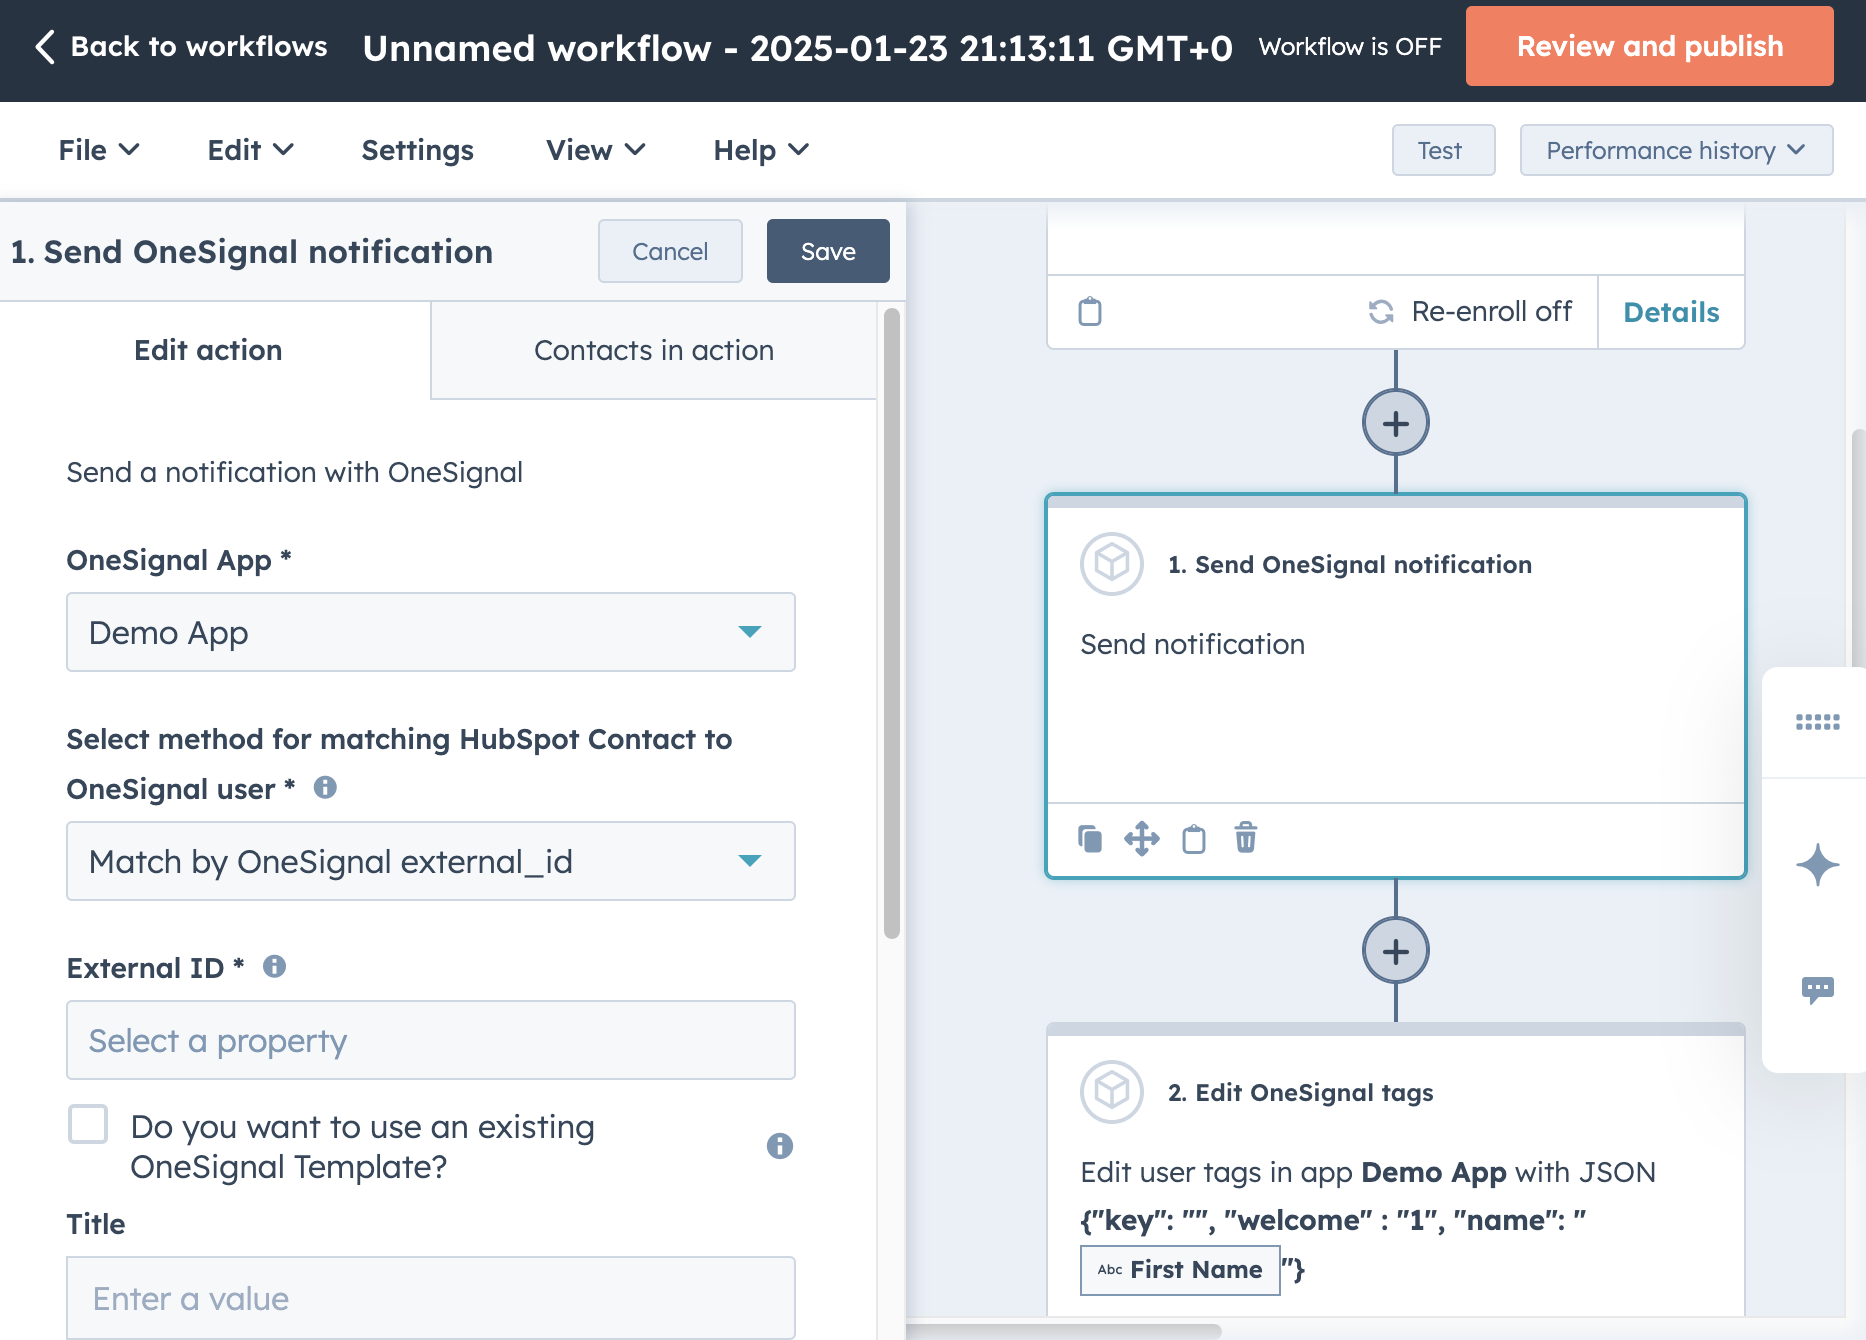
Using a template
Select a predefined Template created in the OneSignal dashboard or API. Templates support push notifications, email, and SMS/RCS messages.Using form fields
If you do not select a template, you can compose a push notification directly in the workflow action using the Title, Subtitle, Message, Image URL, and Launch URL fields. Email and SMS/RCS messages are only available via templates. The form fields option allows you to inject HubSpot contact properties (e.g.,First Name) to personalize the notification content.
Send in-app messages
In-app messages cannot be sent directly from a HubSpot workflow. Instead, use HubSpot to tag users, then target those users with a segment-based in-app message in OneSignal.Tag users from HubSpot
In your HubSpot workflow, use the Edit Tags action to set a tag on contacts. For example:
{ "hubspot_campaign": "spring_promo" }.Create a segment in OneSignal
In the OneSignal dashboard, go to Audience > Segments and click New Segment. Add a User Tag filter matching the tag key and value set by HubSpot (e.g.,
hubspot_campaign is spring_promo).Create the in-app message
Go to Messages > In-App and create a new in-app message. Under Audience, select Show to Particular Segment(s) and choose the segment you created.As users pass through the HubSpot workflow and receive the tag, they are added to the segment immediately.
Configure the trigger
Tags do not trigger in-app messages on their own. If the tag is set while the user is actively using the app, the in-app message does not display until the next session (a new session starts after the app is in the background for 30+ seconds).Available triggers:
- On app open: displays the next time the user opens the app.
- Session duration: displays after a set number of seconds in-session.
- Time since last in-app message: prevents back-to-back messages.
- Programmatic: trigger from your app code using the OneSignal SDK.
Common workflow patterns
HubSpot workflows combine enrollment triggers (the event that starts the workflow) with OneSignal actions (what happens to the user in OneSignal). Below are recommended patterns for common use cases.Every workflow pattern below assumes you have already connected HubSpot to OneSignal and are matching users via External ID.
Welcome and onboarding
Send a welcome message when a new user signs up, and tag them for onboarding in-app messages.| Step | Type | Configuration |
|---|---|---|
| Enrollment trigger | HubSpot | Contact property Became a customer date is known |
| Action 1 | OneSignal: Create User | Set External ID to the HubSpot contact property that matches your app (e.g., a user ID or email address) |
| Action 2 | OneSignal: Edit Tags | { "onboarding": "active", "name": "<First Name>" }. Insert the HubSpot First Name property token for the name value. |
| Action 3 | OneSignal: Send Notification | Use a welcome push template, or compose inline with a personalized greeting |
Re-engagement
Reach out to users who have not visited your app recently.| Step | Type | Configuration |
|---|---|---|
| Enrollment trigger | HubSpot | Contact property Last activity date is more than 14 days ago |
| Action 1 | OneSignal: Send Notification | Use a re-engagement push template (e.g., “We miss you, here’s what’s new”) |
| Delay | HubSpot: Wait 3 days | N/A |
| If/then branch | HubSpot | Check if contact has visited your site since enrollment |
| Yes branch | OneSignal: Edit Tags | { "reengaged": "true" } |
| No branch | OneSignal: Send Notification | Use an email template with a stronger incentive |
Lifecycle stage change
Sync lifecycle stage changes in HubSpot with OneSignal tags so you can target different user segments.| Step | Type | Configuration |
|---|---|---|
| Enrollment trigger | HubSpot | Contact property Lifecycle stage changes to any value |
| Action 1 | OneSignal: Edit Tags | { "lifecycle_stage": "<Lifecycle Stage>" }. Insert the HubSpot Lifecycle Stage property token for the value. |
| If/then branch | HubSpot | Check if lifecycle stage = Customer |
| Yes branch | OneSignal: Send Notification | Use a “Welcome to the family” push or email template |
Deal closed / post-purchase
Trigger a thank-you message and tag users for upsell campaigns after a deal closes.| Step | Type | Configuration |
|---|---|---|
| Enrollment trigger | HubSpot | Deal property Deal stage = Closed Won |
| Action 1 | OneSignal: Edit Tags | { "customer": "true", "deal_value": "<Amount>" }. Insert the HubSpot Deal Amount property token for the value. |
| Action 2 | OneSignal: Send Notification | Use a thank-you email template |
| Delay | HubSpot: Wait 7 days | N/A |
| Action 3 | OneSignal: Send Notification | Use an upsell/cross-sell push template |
Deal-based workflows require a Deal-based workflow type in HubSpot. Use the associated contact’s External ID to match the OneSignal user.
Promotional campaign via in-app message
Target a specific audience with an in-app message triggered by a HubSpot list or form.| Step | Type | Configuration |
|---|---|---|
| Enrollment trigger | HubSpot | Contact becomes a member of a static or active list (e.g., “Spring Sale Eligible”) |
| Action 1 | OneSignal: Edit Tags | { "promo": "spring_2025" } |
promo = spring_2025 and configure an in-app message for that segment.
To remove users from the campaign after it ends, create a second workflow that deletes the tag:
| Step | Type | Configuration |
|---|---|---|
| Enrollment trigger | HubSpot | Date-based, set to the campaign end date |
| Action 1 | OneSignal: Edit Tags | { "promo": "" } |
Troubleshooting
Workflow action shows “Failed” in HubSpot
- Check the error message: Expand the failed action in the HubSpot workflow enrollment history. The error message often indicates the cause (e.g., “User not found,” “Invalid app ID”).
- Verify the External ID: Confirm the HubSpot contact property used as the External ID matches a user in OneSignal. Check the user’s profile in OneSignal > Audience > Users and search by External ID.
- Confirm the integration is active: Go to OneSignal > Data > Integrations > HubSpot and verify the connection status is active.
Message sent but user did not receive it
- Check subscriptions: The user must have an active subscription for the channel you’re sending on (push, email, or SMS/RCS). Verify this in the user’s profile in OneSignal under Subscriptions.
- Check segment membership: If you’re using a template with segment targeting, confirm the user belongs to the targeted segment.
- Review message reports: In the OneSignal dashboard, go to Messages, find the message, and check its delivery report to see if the message was delivered, dropped, or errored.
Tags not appearing on the OneSignal user
- Verify External ID matching: If the External ID in the workflow does not match an existing OneSignal user, the Edit Tags action silently fails. Use the Create User action before Edit Tags to ensure the user exists.
- Check JSON format: Tags must be a valid JSON object. Common mistakes include missing quotes around keys or values, trailing commas, or using single quotes instead of double quotes.
- Check for empty values: Setting a tag value to
""deletes the tag. Verify that HubSpot contact properties being injected are not blank.
In-app message not displaying
See Why didn’t my in-app message display after the tag was set? in the FAQ below.FAQ
What data is shared between HubSpot and OneSignal?
| HubSpot | Direction | OneSignal | Description |
|---|---|---|---|
| Contact properties | → | External ID, Tags | HubSpot contact data matches and enriches OneSignal users via External ID and Tags. |
| Workflows | ← | Message Templates | OneSignal Templates are available for selection in HubSpot workflow actions. |
What happens if the External ID doesn’t match a OneSignal user?
The Send Notification and Edit Tags actions silently fail. No message is sent and no tags are set. Always place a Create User action before other OneSignal actions in your workflow to ensure the user exists in OneSignal.Can I use HubSpot lists to target OneSignal segments?
Not directly. HubSpot lists and OneSignal segments are independent systems. To bridge them, create a workflow that enrolls contacts from a HubSpot list and uses the Edit Tags action to set a tag. Then build a OneSignal segment based on that tag. See Promotional campaign via in-app message for a worked example.Which OneSignal channels can I send from HubSpot?
Push notifications can be sent using templates or form fields. Email and SMS/RCS can only be sent using Templates created in OneSignal. In-app messages cannot be sent from HubSpot workflows. Use the tag-and-segment pattern instead.Why didn’t my in-app message display after the tag was set?
Tags alone do not trigger in-app messages. The tag adds the user to a segment, but the in-app message still requires a trigger to display. If the tag is set while the user is actively using the app, the message will not appear until the next session (30+ seconds in background). Set the in-app message trigger to On app open for the most reliable behavior. See In-App Message Triggers for all trigger options.Can I use HubSpot webhooks to call the OneSignal API directly?
Yes. HubSpot’s Custom Code workflow action lets you make HTTP requests to external APIs. You can call the OneSignal REST API to send messages, create users, or update tags outside the native integration. This is useful for use cases the native actions do not cover, such as sending to a segment rather than an individual user.Can I send OneSignal message events back to HubSpot?
Yes. Use Event Streams to export OneSignal message events (sent, clicked, etc.) to a webhook endpoint. You can route these events to HubSpot’s Custom Events API or use a middleware service to update HubSpot contact properties based on OneSignal engagement data.Can I trigger a OneSignal Journey from HubSpot?
There are two options for getting HubSpot users into a OneSignal Journey:- Tags: Use the Edit Tags action to set a tag on the user. Create a segment in OneSignal based on that tag and use the segment as a Journey entry condition.
- Custom Events: Use HubSpot’s Custom Code action to call the OneSignal Custom Events API, which can serve as a Journey entry trigger.
Can I send custom events from HubSpot to OneSignal?
Not through the native workflow actions. The native integration supports Create User, Edit Tags, and Send Notification. To send custom events, use HubSpot’s Custom Code action to call the OneSignal Custom Events API directly.What HubSpot enrollment triggers work with OneSignal?
Any HubSpot enrollment trigger works. The OneSignal actions are standard workflow actions that execute regardless of how the contact was enrolled. Common triggers include:- Contact property changes (lifecycle stage, lead status, last activity date)
- Form submissions (signup forms, demo requests, event registrations)
- List membership (added to a static or active list)
- Deal stage changes (pipeline progression, closed won/lost)
- Date-based (scheduled campaigns, time since an event)
- Manual enrollment (for one-off sends or testing)
How do I test a workflow before going live?
- Create the workflow and remove all automatic enrollment triggers.
- Save and publish the workflow.
- Manually enroll a single test contact.
- Check the enrollment history in HubSpot for action success/failure.
- Verify the user, tags, or message in the OneSignal dashboard.
- Once confirmed, add your enrollment triggers and re-publish.
Related pages
Tags
Add custom properties to users for personalization and segmentation.
Templates
Create reusable message templates for push, email, and SMS/RCS.
Journeys
Build automated multichannel messaging flows triggered by user behavior.
Event Streams
Export real-time message events to external platforms via webhooks.
Segmentation
Build audience segments based on tags, behavior, and user properties.
In-App Message Triggers
Control when and how in-app messages display to users.