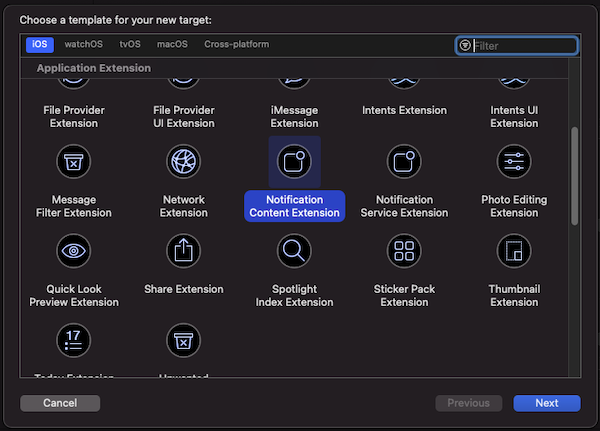
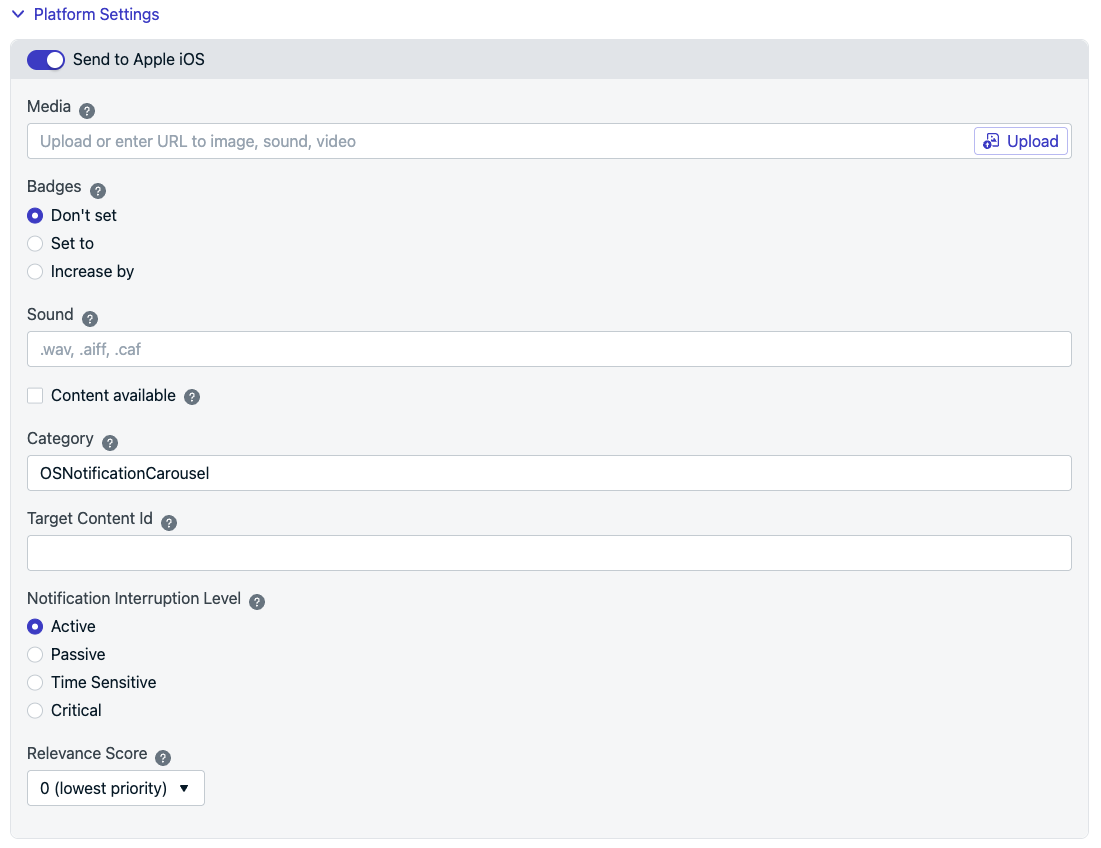
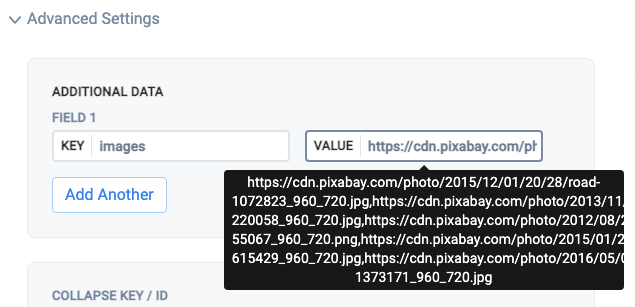
iOS provides a UNNotificationContentExtension protocol as the entry point for a notification content app extension. This can be used to display a custom interface for your app’s notifications. This example guide explains how to use this for creating a carousel within an iOS notification.

Image showing a carousel in a push notification

1. Add a notification content extension

00355f9-Screen_Shot_2020-11-30_at_9.32.26_PM

In Xcode, select File > New > Target…

efd0fde-Screen_Shot_2020-11-30_at_3.10.58_PM

Select “Notification Content Extension”

0a0fa6a-Screen_Shot_2020-11-30_at_6.44.46_PM

Confirm the selection on the window that pops up

ActivateContentExtension

Select activate to debug

2. Add code to your app

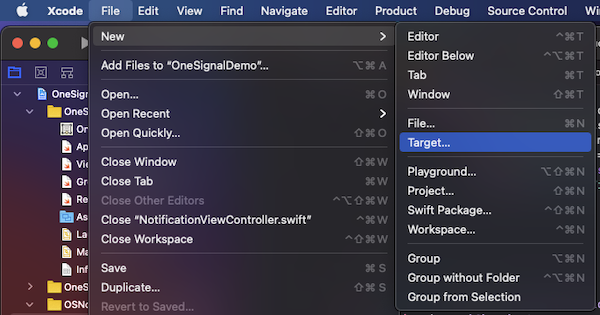
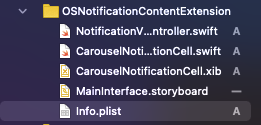
Download the OSNotificationContentExtension from Github and replace the OSNotificationContentExtension in your Xcode Project with the same file from Github.

You should see the following files added:

Files under Content Extension

3. Set your notification category

This example Declares The Actionable Notification Type within the AppDelegate.swift didFinishLaunchingWithOptions.

func application(_ application: UIApplication, didFinishLaunchingWithOptions launchOptions: [UIApplication.LaunchOptionsKey: Any]?) -> Bool {
    
    //START Authorize OS Notification Carousel Category
    if #available(iOS 10.0, *) {
        let options: UNAuthorizationOptions = [.alert]
        UNUserNotificationCenter.current().requestAuthorization(options: options) { (authorized, error) in
            if authorized {
                let categoryIdentifier = "OSNotificationCarousel"
                let carouselNext = UNNotificationAction(identifier: "OSNotificationCarousel.next", title: "👉", options: [])
                let carouselPrevious = UNNotificationAction(identifier: "OSNotificationCarousel.previous", title: "👈", options: [])
                let carouselCategory = UNNotificationCategory(identifier: categoryIdentifier, actions: [carouselNext, carouselPrevious], intentIdentifiers: [], options: [])
                UNUserNotificationCenter.current().setNotificationCategories([carouselCategory])
            }
        }
    }
    //END Authorize OS Notification Carousel Category
    
    return true
}

4. Send your push notification

When Sending Push Messages you can set the iOS Category and custom Data.

iOS category

Use OSNotificationCarousel as the iOS Category:

Set under “Platform Settings” > Send to Apple iOS > “Category”

iOS platform options on OneSignal dashboard

Custom data

OneSignal doesn’t have an option to upload multiple images per notification.

Instead you must list the Image URLs separated by a comma ,

Set under “Advanced Settings” > “Additional Data”

For the “Key” set images and the “Value” set the list of comma separated URLs without quotes.

Example, copy paste:

https://cdn.pixabay.com/photo/2015/12/01/20/28/road-1072823_960_720.jpg,https://cdn.pixabay.com/photo/2013/11/28/10/36/road-220058_960_720.jpg,https://cdn.pixabay.com/photo/2012/08/27/14/19/mountains-55067_960_720.png,https://cdn.pixabay.com/photo/2015/01/28/23/35/landscape-615429_960_720.jpg,https://cdn.pixabay.com/photo/2016/05/05/02/37/sunset-1373171_960_720.jpg

Send the push

Once you receive the push, you will need to long press or swipe left and click “View” to expand the notification depending on the iOS version.

Further reading