Requirements
- Mailgun Account
- Mailgun US API (EU region is not supported)
- OneSignal Account
- A domain you own and access to its DNS provider
Setup
1. Add a new domain in Mailgun
Skip this step if your domain is already set up in the US region.- Go to the Domains page in the Mailgun dashboard.
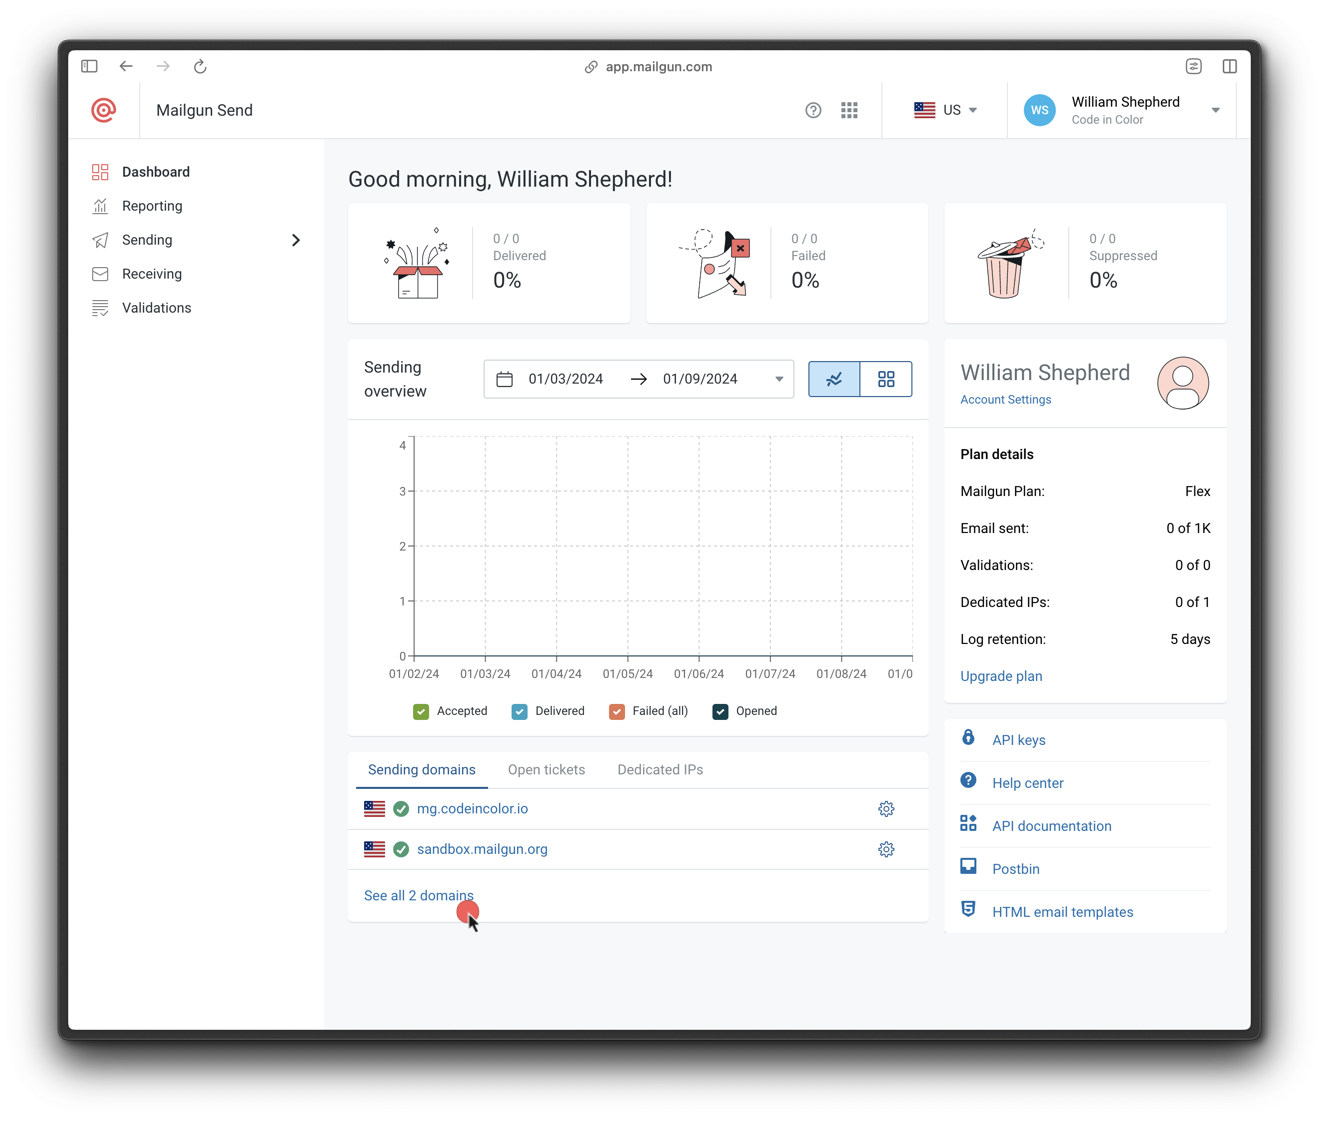
- Click Add new domain.
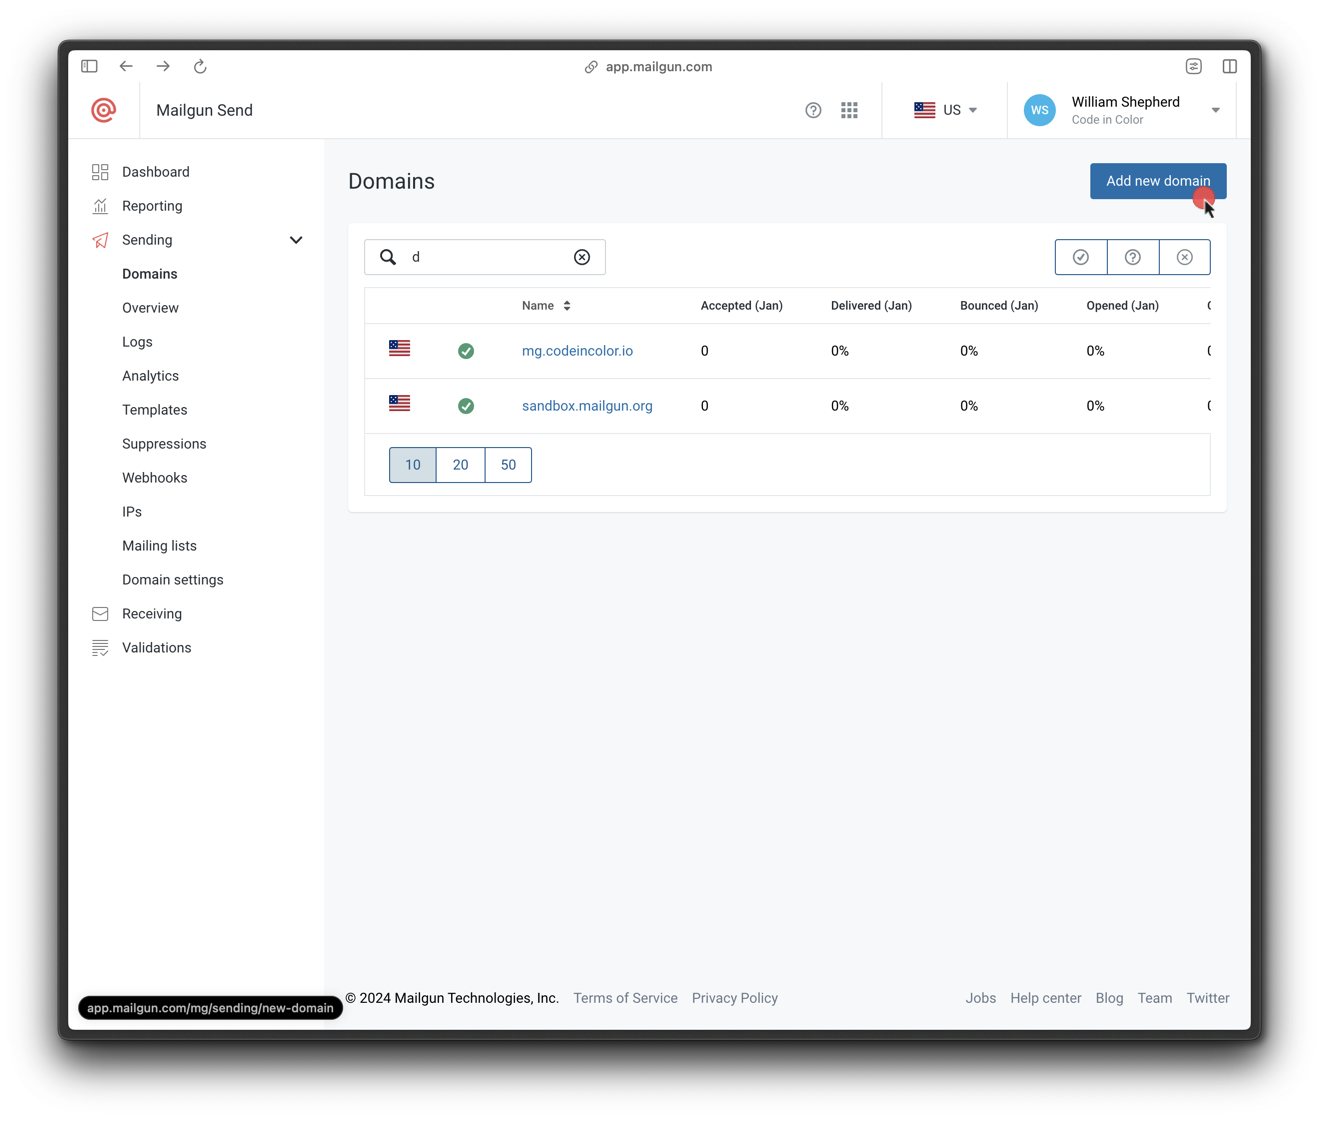
- Enter a subdomain (e.g.,
mail.yourdomain.com) and ensure the region is US.
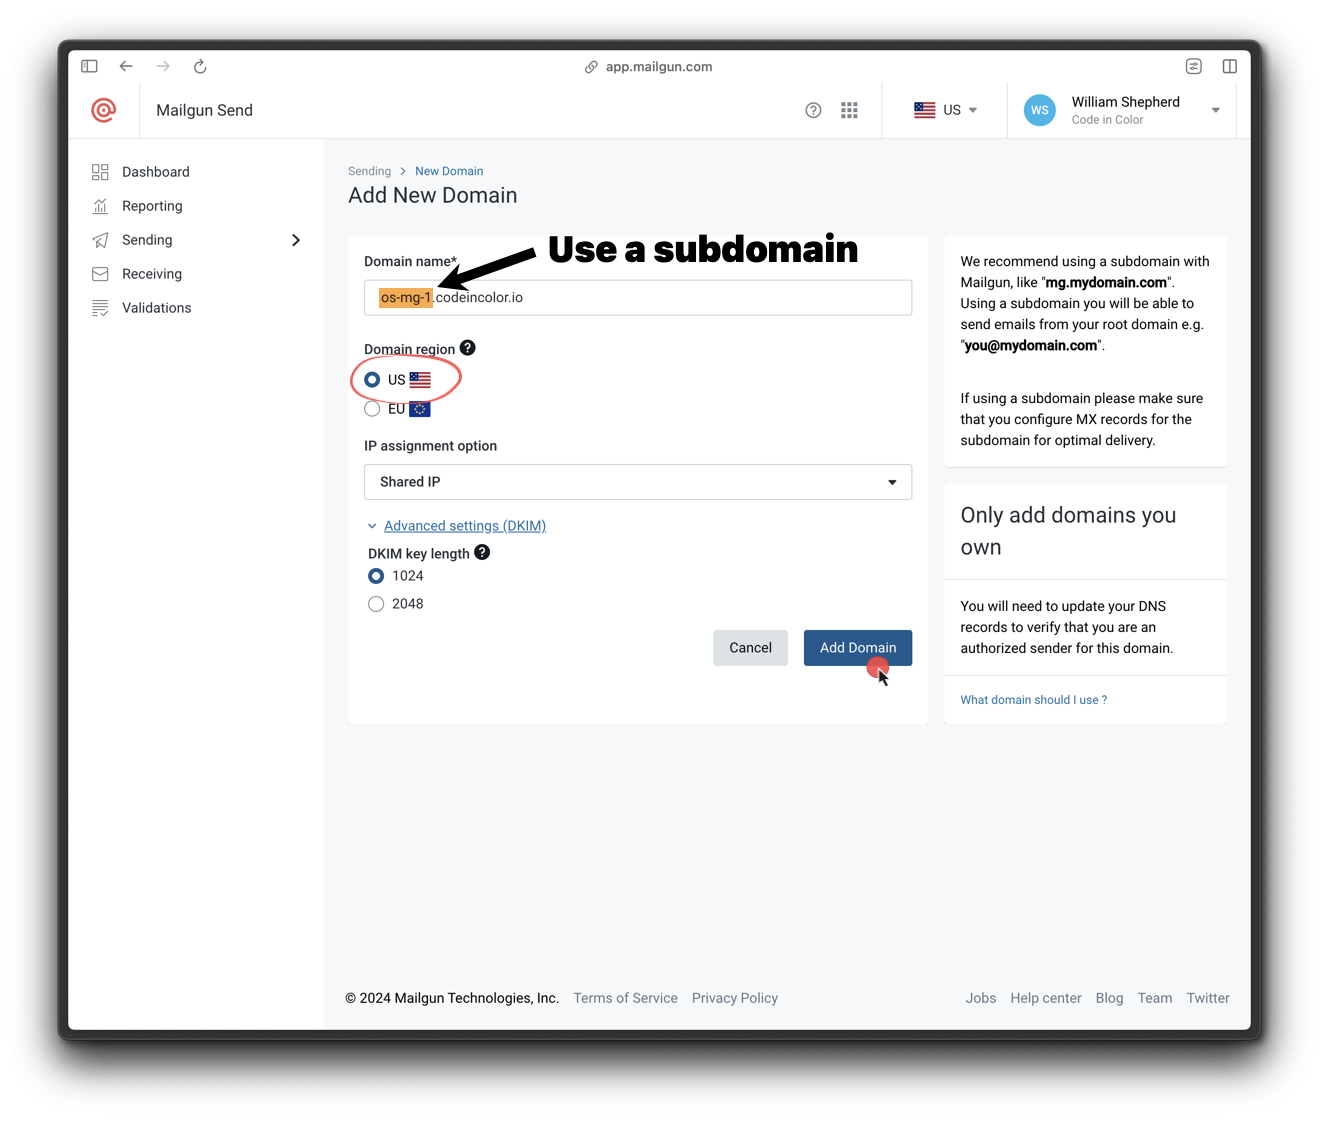
2. Verify DNS settings
Mailgun provides the following DNS records:- 2 TXT (SPF & DKIM)
- 2 MX
- 1 CNAME
- Go to Mailgun > Sending > Domain Settings > Your Domain > DNS Records
- Look for green checkmarks next to each record
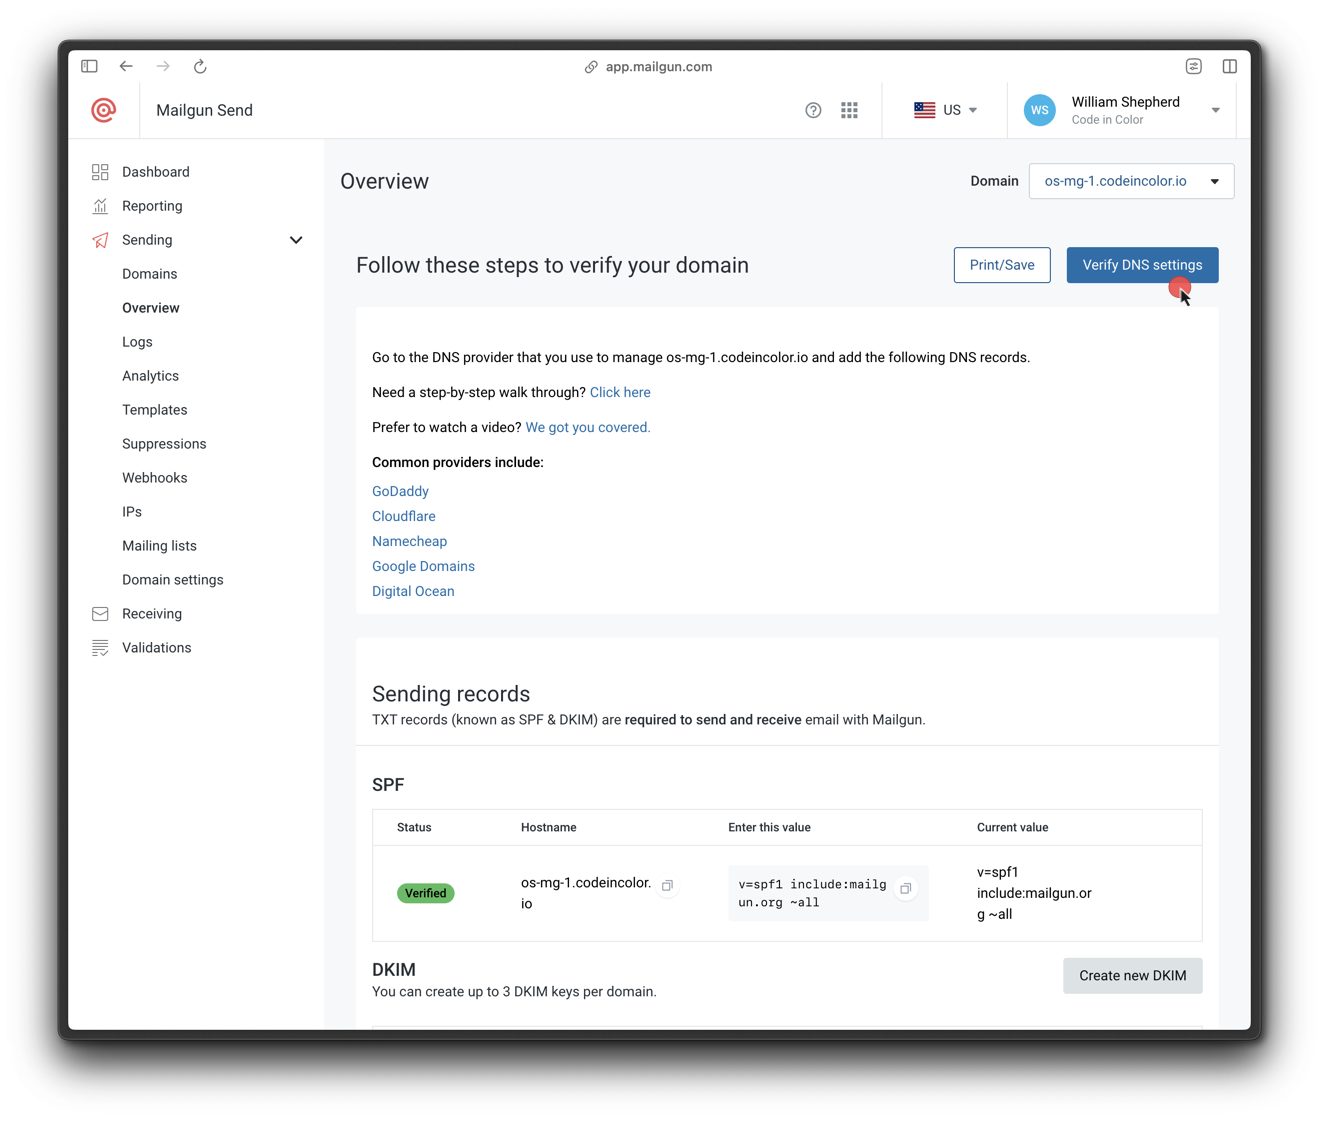
If CNAME is not set correctly, email click, open, and unsubscribe tracking will not work.
3. Set up SMTP credentials
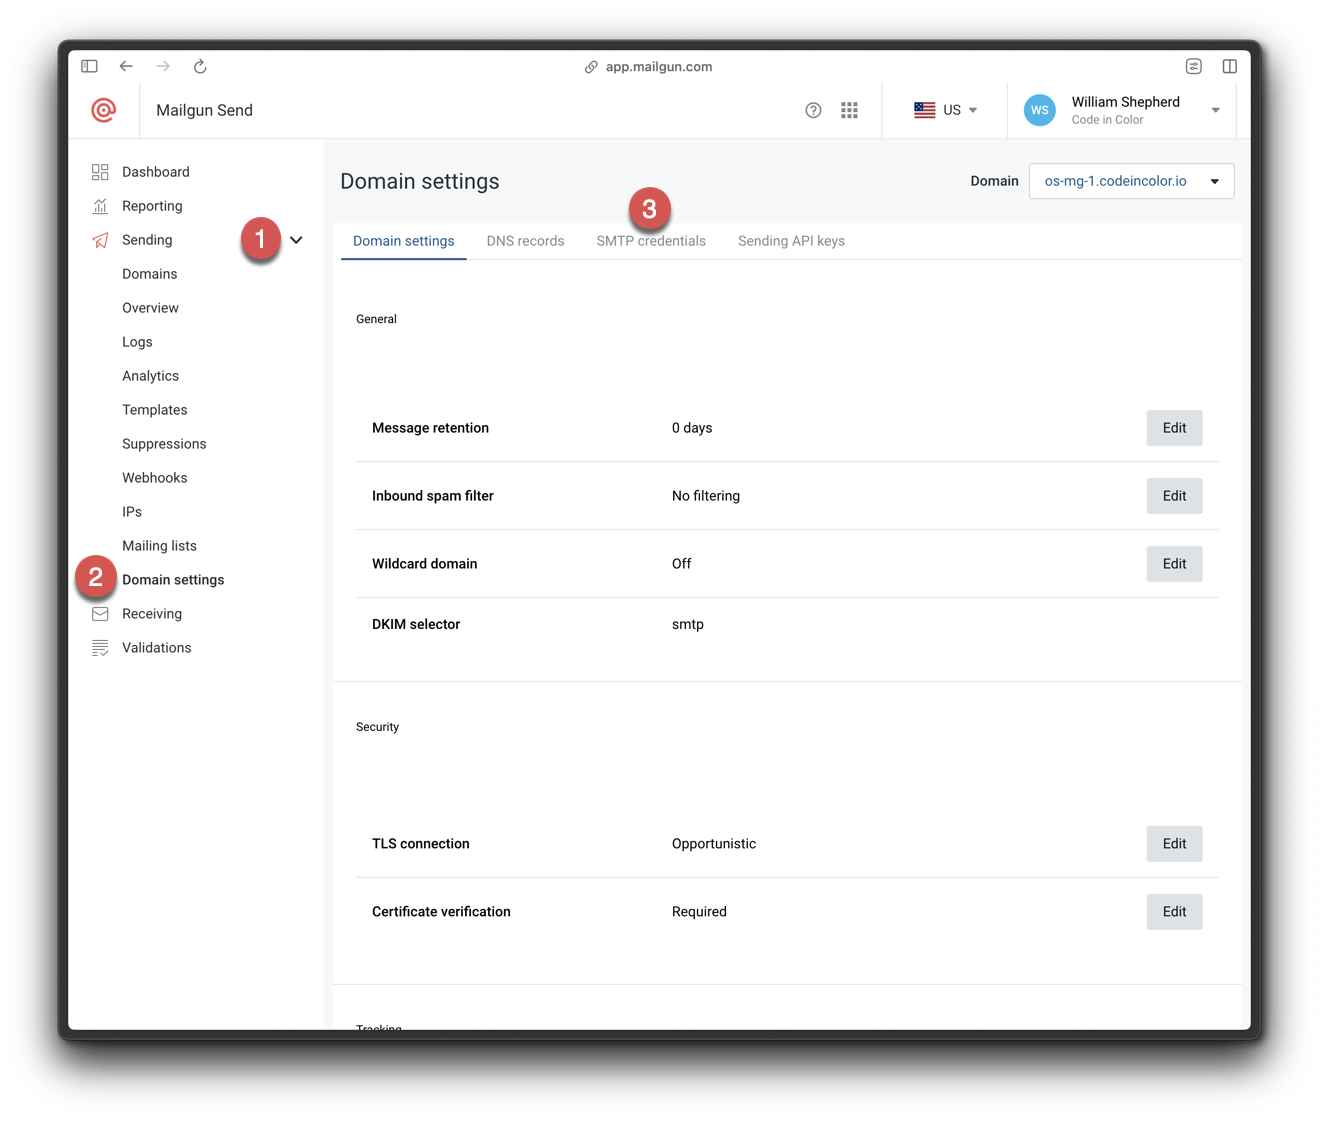
- Go to Sending > Domain Settings > SMTP credentials in Mailgun.
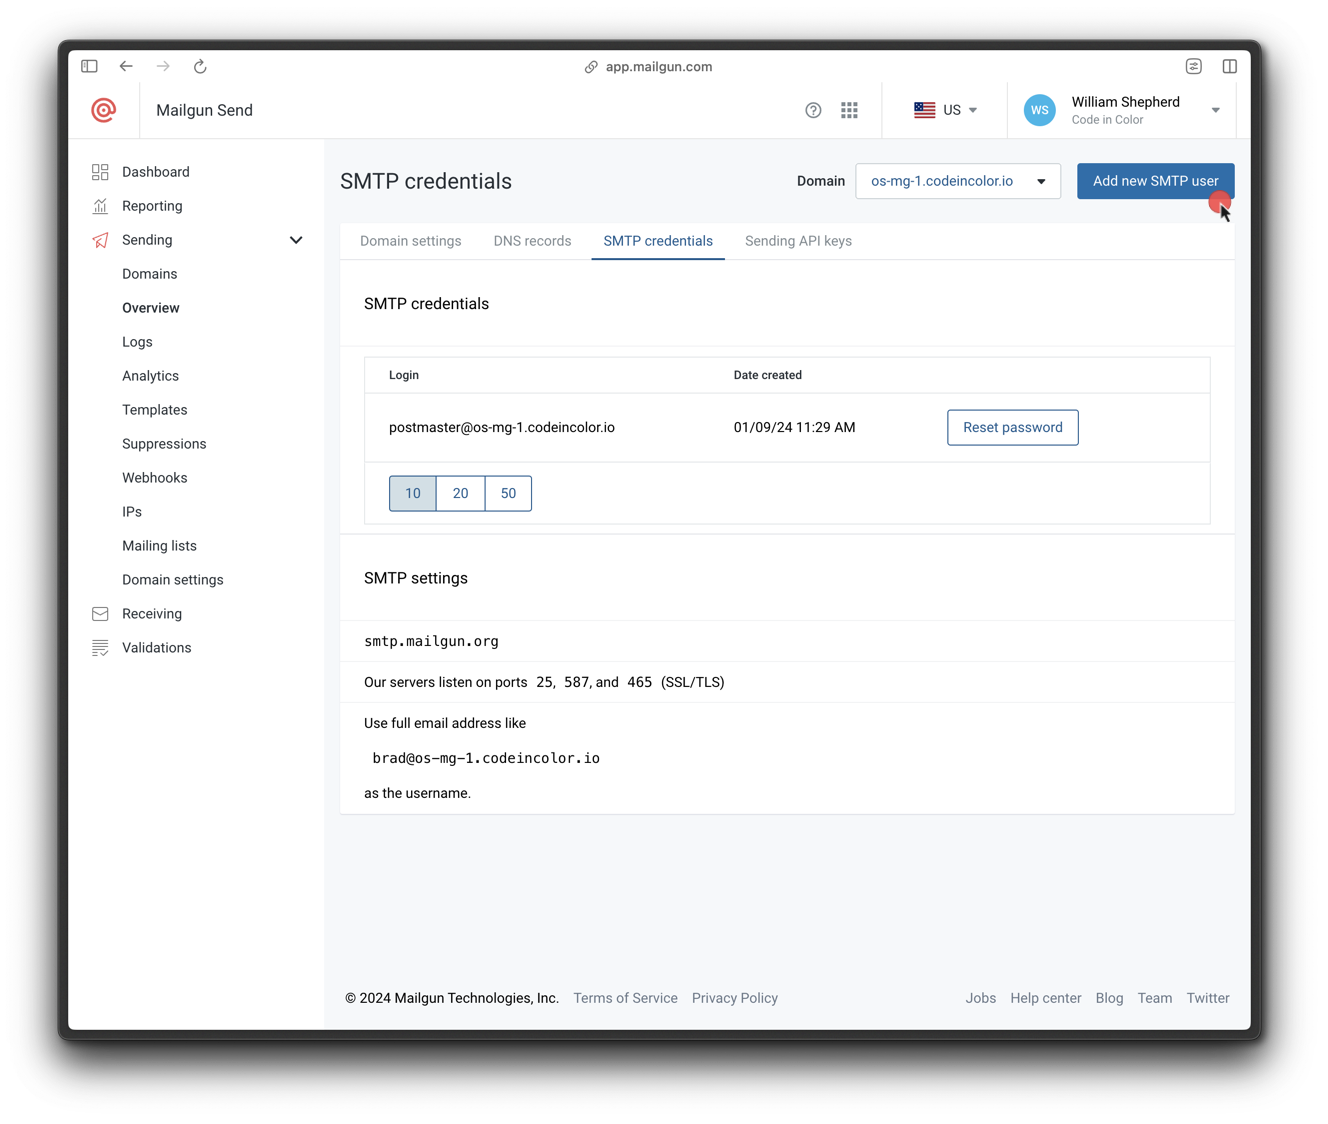
- Click Add new SMTP user.
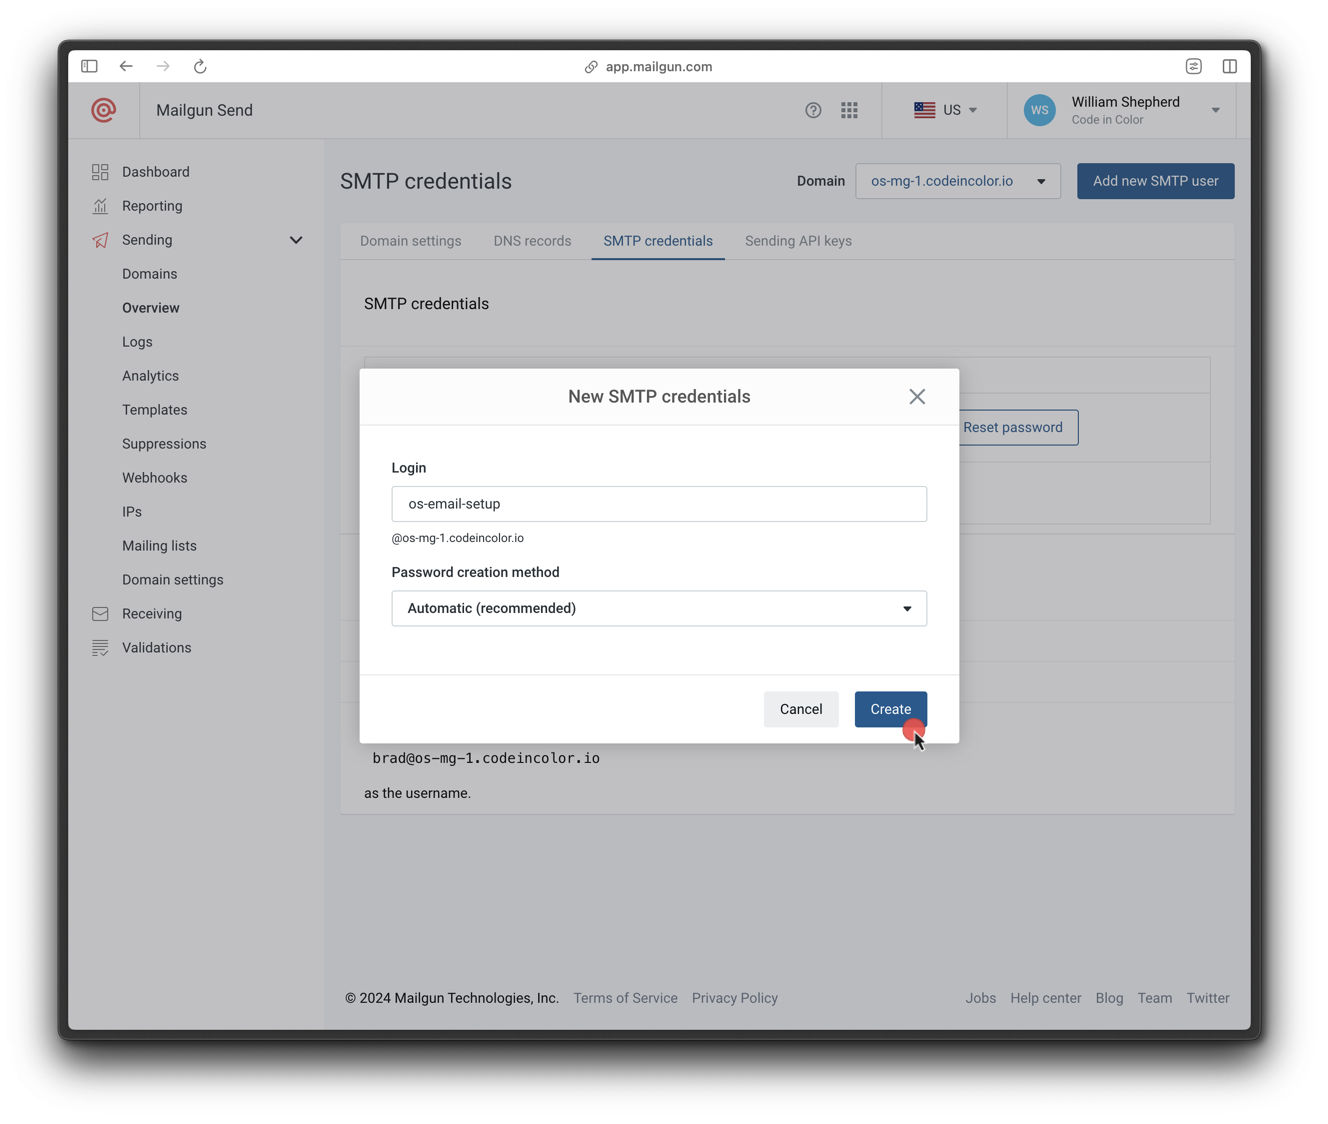
- Set a login name and save the credentials.
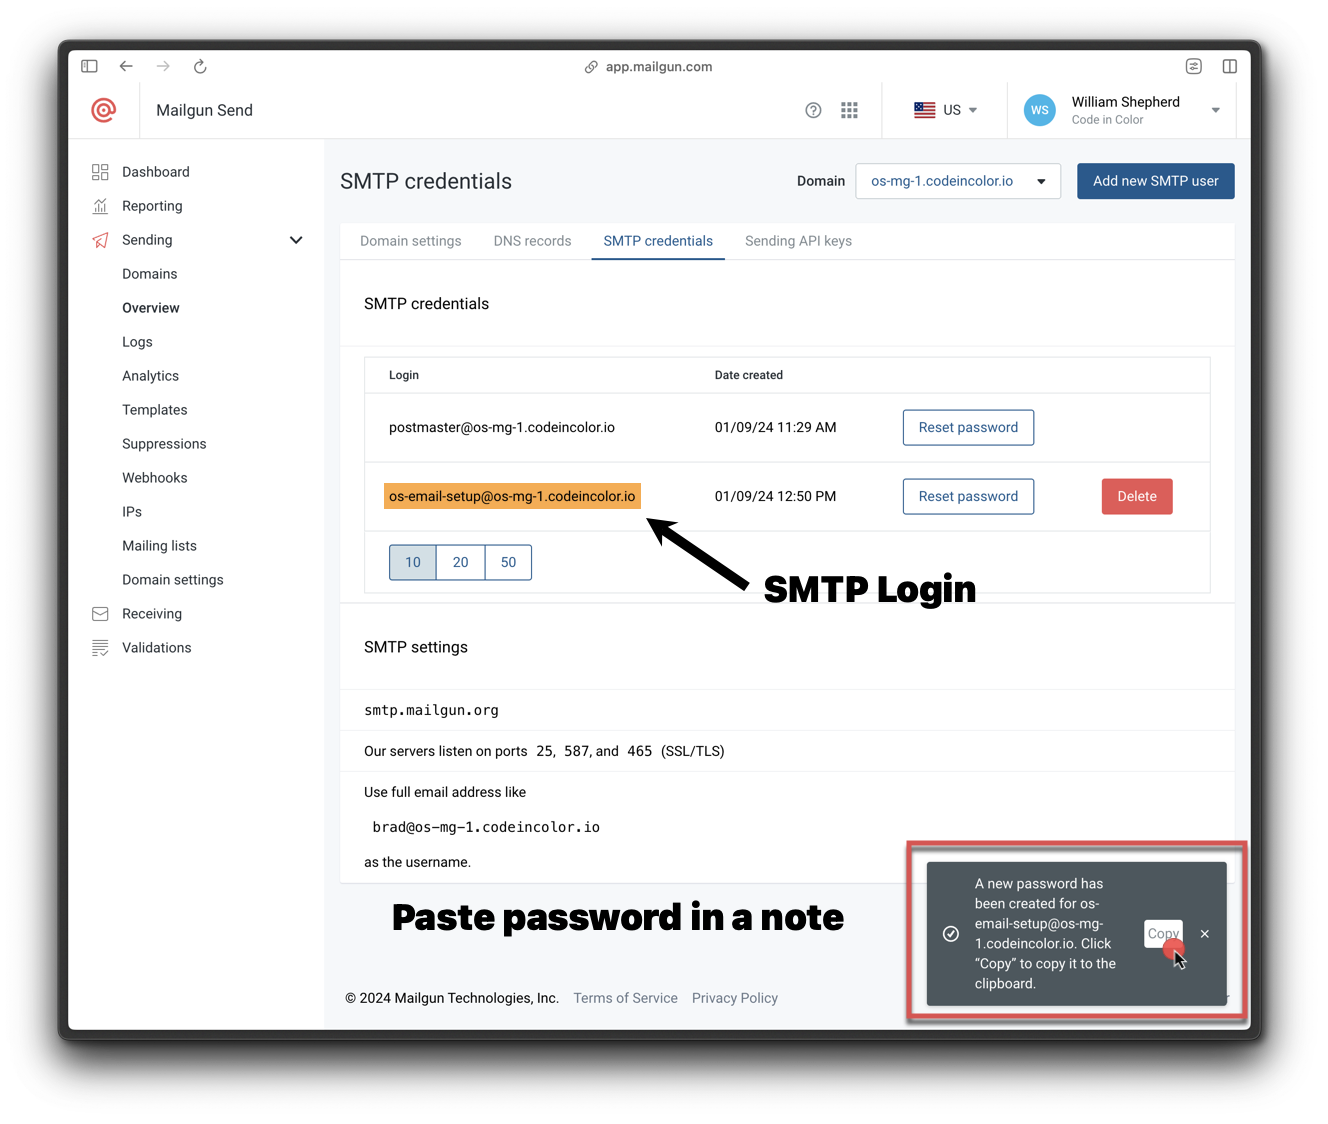
- Click the copy icon to save the password securely.
4. Get a Mailgun API key
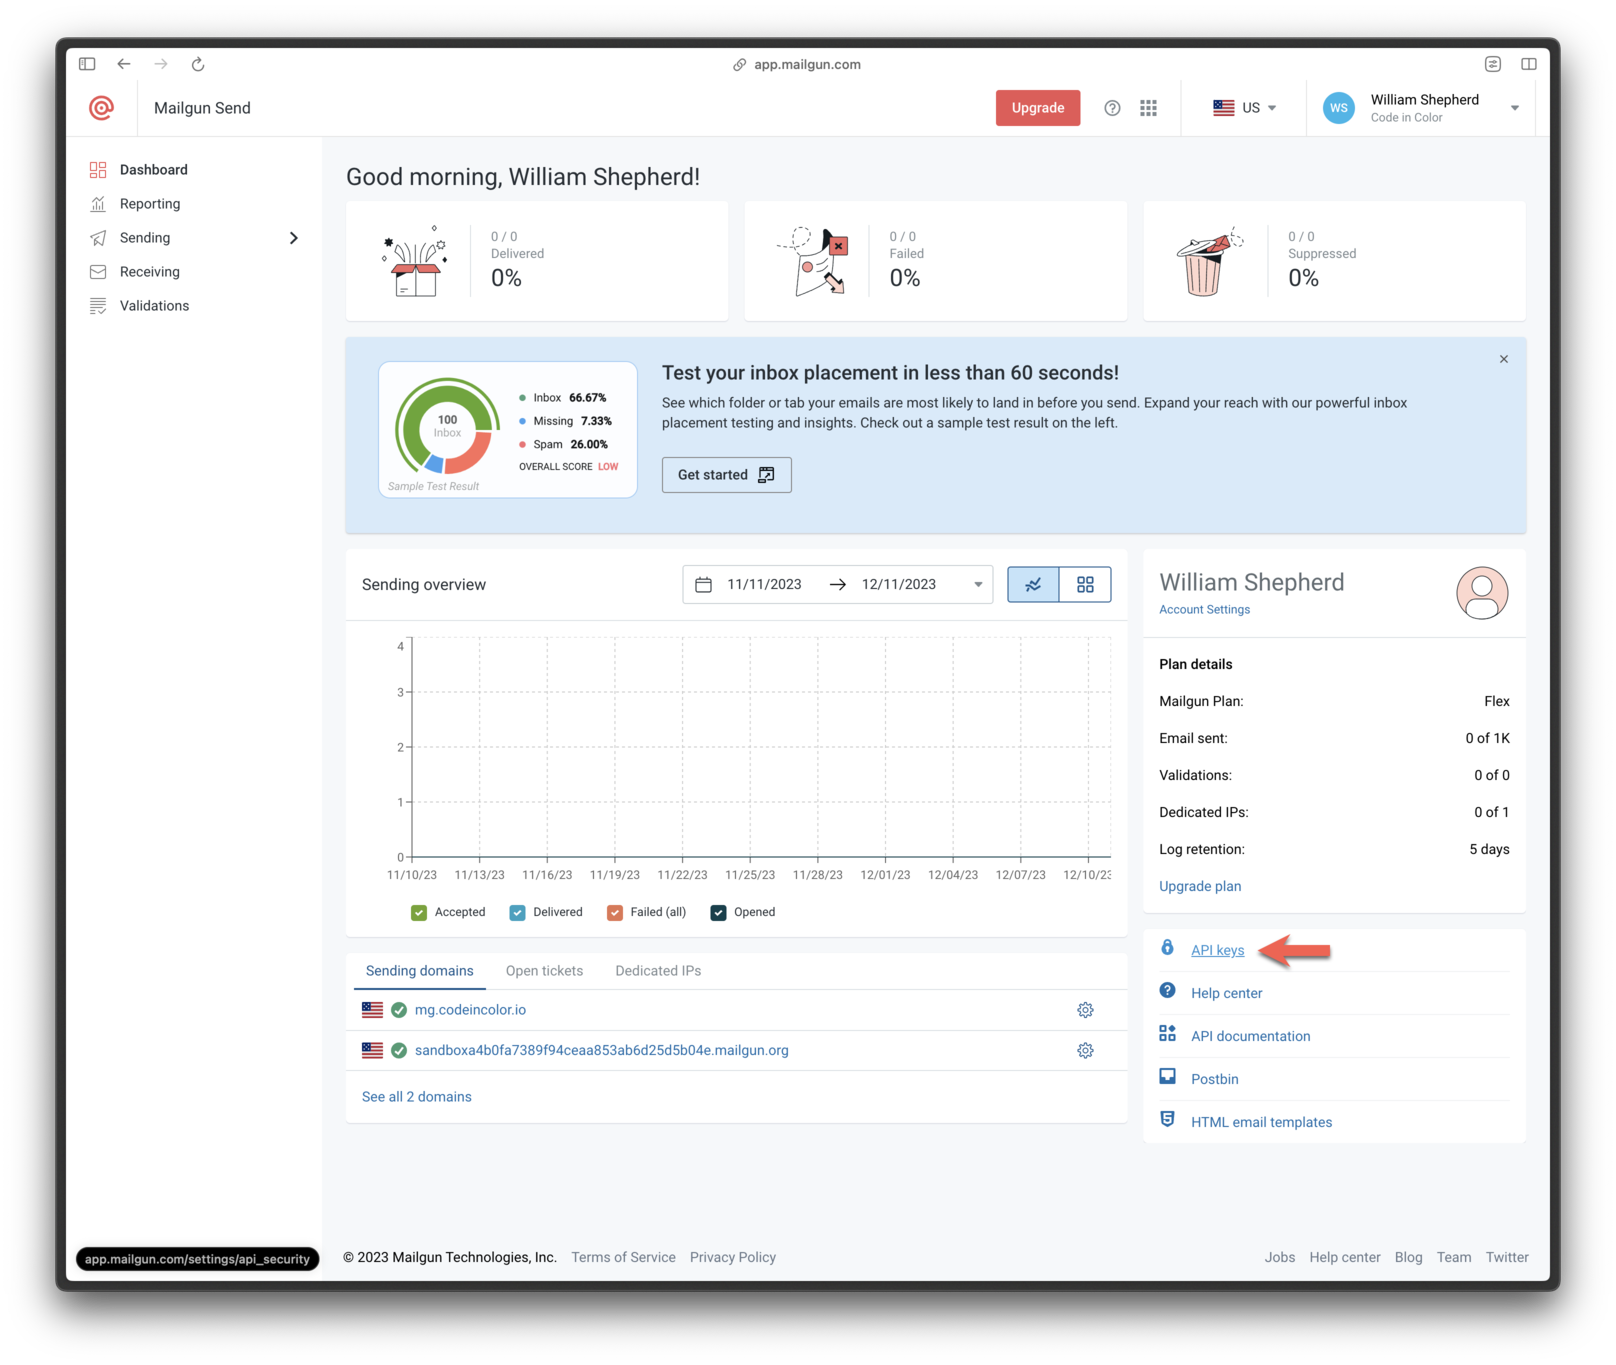
- In the Mailgun dashboard, scroll to the bottom and click API Keys.
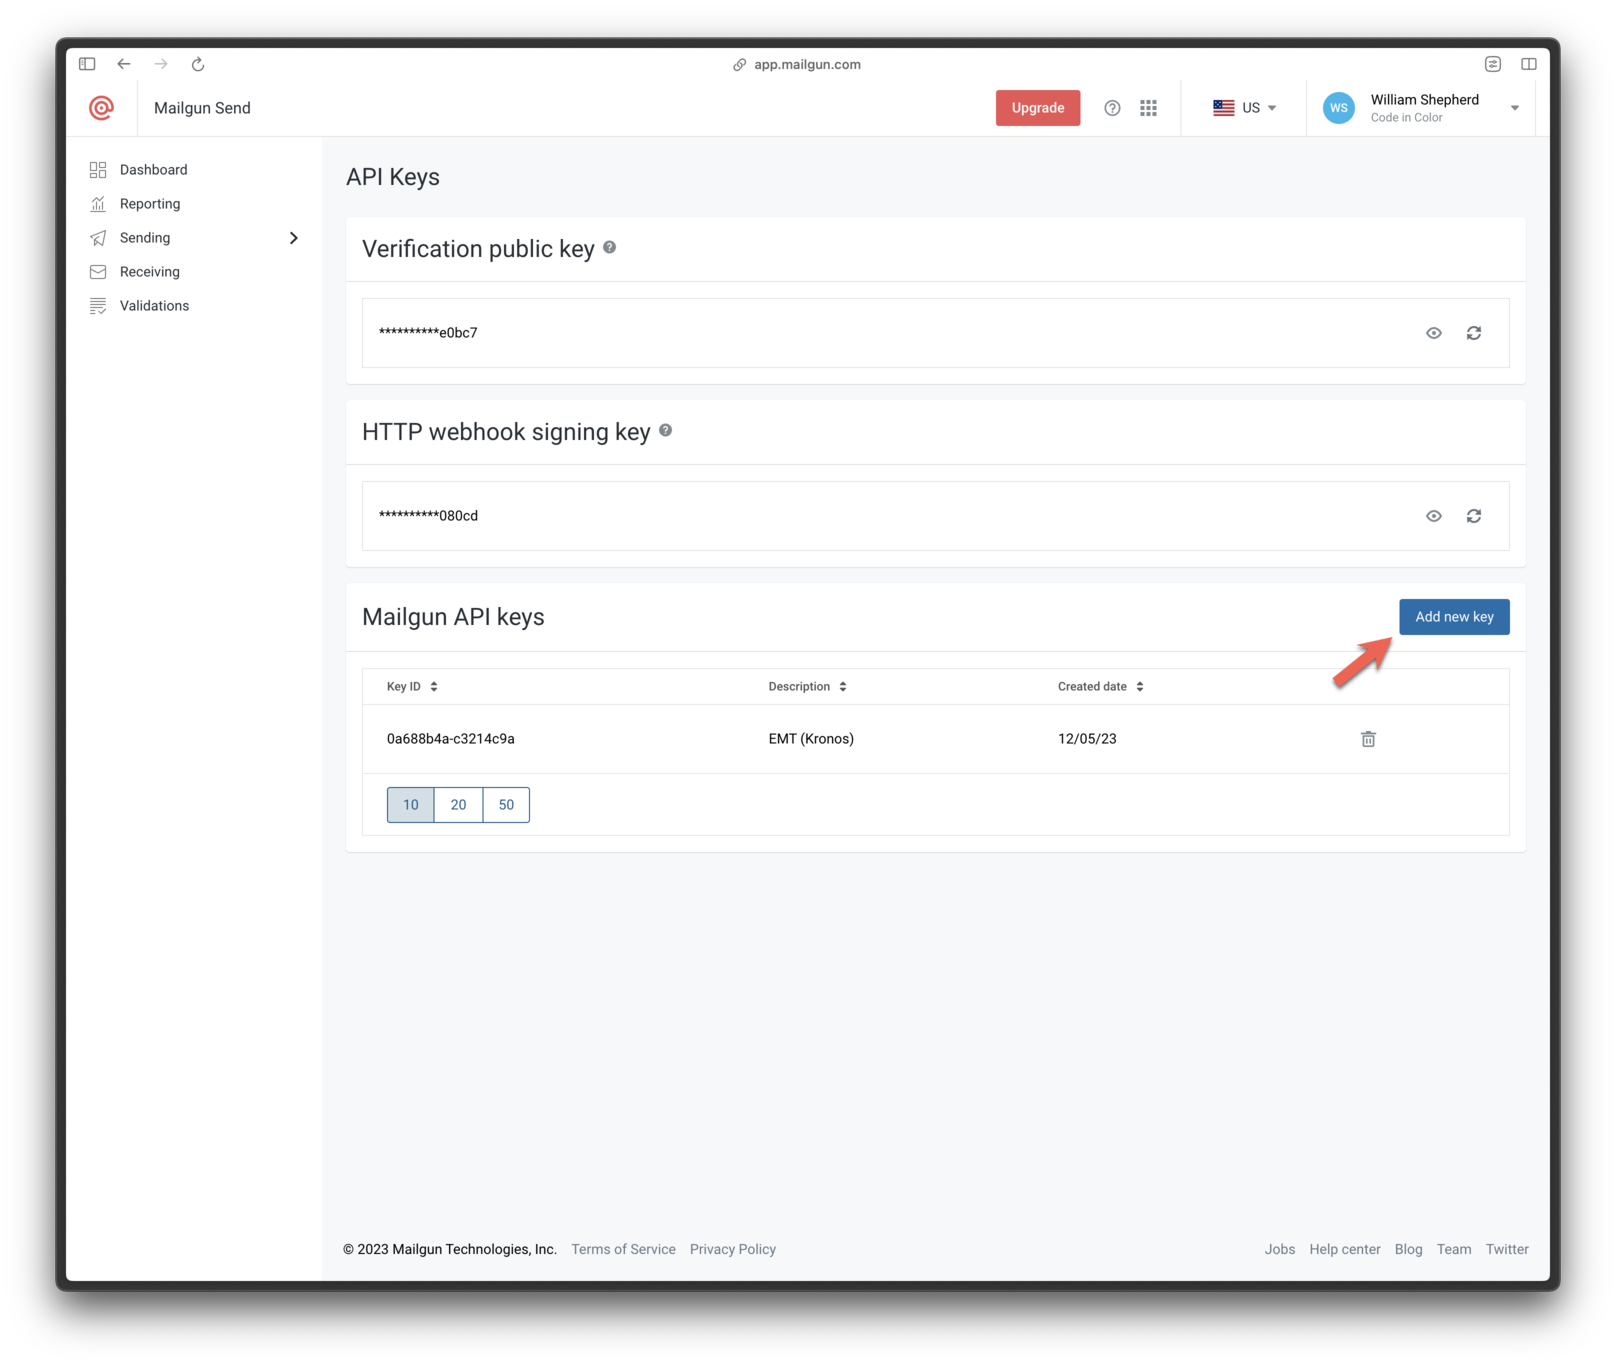
- Click Add new key
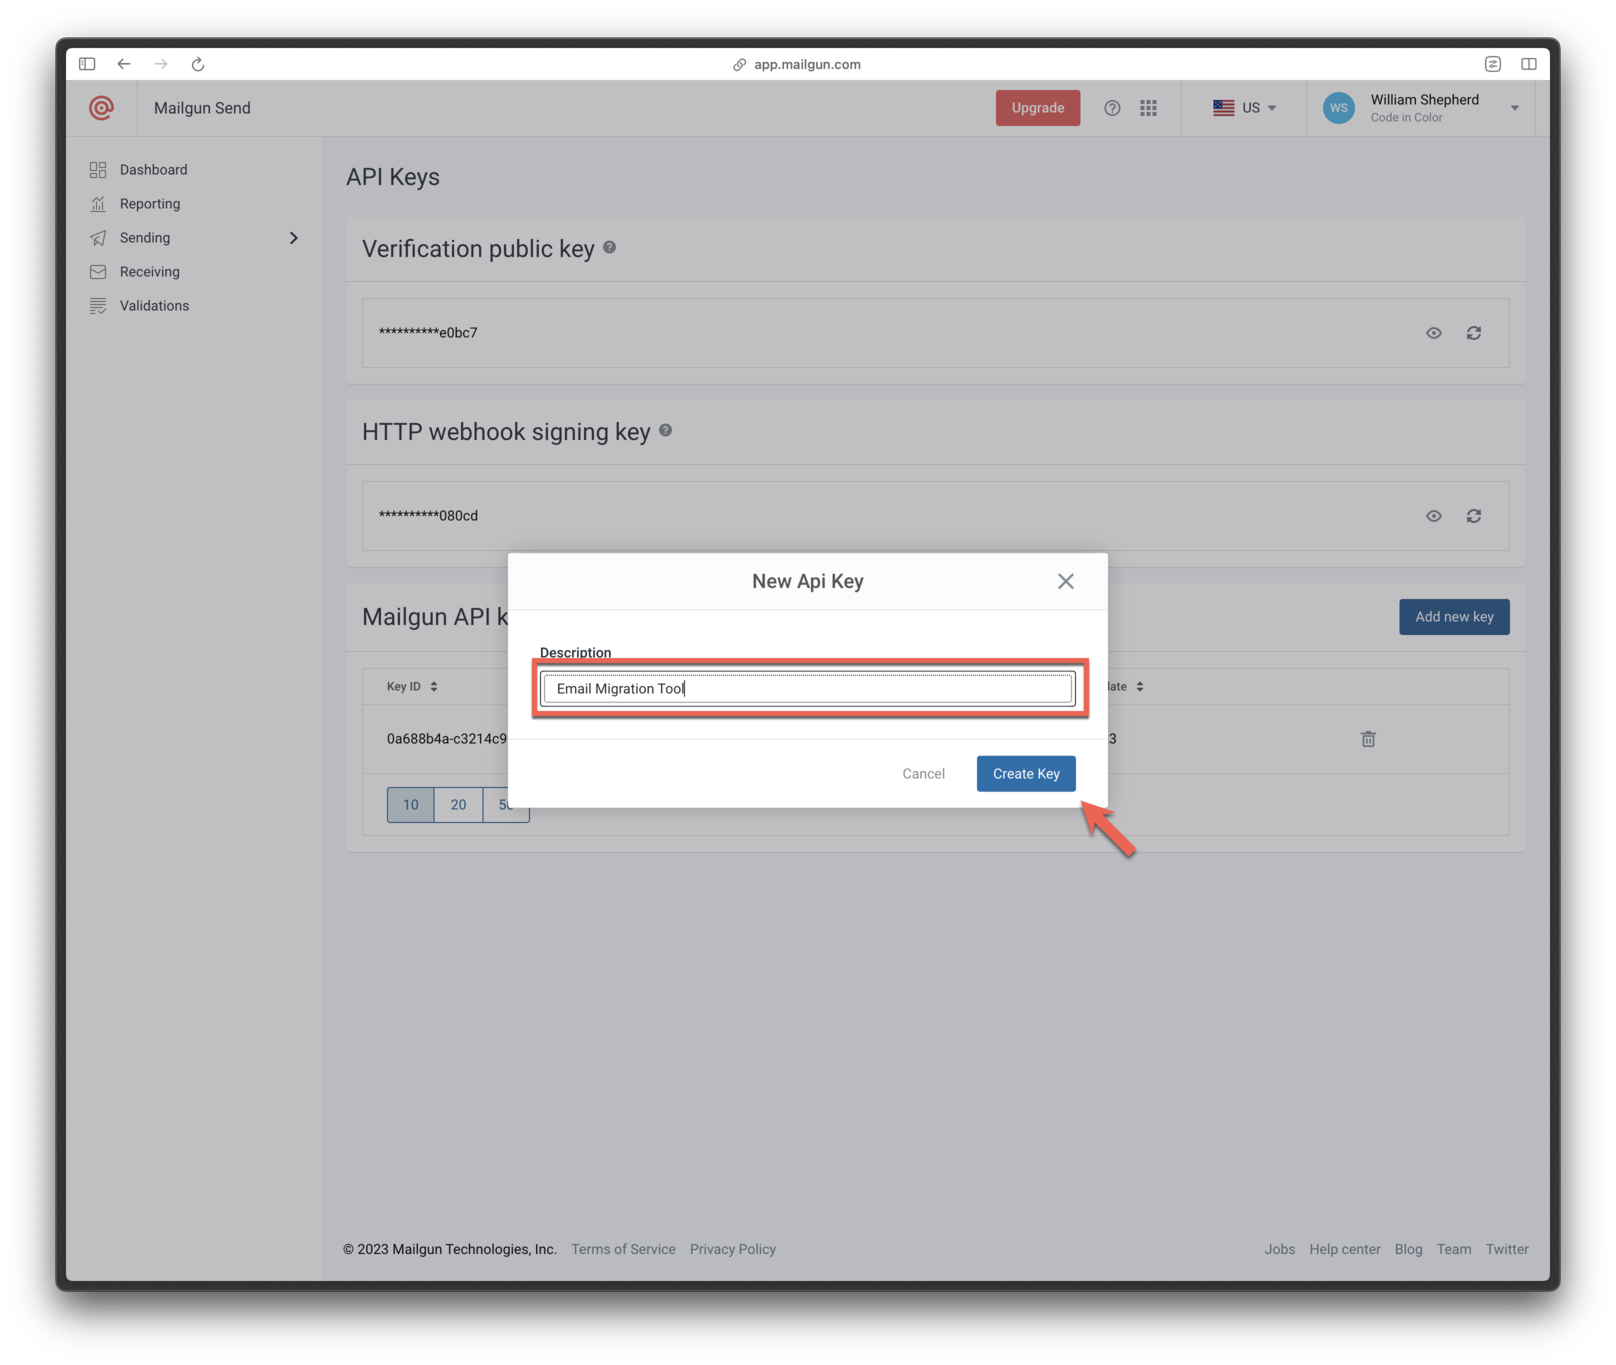
- Name the key and click Create Key.
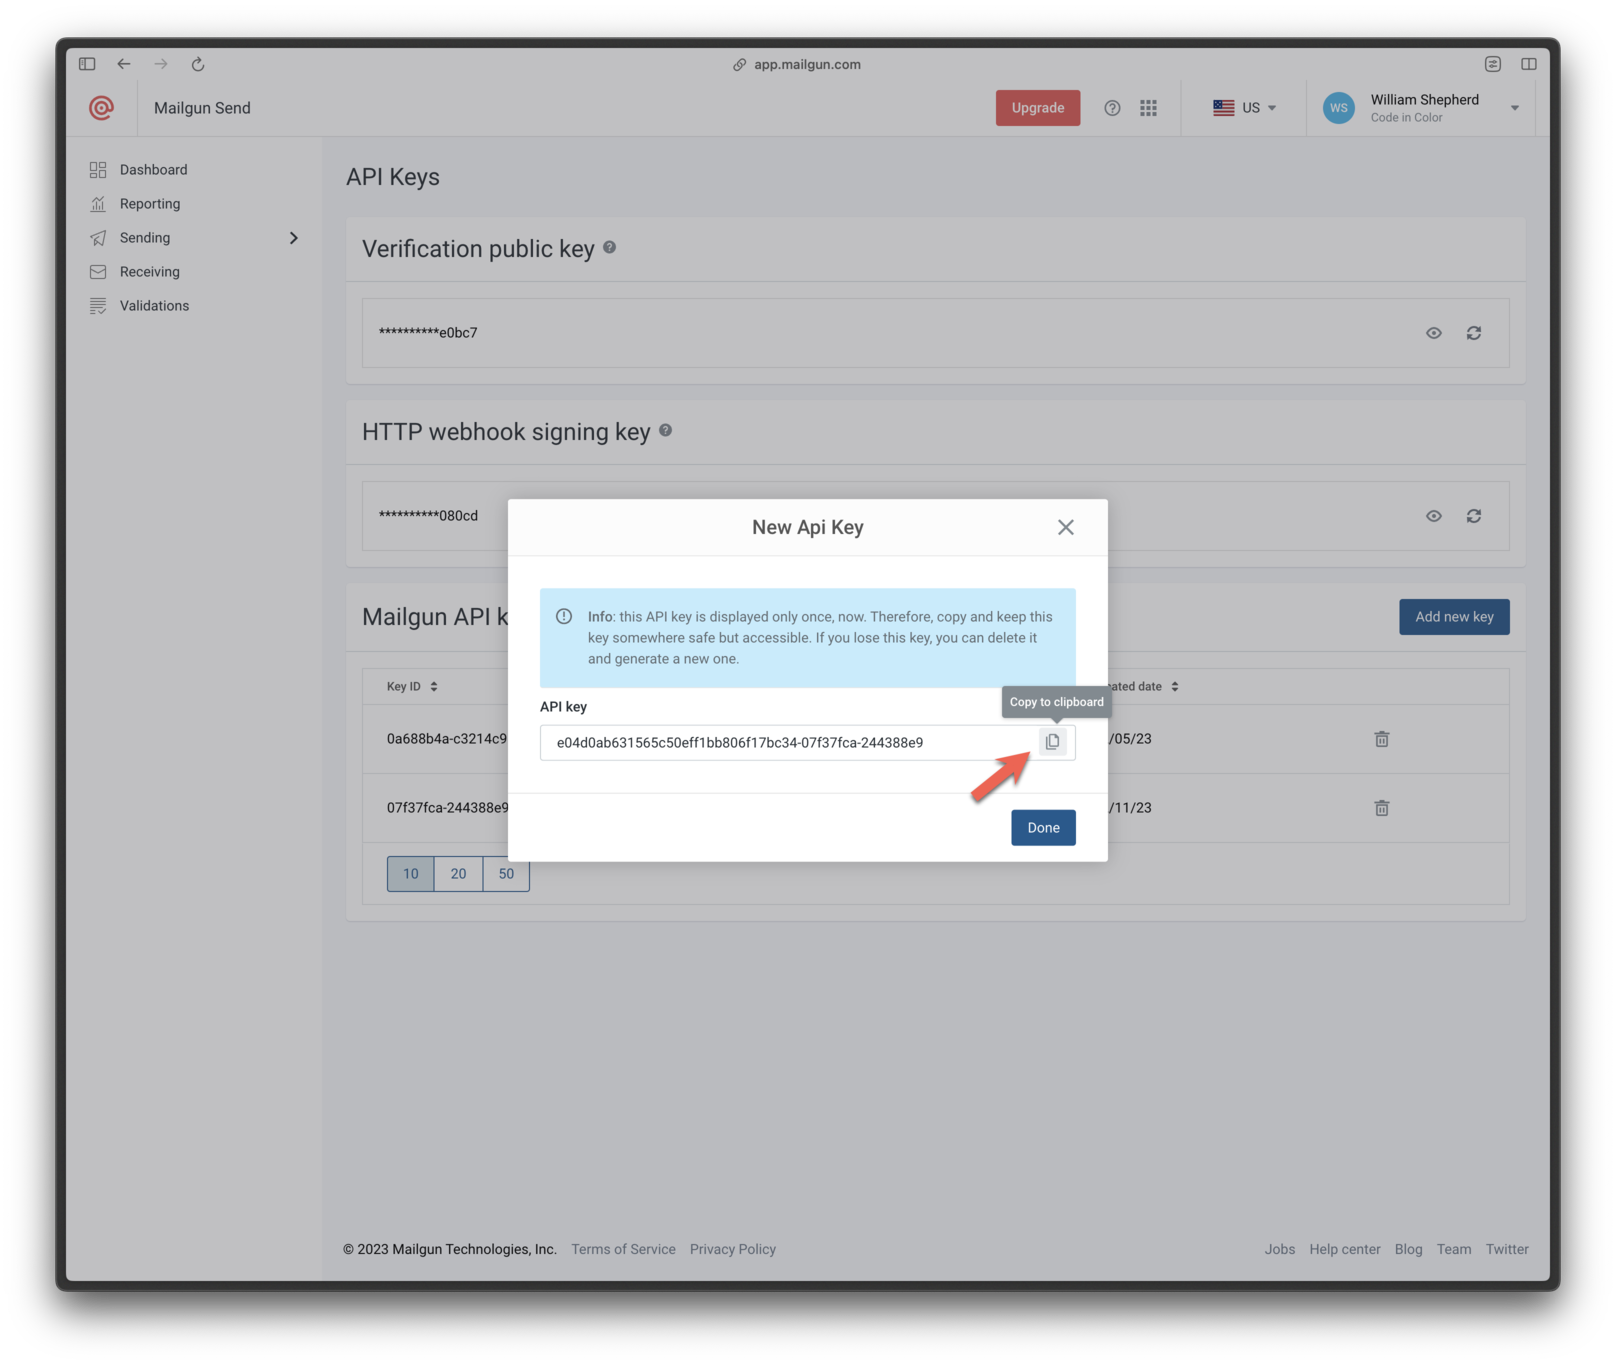
- Copy the generated API key and save it securely.
5. Configure Mailgun in OneSignal
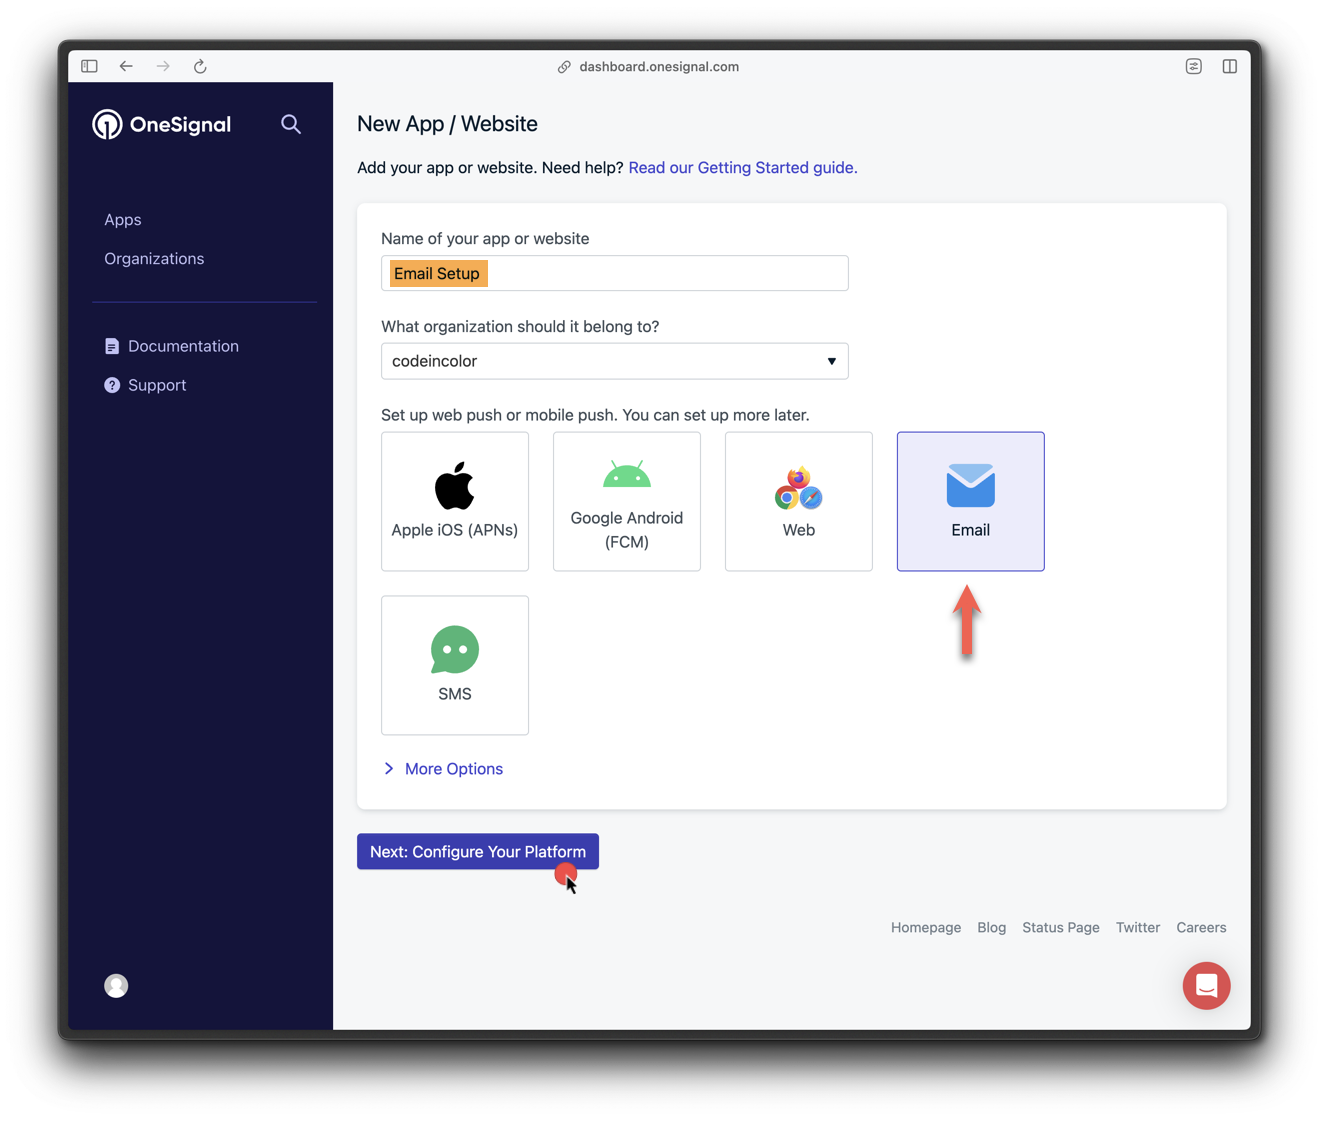
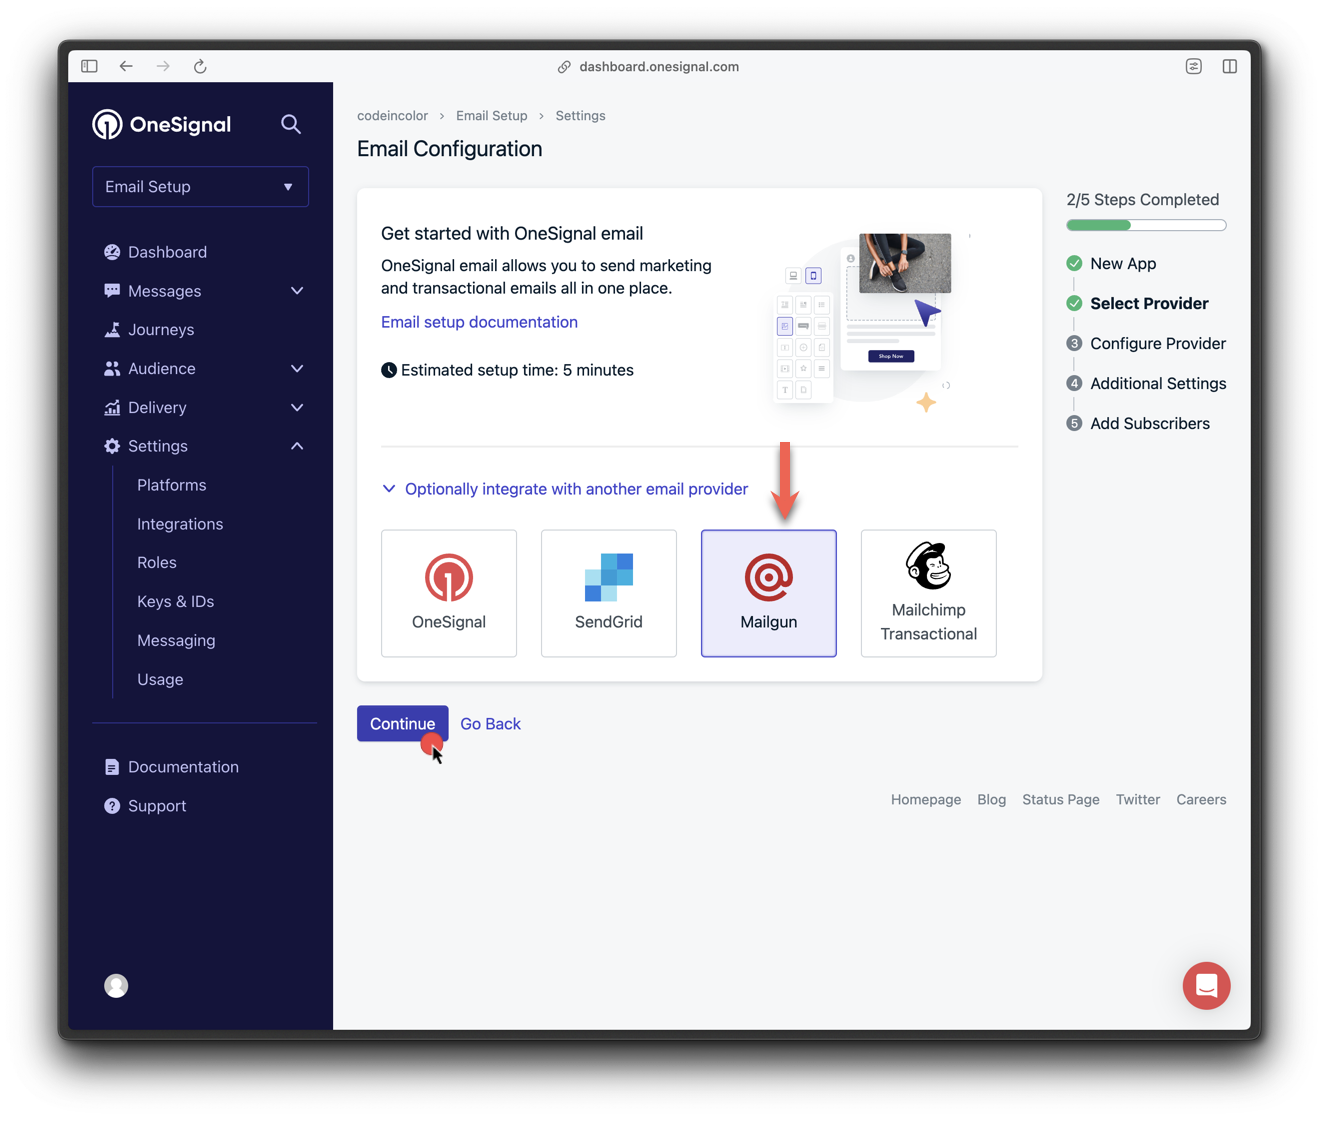
- In OneSignal, go to Settings > Platforms > Email and choose Mailgun.
- Select Mailgun as the provider.
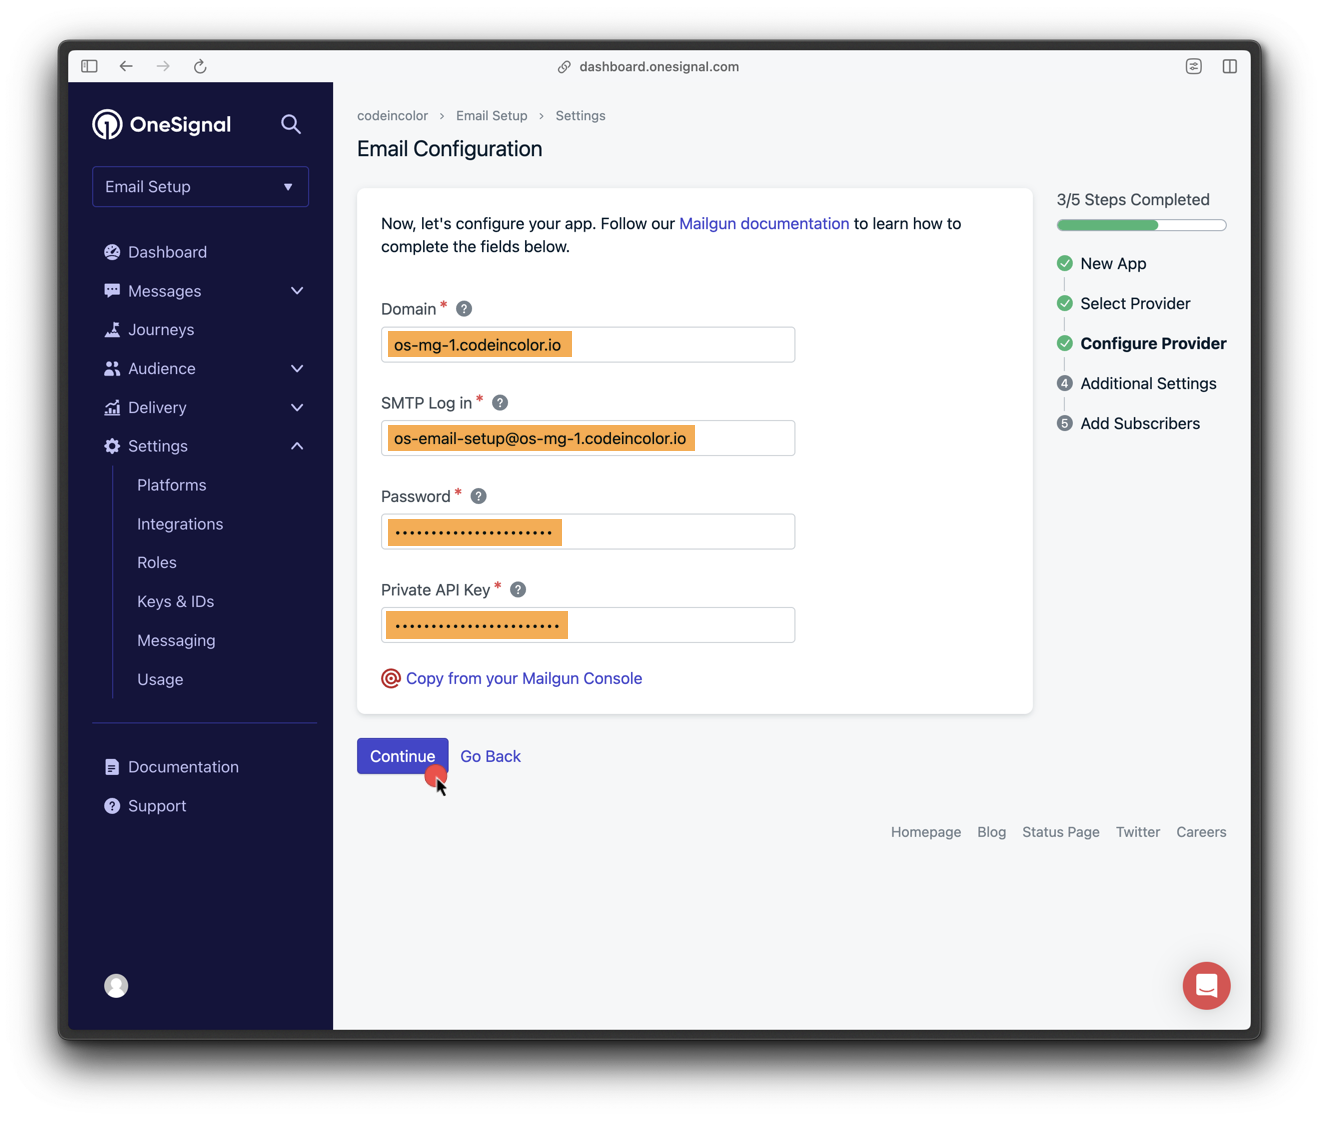
- Enter:
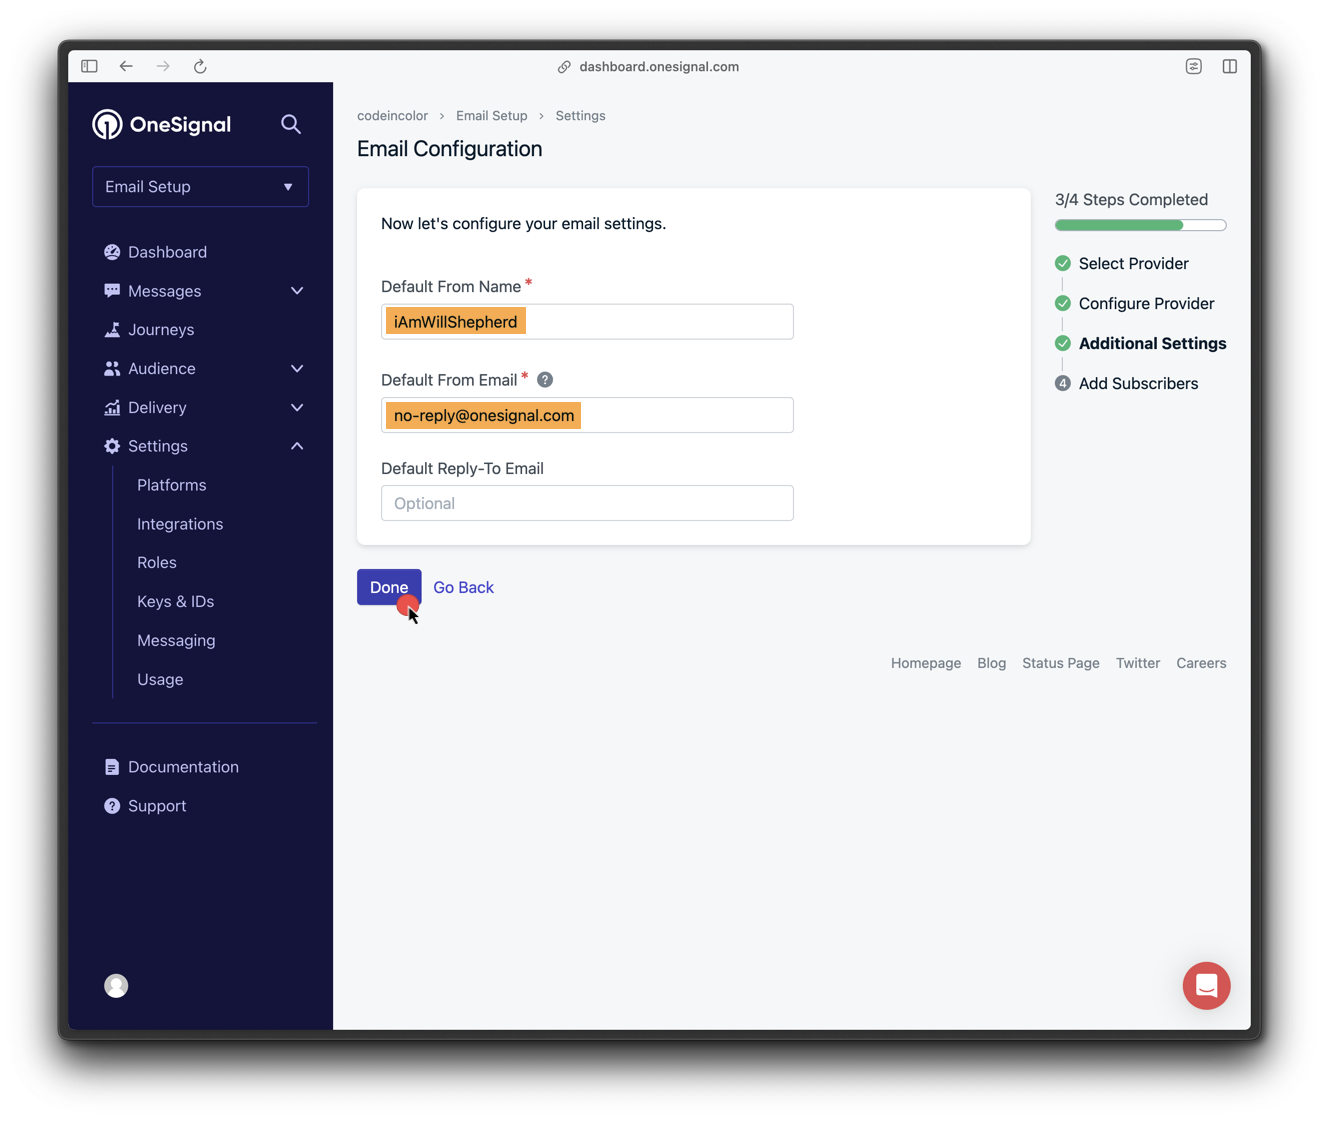
- Set default sender name and
fromemail address.
6. Add OneSignal webhooks to Mailgun
Navigate to Mailgun > Sending > Webhooks > Your Domain > Webhooks and add: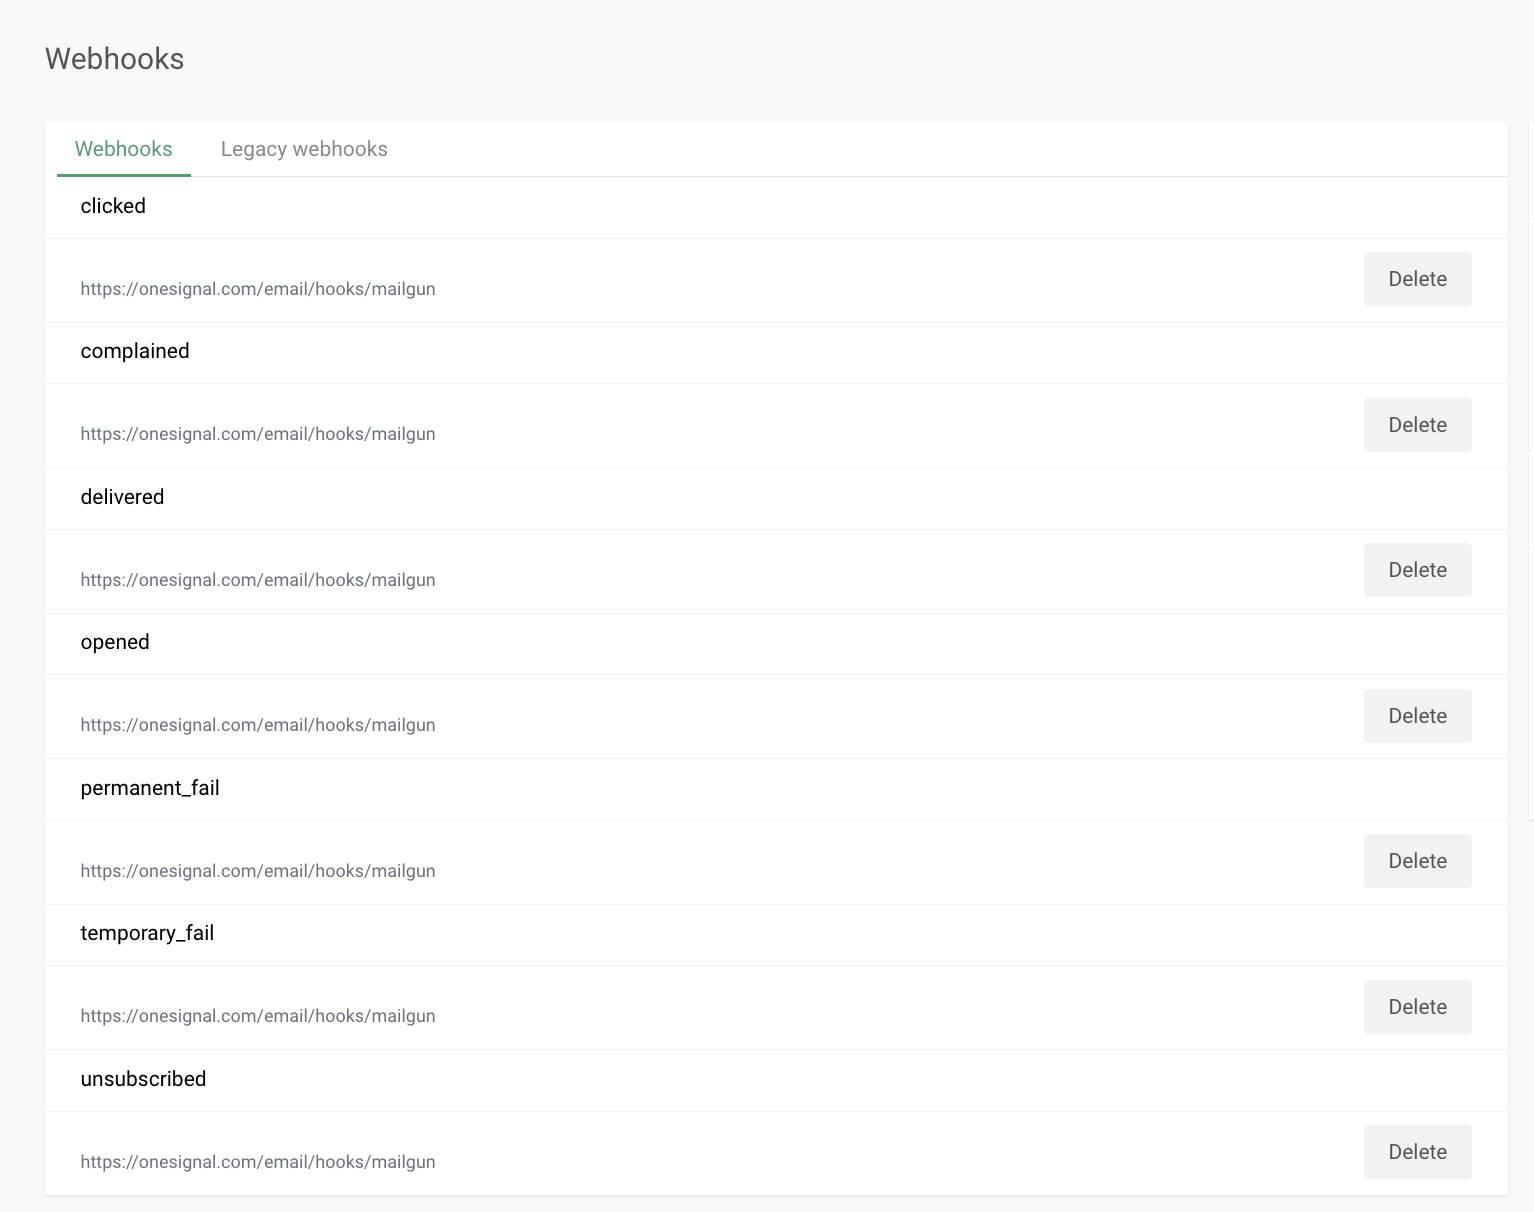
7. Change tracking protocol to HTTPS
Ensure recipients are directed to secure URLs.- Go to your domain settings in Mailgun.
- Under Tracking > Tracking Protocol, change from HTTP to HTTPS.

8. Send a test email
- Go to OneSignal > Messages > Email, click New Email.
- Add a subject, click Send Test Email, input your email, and hit Send Test Message.

Troubleshooting
See our Email FAQNeed help?Chat with our Support team or email
[email protected]Please include:- Details of the issue you’re experiencing and steps to reproduce if available
- Your OneSignal App ID
- The External ID or Subscription ID if applicable
- The URL to the message you tested in the OneSignal Dashboard if applicable
- Any relevant logs or error messages
Email setup complete!
Next steps:
- Return to the Email Setup guide to explore OneSignal Email capabilities.