OneSignal offers an enhanced security feature called Identity Verification to help prevent user impersonation. This feature utilizes JSON Web Tokens – or JWTs, securely generated on your server. To verify subscription information, these tokens are passed to your app and OneSignal’s API.Enable Identity Verification to secure:
Logging in users
Adding email subscriptions
Adding SMS subscriptions
Modifying user identities
Identity Verification is currently in beta. Contact support@onesignal.com to have it enabled for your account. Once support enables it, you activate it in your dashboard (see Step 5).
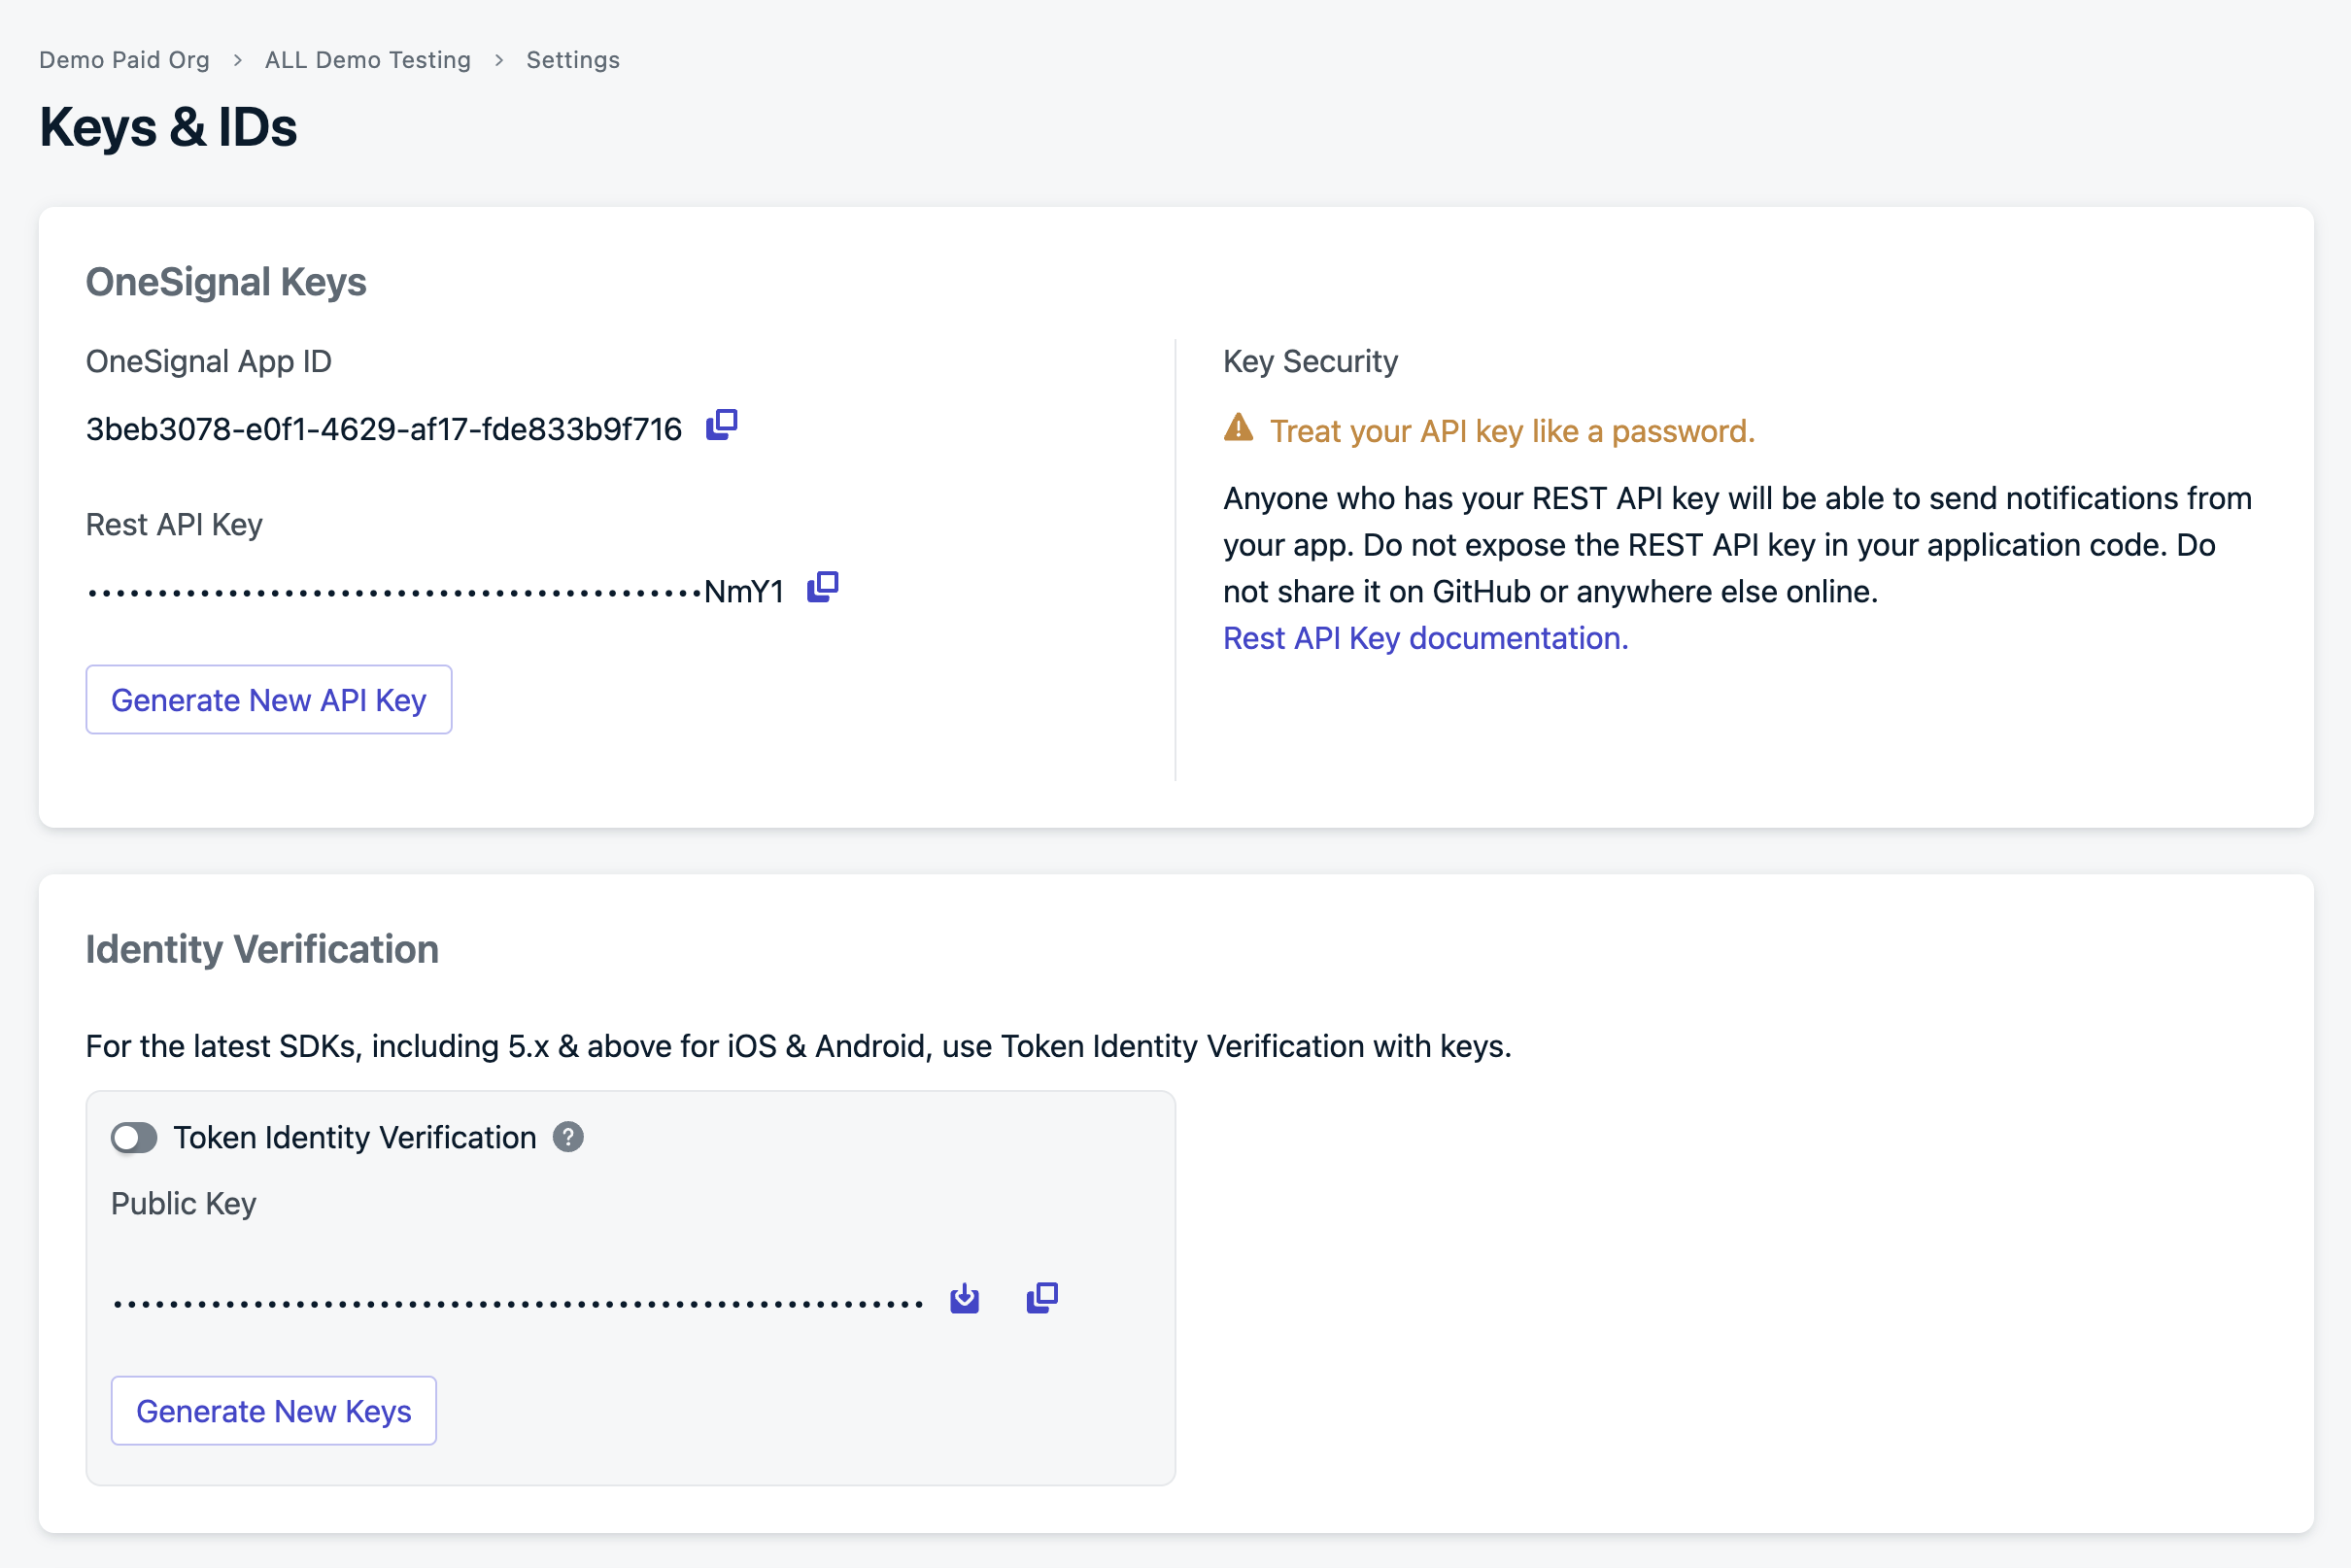
Log in to your OneSignal account and navigate to Settings > Keys & IDs > Identity Verification.
Identity Verification configuration
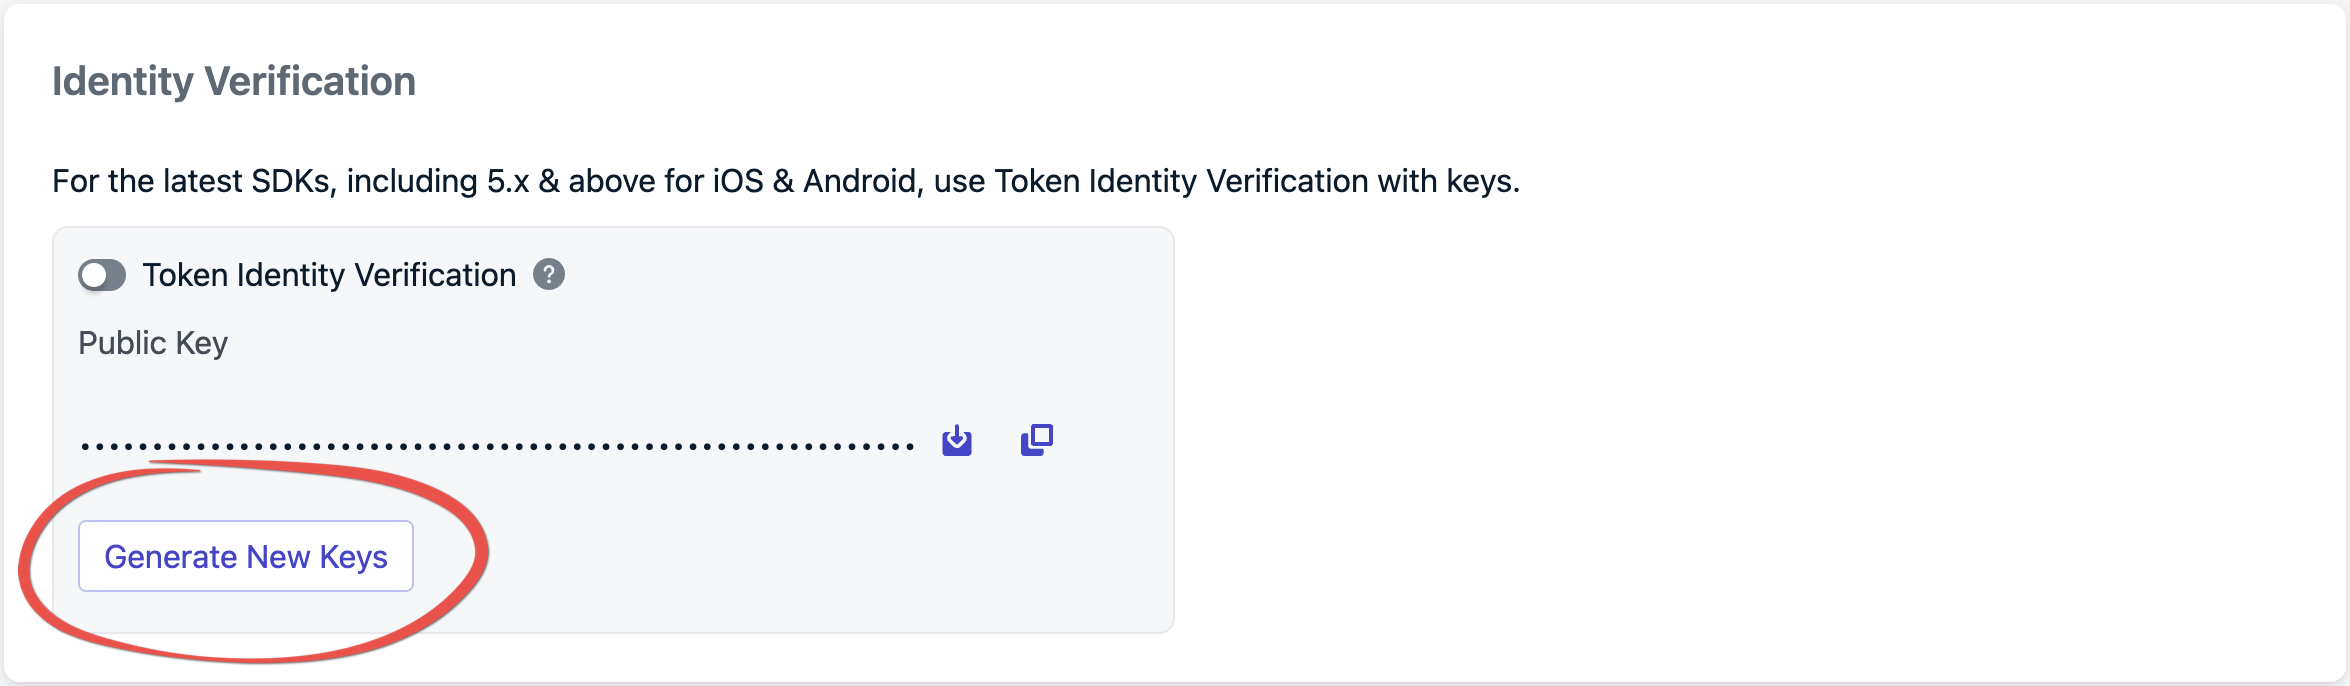
Click Generate New Keys to create a new key pair.
Creating new key pair
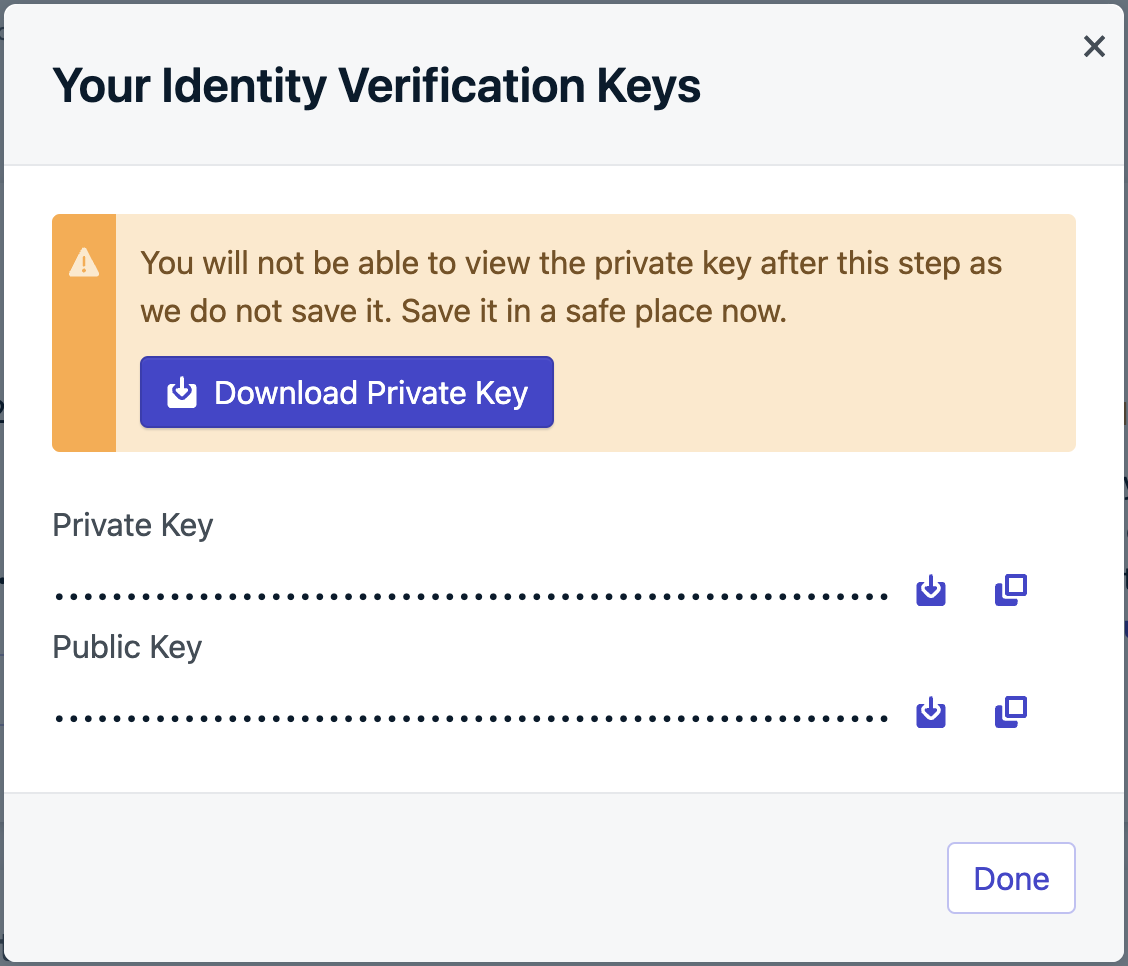
Download the PEM file or copy the private key, making sure to store the private key securely.
Identity Verification key pair
Always store your private keys in a secure environment, such as a key management system. Never expose private keys in client-side code, public repositories, or logs.
2
Generate verification JWT on your backend
Identity verification requires authenticating the end-user with your authentication server before logging them into OneSignal. When the end-user authenticates with your backend, generate the token and include it in the auth response to the device. If your app doesn’t run a backend server, consider setting up a lightweight server to verify users and generate these tokens.
Sign the JWT using the ES256 algorithm. Ensure your backend is configured to use this signing method to avoid verification issues when sending the JWT to OneSignal. We recommend a JWT Library to do this.Example using jsonwebtoken:
import jwt from 'jsonwebtoken';const APP_ID = process.env['ONESIGNAL_APP_ID']const IDENTITY_VERIFICATION_SECRET = process.env['ONESIGNAL_IDENTITY_VERIFICATION_SECRET_KEY']// Generates JWT, potentially with subscription claims, for the user identified by the External IDfunction signOneSignalJWT(externalId, subscriptions) {return jwt.sign({iss: APP_ID,exp: Math.floor(Date.now() / 1000) + 3600, // 1-hour expirationidentity: {'external_id': externalId,},subscriptions},IDENTITY_VERIFICATION_SECRET,{ algorithm: 'ES256' });}// Pass this token to your mobile app to use with the `login` SDK methodconst onesignalJWT = signOneSignalJWT('EXTERNAL_ID');
The private key is in the previous step’s file we downloaded from the Dashboard.
Ideally, subscription details, such as email or phone number, get included in the JWT payload when logging a user in. If these details aren’t available upfront, your verification server must provide an endpoint to generate tokens dynamically as subscription information becomes available.Example: Generating JWT to add subscriptions
Once your backend generates the JWT, call the login method with it. This token ensures the user’s identity is verified before any changes, such as adding an email or SMS subscription, can be made.Example of logging in:
val externalId = "YOUR_EXTERNAL_ID"val onesignalJWT = "YOUR_JWT_TOKEN"OneSignal.login(externalId, onesignalJWT)
val externalId = "YOUR_EXTERNAL_ID"val onesignalJWT = "YOUR_JWT_TOKEN"// Call from a coroutine when you need a non-blocking loginOneSignal.loginSuspend(externalId, onesignalJWT)
let externalId = "YOUR_EXTERNAL_ID"let onesignalJWT = "YOUR_JWT_TOKEN"OneSignal.login(externalId: externalId, token: onesignalJWT)
You’ll need to implement a dedicated endpoint on your backend to handle scenarios like token invalidation. This endpoint should provide a refreshed JWT when OneSignal requests an update.Example of handling token invalidation and refreshing the JWT:
OneSignal.addUserJwtInvalidatedListener(event -> { // Get the expired user's External ID String externalId = event.getExternalId(); // Fetch a new JWT from your backend for the user String onesignalJWT = "yourUpdatedToken"; // Provide the new JWT to the SDK OneSignal.updateUserJwt(externalId, onesignalJWT);});
OneSignal.addUserJwtInvalidatedListener { event -> // Get the expired user's External ID val externalId = event.externalId // Fetch a new JWT from your backend for the user val onesignalJWT = "yourUpdatedToken" // Provide the new JWT to the SDK OneSignal.updateUserJwt(externalId, onesignalJWT)}
OneSignal.addUserJwtInvalidatedListener { event -> val externalId = event.externalId // Fetch a new JWT from your backend, then update from a coroutine appScope.launch { val onesignalJWT = "yourUpdatedToken" OneSignal.updateUserJwtSuspend(externalId, onesignalJWT) }}
class AppDelegate: UIResponder, UIApplicationDelegate, OSUserJwtInvalidatedListener { func application(_ application: UIApplication, didFinishLaunchingWithOptions launchOptions: [UIApplication.LaunchOptionsKey: Any]? = nil) -> Bool { // Set self to listen for JWT invalidated events OneSignal.addUserJwtInvalidatedListener(self) // Remove the JWT listener as needed by calling: // `OneSignal.removeUserJwtInvalidatedListener(self)` } // Required to conform to `OSUserJwtInvalidatedListener` protocol func onUserJwtInvalidated(event: OneSignalUser.OSUserJwtInvalidatedEvent) { // Get the expired user's External ID let externalId = event.externalId // Fetch a new JWT from your backend for the user let onesignalJWT = "yourUpdatedToken" // Provide the new JWT to the SDK OneSignal.updateUserJwt(externalId: externalId, token: onesignalJWT) }}
@interface MyListener: NSObject<OSUserJwtInvalidatedListener>@end@implementation MyListener- (void)onUserJwtInvalidatedWithEvent:(OSUserJwtInvalidatedEvent * _Nonnull)event { // Get the expired user's External ID NSString *externalId = event.externalId; // Fetch a new JWT from your backend for the user NSString *onesignalJWT = @"yourUpdatedToken"; // Provide the new JWT to the SDK [OneSignal updateUserJwt:externalId withToken:onesignalJWT];}// Add or remove your User Jwt Invalidated Listener[OneSignal addUserJwtInvalidatedListener:myListener];[OneSignal removeUserJwtInvalidatedListener:myListener];
This ensures that when a user’s JWT is invalidated, a new one can be fetched from your backend and passed to OneSignal. You can also use this function to generate a token with an email and phone number, allowing you to manage email and SMS subscriptions if the token created during authentication does not contain them.
5
Enable token identity verification in the dashboard
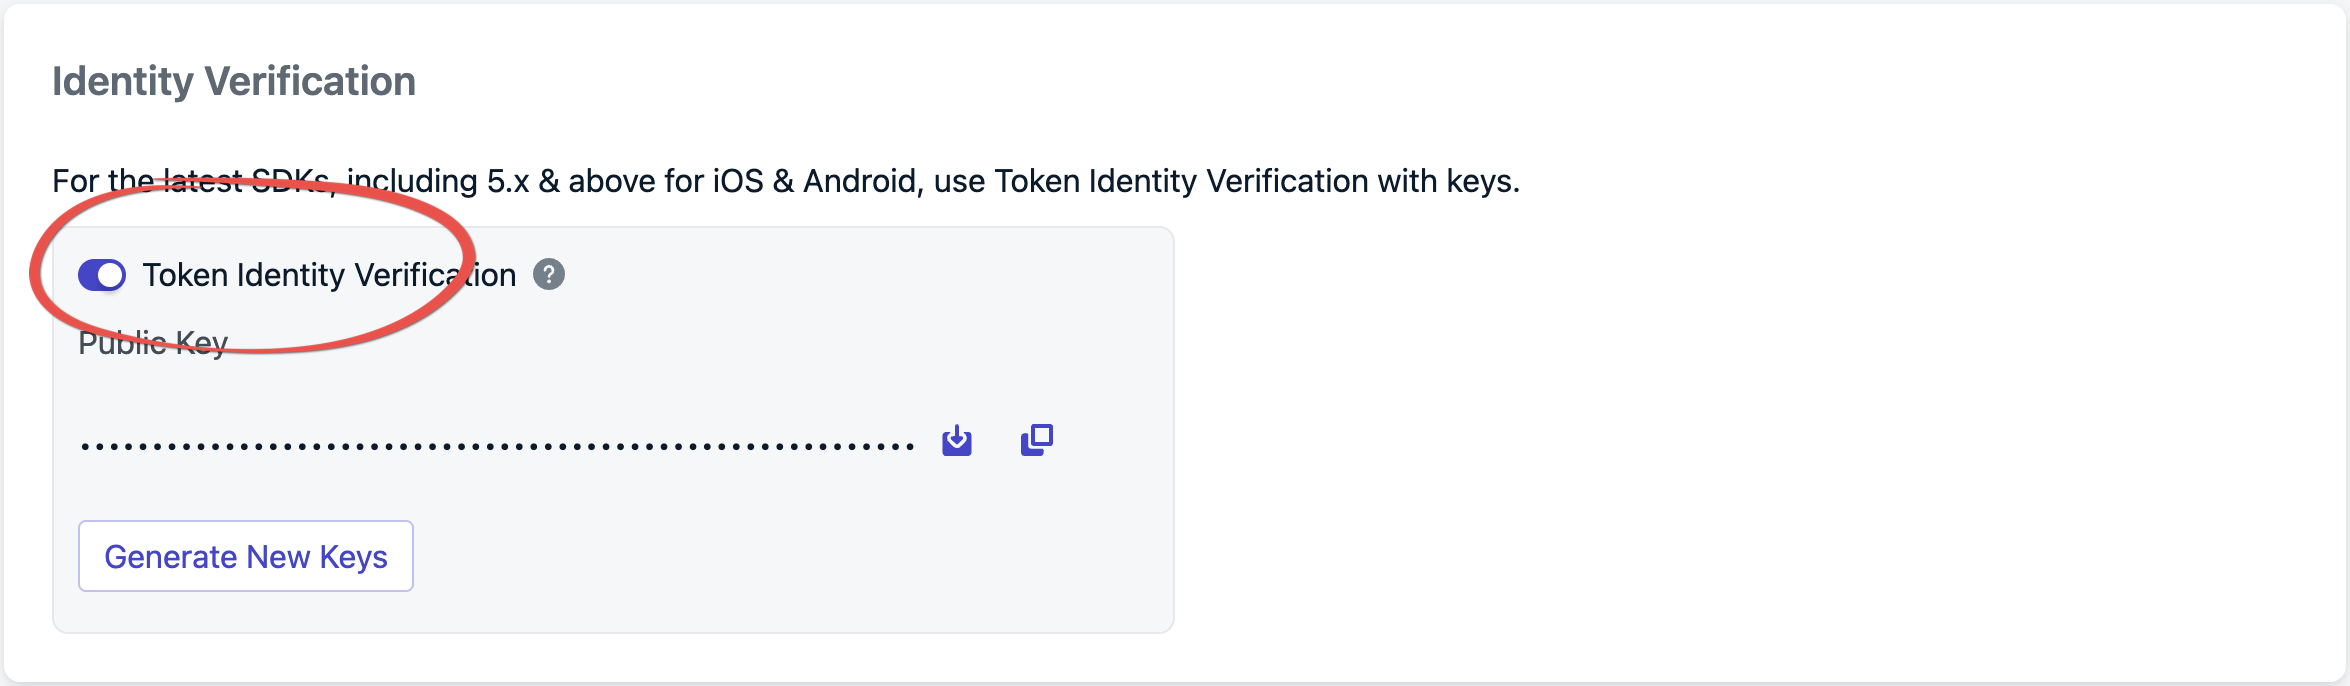
From Settings > Keys & IDs, toggle Token Identity Verification to enable.
Enabling Token Identity Verification
Once enabled, your app must send OneSignal JWTs to verify subscription authenticity. Additionally, your app is required to call the login method using a JWT generated by your identity verification token server.
You don’t need to take extra steps to add subscriptions from your mobile app; calling the login method automatically handles this for you.
Add an email
Add a phone number
OneSignal.getUser().addEmail(emailAddress);
OneSignal.getUser().addEmail(emailAddress)
// If you have not already included it in your JWT token, update the JWT with the emaillet onesignalJWT = "newTokenThatContainsTheEmailToAdd"OneSignal.updateUserJwt(externalId: externalId, token: onesignalJWT)// Add the emailOneSignal.User.addEmail(emailAddress)
// If you have not already included it in your JWT token, update the JWT with the emailNSString *onesignalJWT = @"newTokenThatContainsTheEmailToAdd";[OneSignal updateUserJwt:externalId withToken:onesignalJWT];// Add the email[OneSignal.User addEmail:emailAddress];
OneSignal.getUser().addSms(smsNumber);
OneSignal.getUser().addSms(smsNumber)
// If you have not already included it in your JWT token, update the JWT with the smslet onesignalJWT = "newTokenThatContainsTheSmsToAdd"OneSignal.updateUserJwt(externalId: externalId, token: onesignalJWT)// Add the sms numberOneSignal.User.addSms(smsNumber)
// If you have not already included it in your JWT token, update the JWT with the smsNSString *onesignalJWT = @"newTokenThatContainsTheSmsToAdd";[OneSignal updateUserJwt:externalId withToken:onesignalJWT];// Add the sms number[OneSignal.User addSms:smsNumber];
When Token Identity Verification is enabled, all requests to the following APIs must include a server-generated JWT in the headers as a bearer token, e.g., Authorization: Bearer <JWT>.
No, but it is strongly recommended. Without it, any client that knows a user’s External ID can impersonate that user and modify their subscriptions or data.
The SDK triggers a JWT invalidation event. Implement the addUserJwtInvalidatedListener (see Handle JWT lifecycle events) to fetch a refreshed token from your backend and pass it to updateUserJwt.
When Identity Verification is enabled, logout() disables the push subscription. The subscription remains associated with that user. Calling login with a JWT restores the subscription to its previous status. You do not need to call optIn() again.On Android (Kotlin), you can call logoutSuspend() from a coroutine for the non-blocking equivalent of logout().
When Token Identity Verification is enabled, all requests to the supported APIs must include a server-generated JWT as a bearer token in the Authorization header. The JWT is generated the same way as for SDK use.