Requirements
- Mailchimp Account
- Mailchimp Transactional Email Plan (formerly Mandrill)
- OneSignal Account
- Access to your domain and DNS provider
Setup
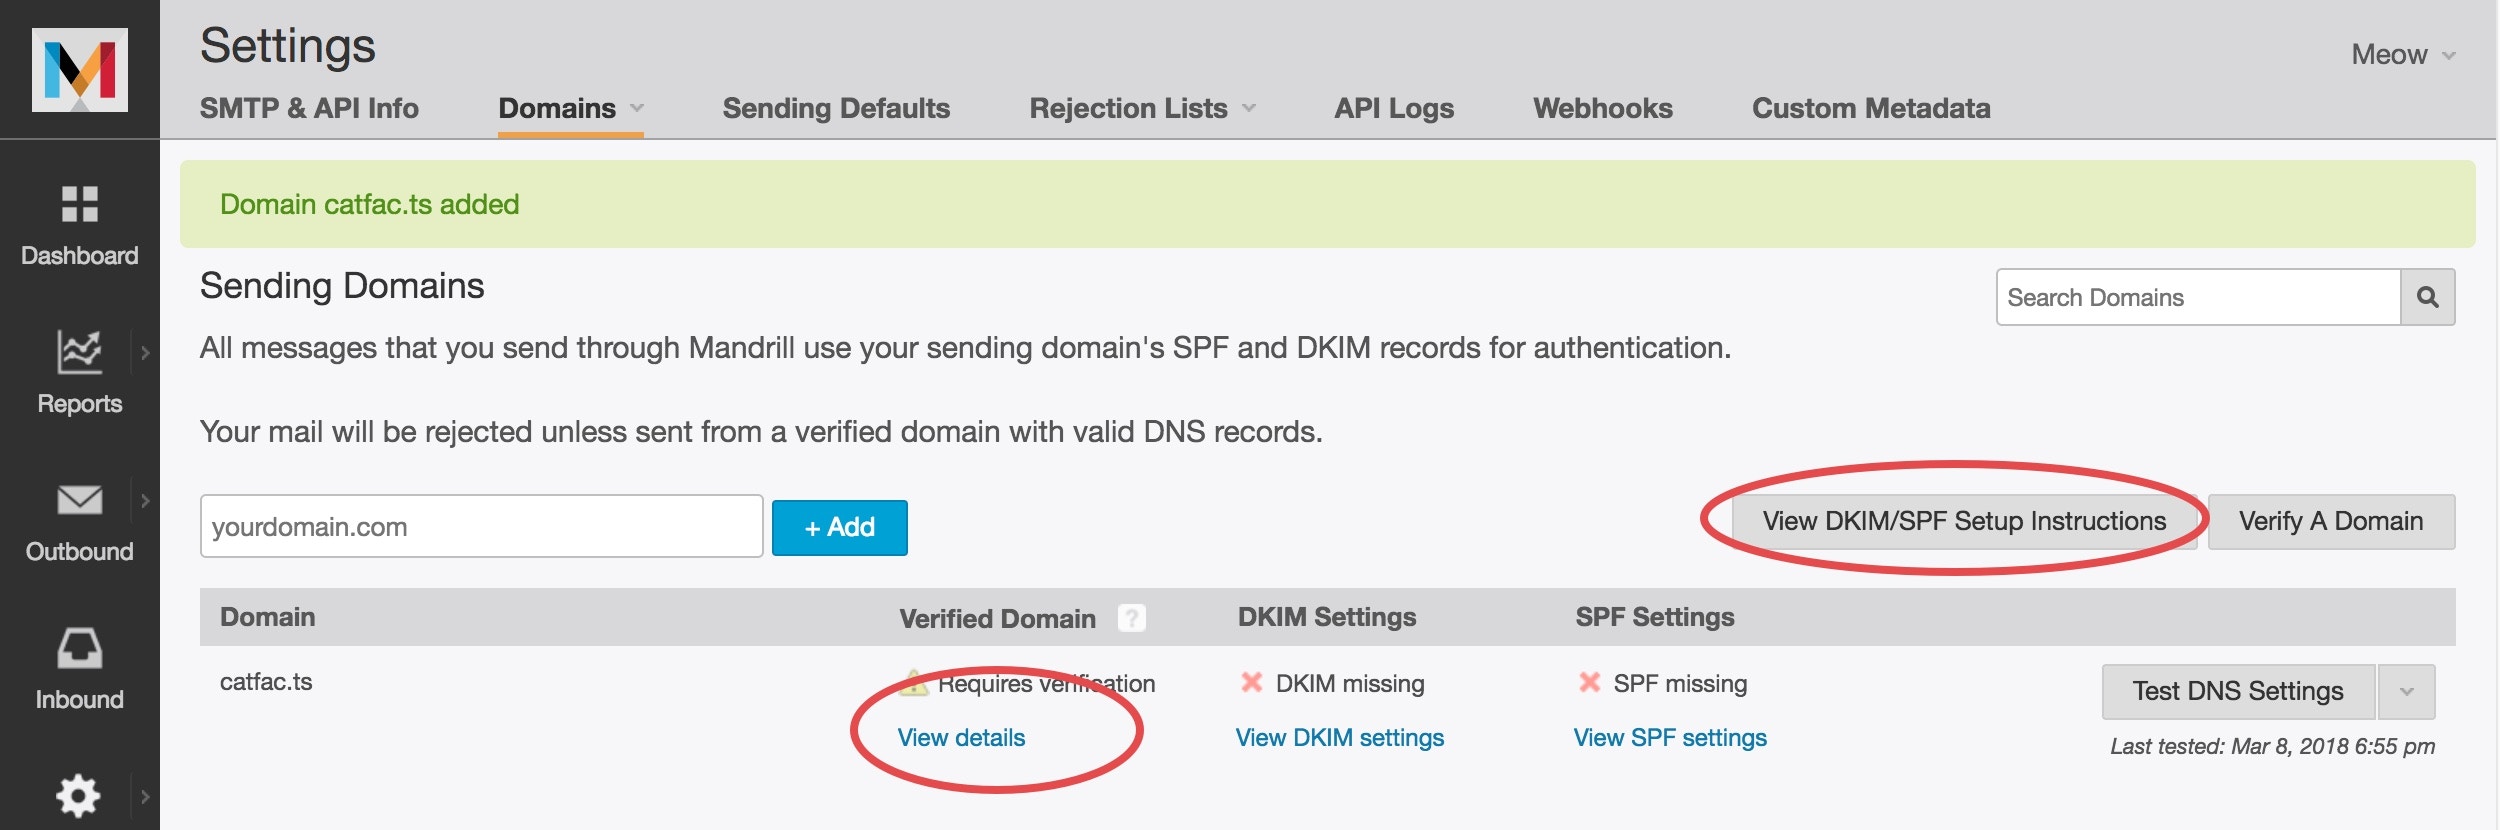
1. Configure your domain for email
Go to the Mailchimp Transactional Email Domains page and add your domain if it hasn’t been added already.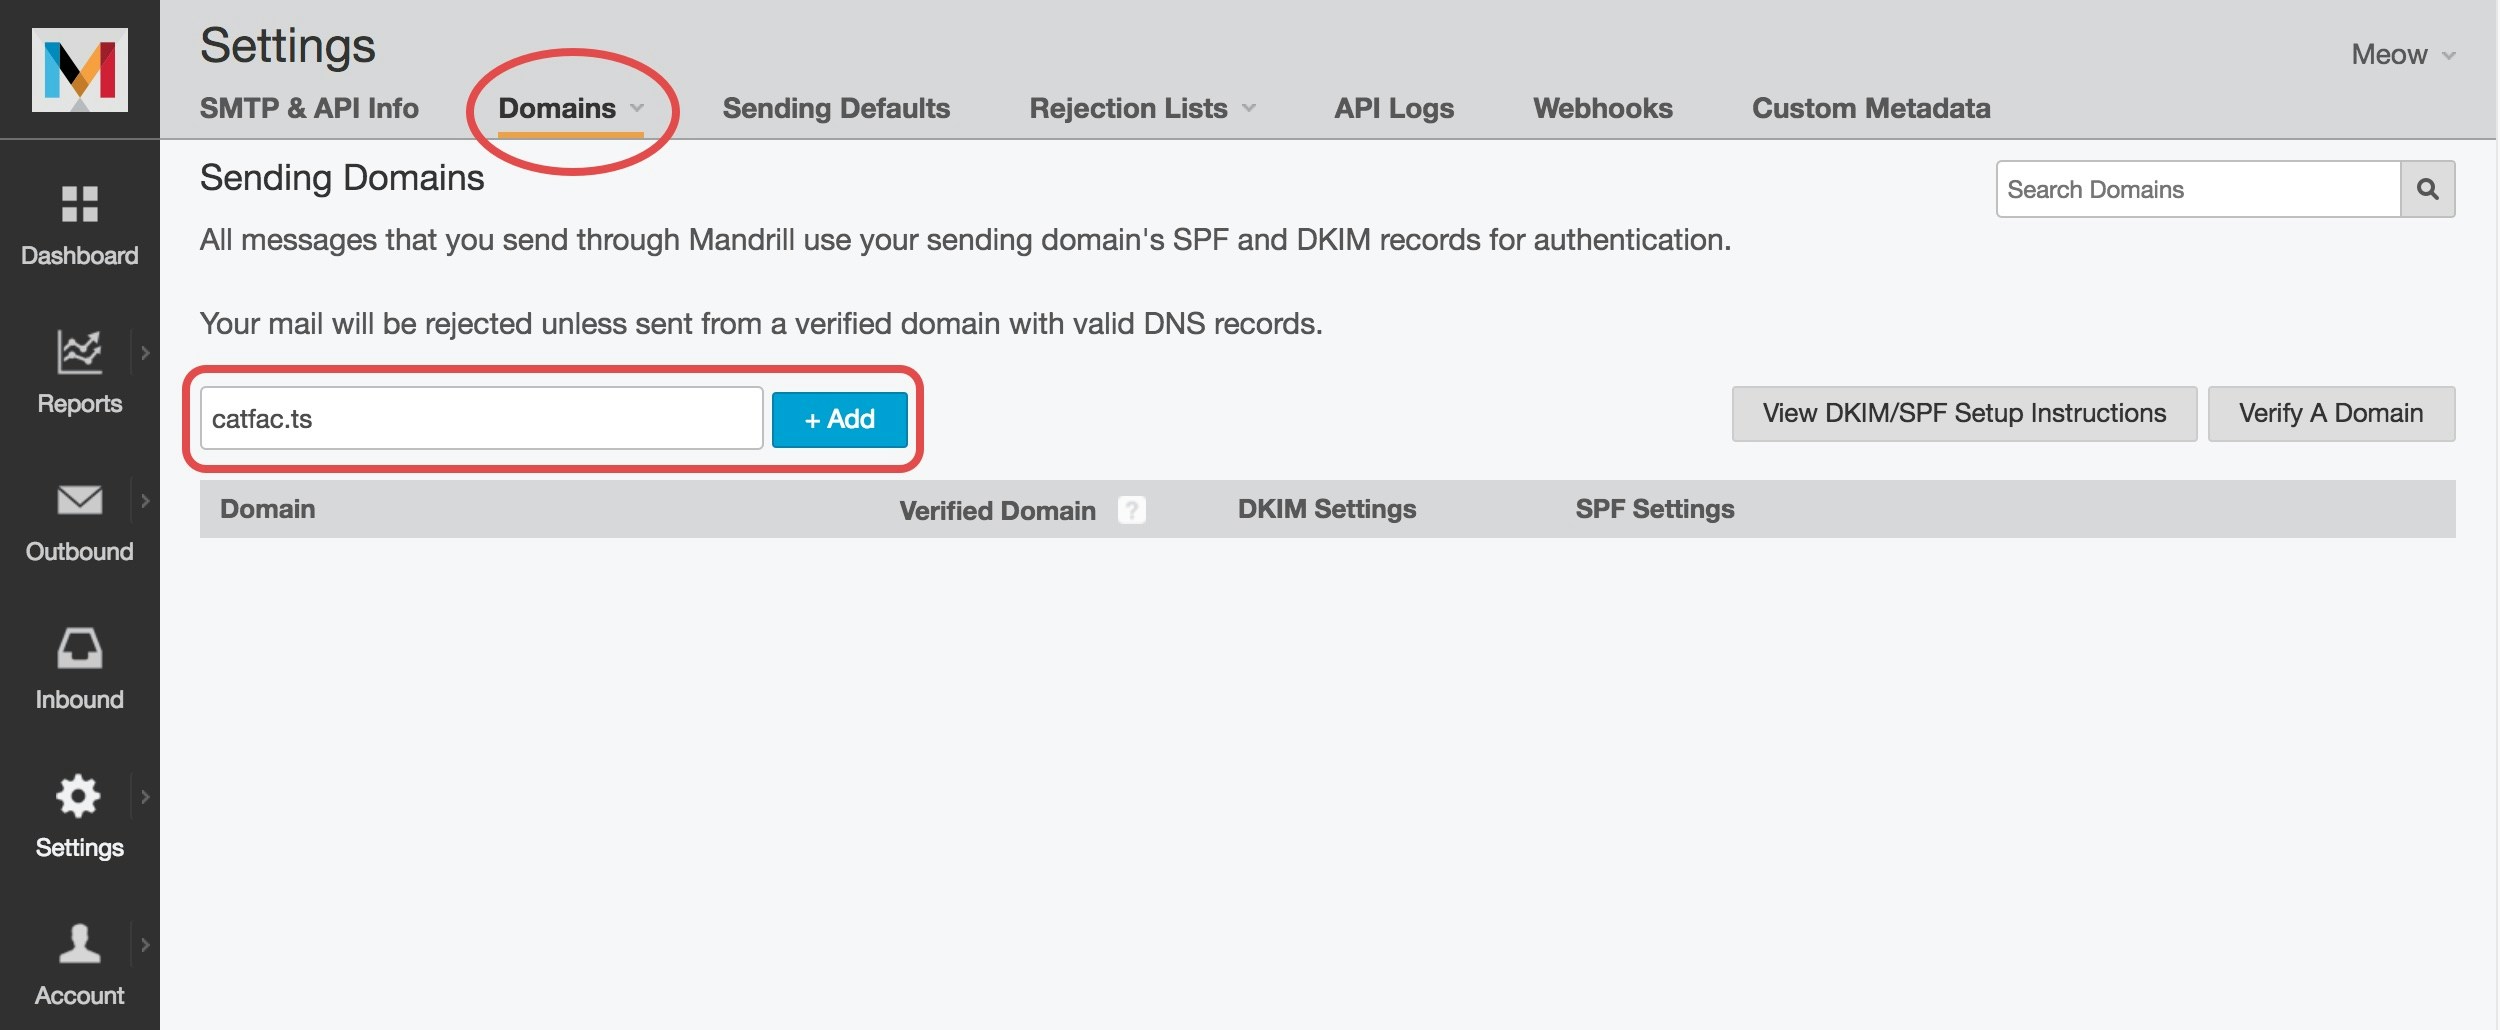
- Click View DKIM/SPF Setup Instructions to get your DNS records.
- Optionally verify ownership via email under View details.
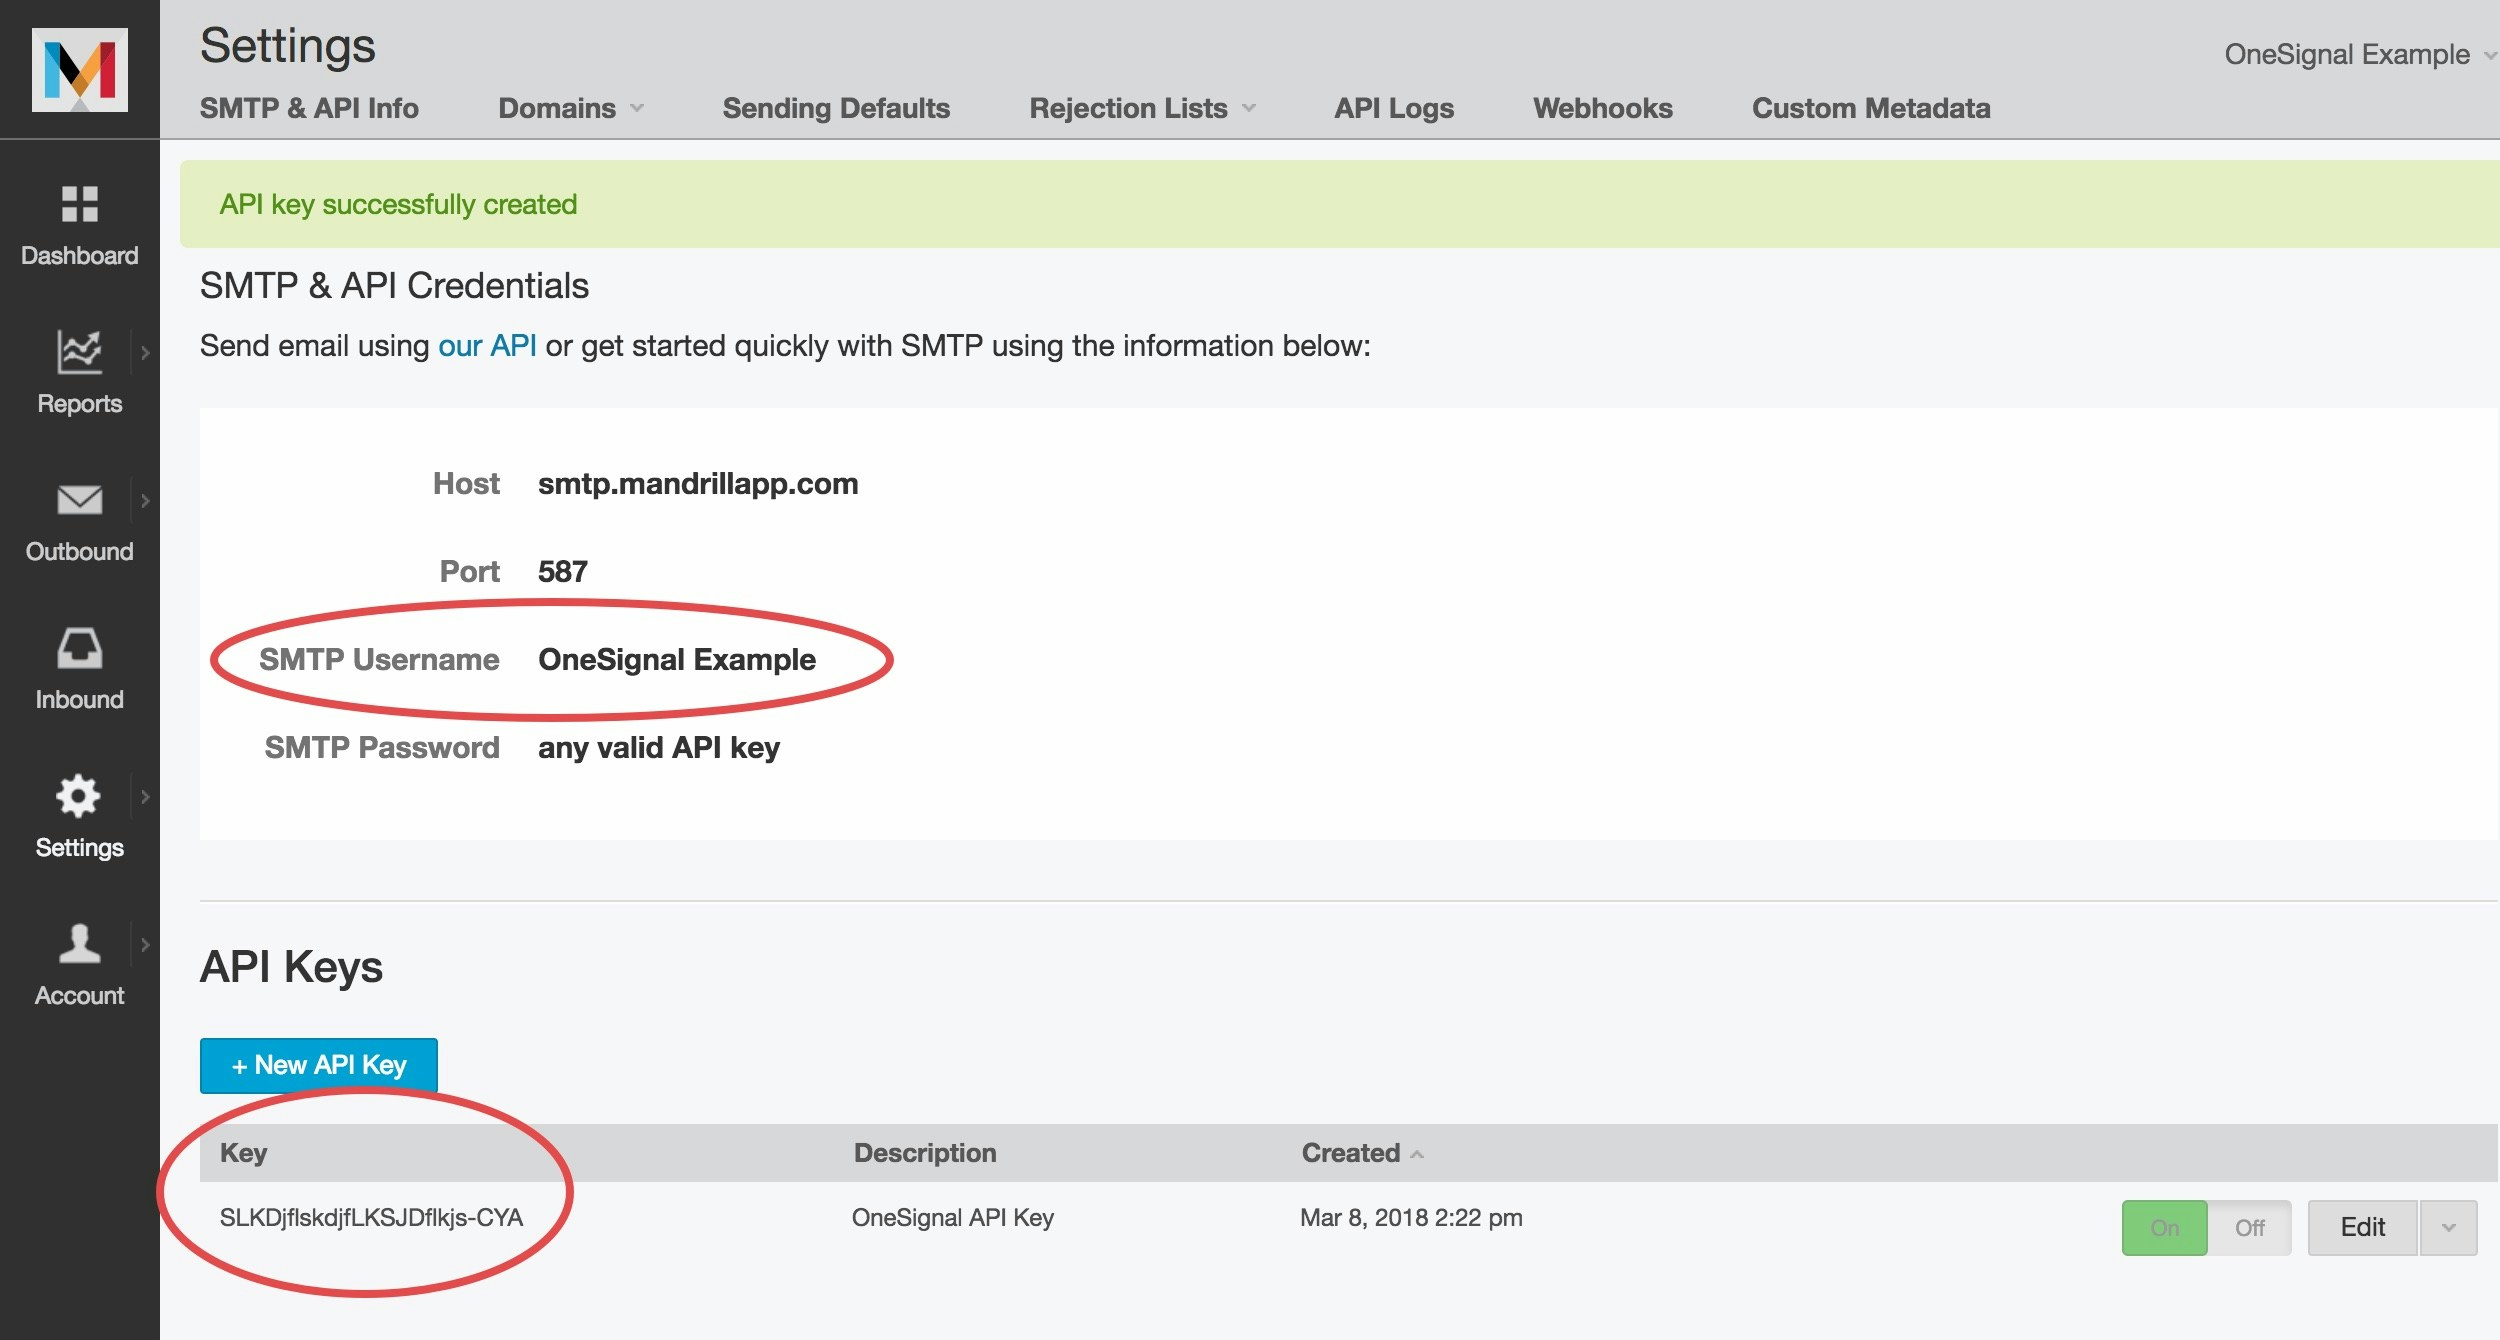
2. Create API Key
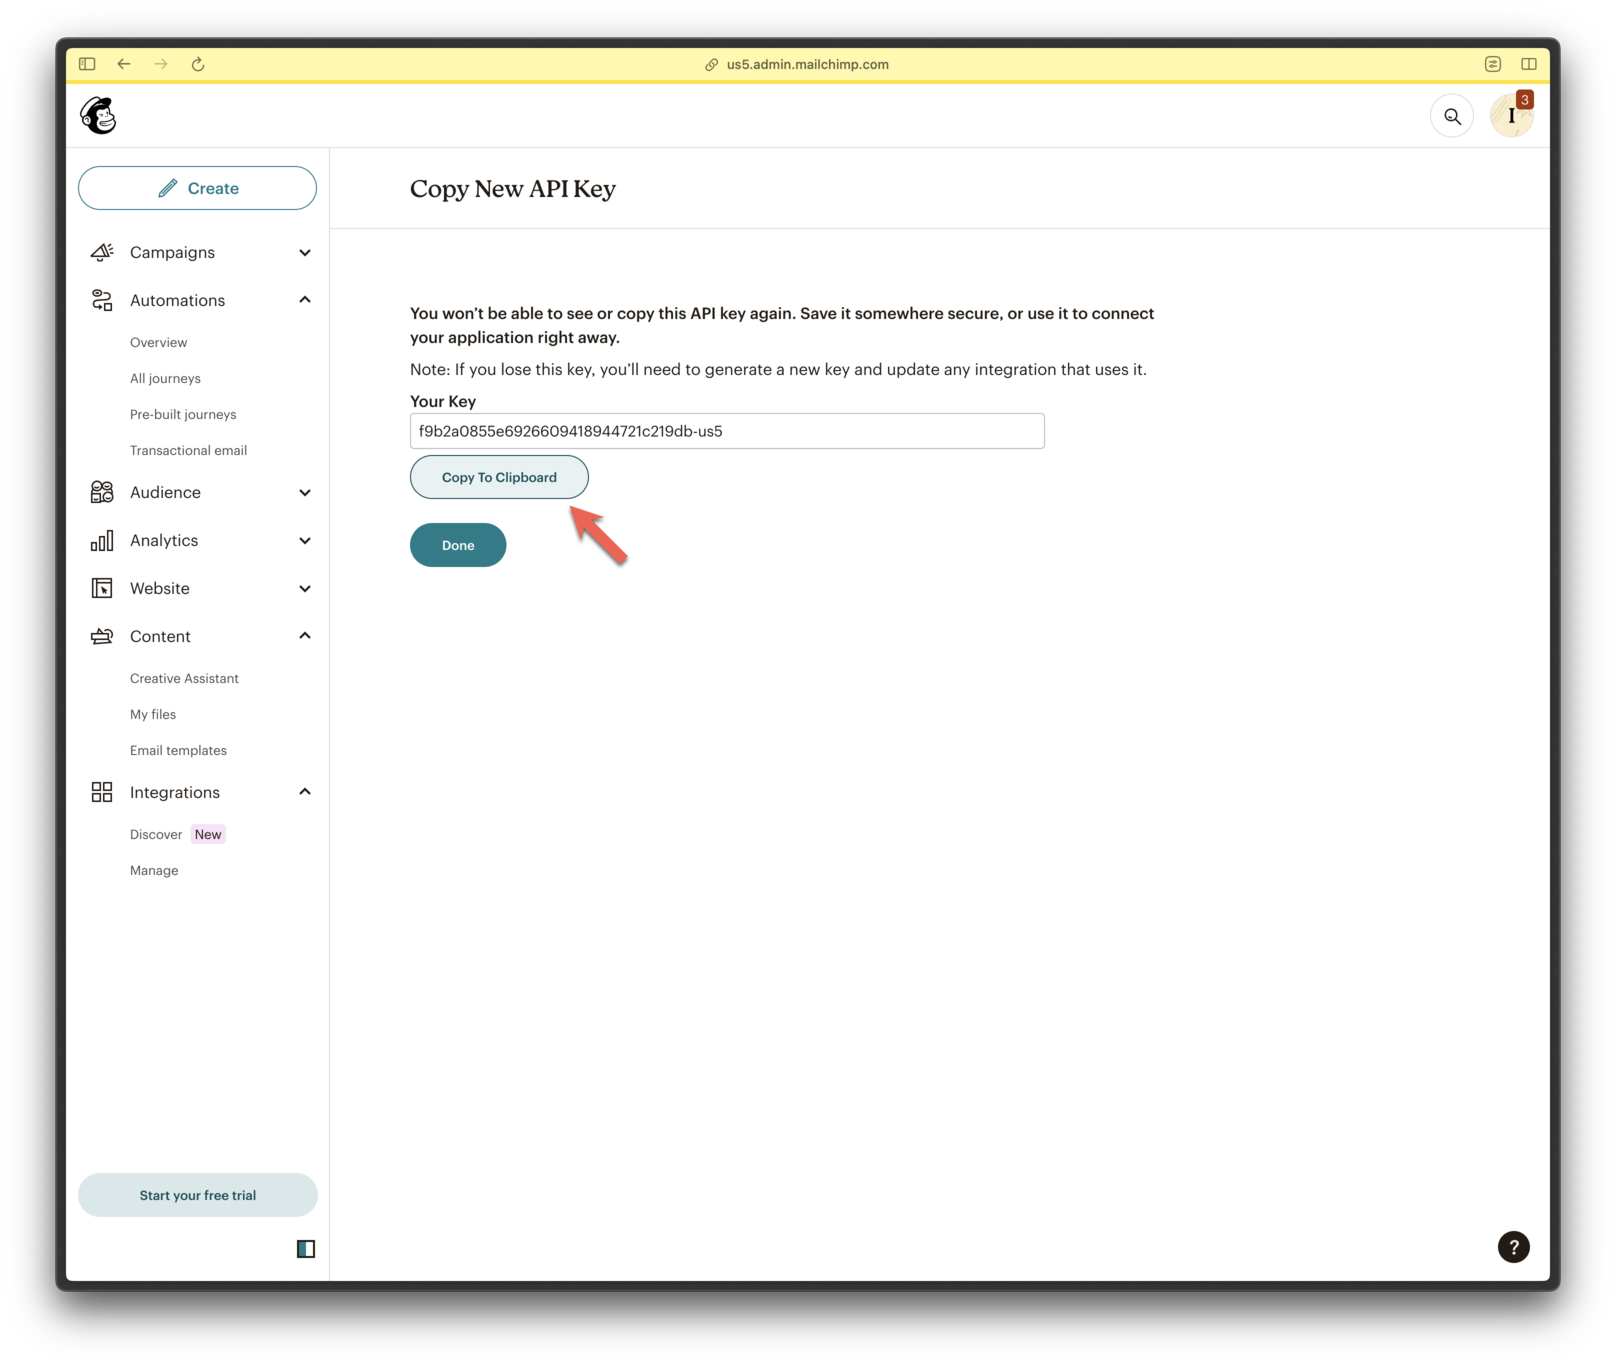
In the Transactional Email Settings, click + New API Key.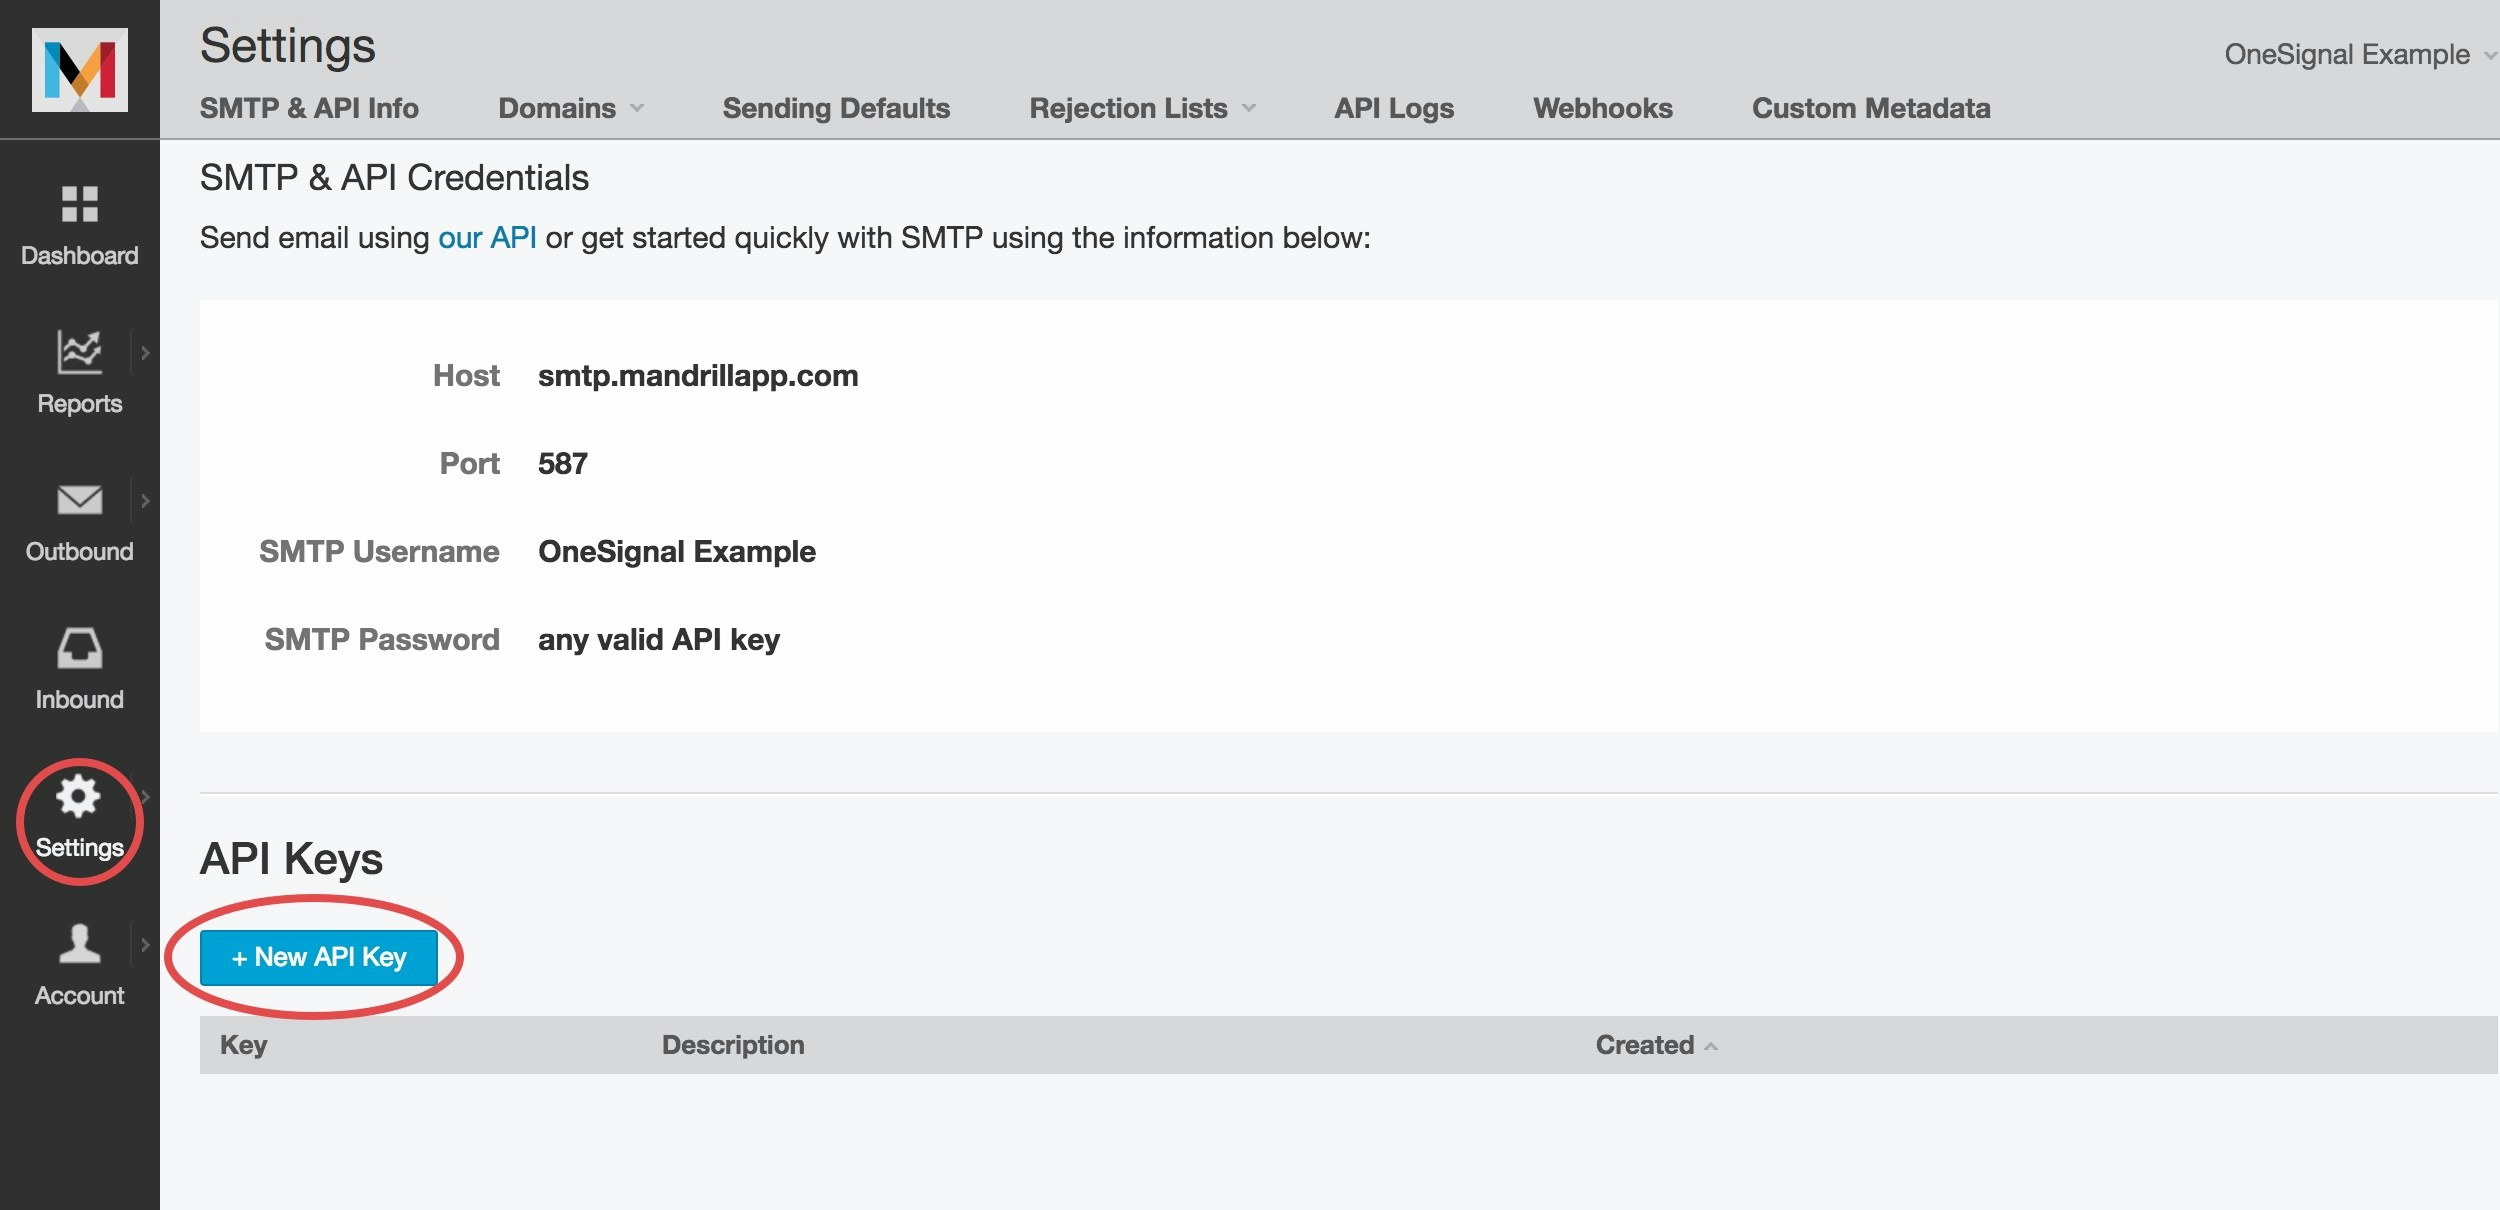
OneSignal API Key.
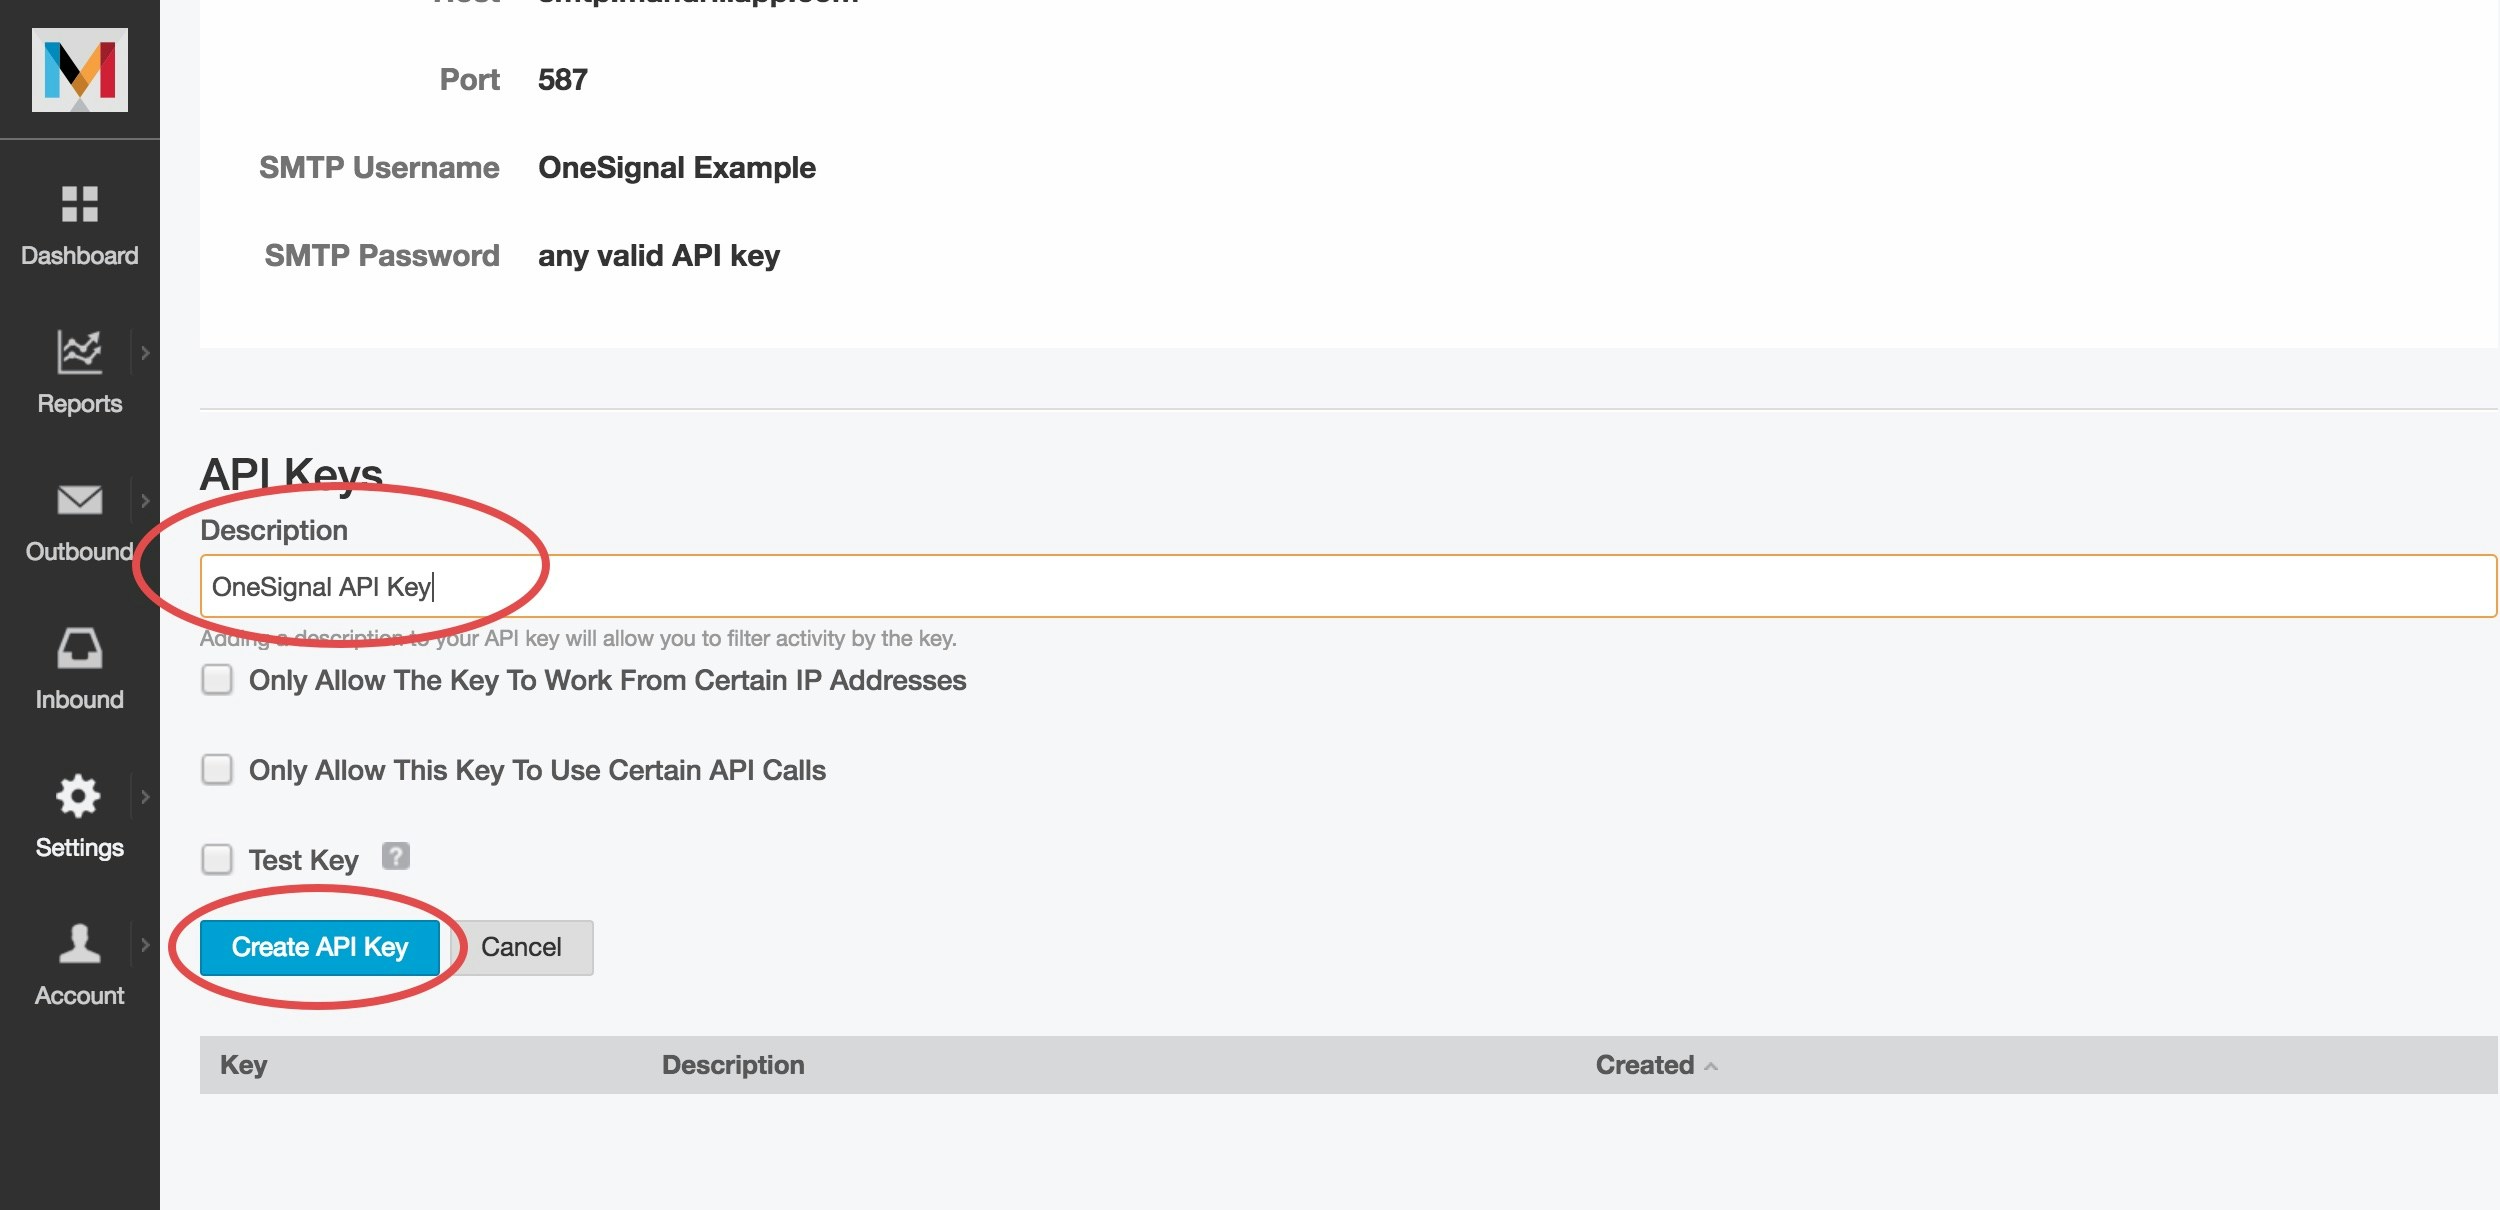
- Copy the API key securely
- Note your SMTP Username
Recommended API Key Permissions
Enable the following permissions to ensure compatibility with OneSignal: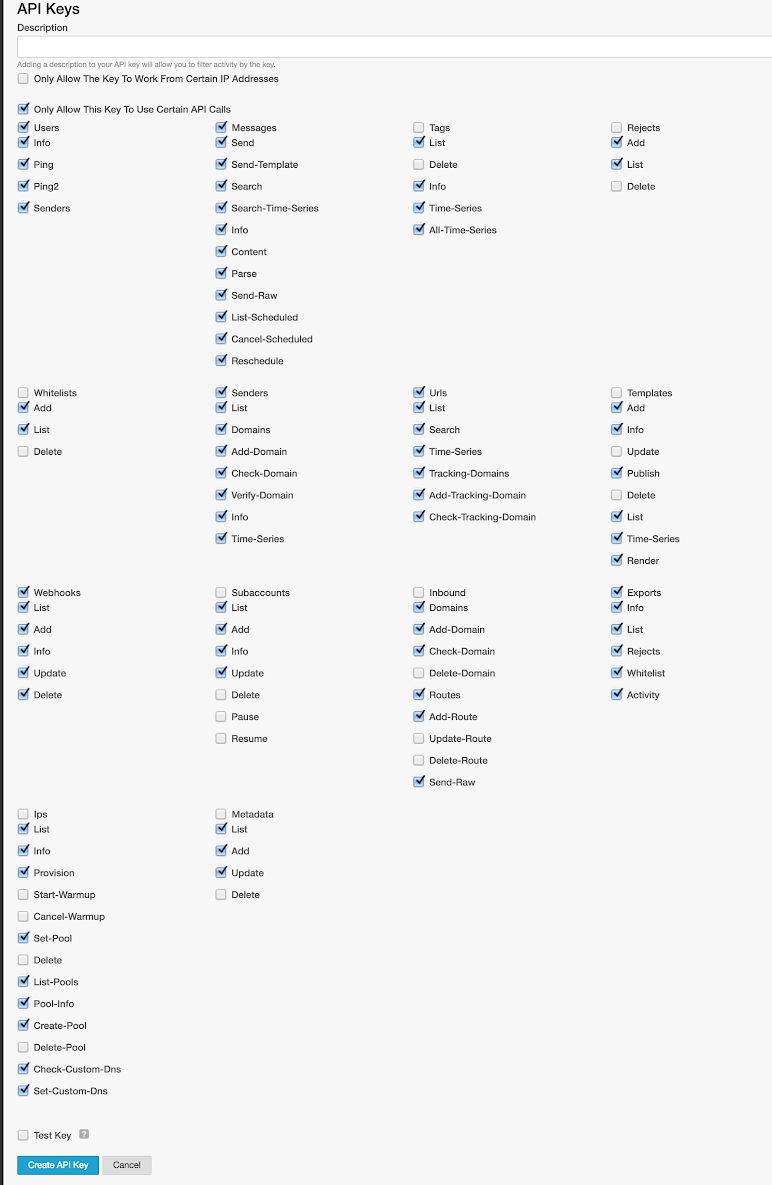
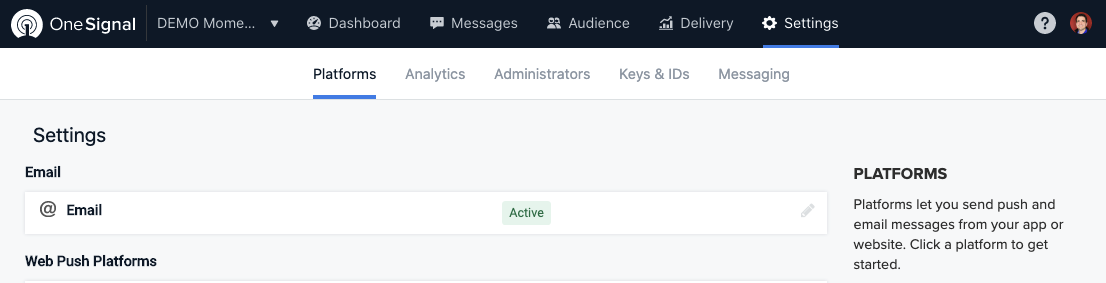
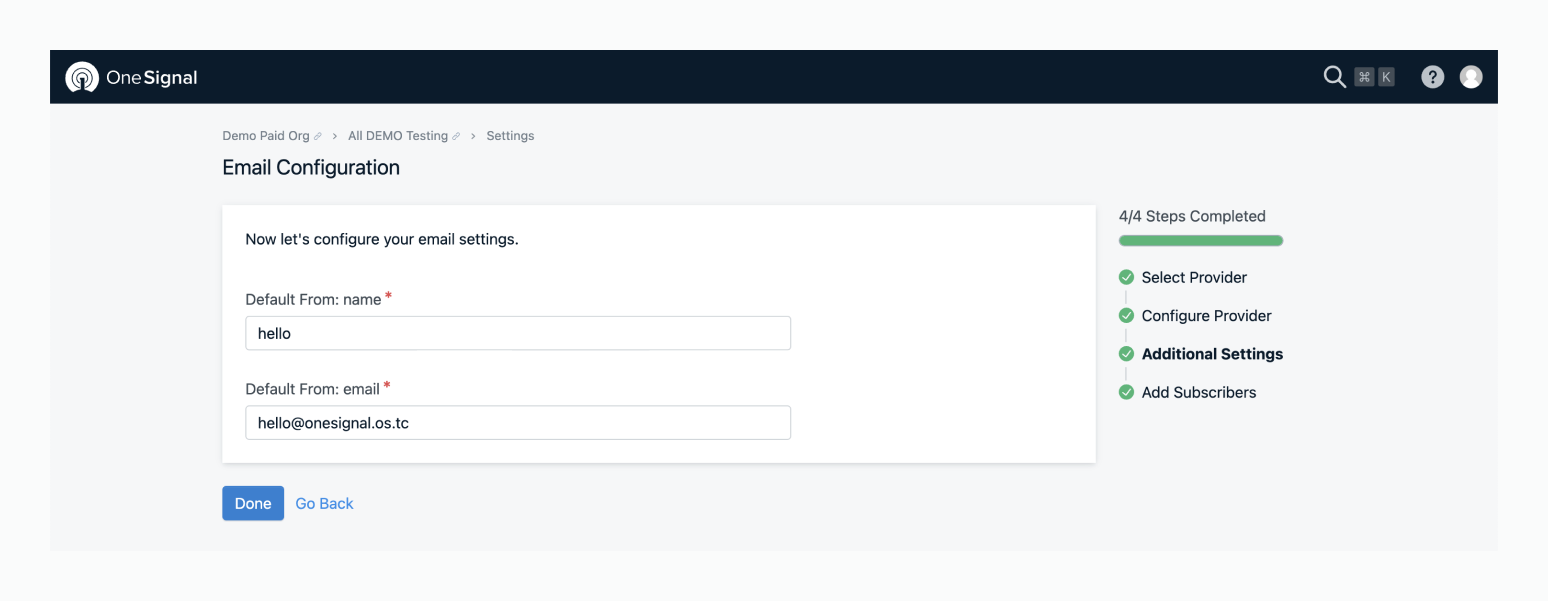
3. Enable email messaging in OneSignal
- In your OneSignal dashboard, go to Settings > Platforms > Email.
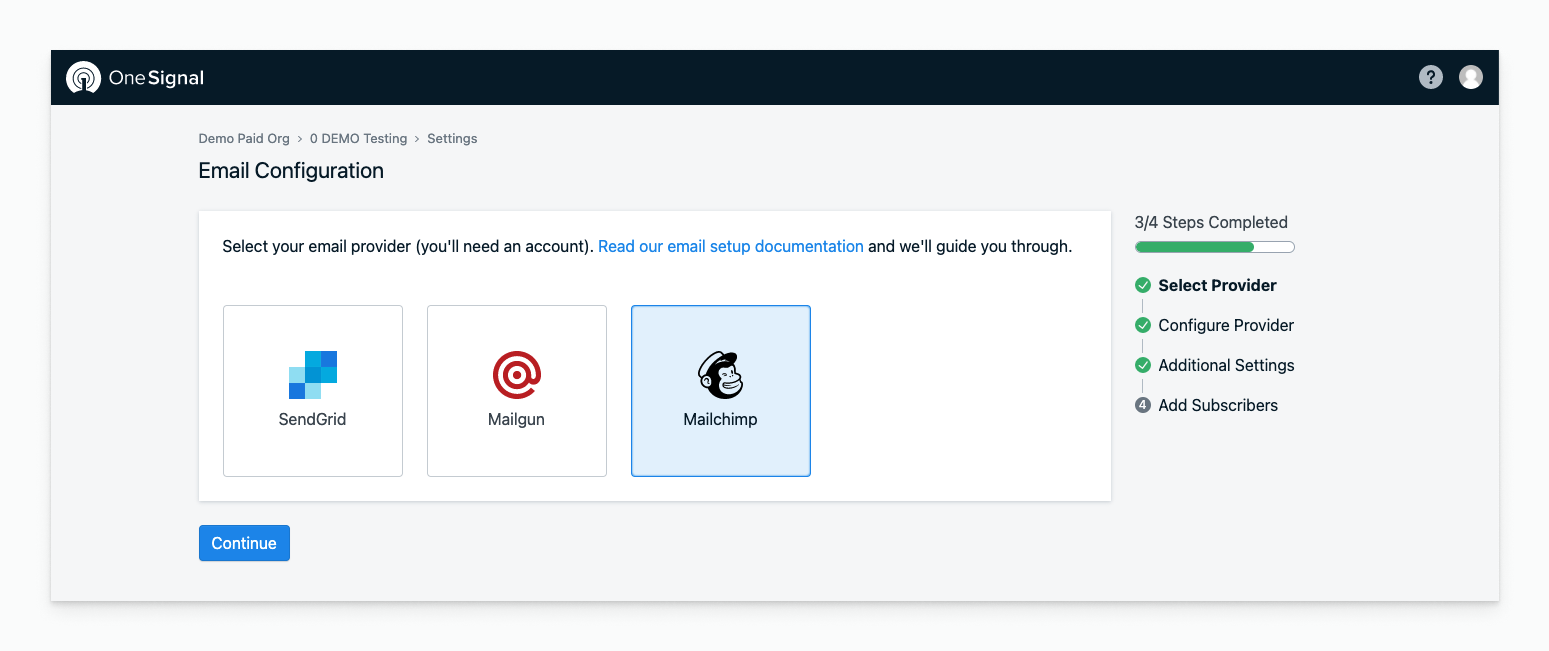
- Select Mailchimp as your provider and enter the API key and SMTP username.
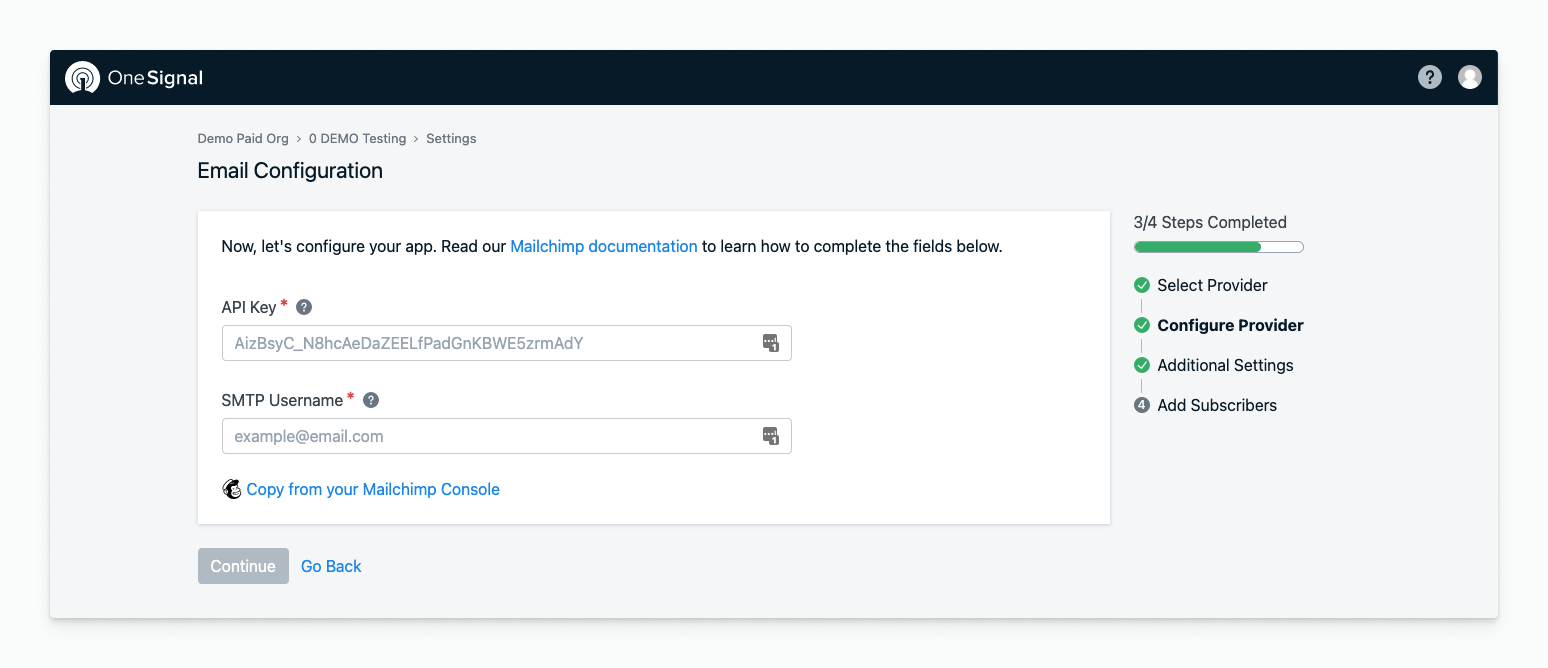
- Set your default sender name and email address.
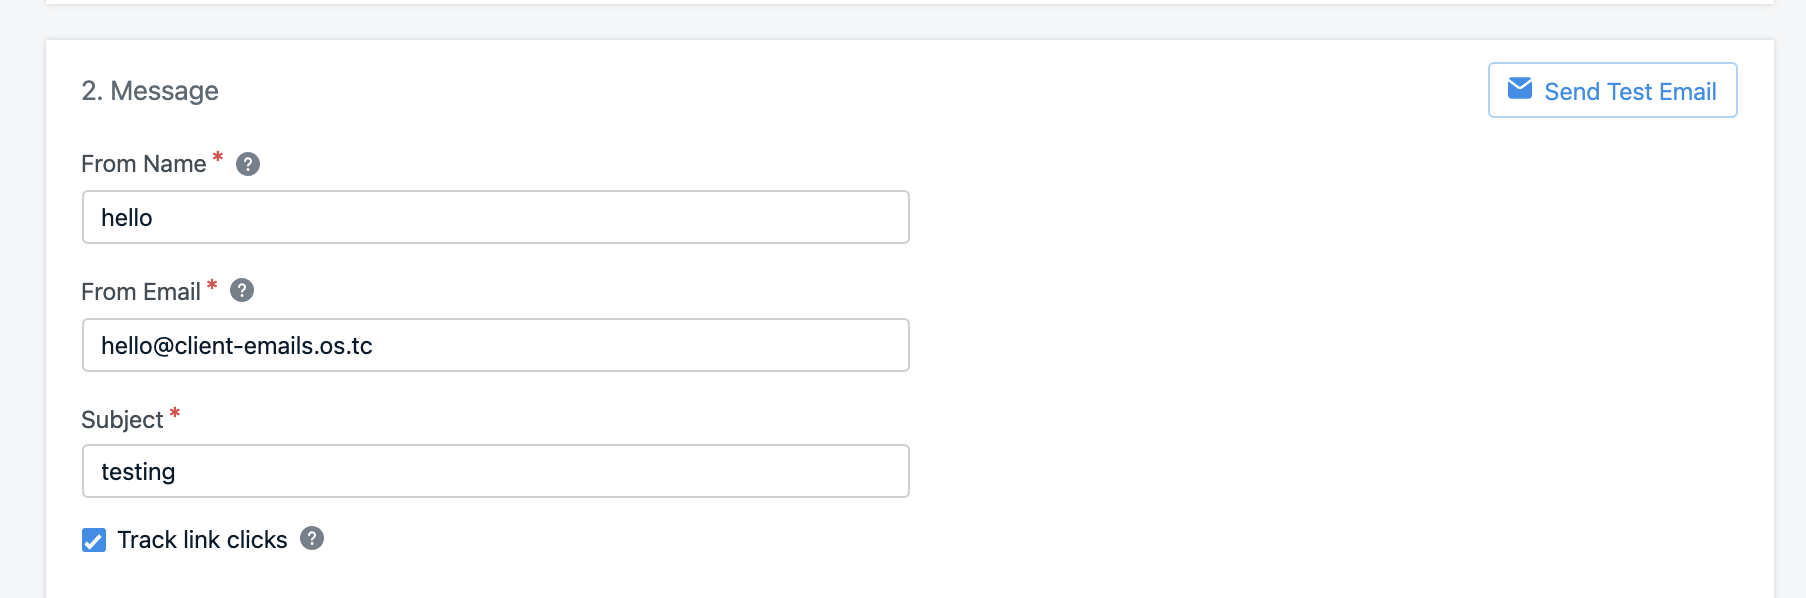
4. Send a test email
Go to OneSignal > Messages > Email and click New Email.- Add a subject line
- Click Send Test Email
- Enter your email address and click Send Test Message
Having issues? Check the Email FAQ or email
support@onesignal.com.For faster assistance, include:- Your OneSignal App ID
- Detailed issue description, logs, and screenshots
- Steps to reproduce
Optional: Generate API key from Mailchimp Dashboard
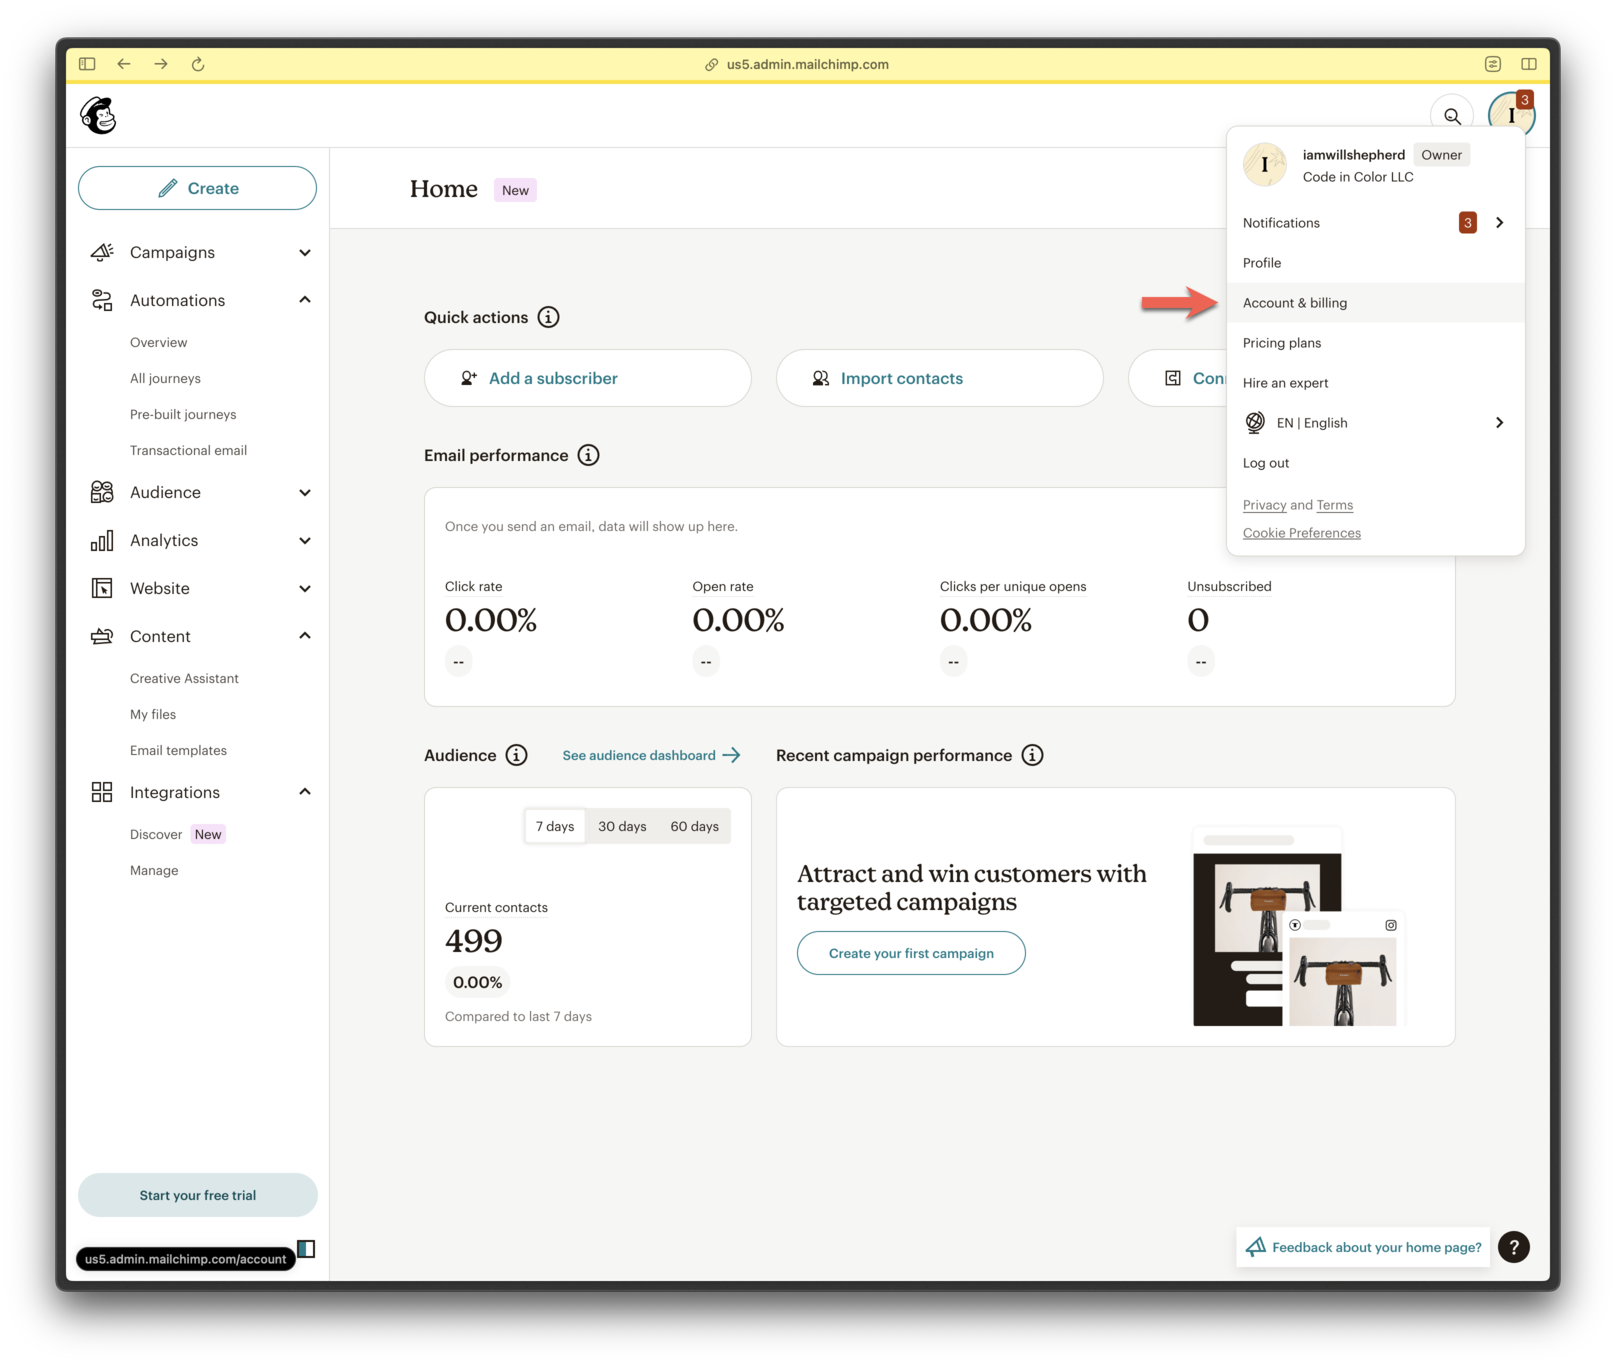
If you are generating an API key from the main Mailchimp account dashboard:- Click your avatar in the top-right corner.
- Go to Account & Billing.
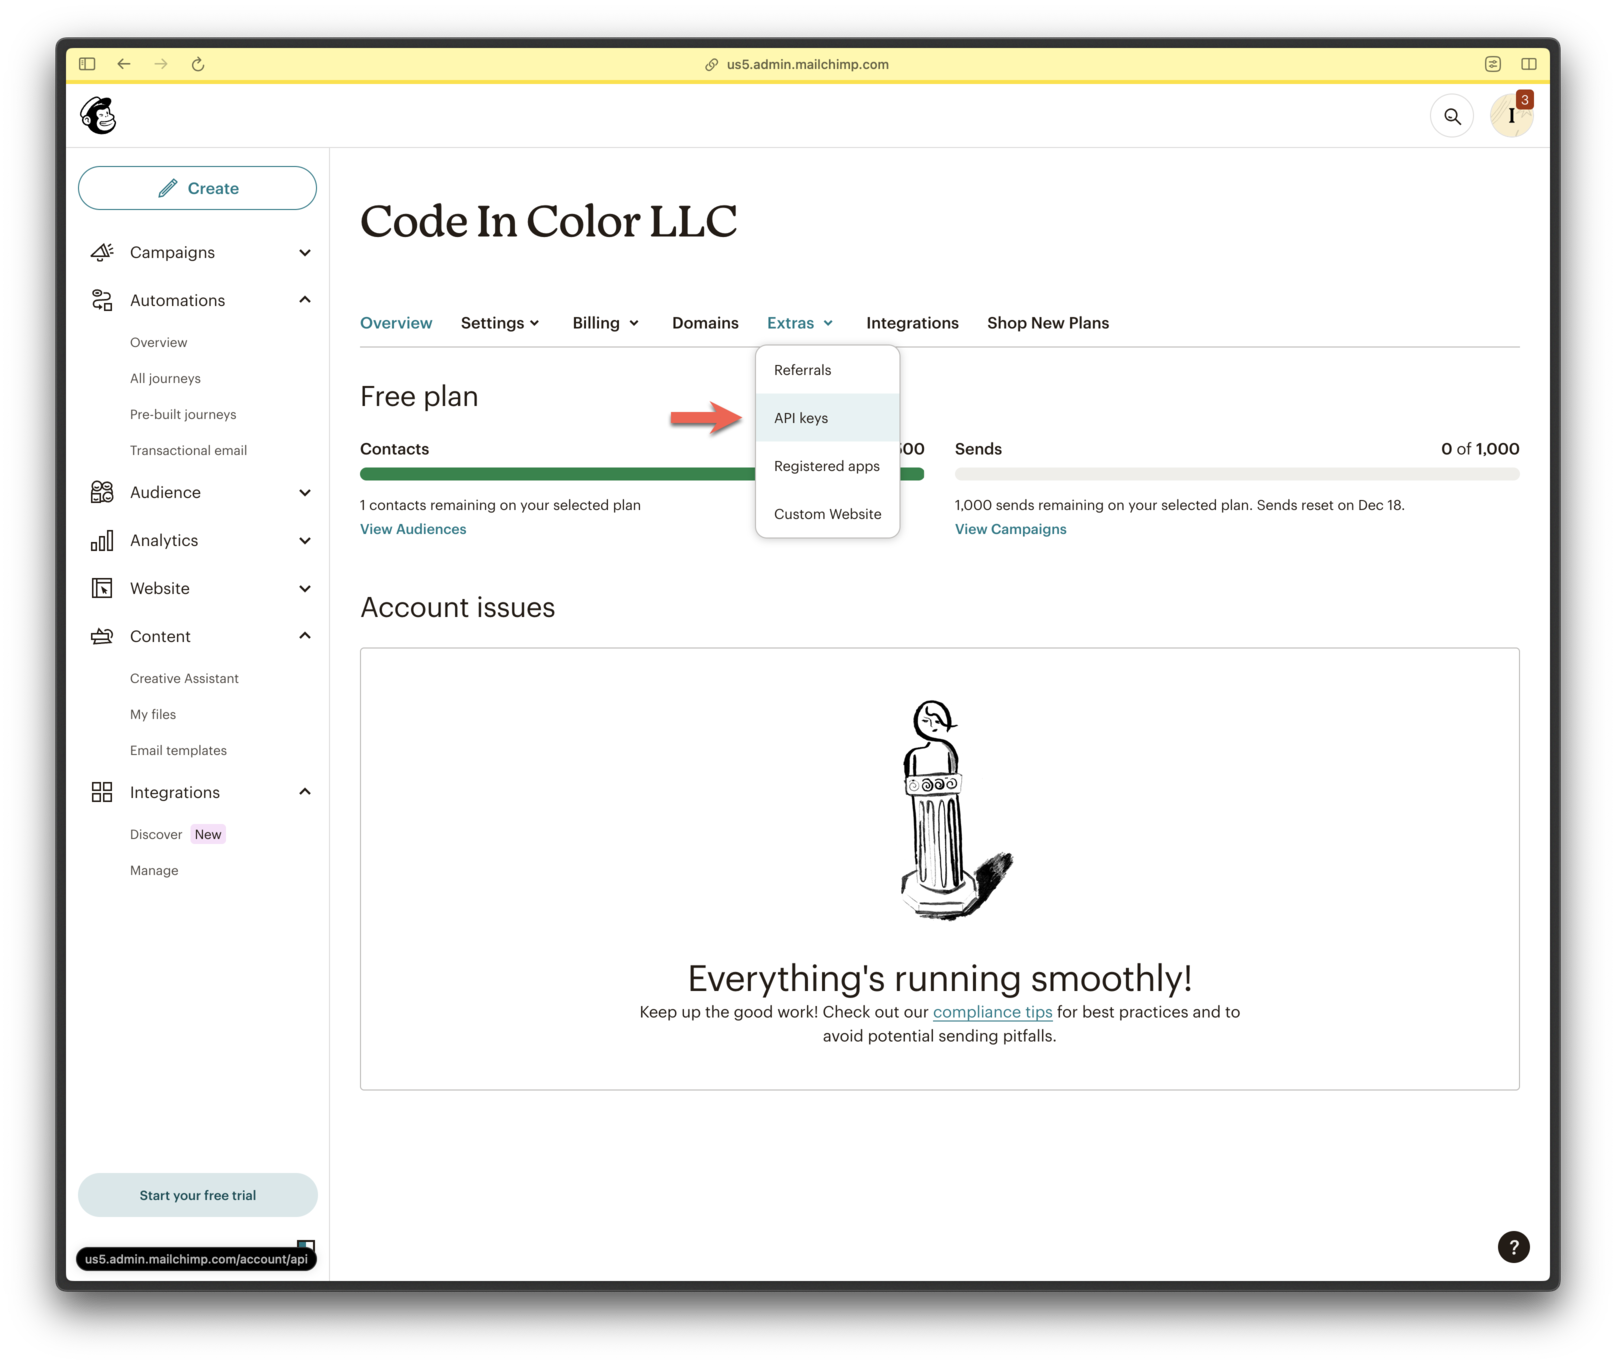
- Click Extras > API Keys.
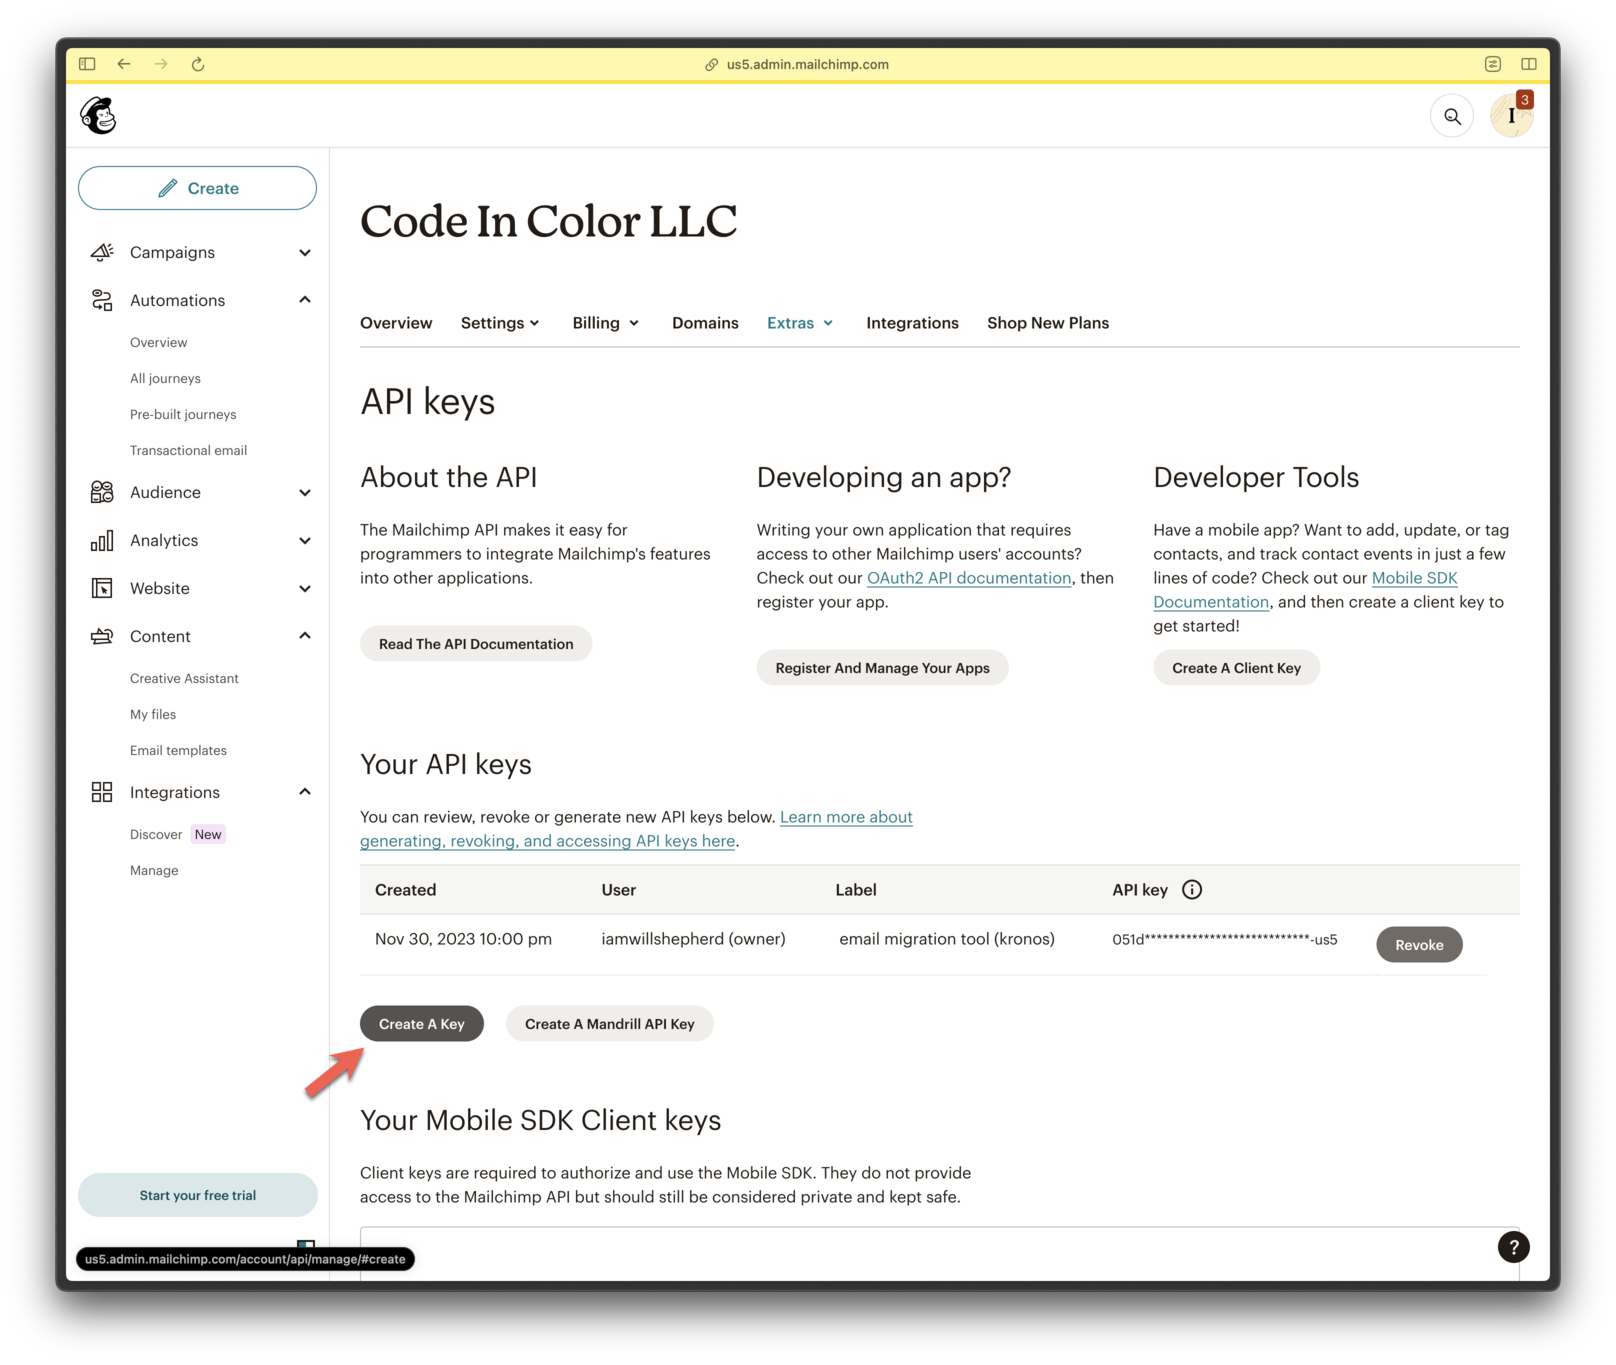
- Click Create A Key.
- Name your key and click Generate Key.
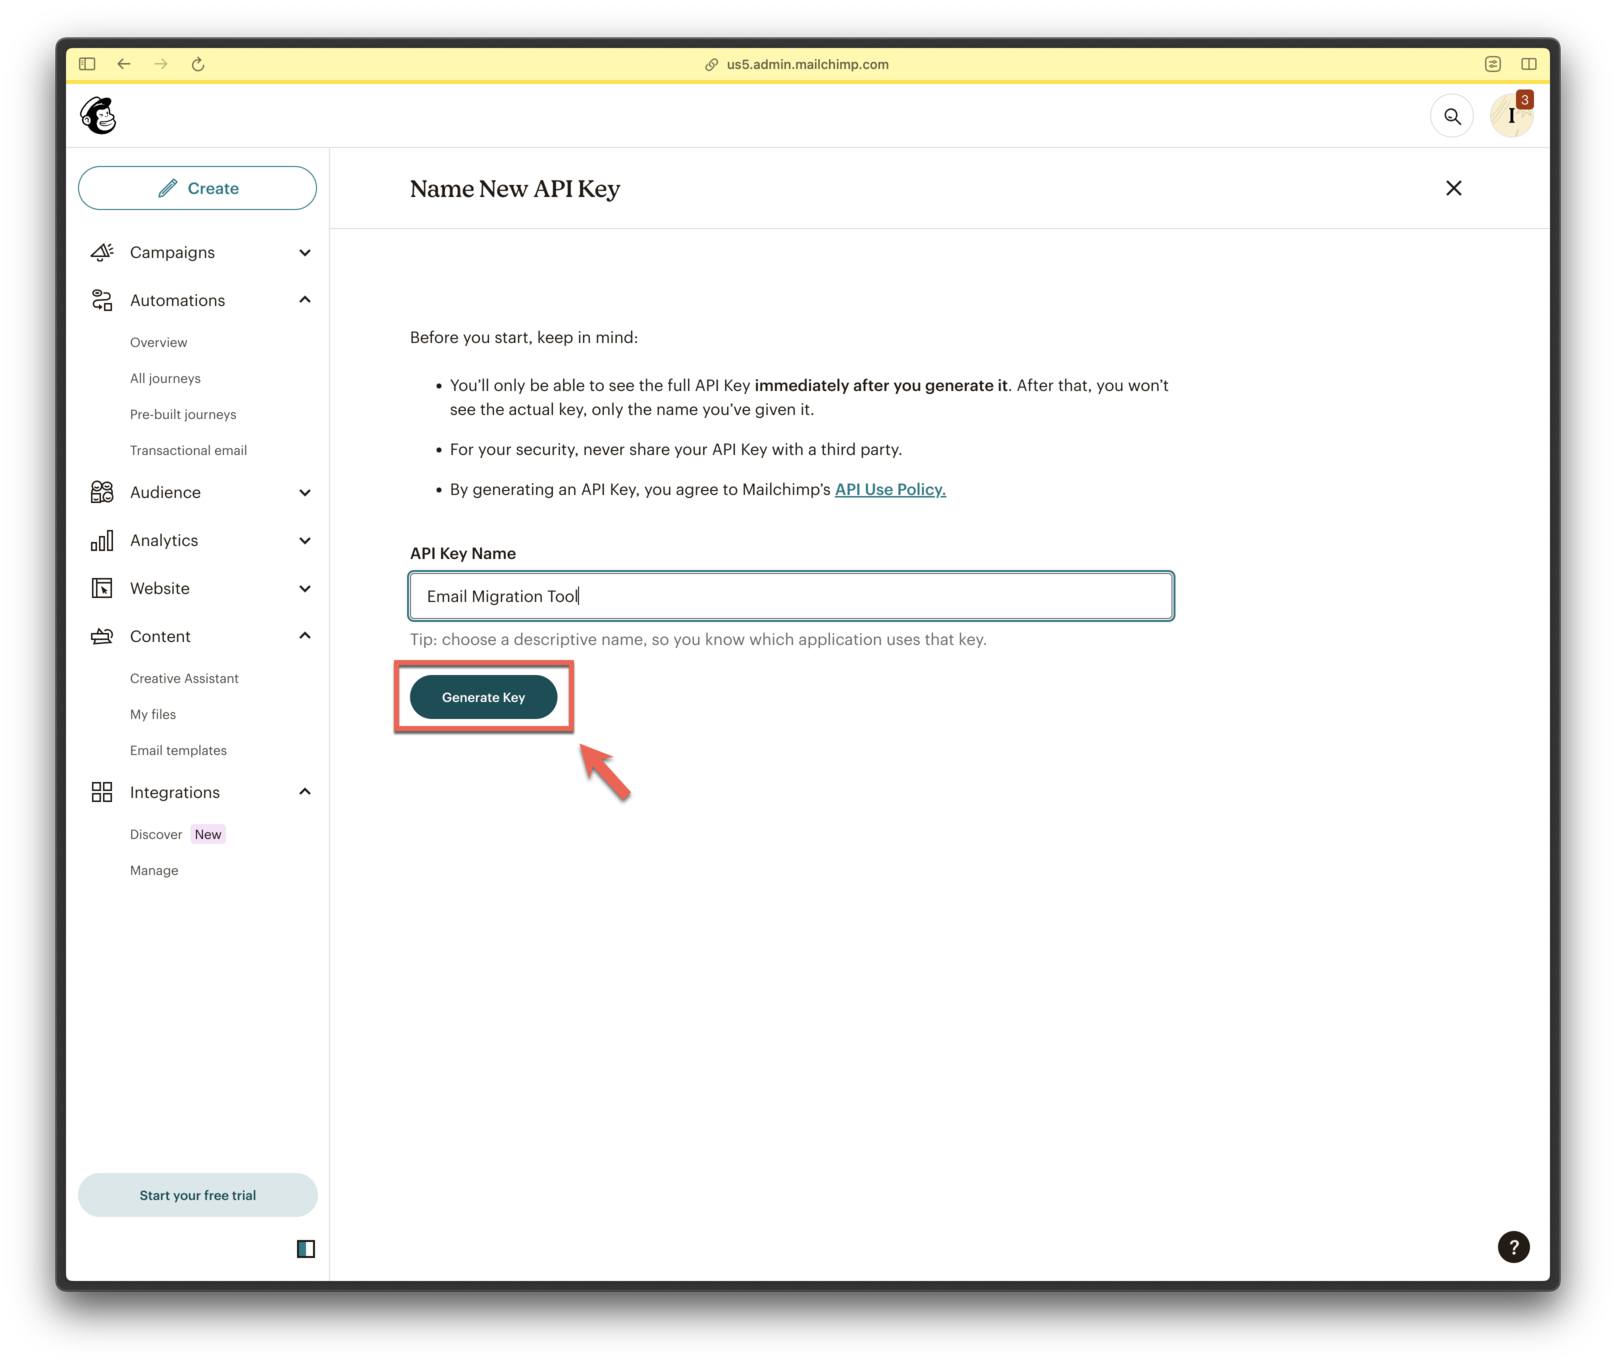
- Copy the API key securely.
✅ Email setup complete!Next steps:
- Return to the Email Setup guide to explore more OneSignal Email features.