

init options, and the service worker path in code, use Custom Code.
WordPress setup
Shopify setup
Custom Code setup
OneSignal.init().Requirements
- HTTPS website: Web push does not work on HTTP or in incognito/private modes.
- Server access: You need to upload a service worker file to your site.
- Single origin: Web push follows the Same-origin policy. If you have multiple origins (domains/subdomains), you need multiple OneSignal apps (one per origin). To comply with this browser limitation, you can either:
- Redirect traffic to a single origin for subscriptions.
- Create multiple OneSignal apps, one per origin.
Configure your OneSignal app and platform
In the OneSignal dashboard:- Go to Settings > Push & In-App > Web.
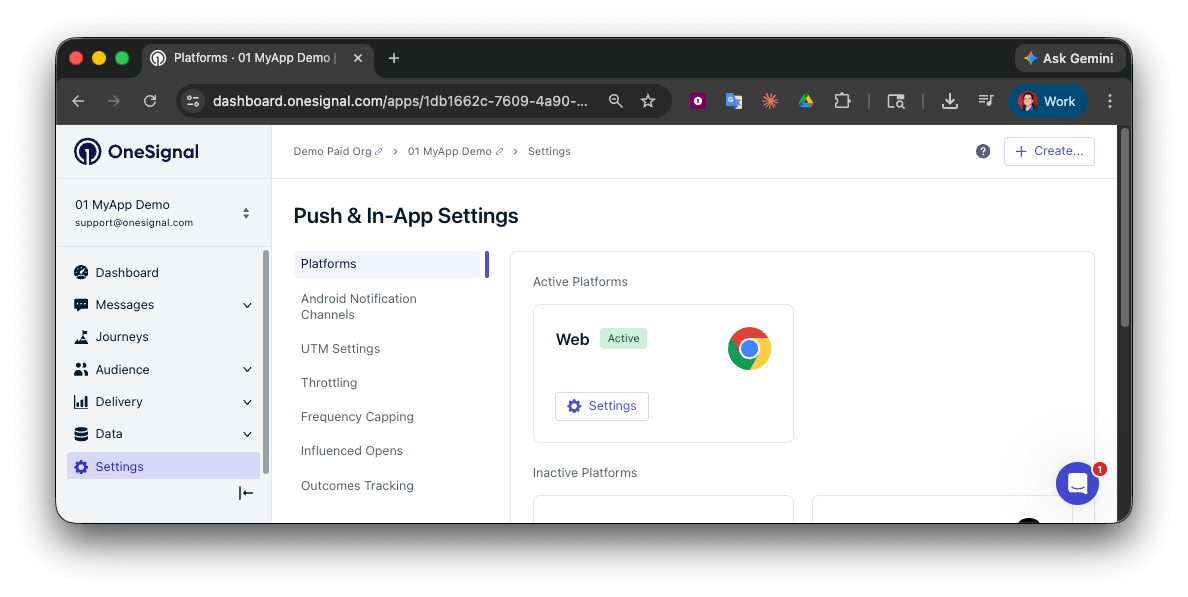
Activate the web platform in your OneSignal settings
Typical Site (recommended)
WordPress
Custom Code
Site setup
Add the site details:- Site Name: The name of your site and default notification title.
- Site URL: The URL of your site. See Site URL for more details.
- Auto Resubscribe: Enable this to automatically resubscribe users who clear their browser data when they return to your site (no new permission prompt required).
- Default Icon URL: Upload a square
256×256PNG, JPG, or non-animated GIF that appears in notifications and prompts. If not set, a bell icon is used as the default. See Notification icons.
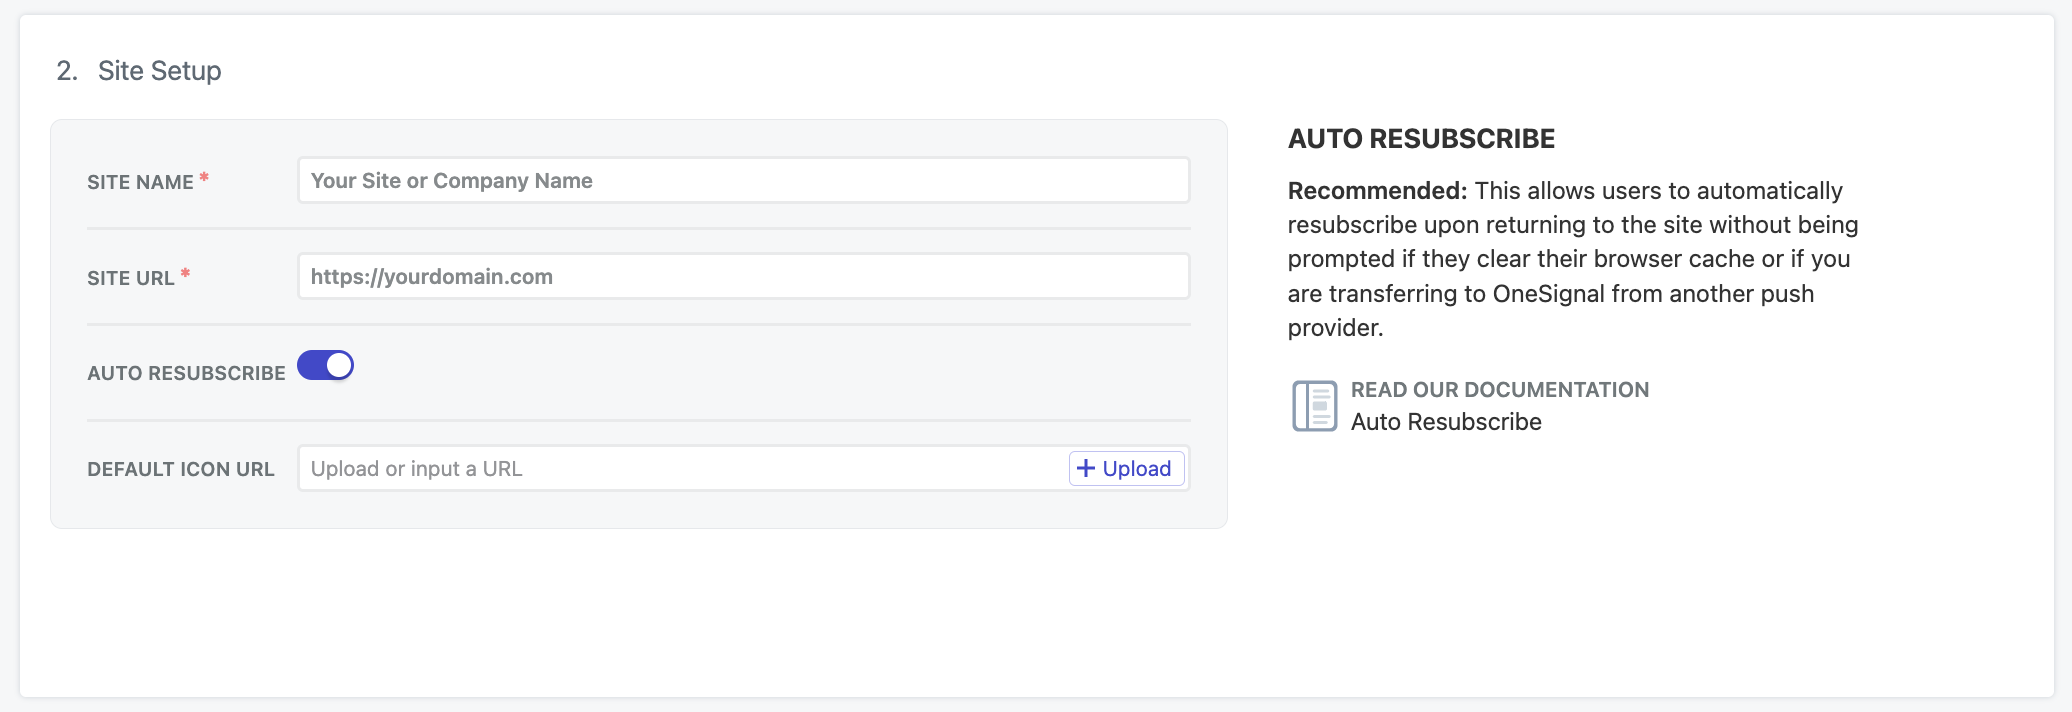
Web settings in the OneSignal dashboard
Site URL
Enter the exact origin of your site, e.g.,https://yourdomain.com. Avoid using www. if your site isn’t configured that way.
If you have multiple origins, see Requirements.
Local testing
The web SDK can be tested on localhost environments. If you are testing on localhost, use a separate OneSignal app from your production app.Localhost configuration
Localhost configuration
http://localhosthttps://localhost:3000http://127.0.0.1https://127.0.0.1:5000
http://localhost and http://127.0.0.1 as secure origins, so the SDK can initialize over HTTP on those hosts only. Other hostnames (for example http://mysite.local) are not treated as secure and cannot be used for web push testing.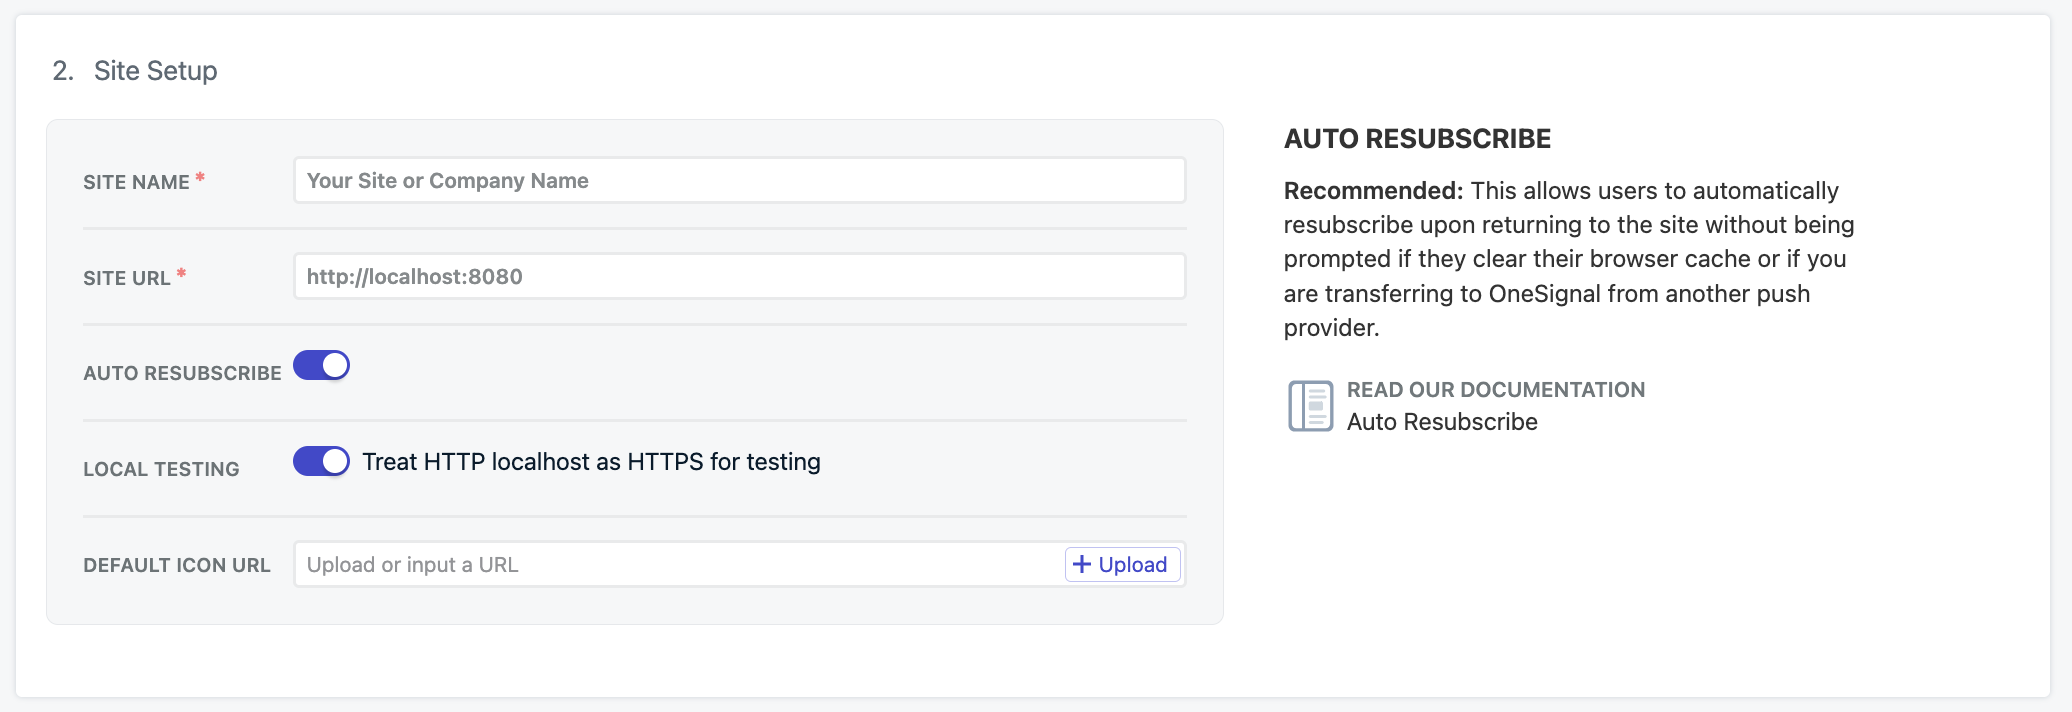
Local testing in the OneSignal dashboard
allowLocalhostAsSecureOrigin: true to your OneSignal init options when initializing on localhost.If you’re testing localhost on HTTPS with a self-signed certificate, you may have to ask Chrome to ignore invalid certificates for testing with: --allow-insecure-localhost. Firefox and Safari provide built-in mechanisms to add exceptions for security certificates.Permissions prompt
Typical site setup allows you or your team members to add, remove, and update permission prompts through the OneSignal dashboard anytime.Web permission prompts
Welcome notification (optional)
You can also set a welcome notification to be sent to users when they subscribe to push notifications. Typical Site and WordPress set this in the dashboard. Custom Code setswelcomeNotification in OneSignal.init().
To set this in the dashboard, go to Settings > Push & In-App > Web:
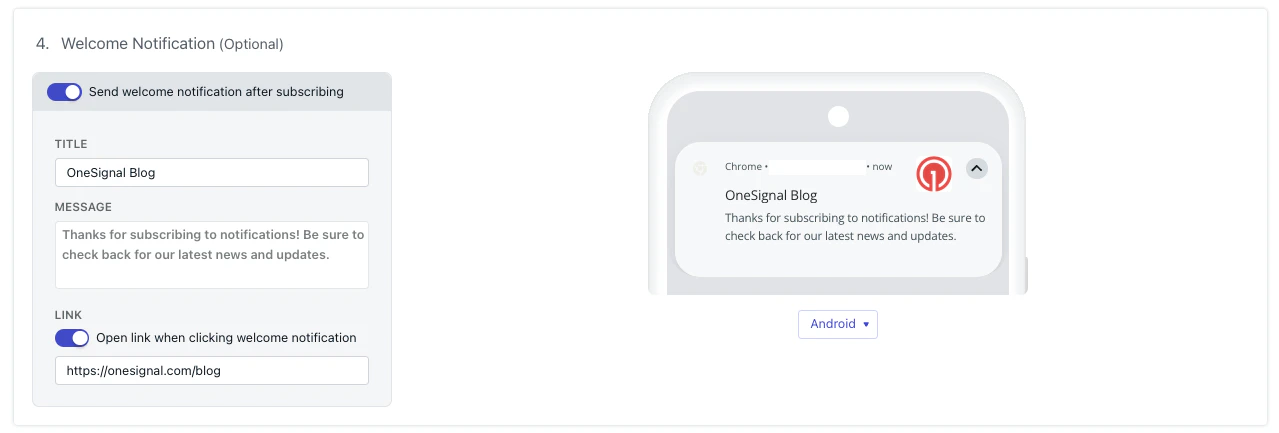
Welcome notification configuration
welcomeNotification parameters in the Web SDK reference.
Advanced settings
The following features are configurable in the OneSignal dashboard.Webhooks
The web SDK canPOST certain web push events to a URL of your choosing.
Web Push Webhooks are a separate implementation from Event Webhooks and cannot be used interchangeably.
Web push webhooks
Service workers
The Web SDK looks forOneSignalSDKWorker.js at your site root (https://yourdomain.com/OneSignalSDKWorker.js) unless you tell it a different location.
How you tell the SDK a non-root location depends on the integration type you selected.
Typical Site: Set the path in the dashboard. Do not set serviceWorkerPath in code.
If you host the file at the root, leave the default path settings. If you host it in a subdirectory, you must set the path below or the SDK still requests /OneSignalSDKWorker.js and registration fails.
- Go to Settings > Push & In-App > Web.
- Open Advanced Push Settings.
- Enable Customize service worker paths and filenames.
- Set the fields to match the file’s public URL:
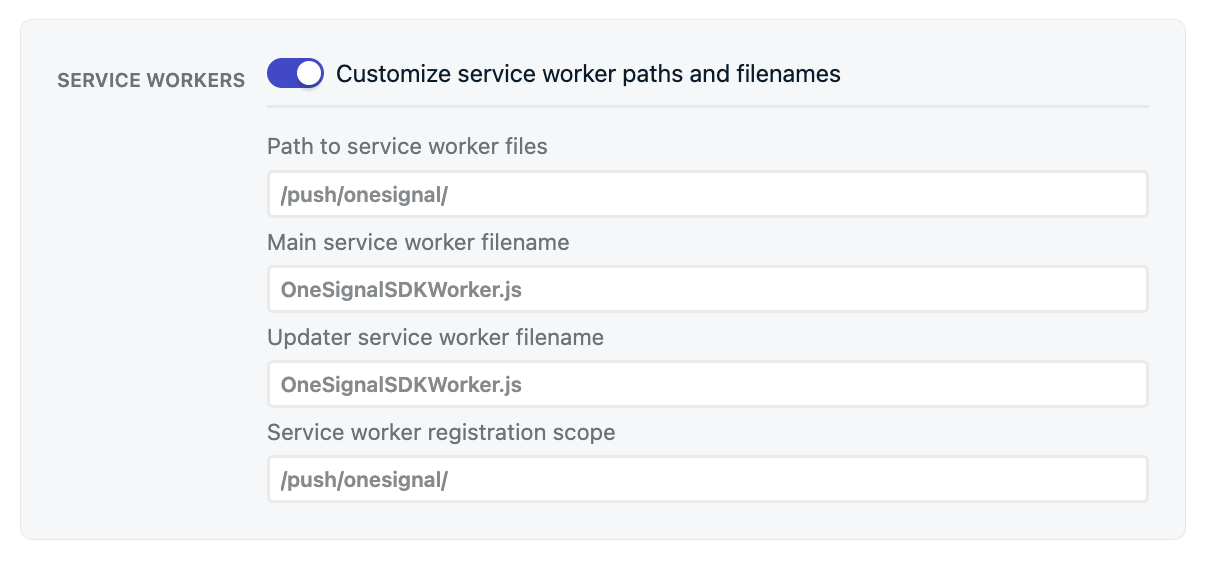
Service worker configuration
https://yourdomain.com/push/onesignal/OneSignalSDKWorker.js.
Custom Code: Do not use the dashboard path fields. Pass serviceWorkerPath and serviceWorkerParam in OneSignal.init(). See Custom Code setup for the init options, and OneSignal service worker for combining workers and migration.
Click behavior
Click behavior only changes what happens when the user already has your site open in a same-origin tab. If no matching tab is open, the browser opens a new tab to the notification URL. This setting does not change that. Click behavior works on Chrome, Edge, Firefox, and Safari. If no launch URL is set, the notification URL is your homepage. Set a launch URL to send users to a specific page, add UTM tracking, or append?_osp=do_not_open to dismiss without opening a page.
If a same-origin tab is already open, the behavior depends on the setting you choose:
URLs, links, and deep linking
?_osp=do_not_open.Action buttons
Web SDK push event listeners
Persistence
Persistence keeps the notification on screen until the user interacts with it. It works only on Chrome and Edge on desktop. Firefox, Safari, and all mobile browsers ignore it. A persistent notification can crowd out text, images, and action buttons, so you may want to disable it if this is a problem for your users. When the value is unset, the SDK currently treats persistence as on.- Typical Site: Use the Persistence toggle in Settings > Push & In-App > Web.
- Custom Code: Set
persistNotificationinOneSignal.init(). The dashboard toggle does not apply. SeepersistNotification.
Safari Web Push .p12 certificate (optional, legacy)
Leave this off unless you already have your own Safari Web Push.p12 certificate and want to support legacy Safari users.
Modern Safari (macOS 13+ and iOS 16.4+) uses standards-based Web Push with VAPID (Voluntary Application Server Identification). OneSignal handles VAPID automatically. You do not upload a certificate for those browsers.
Apple does not offer a .p8 token or key for Safari web push. Native iOS and macOS apps use a .p8 to authenticate with APNs. Safari web push does not. The only Apple credential that applies to Safari is a Safari Web Push .p12 certificate, and only for the legacy Website Push ID path.
That legacy path still applies to:
- Safari on macOS 12 and earlier (no VAPID)
- Existing subscribers who already granted permission through the older Safari API (Safari does not migrate those subscriptions to VAPID)
.p12 file and its password. Typical Site and Custom Code both set this in the dashboard. You do not set it in OneSignal.init().
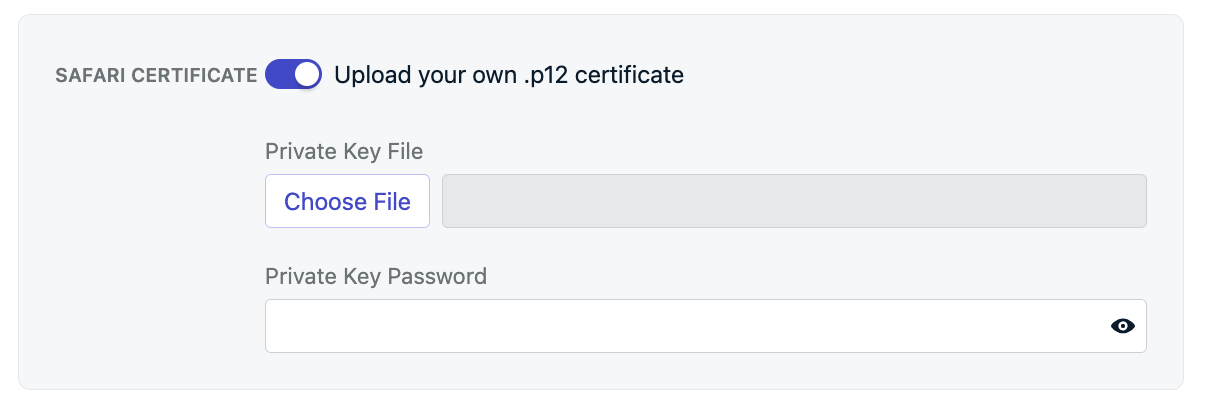
Safari Web Push .p12 certificate (optional, legacy)
Upload service worker file
Add theOneSignalSDKWorker.js service worker file to your site.
Download it from the OneSignal dashboard, or create a file named OneSignalSDKWorker.js with this single line:
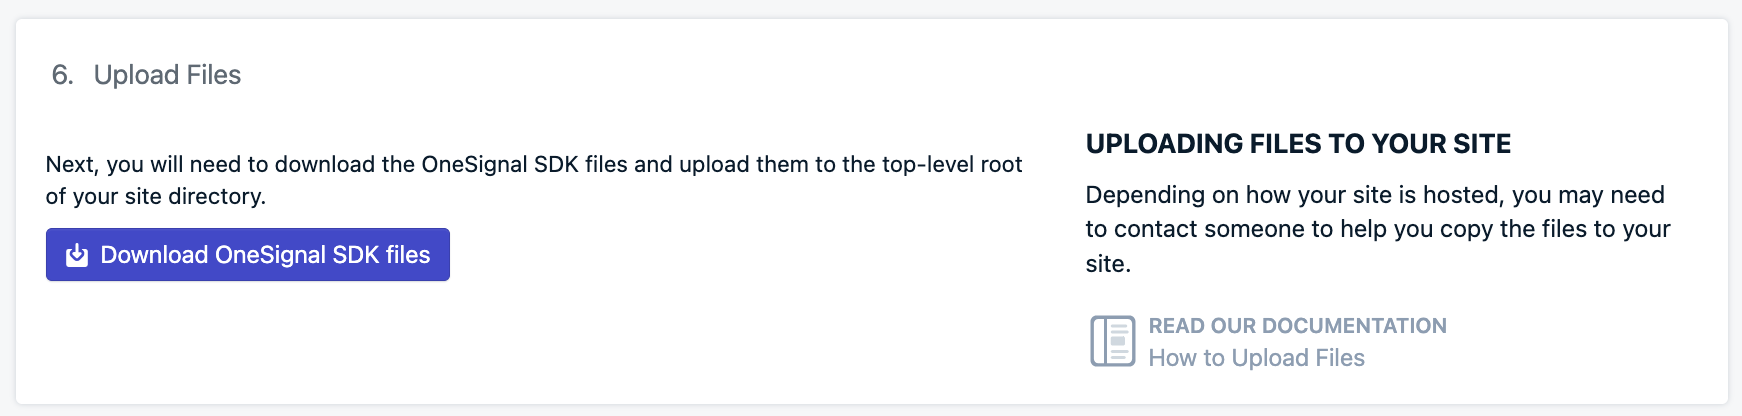
Upload service worker file step
OneSignal.init() instead. See Custom Code setup.
Root (default): Upload the file so it is available at https://yourdomain.com/OneSignalSDKWorker.js. Leave the service worker path settings unchanged. The SDK requests this URL automatically.
Subdirectory: If your site already has a service worker (for example a PWA), put OneSignal’s file in a subdirectory such as /push/onesignal/ so it does not conflict with the worker that owns /. Then tell the SDK where to look: follow Service workers and enable Customize service worker paths and filenames. Set Path to service worker files and Service worker registration scope to that subdirectory (for example /push/onesignal/). The file must be publicly accessible at https://yourdomain.com/push/onesignal/OneSignalSDKWorker.js.
Once the file is on your server, check the following to make sure it works:
Verify the location
- Default:
https://yourdomain.com/OneSignalSDKWorker.js - Subdirectory example:
https://yourdomain.com/push/onesignal/OneSignalSDKWorker.js
It must be publicly accessible on your origin
OneSignalSDKWorker.js file must be publicly accessible and available on your origin. It cannot be hosted via a CDN or placed on a different origin with redirect.When you visit the URL to the file, you should see the code.It must be served with a content-type: application/javascript
OneSignal service worker
Add code to your site
To initialize OneSignal on your site with the JavaScript SDK, copy the provided code into your website’s<head> tags. The OneSignal dashboard provides this same snippet pre-filled with your app ID.
If you load scripts with Google Tag Manager, stop here and follow Google Tag Manager setup. That guide uses this dashboard and service worker work, then initializes the SDK in GTM instead of pasting the snippet below.
iOS web push support
Apple started supporting web push notifications on iPhones and iPads running iOS 16.4+. Unlike Android devices, where web push works in a supported browser without extra setup, Apple requires amanifest.json file and a user action to add your site to their Home Screen.
iOS web push setup
manifest.json file and guide users to add your site to their home screen.Testing the OneSignal SDK integration
Verify that your OneSignal SDK integration is working by testing push notifications and subscription registration.Check web push subscriptions
Launch your site on a test device.
- Use Chrome, Firefox, Edge, or Safari while testing.
- Do not use Incognito or private browsing mode. Users cannot subscribe to push notifications in these modes.
- The prompts should appear based on your permission prompts configuration.
- Click Allow on the native prompt to subscribe to push notifications.
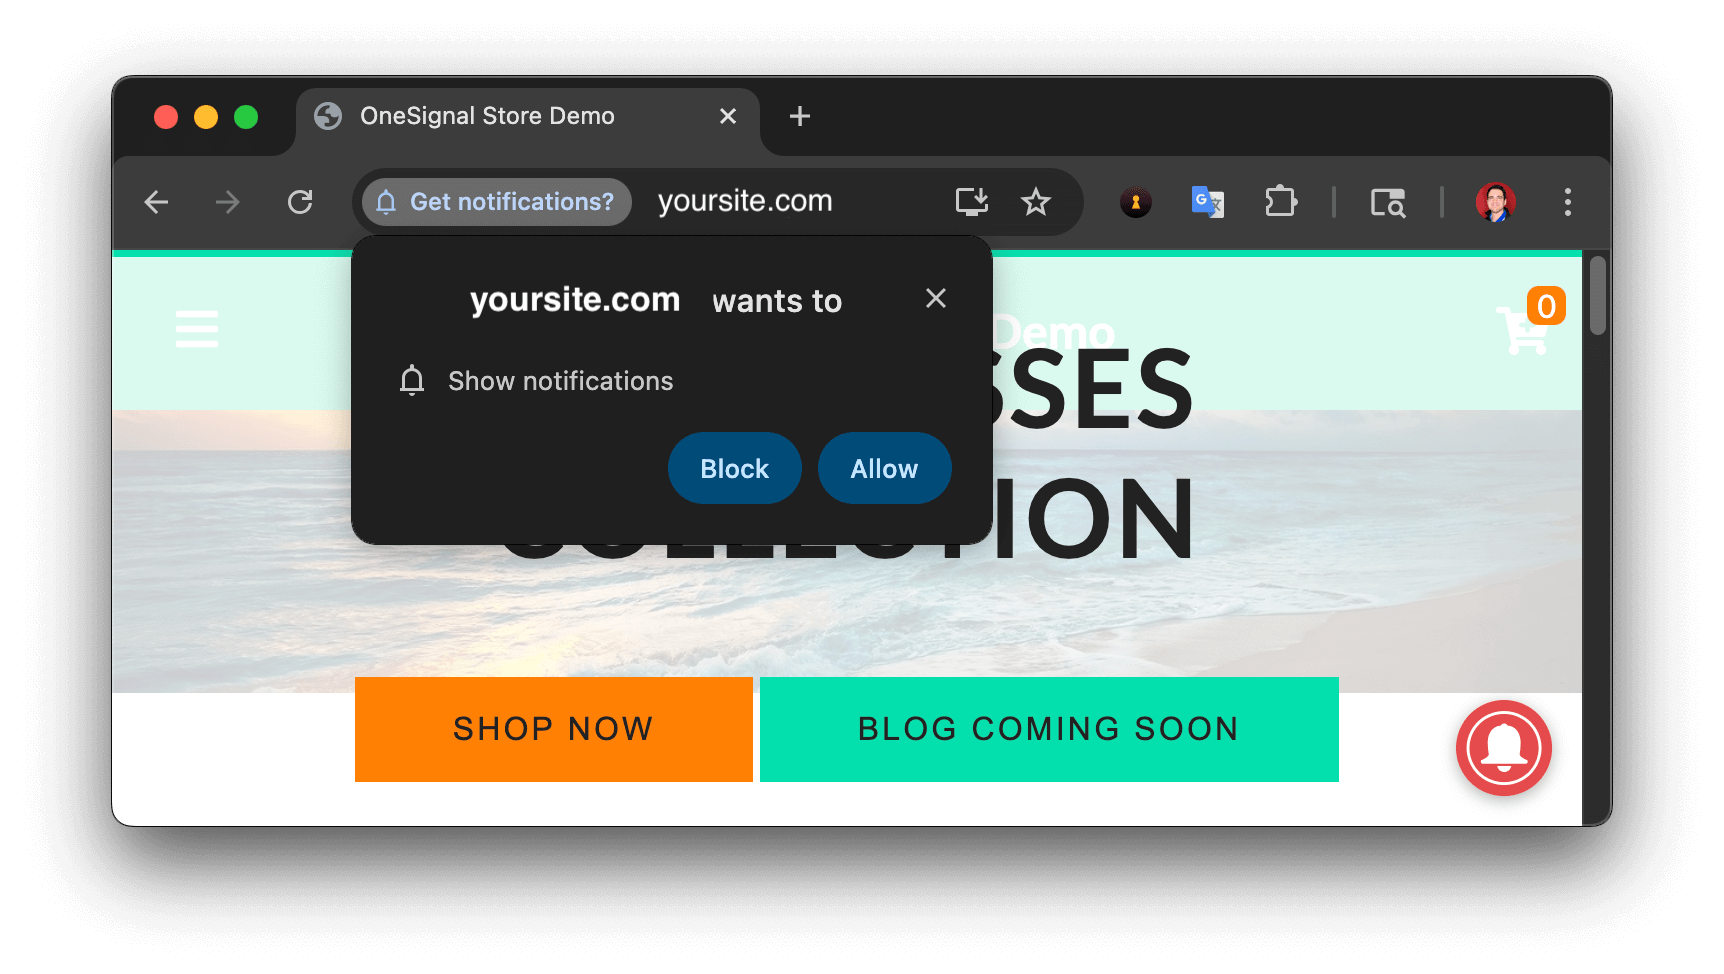
Web push native permission prompt
Check your OneSignal dashboard
- Go to Audience > Users & subscriptions > Subscriptions.
- You should see a new entry with the status Subscribed.
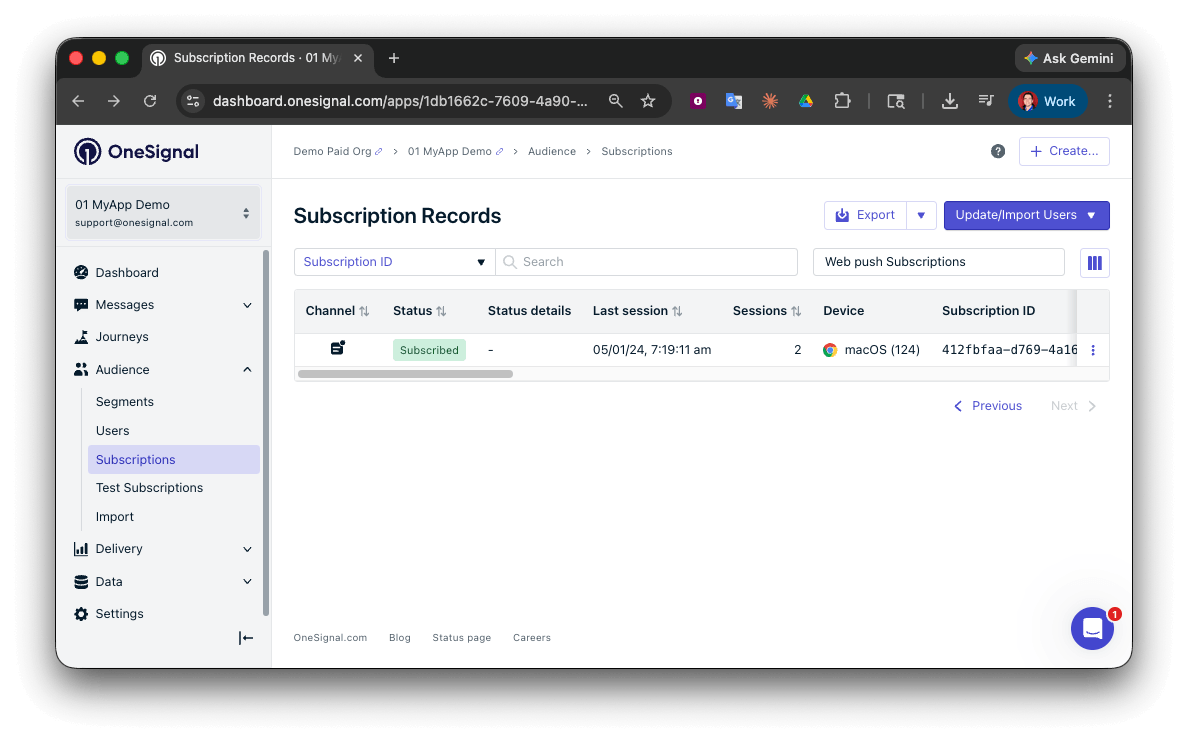
Dashboard showing subscription with 'Subscribed' status
Set up test users
Test users are helpful for testing a push notification before sending a message.Add to Test Users.

Adding a device to Test Users
Name your subscription.
Create a test users segment.
Name the segment.
Test Users (the name is important because it will be used later).Add the Test Users filter and click Create Segment.
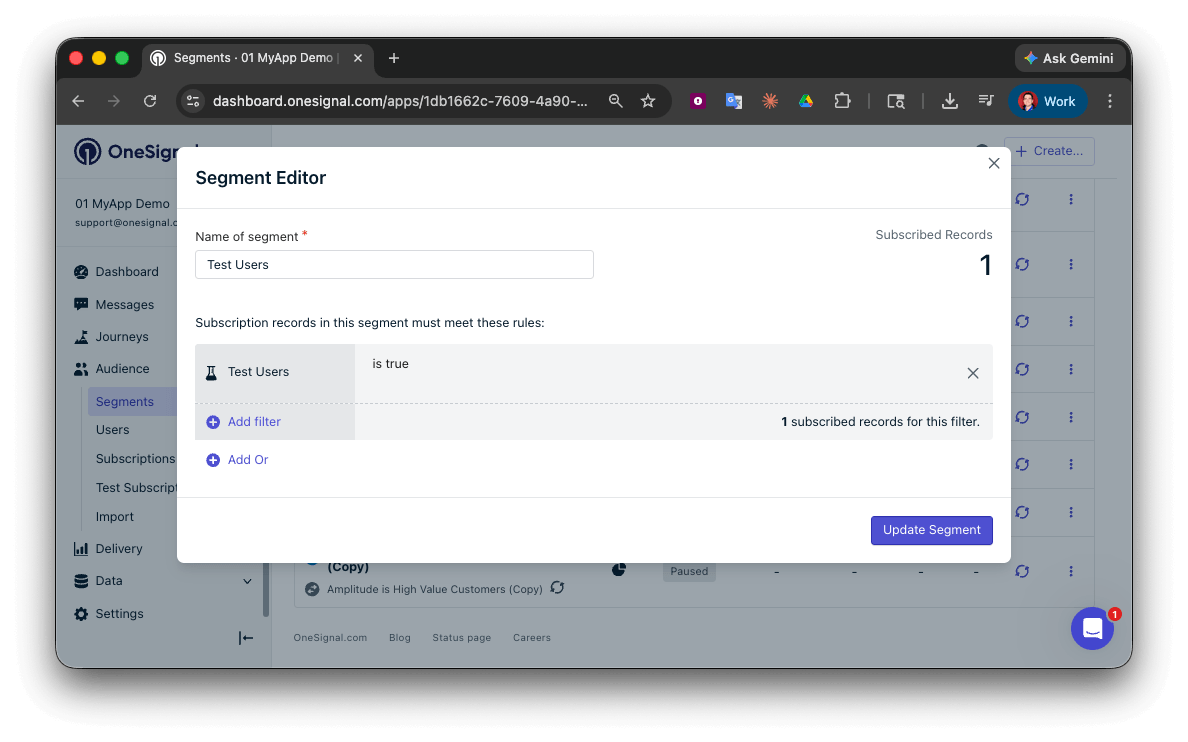
Creating a 'Test Users' segment with the Test Users filter
Send test push via API
Get your App API Key and App ID.
Update the provided code.
YOUR_APP_API_KEY and YOUR_APP_ID in the code below with your actual keys. This code uses the Test Users segment created earlier.Run the code.
Check images and confirmed receipt.
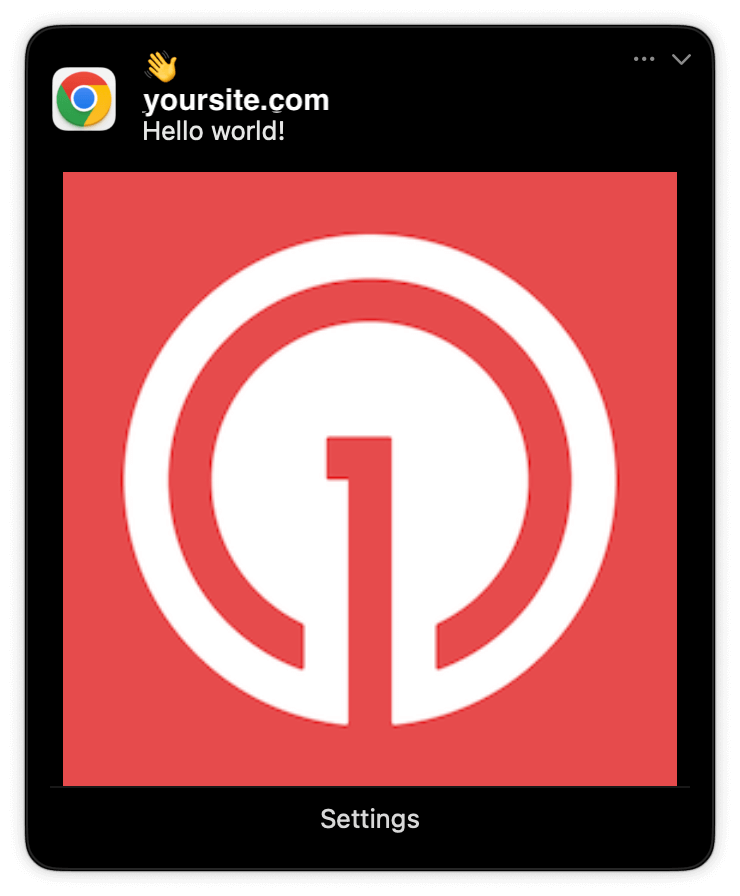
Expanded push notification with image on Chrome macOS
Check for confirmed receipt.
Push notification message reports
support@onesignal.com with the following:
- The API request and response (copy-paste into a
.txtfile) - Your Subscription ID
- Your website URL with the OneSignal code
User identification
The previous section covered creating web push Subscriptions. This section expands to identifying Users across all their subscriptions (including push, email, and SMS) using the OneSignal SDK. It covers External IDs, tags, multi-channel subscriptions, privacy, and event tracking to help you unify and engage users across platforms.Assign External ID
Use an External ID to identify users consistently across devices, email addresses, and phone numbers using your backend’s user identifier. This ensures your messaging stays unified across channels and 3rd party systems (especially important for Integrations). Set the External ID with the SDK’slogin method each time a user is identified by your app.
Add Tags
Tags are key-value pairs of string data you can use to store user properties (likeusername, role, or preferences) and events (like purchase_date, game_level, or user interactions). Tags power advanced Message Personalization and Segmentation allowing for more advanced use cases.
Set tags with the SDK’s addTag and addTags methods as events occur in your app.
In this example, the user reached level 6 identifiable by the tag called current_level set to a value of 6.
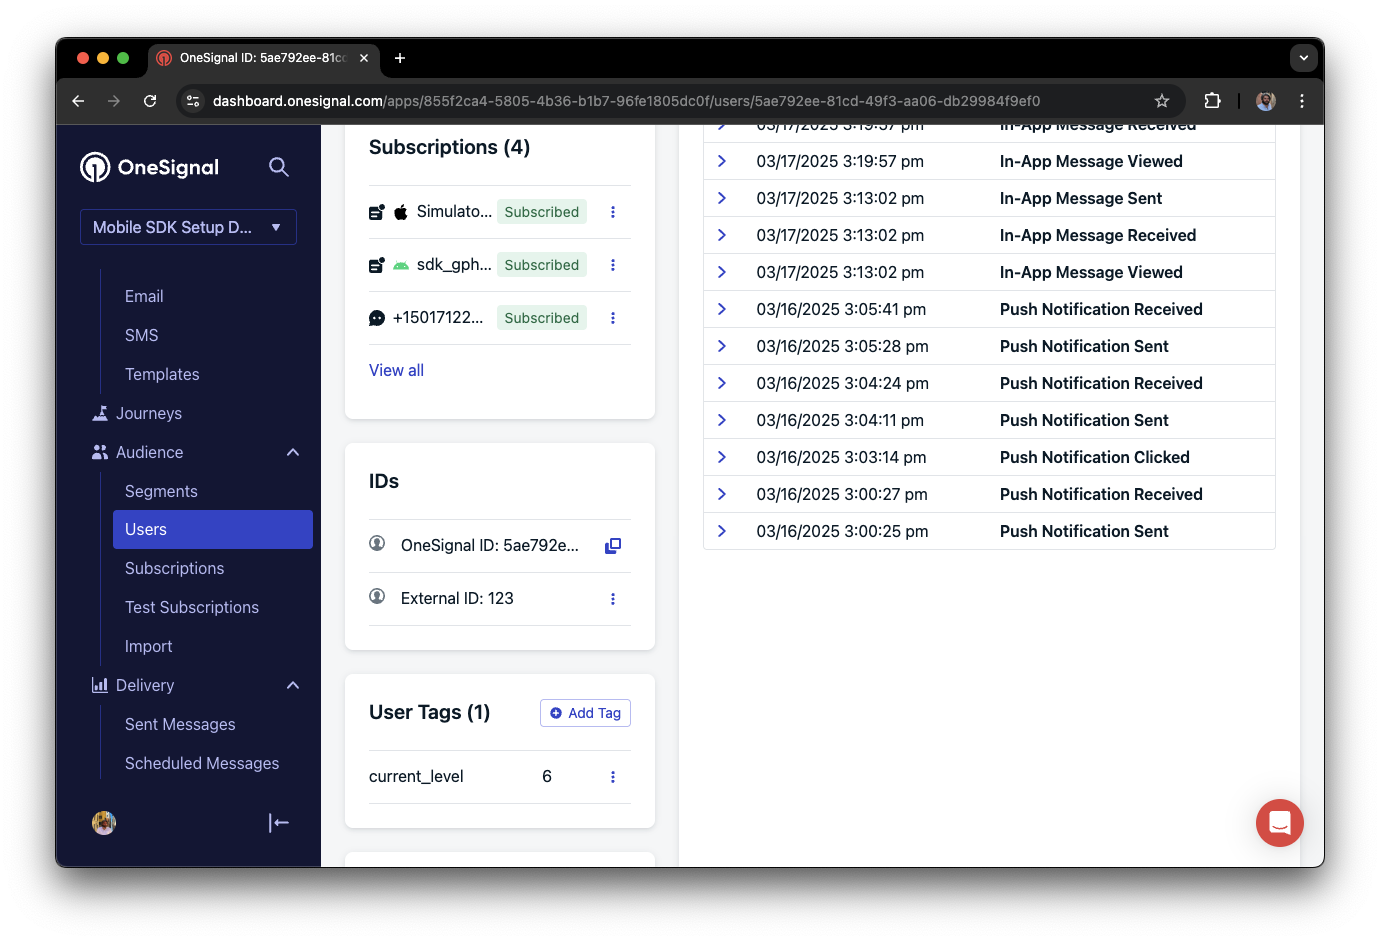
A user profile in OneSignal with a tag called "current_level" set to "6"
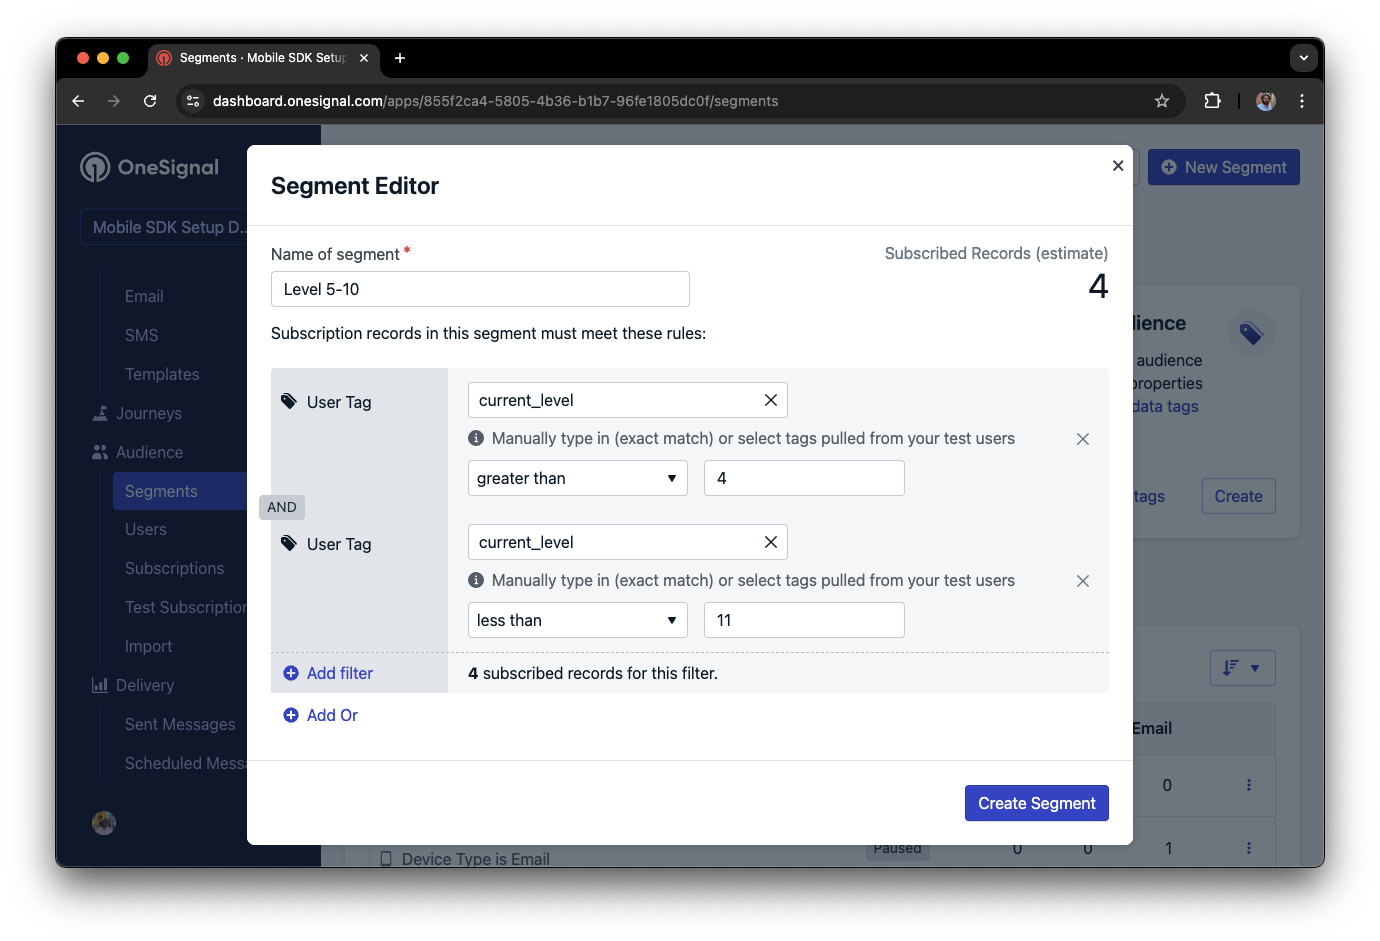
Segment editor showing a segment targeting users with a current_level value of greater than 4 and less than 10
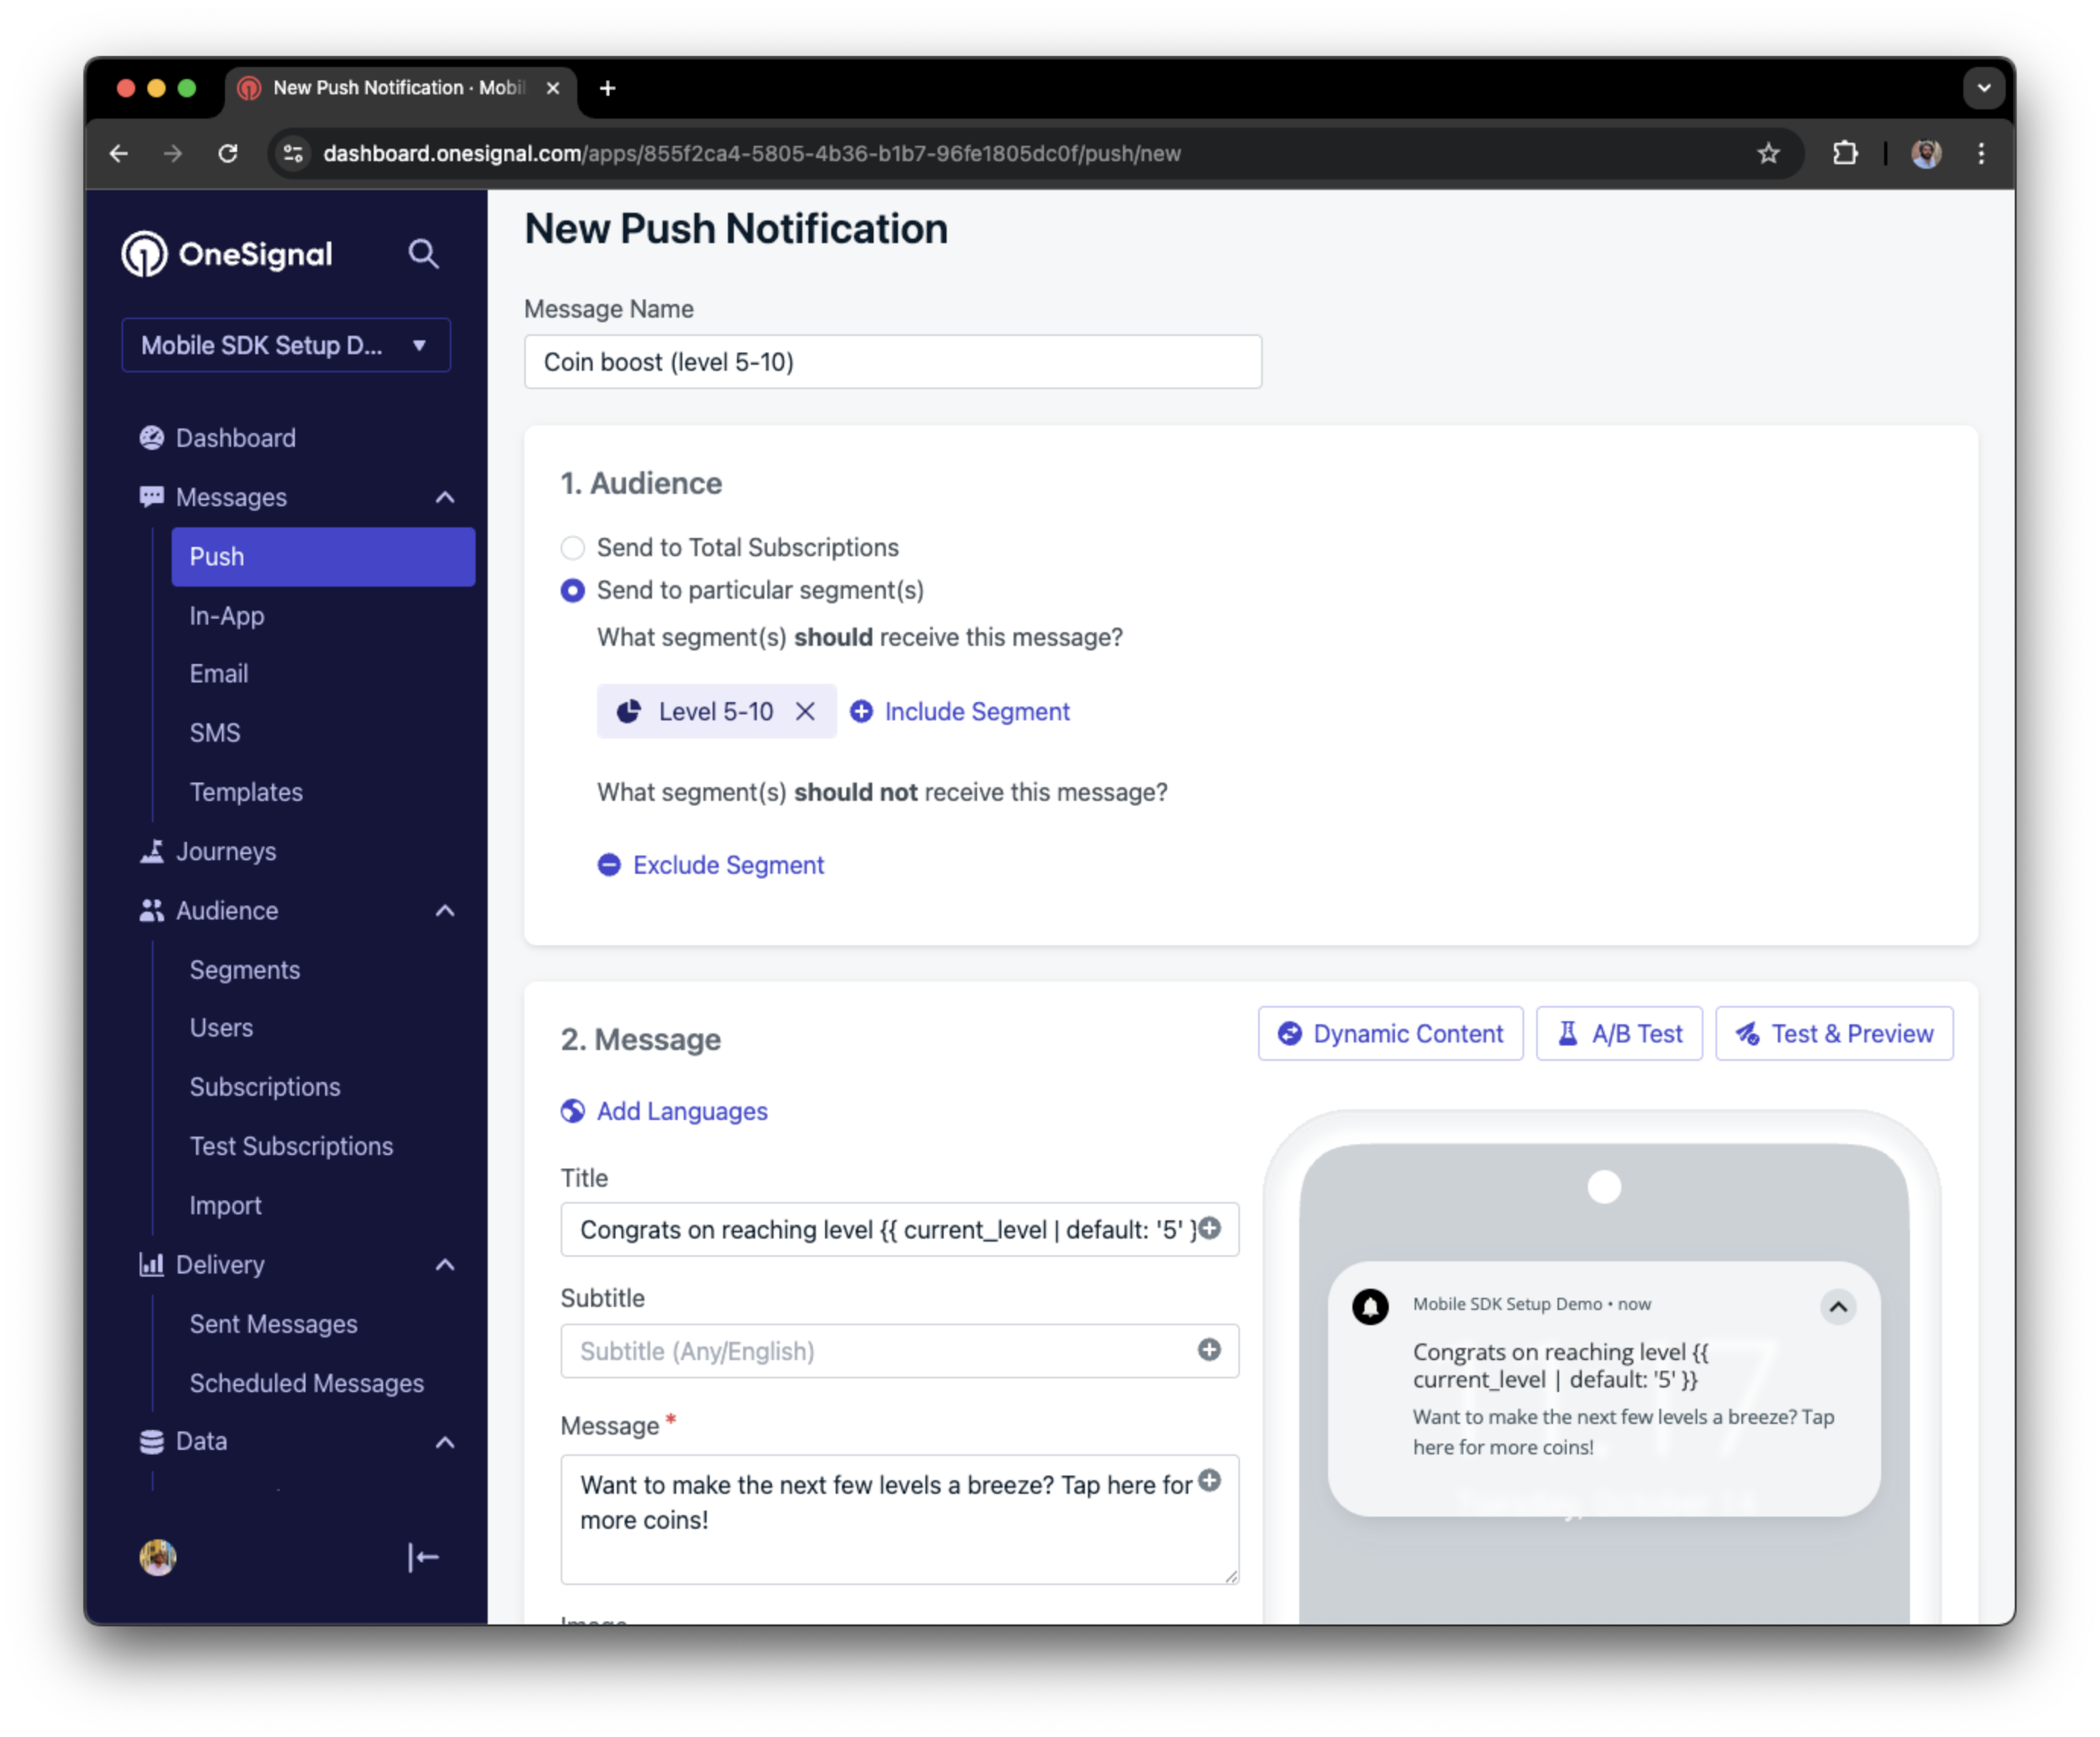
Push notification targeting the Level 5-10 segment with a personalized message
Add email and/or SMS subscriptions
The OneSignal SDK creates web push subscriptions automatically when users opt in. You can also reach users through email and SMS channels by creating the corresponding subscriptions.- Use the
addEmailmethod to create email subscriptions. - Use the
addSmsmethod to create SMS subscriptions.
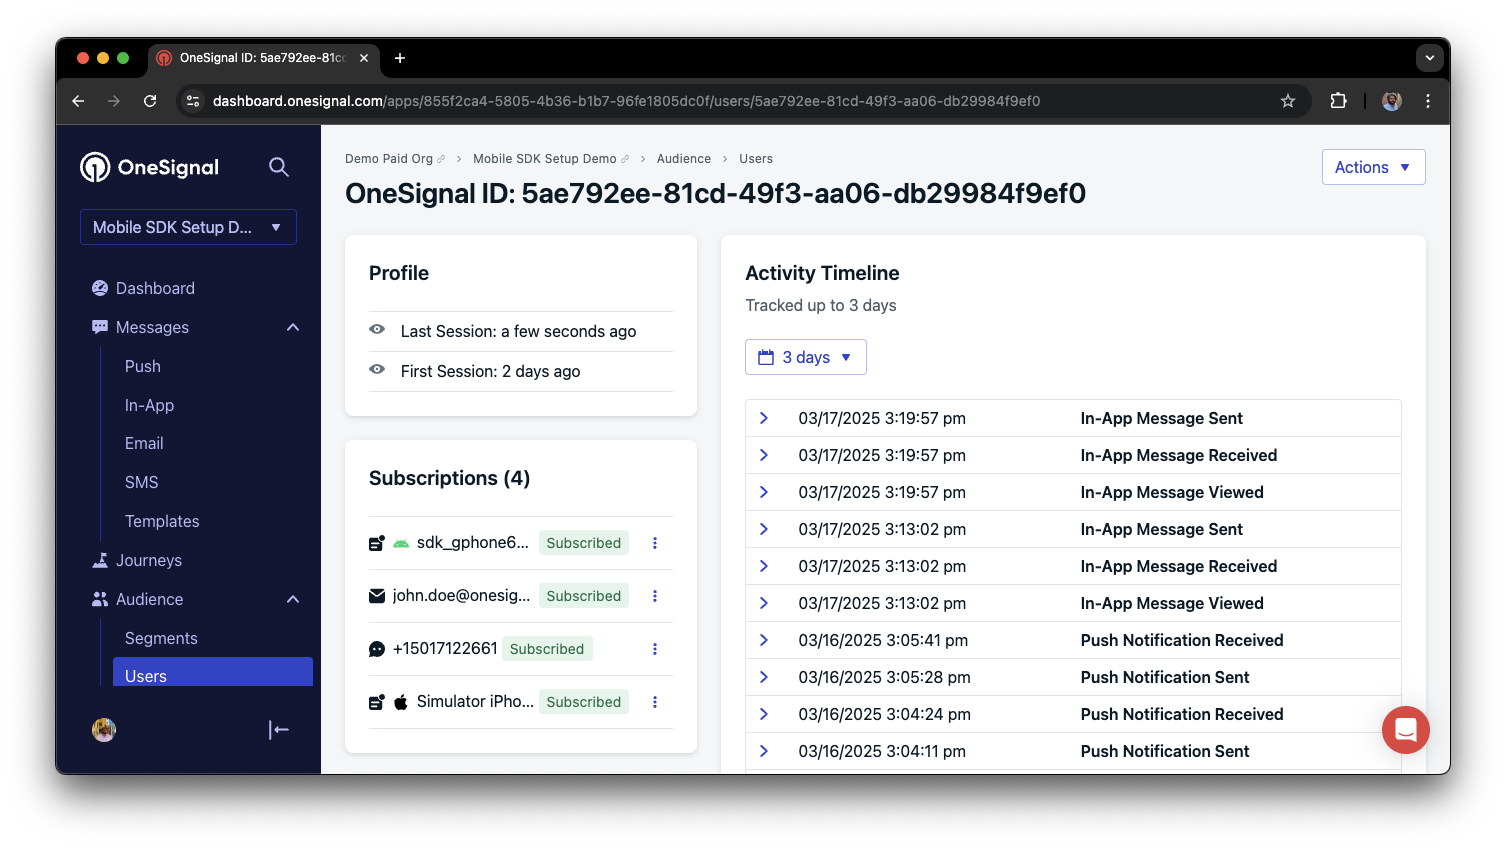
A user profile with push, email, and SMS subscriptions unified by External ID
- Obtain explicit consent before adding email or SMS subscriptions.
- Explain the benefits of each communication channel to users.
- Provide channel preferences so users can select which channels they prefer.
Privacy & user consent
To control when OneSignal collects user data, use the SDK’s consent gating methods:setConsentRequired(true): Prevents data collection until consent is given.setConsentGiven(true): Enables data collection once consent is granted.
Data collected by the SDK
Handling personal data
Listen to push, user, and in-app events
Use SDK listeners to react to user actions and state changes. The SDK provides several event listeners you can hook into. See the SDK reference guide for more details.Push notification events
- Click event listener: Detect when a notification is tapped.
- Foreground lifecycle listener: Control how notifications behave in foreground.
User state changes
- User state change event listener: Detect when the External ID is set.
- Permission observer: Track the user’s specific interaction with the native push permission prompt.
- Push subscription change observer: Track when the push subscription status changes.
Advanced setup & capabilities
Explore more capabilities to enhance your integration:Migrating to OneSignal
Integrations
Action buttons
Multi-language messaging
Identity Verification
Custom Outcomes
Web SDK setup & reference
Web push setup
Web SDK reference
FAQ
Does web push work on HTTP sites?
No. Web push requires HTTPS. Browsers enforce this as a security requirement. The only exception islocalhost and 127.0.0.1, which browsers treat as secure origins for development purposes.
Why do I need a service worker file?
The service worker runs in the background and handles incoming push notifications even when the user does not have your site open. Without it, the browser cannot display notifications. TheOneSignalSDKWorker.js file must be publicly accessible on your origin.
Where does the Web SDK look for the service worker?
The Web SDK looks forOneSignalSDKWorker.js at your site root (https://yourdomain.com/OneSignalSDKWorker.js) unless you set a custom path. Typical Site sets the path in the dashboard: enable Customize service worker paths and filenames under Settings > Push & In-App > Web > Advanced Push Settings. Custom Code does not use those dashboard fields. Pass serviceWorkerPath and serviceWorkerParam in OneSignal.init(). See Custom Code setup.
Should I use this guide if my site is on WordPress or Shopify?
No. Use WordPress setup or Shopify setup. Those integrations add the SDK and service worker for you.What is the difference between Typical Site and Custom Code?
Typical Site is the recommended path on this page: you configure prompts, most settings, and the service worker path in the OneSignal dashboard, then add the JavaScript snippet. Custom Code is for programmatic control. You set prompts,init options, and the service worker path in code with serviceWorkerPath and serviceWorkerParam. See Custom Code setup.
Do I need to upload a Safari certificate?
No, not for Safari on macOS 13+ or iOS 16.4+. OneSignal uses VAPID automatically. Upload a Safari Web Push .p12 only for the legacy Website Push ID path (macOS 12 and earlier, plus existing legacy subscribers). See Safari Web Push .p12 certificate.Can I use a .p8 key for Safari web push?
No. Apple does not offer a .p8 token or key for Safari web push. Use a .p8 only for native iOS or macOS apps. See iOS p8 token-based connection to APNs. The only Safari credential is a Safari Web Push .p12, and only for the legacy path.Can I use web push on iOS (iPhone/iPad)?
Yes, starting with iOS 16.4+. However, Apple requires amanifest.json file and the user must add your site to their home screen first. See iOS web push setup for the full requirements. iOS web push uses VAPID. You do not upload a Safari .p12 or .p8 for it.
Why are my notifications not showing?
Common causes include an incorrectly placed service worker file, a mismatched Site URL in the dashboard, or the user having notifications blocked in their browser settings. See Web push: Notifications not shown for a full troubleshooting checklist.support@onesignal.comPlease include:- Details of the issue you’re experiencing and steps to reproduce if available
- Your OneSignal App ID
- The External ID or Subscription ID if applicable
- The URL to the message you tested in the OneSignal Dashboard if applicable
- Any relevant logs or error messages