

Requirements
Make sure you have the following before starting:- An iOS or macOS app with Push Notification capability enabled.
- A Paid Apple Developer Account with Admin access.
- A OneSignal Account.
Set up APNs authentication
Generate your .p8 key in Apple Developer Account
- Log into your Apple Developer Account.
- Go to Certificates, Identifiers & Profiles > Keys.
- Click the blue plus (+) icon. If you don’t see it, contact your Admin for access.
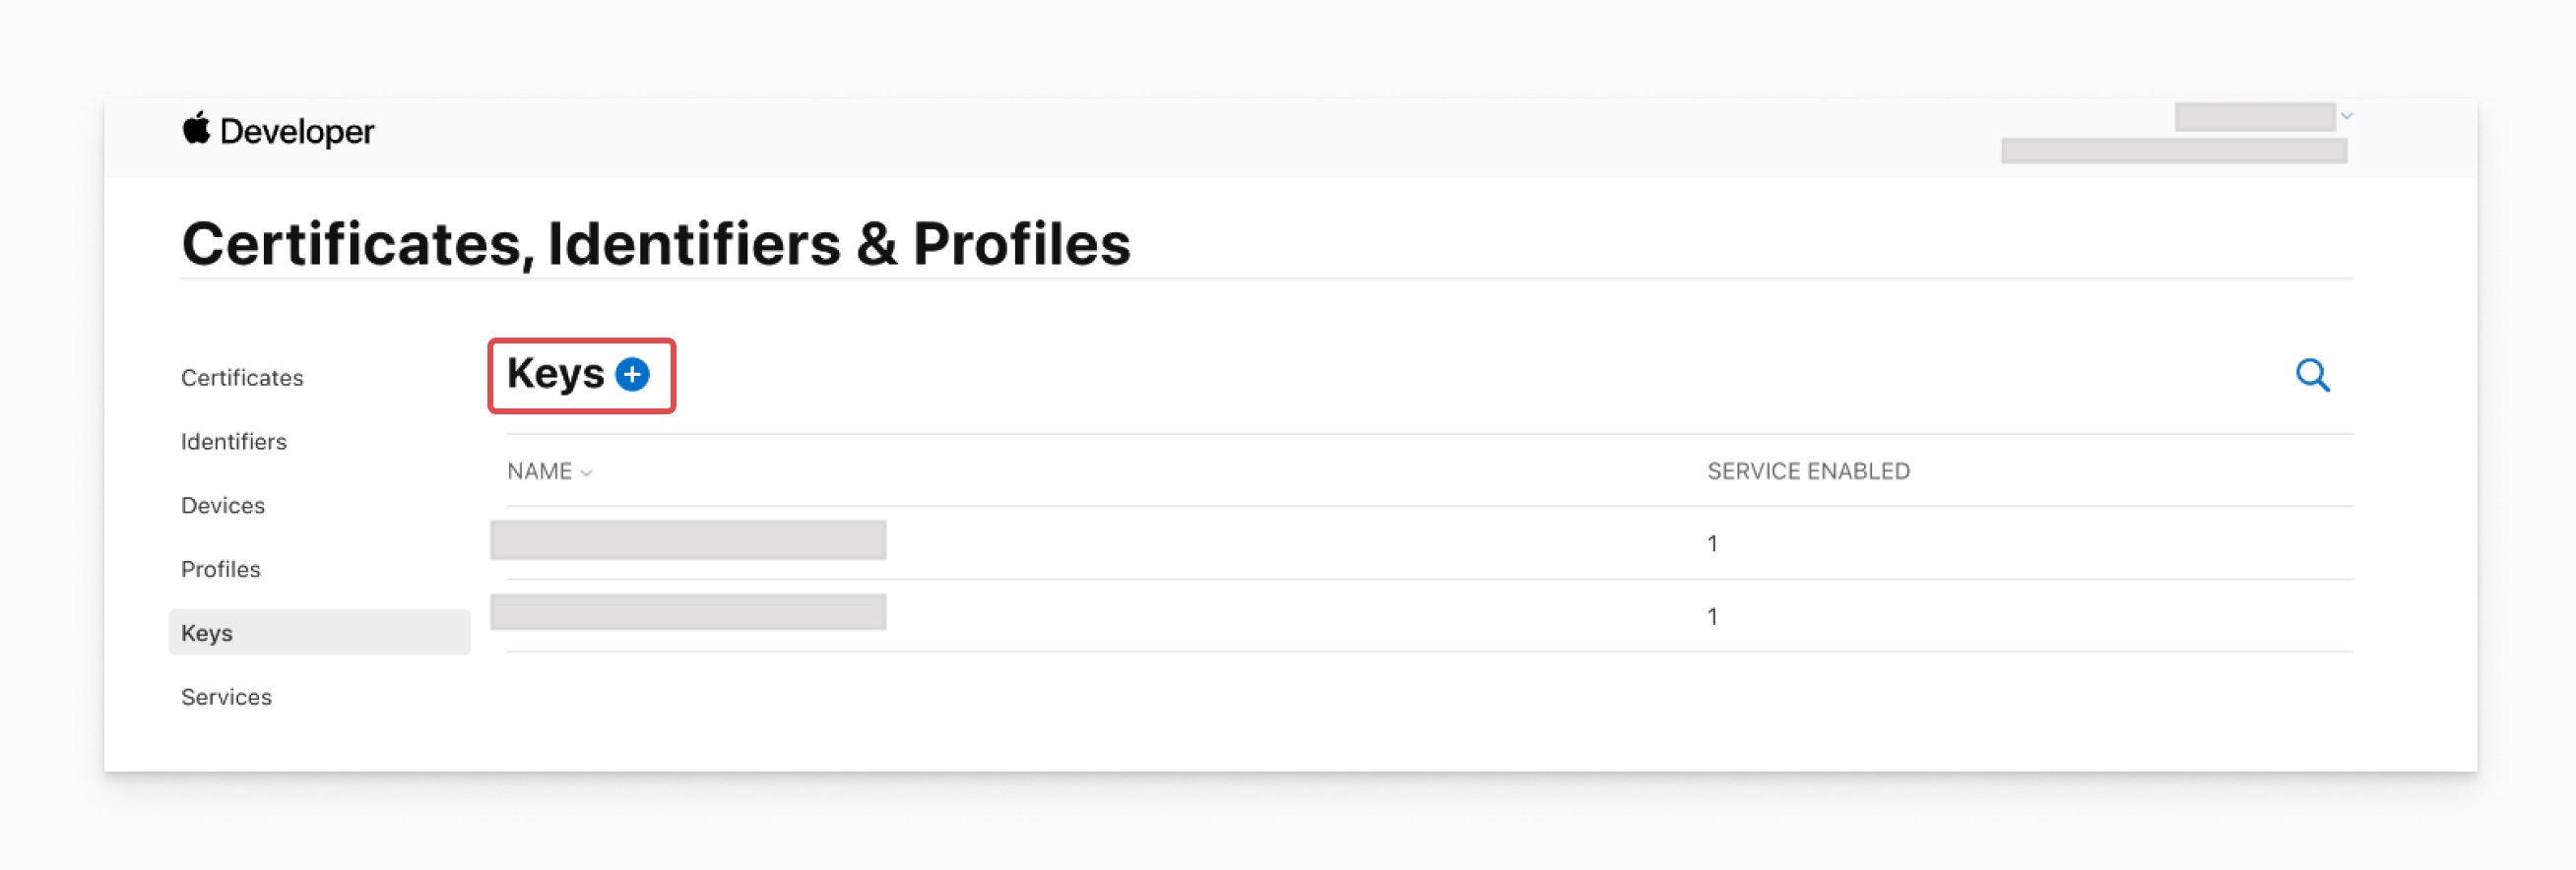
Apple Developer Keys page. Click the blue plus (+) icon to create a new key.
- Select Apple Push Notifications service (APNs).
- When configuring the key, ensure that Sandbox & Production is selected:
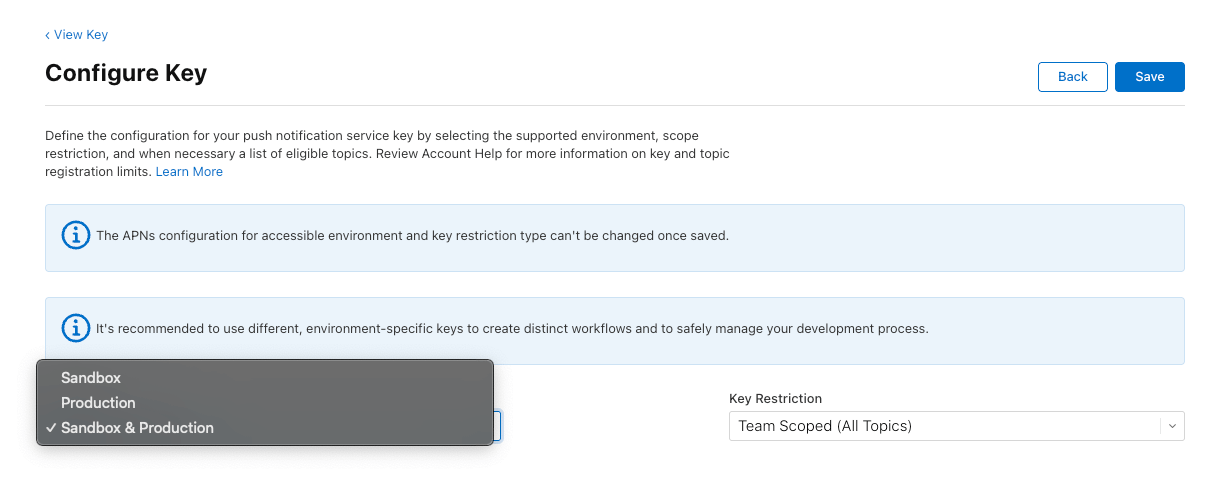
Select Sandbox & Production so the key works in both APNs environments. OneSignal requires this. Sandbox-only or Production-only keys will be rejected on save.
- Enter a name for the key and click Continue, then Register.
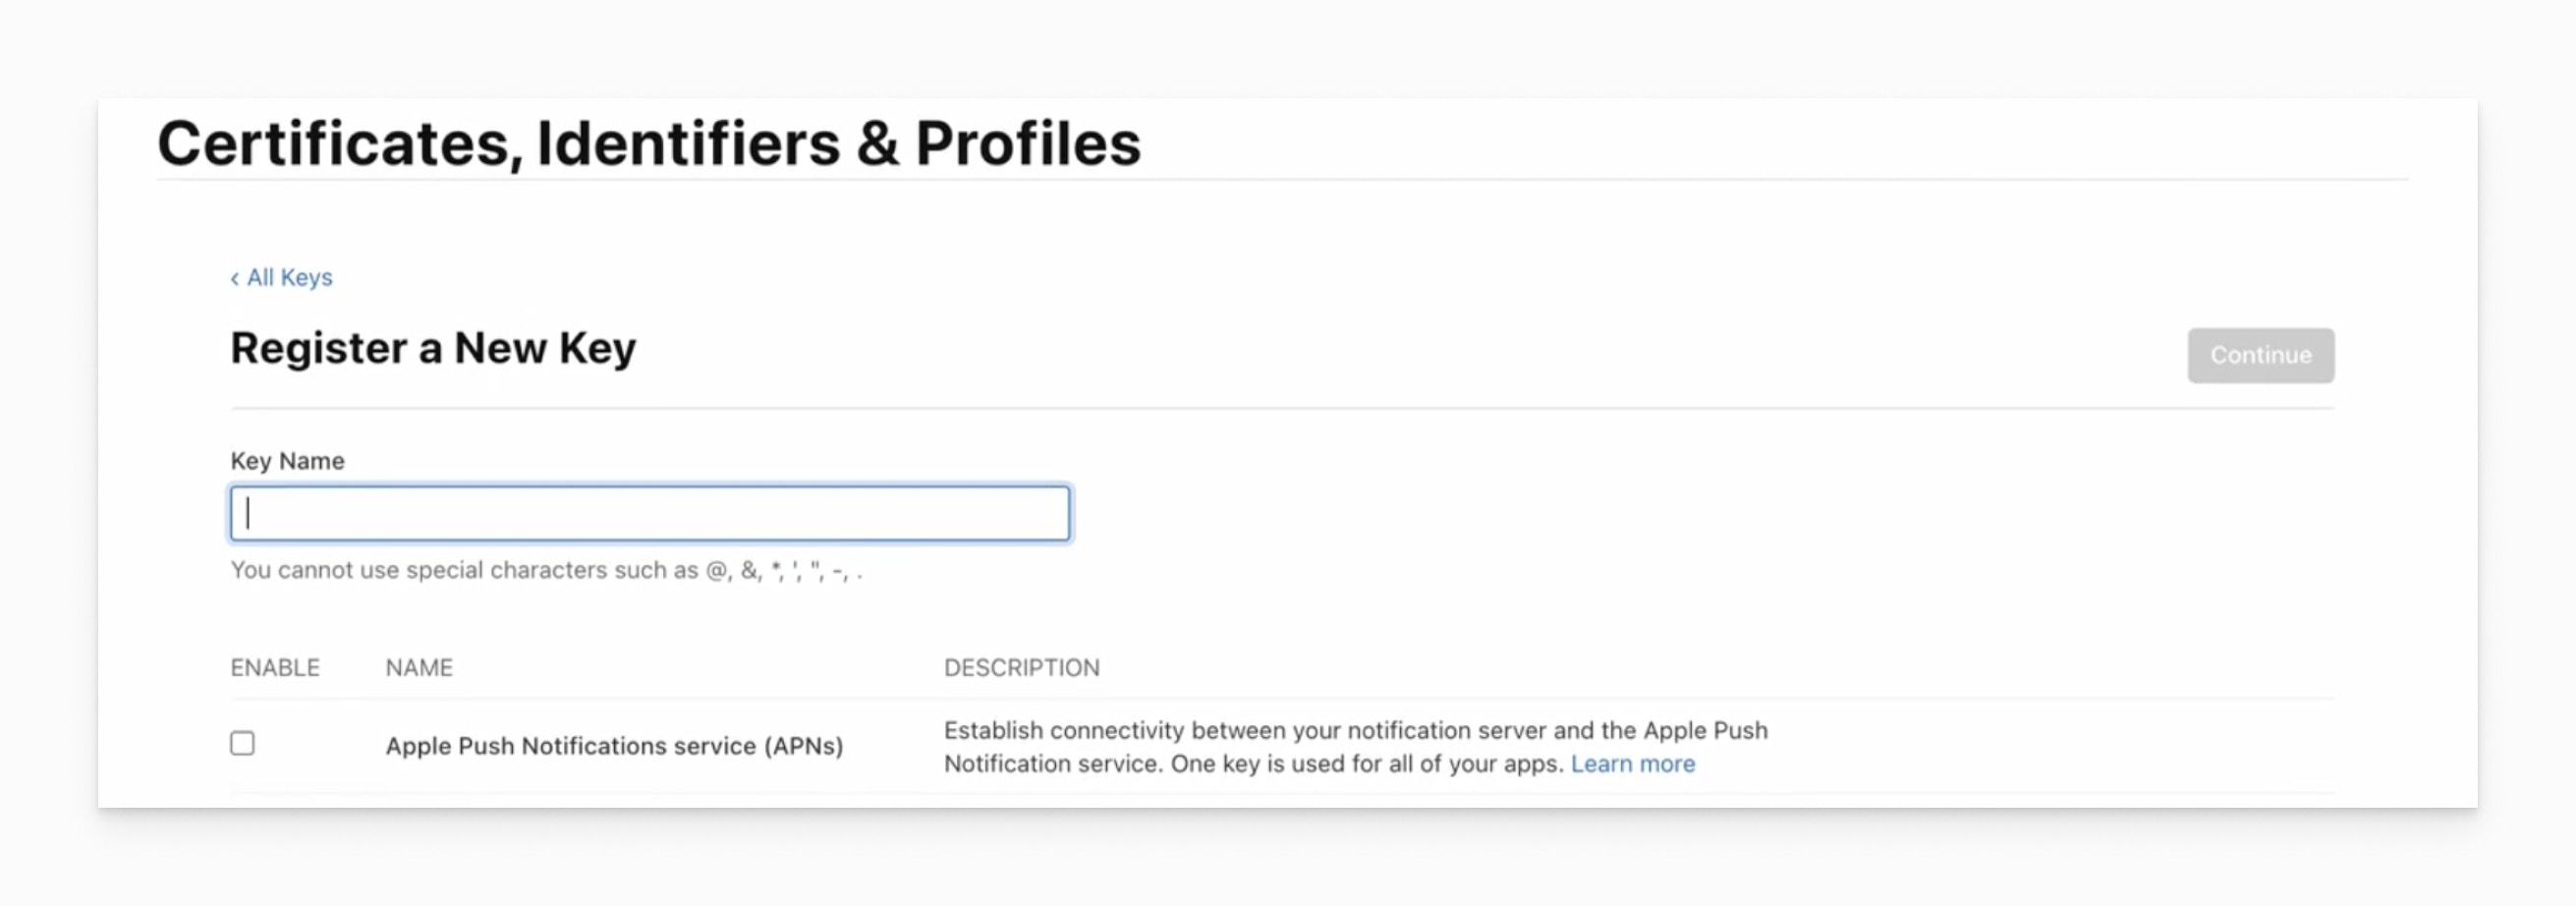
Register the key after naming it. You'll download the .p8 file on the next screen.
- Download your .p8 key and store it securely. You won’t be able to download it again.
Upload the .p8 key to OneSignal
- Navigate to Settings > Push & In-App > Apple iOS (APNs) Settings in your OneSignal dashboard.

OneSignal dashboard push configuration page.
- Choose .p8 Auth Key (Recommended) as the authentication method.

If updating from a p12 or another p8, you'll have the option to 'update authentication'
.p8 File– The private key file you downloaded from your Apple Developer account.Key ID– A 10-character alphanumeric string (e.g.,ABC123DEFG) found next to your key name in the Keys section of your Apple Developer account. Make sure it matches the downloaded .p8 file.Team ID– A 10-character alphanumeric string (e.g.,9A1B2C3D4E) shown next to your team name in the top-right corner of your Apple Developer account. This is not the same as the Key ID.App Bundle ID– A reverse-domain string (e.g.,com.example.app) found in:- The Identifiers section of your Apple Developer account, or
- Xcode > Main App Target > Signing & Capabilities
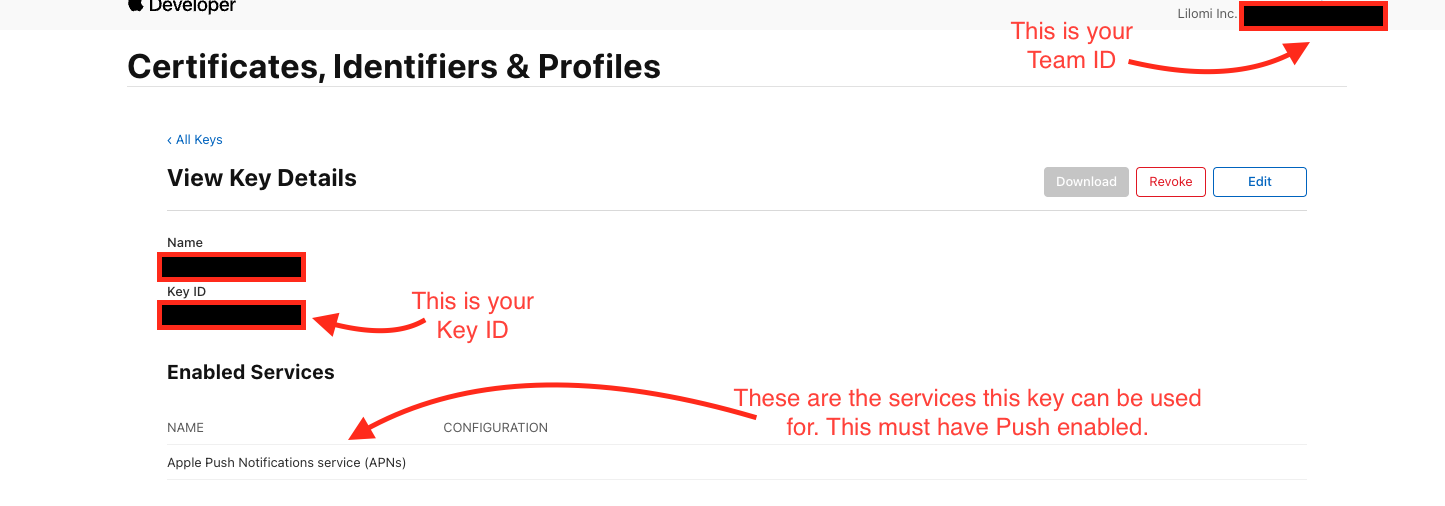
Finding your .p8 key details
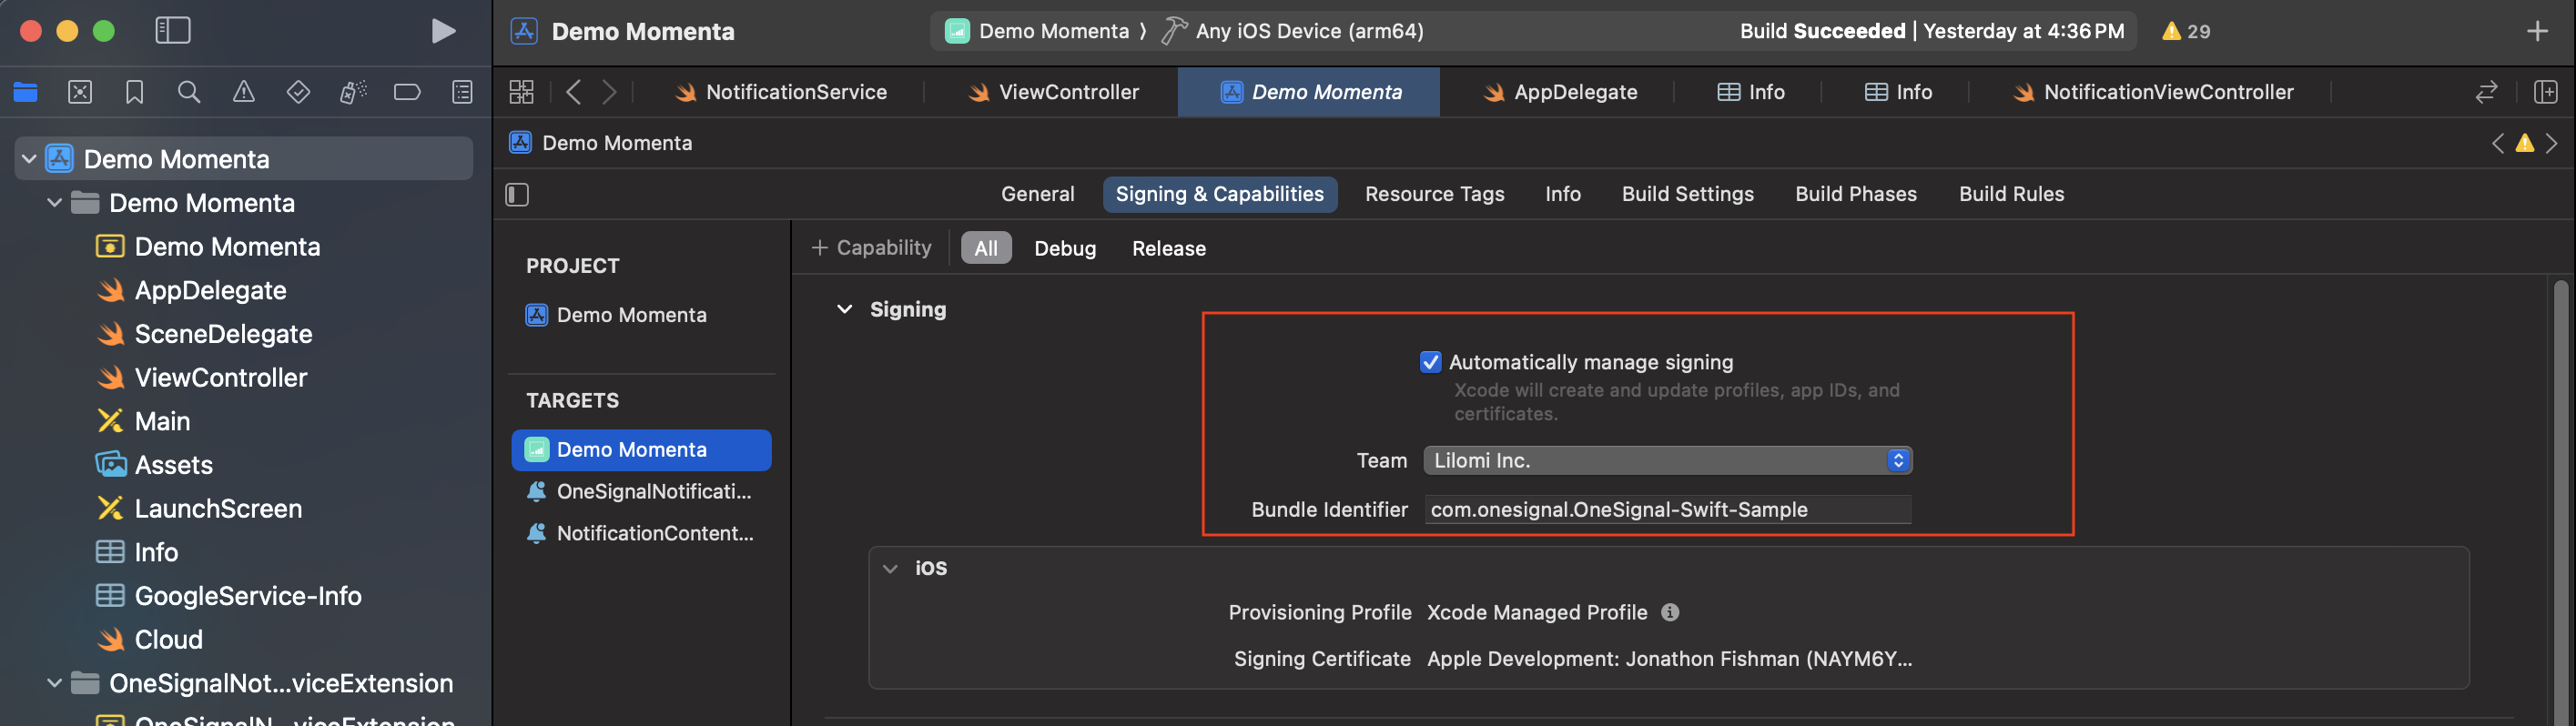
Finding your Bundle ID on Xcode
Troubleshoot APNs errors
OneSignal authenticates your .p8 key against Apple Push Notification service when you save it, and APNs continues to return response codes for individual notifications at send time. If Apple rejects your credentials at save or reports a delivery failure, find the fix below.InvalidProviderToken (403)
Apple couldn’t authenticate this key. The .p8 file, Key ID, or Team ID doesn’t match, or the key was revoked in Apple Developer. Apple returns this same response for all four causes.
To fix:
- In your Apple Developer account, open the key and confirm it is Active with Apple Push Notifications service enabled.
- Copy the Key ID shown on that page into the Key ID field, exactly.
- Copy your Team ID from your Apple Developer Membership details into the Team ID field.
- If everything above matches, the key may have been revoked. Create a new .p8 key, download it, and upload it here with its Key ID.
TopicDisallowed or MissingTopic
Your key is valid, but the App Bundle ID doesn’t match an app registered under this Apple team.
To fix:
- In Xcode, open your app and copy the Bundle Identifier from your target’s Signing & Capabilities tab. Do not use the OneSignalNotificationServiceExtension Bundle ID with
.OneSignalNotificationServiceExtension. - Paste it into the App Bundle ID field, exactly. Bundle IDs are case-sensitive.
- Confirm the same Bundle ID appears under Identifiers in the Apple Developer account where your key was created.
BadEnvironmentKeyInToken (403)
Your key is restricted to a single environment (Sandbox-only or Production-only), but OneSignal requires a key valid in both environments.
To fix:
- In your Apple Developer account, create a new key with Apple Push Notifications service enabled.
- Under Environment, select Sandbox & Production.
- Under Key Restriction, select Team Scoped (All Topics).
- Download the new .p8 and upload it here with its Key ID.
InvalidProviderToken (after previously working)
If notifications suddenly start failing with InvalidProviderToken and you haven’t changed your credentials, the .p8 key was most likely revoked in Apple Developer. Apple doesn’t return a dedicated “revoked” code.
To fix: Create a new .p8 key, download it, and upload it here with its Key ID and your Team ID.
For the full list of delivery response codes, see Push notification message reports.
Other checks
If you’re not seeing one of the response codes above, work through these general checks.Check the .p8 file format
.p8 file in a text editor. It should look like this:Confirm you didn't upload a .p12 by mistake
.p8keys come from the Keys section of your Apple Developer account..p12certificates come from the Certificates section and are not compatible with .p8 authentication. Use the .p12 setup guide if that’s the flow you want.
Confirm the key has APNs capability
Wait a few minutes after creating a new key
Need help?
- Revoke the current
.p8key and create a new one from scratch. - Double-check you’re using a valid Bundle ID from the same Apple Developer account the key was created under.
- Reach out to
support@onesignal.comwith a screenshot of your Apple Developer key configuration and the Key ID, Team ID, and Bundle ID you entered in OneSignal.
Next steps
iOS SDK setup
Mobile SDK setup
FAQ
What’s the difference between .p8 and .p12?
A .p8 key is a token-based authentication key that does not expire and works across all apps under your Apple Developer account. A .p12 certificate is app-specific and expires after one year, requiring annual renewal. OneSignal recommends .p8 for its simplicity and lower maintenance. See the .p12 certificate guide for the alternative method.Does my .p8 key expire?
No. Unlike .p12 certificates, .p8 keys do not expire. Once created, a .p8 key remains valid until you revoke it in your Apple Developer account.Can I use one .p8 key for multiple apps?
Yes. A single .p8 key works for all apps under the same Apple Developer account. You can upload the same .p8 file to multiple OneSignal apps. Each app only needs its own unique Bundle ID.Do I need a provisioning profile, and how do I create one?
Yes, Apple requires different types of profiles for development, testing (Ad Hoc), and distribution to the App Store. In Xcode, select Automatically manage signing to create one automatically.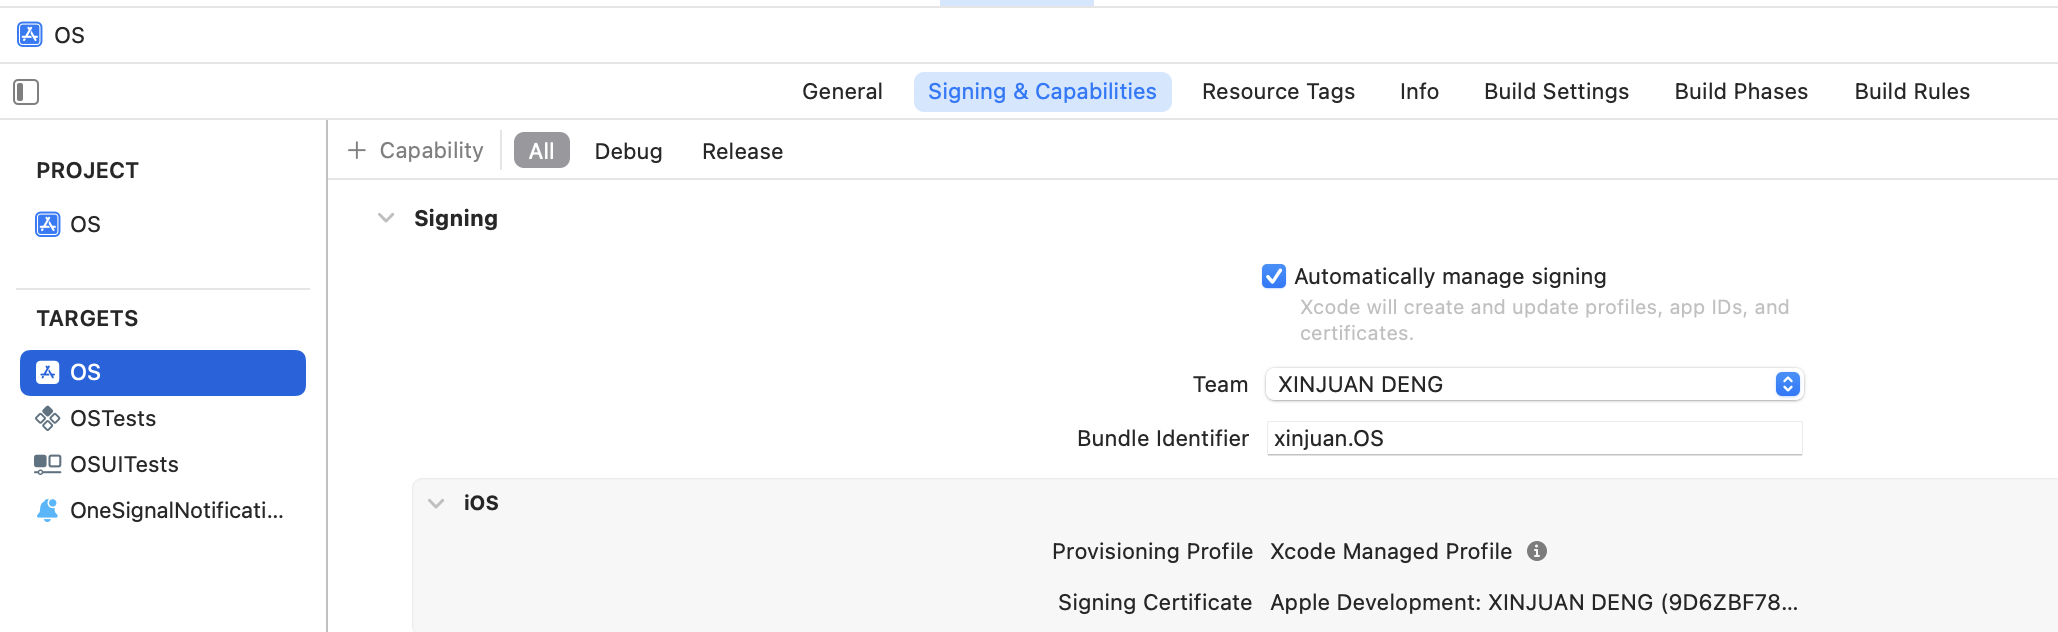
Enable Automatically manage signing in Xcode to have Apple generate provisioning profiles for you.