Import or update users in OneSignal using CSV uploads, REST API, or manual entry. Supports email, SMS, tags, and more for seamless user onboarding or migration.
Import or update users in bulk through the OneSignal dashboard using a CSV file or manual entry. Common use cases include migrating users from another platform, updating user details, and organizing users with Tags and Segments.
You can also update or create users via the REST API.
email — Required for creating new email subscriptions. See Email address validation for more info.
phone_number — Required for creating new SMS subscriptions.
subscription_id — Only recommended for cases where you track Subscription IDs on your backend and want to set an external_id.
Only one identifier of each type is allowed per row. To associate multiple emails or phone numbers with the same user, use separate rows sharing the same external_id.
Include external_id to deduplicate Users. Make sure it matches the ID used in your SDK login method — otherwise it resets when the user opens the app.
To change subscription status, the row must include email, phone_number, or subscription_id. An external_id alone is not enough.
subscription_id does not link or merge Subscriptions. Use external_id to add new emails or phone numbers to an existing user.
Include up to 1,000 Tags per import. Use tag keys in the column headers and tag values in the rows. You can also use a single tags column with JSON formatting — see Bulk tag updates for details.
Tag plan limits apply per user, not per app. For example, if your plan allows 20 tags per user and a user already has 19, you can only add 1 more — even though the app itself can have unlimited tag keys.
Use the Bulk tag updates workflow to export users, clear unwanted tag values, and re-import with the delete option enabled.
Avoid spaces in tag keys — use underscores instead.
Reserved and restricted tag keysThe following tag keys are reserved and should not be used:
“user”
“subscription”
“message”
“template”
“app”
“org”
“custom_data”
“dynamic_content”
If you accidentally set one of these as a tag key, remove it via the Update User API.Tag overwrites and deletionsDuring a CSV import:
Tags included in your CSV are overwritten with the value provided.
Tags not included in your CSV remain unchanged on the user record.
If a tag is still present after import, verify that:
The header column contains the tag key.
The row contains no value.
You selected the “Delete tags with blank values” option in the Review screen.
Other sources of tags being addedIf deleted tags reappear after import, an integration may be automatically writing them back. Common sources include:
Segment
HubSpot
Journeys
SDK Tagging methods
Custom APIs or ETL pipelines
Review integration mappings and event triggers to ensure they are not overwriting your CSV changes.
Email address validation detects common problems in email addresses before they reach your audience. It flags typos, invalid domains, role-based addresses, and disposable email services that could increase your bounce rate or hurt your sender reputation.
Email address validation
Validate email addresses during CSV import and in bulk to reduce bounces and protect your sender reputation.
If you have errors or questions about your CSV formatting, you can describe your CSV problem to an AI tool (like Claude, ChatGPT, or similar) to automatically clean or rebuild your file before importing again.
Always test with a small sample (5-10 rows) before importing thousands of records.
Example AI prompts for common CSV issues
Deleting tags
Tag formatting
Identify invalid formats
Fix phone numbers
Migrate from another platform
AI prompt example for deleting unwanted tags
I want to remove all tags except "user_name" from this CSV.Please:1. Keep only the "user_name" tag column.2. Remove all other tag columns.3. Format the CSV so it matches the OneSignal import requirements in this doc: https://documentation.onesignal.com/docs/en/importHere is my CSV:[PASTE CSV]
AI prompt example for fixing multiple tag columns format
I have multiple tag columns such as tag_first_name, tag_last_name, and tag_city.According to the OneSignal import documentation, each tag must:- Use the tag_ prefix- Contain only alphanumeric characters and underscores- Follow supported data typesCould you review my CSV, identify what is incorrectly formatted, and return a corrected version that meets these requirements?Documentation link:https://documentation.onesignal.com/docs/en/import
AI prompt example for identifying missing or invalid formatting
OneSignal rejected my CSV during import.Please:1. Validate my CSV structure.2. Identify any formatting issues (headers, ID columns, tag formats, quoting).3. Return a corrected version that follows the requirements in this doc: https://documentation.onesignal.com/docs/en/import#csv-requirementsHere is the file:[PASTE CSV]
AI prompt example for fixing invalid phone number formats (E.164)
My import is failing because phone numbers are not in E.164 format.Please:1. Convert all phone numbers to E.164 format.2. Keep all other fields unchanged.3. Ensure the CSV matches OneSignal's required structure: https://documentation.onesignal.com/docs/en/importExample of current format: (555) 555-1234Here is my CSV:[PASTE CSV]
AI prompt example for data from another platform
I'm migrating from [Platform Name] to OneSignal.Could you transform this CSV to match OneSignal's import format?Include:- `external_id`- Any tags converted with the `tag_` prefix (if desired)- Phone numbers in E.164 format (if applicable)Reference doc:https://documentation.onesignal.com/docs/en/importHere is my CSV:[PASTE CSV]
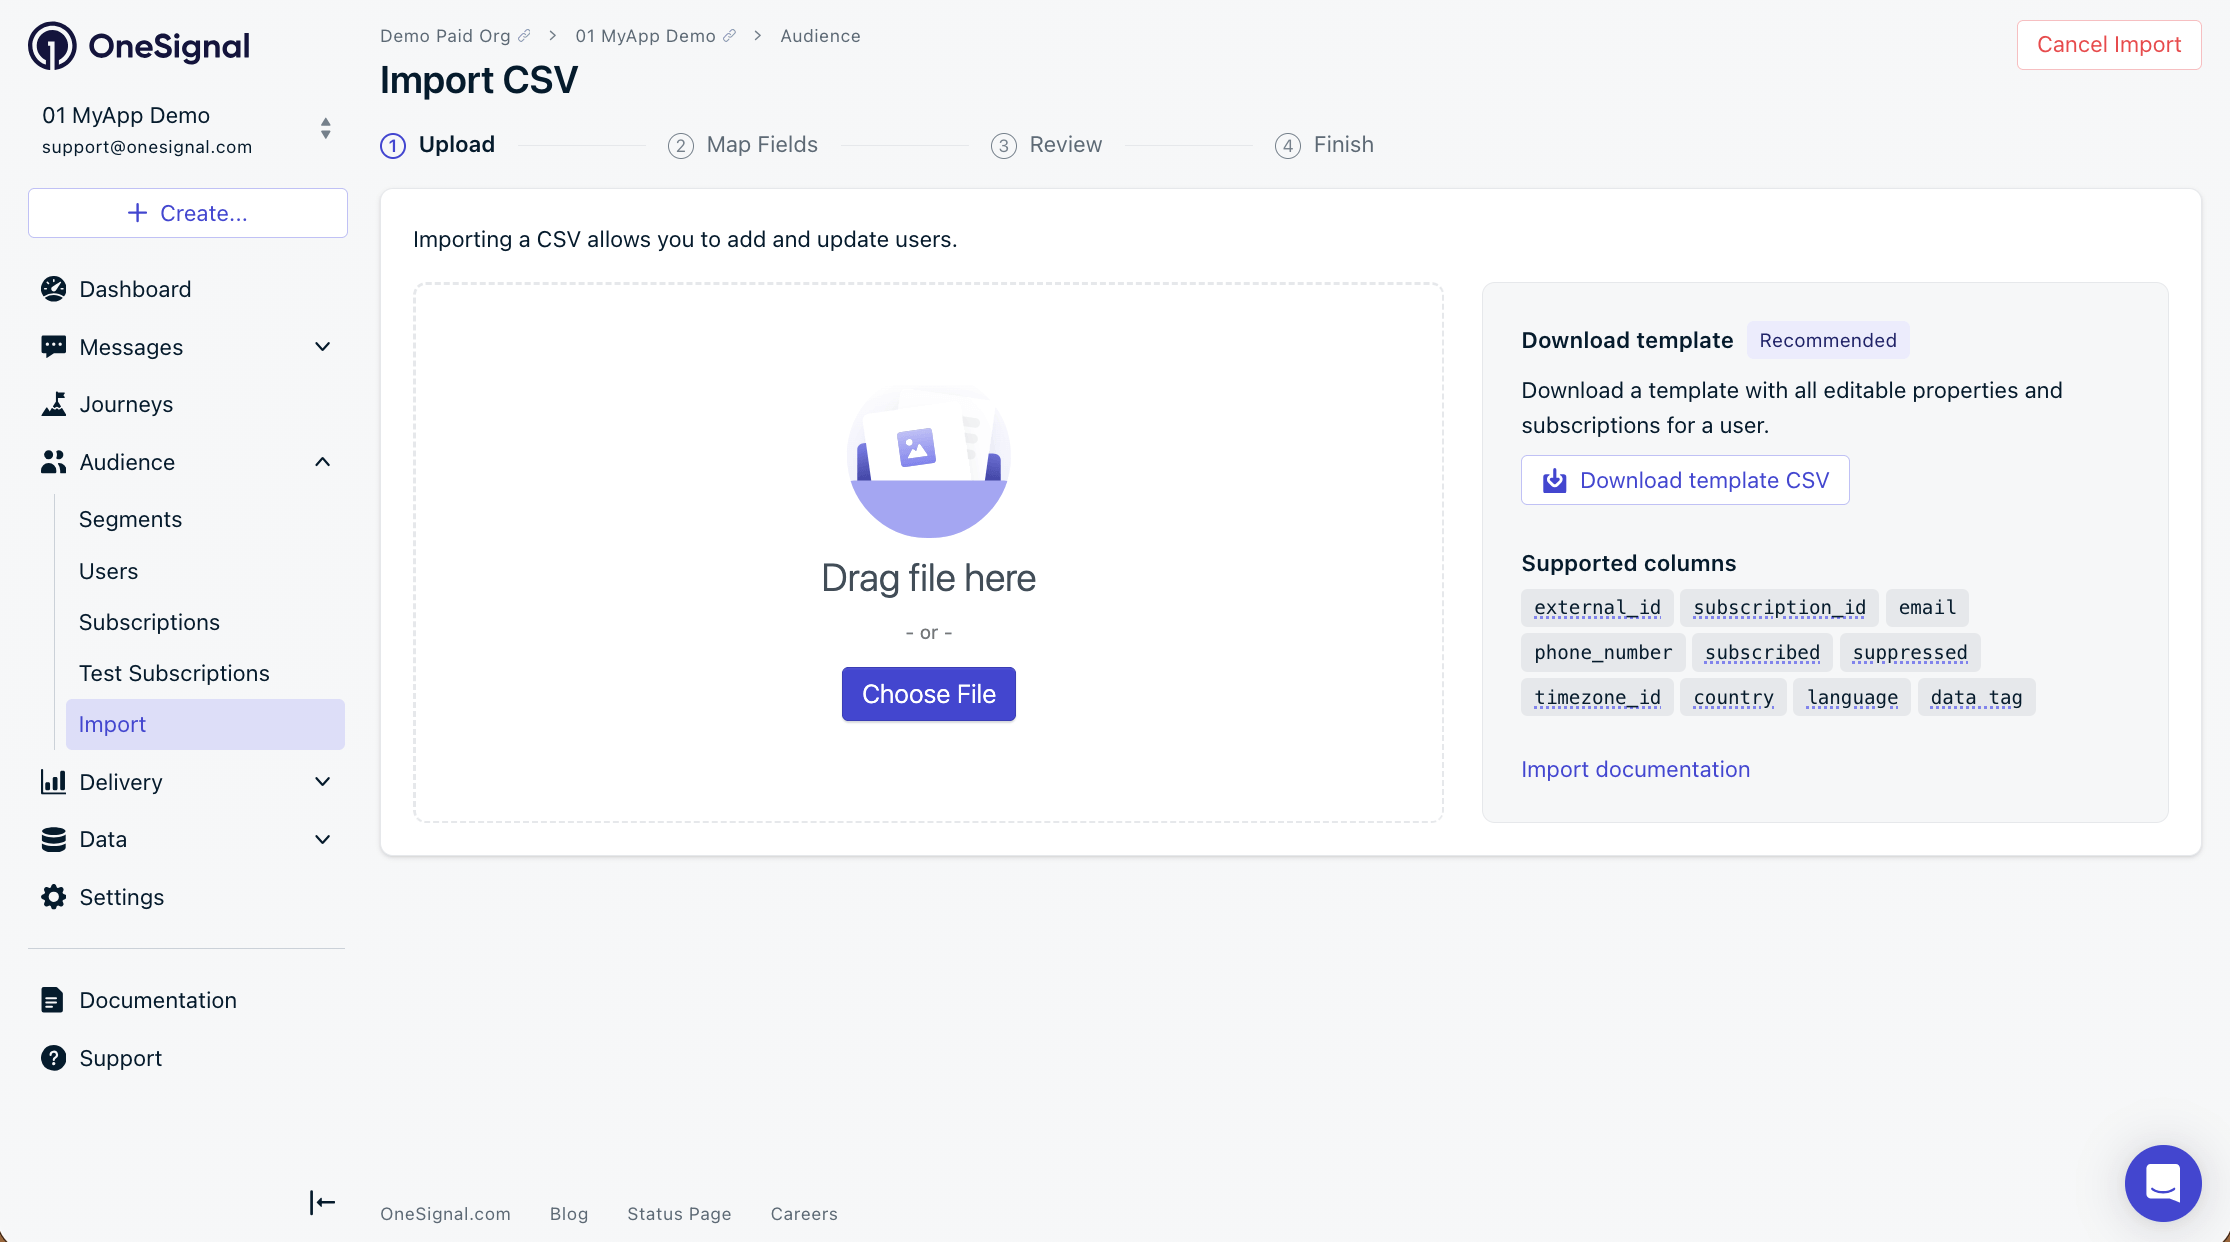
Navigate to Audience > Import and click Launch CSV Importer.
1
Upload your CSV
Select your prepared CSV file.
Import CSV screen
2
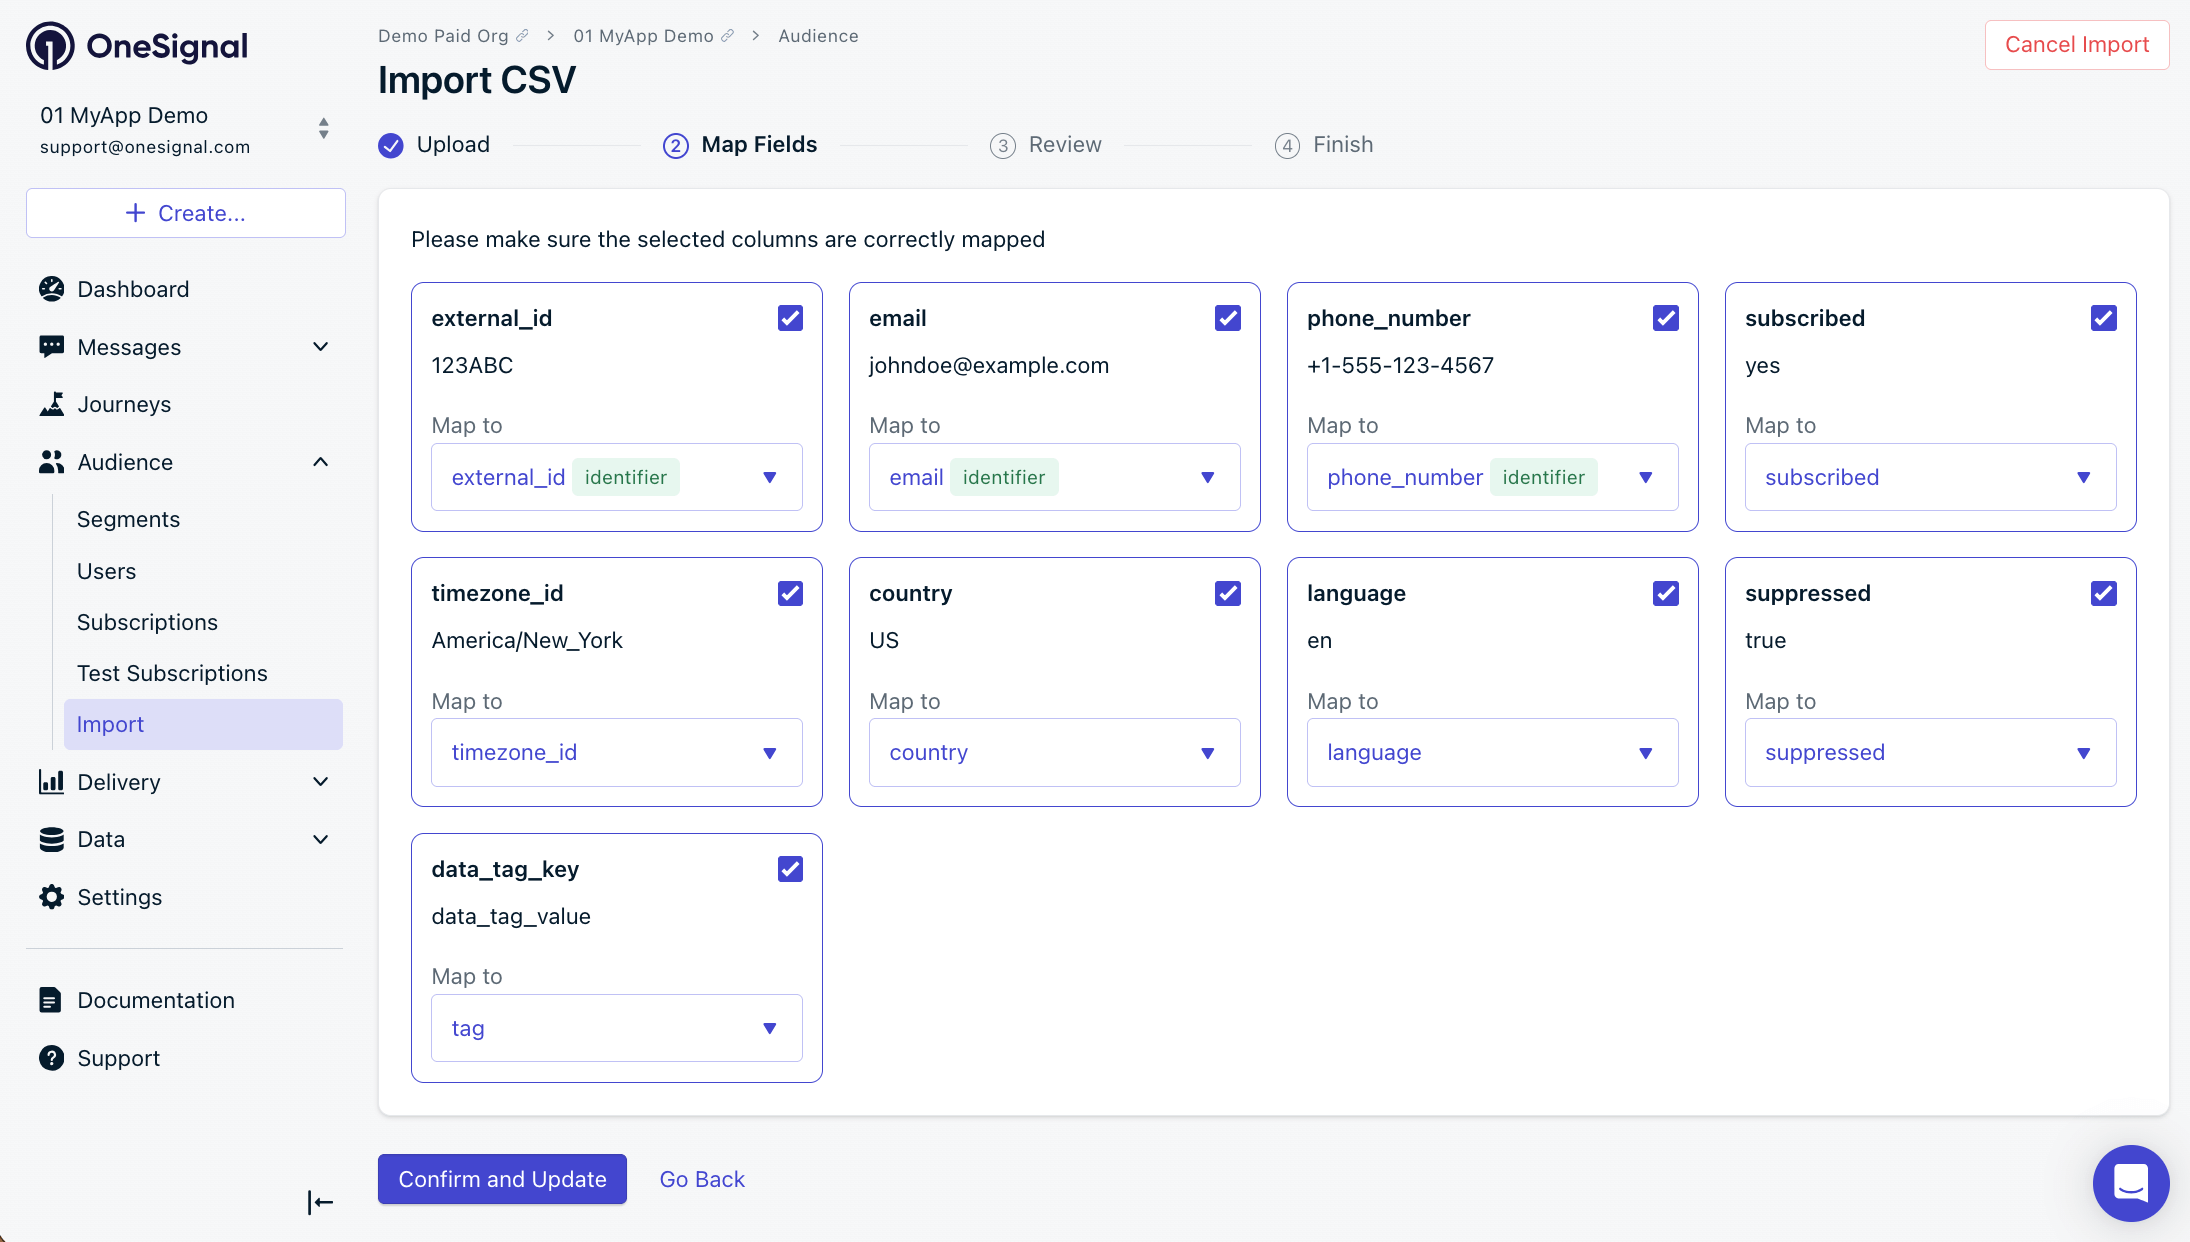
Map fields
OneSignal auto-maps your CSV headers to known properties. Review the mappings before confirming — use external_id, email, phone_number, and/or subscription_id as identifiers, not tags.
To add a new email or phone number to an existing user, you must useexternal_id. Do not use subscription_id — it will not link or merge Subscriptions.
Import CSV Map Fields screen
If OneSignal detects format issues, fix the CSV and re-upload (recommended) or uncheck the affected column to skip it.
3
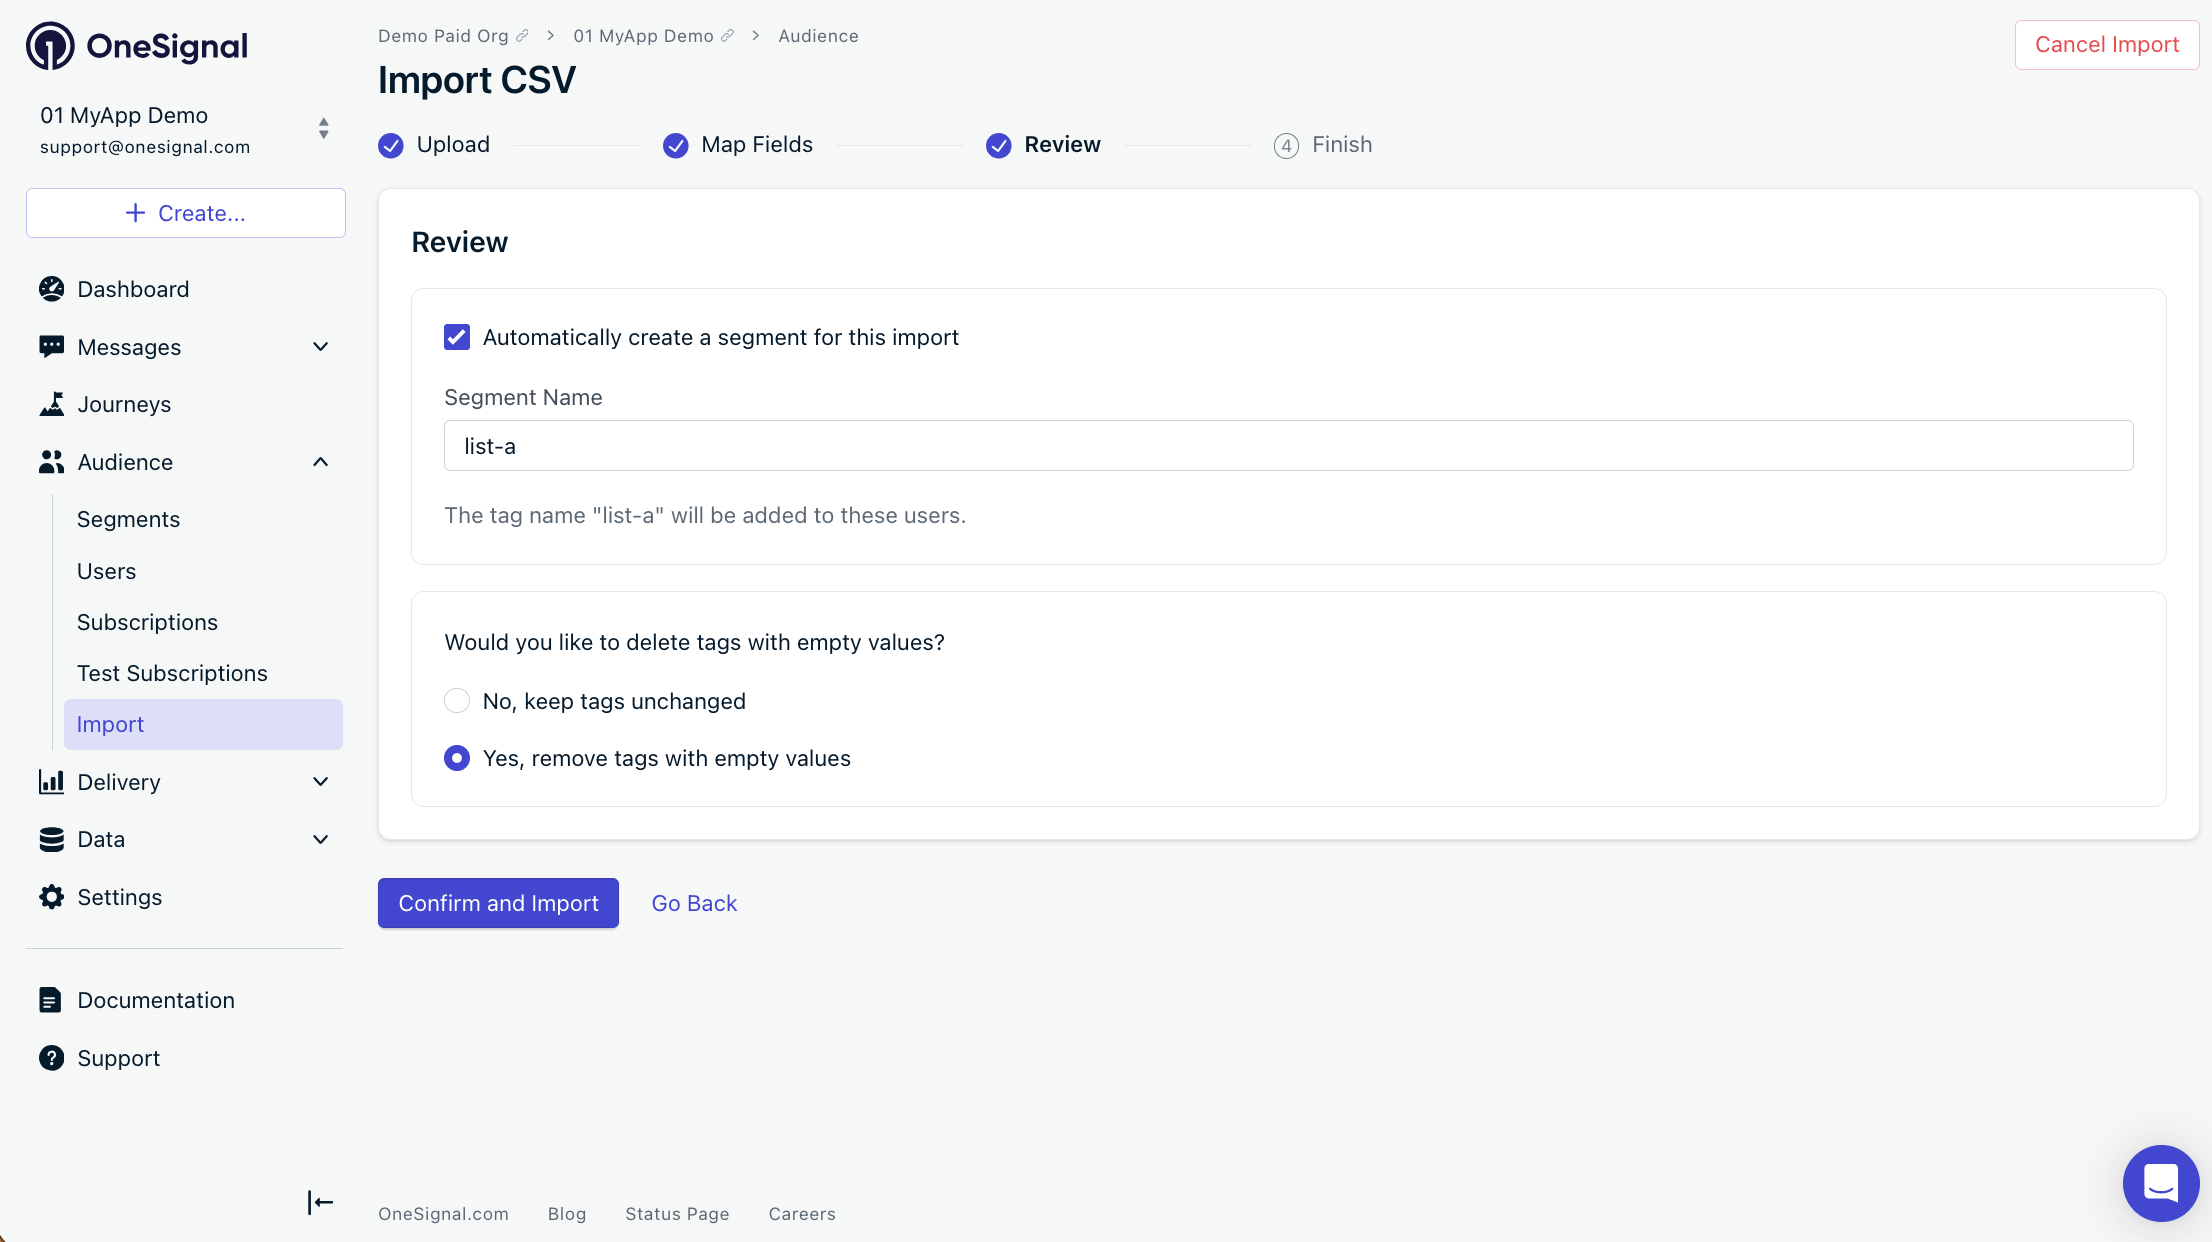
Review and confirm
The Review screen allows you to:
Automatically create a Segment — Adds a tag to each imported user and creates a matching Segment. Be mindful of your plan limits.
Delete tags with blank values — Removes any tag where the value is blank in the CSV. This is useful for cleaning up unwanted tags and staying under plan limits.
Configure email address validation — Configure email address validation settings to reduce bounces and protect your sender reputation.
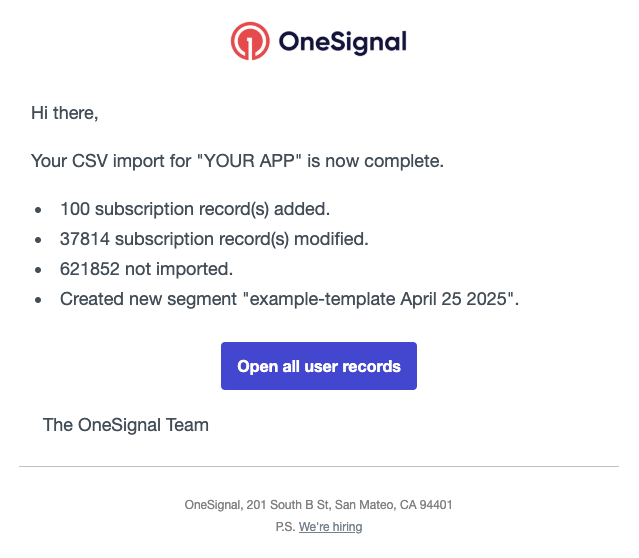
Once the import finishes, you receive a confirmation email from contact@onesignal.com with the following data. Note that a single User can have multiple Subscriptions (e.g., email + push), so subscription counts may be higher than your row count.Subscription record(s) added — New email or SMS Subscriptions created. 0 means no unique email or phone_number identifiers were found.Subscription record(s) modified — Subscriptions where data changed (tags, properties, etc.). For example, 10 External IDs each linked to 20 subscriptions = 200 records modified.Subscription updates skipped — Subscriptions skipped for the stated reason. If the reason is “over your app’s tag limit,” remove tags and re-import or upgrade your plan.Not imported — Rows that were not updated or imported. Common causes: the external_id does not match any existing subscription, or the email/phone_number already exists with no new data to set.Created new segment — The segment name, if you selected that option.
Example email confirmation.
In the example above:
100 subscriptions were created from unique email addresses or phone numbers not already in the app.
37,814 subscriptions were updated (not the count of Users — each user can have multiple subscriptions).
621,852 rows were not imported because their External IDs did not match existing users, or their emails/phone numbers already existed with no new data.
Segments only count subscribedSubscriptions. Unsubscribed subscriptions are updated by the import but not reflected in segment counts. Improvements to segmentation are in progress.
You can add, update, or delete Tags in bulk using the CSV import. This section covers how to format tags for import and how to remove unwanted tags.Import tags from a single columnInstead of using separate column headers for each tag key, you can set a single tags header with each row containing a JSON map of all key-value pairs within quotes. This is especially useful if you previously exported a CSV with tags and want to re-import it without reformatting.
CSV header
external_id,email,tags
Tags must be formatted as a JSON object enclosed in 2 sets of double quotes around each key-value pair.
When imported, OneSignal automatically converts each key-value pair into distinct tags. For example, the above row would be converted to 2 tags: level:30 and color:teal.Bulk delete tagsTo remove tags in bulk, export your current data, blank out the tag values, and re-import the CSV with the delete option enabled.
1
Export your data
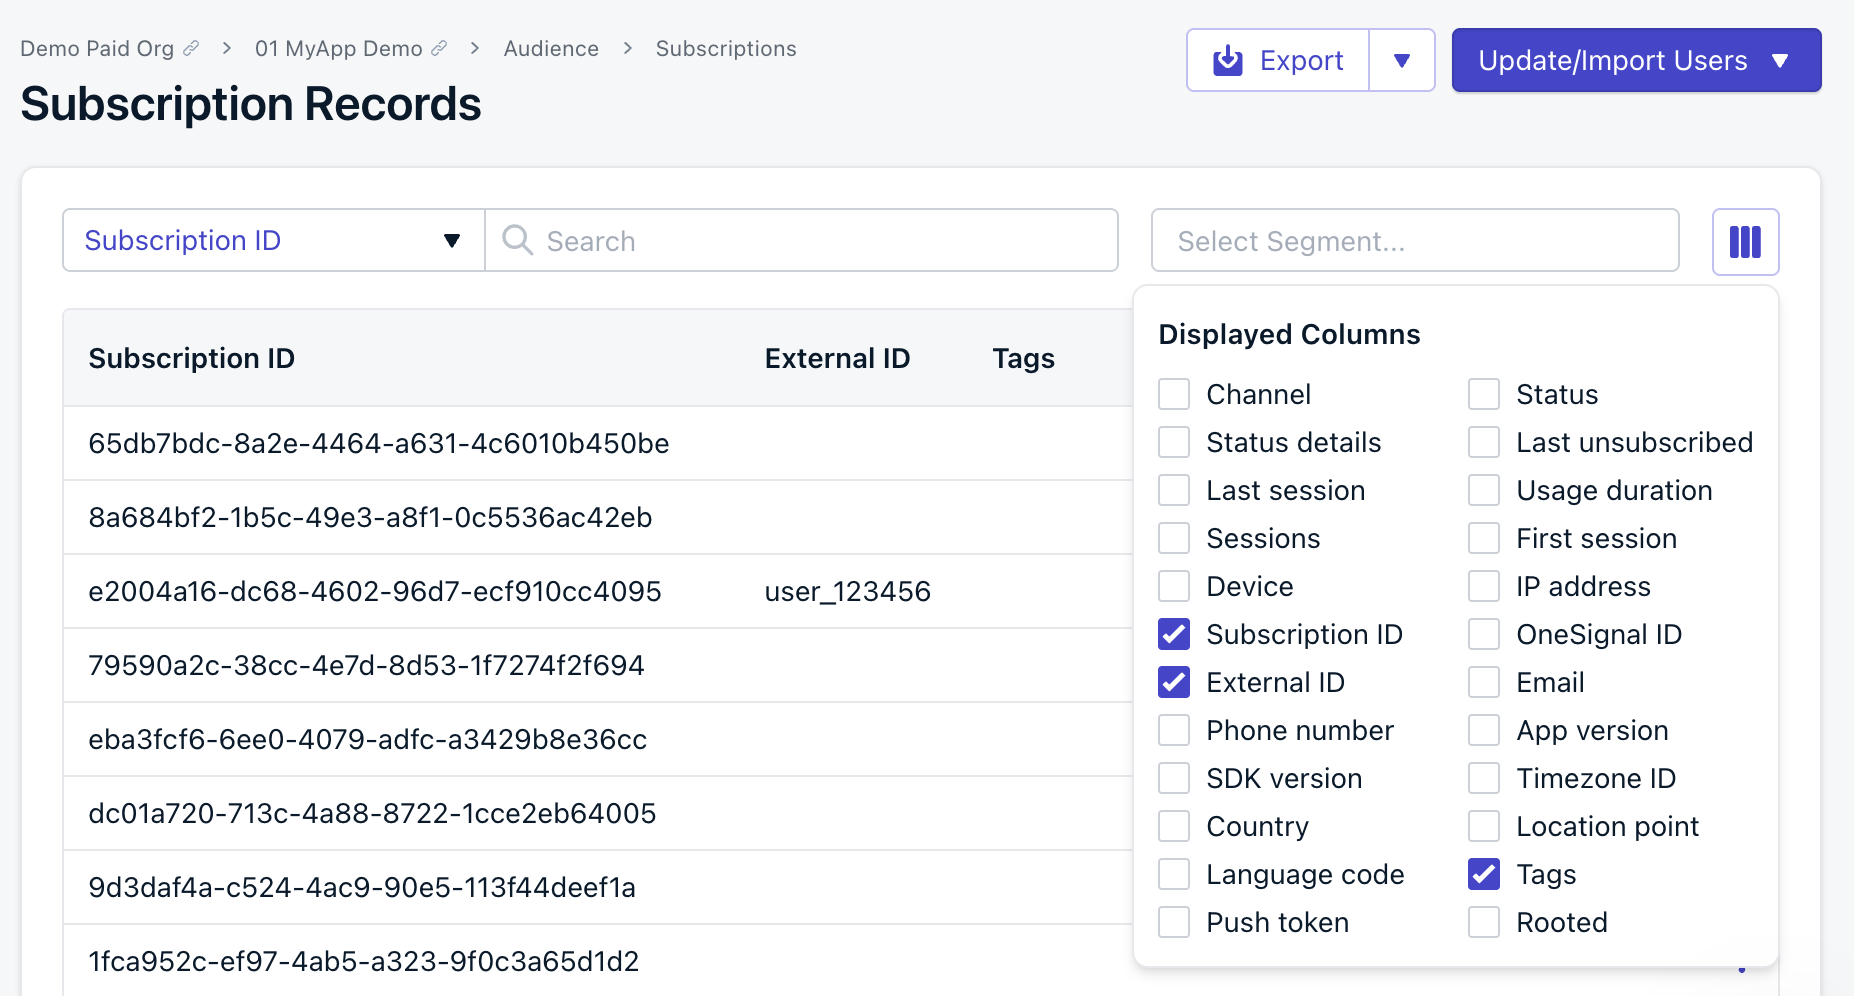
Navigate to Audience > Subscriptions in the OneSignal dashboard. Enable only the External ID, Subscription ID, and Tags columns (and optionally Email or Phone Number).
Click Export to export the CSV.
Select the displayable columns for export
2
Clear the tag values you want to delete
Open the exported CSV in a text editor and set the values of each tag you want to delete as an empty string.For example, a row with tag values before editing:
This will result in deleting the tags level and color from the user.
3
Re-import the CSV with the delete option
Take the edited CSV and import.
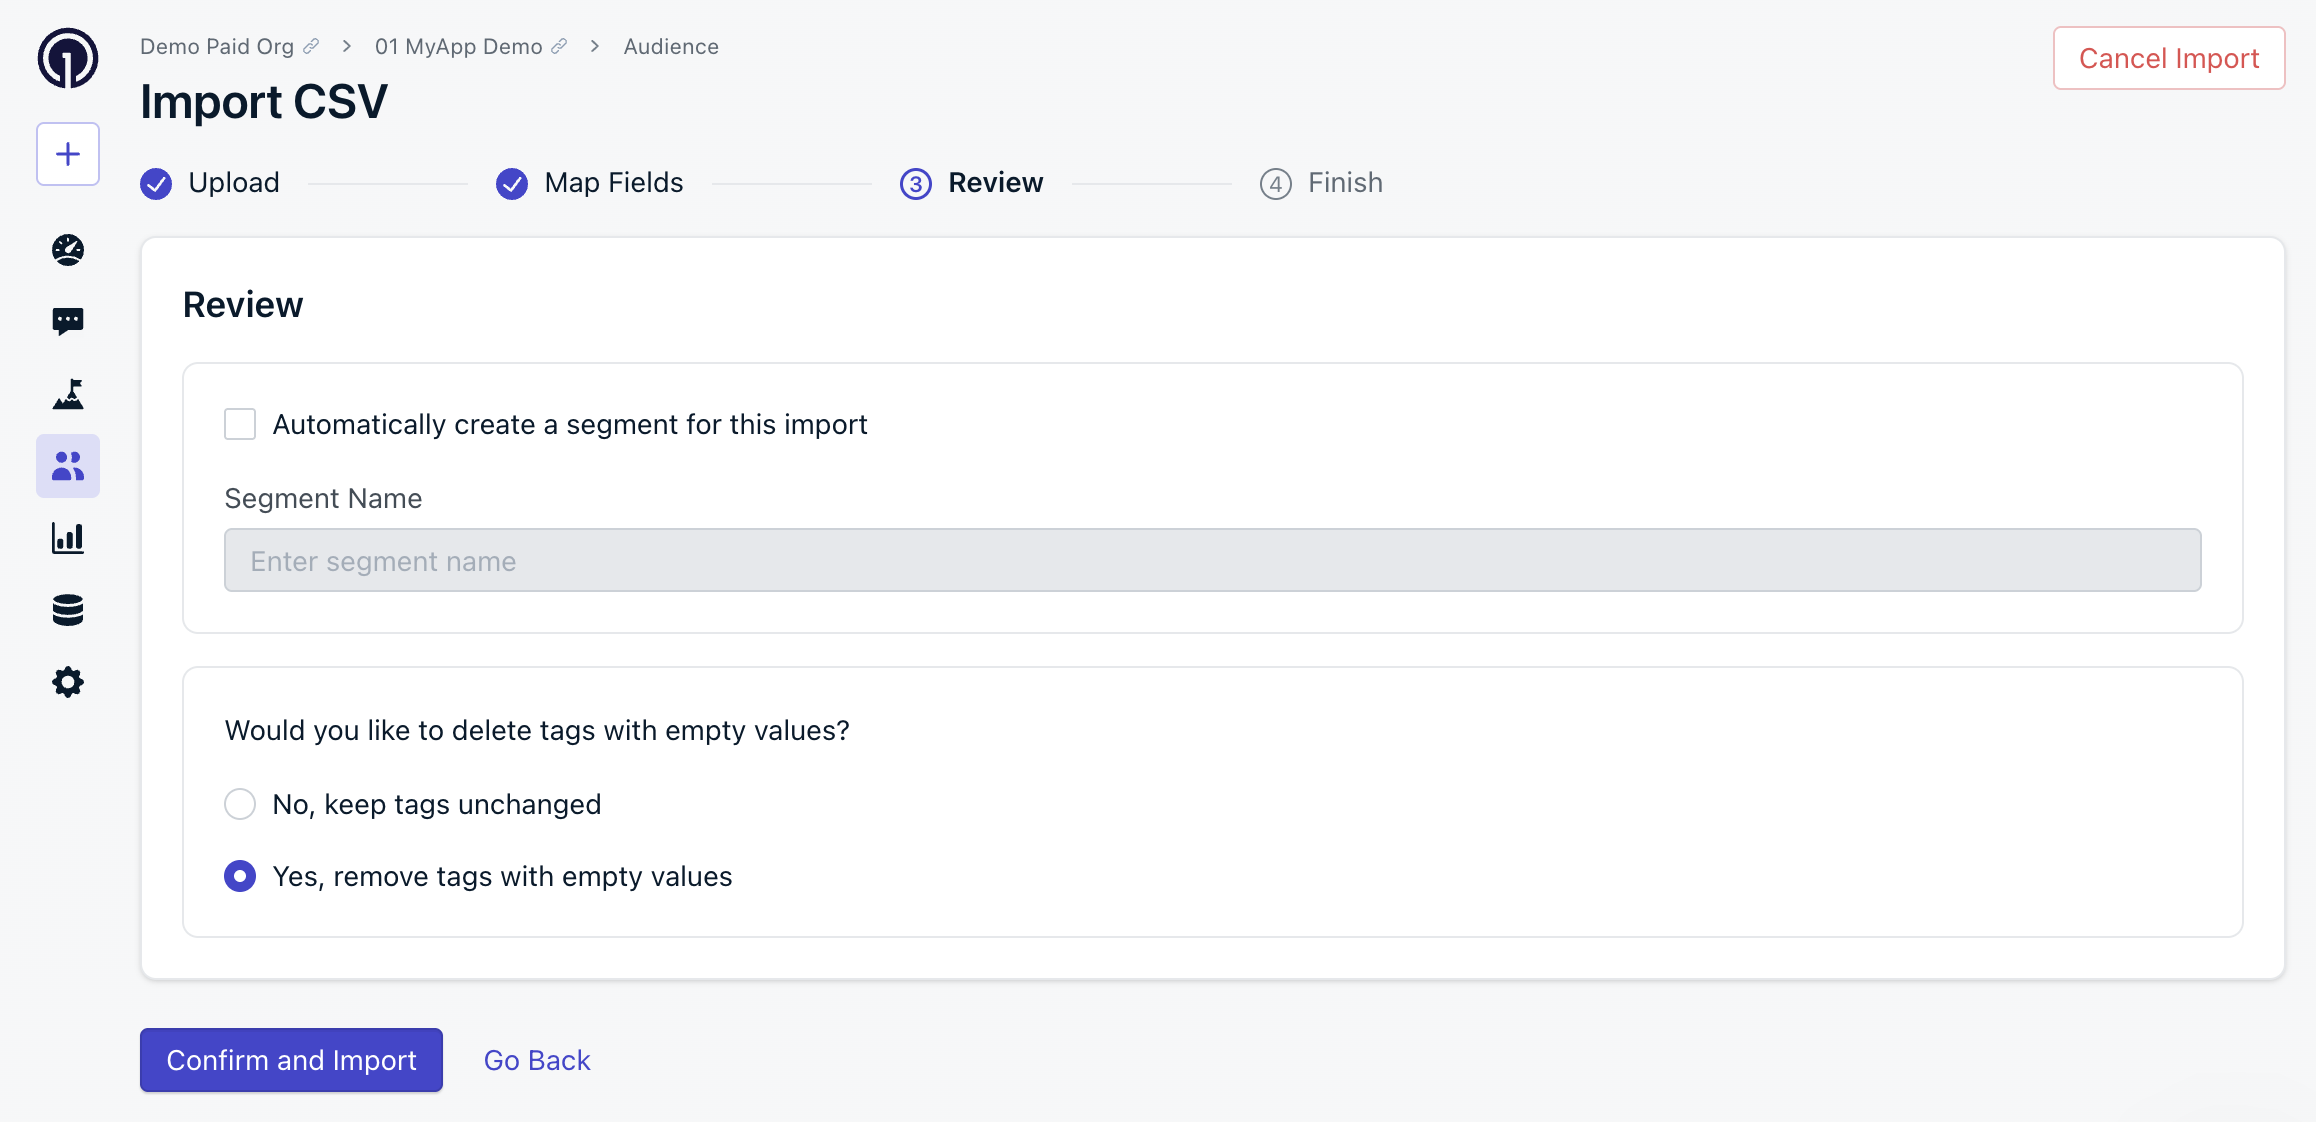
On the Review screen, select Yes for Delete tags with blank values. OneSignal deletes the tags with blank values during import.
Review screen with remove tags with empty values option
To remove only specific tags, clear the values for those tags and leave the others unchanged. Only blank values are deleted when the delete option is enabled.
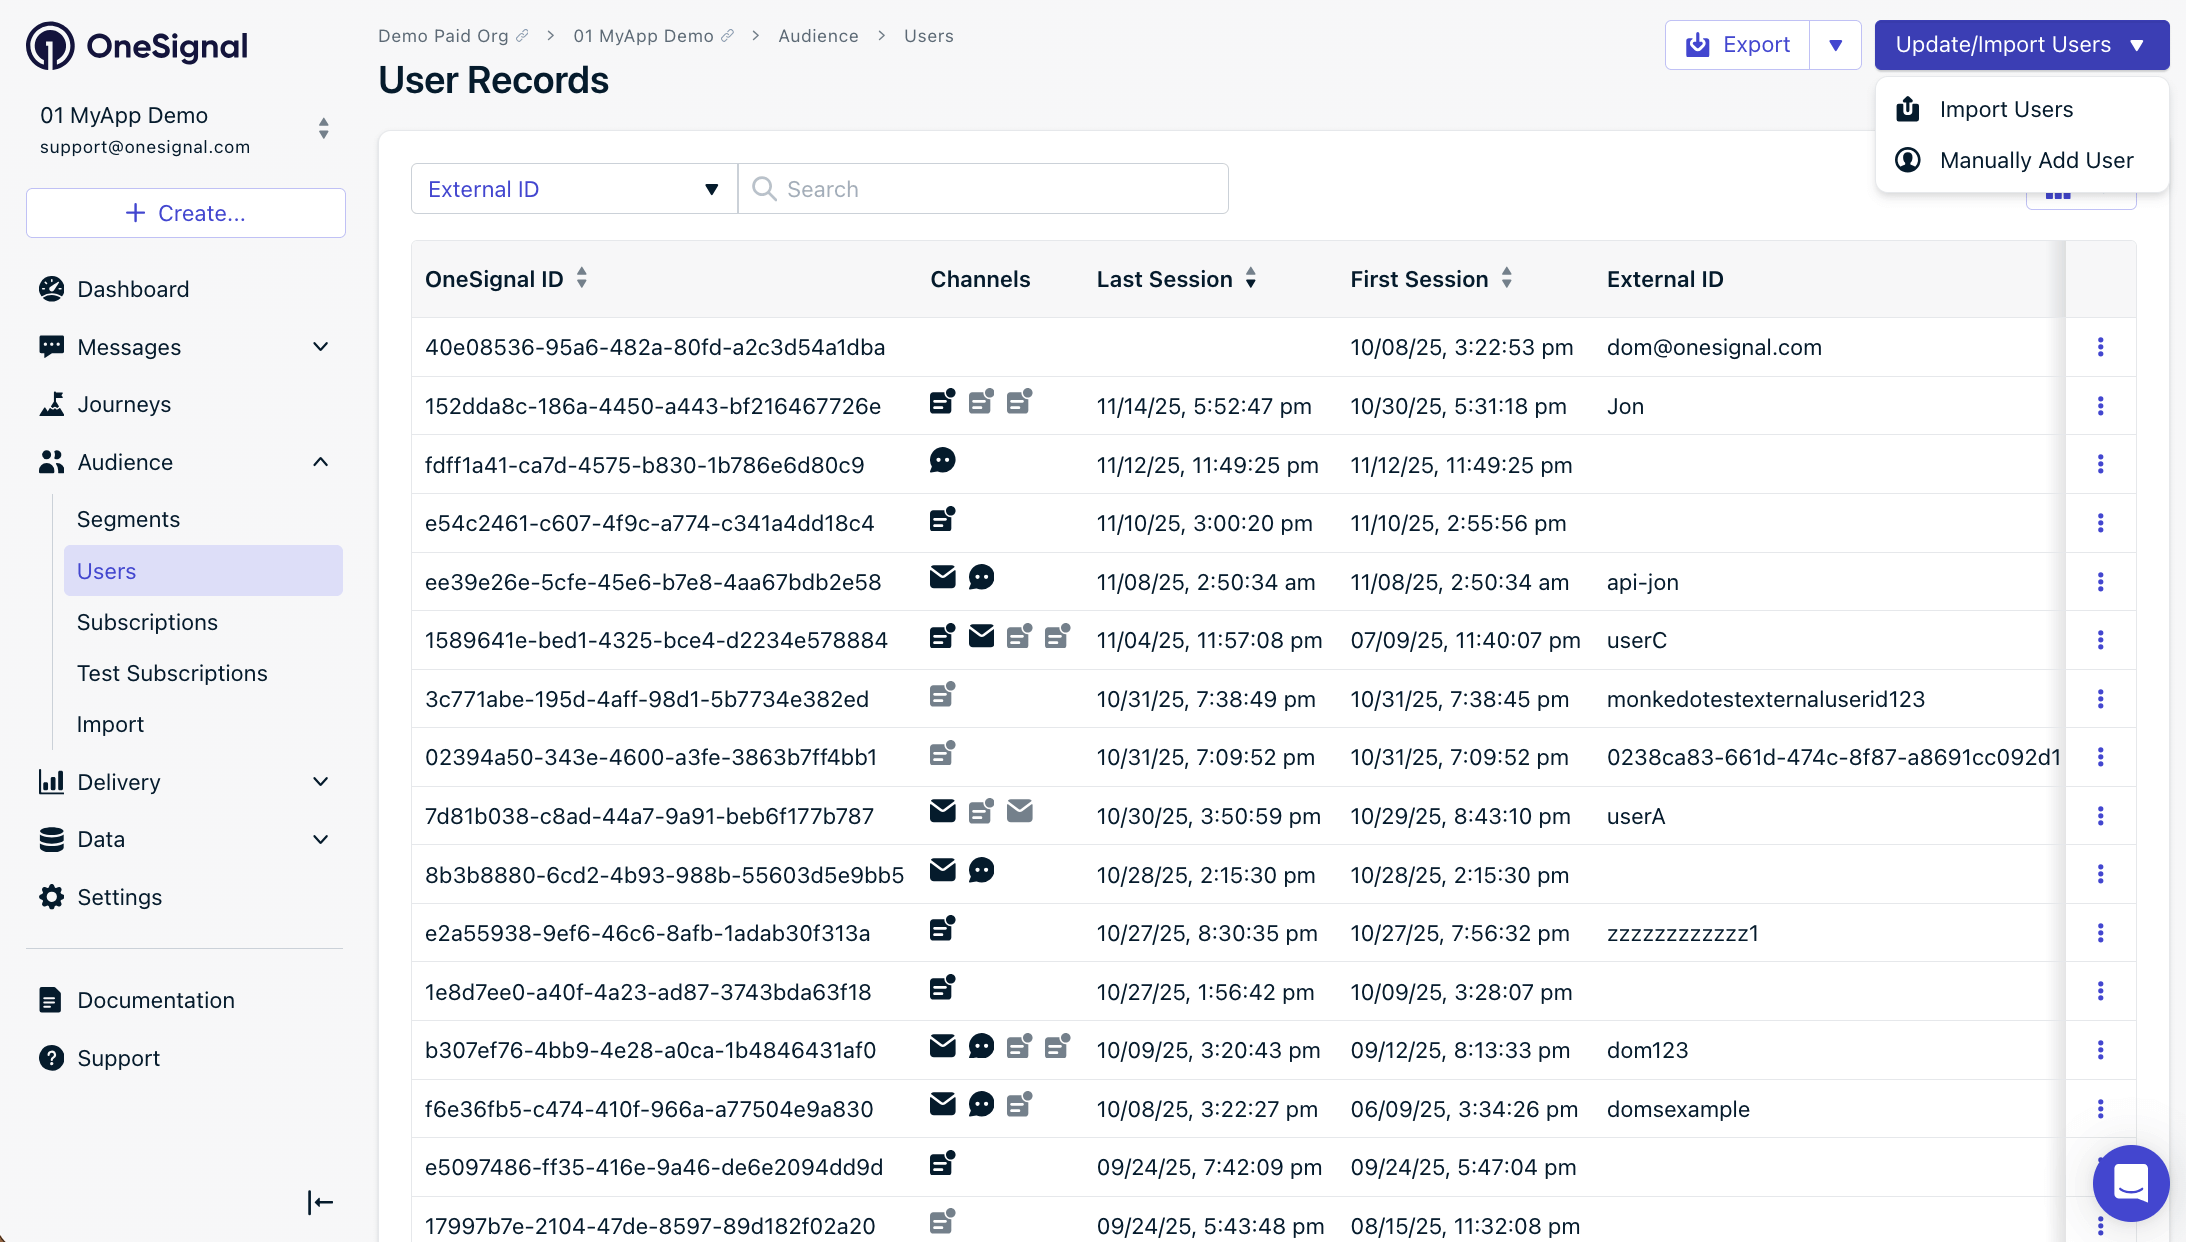
You can manually add users’ email and phone number Subscriptions through the OneSignal dashboard by navigating to Audience > Users > Update/Import Users > Manually Add Users.
Manually add users screen
On the New User screen, include the data you want and select Create User.
Most imports complete within a few minutes depending on file size. You receive a confirmation email from contact@onesignal.com when the import finishes.
Why don’t my segment counts match the rows in my CSV?
Segments only count subscribedSubscriptions. Unsubscribed subscriptions are updated but not reflected in segment counts. See the Email confirmation section for details.
Why did my import show “not imported” for some rows?
Rows are skipped when the external_id does not match any existing subscription, or when the email/phone_number already exists with no new data to set. See Email confirmation for details on each status.