Live Activities are an iOS feature. For similar capability on Android, see Android Live Notifications.
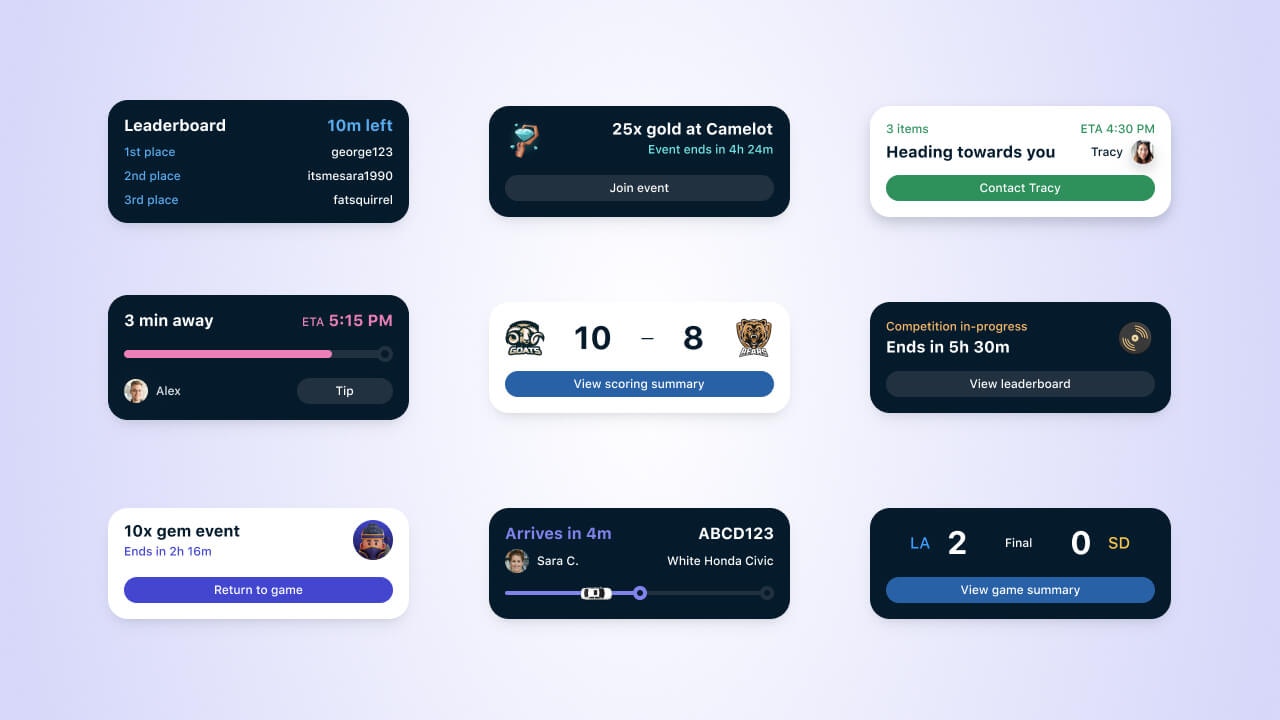
Live Activities examples
When to use Live Activities
Live Activities work best for transactional, time-bound updates with a clear beginning and end. They are visible for up to 8 hours of active updates, do not require push permission for the first activity (they are provisional), and render on premium iOS surfaces like the Lock Screen and Dynamic Island. OneSignal manages the underlying update tokens, scales a single API call across all Subscriptions, and records delivery and engagement analytics for each send.For use cases and examples, see the OneSignal Live Activities blog post.
Get started
Requirements
- iOS 16.1+ or iPadOS 17+.
- OneSignal Mobile SDK integrated.
- Setup completed per the Live Activities Developer Setup.
- Click tracking and confirmed receipt require iOS SDK 5.2.15 or higher.
How Live Activities work
- Active updates: Up to 8 hours from when the activity starts.
- Stale period: After the last update or a call to end the activity, iOS keeps the activity visible for up to 4 more hours before removing it automatically.
- Limit: Up to 5 simultaneous Live Activities per app.
- Permissions: The first activity is provisional — no push permission required. Future activities depend on user settings.
- Remote start: Supported on iOS 17.2+ via push-to-start.
- Content policy: Must provide user value. Not for ads or purely promotional content.
Create, update, and end a Live Activity
1
Start a Live Activity
Start an activity in one of two ways:
- The Start Live Activity API (push-to-start).
- In-app, by calling ActivityKit from your iOS code. See the Live Activities Developer Setup.
2
Update a Live Activity
Call the Update Live Activity API with the
activity_id. OneSignal delivers the update to every Subscription associated with that activity.3
End a Live Activity
End an activity in one of three ways:
- OneSignal SDK (`exitLiveActivity`)
- Update Live Activity API
- User action
- Tells OneSignal to stop sending updates for the given
activityId. - Does not remove the activity from the screen. iOS removes it automatically after the 4-hour stale period or when the user dismisses it.
Analytics and reporting
Track delivery, confirmed receipt, clicks, failures, and unsubscribes on every Live Activity send. Metrics follow the same definitions used across channels — see the Metrics glossary for canonical definitions, and Live Activities analytics for message reports, Audience Activity exports, and rate calculations.Live Activities analytics
Measure delivery, confirmed receipt, clicks, and unsubscribes. Export Audience Activity and compute engagement rates.
Best practices
Functionality
- Use Live Activities for transactional or contextual updates with a defined beginning and end — for example, ETA, score, or timer.
- Keep each activity shorter than 8 hours of active updates, and only as long as the content remains useful.
- Avoid excessive updates. Frequent updates drain device battery and can trigger throttling.
- Do not use Live Activities for ads or purely promotional content.
UI and UX
- Support every presentation: Compact, Minimal, Expanded, and Lock Screen.
- Apply your brand, spacing, and dark/light themes consistently.
- Prioritize clarity and tap targets. Do not try to draw attention to the Dynamic Island itself.
- Do not display sensitive information in a Live Activity.
See Apple’s Live Activities Human Interface Guidelines for more detail.
Targeting at scale
Target users based on the event:- Use segments for broad events like sports games, concerts, or launches.
- Target individual users for personal or transactional events such as orders and deliveries.
Set update priority
Apple uses thepriority field on each update to decide how urgent it is. Sending too many high-priority updates in a short window triggers throttling, where iOS delays or drops updates.
- Use a mix of
priority: 5(standard) andpriority: 10(high). Reservepriority: 10for time-sensitive updates. - If your use case requires frequent high-priority updates, add
NSSupportsLiveActivitiesFrequentUpdatesto your app’sInfo.plistas a Boolean set toYES. See Apple’s guidance on update frequency. - When the budget is exceeded, iOS may prompt the user to allow additional updates. If the user allows, Apple expands the budget for that app.
priority field, see the Update Live Activity API.
FAQ
Do I have access to Live Activities in my plan?
Live Activities are available on all plans except Free plans with more than 10,000 opted-in subscribers. Upgrade from the Free plan to use Live Activities. See pricing or contactsupport@onesignal.com.
What is the budget for high-priority updates?
Apple does not publish a fixed limit. iOS enforces a dynamic, device-level budget based on recentpriority: 10 usage, and throttles or drops updates when the budget is exceeded. Mix priority: 5 with priority: 10, and reserve high priority for time-sensitive updates. See Apple’s guidance.
Where can I see Live Activities in the OneSignal dashboard?
Live Activities are sent only through the Live Activity APIs, but you can review historically sent activities in Sent Messages filtered to Live Activities for up to 30 days. For aggregate trends, see Engagement Trends.What devices support Live Activities?
Apple maintains the compatibility list for iOS 16+ and iPadOS 17+.What’s the difference between Delivered and Confirmed Receipt?
Delivered means APNs accepted the Live Activity update for delivery. Confirmed Receipt means the OneSignal SDK on the device confirmed that the update actually arrived. Confirmed Receipt requires iOS SDK 5.2.15+ and completed Confirmed receipt setup. See the Metrics glossary for the full definitions.Related
Live Activities Developer Setup
Integrate the OneSignal iOS SDK and configure your app for Live Activities.
Live Activities analytics
Message reports, Audience Activity, and CSV export for Live Activities.
Update Live Activity API
Send, update, and end Live Activities at scale with the REST API.
Confirmed receipt
Requirements for device-side receipt confirmation on iOS.
Android Live Notifications
Deliver similar real-time experiences on Android devices.
Metrics glossary
Canonical definitions for every metric across dashboard, API, CSV, and Event Streams.