

Visão geral
Configurando notificações push para seu app Unity usando OneSignal
Integrar notificações push ao seu app Unity é uma maneira poderosa de aumentar o engajamento e retenção de usuários. O Unity SDK do OneSignal suporta dispositivos iOS (APNs), Android (FCM), Amazon (ADM) e Huawei, permitindo mensagens em tempo real com esforço mínimo. Seja construindo jogos móveis ou apps interativos, este guia ajuda você a integrar o OneSignal de forma rápida e confiável.Requisitos
- Unity 2022.3 ou mais recente
- App e plataforma OneSignal configurados
- macOS com Xcode 14+ (instruções de configuração usam Xcode 16.2)
- Dispositivo com iOS 12+, iPadOS 12+, ou simulador Xcode rodando iOS 16.2+
- Dispositivo ou emulador Android 7.0+ com Google Play Store (Services) instalado
Configure seu app e plataforma OneSignal
Configure seu app OneSignal com as plataformas que você suporta — Apple (APNs), Google (FCM), Huawei (HMS) e/ou Amazon (ADM).Instruções de configuração passo a passo
Instruções de configuração passo a passo
Crie ou selecione seu app
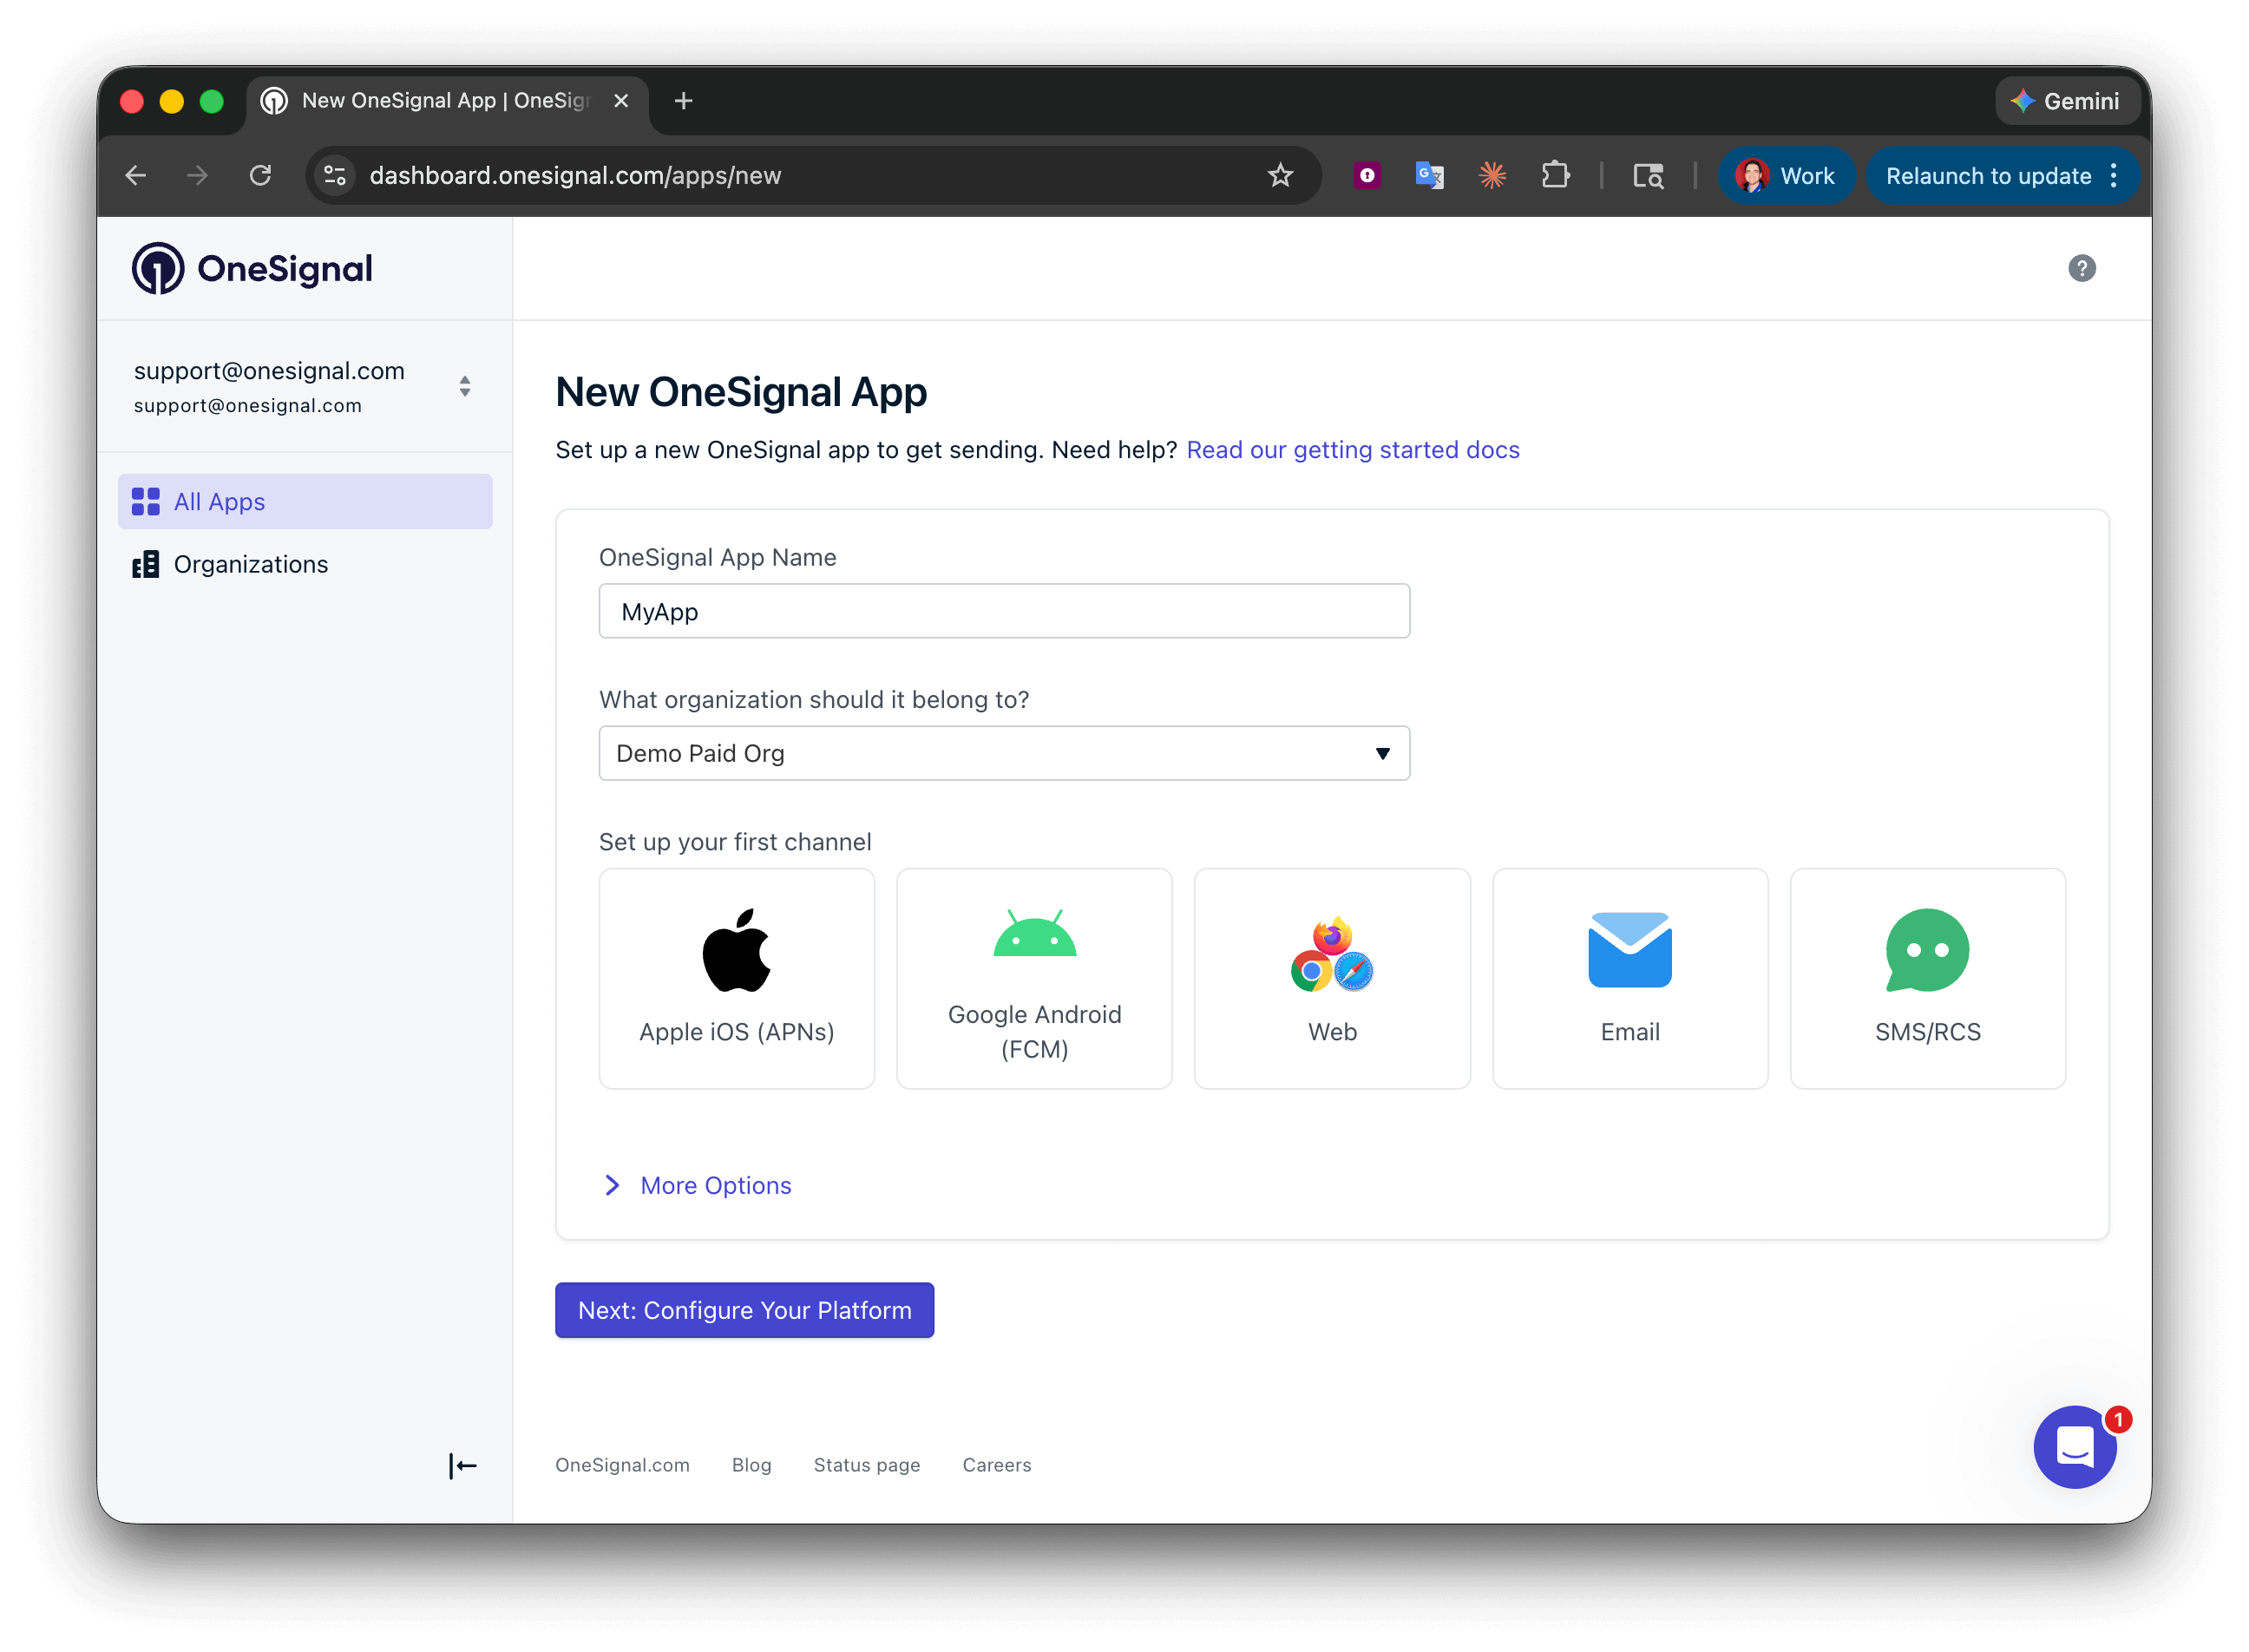
Configurando seu primeiro app OneSignal, Organização e canal.
Configure credenciais da plataforma
- Android: Configure Credenciais Firebase
- iOS: Token p8 (Recomendado) ou Certificado p12
- Amazon: Gere API Key
- Huawei: Autorize OneSignal
Salve seu App ID e instale o SDK
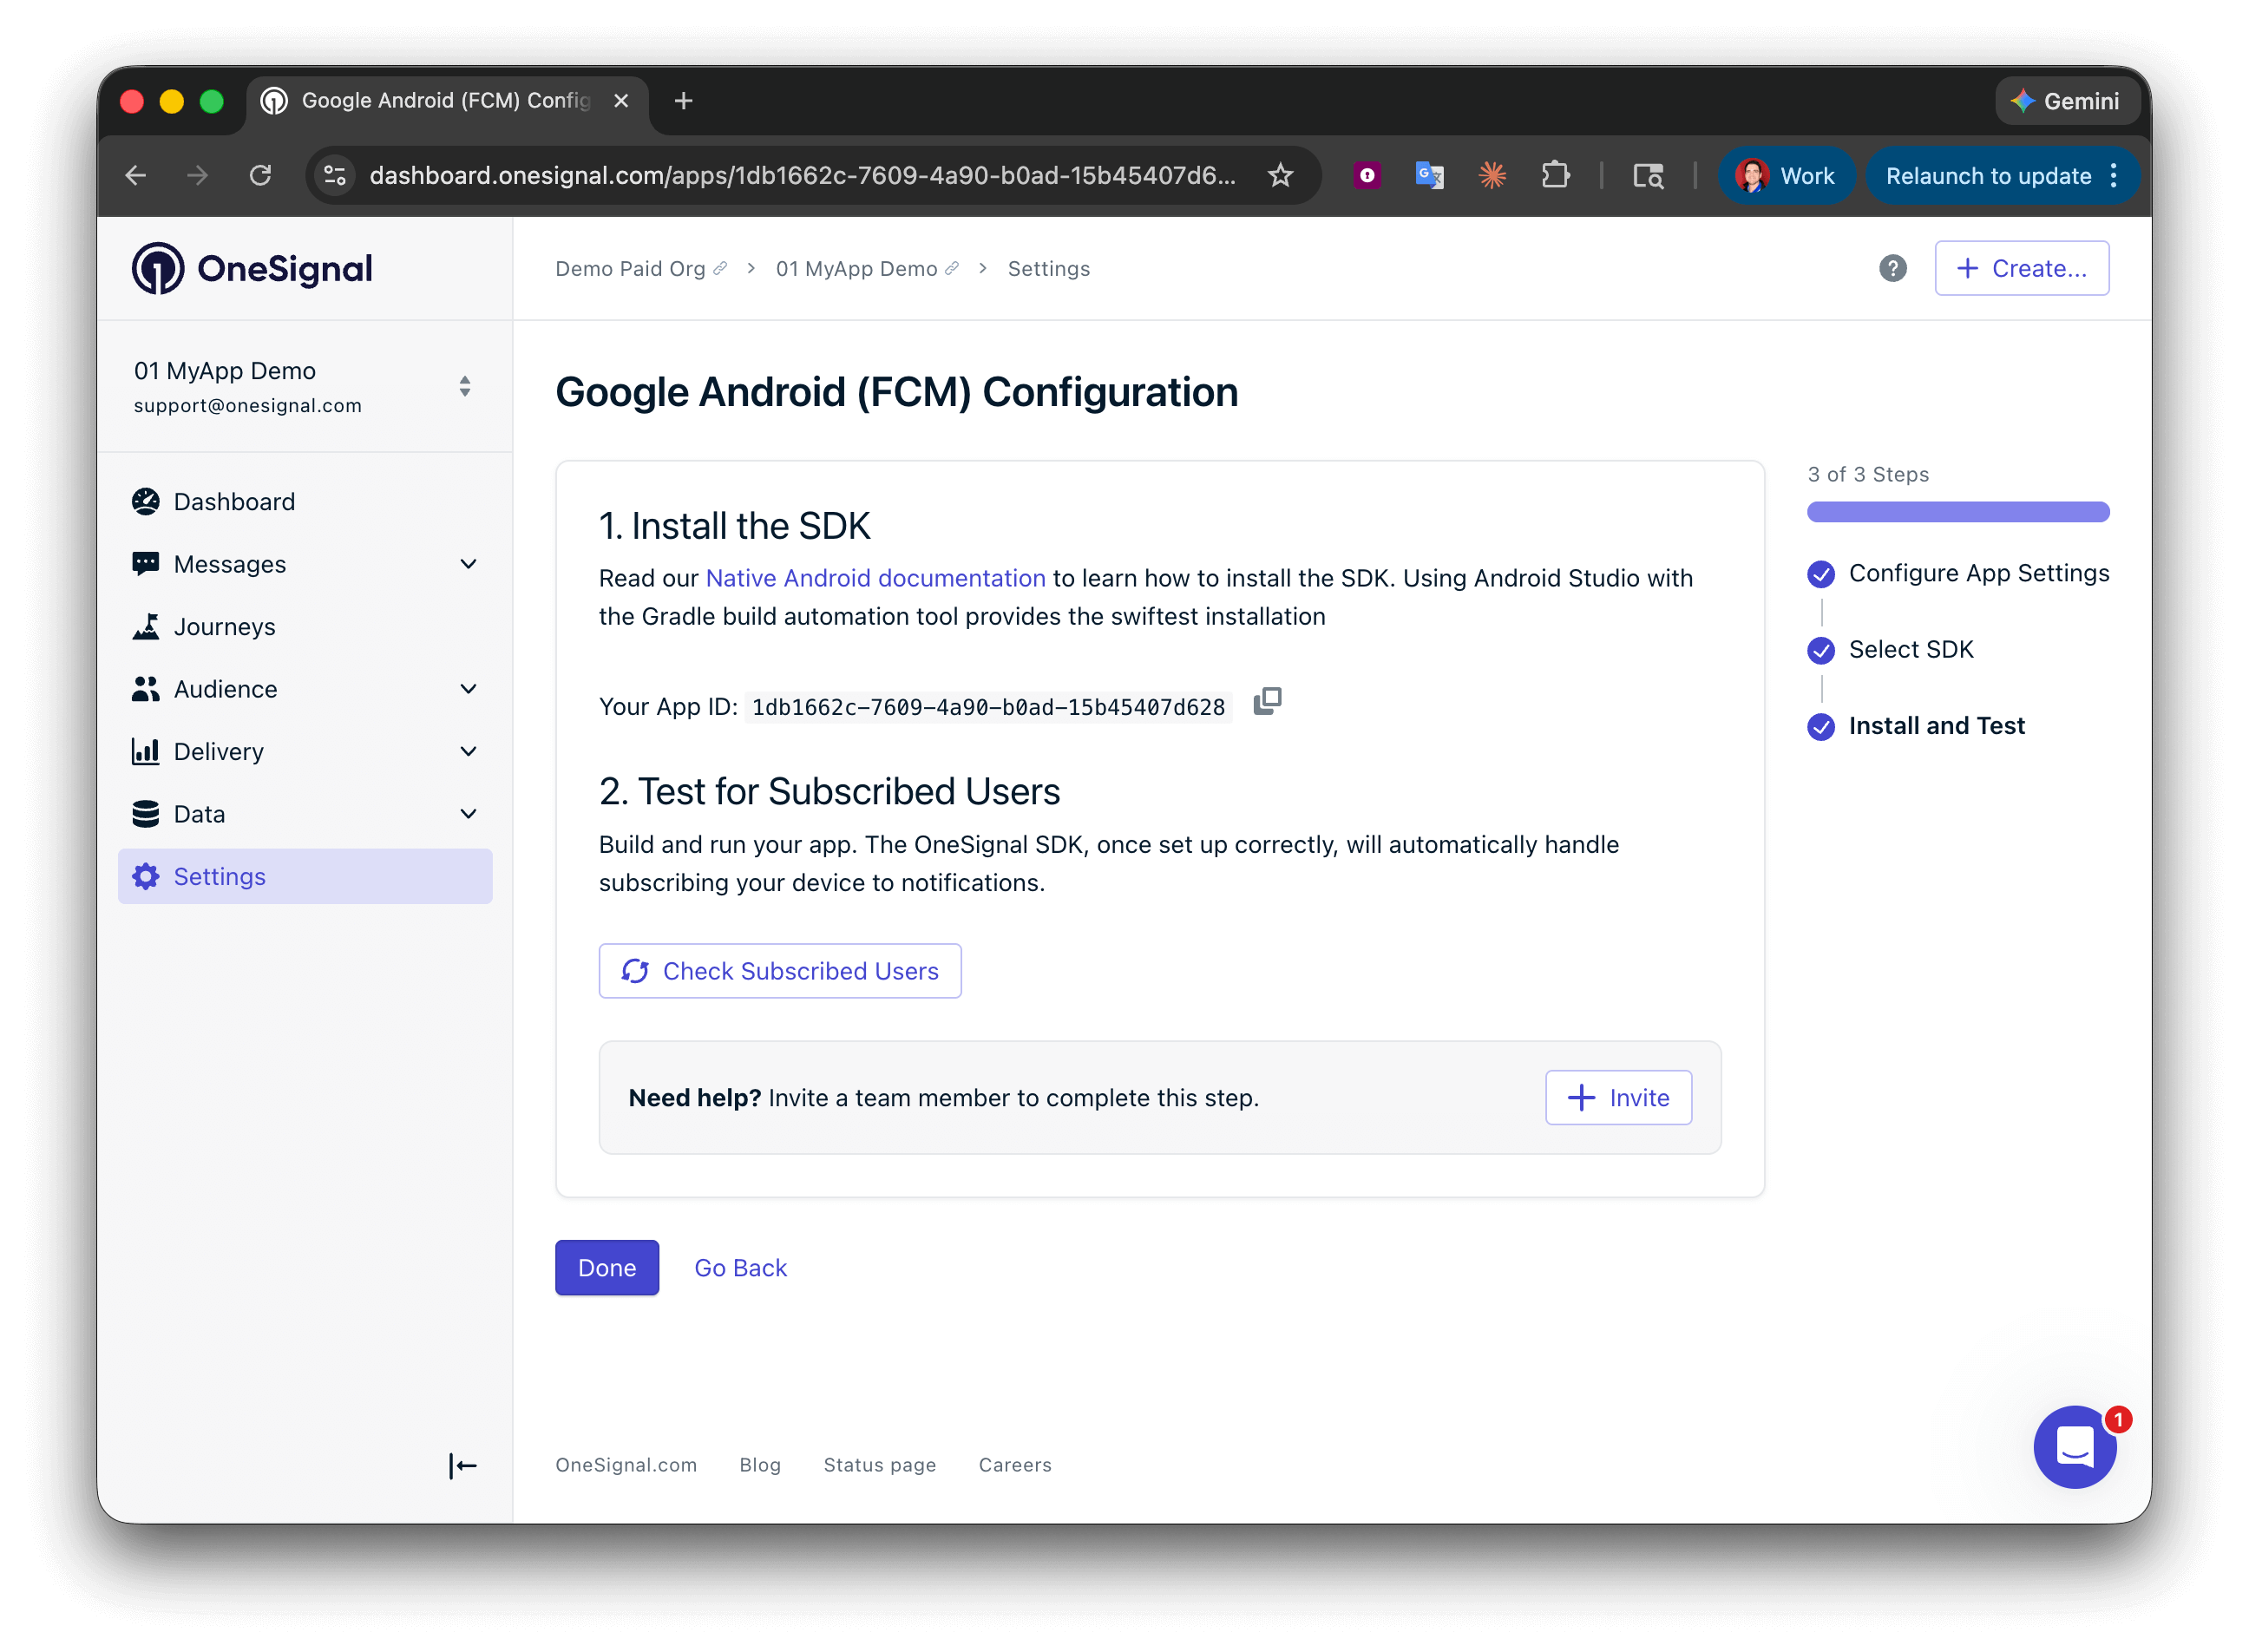
Salve seu App ID e convide membros adicionais da equipe.
Configuração
1. Adicionar o OneSignal Unity SDK
Dois métodos de instalação estão disponíveis:- Unity Asset Store
- Unity Package Manager
- Adicione o SDK à sua conta via Add to My Assets.
- Clique em Open in Unity para abrir o Unity Editor e Package Manager.
- Baixe e Importe o SDK.
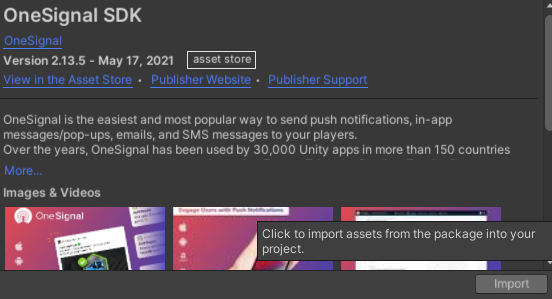
OneSignal Unity SDK em My Assets
- Aceite o prompt para importar todos os arquivos.
- Vá para Window > OneSignal SDK Setup e siga a checklist, especialmente Import OneSignal packages.
- Após importar, Unity atualizará o registro. Complete os passos de configuração restantes mostrados na janela de setup.
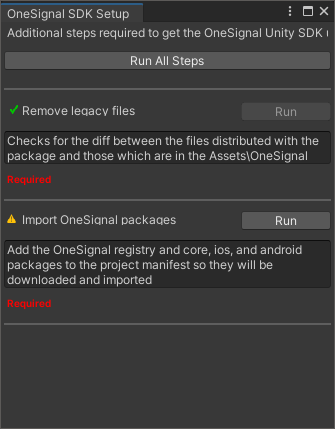
Janela OneSignal SDK Setup
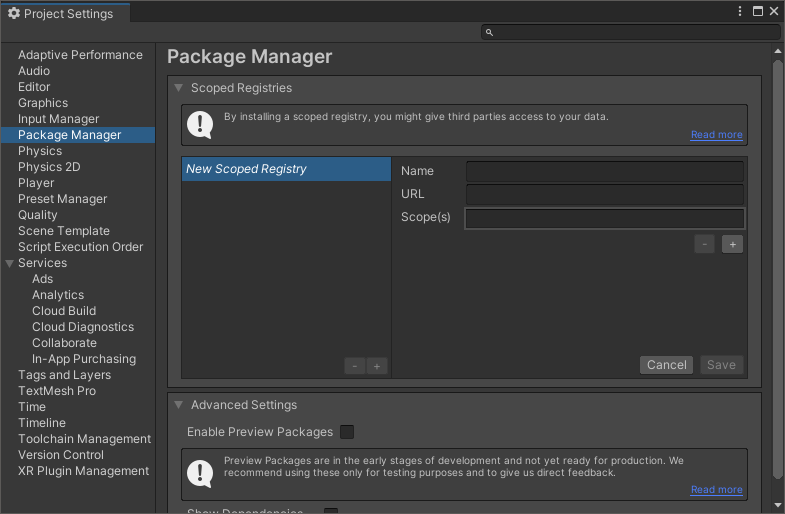
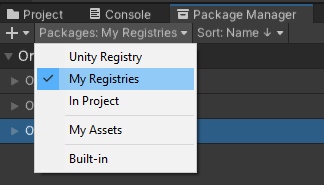
2. Configuração de plataforma
Adicione todas as plataformas que seu app suporta.Configuração iOS
Nosso SDK auto-configura as configurações Xcode necessárias. Escolha sua abordagem de provisionamento:- Automatically Sign (Recomendado)
- Provisionamento Manual
- Vá para File > Build Settings > Player Settings.
- Em Other Settings, marque Automatically Sign.
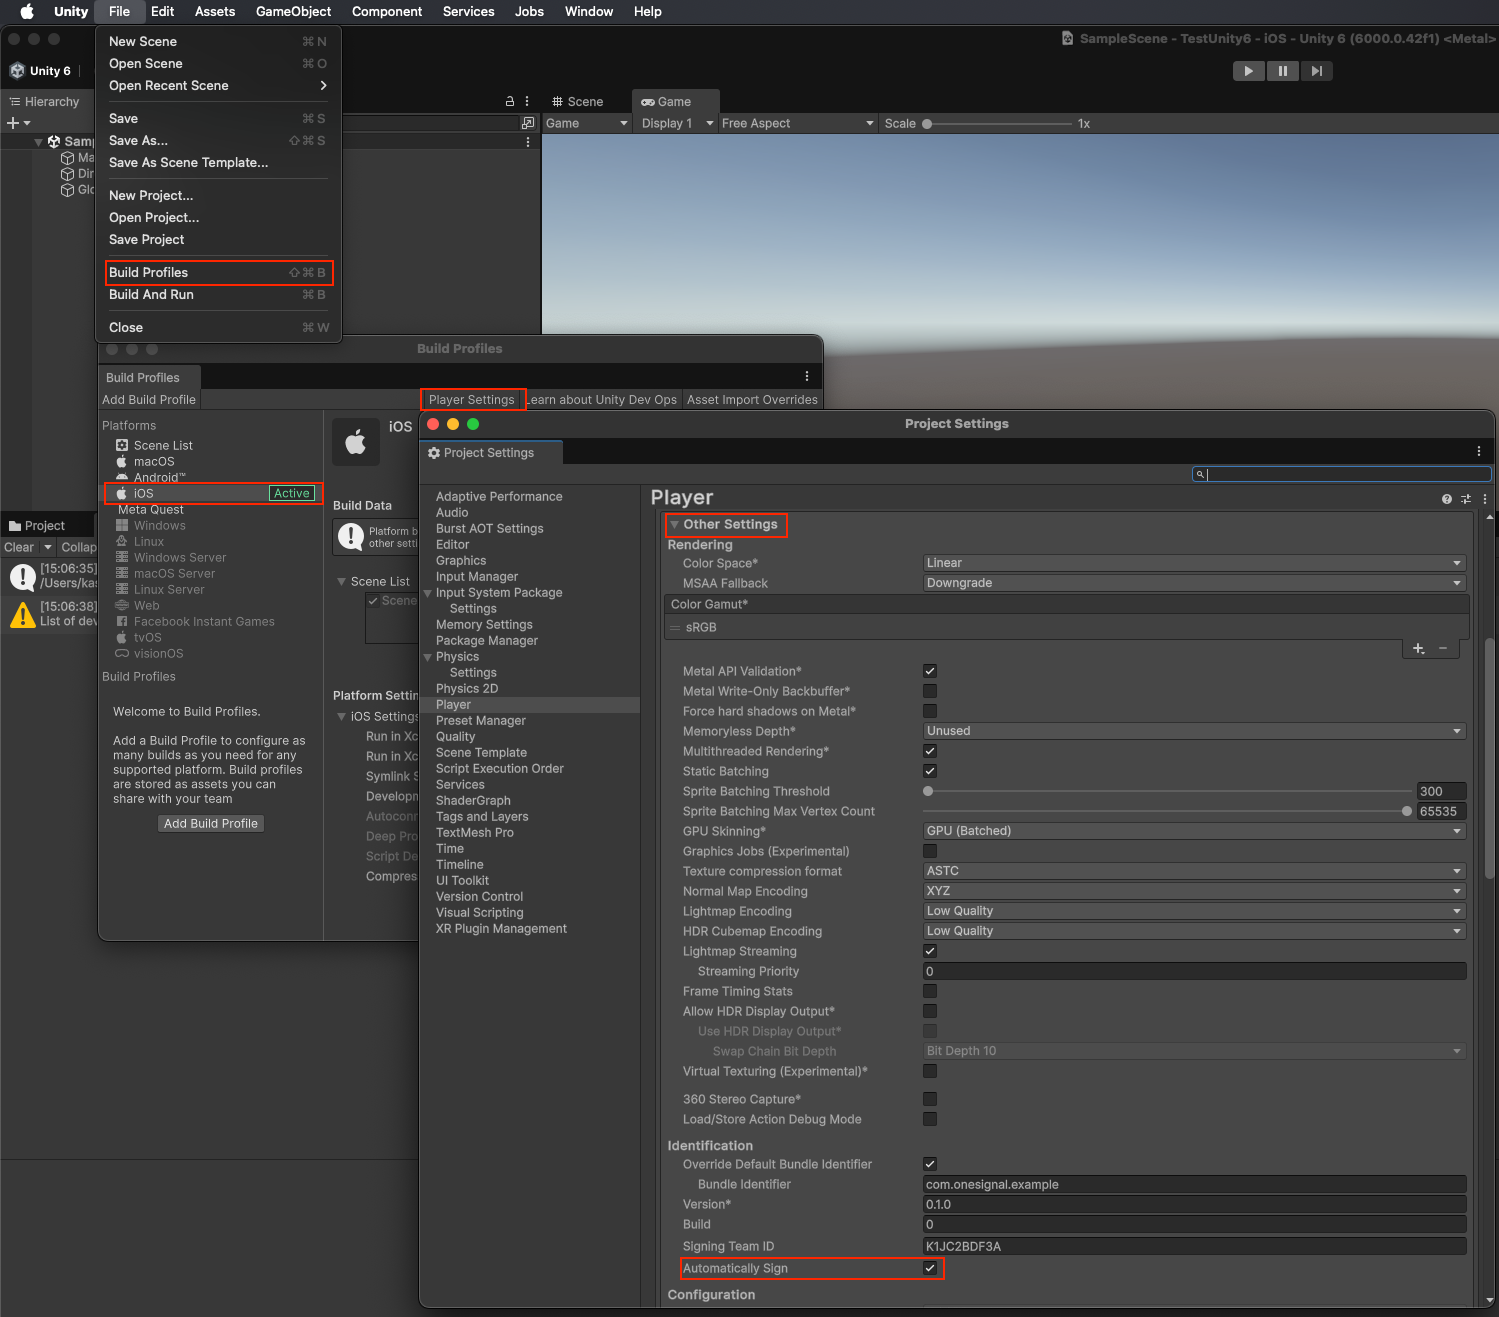
Habilitar assinatura automática no Unity
Configuração Android
- Vá para Edit > Project Settings > Player > Android.
- Em Publishing Settings, habilite:
- Custom Main Gradle Template
- Custom Gradle Properties Template
- Execute Assets > External Dependency Manager > Android Resolver > Force Resolve.
- Target API Level deve ser 33+ (v5.0.6+).
- Se Minify estiver habilitado, execute Copy Android plugin to Assets de OneSignal SDK Setup para usar
OneSignalConfig.androidlib. - Substitua os ícones padrão dentro de
Assets/Plugins/Android/OneSignalConfig.androidlib/src/main/respelos seus próprios (apenas nomes de arquivo em minúsculas, sublinhados permitidos). Veja Ícones de notificação para mais.
Configuração Amazon
Configuração Amazon FireOS (ADM)
Configuração Amazon FireOS (ADM)
- Edite ou crie
Plugins/Android/AndroidManifest.xml. - Adicione namespace:
- Adicione permissões:
- Adicione o seguinte à tag
<application>:
-
Substitua todas as instâncias de
COM.YOUR.PACKAGE_NAMEpelo seu nome de pacote real. -
Coloque seu
api_key.txtemAssets/Plugins/Android/OneSignalConfig.androidlib/src/main/assets
- Veja Guia Generate an Amazon API Key para ajuda na criação deste arquivo.
Configuração Huawei
Opcional: Desabilitar o módulo de localização
A partir do OneSignal Unity SDK 5.3.0, você pode excluir o módulo de localização nativo do OneSignal das compilações iOS e Android quando seu app não usaOneSignal.Location. Por padrão, o SDK inclui o módulo de localização nativo para que as APIs de localização funcionem sem configuração adicional.
Defina o indicador antes de resolver as dependências do Android ou compilar o iOS. Há duas formas de excluí-lo:
- Alternância do Editor (interativa): No Unity Editor, vá para Project Settings > OneSignal e habilite Disable Location Module. A configuração é salva em
ProjectSettings/OneSignalSettings.json. - Variável de ambiente (CLI/CI): Exporte
ONESIGNAL_DISABLE_LOCATION=true(ou1) no shell antes de iniciar o Unity. A variável de ambiente tem precedência sobre a alternância do Editor.
Assets/OneSignal/Editor/OneSignalAndroidDependencies.xml e Assets/OneSignal/Editor/OneSignaliOSDependencies.xml. Depois de executar Assets > External Dependency Manager > Android Resolver > Force Resolve, o Android resolve os módulos OneSignal sem o artefato de localização em Assets/Plugins/Android/mainTemplate.gradle. As compilações iOS usam pods OneSignal sem OneSignalLocation.
OneSignal.Location.RequestPermission() e atribuir OneSignal.Location.IsShared não executam nenhuma ação em compilações nativas sem o módulo de localização. OneSignal.Location.IsShared retorna false.
Aplicar a alteração após as dependências nativas serem armazenadas em cache
Se você alternar essa configuração em um projeto existente, limpe as saídas nativas obsoletas e resolva novamente as dependências com o indicador definido:- Exclua
Assets/OneSignal/Editor/OneSignalAndroidDependencies.xmleAssets/OneSignal/Editor/OneSignaliOSDependencies.xml, depois reabra o projeto para que o Unity os regenere a partir deProjectSettings/OneSignalSettings.json. - Execute Assets > External Dependency Manager > Android Resolver > Force Resolve para que
Assets/Plugins/Android/mainTemplate.gradlereceba os pacotes sem localização. - Reexporte o projeto Xcode do iOS e execute
pod install, se necessário. - Remova
Build/e outras saídas geradas antes de recompilar.
3. Inicializar o SDK
Adicione este código dentro do métodoStart() de um MonoBehaviour no início do ciclo de vida da sua aplicação.
Substitua YOUR_APP_ID pelo seu OneSignal App ID encontrado no seu dashboard OneSignal Settings > Keys & IDs.
Testando a integração do OneSignal SDK
Este guia ajuda você a verificar se sua integração do OneSignal SDK está funcionando corretamente testando notificações push, registro de inscrição e mensagens in-app.Verifique inscrições mobile
Inicie seu app em um dispositivo de teste.
requestPermission durante a inicialização.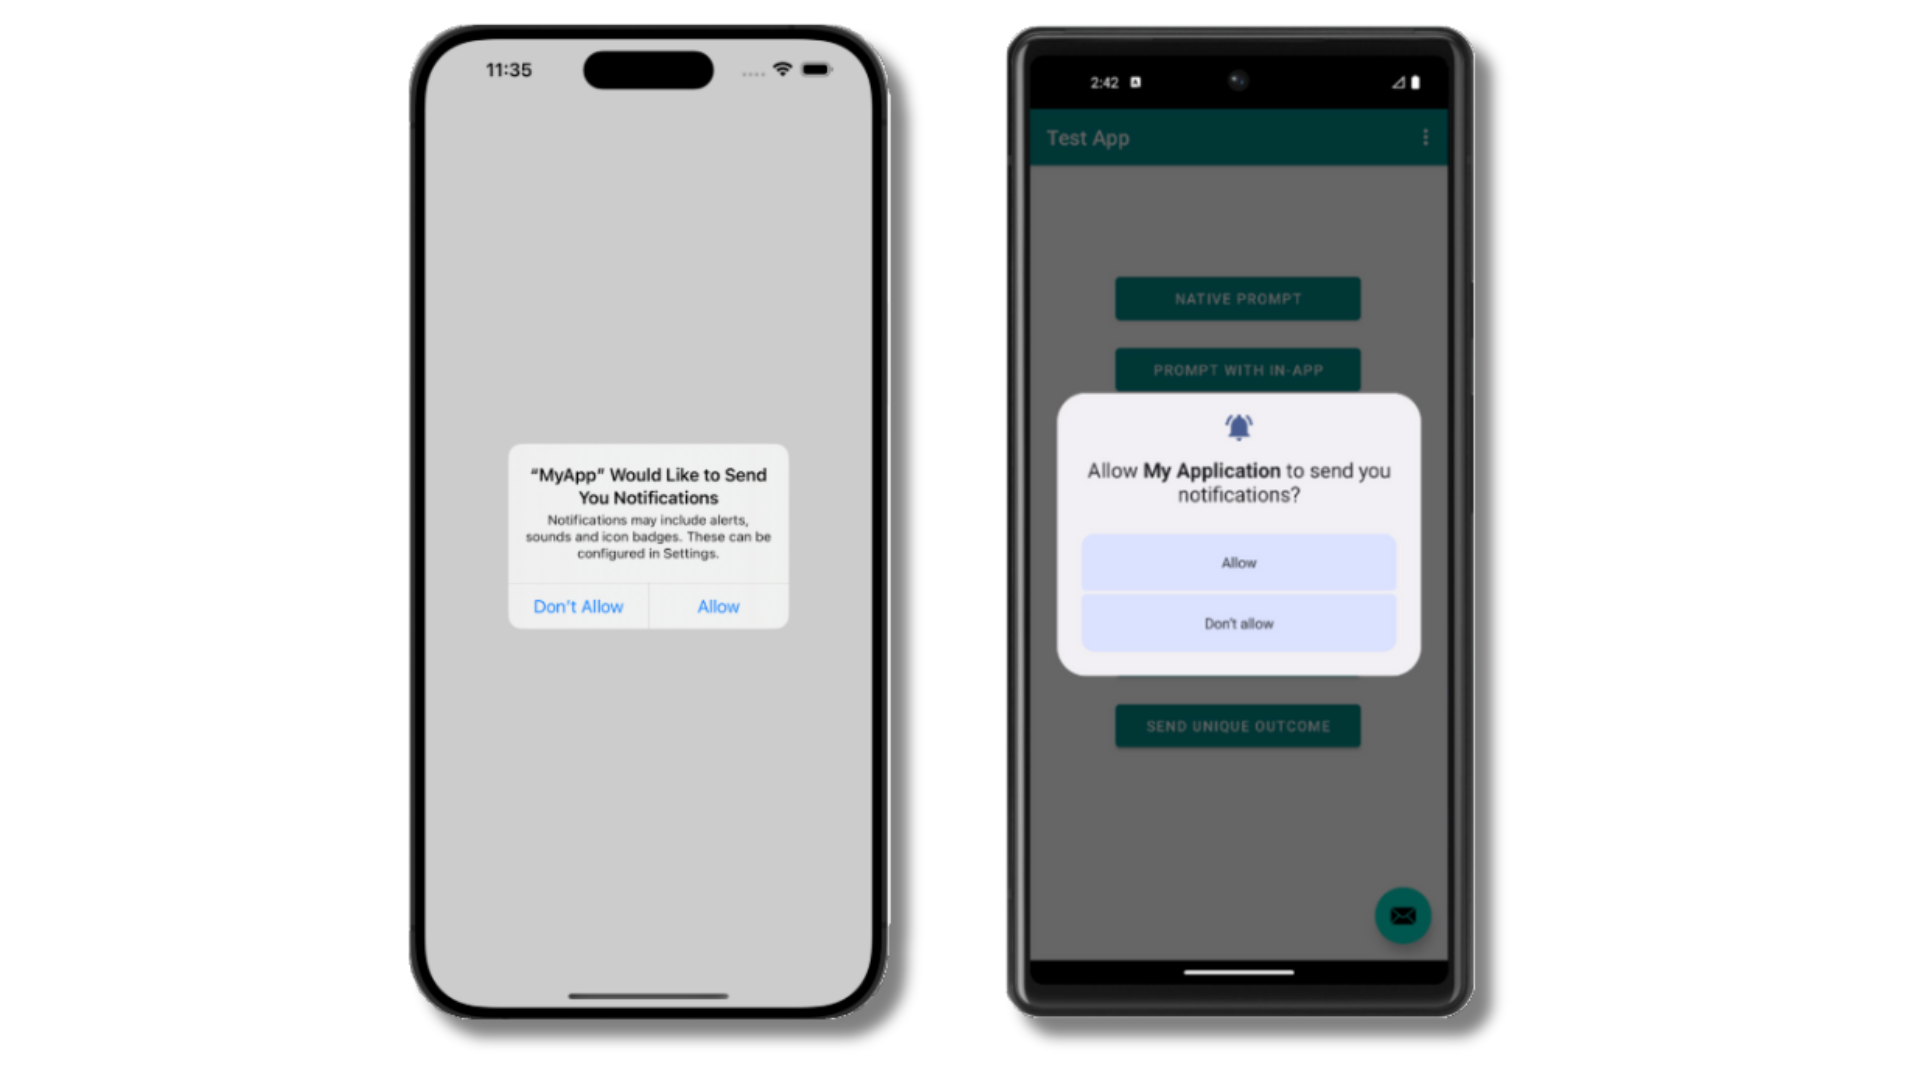
Prompts de permissão push iOS e Android
Verifique seu dashboard OneSignal
- Vá para Audience > Subscriptions.
- Você deve ver uma nova entrada com o status “Never Subscribed”.
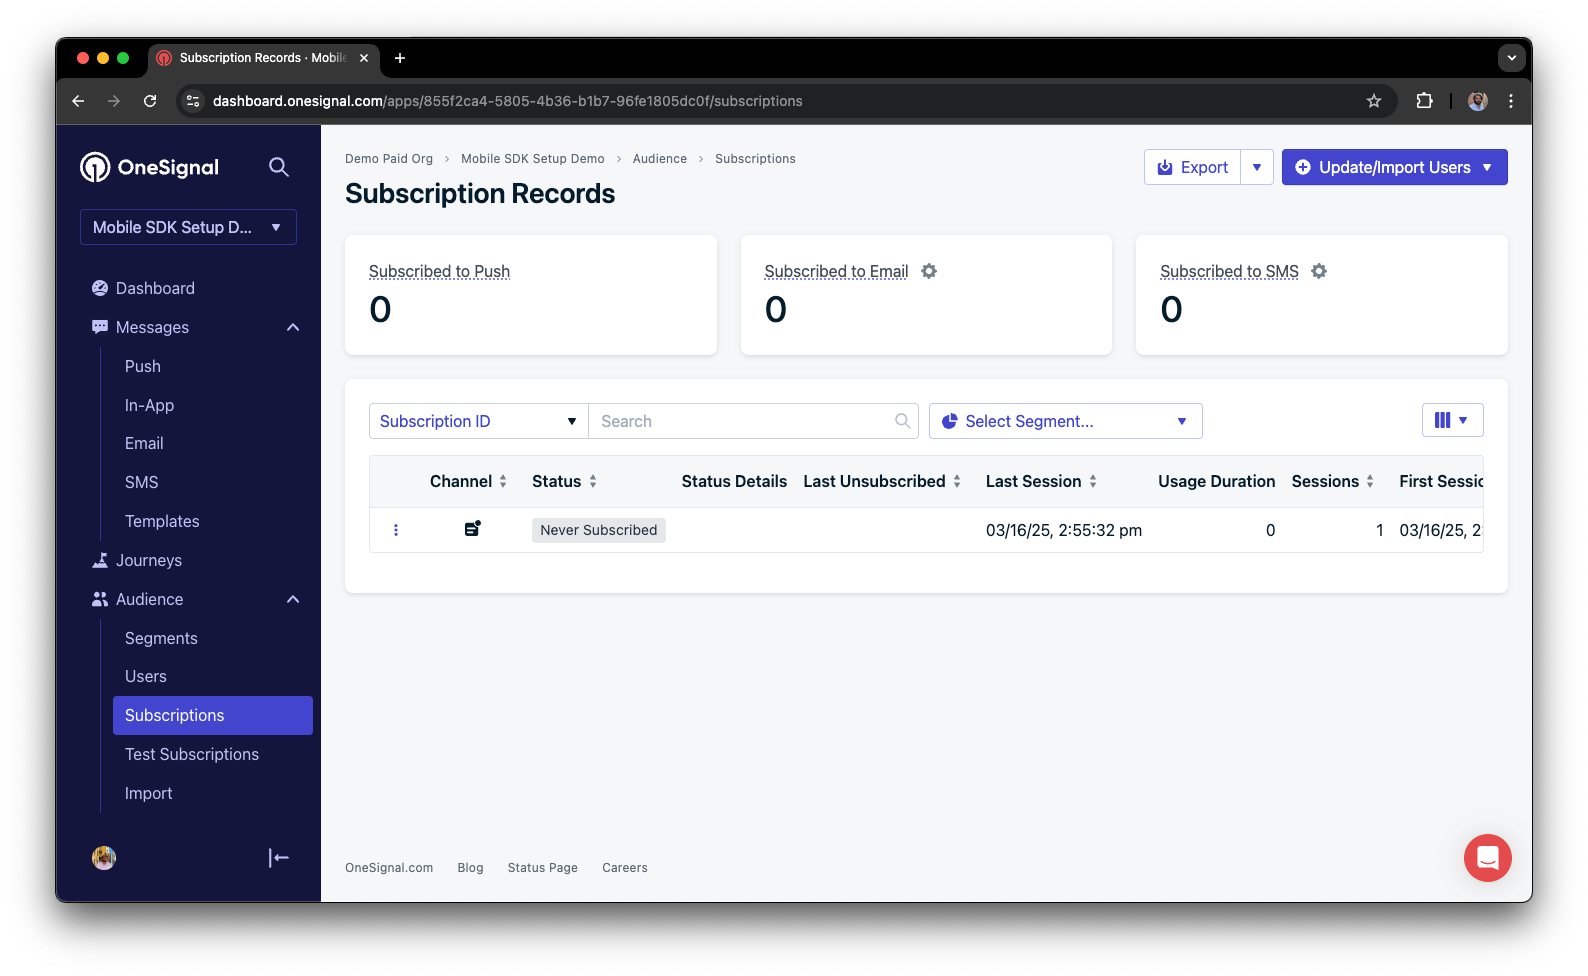
Dashboard mostrando inscrição com status 'Never Subscribed'
Retorne ao app e toque em Allow no prompt.
Atualize a página de Subscription do dashboard OneSignal.
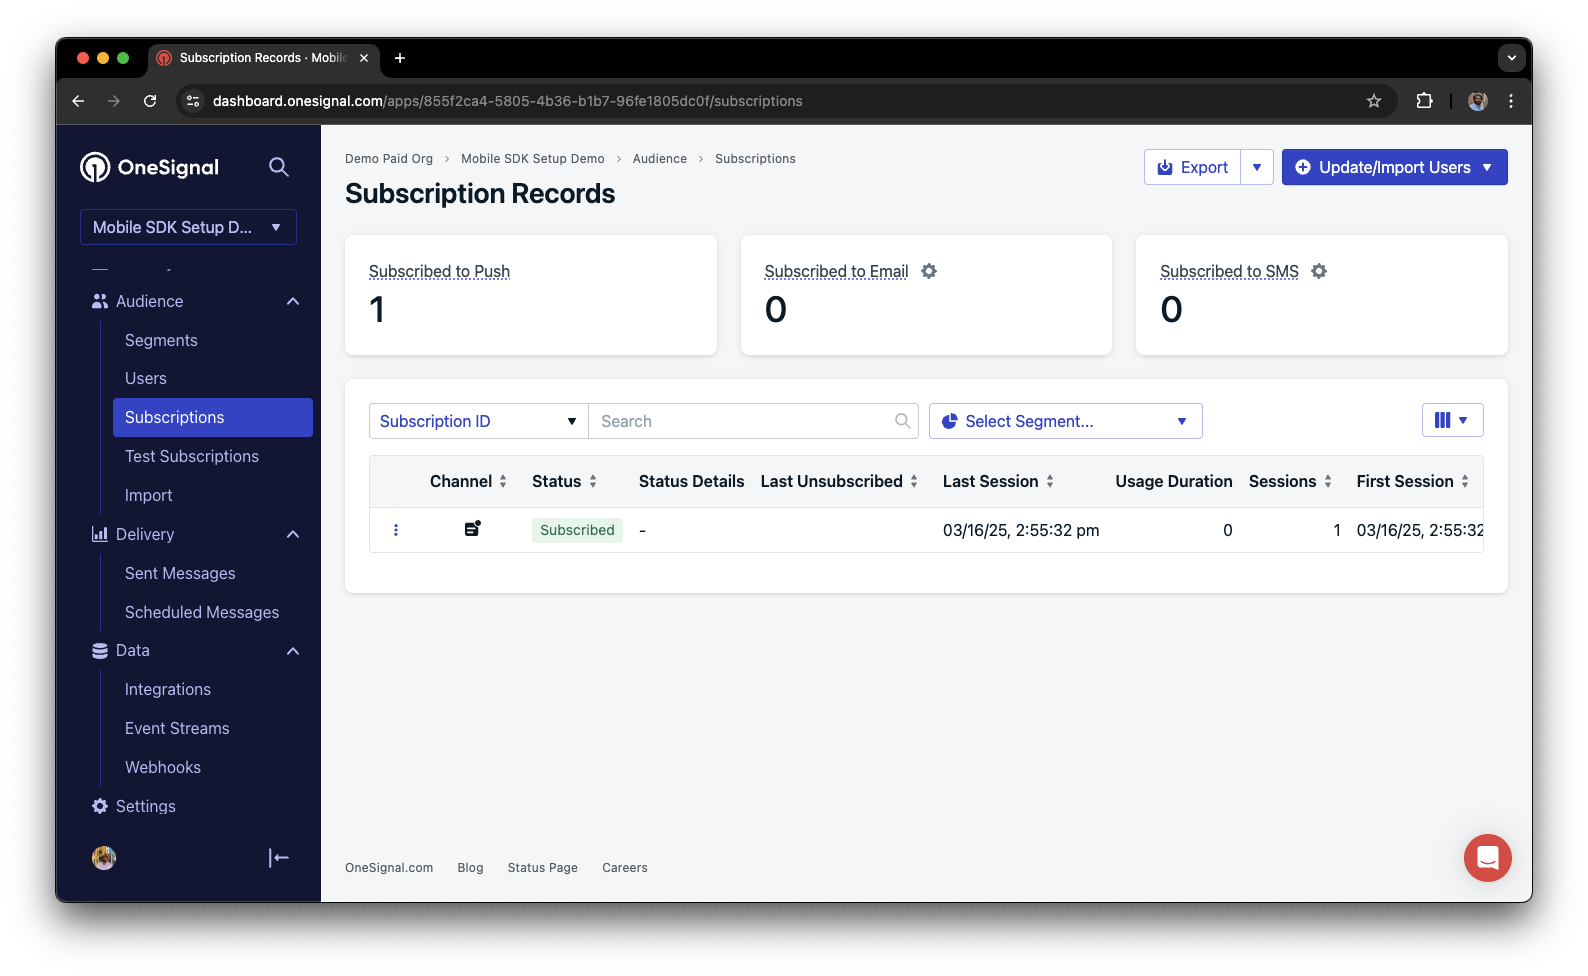
Dashboard mostrando inscrição com status 'Subscribed'
Configure inscrições de teste
Inscrições de teste são úteis para testar uma notificação push antes de enviar uma mensagem.Adicione a Test Users.

Adicionando um dispositivo a Test Users
Nomeie sua inscrição.
Crie um segmento de usuários de teste.
Nomeie o segmento.
Test Users (o nome é importante porque será usado depois).Adicione o filtro Test Users e clique em Create Segment.
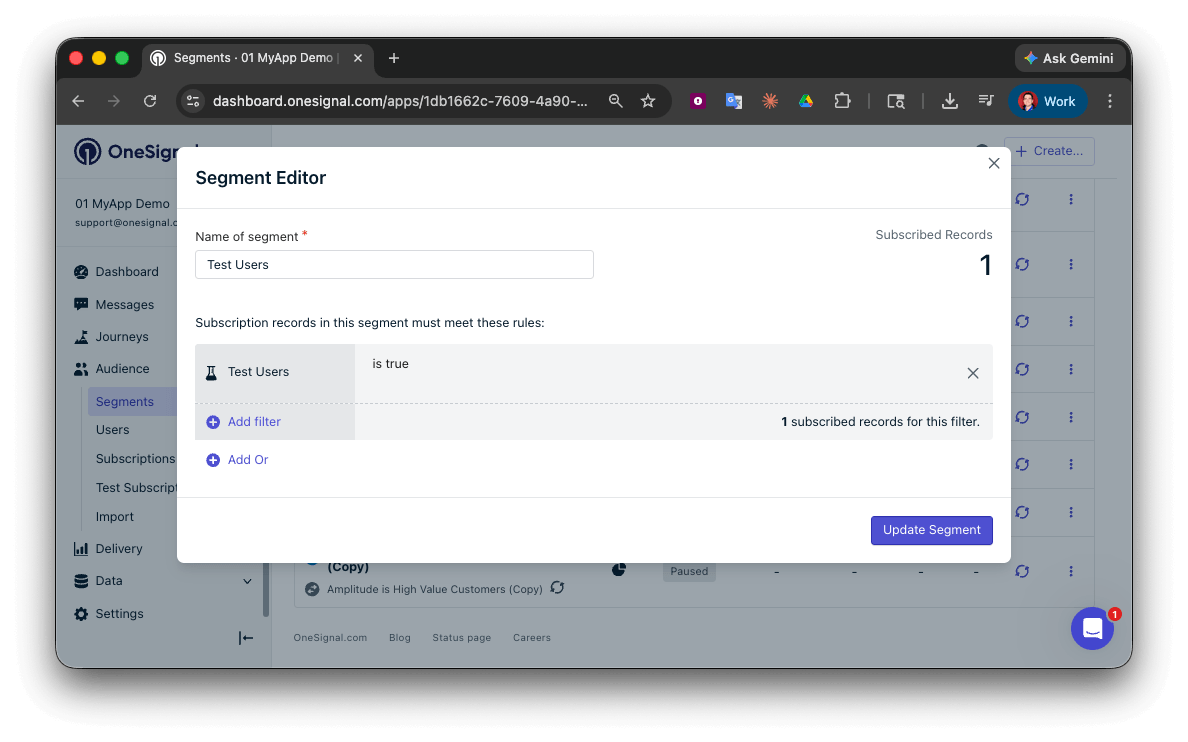
Criando um segmento 'Test Users' com o filtro Test Users
Envie push de teste via API
Obtenha seu App API Key e App ID.
Atualize o código fornecido.
YOUR_APP_API_KEY e YOUR_APP_ID no código abaixo com suas chaves reais. Este código usa o segmento Test Users que criamos anteriormente.Execute o código.
Verifique imagens e entrega confirmada.
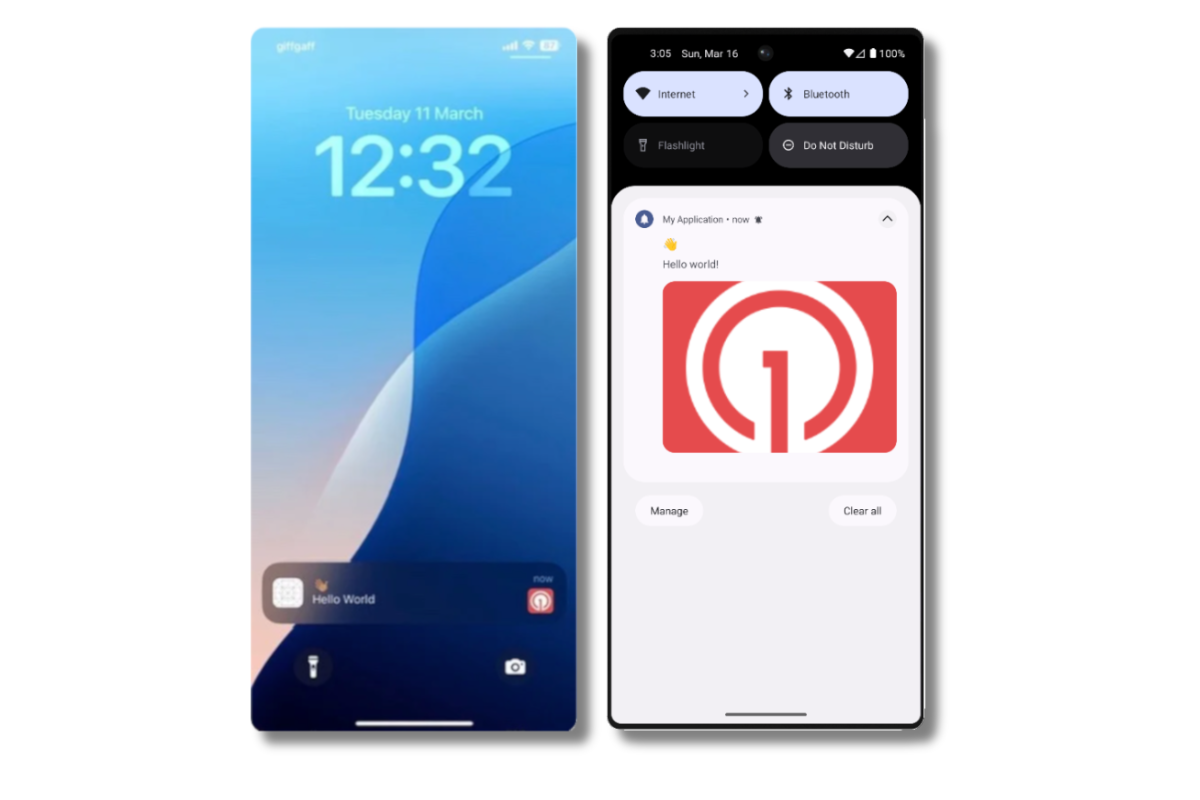
Notificação push com imagem no iOS e Android
Verifique por entrega confirmada.
Envie uma mensagem in-app
Mensagens in-app permitem que você se comunique com usuários enquanto eles estão usando seu app.Feche ou coloque em background seu app no dispositivo.
Crie uma mensagem in-app.
- No seu dashboard OneSignal, navegue para Messages > In-App > New In-App.
- Encontre e selecione a mensagem Welcome.
- Defina seu Público como o segmento Test Users que usamos anteriormente.
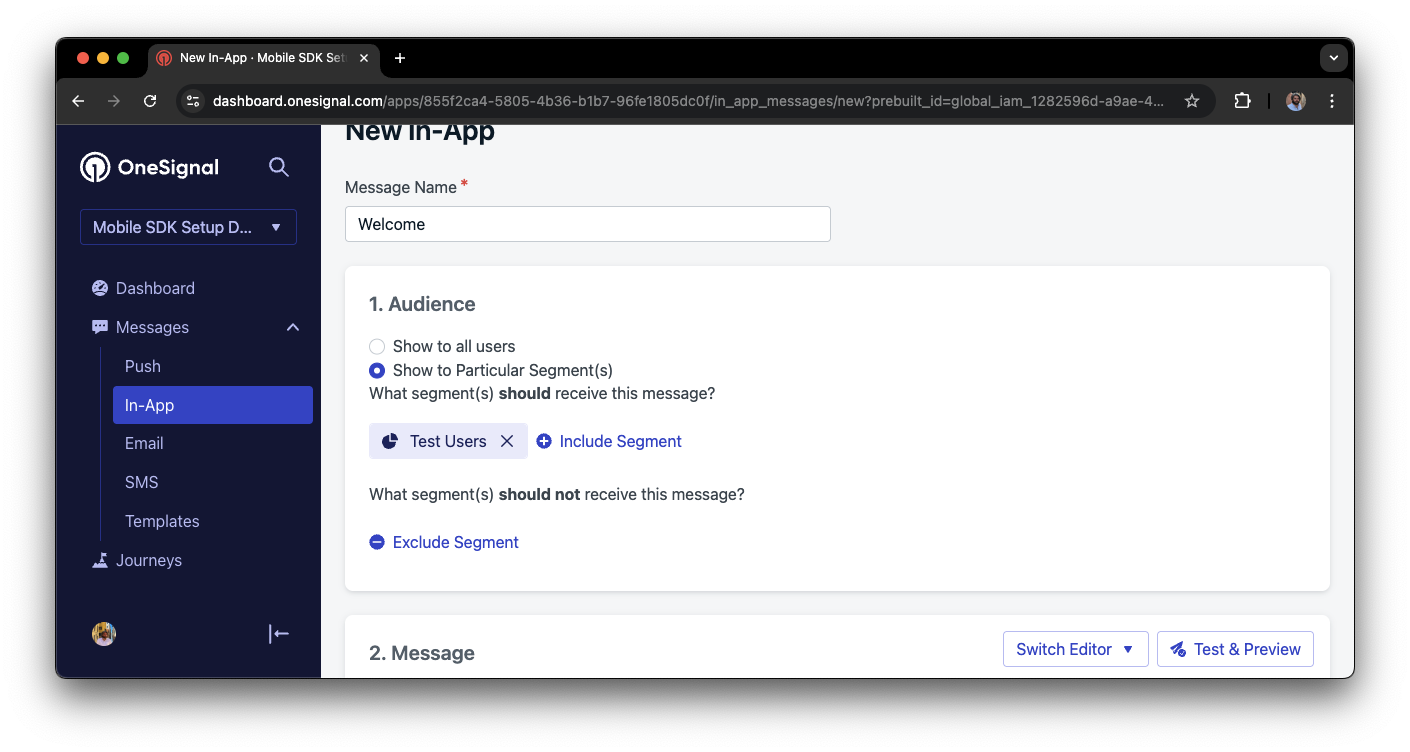
Direcionando o segmento 'Test Users' com uma mensagem in-app
Personalize o conteúdo da mensagem se desejar.
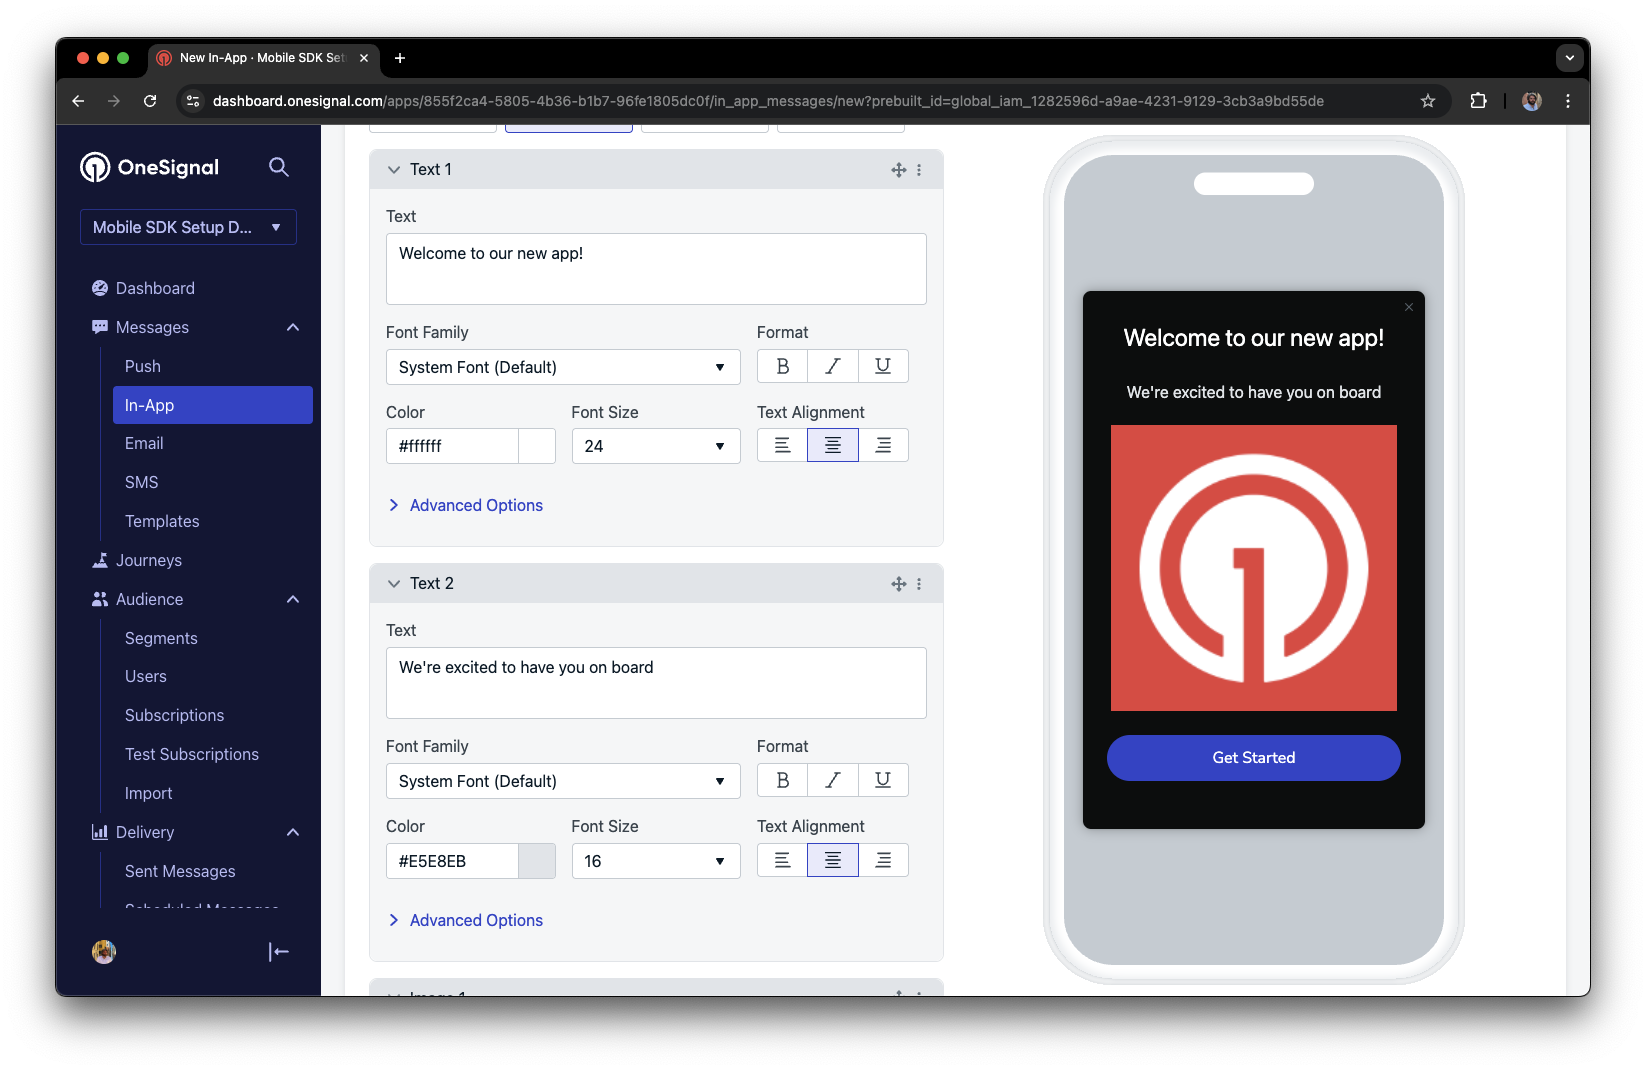
Exemplo de personalização da mensagem Welcome in-app
Defina Trigger como 'On app open'.
Agende frequência.
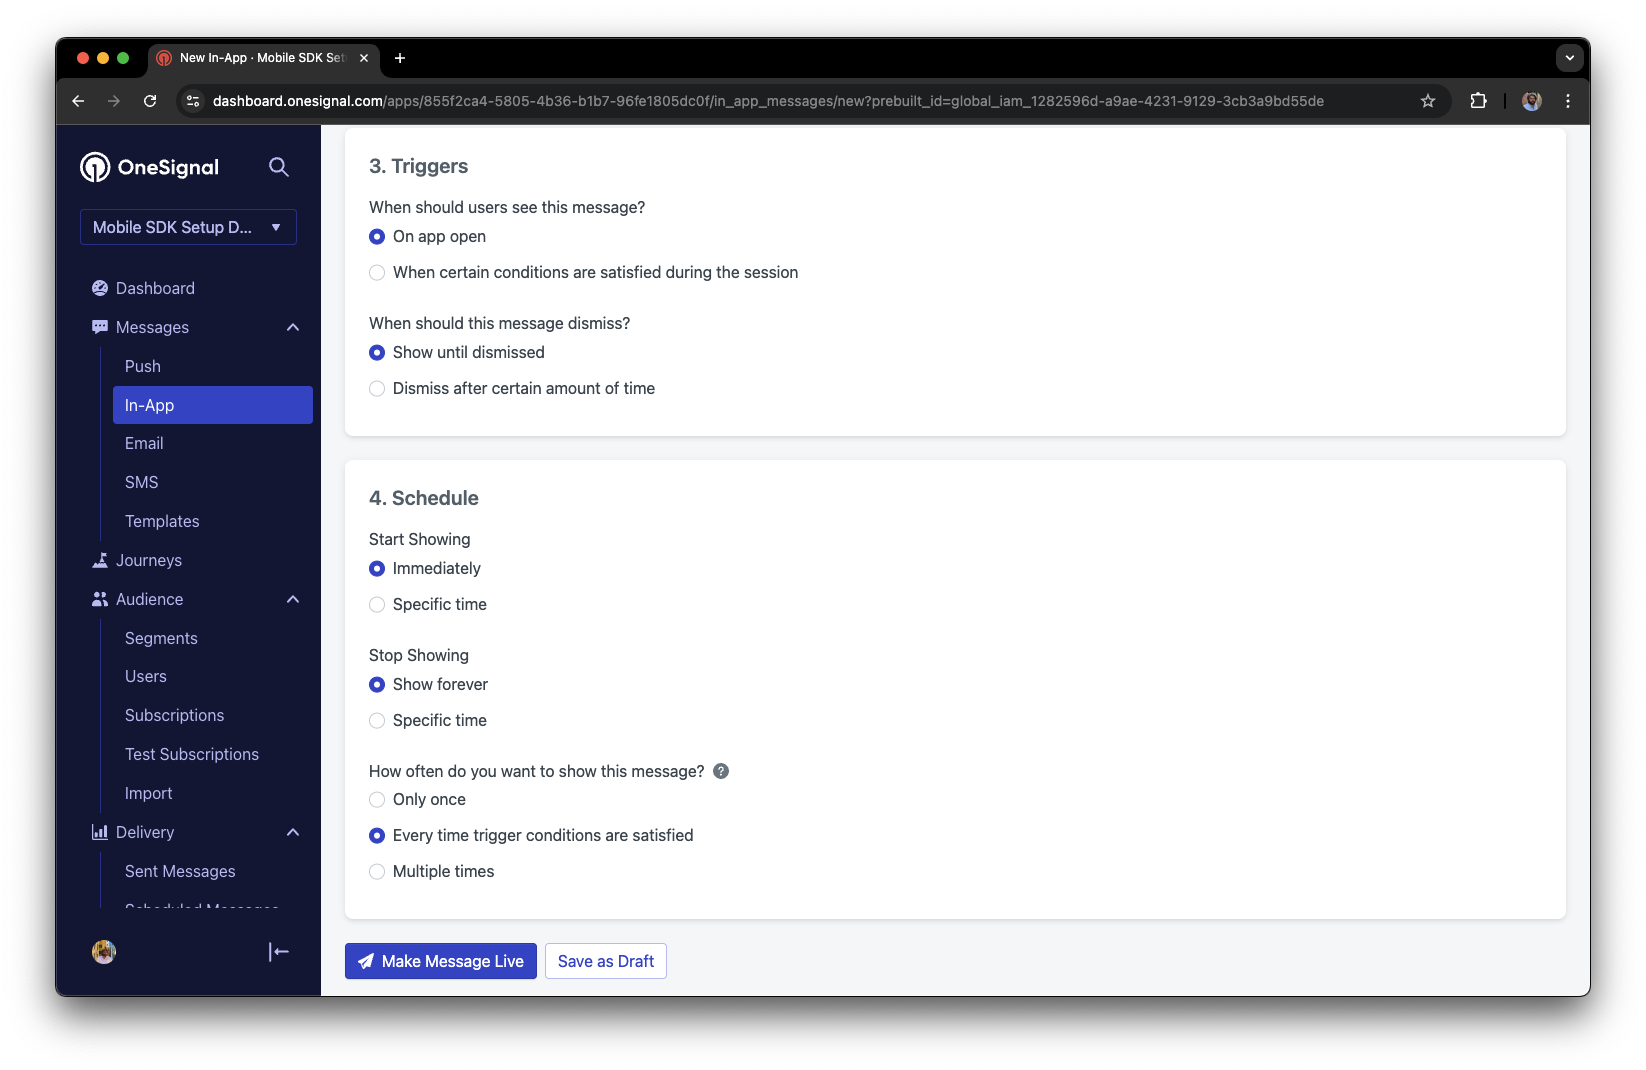
Opções de agendamento de mensagem in-app
Torne a mensagem ativa.
Abra o app e veja a mensagem.
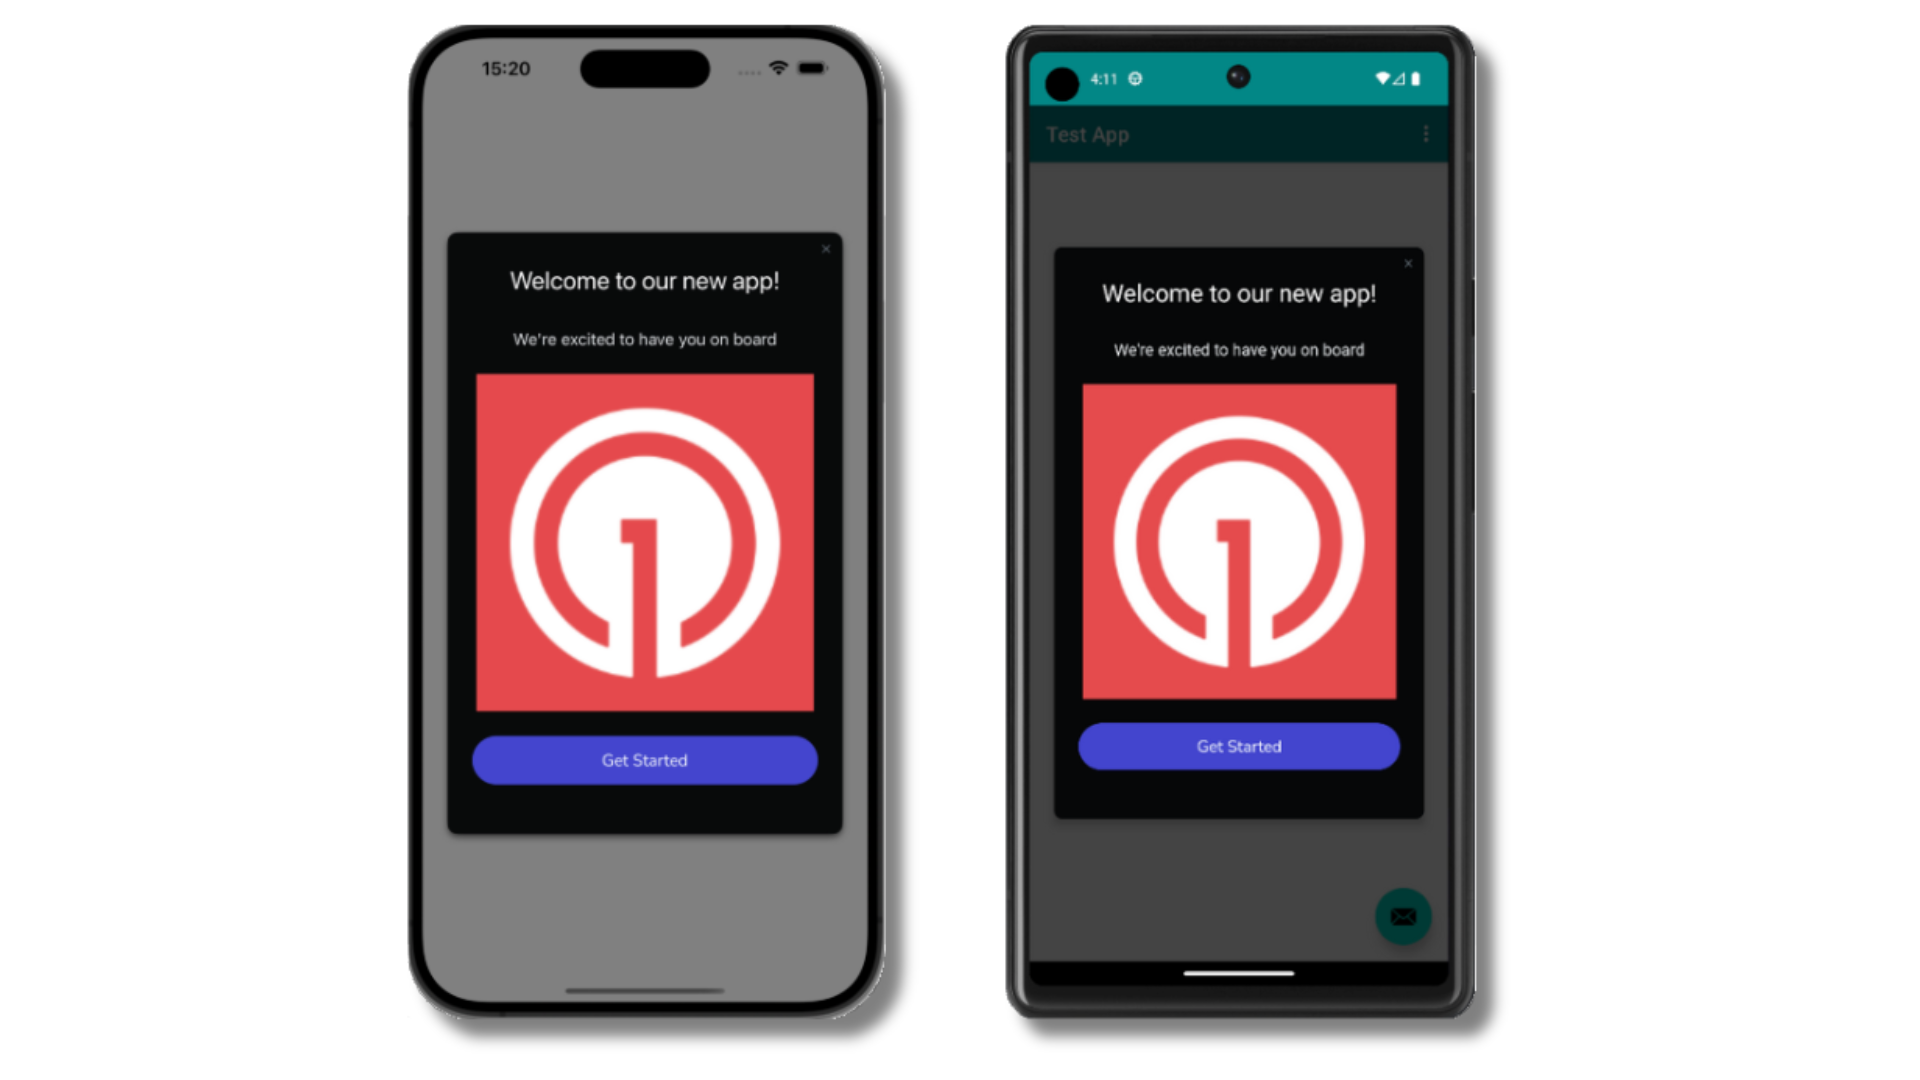
Mensagem in-app Welcome mostrada em dispositivos
- Coletar Inscrições, configurar inscrições de teste e criar Segmentos.
- Enviar Push com imagens e Entrega Confirmada usando Segmentos e nossa API Create message.
- Enviar Mensagens in-app.
Identificação de usuário
Anteriormente, demonstramos como criar Inscrições móveis. Agora vamos expandir para identificar Usuários através de todas as suas inscrições (incluindo push, email e SMS) usando o OneSignal SDK. Cobriremos External IDs, tags, inscrições multicanal, privacidade e rastreamento de eventos para ajudá-lo a unificar e engajar usuários através de plataformas.Atribua External ID
Use um External ID para identificar usuários consistentemente através de dispositivos, endereços de email e números de telefone usando o identificador de usuário do seu backend. Isso garante que suas mensagens permaneçam unificadas através de canais e sistemas de terceiros (especialmente importante para Integrações). Defina o External ID com o métodologin do nosso SDK cada vez que eles são identificados pelo seu app.
Adicione Tags
Tags são pares chave-valor de dados string que você pode usar para armazenar propriedades de usuário (comousername, role ou preferências) e eventos (como purchase_date, game_level ou interações de usuário). Tags potencializam Personalização de Mensagem avançada e Segmentação permitindo casos de uso mais avançados.
Defina tags com os métodos addTag e addTags do nosso SDK conforme eventos ocorrem no seu app.
Neste exemplo, o usuário alcançou o nível 6 identificável pela tag chamada current_level definida com um valor de 6.
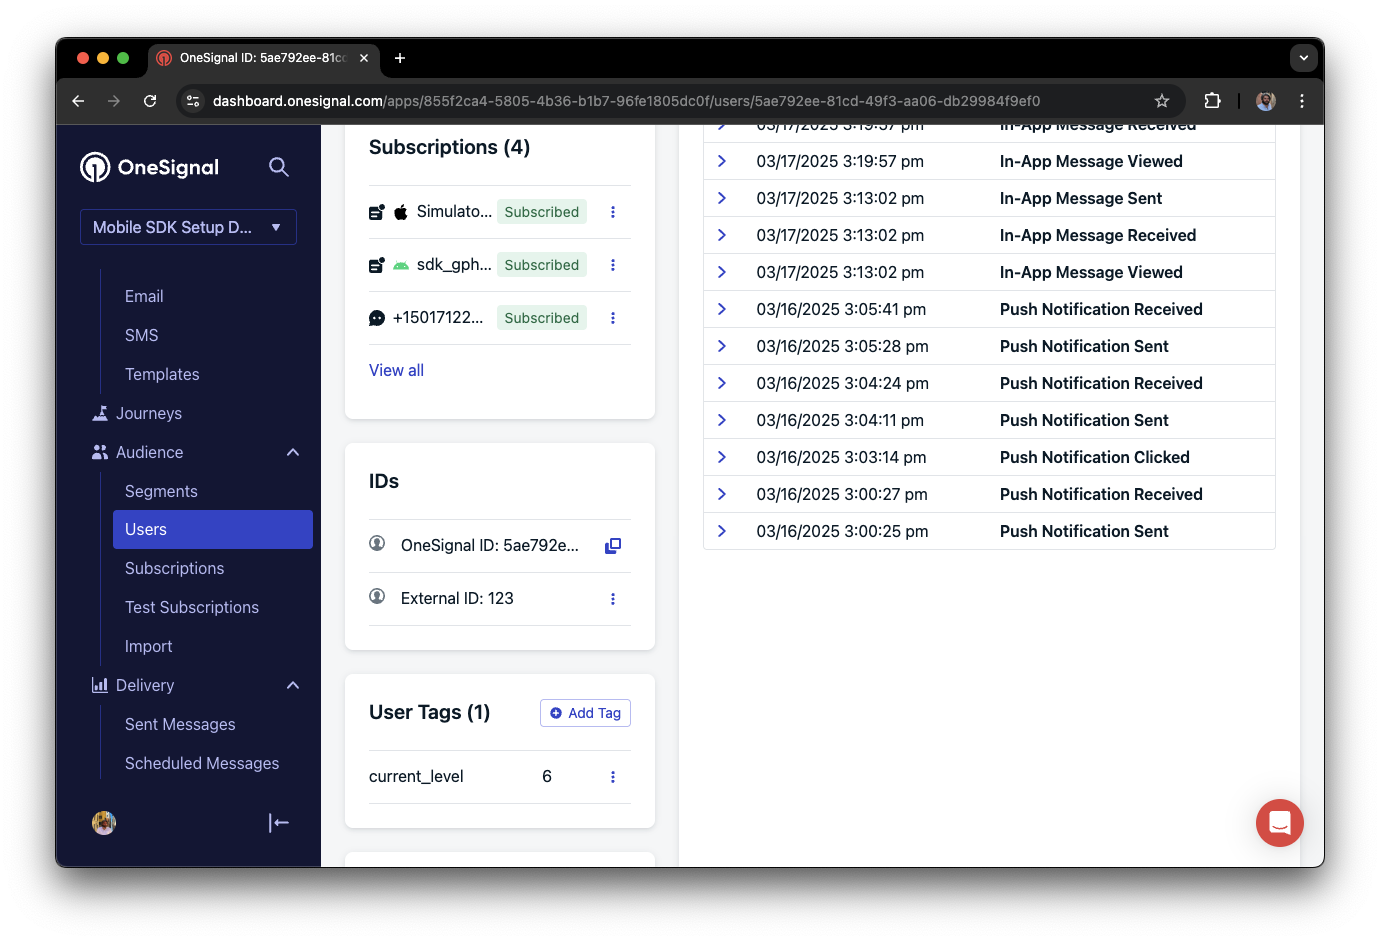
Um perfil de usuário no OneSignal com uma tag chamada "current_level" definida como "6"
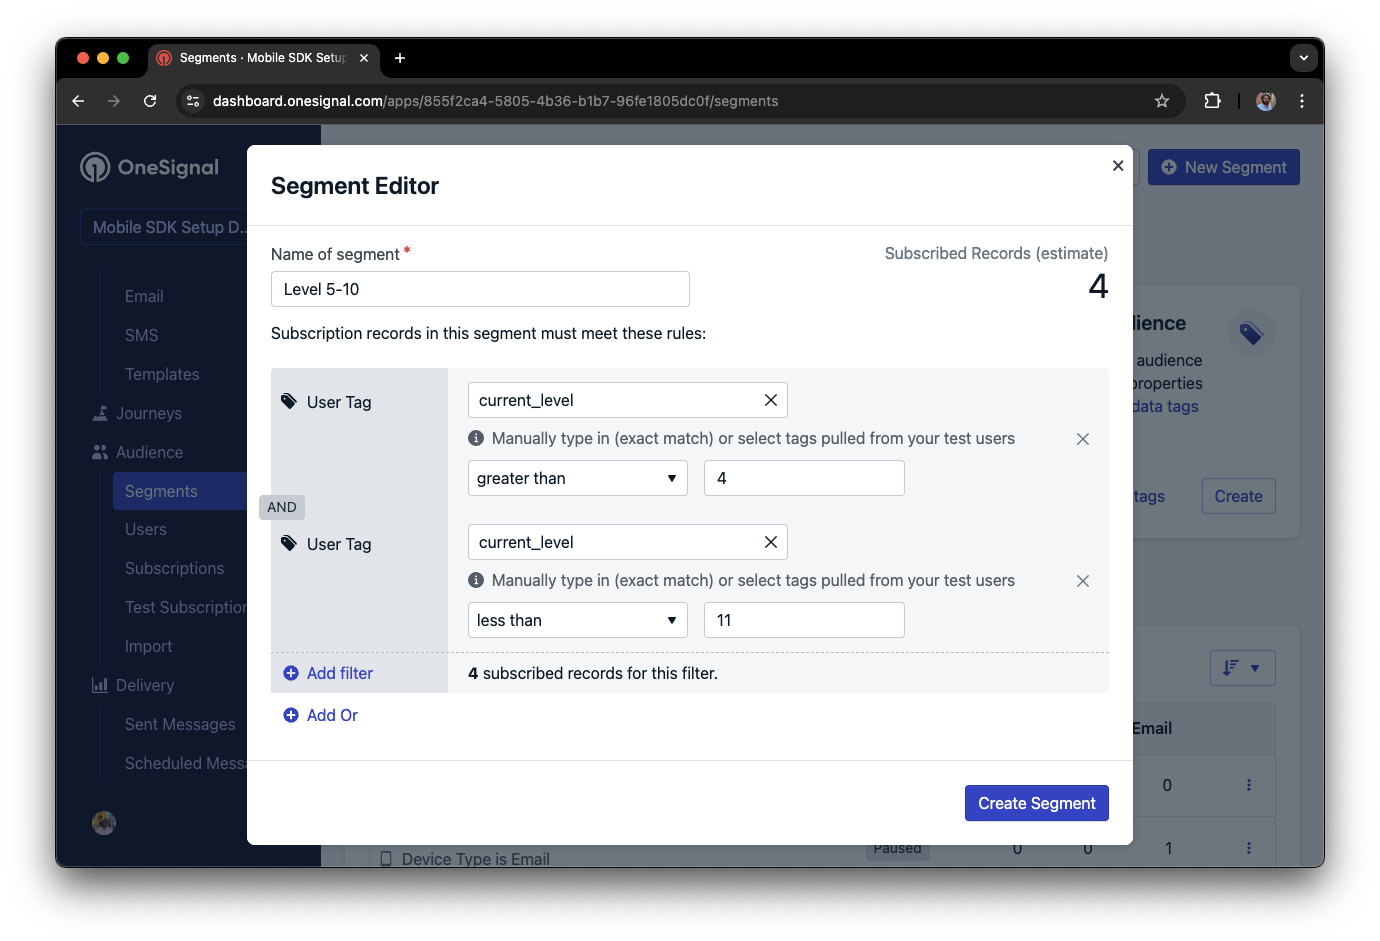
Editor de segmento mostrando um segmento direcionado a usuários com um valor current_level maior que 4 e menor que 10
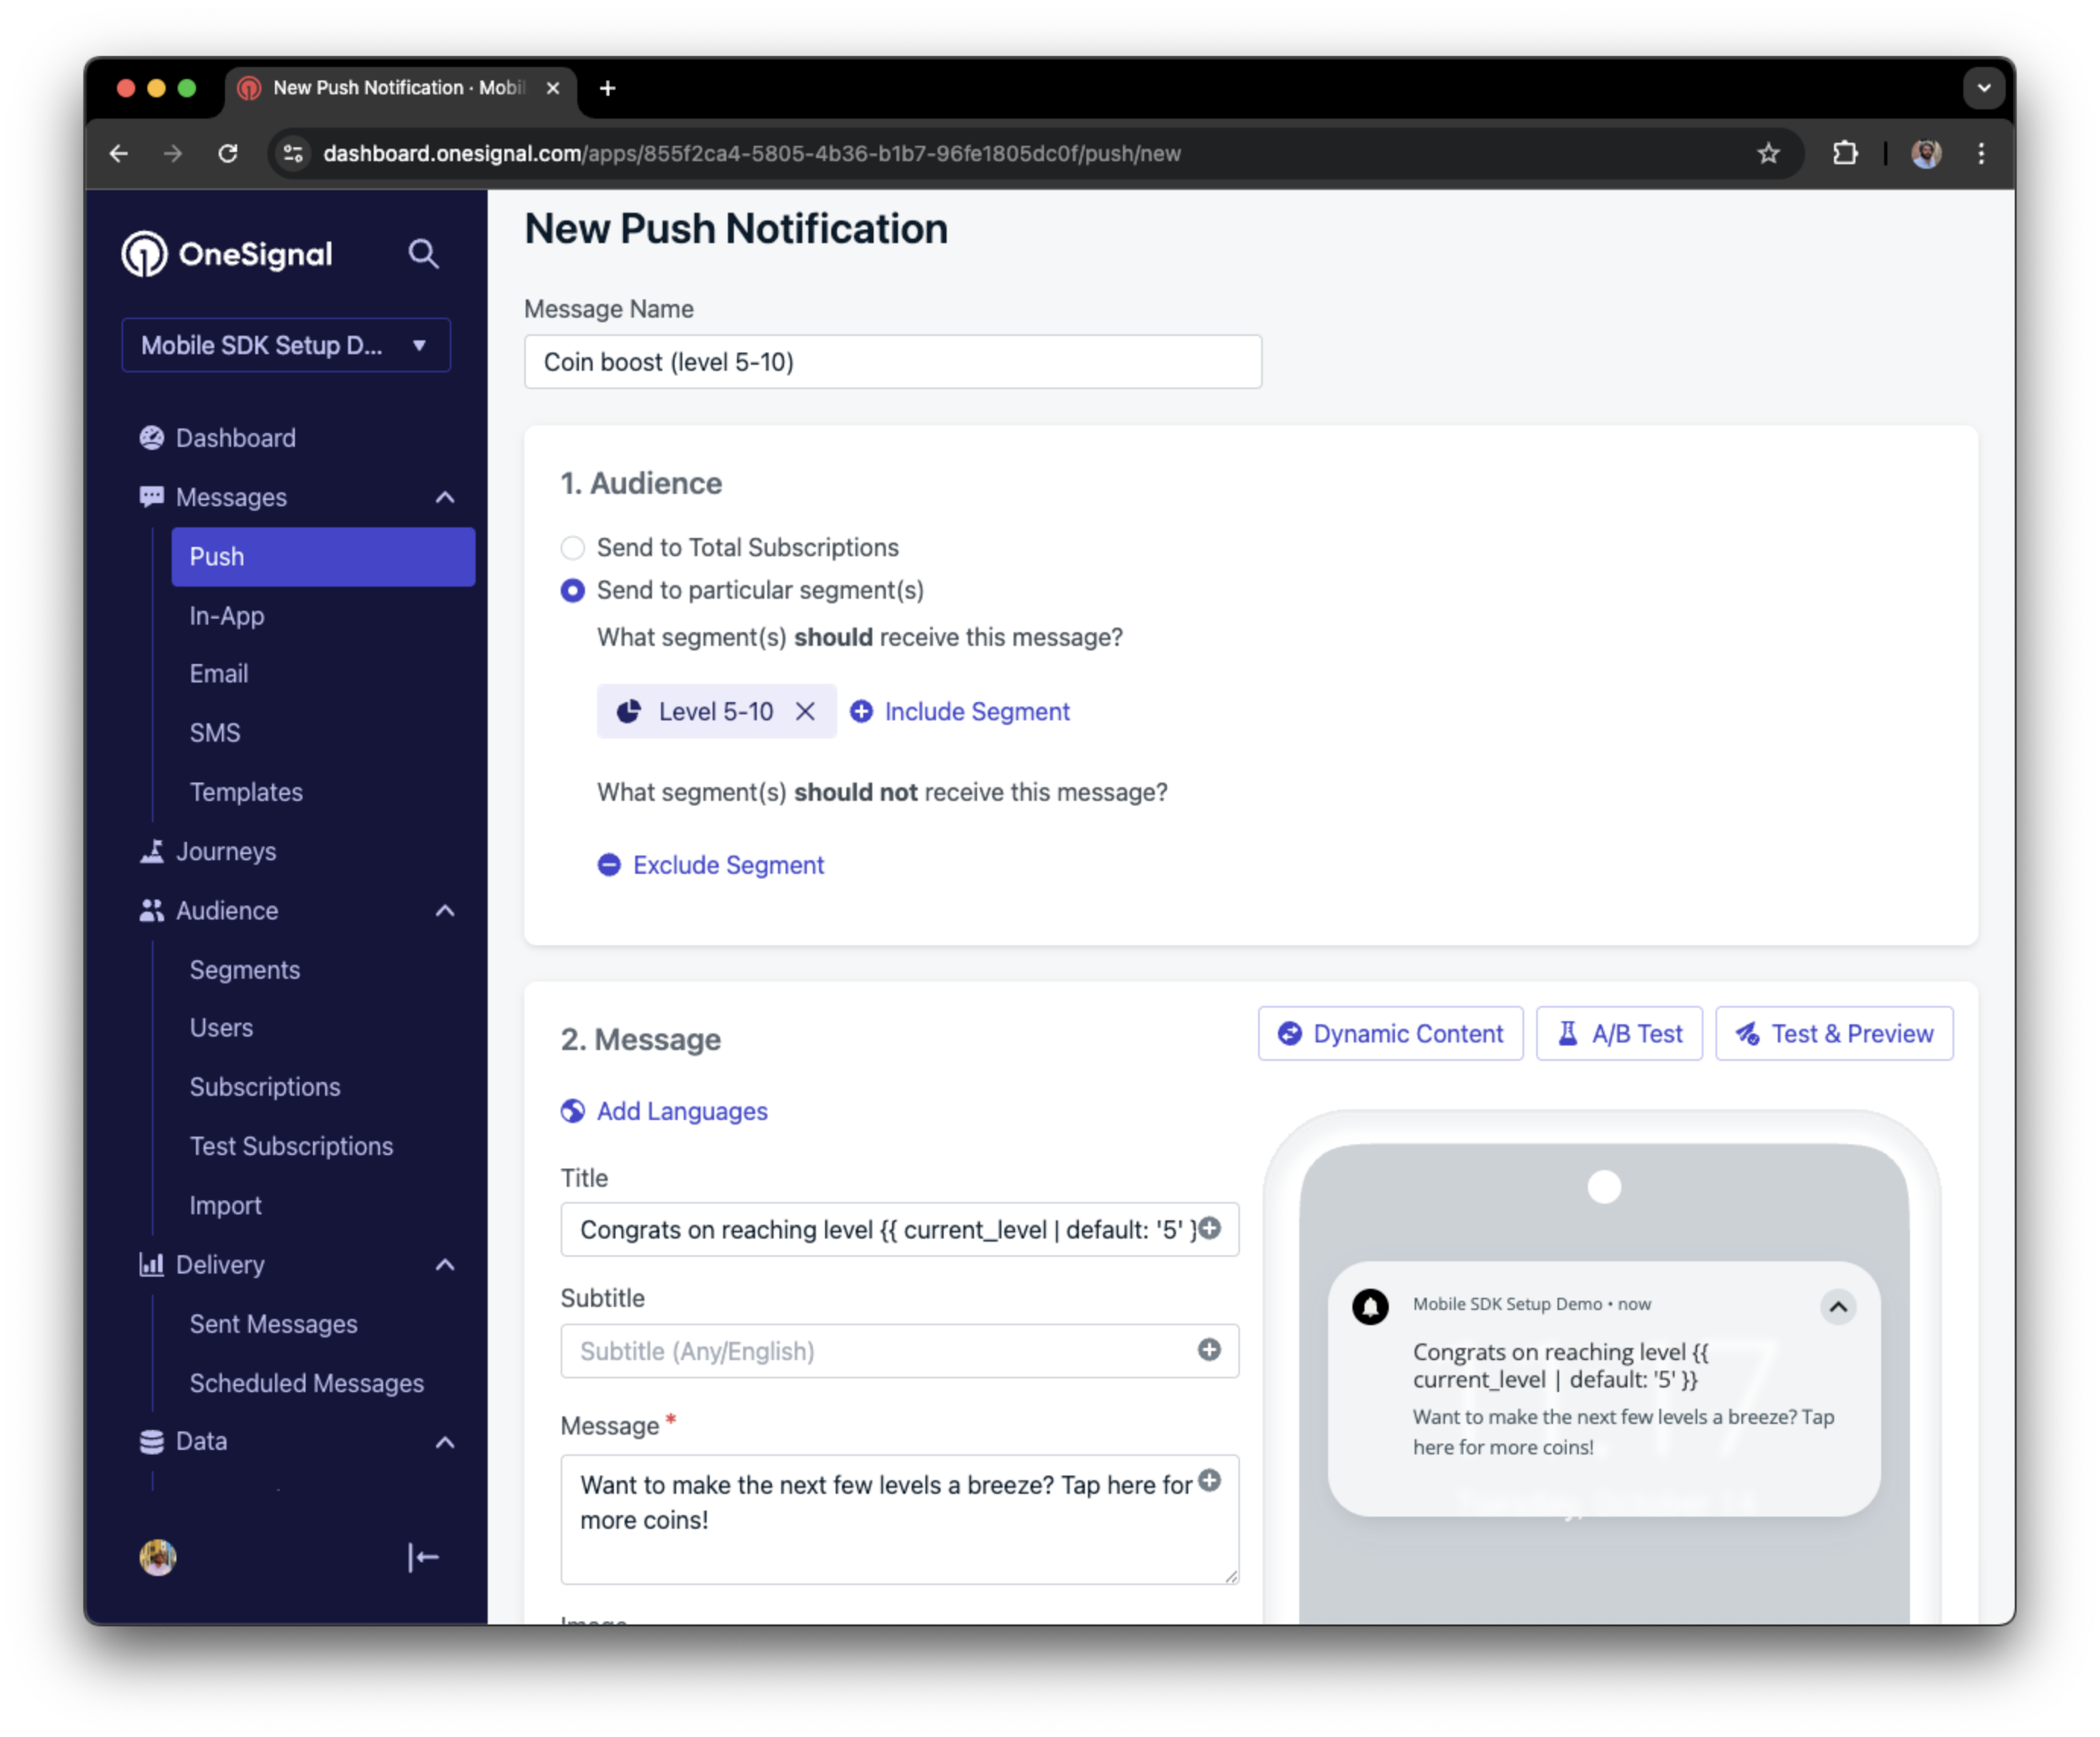
Captura de tela mostrando uma notificação push direcionada ao segmento Nível 5-10 com uma mensagem personalizada
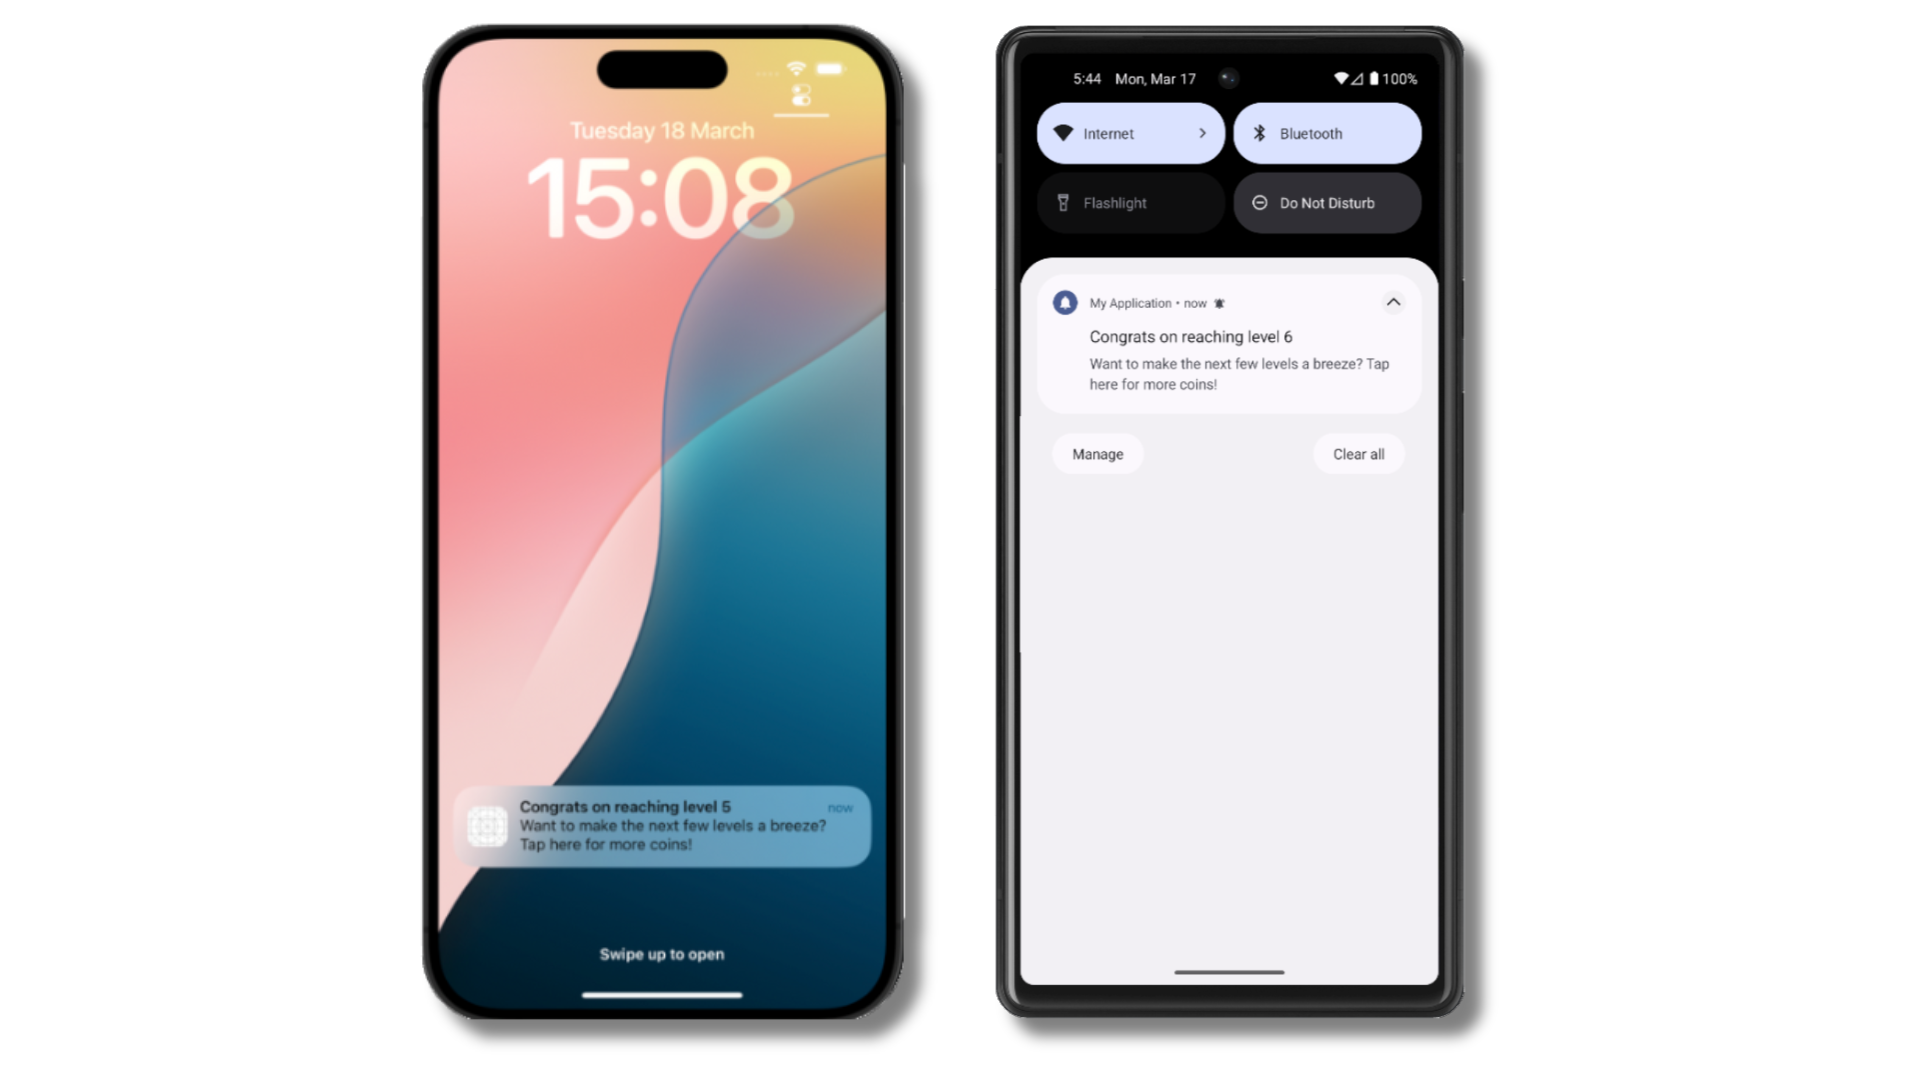
A notificação push é recebida em um dispositivo iOS e Android com o conteúdo personalizado
Adicione inscrições de email e/ou SMS
Anteriormente vimos como nosso SDK cria inscrições móveis para enviar push e mensagens in-app. Você também pode alcançar usuários através de canais de email e SMS criando as inscrições correspondentes.- Use o método
addEmailpara criar inscrições de email. - Use o método
addSmspara criar inscrições de SMS.
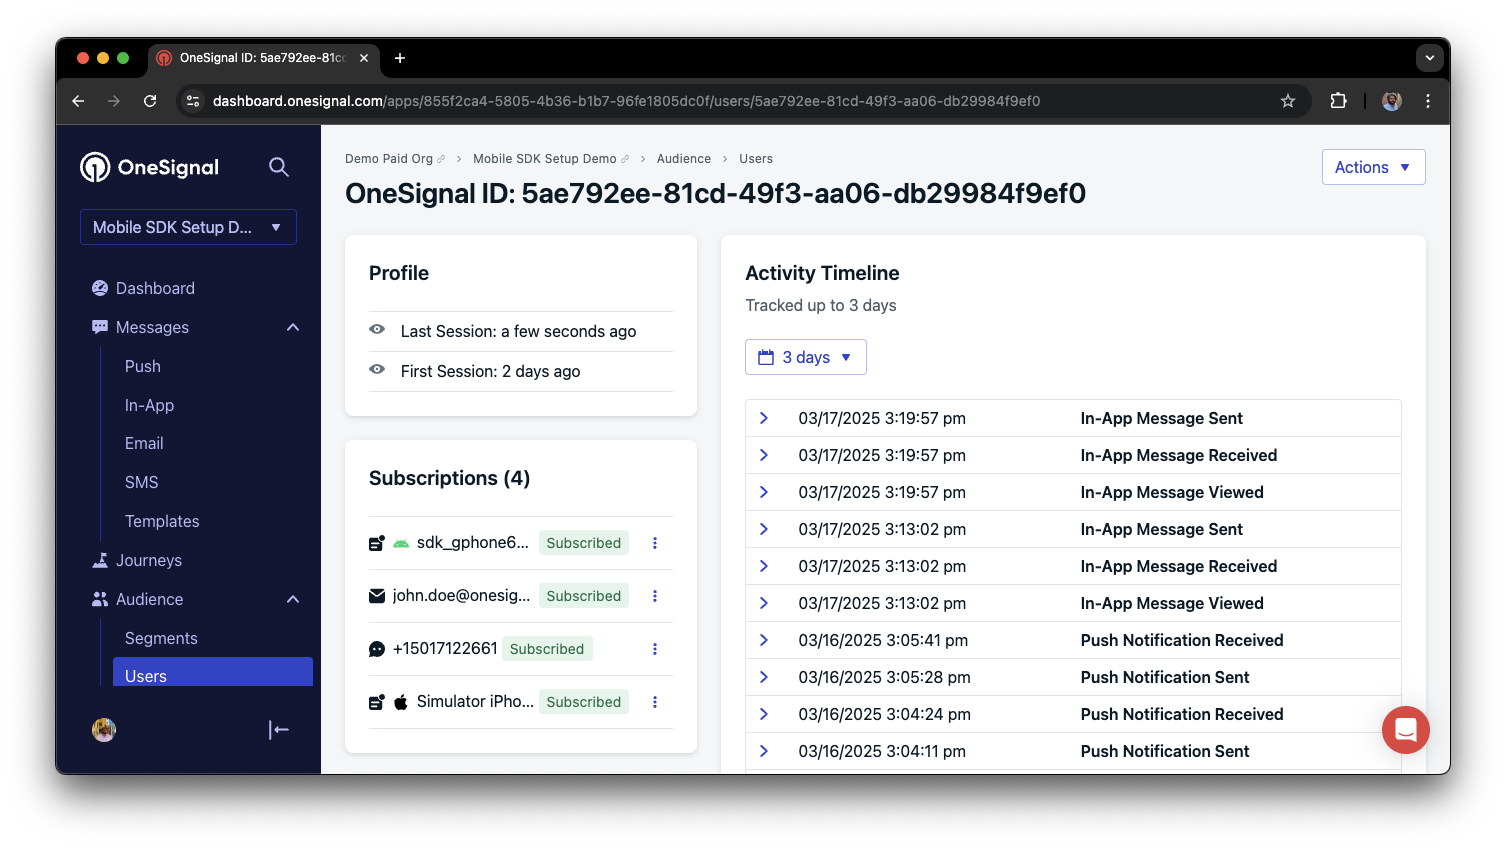
Um perfil de usuário com inscrições push, email e SMS unificadas por External ID
- Obtenha consentimento explícito antes de adicionar inscrições de email ou SMS.
- Explique os benefícios de cada canal de comunicação aos usuários.
- Forneça preferências de canal para que usuários possam selecionar quais canais eles preferem.
Privacidade e consentimento do usuário
Para controlar quando OneSignal coleta dados de usuário, use os métodos de controle de consentimento do SDK:setConsentRequired(true): Previne coleta de dados até que consentimento seja dado.setConsentGiven(true): Habilita coleta de dados uma vez que consentimento é concedido.
Solicite permissões push
Em vez de chamarrequestPermission() imediatamente ao abrir o app, adote uma abordagem mais estratégica. Use uma mensagem in-app para explicar o valor das notificações push antes de solicitar permissão.
Para melhores práticas e detalhes de implementação, veja nosso guia Solicite permissões push.
Escute eventos de push, usuário e in-app
Use listeners do SDK para reagir a ações de usuário e mudanças de estado. O SDK fornece vários event listeners para você conectar. Veja nosso guia de referência do SDK para mais detalhes.Eventos de notificação push
addClickListener(): Detecte quando uma notificação é tocada. Útil para Deep Linking.addForegroundLifecycleListener(): Controle como notificações se comportam em foreground.
Mudanças de estado do usuário
addObserver()para estado do usuário: Detecte quando o External ID é definido.addPermissionObserver(): Rastreie a interação específica do usuário com o prompt de permissão push nativo.addObserver()para inscrição push: Rastreie quando o status de inscrição push muda.
Eventos de mensagem in-app
addClickListener(): Lide com ações de clique in-app. Ideal para deep linking ou rastreamento de eventos.addLifecycleListener(): Rastreie o ciclo de vida completo de mensagens in-app (exibida, clicada, descartada, etc.).
Configuração avançada e capacidades
Explore mais capacidades para melhorar sua integração:- 🔁 Migrando para OneSignal de outro serviço
- 🌍 Rastreamento de localização
- 🔗 Deep Linking
- 🔌 Integrações
- 🧩 Mobile Service Extensions
- 🛎️ Botões de ação
- 🌐 Mensagens multilíngues
- 🛡️ Verificação de Identidade
- 📊 Custom Outcomes
- 📲 Live Activities
Configuração e referência do Mobile SDK
Certifique-se de que você habilitou todos os recursos principais revisando o guia Configuração de mobile push. Para detalhes completos sobre métodos disponíveis e opções de configuração, visite a referência do Mobile SDK.support@onesignal.comPor favor inclua:- Detalhes do problema que você está enfrentando e passos para reproduzir se disponível
- Seu OneSignal App ID
- O External ID ou Subscription ID se aplicável
- A URL para a mensagem que você testou no Dashboard OneSignal se aplicável
- Quaisquer logs ou mensagens de erro relevantes