Visão geral
Este é um guia passo a passo para integrar o OneSignal React Native & Expo SDK em seus aplicativos iOS e Android. Ao final deste guia, você poderá enviar notificações push e mensagens no aplicativo com o OneSignal.Requisitos
- Um aplicativo Expo gerenciado. Para aplicativos React Native puros, veja Configuração do SDK React Native.
- Build de desenvolvimento do Expo
- Expo SDK 53+ (React Native 0.79+) com Nova Arquitetura habilitada
- EAS CLI (documentação do EAS Build)
- App e plataforma OneSignal configurados
- macOS com Xcode 14+ (as instruções de configuração usam Xcode 16.2)
- Dispositivo com iOS 12+, iPadOS 12+, ou simulador Xcode executando iOS 16.2+
- CocoaPods 1.16.2+
- Dispositivo ou emulador Android 7.0+ com Google Play Store (Services) instalado
Configure your OneSignal app and platform
Configure your OneSignal app with the platforms you support — Apple (APNs), Google (FCM), Huawei (HMS), and/or Amazon (ADM).Step-by-step setup instructions
Step-by-step setup instructions
Create or select your app
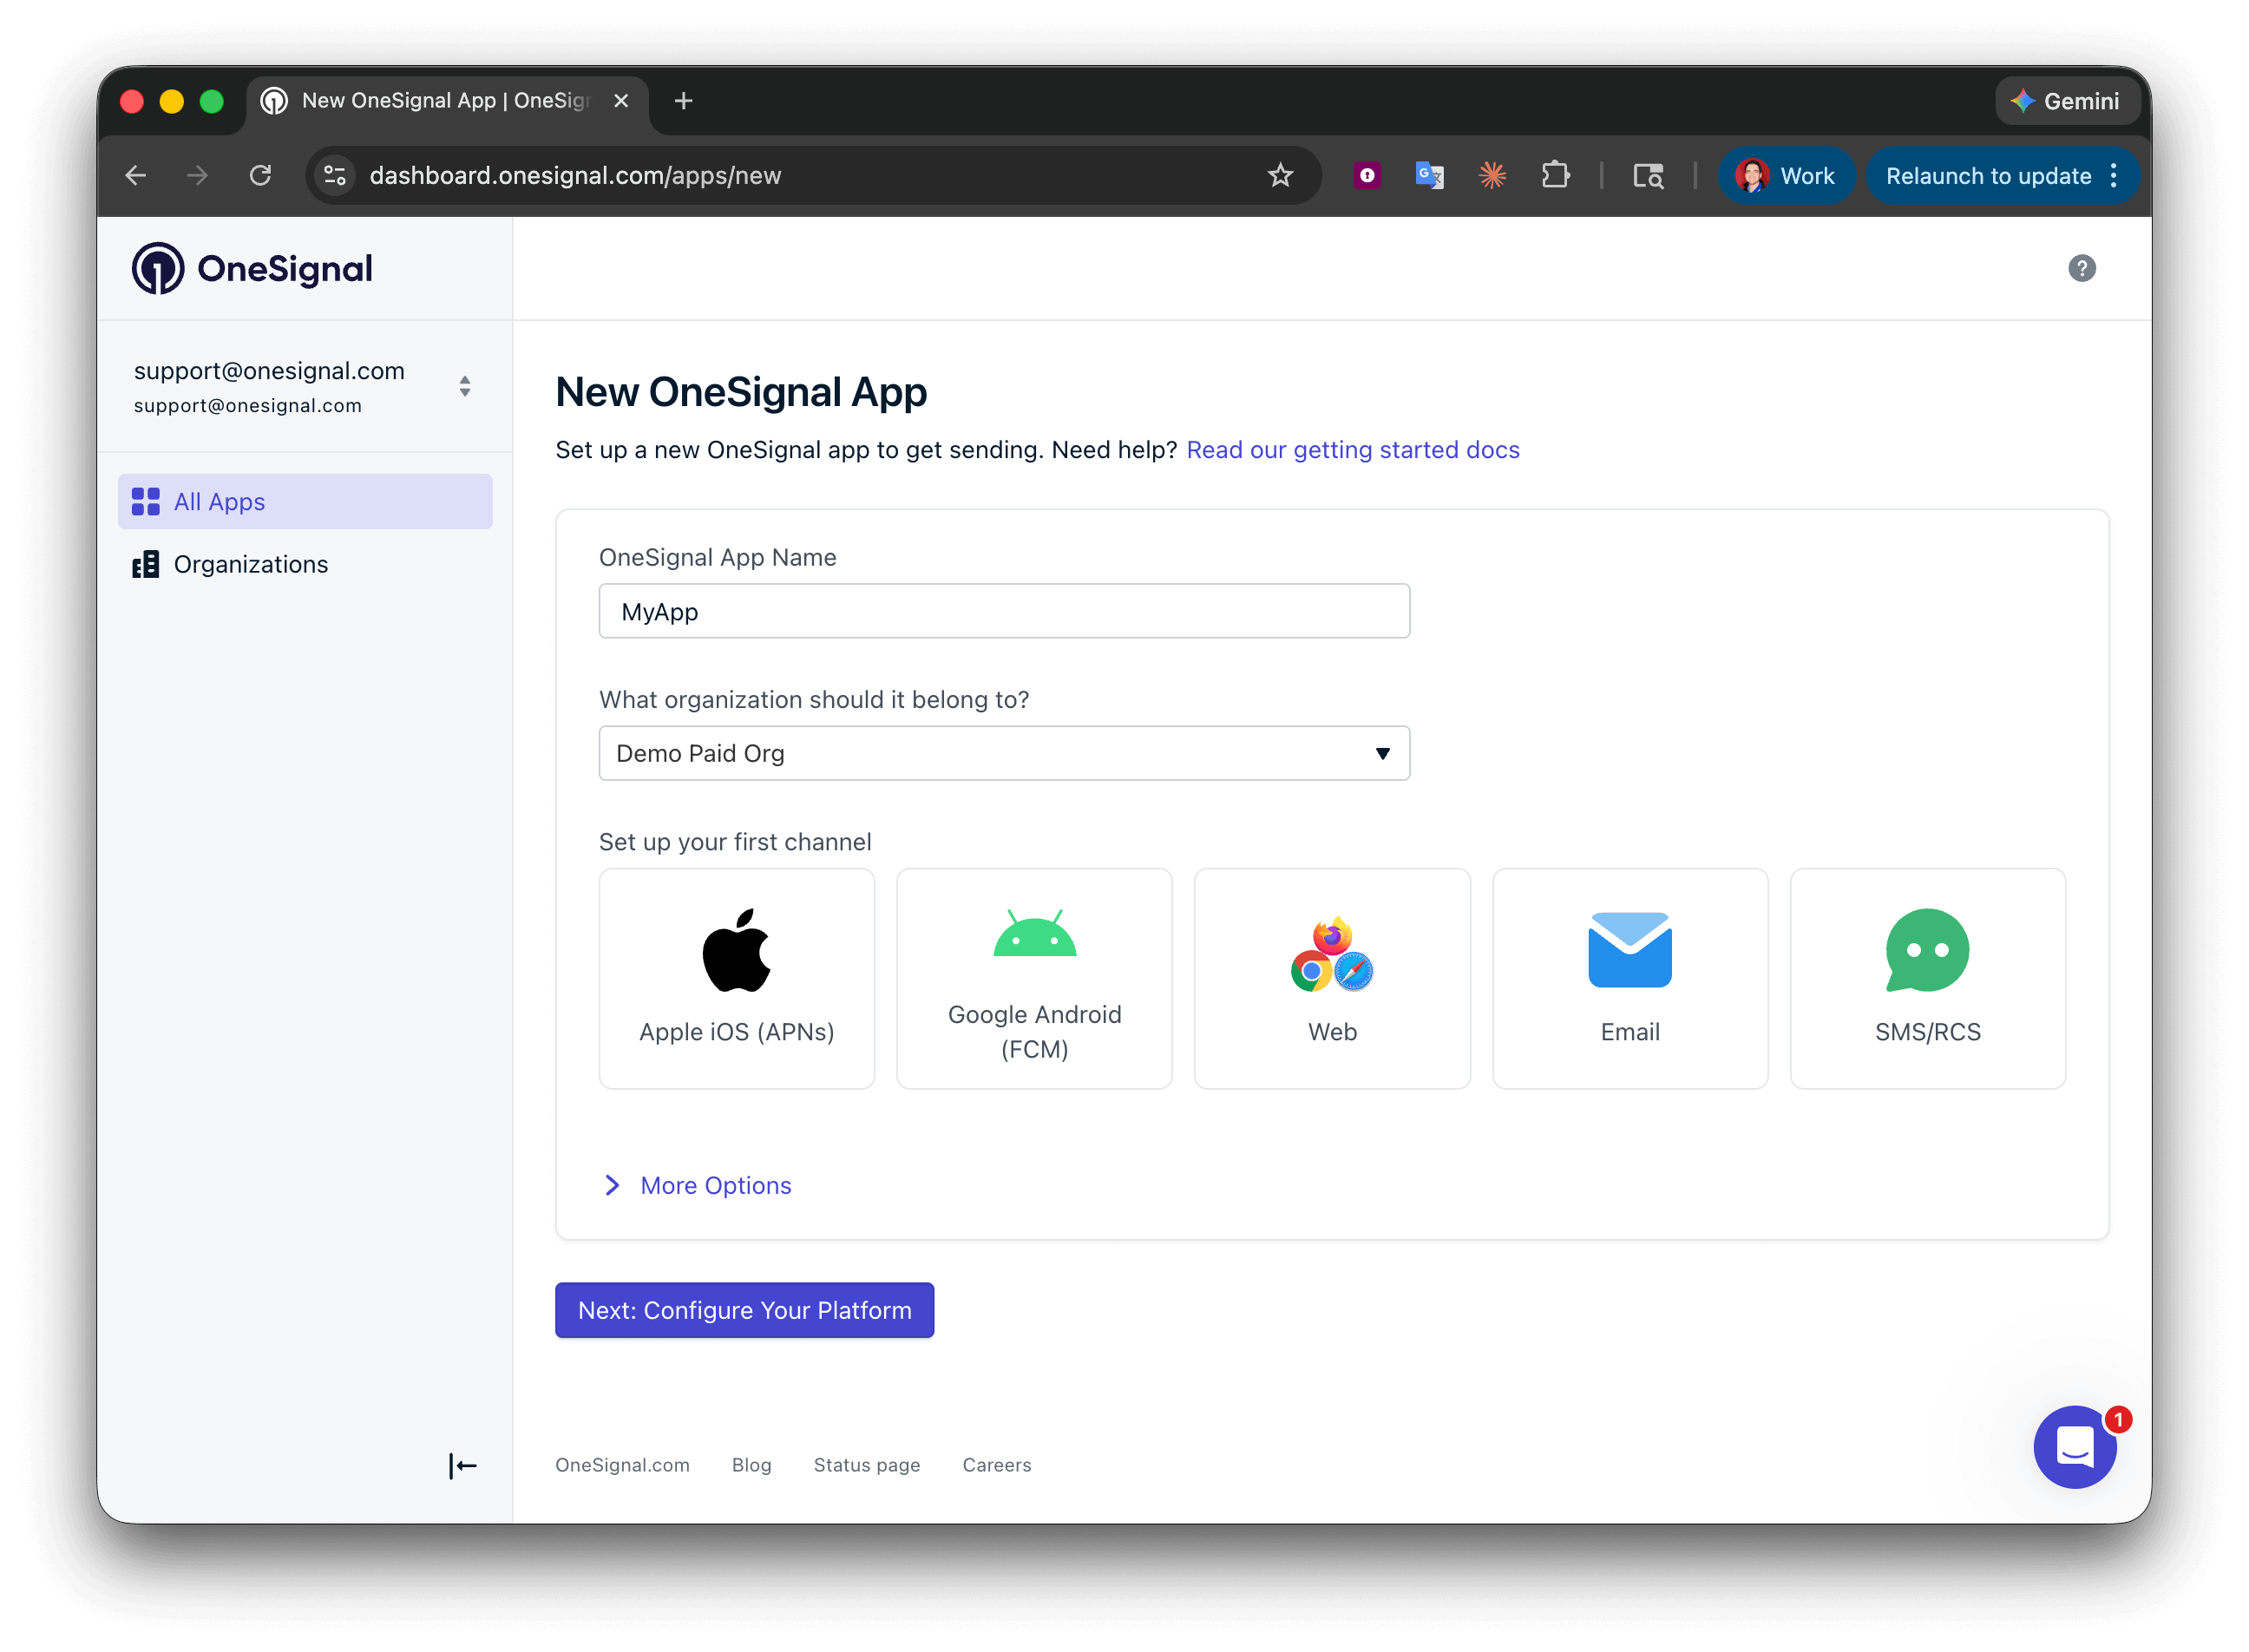
Setting up your first OneSignal app, Organization, and channel.
Configure platform credentials
- Android: Set up Firebase credentials
- iOS: p8 token (recommended) or p12 certificate
- Amazon: Generate API key
- Huawei: Authorize OneSignal
Save your App ID and install the SDK
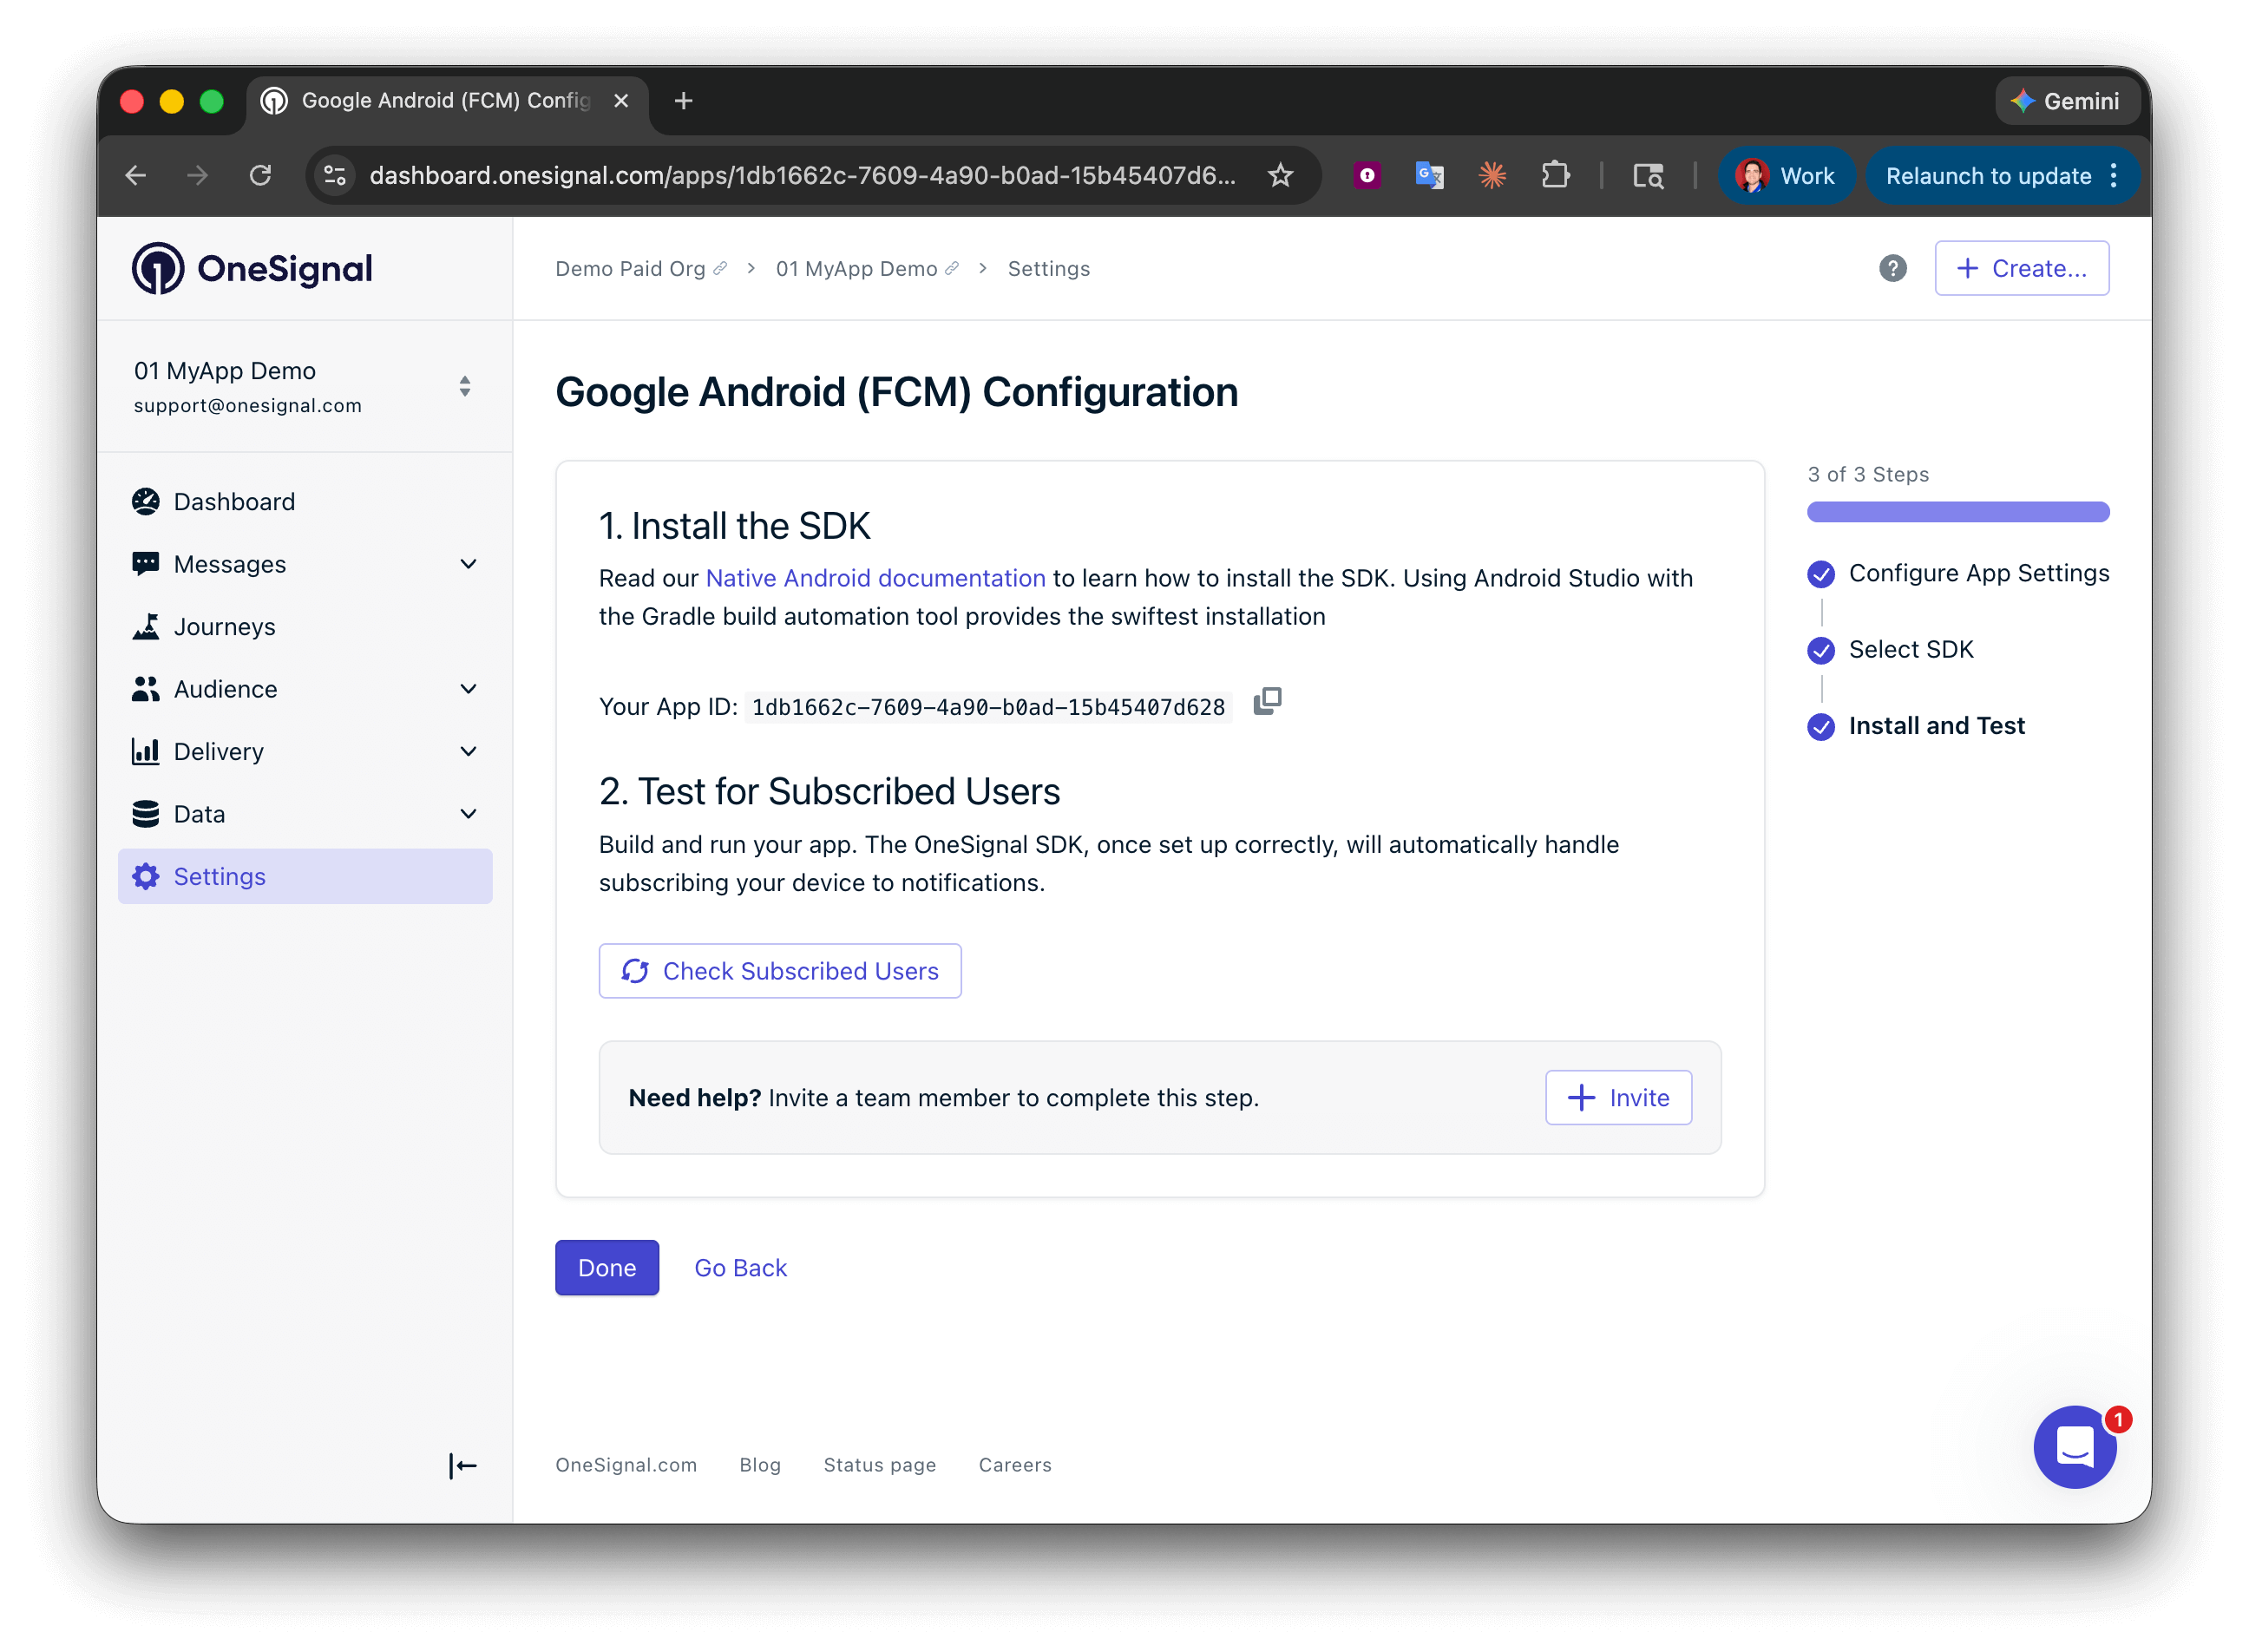
Save your App ID and invite additional team members.
Configuração do SDK
1. Adicionar SDK
Instale o plugin OneSignal Expo usando a Expo CLI.react-native-onesignal ao seu projeto.
2. Configurar o plugin
Abra seuapp.json (ou app.config.js / app.config.ts). Você deve incluir as seguintes configurações.
Configurações obrigatórias
"bundleIdentifier": O identificador de pacote do seu app que corresponde à autenticação p8 ou p12 que você está usando no seu app OneSignal."infoPlist": Requer que a chaveUIBackgroundModesseja definida como["remote-notification"]."entitlements"- Requer que a chave
aps-environmentseja definida como"development"para testes e"production"para builds do Testflight e App Store. - Requer que a chave
com.apple.security.application-groupsseja definida como["group.${ios.bundleIdentifier}.onesignal"].
- Requer que a chave
"android": Requer que a chavepackageseja definida com o nome do pacote do seu app."plugins": O arraypluginsdo seu app. É necessário adicionar o plugin[onesignal-expo-plugin]no topo do array de plugins. Também requer que a chavemodeseja definida como"development"para testes e"production"para builds do Testflight e App Store.
Propriedades adicionais do plugin.
Propriedades adicionais do plugin.
Opcional: desabilitar o módulo de localização
Se seu app não usaOneSignal.Location, defina disableLocation como true nas props do plugin Expo do OneSignal. Esta opção requer react-native-onesignal 5.5.1 ou posterior. O plugin configura a resolução de dependências nativas para que react-native-onesignal exclua o módulo de localização. No iOS, o plugin grava a configuração de ambiente do Podfile usada durante a resolução do CocoaPods. No Android, o plugin grava onesignal.disableLocation=true nas propriedades Gradle geradas.
Podfile do iOS gerado declarar explicitamente OneSignalXCFramework em um target de Notification Service Extension ou de widget de Live Activity, use uma subespecificação modular como OneSignalXCFramework/OneSignal ou OneSignalXCFramework/OneSignalLiveActivities. O pod 'OneSignalXCFramework' agregado resolve OneSignalComplete e inclui localização. Após um prebuild limpo, verifique se nem OneSignalComplete nem OneSignalLocation aparecem em ios/Podfile.lock.
- app.config.ts
- app.json
onesignal-expo-plugin 2.6.0, você pode importar withOneSignal para ter suporte completo a TypeScript e autocompletar nas props do plugin.3. Inicializar SDK
Dependendo da sua estrutura Expo (entrada de App tradicional ou Expo Router), inicialize o OneSignal seguindo estas opções.- Entrada de App Tradicional
- Expo Router
App.tsx ou App.js, inicialize o OneSignal com os métodos fornecidos.Substitua YOUR_APP_ID pelo ID do seu App OneSignal encontrado no painel OneSignal em Configurações > Chaves & IDs.useCallback
Se o seu listener precisar acessar props ou state, defina-o fora do useEffect com useCallback para que a mesma referência seja usada ao adicionar e remover. Passar referências de função diferentes para addEventListener e removeEventListener não tem efeito — o listener não é removido e pode disparar depois que o componente é desmontado.
Android setup
Make sure your OneSignal app is configured for the Android platform using your Firebase credentials. Set up your notification icons to match your app’s branding. If this step is skipped, a default bell icon will display for your push notifications. Build for Android At this point, you should be able to build and run your app on a physical Android device or emulator without issues.- Continue with the iOS setup, if applicable.
- Or jump ahead to Testing the OneSignal SDK integration.
Configuração iOS
Certifique-se de que seu app OneSignal está configurado para a plataforma iOS usando o Token p8 (Recomendado) ou Certificado p12.Build para iOS
Agora você deve ser capaz de fazer build e executar seu app em um dispositivo iOS real ou simulador iOS (16.2+).Erros comuns de build do iOS
Cycle Inside... building could produce unreliable results.
Cycle Inside... building could produce unreliable results.
- Abra sua pasta
.xcworkspaceno Xcode e navegue até seu app target > Build Phases. - Você deve ter uma fase chamada “Embed Foundation Extensions” ou “Embed App Extensions”.
- Arraste e mova esta fase de build para acima de “Run Script”.
- Faça o build e execute seu app. O erro deve ser resolvido.
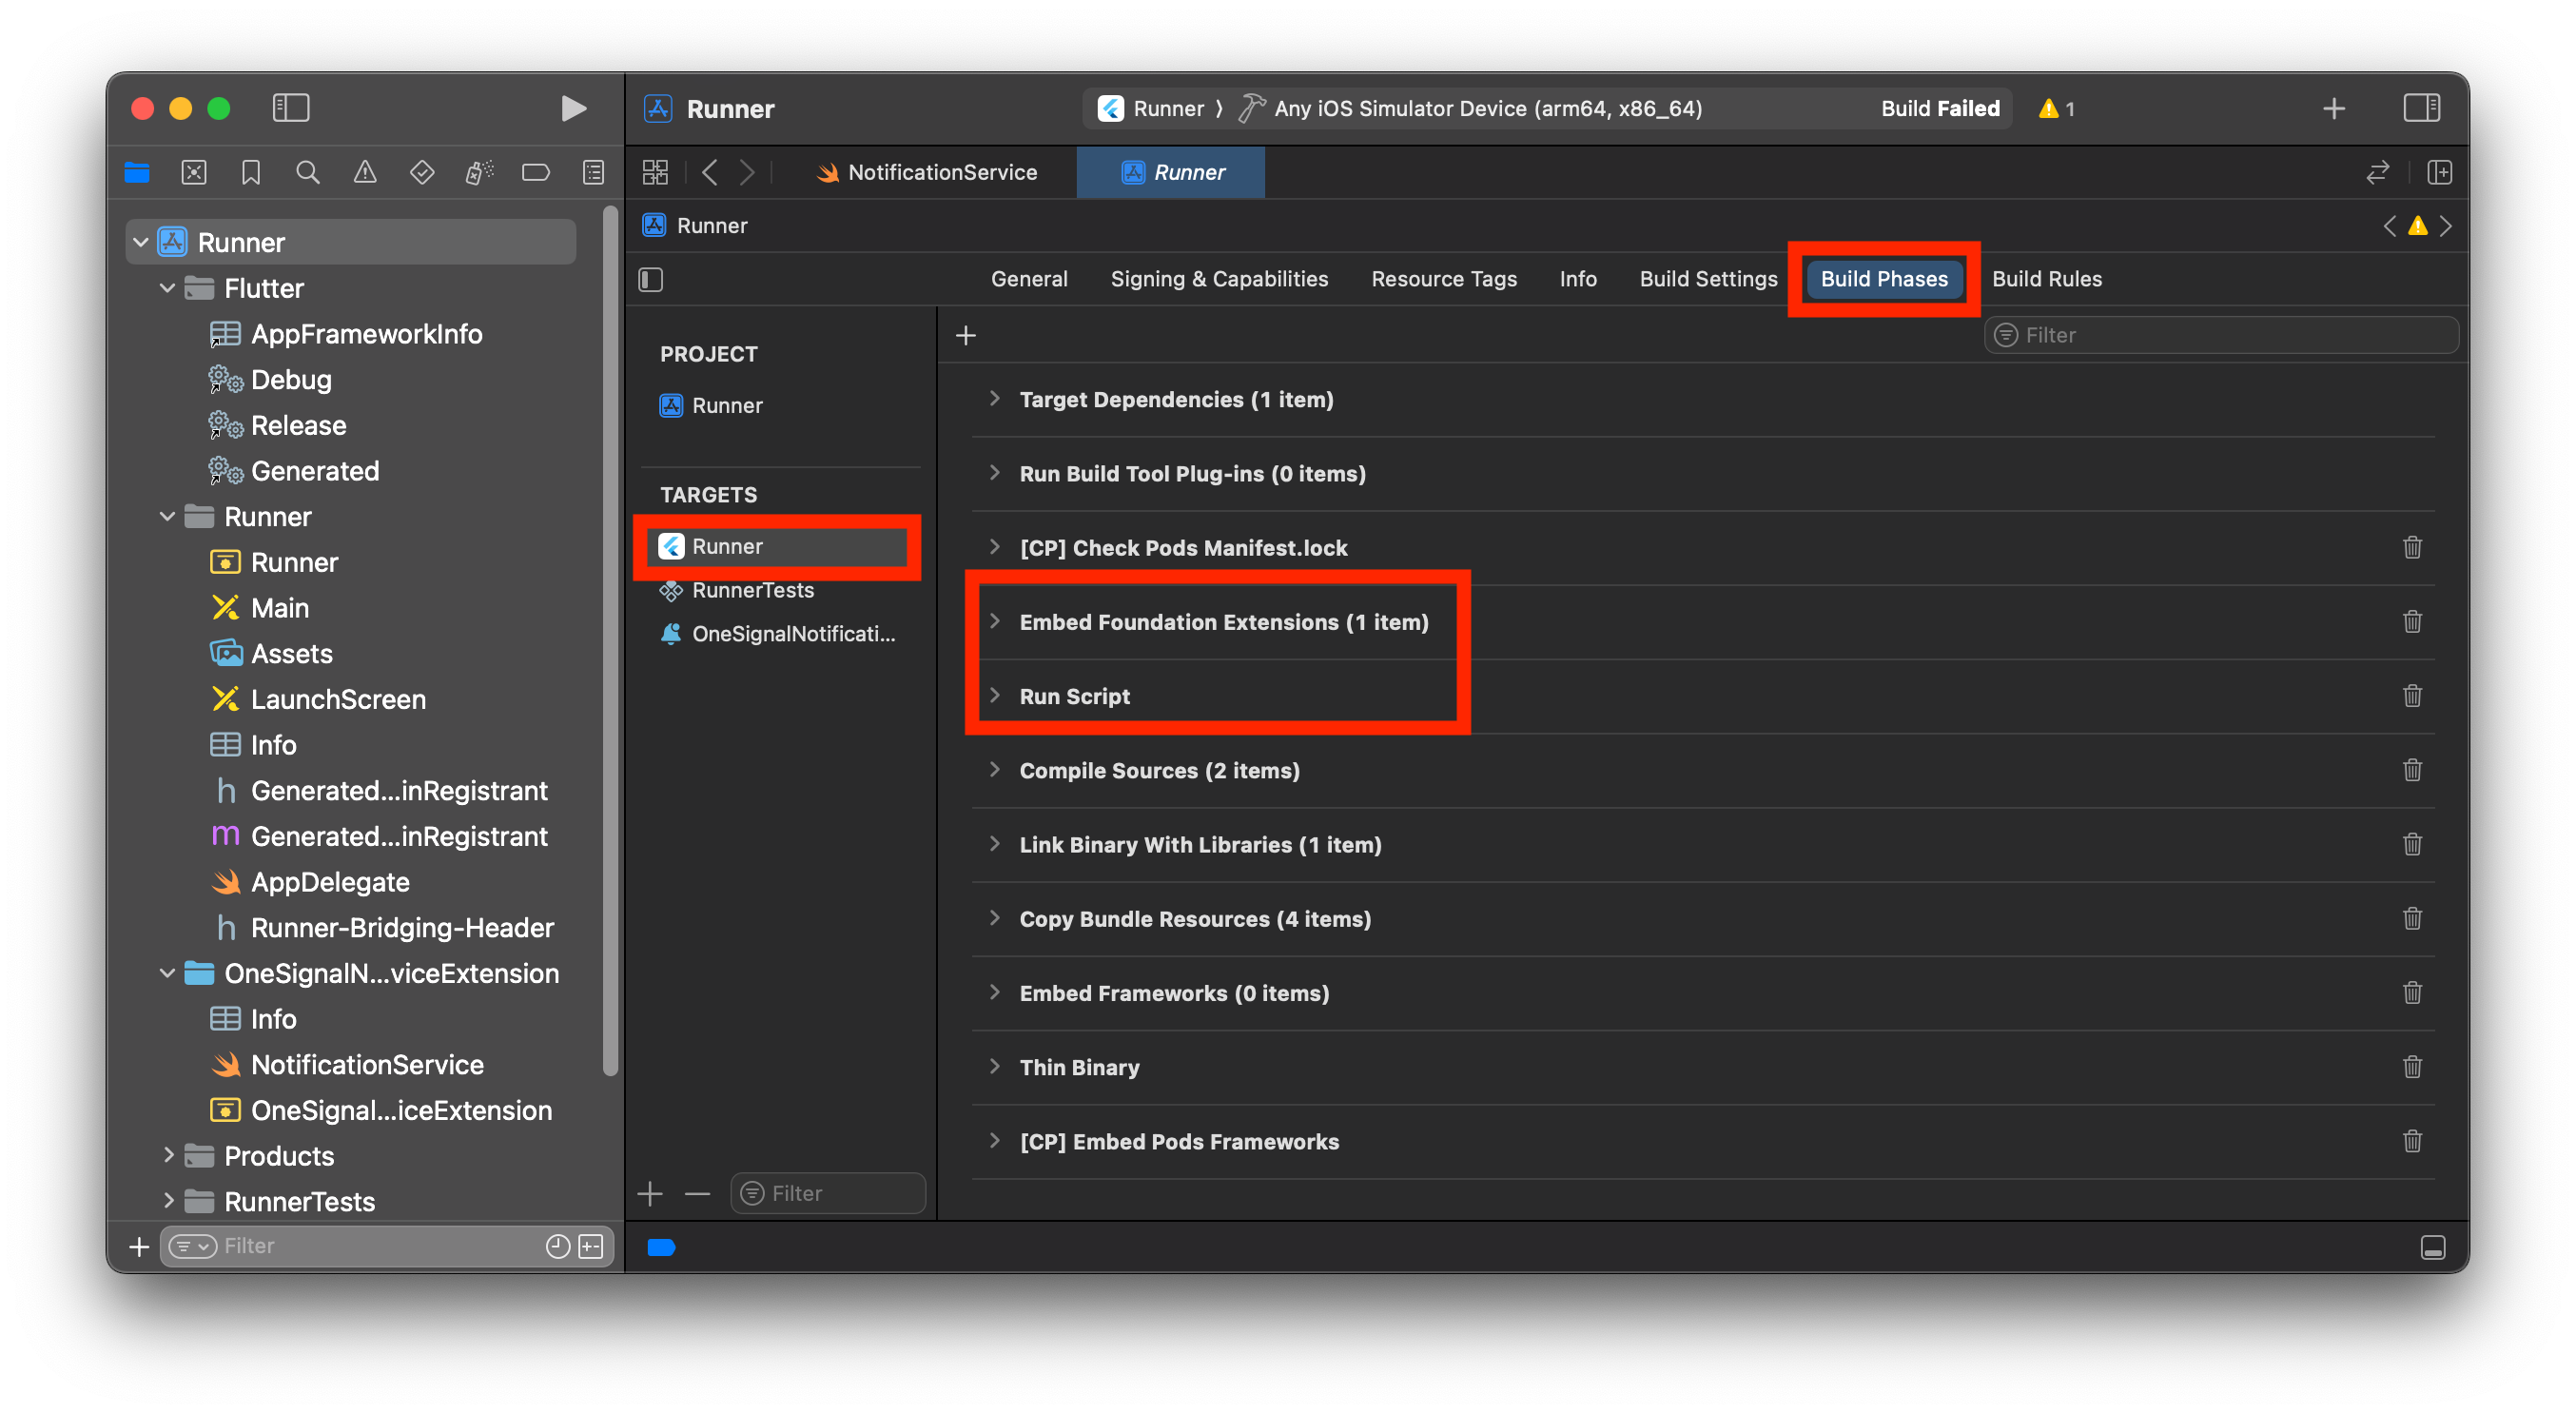
Ordem correta das Build Phases no Xcode.
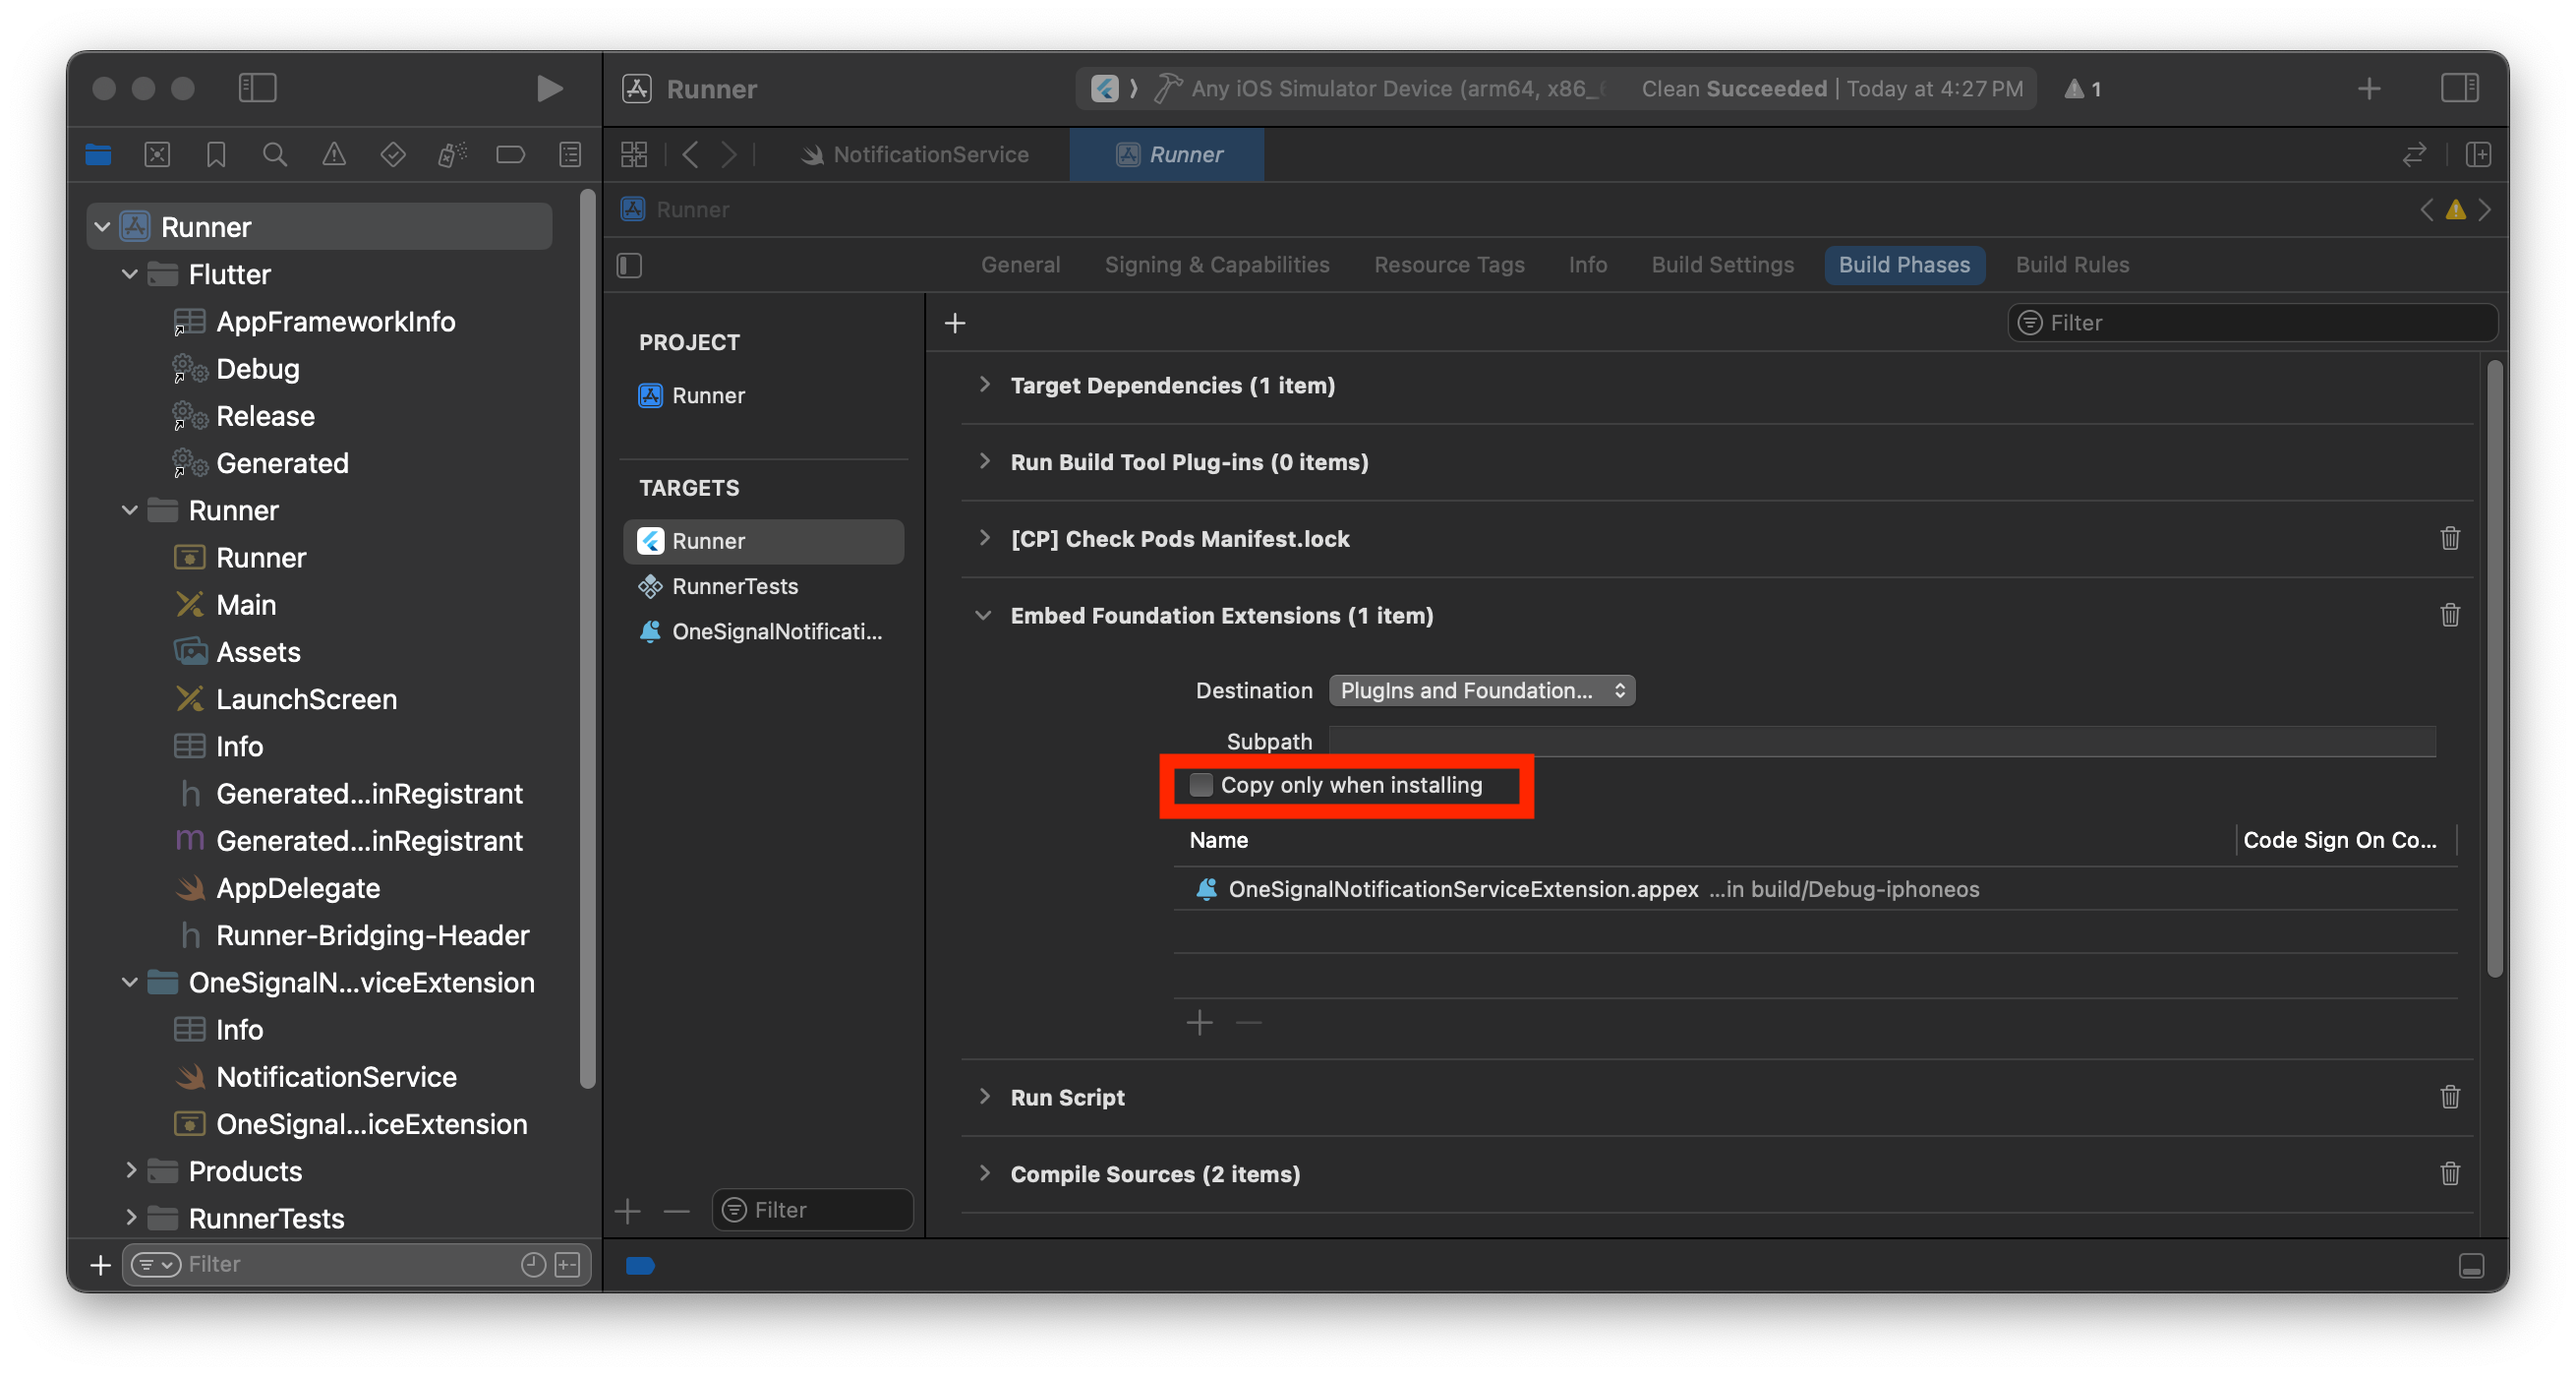
Desmarque Copy only when installing.
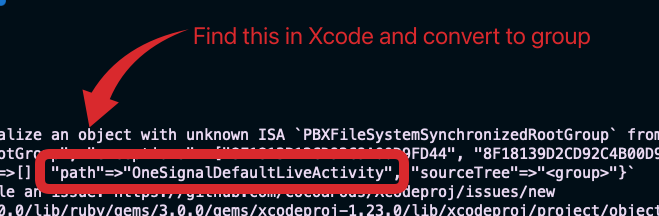
Erro PBXGroup
Erro PBXGroup
PBXGroup tentou inicializar um objeto com ISA desconhecido PBXFileSystemSynchronizedRootGroup dos atributos: {"isa"=>"...", "exceptions"=>["//", "..."], "explicitFileTypes"=>{}, "explicitFolders"=>[], "path"=>"OneSignalNotificationServiceExtension", "sourceTree"=>"<group>"}- Encontre a pasta listada em “path” no erro
- Na barra lateral do projeto Xcode, clique com o botão direito na pasta
- Selecione Convert to Group
Erro de caminho para PBXGroup.
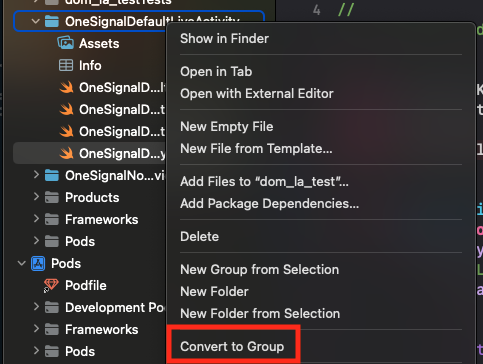
Converter pasta para grupo.
Testing the OneSignal SDK integration
This guide helps you verify that your OneSignal SDK integration is working correctly by testing push notifications, subscription registration, and in-app messaging.Check mobile subscriptions
Launch your app on a test device.
requestPermission method during initialization.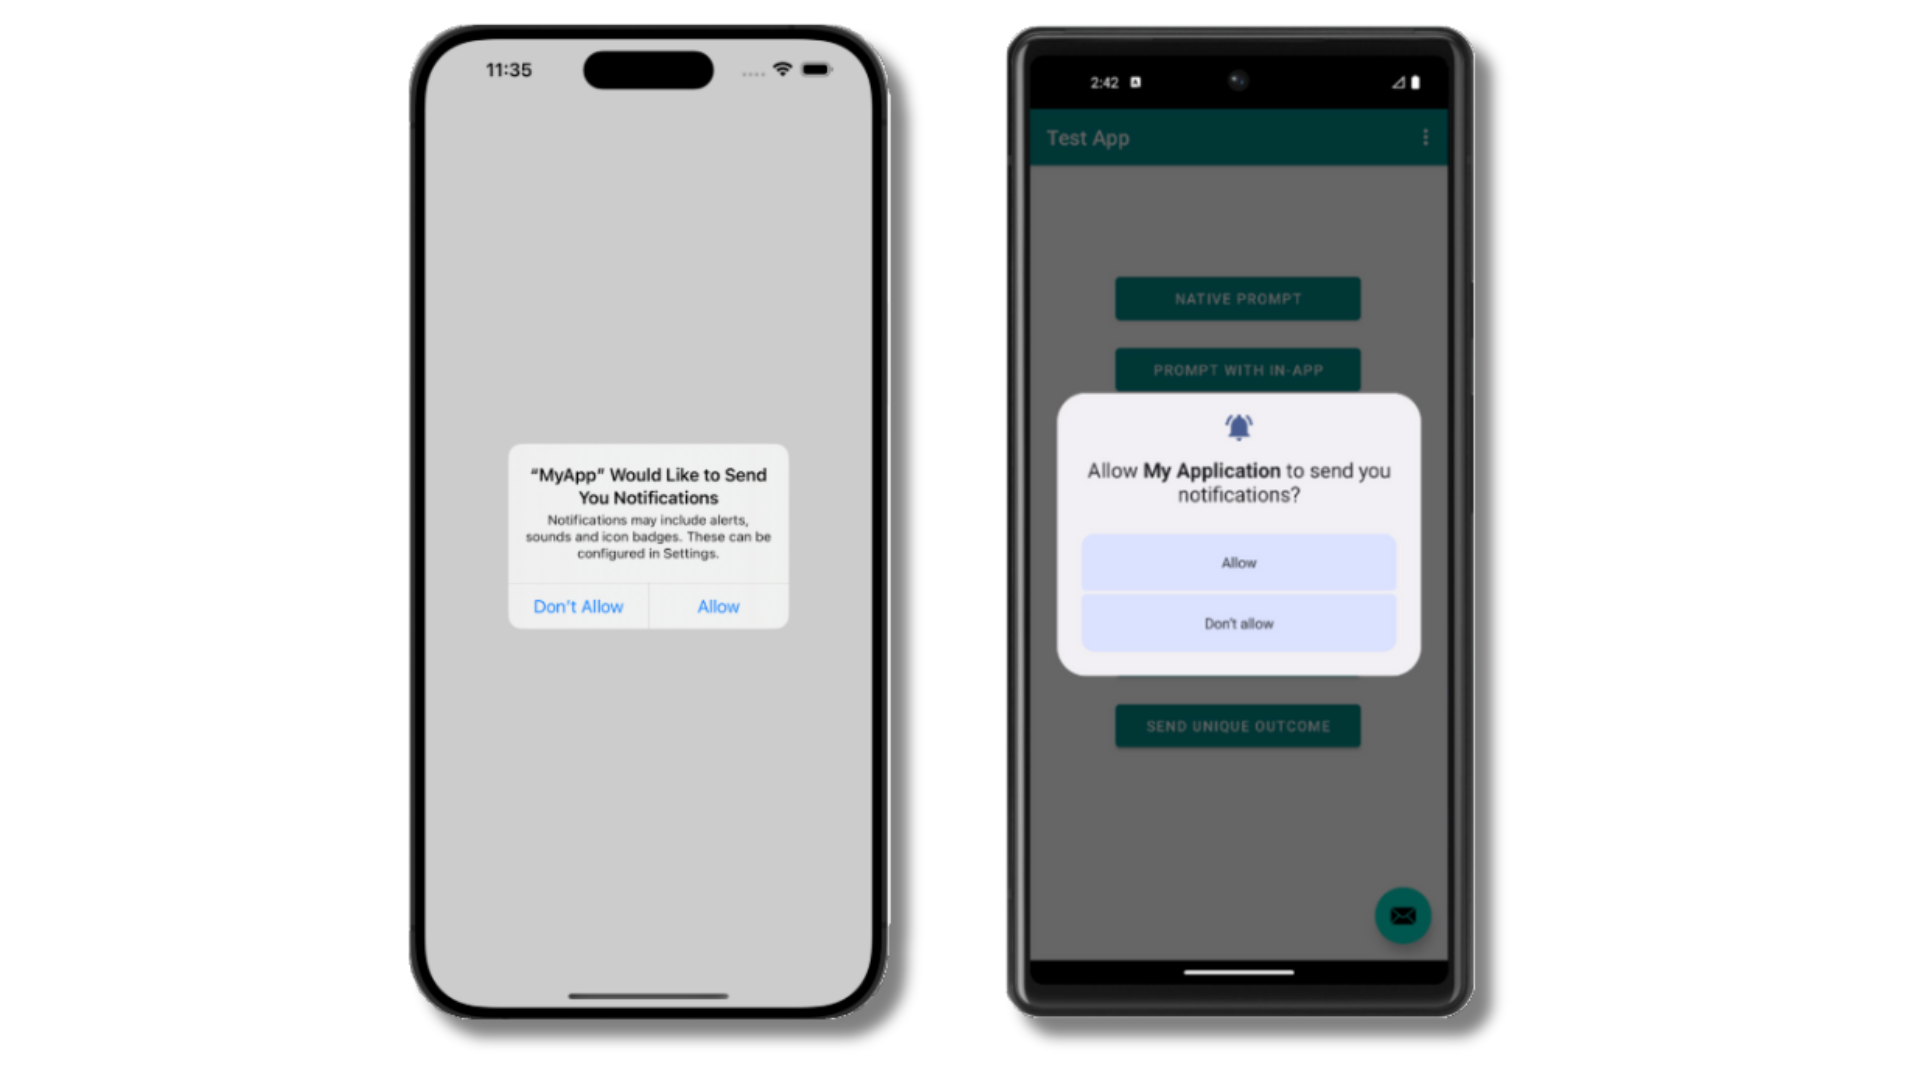
iOS and Android push permission prompts
Check your OneSignal dashboard
- Go to Audience > Subscriptions.
- You should see a new entry with the status “Never Subscribed”.
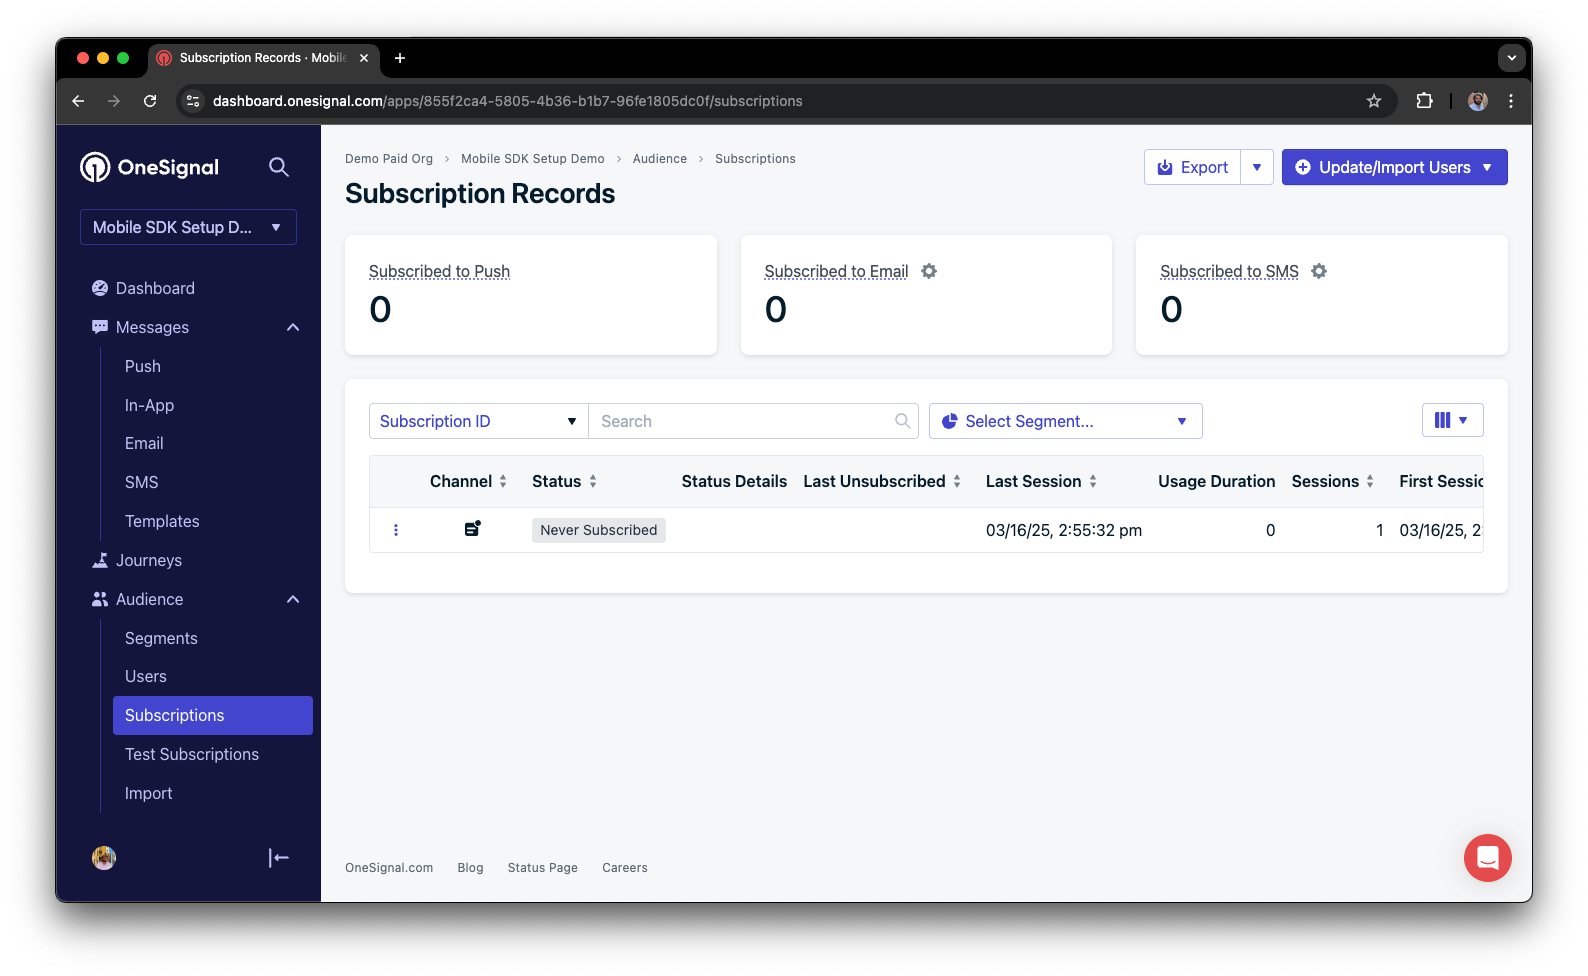
Dashboard showing subscription with 'Never Subscribed' status
Return to the app and tap Allow on the prompt.
Refresh the OneSignal dashboard Subscription's page.
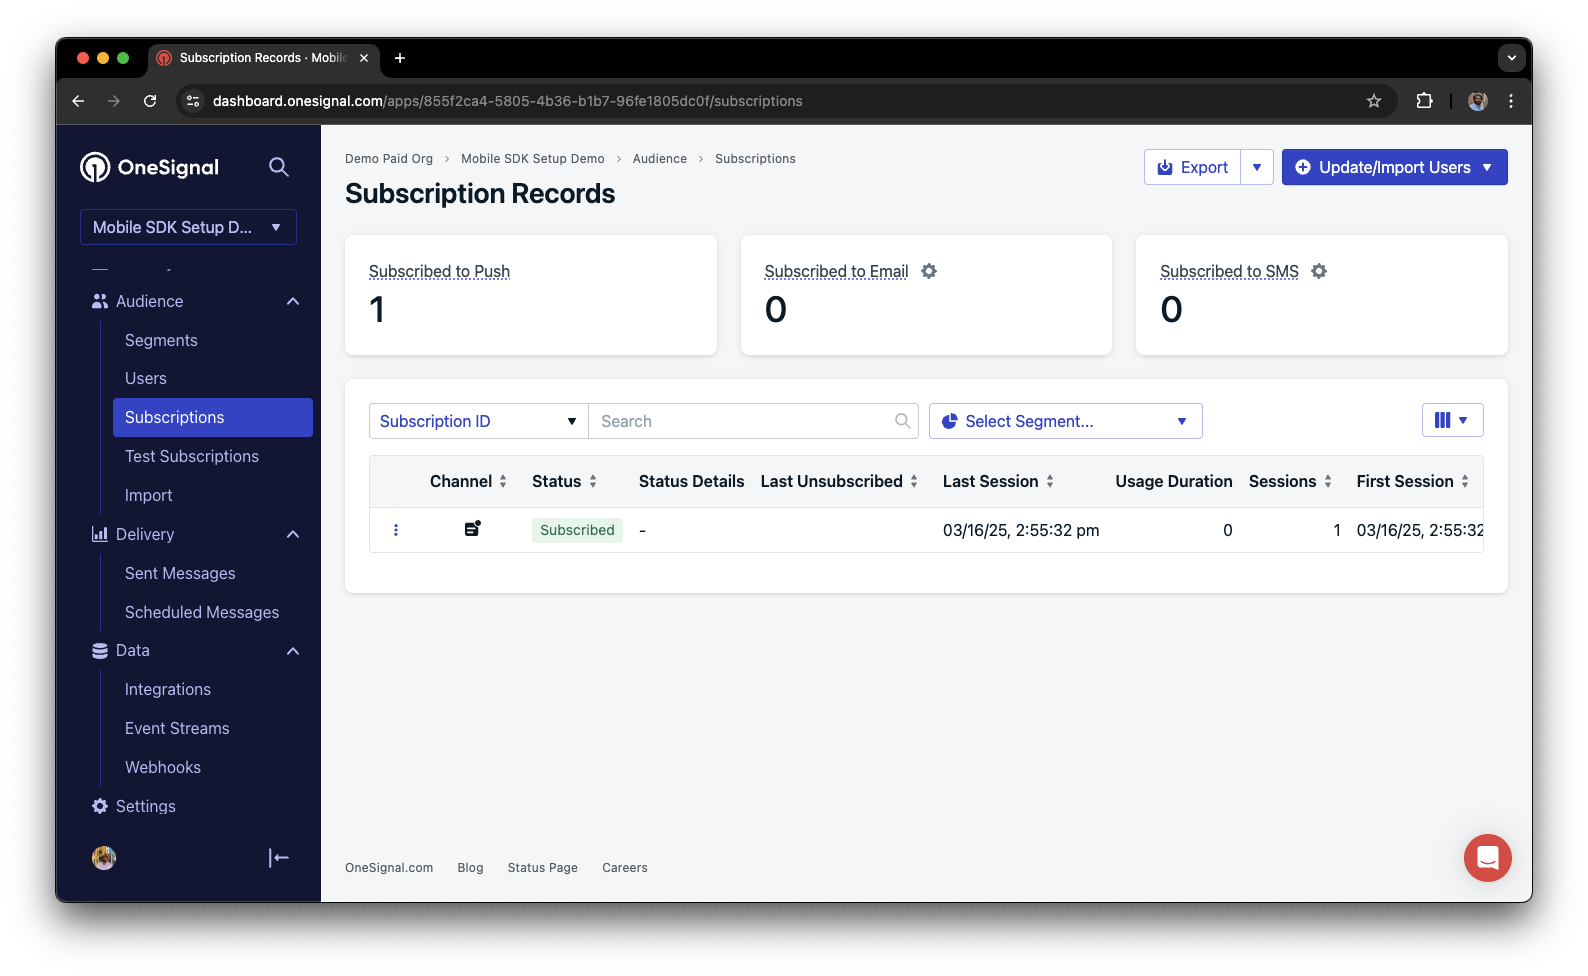
Dashboard showing subscription with 'Subscribed' status
Set up test users
test users are helpful for testing a push notification before sending a message.Add to Test Users.

Adding a device to Test Users
Name your subscription.
Create a test users segment.
Name the segment.
Test Users (the name is important because it will be used later).Add the Test Users filter and click Create Segment.

Creating a 'Test Users' segment with the Test Users filter
Send test push via API
Get your App API Key and App ID.
Update the provided code.
YOUR_APP_API_KEY and YOUR_APP_ID in the code below with your actual keys. This code uses the Test Users segment we created earlier.Run the code.
Check images and confirmed receipt.
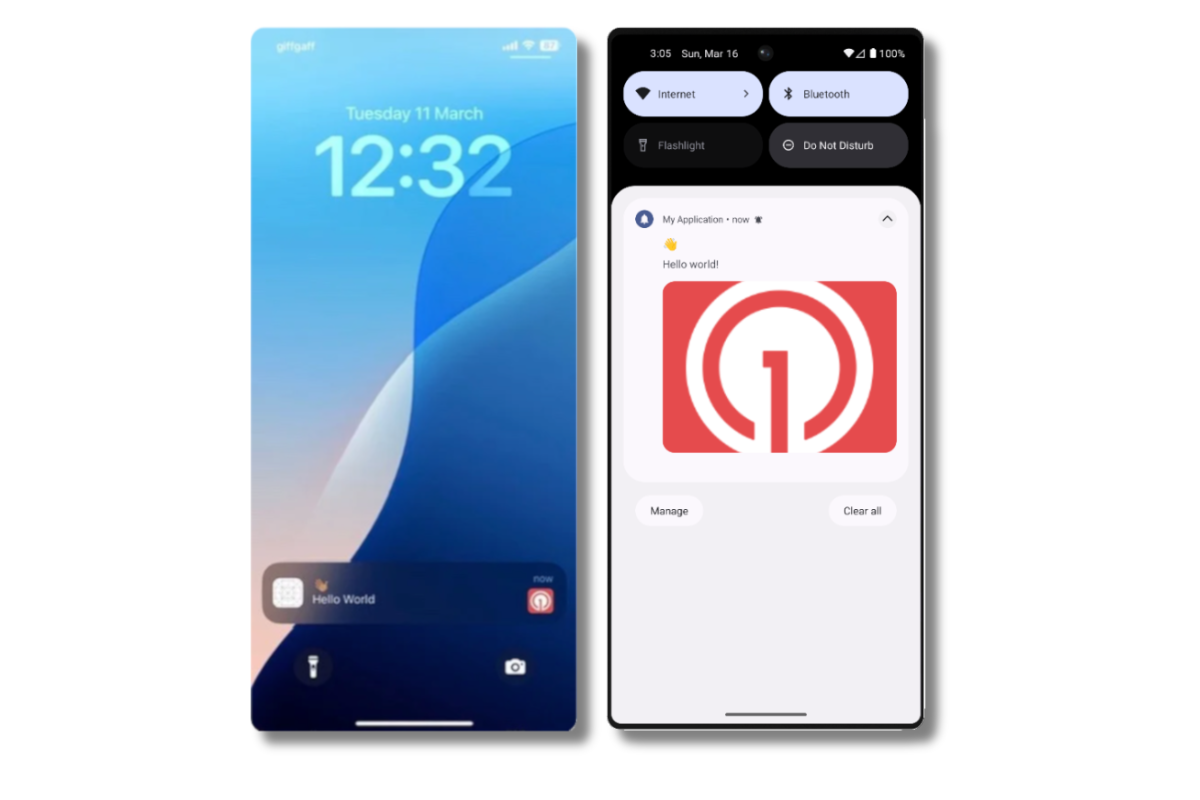
Push notification with image on iOS and Android
Check for confirmed receipt.
Send an in-app message
In-app messages let you communicate with users while they are using your app.Close or background your app on the device.
Create an in-app message.
- In your OneSignal dashboard, navigate to Messages > In-App > New In-App.
- Find and select the Welcome message.
- Set your Audience as the Test Users segment we used previously.
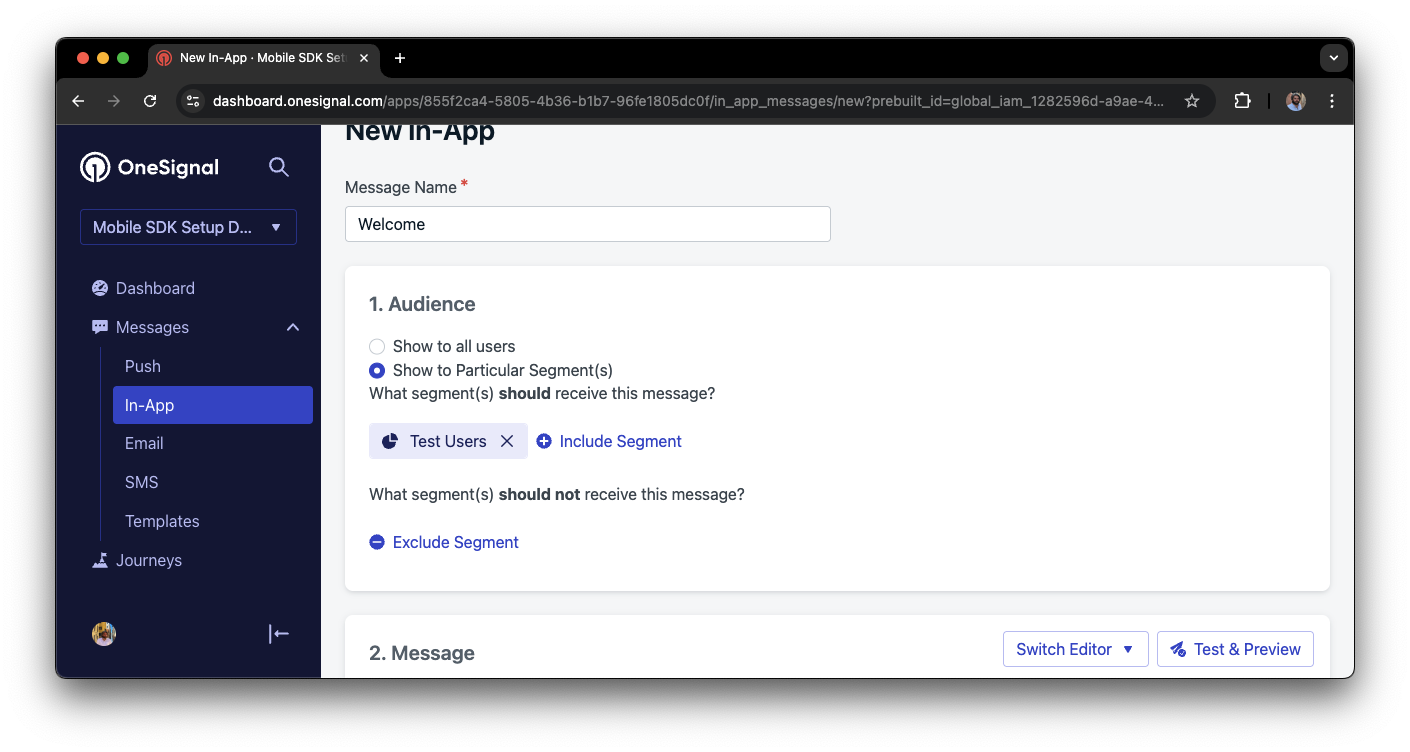
Targeting the 'Test Users' segment with an in-app message
Customize the message content if desired.
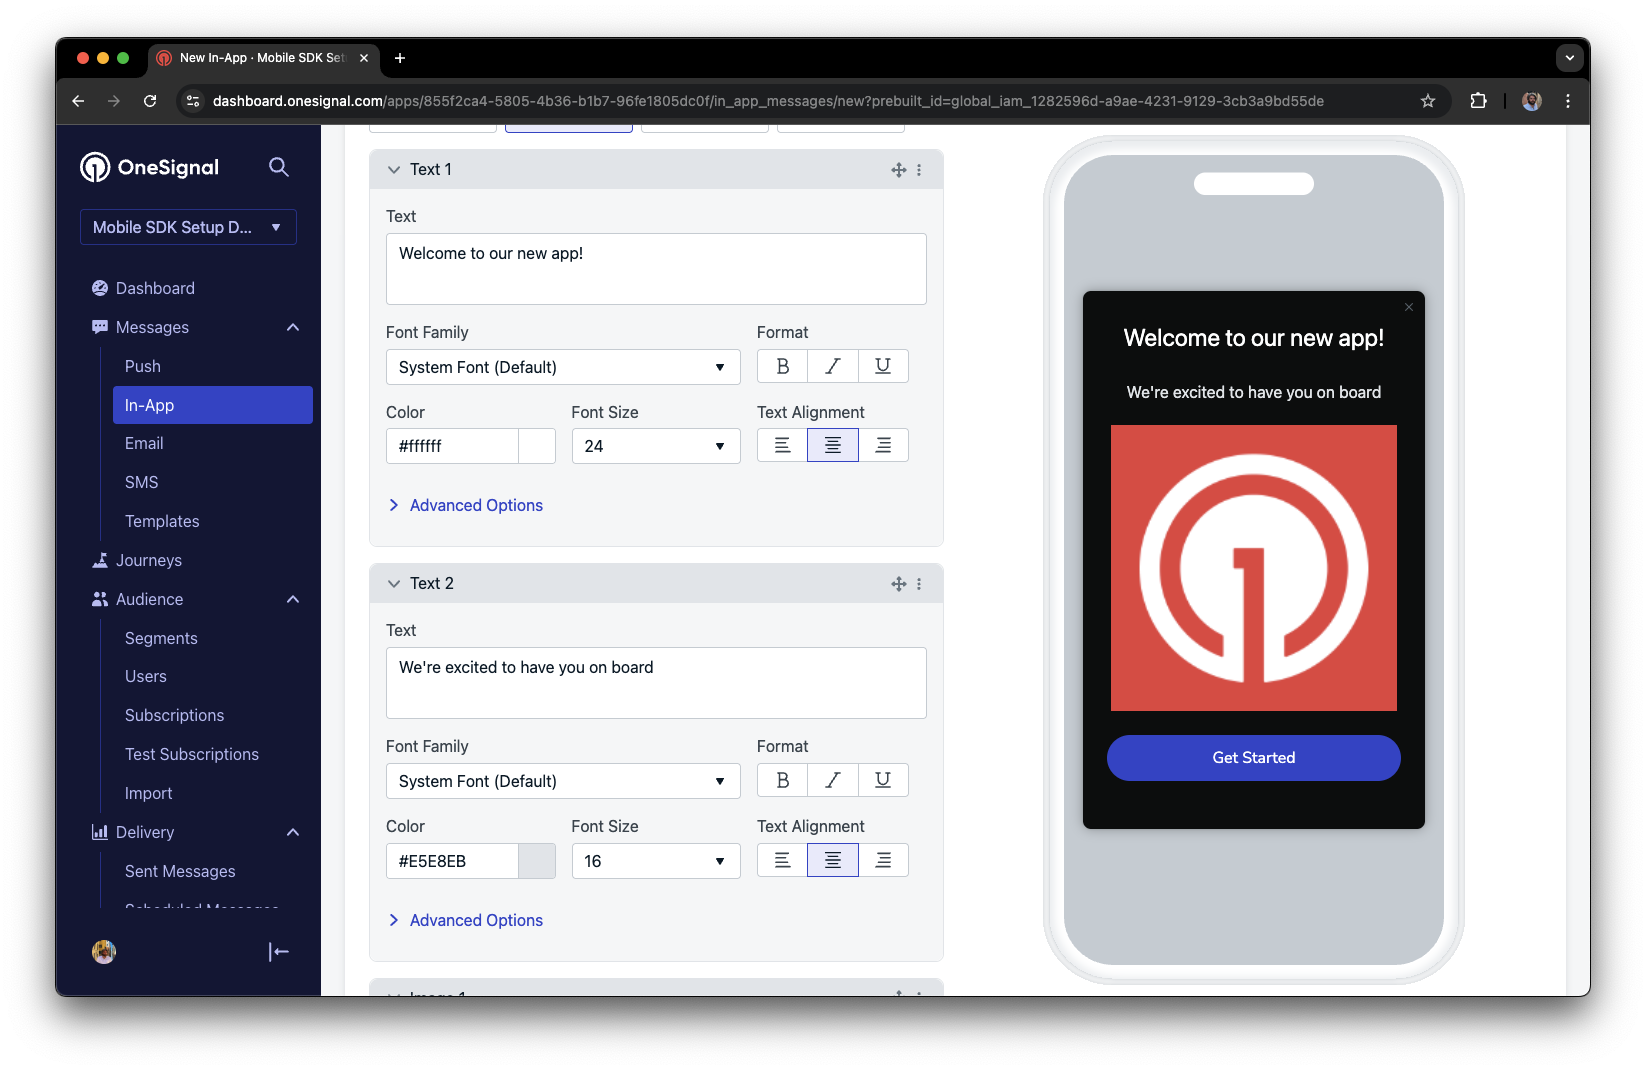
Example customization of in-app Welcome message
Set Trigger to 'On app open'.
Schedule frequency.
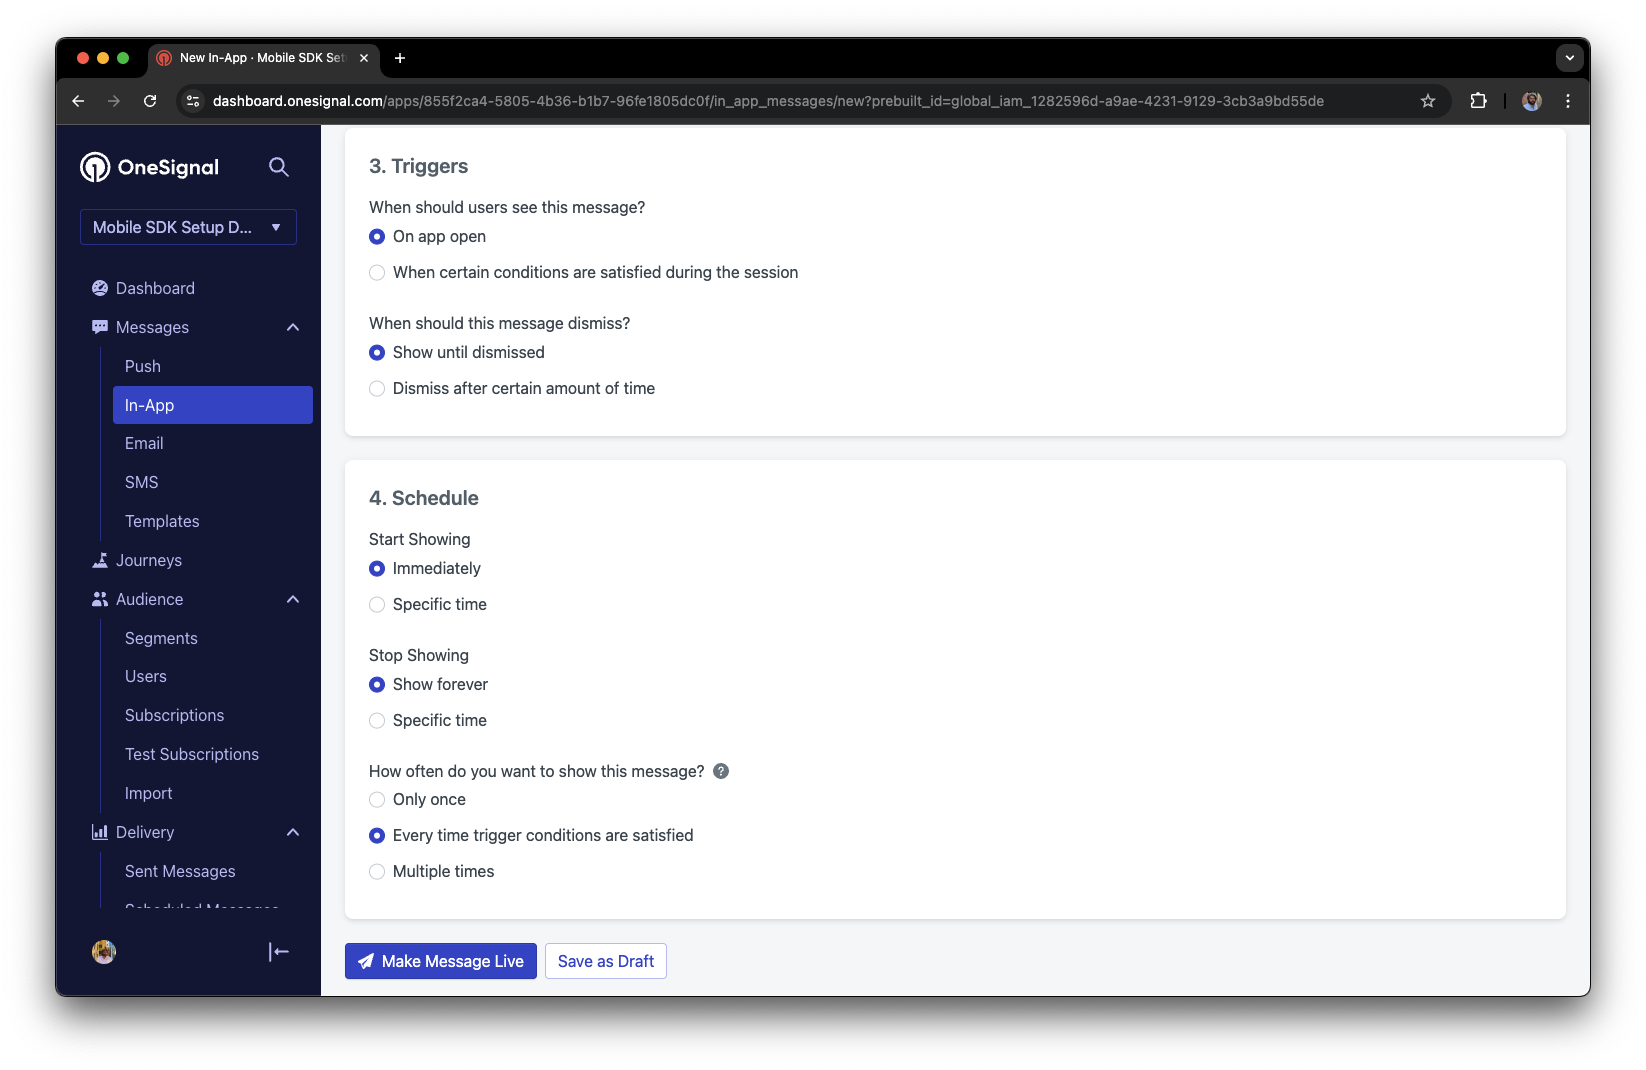
In-app message scheduling options
Make message live.
Open the app and see the message.
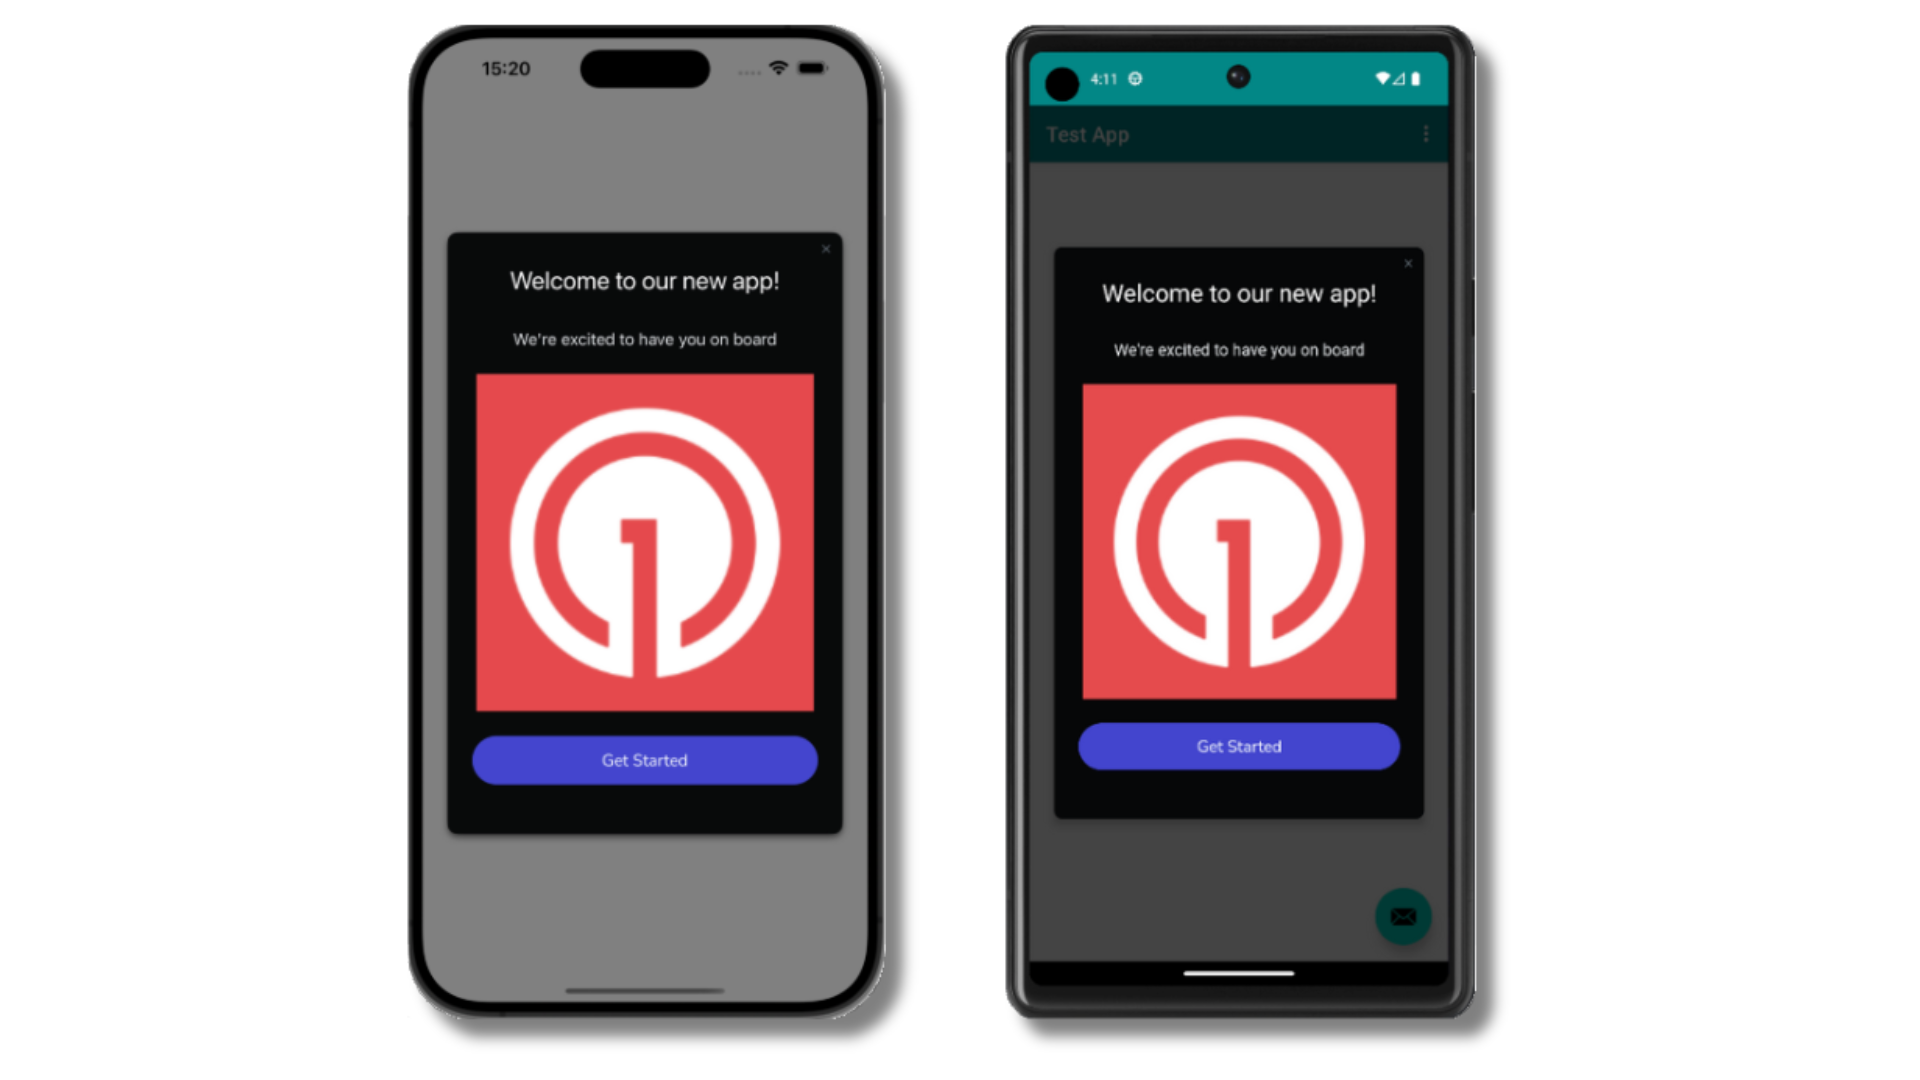
Welcome in-app message shown on devices
- Gathering Subscriptions, setting Test Users, and creating Segments.
- Sending Push with images and Confirmed receipt using Segments and our Create message API.
- Sending In-app messages.
User identification
Previously, we demonstrated how to create mobile Subscriptions. Now we’ll expand to identifying Users across all their subscriptions (including push, email, and SMS) using the OneSignal SDK. We’ll cover External IDs, tags, multi-channel subscriptions, privacy, and event tracking to help you unify and engage users across platforms.Assign External ID
Use an External ID to identify users consistently across devices, email addresses, and phone numbers using your backend’s user identifier. This ensures your messaging stays unified across channels and 3rd party systems (especially important for Integrations). Set the External ID with our SDK’slogin method each time they are identified by your app.
Add Tags
Tags are key-value pairs of string data you can use to store user properties (likeusername, role, or preferences) and events (like purchase_date, game_level, or user interactions). Tags power advanced Message Personalization and Segmentation allowing for more advanced use cases.
Set tags with our SDK addTag and addTags methods as events occur in your app.
In this example, the user reached level 6 identifiable by the tag called current_level set to a value of 6.
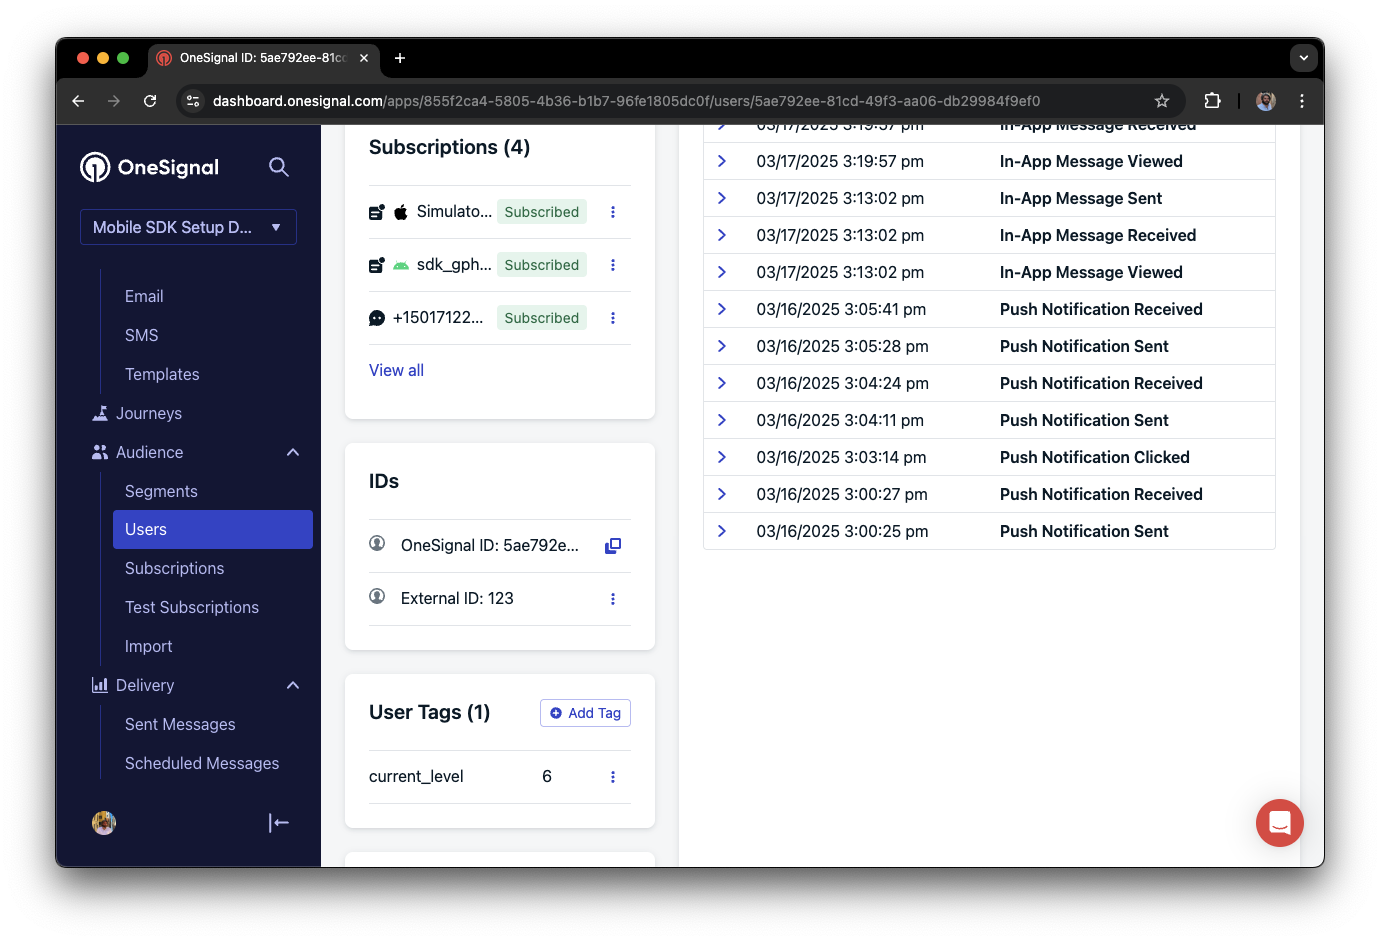
A user profile in OneSignal with a tag called "current_level" set to "6"
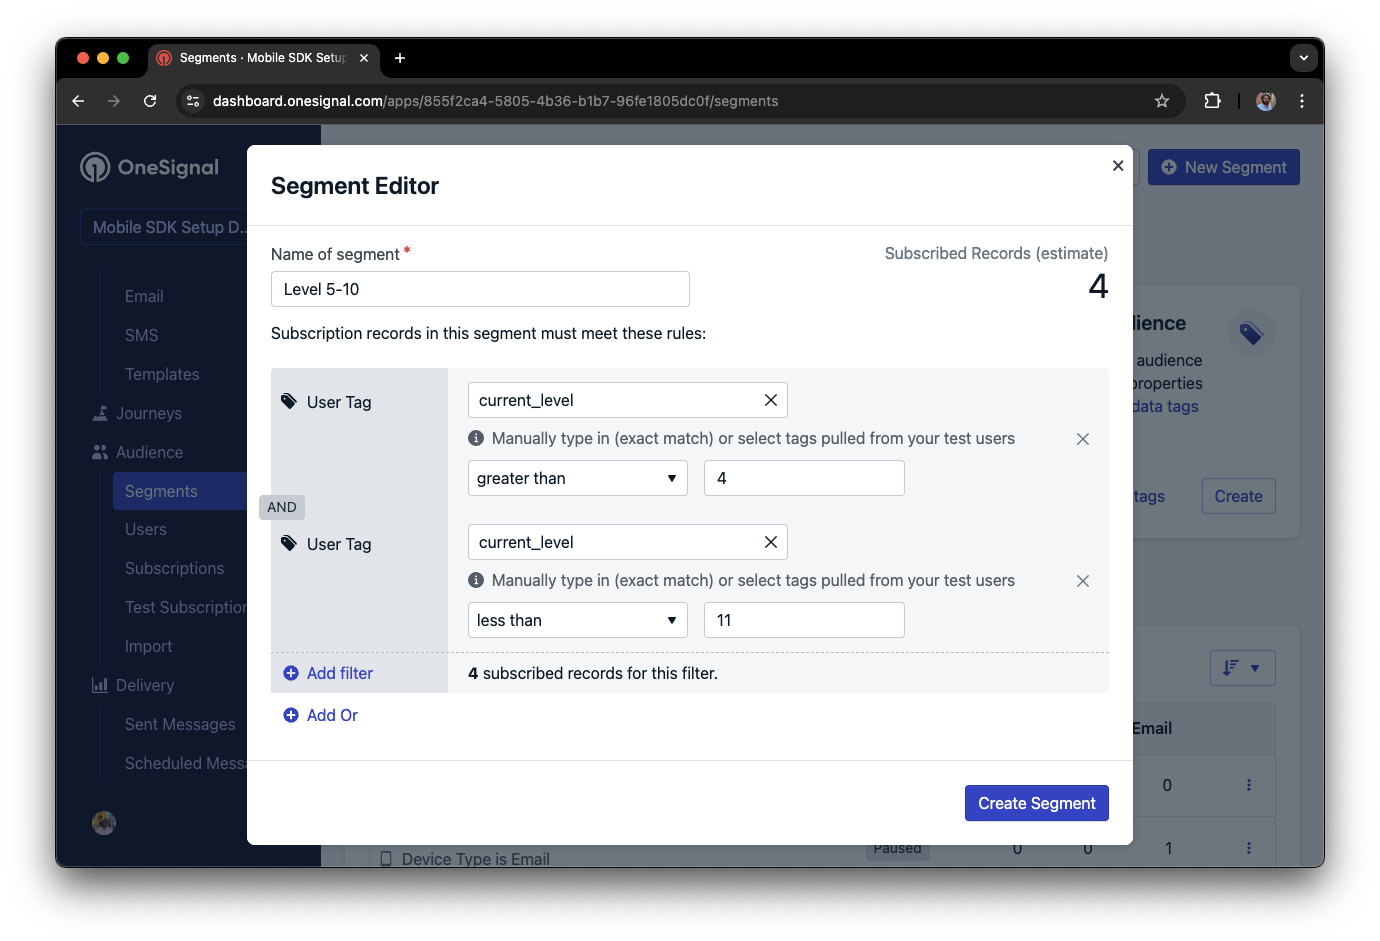
Segment editor showing a segment targeting users with a current_level value of greater than 4 and less than 10
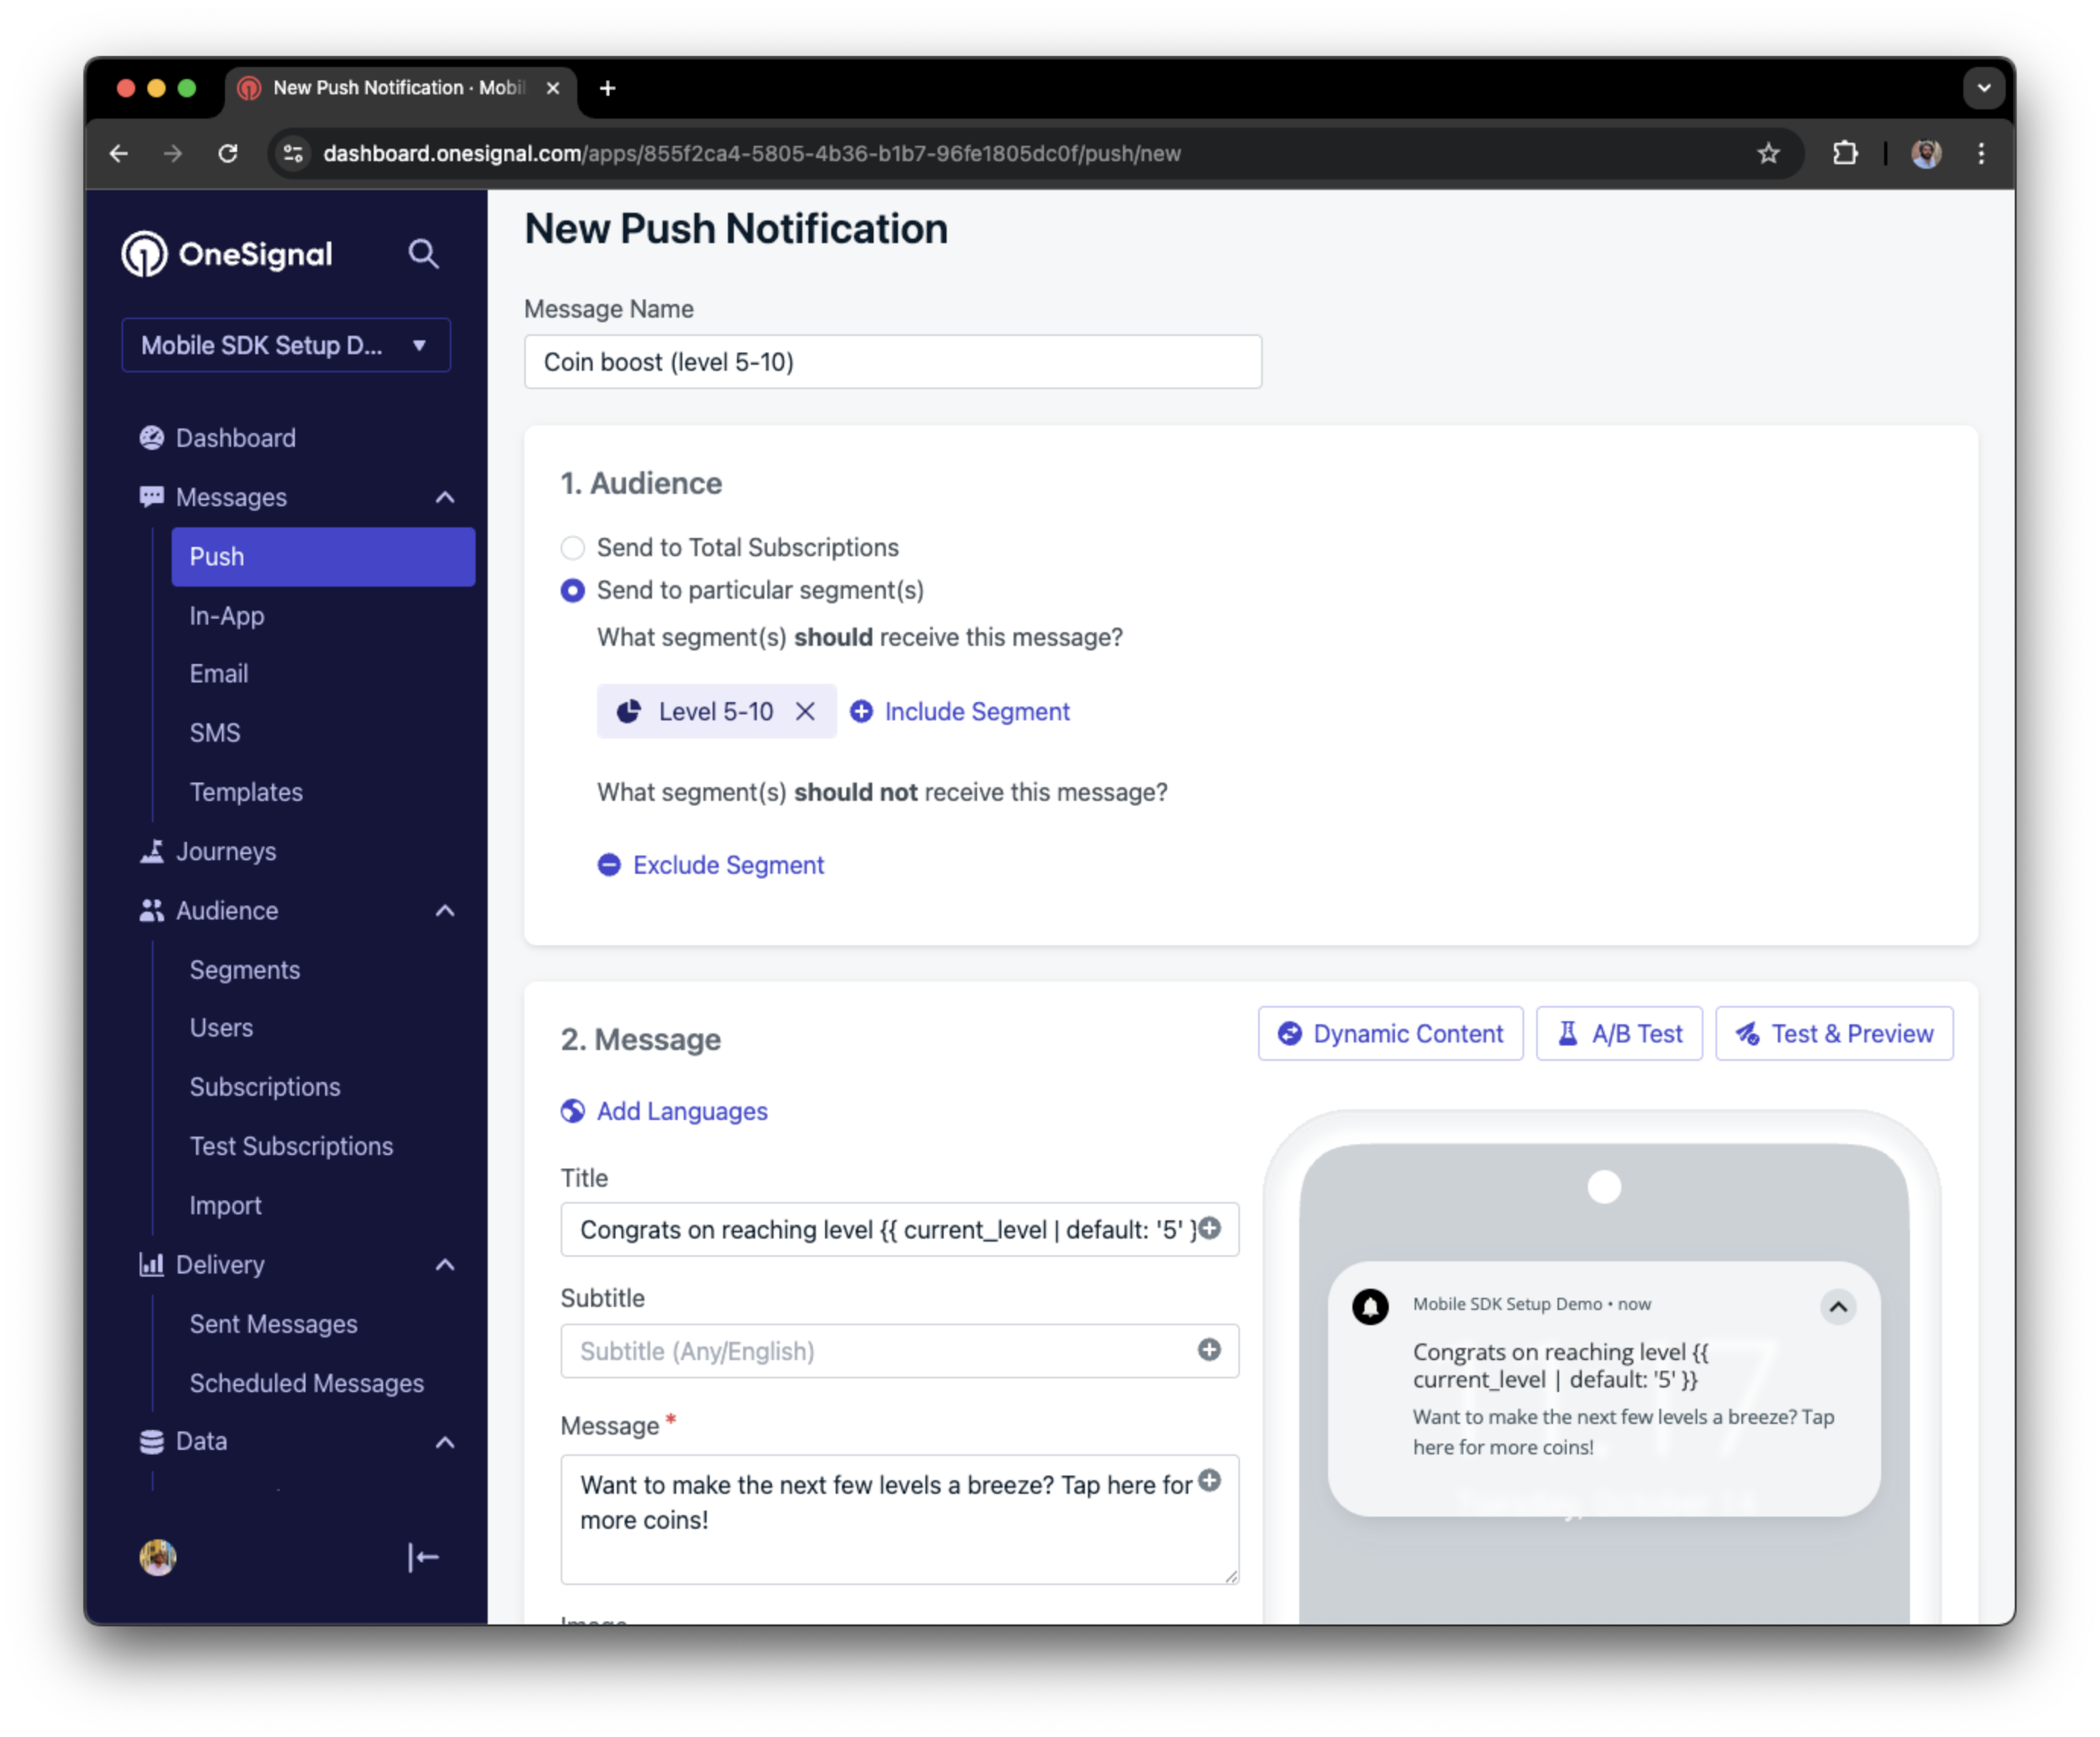
Screenshot showing a push notification targeting the Level 5-10 segment with a personalized message
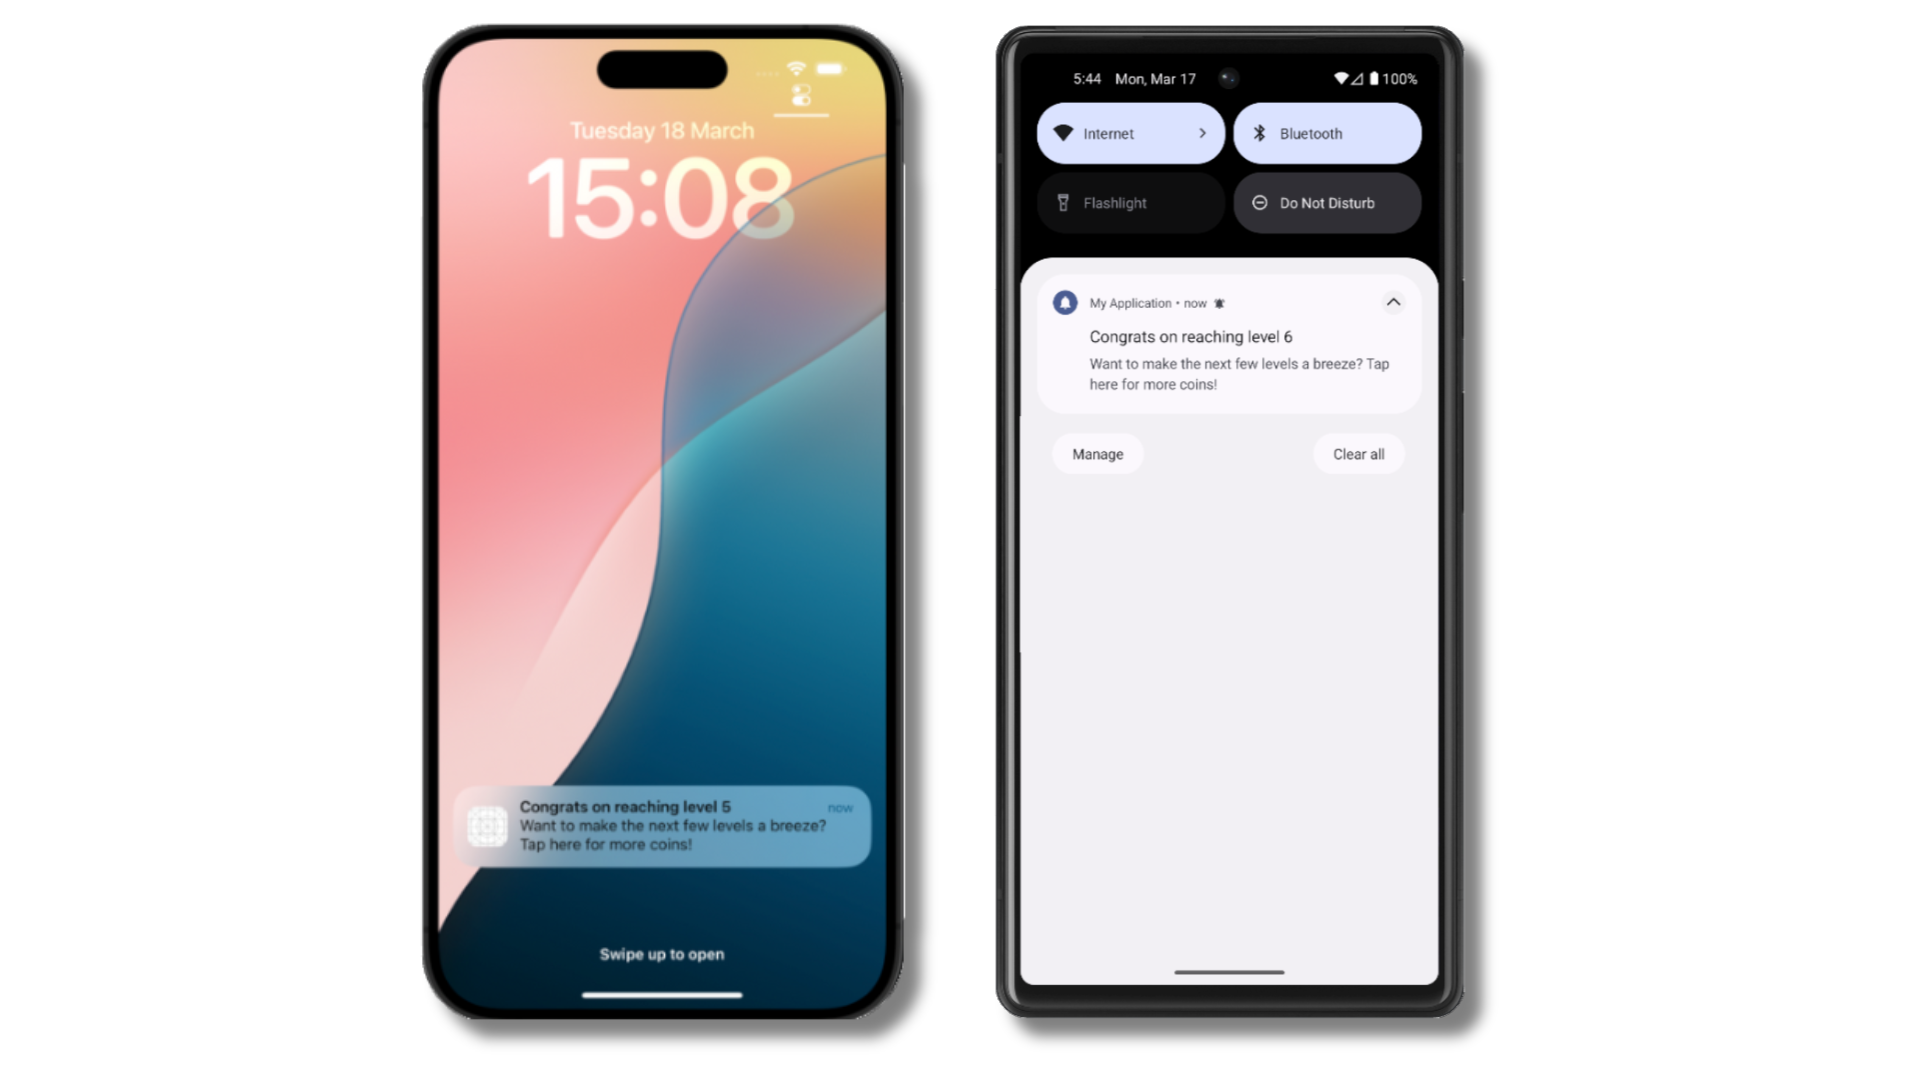
The push notification is received on an iOS and Android device with the personalized content
Add email and/or SMS subscriptions
Earlier we saw how our SDK creates mobile subscriptions to send push and in-app messages. You can also reach users through emails and SMS channels by creating the corresponding subscriptions.- Use the
addEmailmethod to create email subscriptions. - Use the
addSmsmethod to create SMS subscriptions.
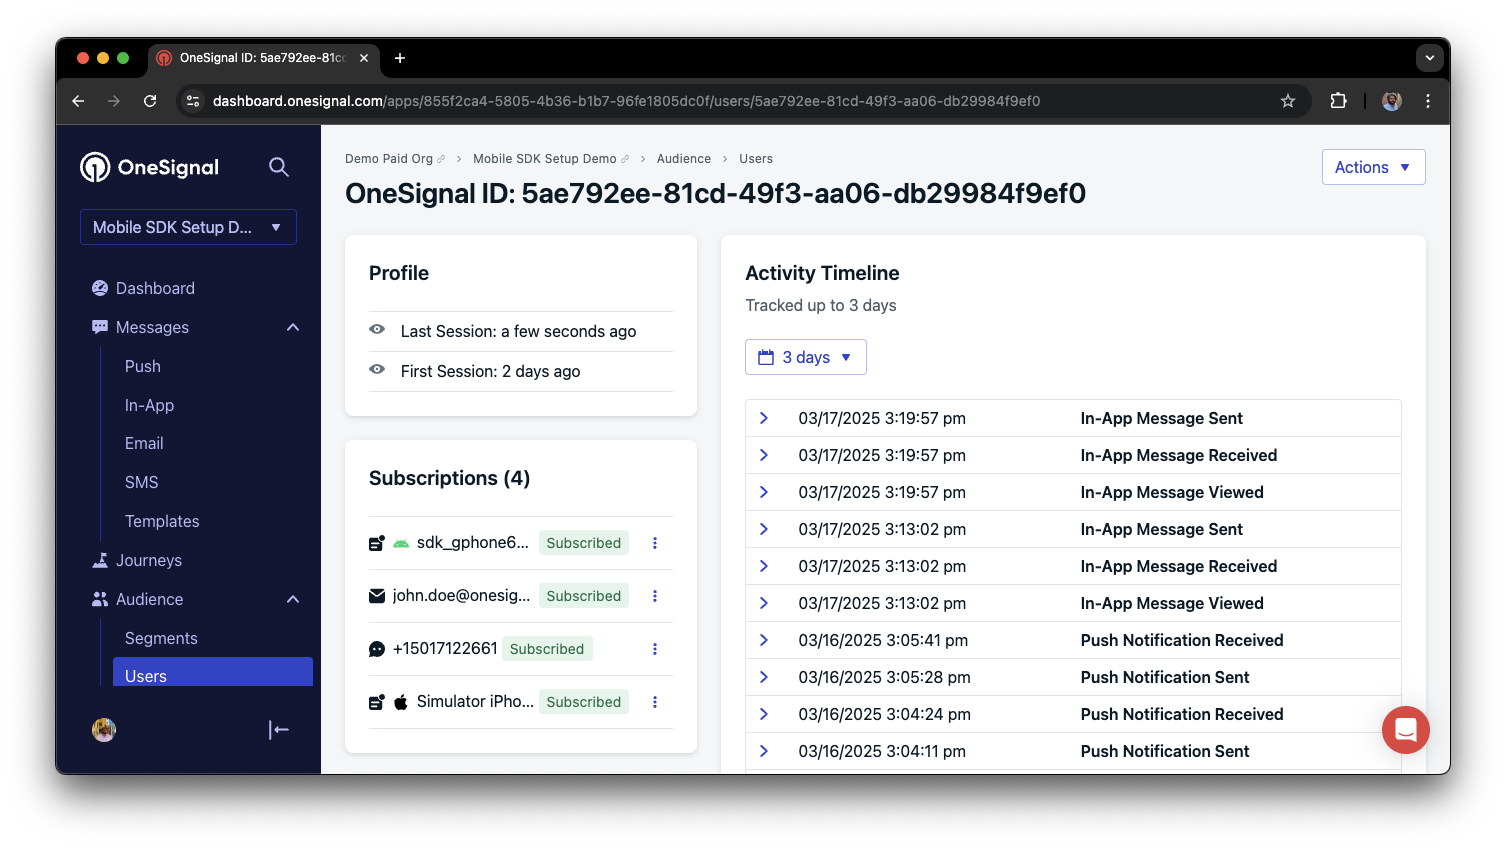
A user profile with push, email, and SMS subscriptions unified by External ID
- Obtain explicit consent before adding email or SMS subscriptions.
- Explain the benefits of each communication channel to users.
- Provide channel preferences so users can select which channels they prefer.
Privacy & user consent
To control when OneSignal collects user data, use the SDK’s consent gating methods:setConsentRequired(true): Prevents data collection until consent is given.setConsentGiven(true): Enables data collection once consent is granted.
Prompt for push permissions
Instead of callingrequestPermission() immediately on app open, take a more strategic approach. Use an in-app message to explain the value of push notifications before requesting permission.
For best practices and implementation details, see our Prompt for push permissions guide.
Listen to push, user, and in-app events
Use SDK listeners to react to user actions and state changes. The SDK provides several event listeners for you to hook into. See our SDK reference guide for more details.Push notification events
addClickListener(): Detect when a notification is tapped. Helpful for Deep Linking.addForegroundLifecycleListener(): Control how notifications behave in foreground.
User state changes
addObserver()for user state: Detect when the External ID is set.addPermissionObserver(): Track the user’s specific interaction with the native push permission prompt.addObserver()for push subscription: Track when the push subscription status changes.
In-app message events
addClickListener(): Handle in-app click actions. Ideal for deep linking or tracking events.addLifecycleListener(): Track full lifecycle of in-app messages (shown, clicked, dismissed, etc.).
Advanced setup & capabilities
Explore more capabilities to enhance your integration:- 🔁 Migrating to OneSignal from another service
- 🌍 Location tracking
- 🔗 Deep Linking
- 🔌 Integrations
- 🧩 Mobile Service Extensions
- 🛎️ Action buttons
- 🌐 Multi-language messaging
- 🛡️ Identity Verification
- 📊 Custom Outcomes
- 📲 Live Activities
Mobile SDK setup & reference
Make sure you’ve enabled all key features by reviewing the Mobile push setup guide. For full details on available methods and configuration options, visit the Mobile SDK reference.support@onesignal.comPlease include:- Details of the issue you’re experiencing and steps to reproduce if available
- Your OneSignal App ID
- The External ID or Subscription ID if applicable
- The URL to the message you tested in the OneSignal Dashboard if applicable
- Any relevant logs or error messages