Send marketing and transactional emails with OneSignal using the dashboard, Journeys, or the API, with built-in personalization, analytics, and deliverability tools.
OneSignal Email lets you send marketing and transactional emails from the dashboard, Journeys, or the API.
Send marketing campaigns and transactional messages from the dashboard or API
Build automated email and multi-channel flows with Journeys
Design emails using drag-and-drop or HTML
Personalize content with dynamic fields, conditional logic, and language variants
Track performance and A/B test with detailed analytics
Segment your audience for precise targeting
Integrate with CRMs and tools like HubSpot, Mixpanel, Amplitude, Zapier, and more
Deliverability determines whether your emails reach the inbox or land in spam. OneSignal provides tools and guidance to help you build and maintain a healthy sending reputation.
Email deliverability
Understand how inbox placement works and how OneSignal supports it.
Email reputation best practices
Warm domains, manage volume, and avoid spam filters.
Auto warm-up
Automatically ramp sending volume for new domains.
Google Postmaster Tools
Monitor Gmail reputation and delivery signals.
Suppressions
Manage blocked and suppressed email addresses.
Email message reports
Track open, click, and conversion rates.
Email troubleshooting
Diagnose and resolve common delivery issues.
Create a confirmed opt-in journey
Use Tags, Segments, and Journeys to create a confirmed opt-in journey.
Add your own verification links
Learn how to add your own verification links to your emails.
OneSignal supports visual and code-based email creation. Use the drag-and-drop editor for quick campaigns or the HTML editor for full design control. You can also start from a template and customize from there.
Drag-and-drop editor
Build emails visually without writing code.
HTML editor
Design fully custom emails using HTML.
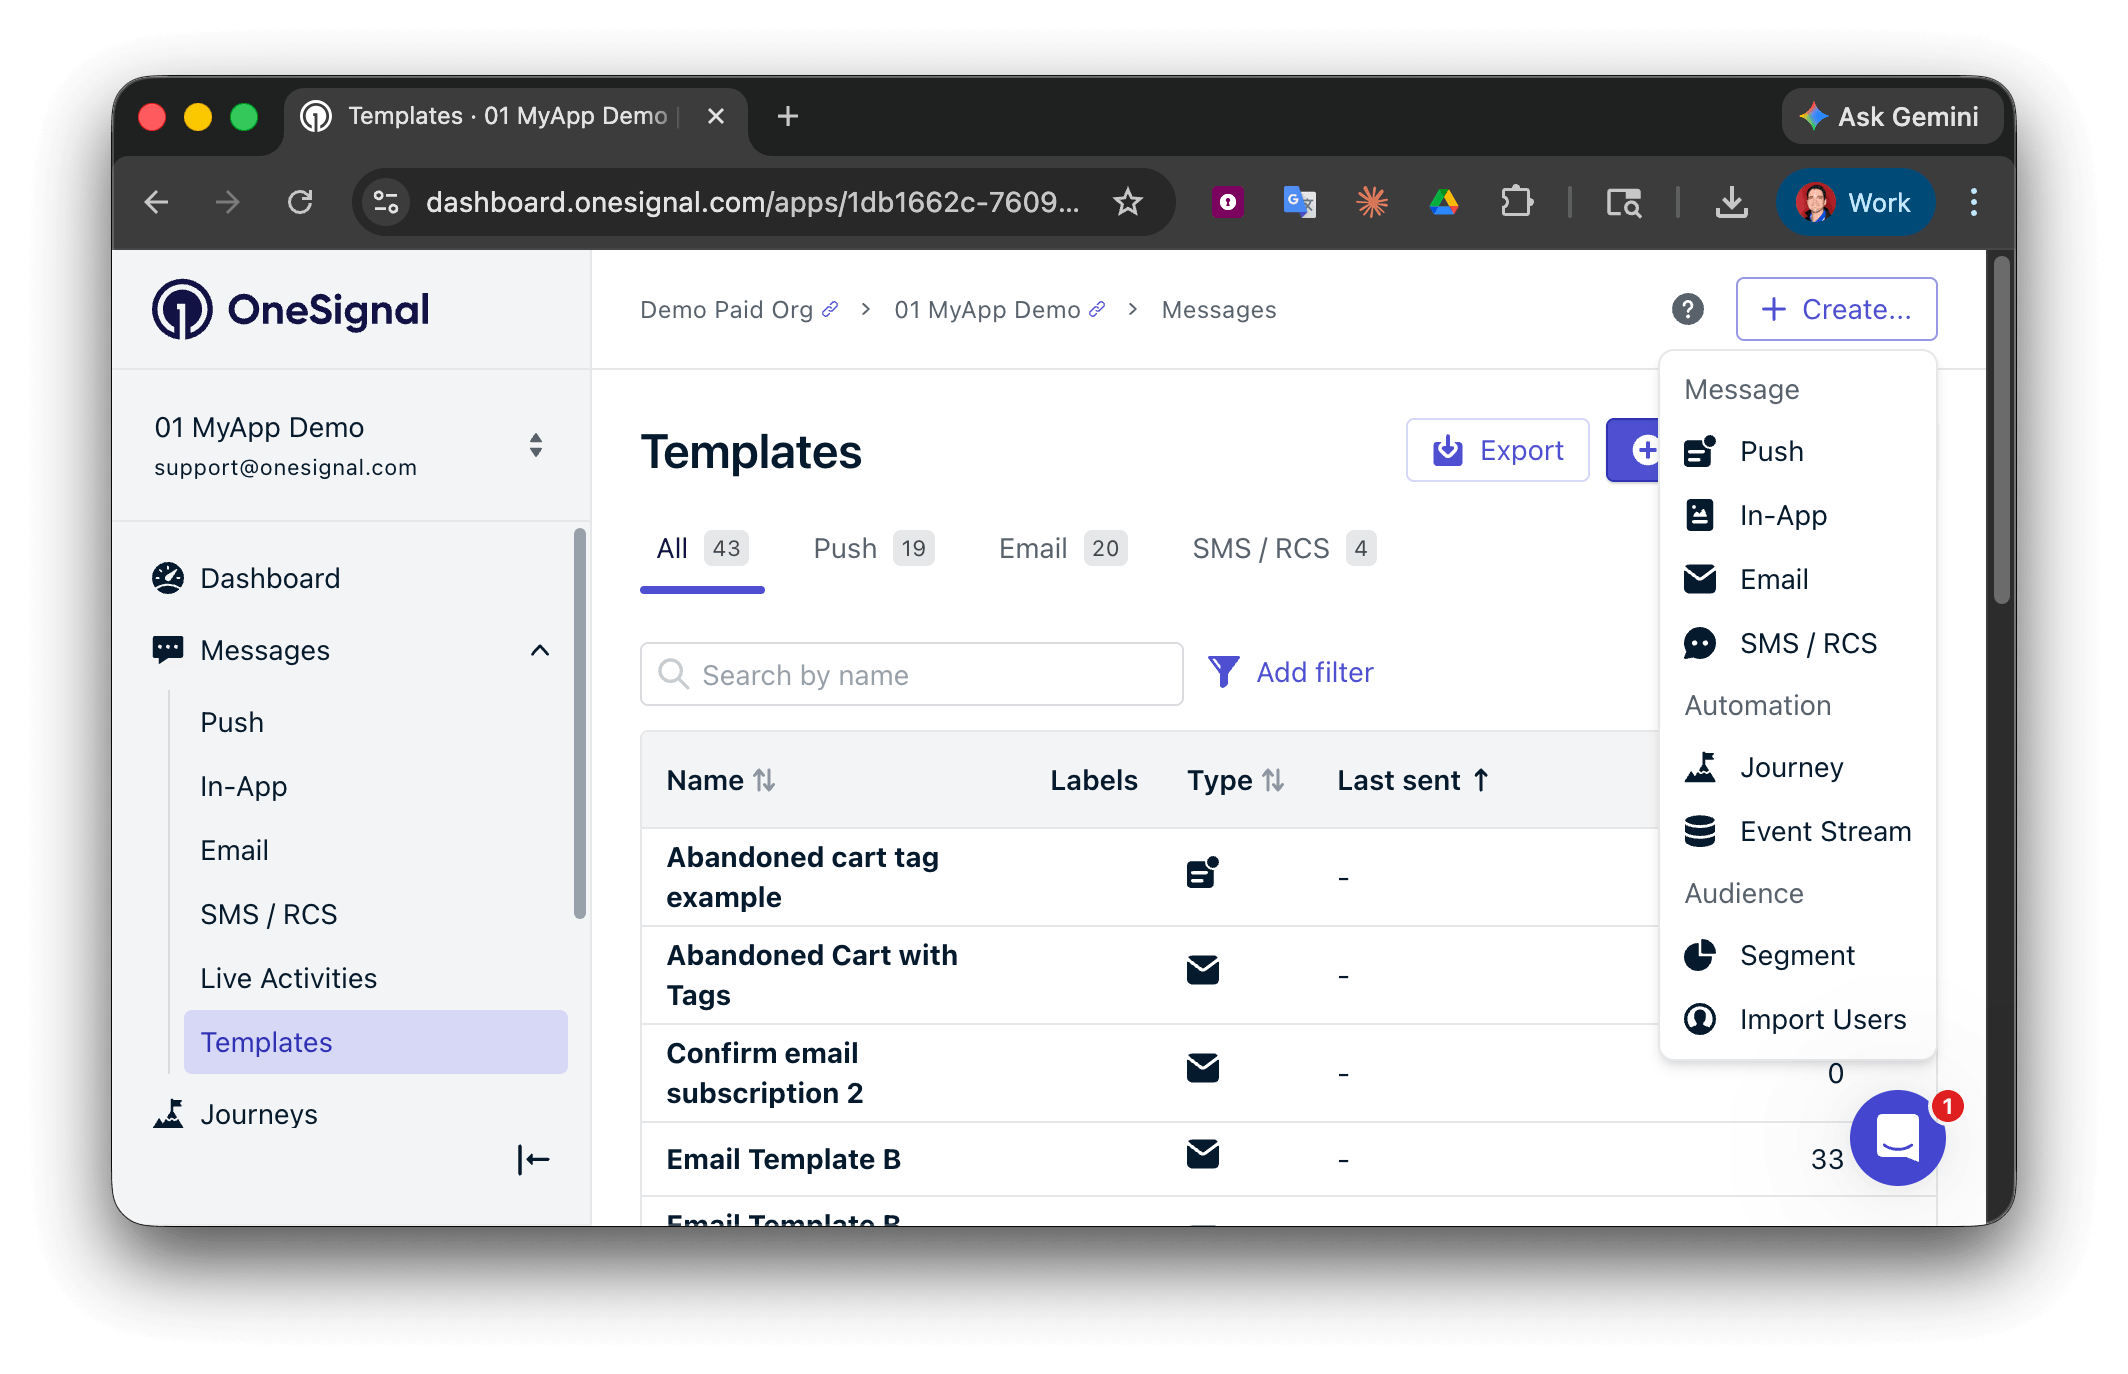
Templates
Start from pre-built templates or create and save your own layouts.
Unsubscribe links and headers
Control unsubscribe behavior, headers, and compliance settings.
Message personalization
Personalize content using user data and conditional logic.
Multi-language messaging
Send localized emails in multiple languages.
Email template forwarding
Import existing email templates by forwarding them directly to OneSignal.
Add internal metadata for tracking and reporting. API equivalent: name
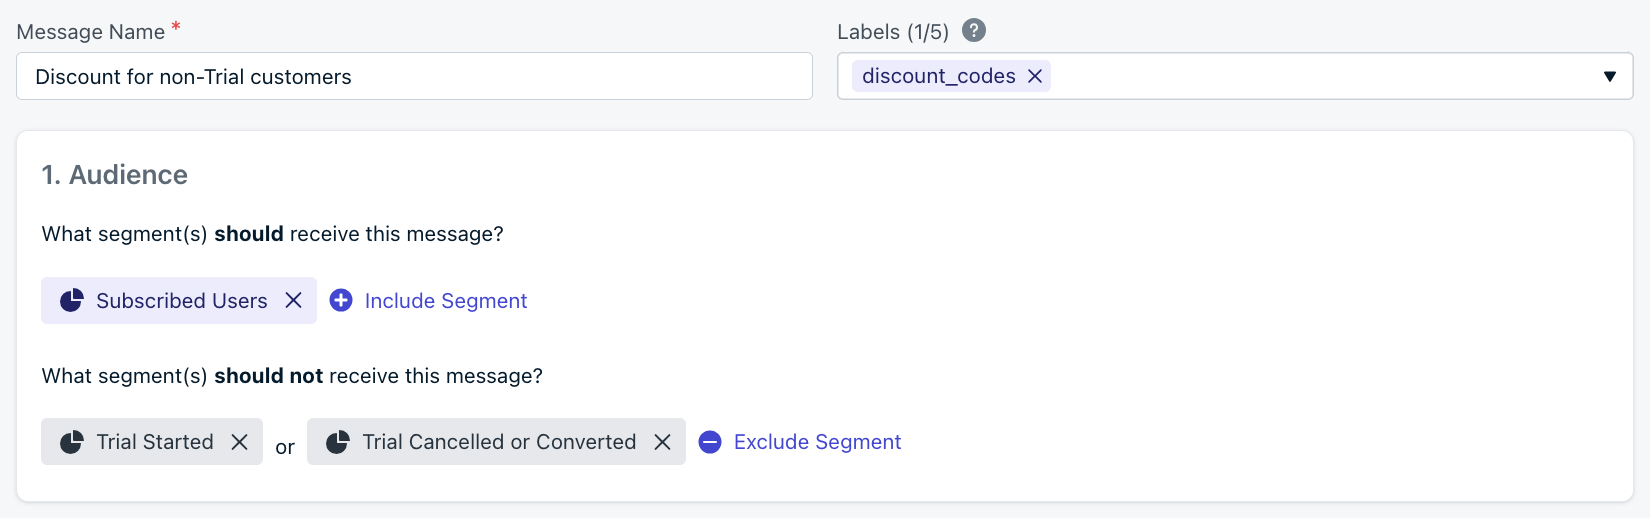
Select your audience
Choose which users receive the message. You can include and exclude segments to target specific groups. Defaults to all “Subscribed Users” if no segment is set.
Name, label, and audience segment selection in the dashboard.
The “start sending” time determines the audience cutoff. OneSignal evaluates segment membership at that moment; anyone in the audience receives the message, regardless of per-user optimization settings.
Per-user optimization:Set when users should receive the message.
Option
Description
API field
Everyone at the same time
All recipients receive the email at once. Best for urgent messages.
Intelligent Delivery
Sends at the optimal time for each user based on their open and click activity (excludes bot activity).
delayed_option: last-active
Custom time per timezone
Sends at a set local time in each user’s timezone.
delayed_option: timezone, delivery_time_of_day
With Intelligent Delivery or Custom time per timezone, delivery spans a 24 hour period so every record in the audience can receive the message. If it is already 10am for a recipient when a 9am-local message sends, they receive it at 9am the following day.
Click Review and Send to send immediately or on schedule, or Save as draft to edit later. Once sending begins, monitor performance under Messages > Email or in Delivery > Sent Messages. See Email message reports for details.
What’s the difference between marketing and transactional emails?
Marketing emails are campaigns sent to a segment of users, such as promotions or newsletters. Transactional emails are triggered by a user action or event, such as a password reset or order confirmation. See Transactional email setup for configuration details.
Common causes include missing DNS authentication (SPF, DKIM, DMARC), sending to unengaged users, or ramping volume too quickly on a new domain. See Email deliverability and Email reputation best practices for guidance.
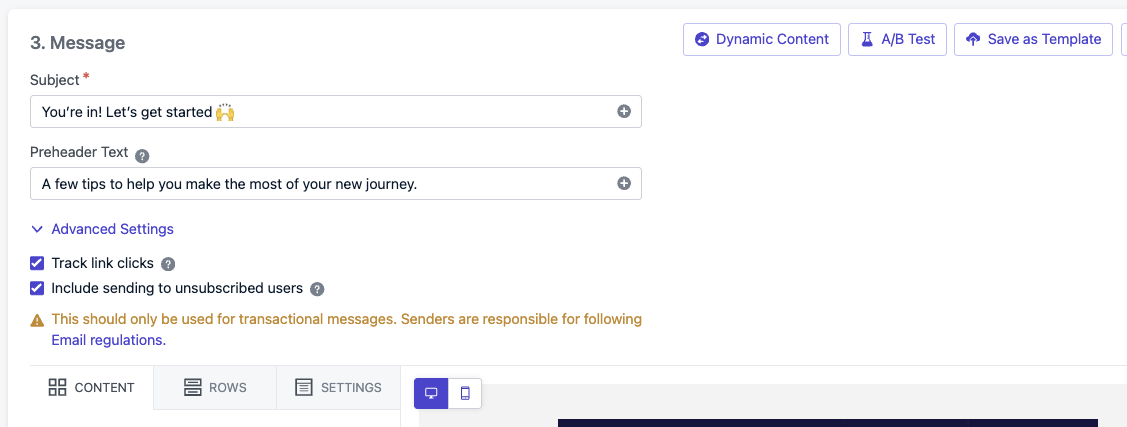
Only for compliance or non-marketing messages, such as legal notices. Enable the Send to unsubscribed users option when composing or set include_unsubscribed via the API. Using this for marketing emails violates anti-spam regulations.
Set up Test Users to verify delivery, rendering, and deep links without affecting real Users. You can also send to a single-user segment for quick testing.