Important updates for 2025
Cross-Browser Support: Web push notifications now work across all major browsers on iOS/iPadOS 16.4+ including Safari, Chrome, and Edge. iOS 17+ Improvements: Enhanced implementation with relevant APIs enabled by default, making web push more accessible to users. Reliability Considerations: Some developers report occasional reliability issues where iOS web push notifications may work initially but then stop unexpectedly. Monitor your notification delivery rates and have fallback engagement strategies in place.Requirements
- iOS/iPadOS Version: 16.4 or higher
- HTTPS Origin: Secure connection with responsive design
- Web Application Manifest: Valid
manifest.jsonfile with correct settings - Home Screen Installation: Web app must be added to user’s home screen from any supported browser
- User-Initiated Action: User must interact with your site before permission prompts can appear
- OneSignal Service Worker: Required for notification delivery
Progressive web app (PWA) check
If your website is already a Progressive Web App (PWA), no additional site updates are needed. Use Lighthouse in Chrome DevTools to audit whether your site qualifies as a PWA.Setup
1. Create your web application manifest
A Web Application Manifest (manifest.json) is a JSON file that defines how your web application appears and behaves when installed on a user’s device. For iOS web push, this file is mandatory.
Required manifest fields
Yourmanifest.json must include these essential fields:
$schema(recommended): JSON schema URL for validation and IDE supportname(required): Full application name displayed to usersdisplay(required): Must be set to"standalone"or"fullscreen"for iOS compatibilitystart_url(required): Entry point URL when the application launchesicons(required): Array of icon objects with multiple sizesid(recommended): Unique identifier allowing multiple app instances
Example manifest file
Implementation steps
- File Placement: Place
manifest.jsonin your website’s root directory - HTML Integration: Add this link tag to the
<head>section of all pages:
- Icon Preparation: Create high-quality PNG icons in multiple sizes (192x192, 256x256, 384x384, 512x512 pixels recommended)
Use tools like SimiCart Manifest Generator to quickly create manifest files, or validate existing ones with Manifest Tester.
2. Add the OneSignal service worker
If you’ve already completed our Web SDK setup and can receive web push notifications on other browsers, this step is complete. See OneSignal Service Worker documentation for detailed setup instructions.3. Configure permission prompts
Existing Web permission prompts from your Web SDK setup will work on iOS devices only after users add your site to their home screen and open it from there. This is Apple’s design requirement.4. Guide users to “Add to Home Screen”
Unlike desktop or Android devices where permission prompts appear based on your settings, iOS requires a specific user journey that you must facilitate.The required user journey
Users must complete these steps to receive notifications:- Visit your website on Safari, Chrome, or Edge on iOS/iPadOS 16.4+
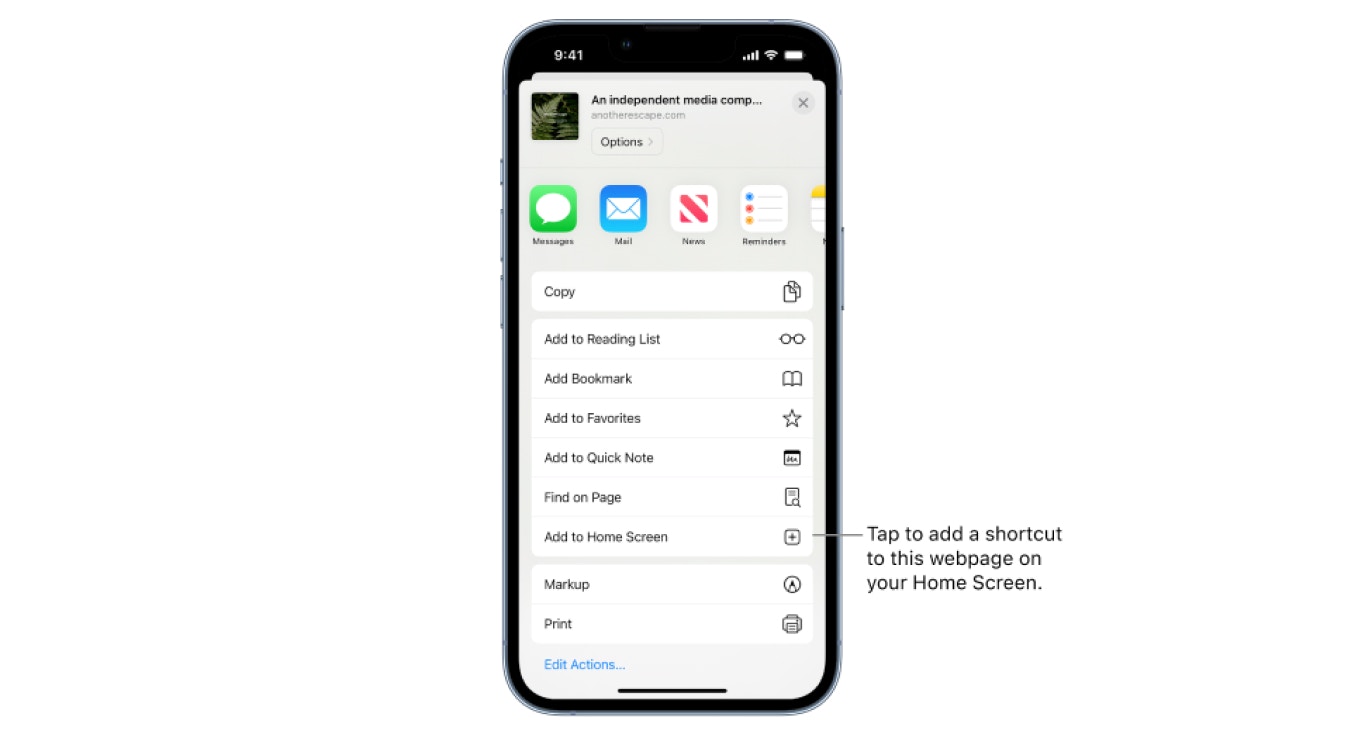
- Click the browser’s Share button
- Select Add to Home Screen option
- Save the app to their device
- Open the app from the home screen (not the browser)
- Interact with your subscribe button to trigger the native permission prompt
User onboarding strategies
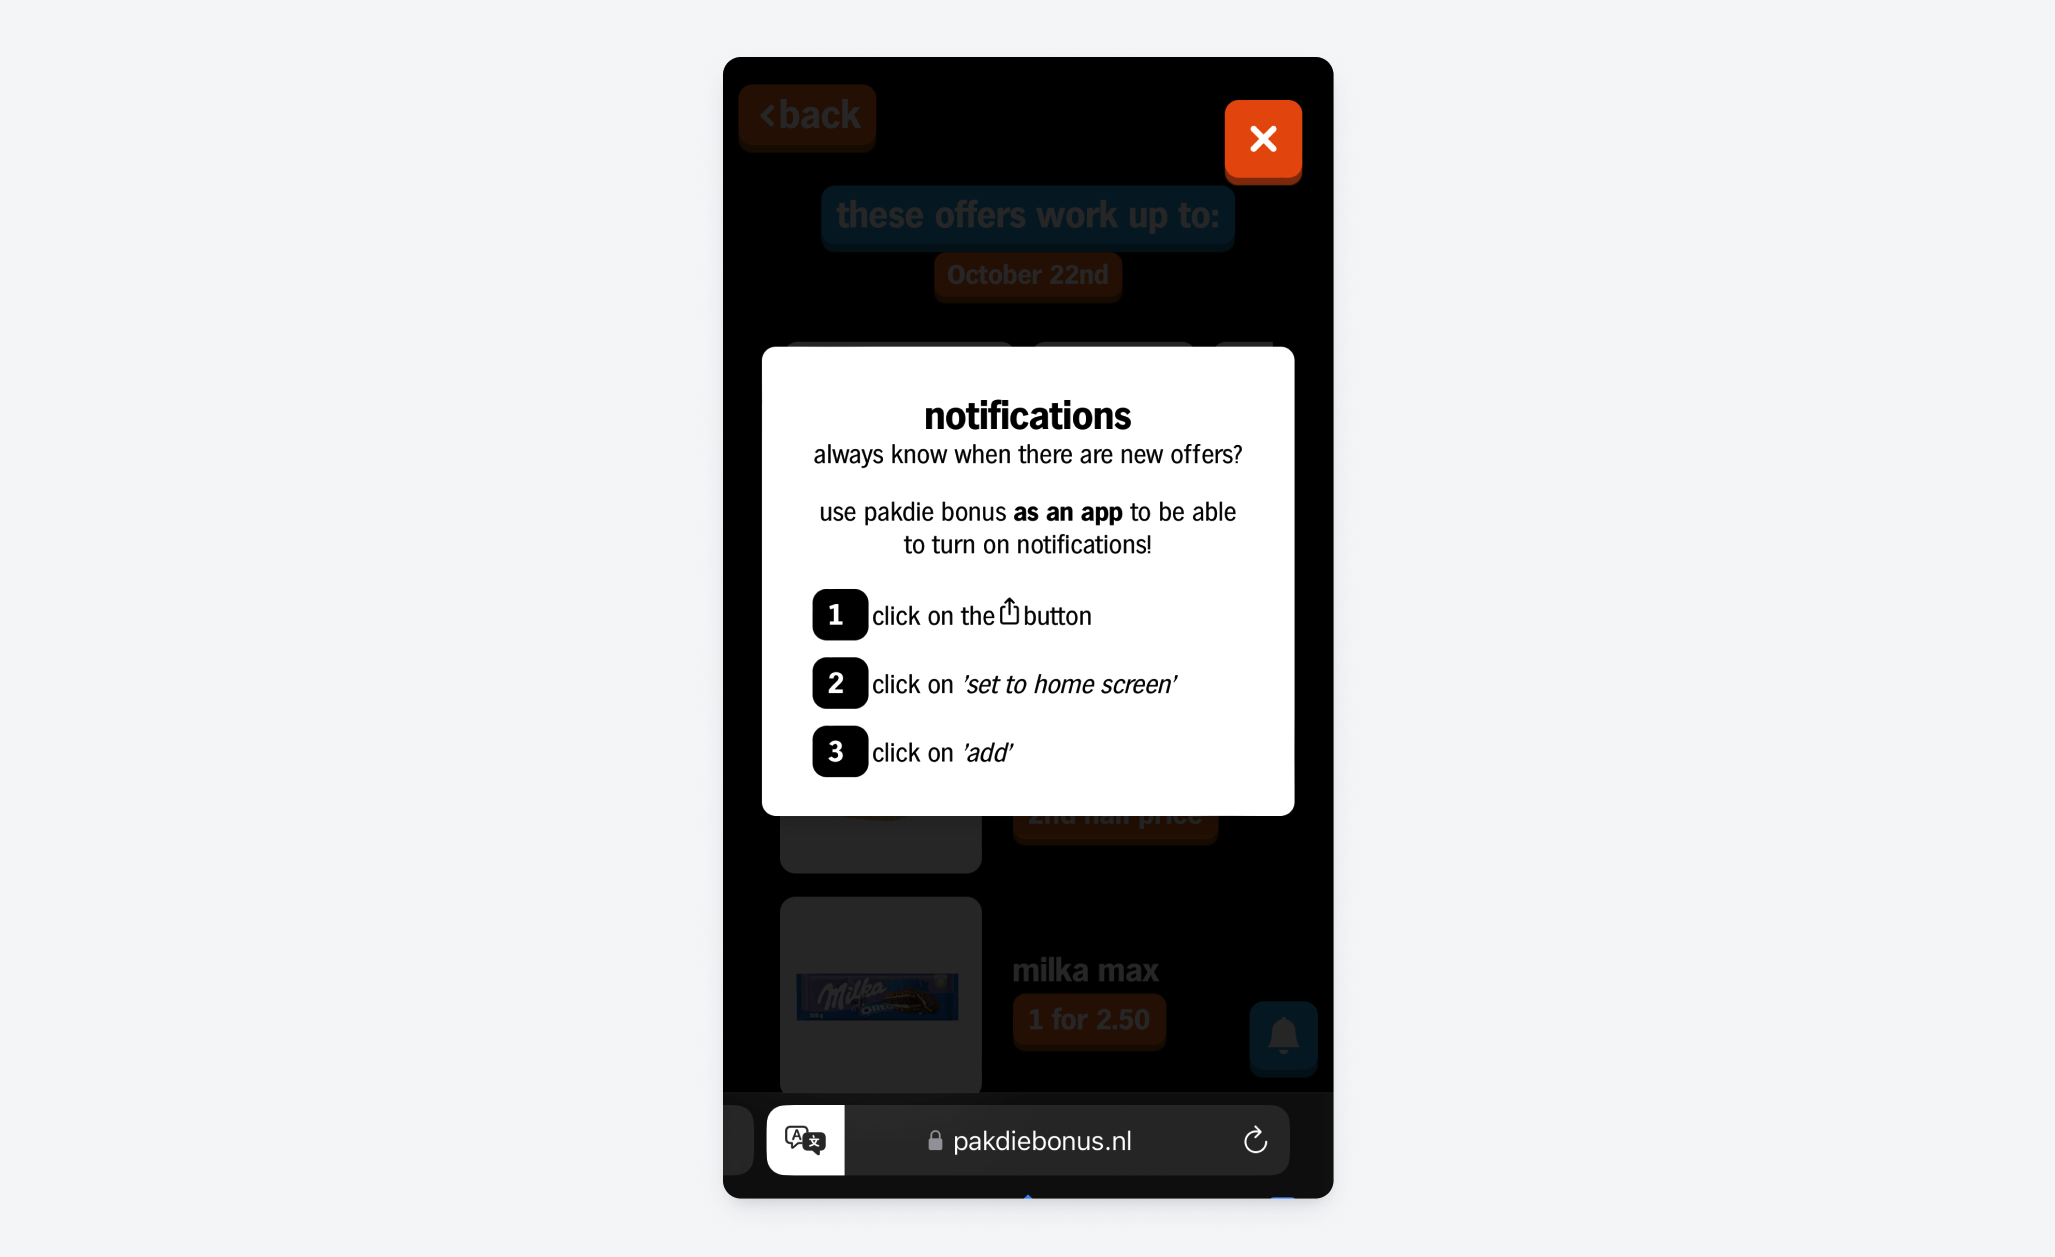
Since this process isn’t intuitive, implement clear guidance through:- Website banners: Display banners specifically on mobile Apple devices explaining the value of notifications and providing step-by-step instructions.
- Visual guides: Use screenshots and arrows to show users exactly where to tap.
- Timing: Present the guidance after users have demonstrated engagement with your content.
Implementation examples
Here are effective approaches from real applications:


Open source solutions
Consider implementing this popular open-source banner solution: GitHub Project: add-to-home-screen by rajatsehgal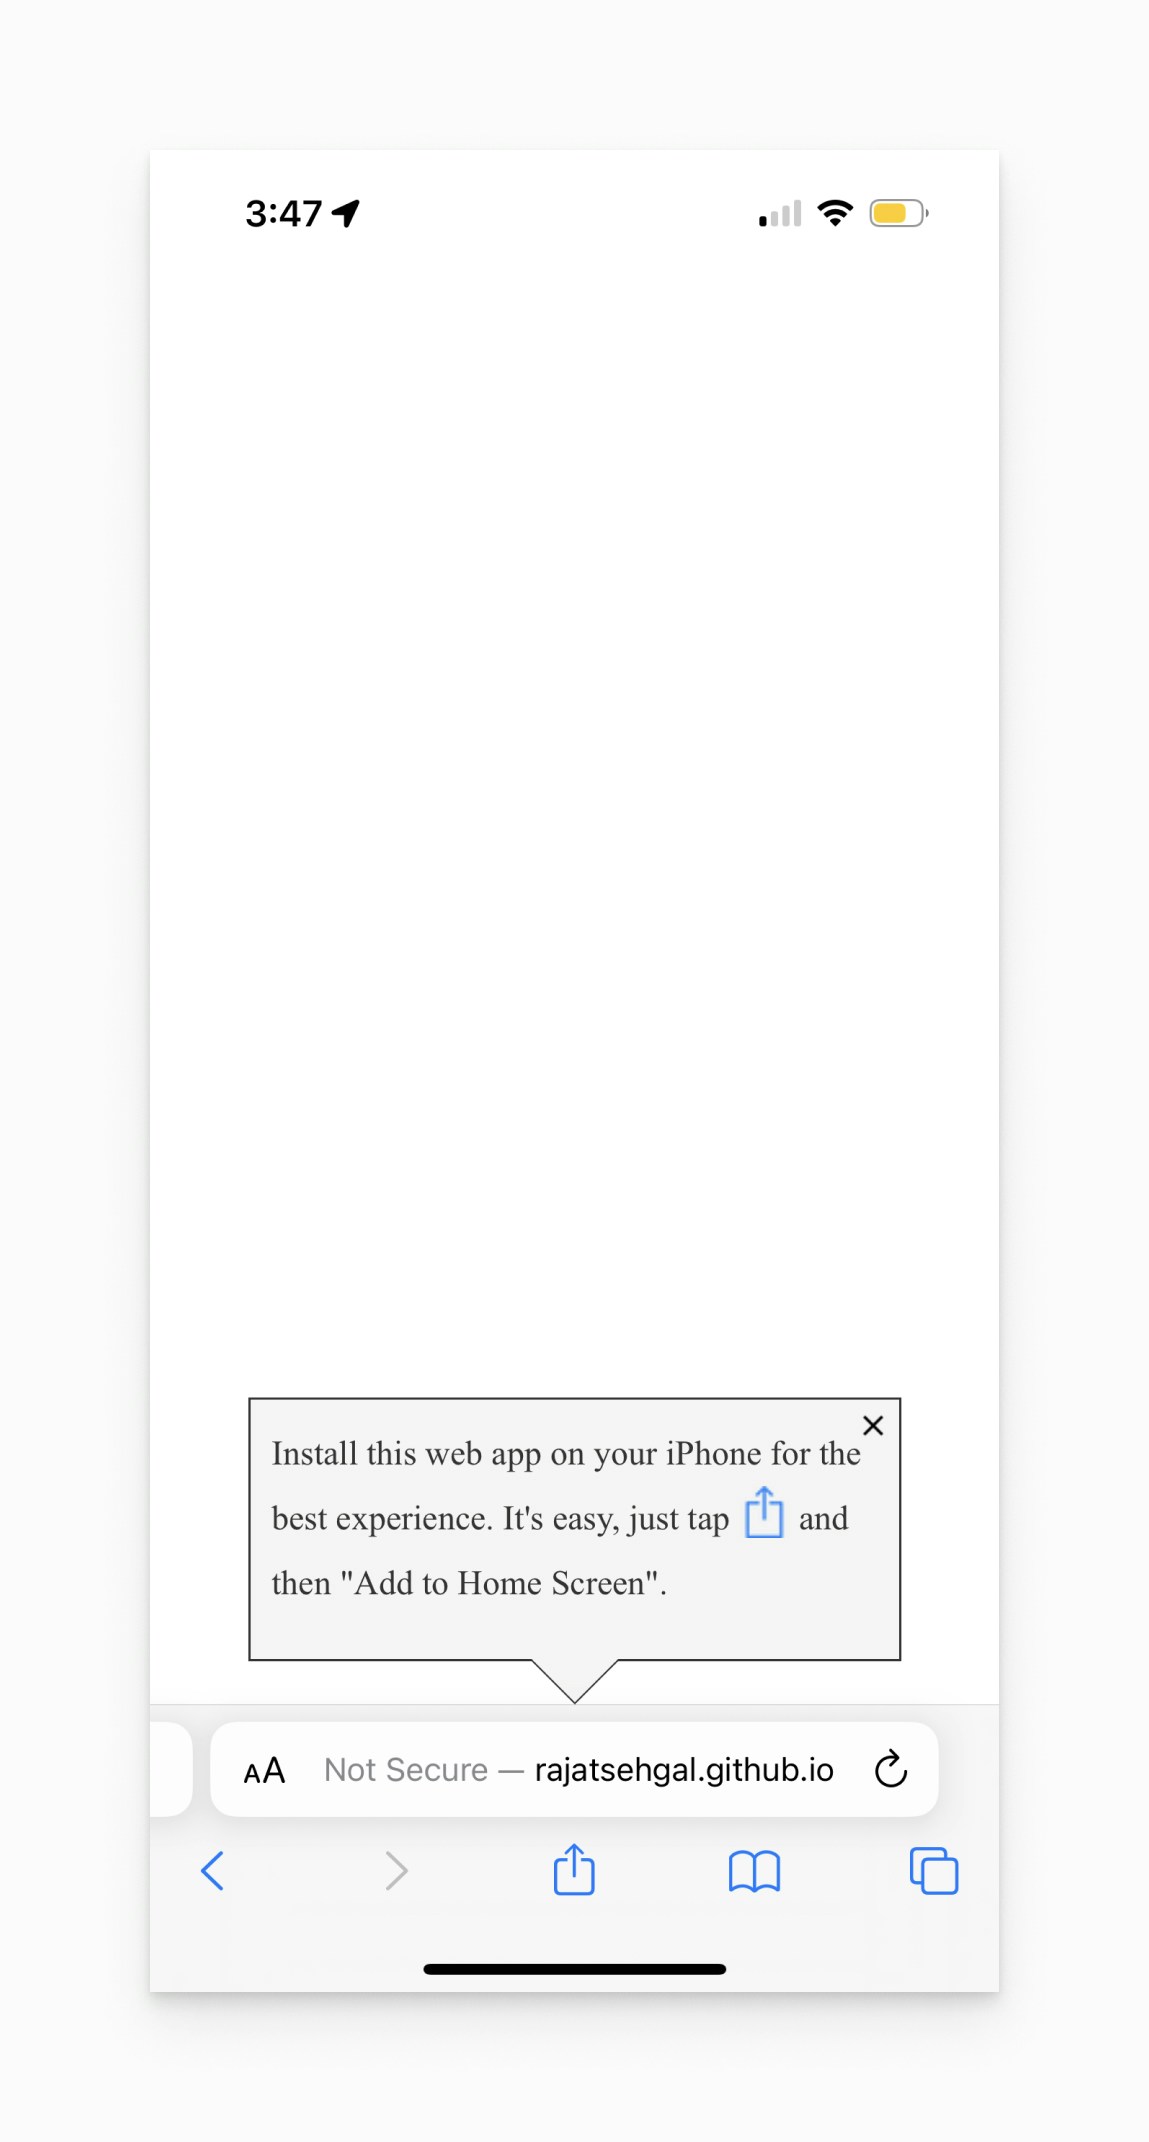
5. Testing and validation
Manifest file testing
- Accessibility Check: Navigate to
https://yoursite.com/manifest.jsonto ensure public accessibility - Browser DevTools:
- Open Chrome DevTools (F12)
- Go to Application tab → Manifest
- Review any errors or warnings
- Online Validators:
End-to-end push notification testing
- Visit your website on iOS 16.4+ device using Safari, Chrome, or Edge
- Click the browser’s Share button
- Select Add to home screen
- Save the app to your device
- Open the app from the home screen (crucial step)
- Trigger your subscribe button - the native permission prompt should appear
- Grant permission and test notification delivery
Important testing notes
Re-testing requirements: To test again on the same device:- Remove the app from home screen
- Clear browser cache (Settings > Safari/Chrome/Edge > Clear cache)
- Repeat the process
- Ensure
displayfield is"standalone"or"fullscreen" - Verify all icon paths are accessible
- Confirm manifest serves with correct MIME type (
application/manifest+json) - Test for CORS errors
Troubleshooting
Manifest not loading: Check file path, HTTPS requirement, and MIME type configuration on your server. Icons not displaying: Verify icon file accessibility and correct size specifications in manifest. Permission prompt not appearing: Ensure user accessed site via home screen app and clicked an interactive element first. Notifications not delivering: Verify OneSignal service worker is properly installed and check browser console for errors.Next steps
You’re now ready to send notifications! Continue to Push documentation or use our Create message API to start engaging your iOS users with web push notifications.