Prerequisites
- A site that supports HTTPS.
- You can publish changes in GTM for the site’s container.
- You’ve completed the OneSignal Web SDK setup flow until Add Code to Site. This gives you:
- A OneSignal Web Push app and App ID.
- The OneSignal Service Worker setup.
Setup
1. Set up your OneSignal web app
Follow Web SDK setup until you reach Add Code to Site. This is where you will get the OneSignal App ID.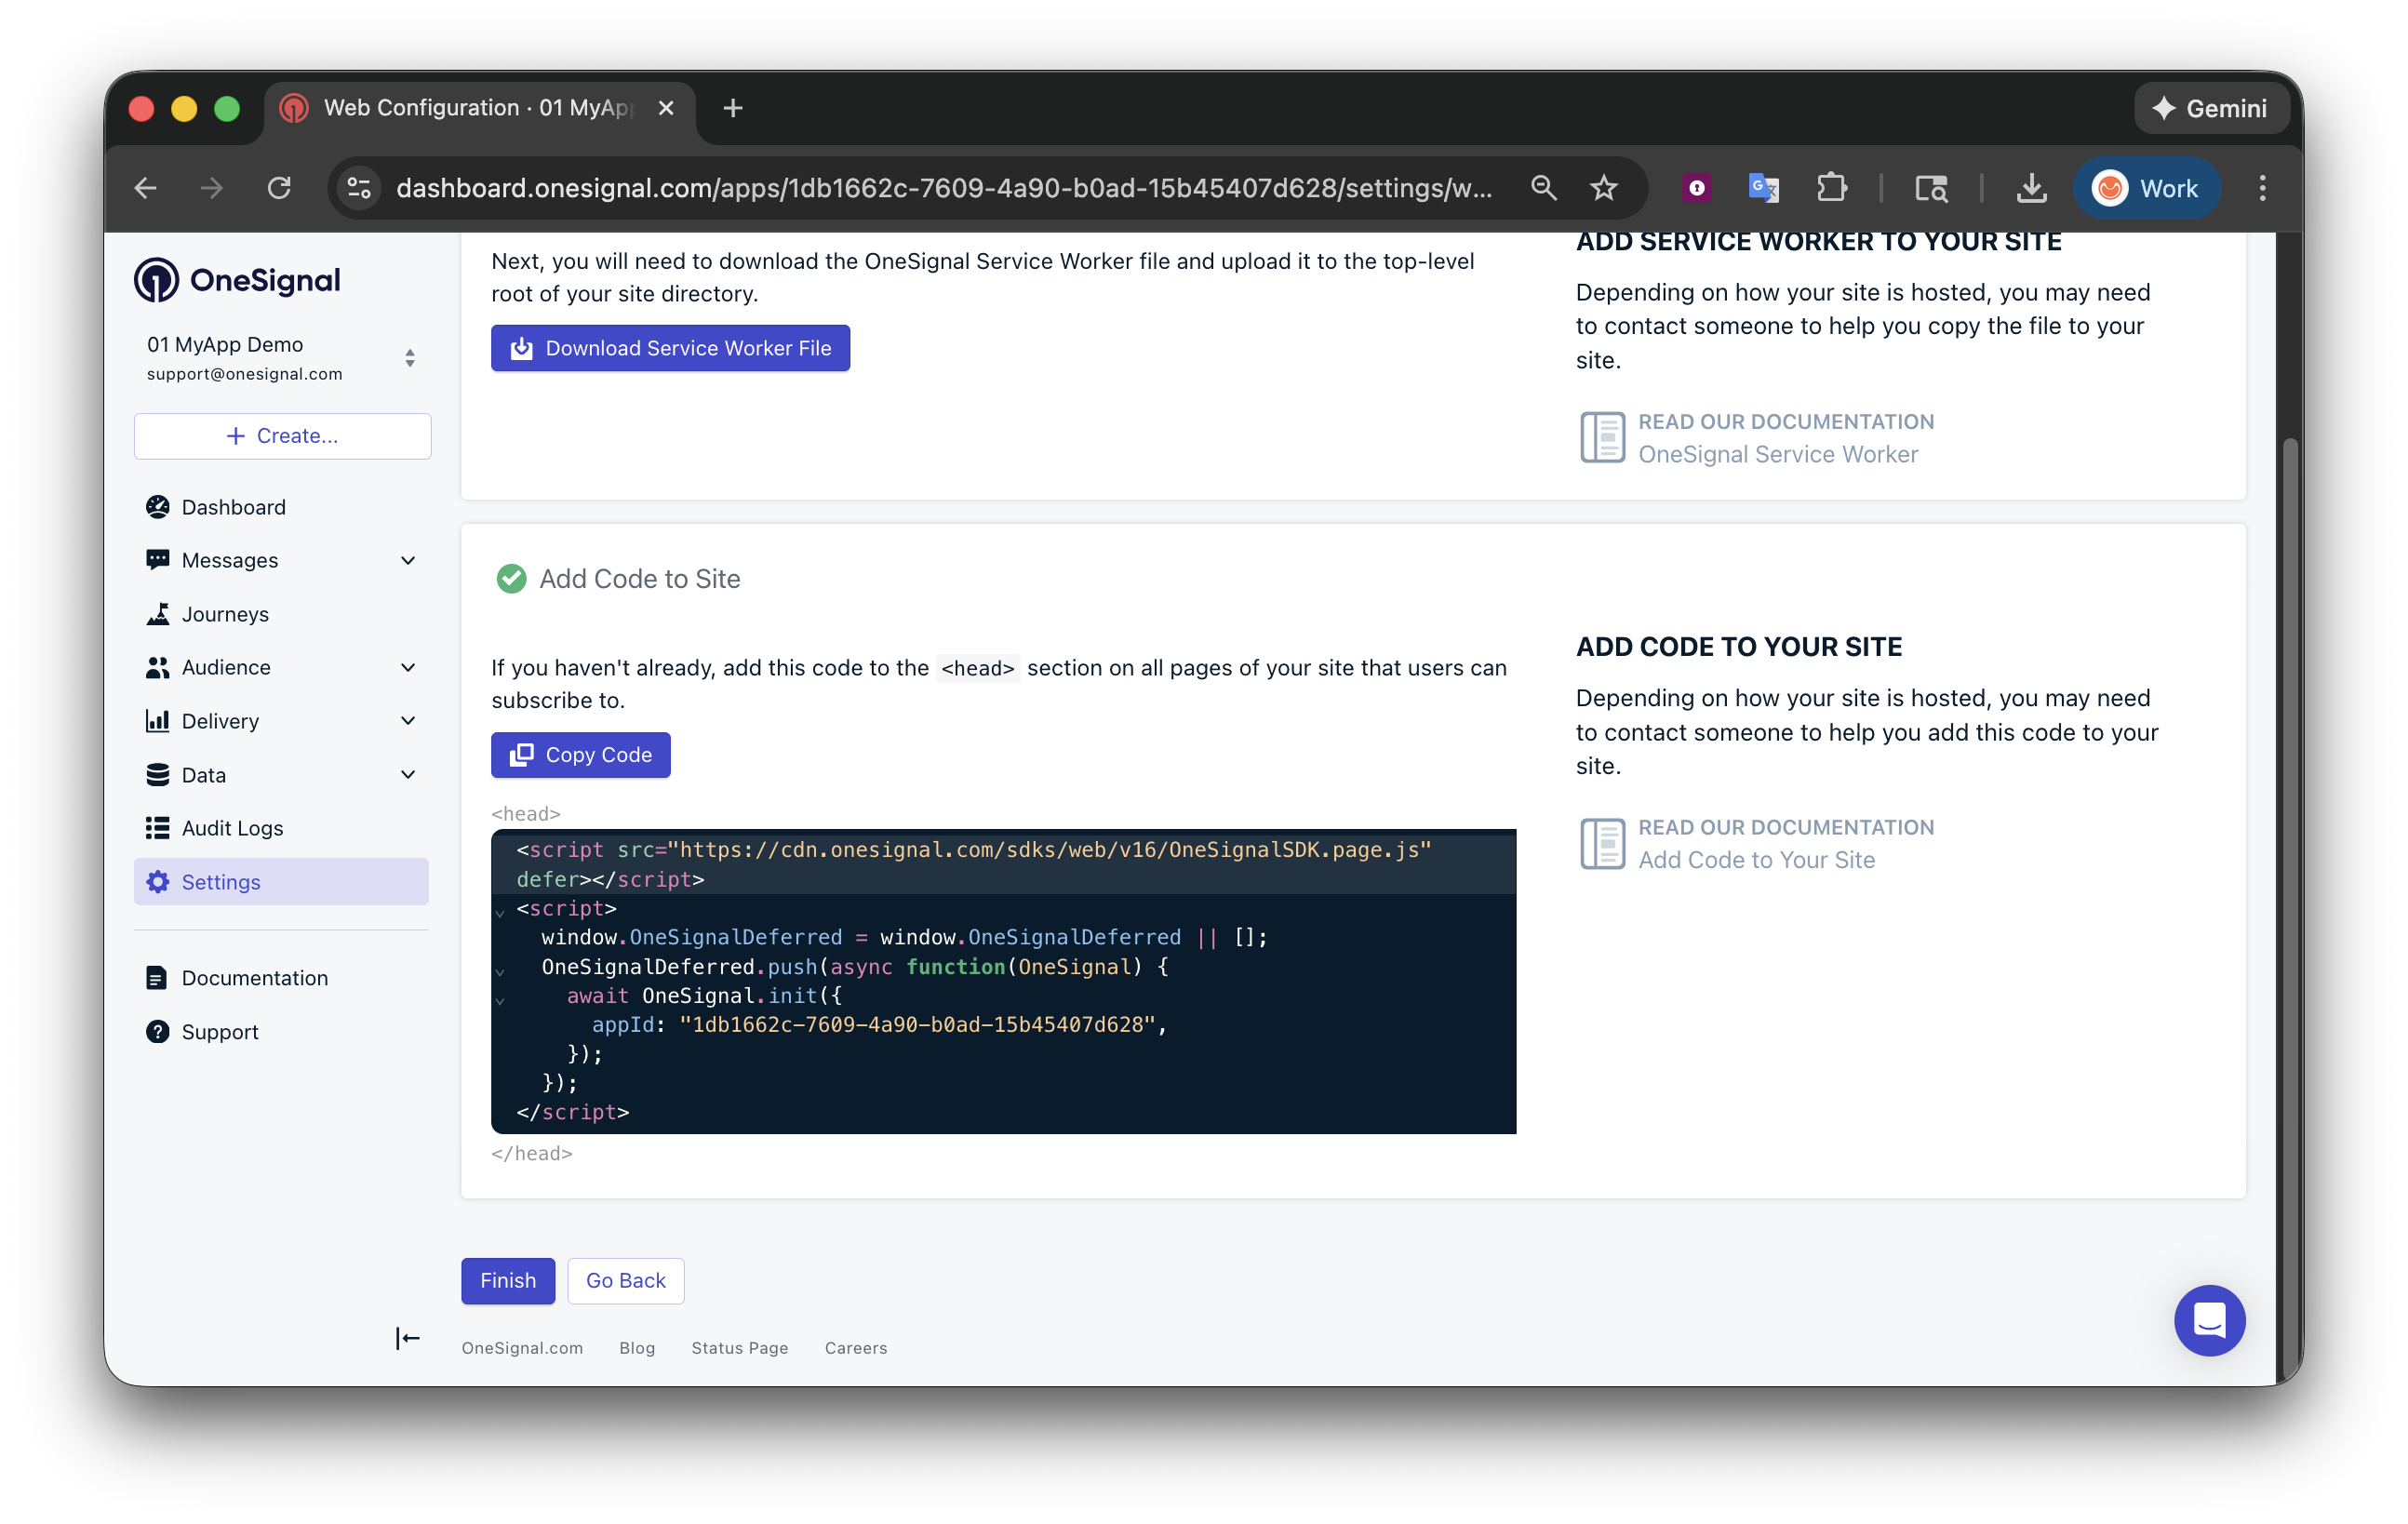
Once you reach this step, you will need to make some adjustments to the code to work with Google Tag Manager.
2. Create GTM variables
Create GTM variables for values you reference across tags. This avoids hardcoding and makes your setup easier to maintain. Create aONESIGNAL_APP_ID variable
- In GTM, go to Variables > New.
- Choose Constant.
- Name it
ONESIGNAL_APP_ID - Set the value to your OneSignal App ID.
- Save
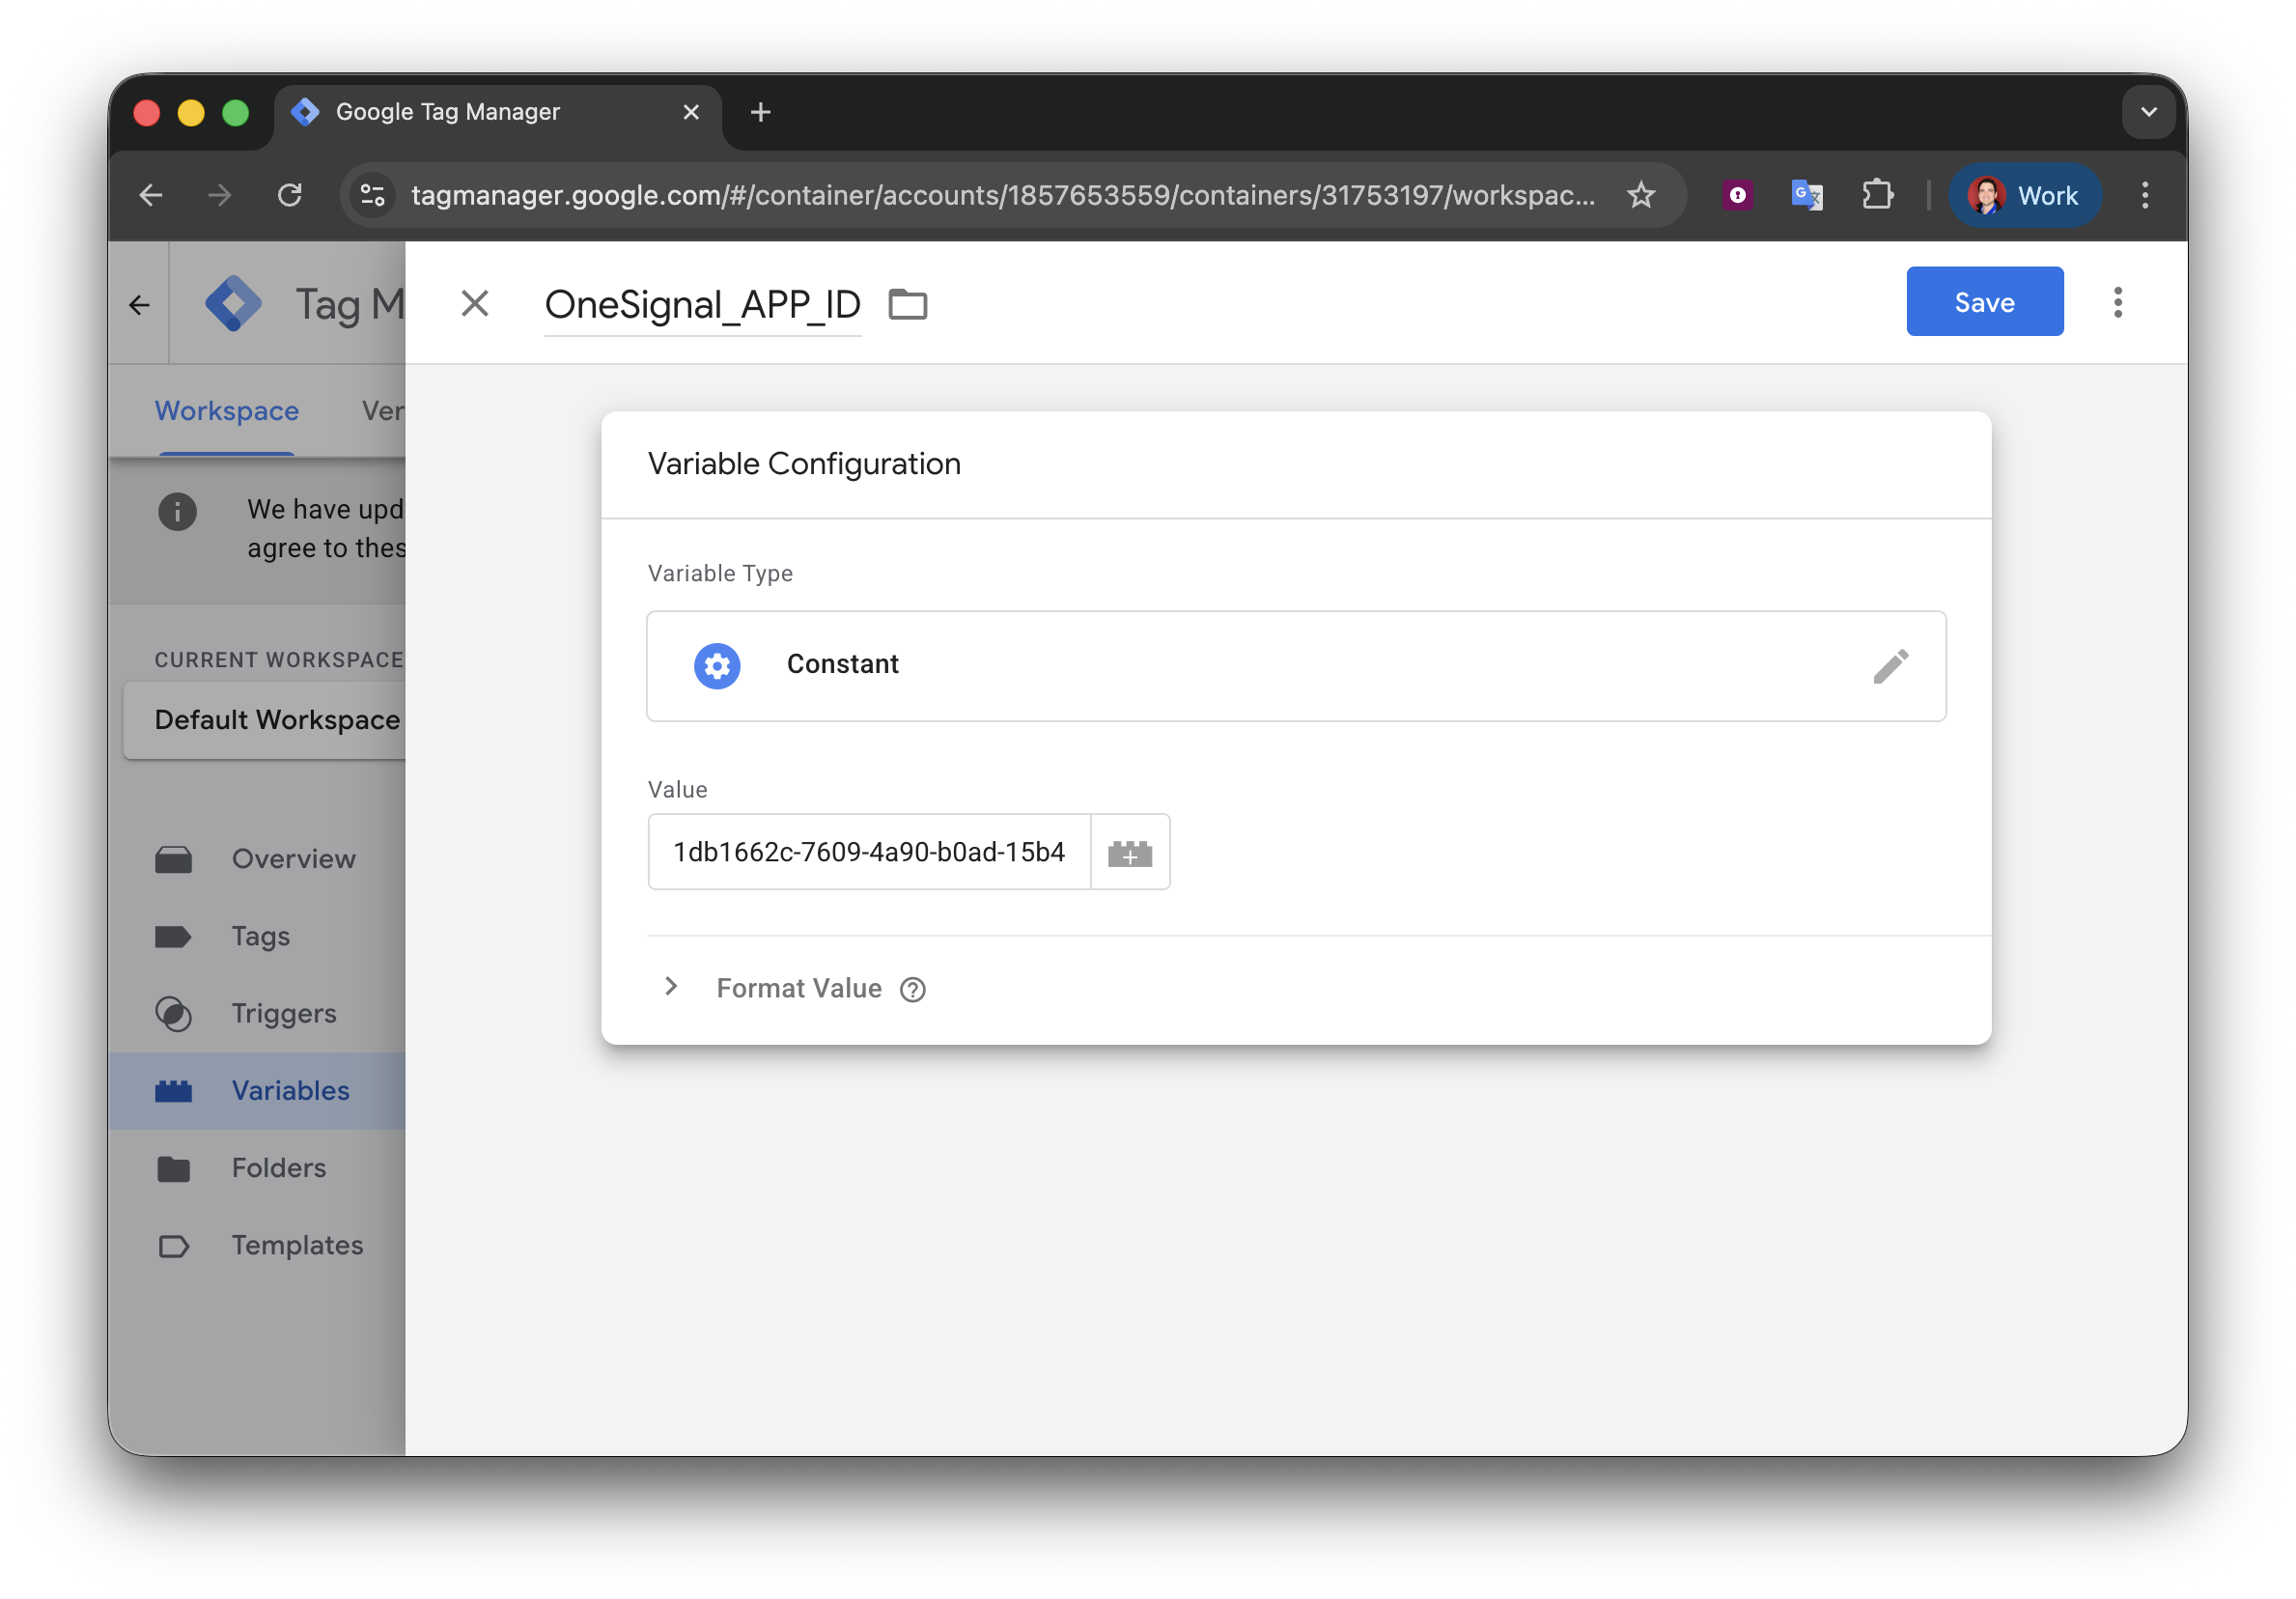
Creating a OneSignal App ID variable
You can now reference your App ID anywhere in GTM using
{{ ONESIGNAL_APP_ID }}.ONESIGNAL_EXTERNAL_ID variable (Recommended)
Use this if you associate users with an external identifier (for example, a user ID from your database or auth system).
Choose a variable type based on where the value lives on your site. Common options:
- Data Layer Variable (recommended)
- First-Party Cookie
- DOM Variable (advanced)
3. Create the OneSignal init tag
- In GTM, go to Tags > New
- Name the tag:
OneSignal - Init - Tag Type: Custom HTML
- Paste the below code.
- Under Advanced Settings > Tag firing options, set Once per page.
- Under Triggering, select Initialization - All Pages.
HTML
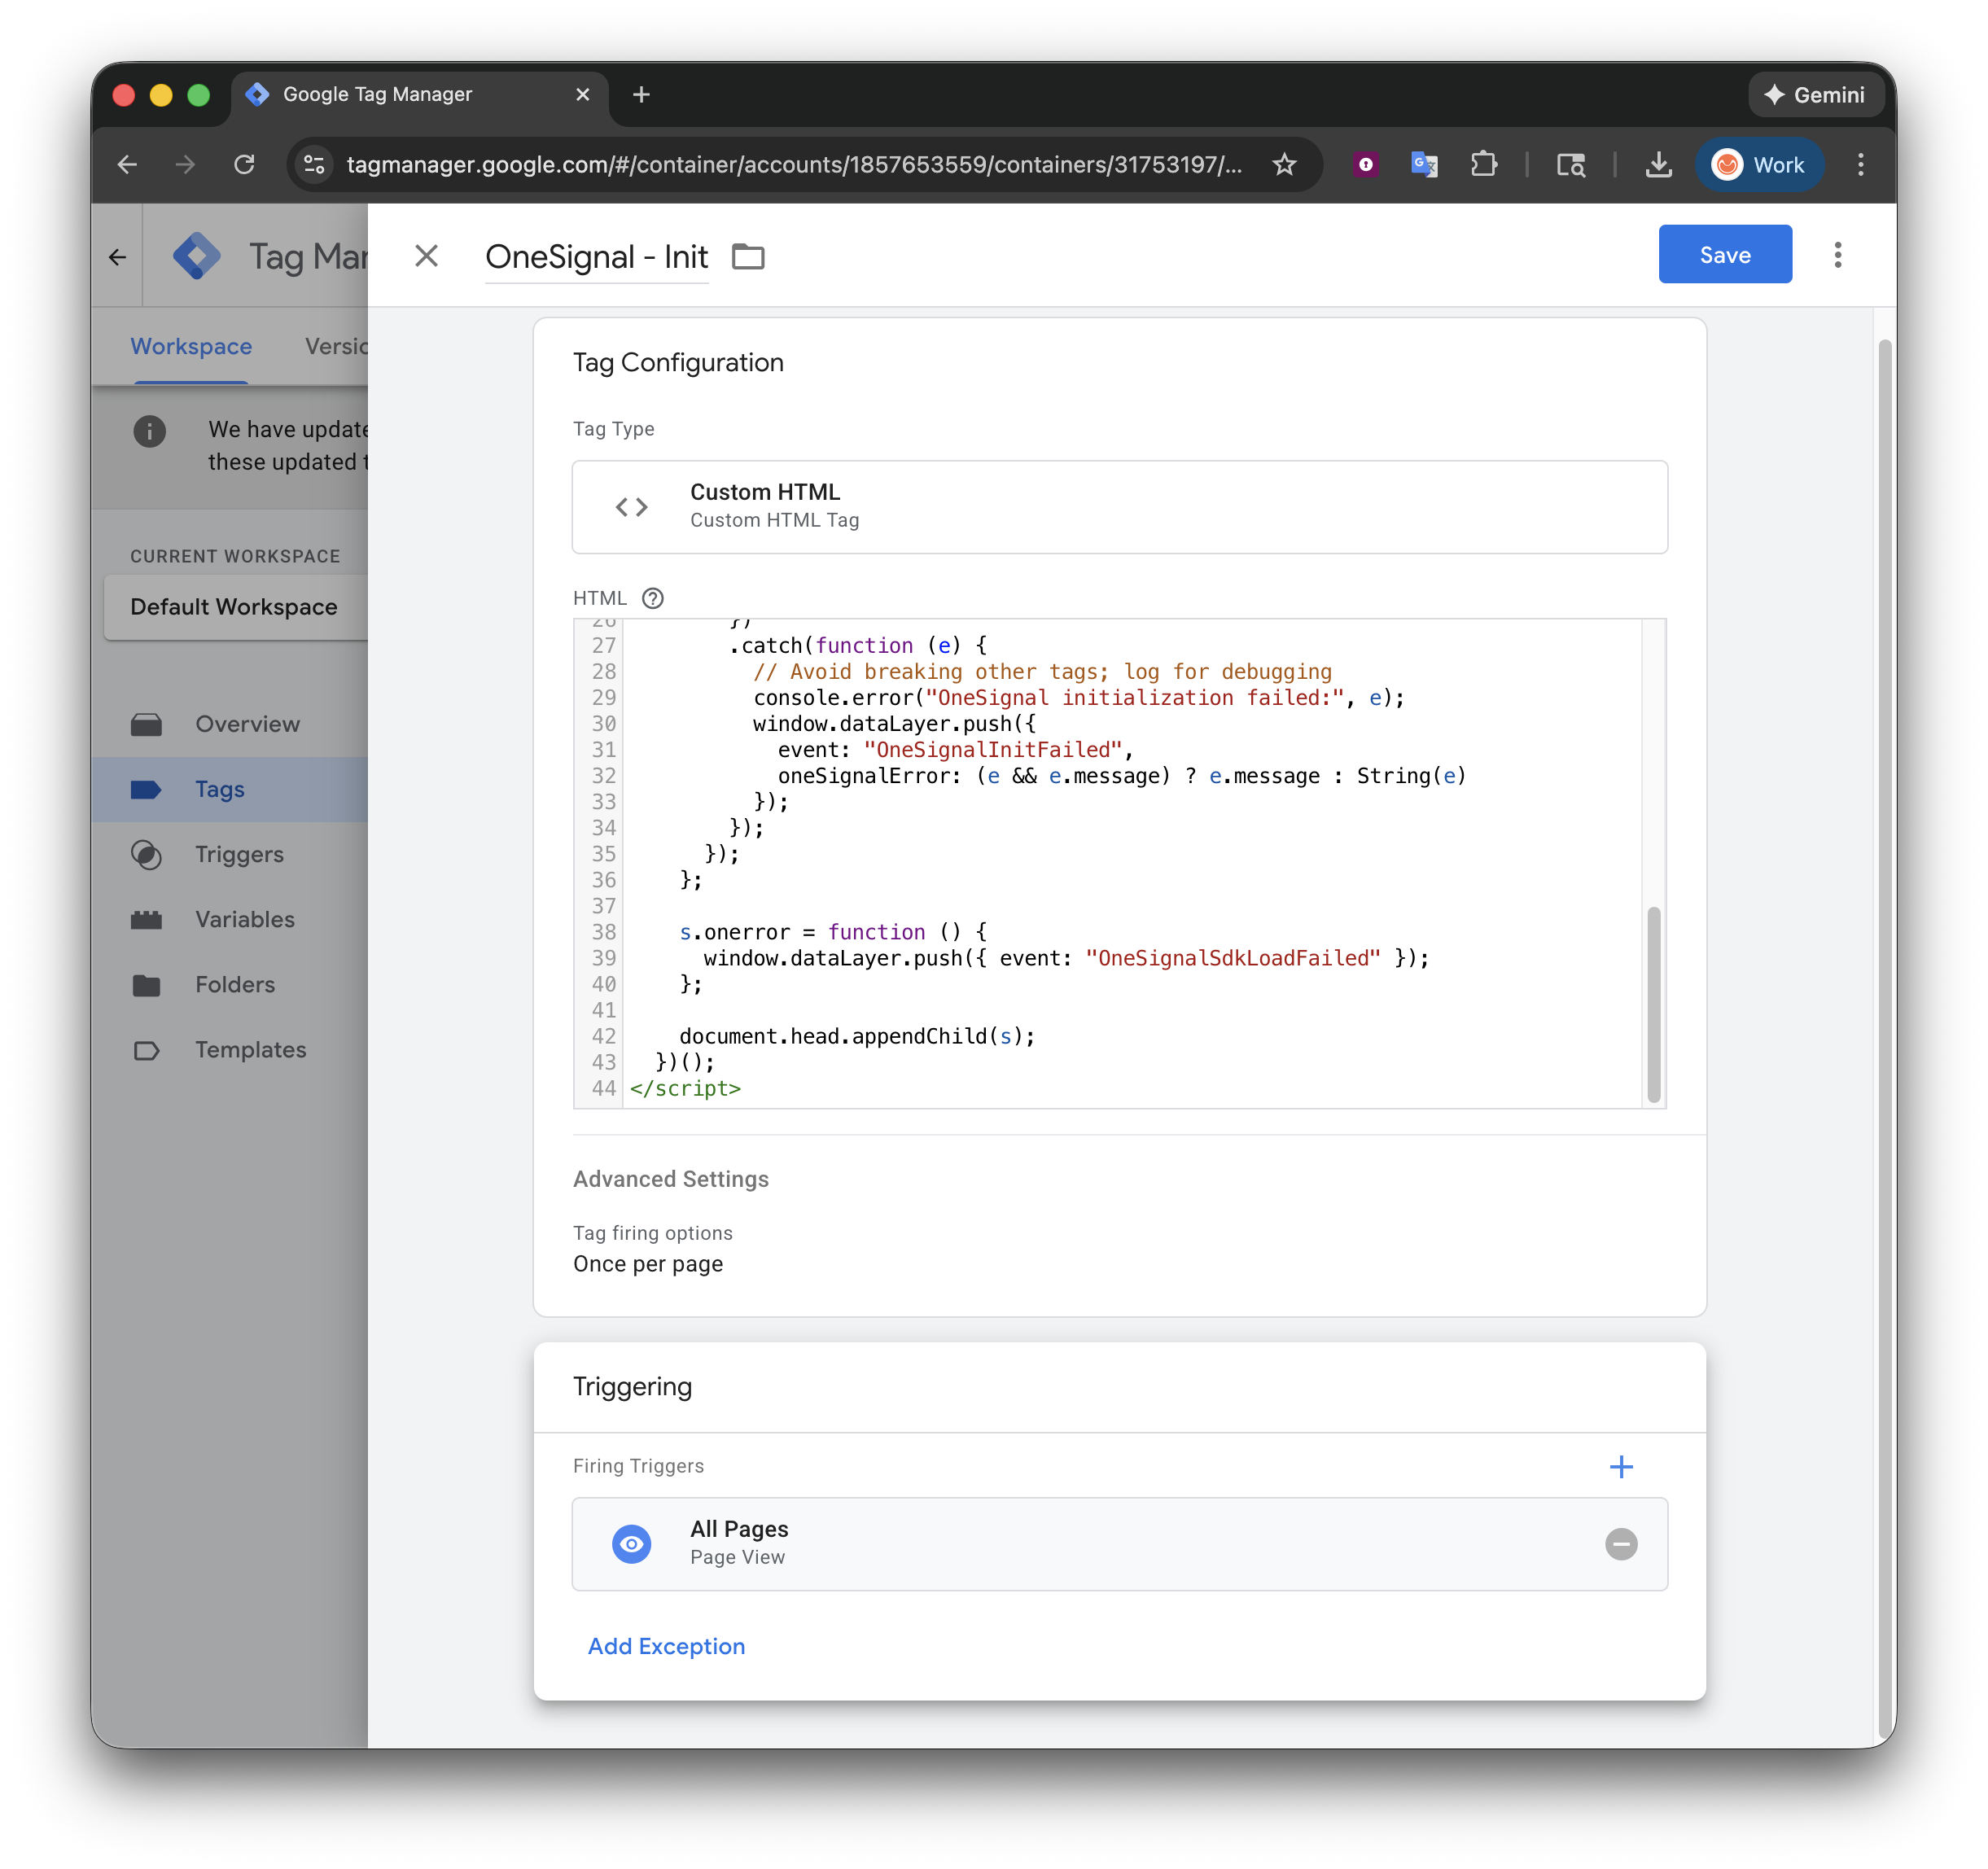
Configuring the OneSignal - Init tag
4. Set External ID and tags
Setting the External ID is optional but recommended because it allows you to identify users across devices and syncs with your backend. PushONESIGNAL_EXTERNAL_ID into the dataLayer
This example shows how you might push a user ID into the dataLayer so GTM can read it via the ONESIGNAL_EXTERNAL_ID variable (created in step 2).
HTML
- Tag name:
OneSignal – Set External ID - Tag type: Custom HTML
- Tag firing options: Once per page
- Trigger:
- Create a custom event trigger for
OneSignalInitialized(set in the above OneSignal - Init tag) and - Optionally if you know the user ID is available on the page load.
- Create a custom event trigger for
HTML
Advanced example with retry logic (use if External ID is not being set)
Advanced example with retry logic (use if External ID is not being set)
HTML
Set tags
This sends OneSignal Tags using our Web SDK. Tag configuration:- Name:
OneSignal - Add Tags - Tag Type: Custom HTML
- Tag firing options: Once per page
- Trigger:
OneSignalInitialized, and- Your condition for when tag data is available (for example: after login, on a profile page, after purchase).
TAG_1/TAG_2 and VALUE_1/VALUE_2 with your tag names and values.
HTML
Only send tags when you actually have the user data available (for example: after login, after a profile loads, or after a known conversion event).
Listen for push subscription changes
You can monitor push subscription state changes (opt-in, opt-out, token updates) by adding an event listener. This is useful for syncing subscription status with your analytics or backend systems via the GTM dataLayer. Tag configuration:- Name:
OneSignal - Push Subscription Listener - Tag Type: Custom HTML
- Tag firing options: Once per page
- Trigger:
OneSignalInitialized
HTML
Consent Mode and privacy considerations
If your site uses Consent Mode / a CMP, decide whether OneSignal should load:- Only after consent (common for EU/UK), or
- Immediately (common where “functional” storage is allowed by default).
Testing
- In GTM, open Preview mode.
- Load your site and confirm:
OneSignal - Initfires once.OneSignalInitializedappears in the GTM event timeline (if you kept the event push).
- Subscribe to your website. See Web permission prompts for prompting details.
- In the OneSignal dashboard, go to Audience > Subscriptions and confirm:
- A Subscription appears after you opt in.
- An External ID is visible if you set one.
- Send a test push from Messages > New Push.
If initialization is working, you’ll see subscriptions appearing in OneSignal after opt-in.
Troubleshooting
-
Init tag fires, but SDK never loads
- Check for Content Security Policy (CSP) blocking
https://cdn.onesignal.com. - Check for ad blockers/script blockers.
- Check for Content Security Policy (CSP) blocking
-
dataLayererrors- Ensure
window.dataLayer = window.dataLayer || []is set before anydataLayer.push()calls.
- Ensure
-
Duplicate prompts / duplicate SDK load
- Make sure you are not also loading OneSignal via site code, a CMS plugin, or another GTM tag.
-
Add Tags runs but doesn’t appear in OneSignal
- Confirm the Trigger Group waits for
OneSignalInitialized. - Confirm your user action trigger actually fires.
- Confirm tags are valid key/value pairs and within Plan limits.
- Confirm the Trigger Group waits for
For additional help, see Web SDK troubleshooting.
FAQ
Does OneSignal work with GTM Consent Mode?
Yes. You can control when OneSignal loads using GTM’s consent controls or OneSignal’s own privacy methods. If your site requires consent before loading scripts, configure the init tag’s trigger to fire only after consent is granted, or use OneSignal’ssetConsentRequired and setConsentGiven methods. See Handling personal data for details.
Why isn’t my External ID being set?
The most common cause is a GTM timing issue where{{ONESIGNAL_EXTERNAL_ID}} resolves to "undefined" or "null" because the dataLayer variable isn’t populated yet when the tag fires. Verify the variable has a value in GTM Preview mode before the tag executes. If the value loads asynchronously, use the advanced example with retry logic.
Can I load OneSignal through both GTM and site code?
No. Loading the OneSignal SDK more than once causes duplicate prompts and unpredictable behavior. Use either GTM or direct site code, not both. Also check for CMS plugins that may inject OneSignal separately.Related pages
Web permission prompts
Configure how and when to prompt visitors for web push permission.
Tags
Set key-value data on Users for personalization and segmentation.
Web SDK reference
Full method and event reference for the OneSignal Web SDK.
Handling personal data
Manage user consent and control which data the OneSignal SDK collects.