Requirements
If you need to manually set up your sending domain DNS recordss, you must:- Own the sending domain.
- Have access to DNS settings via your provider.
Registering your domain with Cloudflare
Registering your domain with Cloudflare
Create an account at Cloudflare.com.Go to Domain Registration > Register Domains.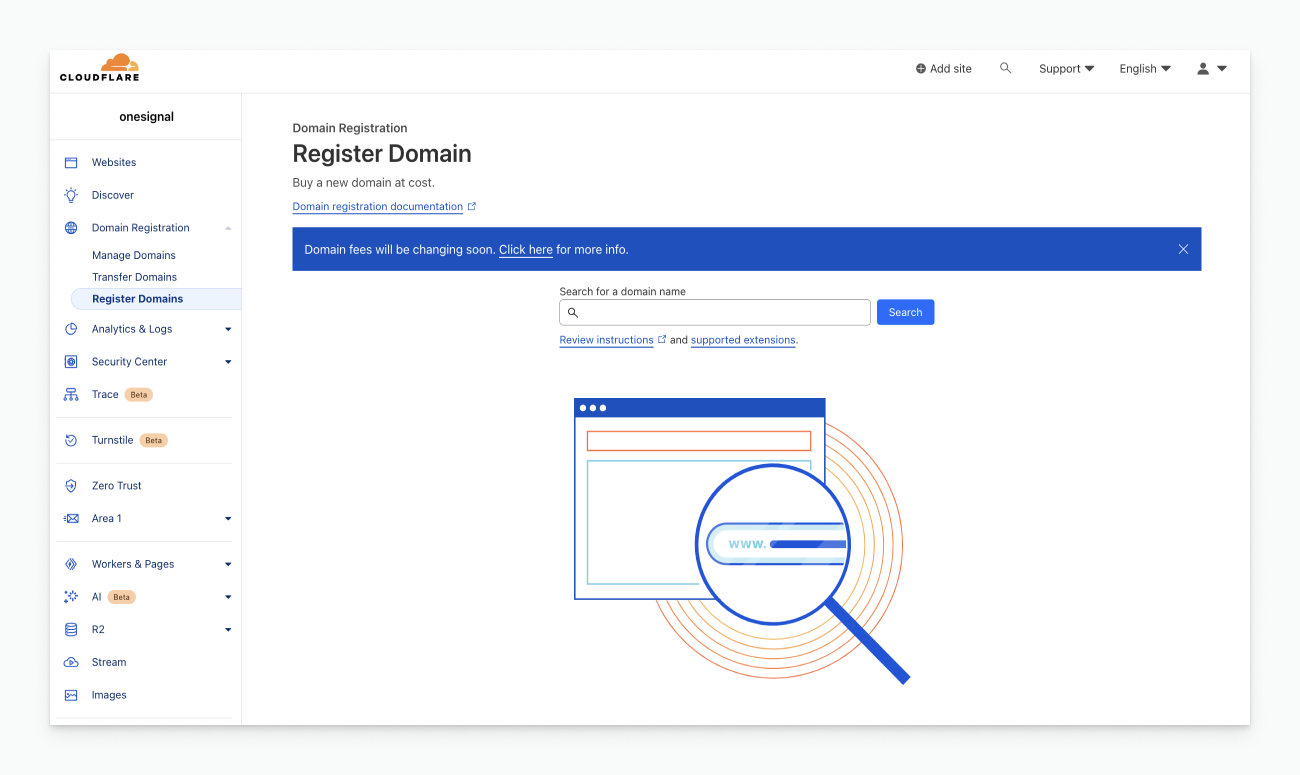
Cloudflare's Domain Registration Page
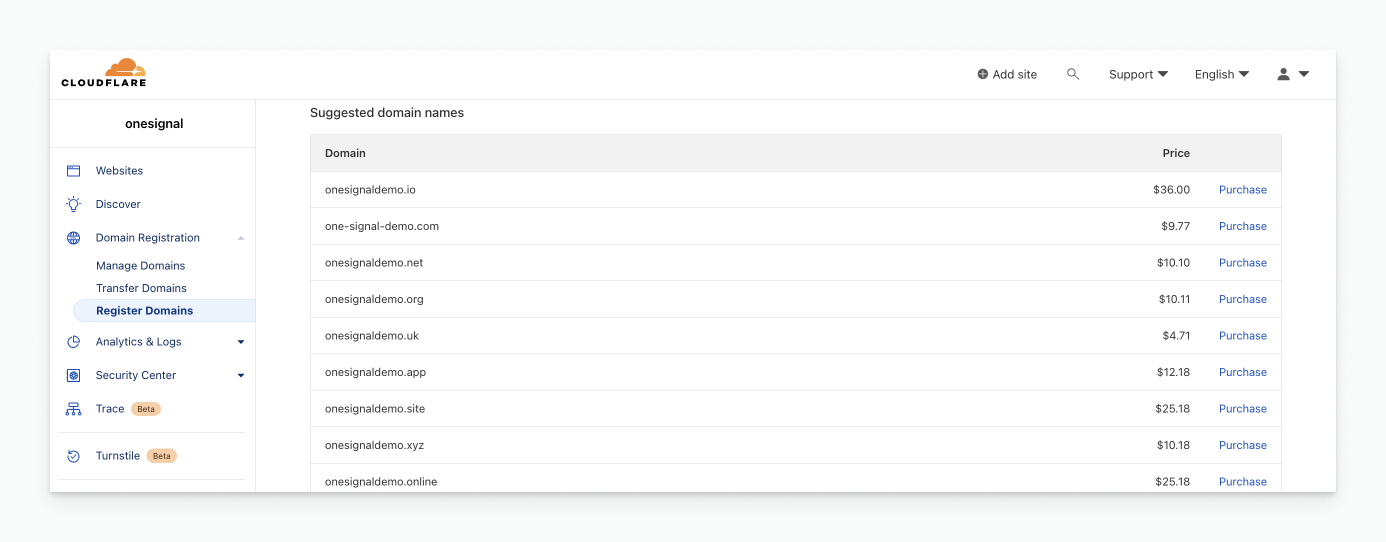
Cloudflare's Domain Purchase Page
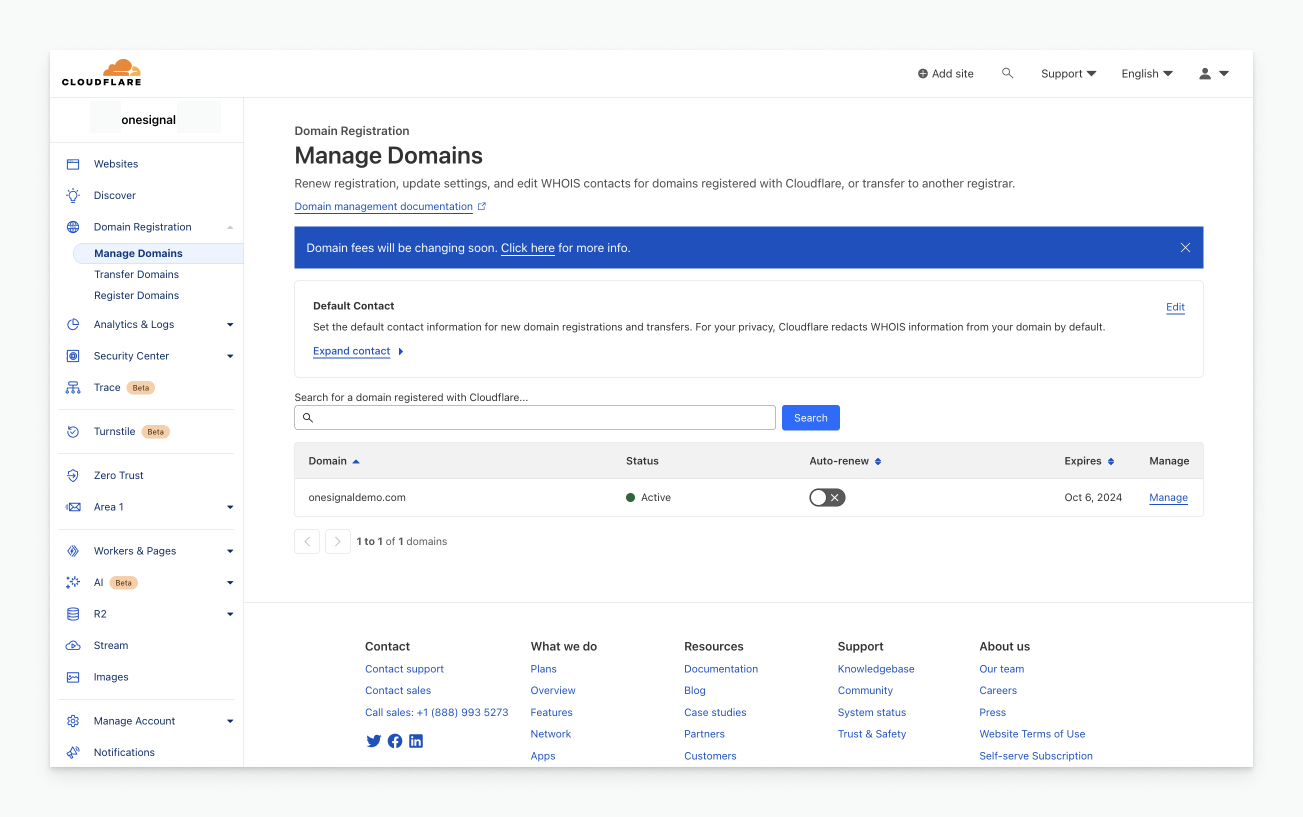
Cloudflare's Domain Management Page
Email DNS configuration
Complete the Email Setup steps until you’re prompted to add DNS records, then return here or use the Auto-Configure DNS button. From the OneSignal dashboard:- ⚠️ means the current DNS record does not match
- ✅ means the current DNS record matches

Copy DNS records from OneSignal
TXT records
- Type:
TXT - Name: OneSignal “Hostname”
- Content: OneSignal “Value”
- TTL: Auto or lowest
- Priority:
10(if required)
If you already have an SPF TXT record, append additional includes like:
v=spf1 include:spf.onesignal.email include:mailgun.org include:your-other-spf-records ~all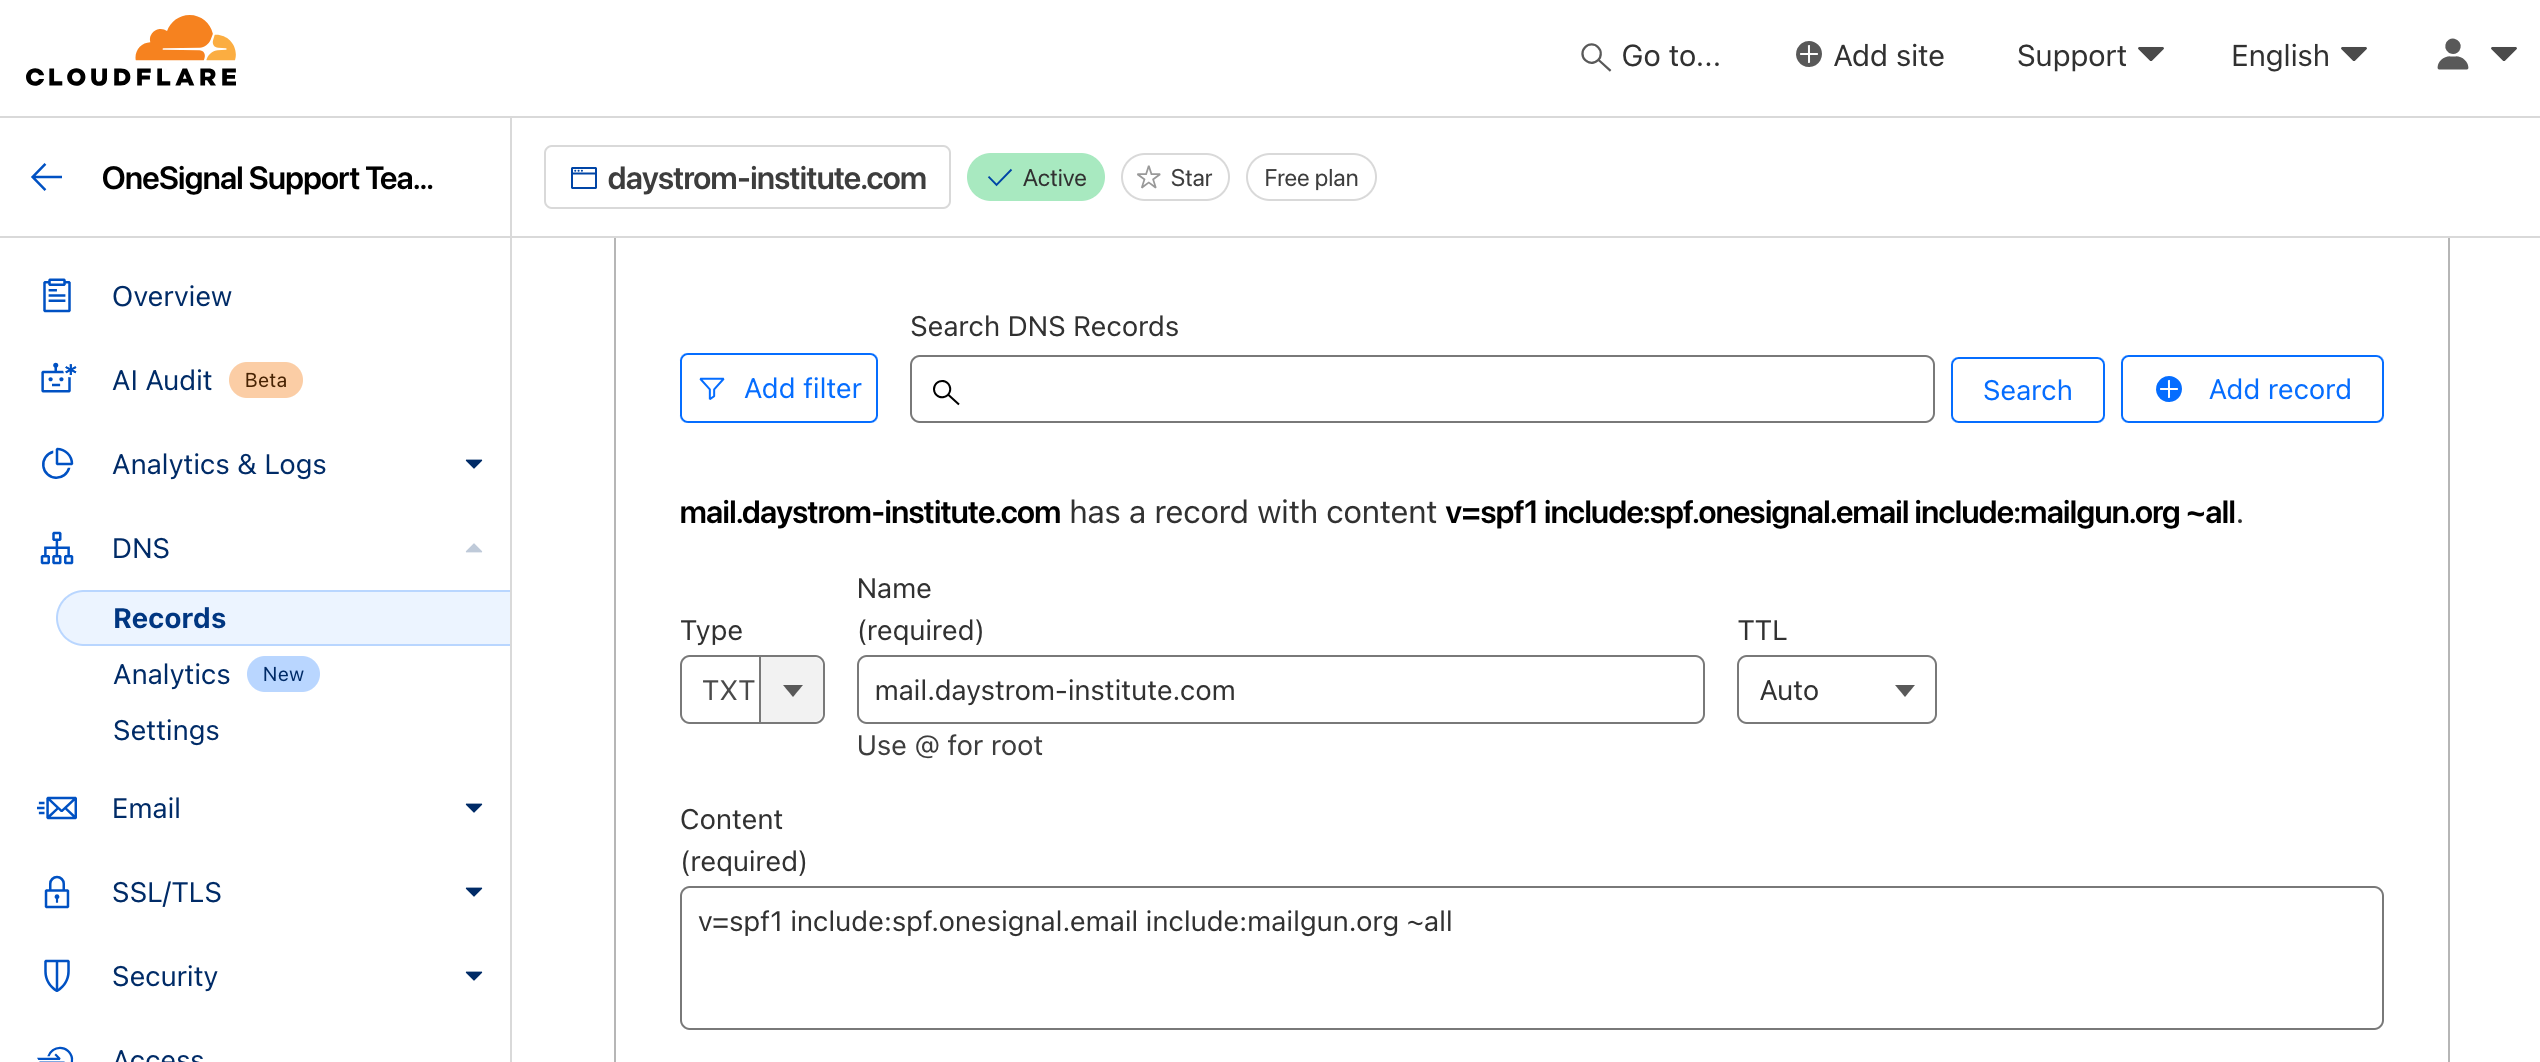
DNS record interface
SPF (Sender Policy Framework)
Verifies the sending IP is authorized to send emails on your domain’s behalf. No extra action needed beyond adding the TXT record provided by OneSignal.DMARC
Adds policy enforcement for SPF/DKIM failures. DMARC is required for secure email sending. Learn more: Email Sender GuidelinesOneSignal uses the value
v=DMARC1; p=none; for the DMARC record. If you already have a DMARC record, make sure this is included and not set multiple times.CNAME records
Used for open, click, and unsubscribe tracking.- Type:
CNAME - Name: OneSignal “Hostname”
- Target: OneSignal “Value”
- TTL: Auto or lowest
- Proxy: DNS only
- Flattening: Off
- Priority:
10(if required)
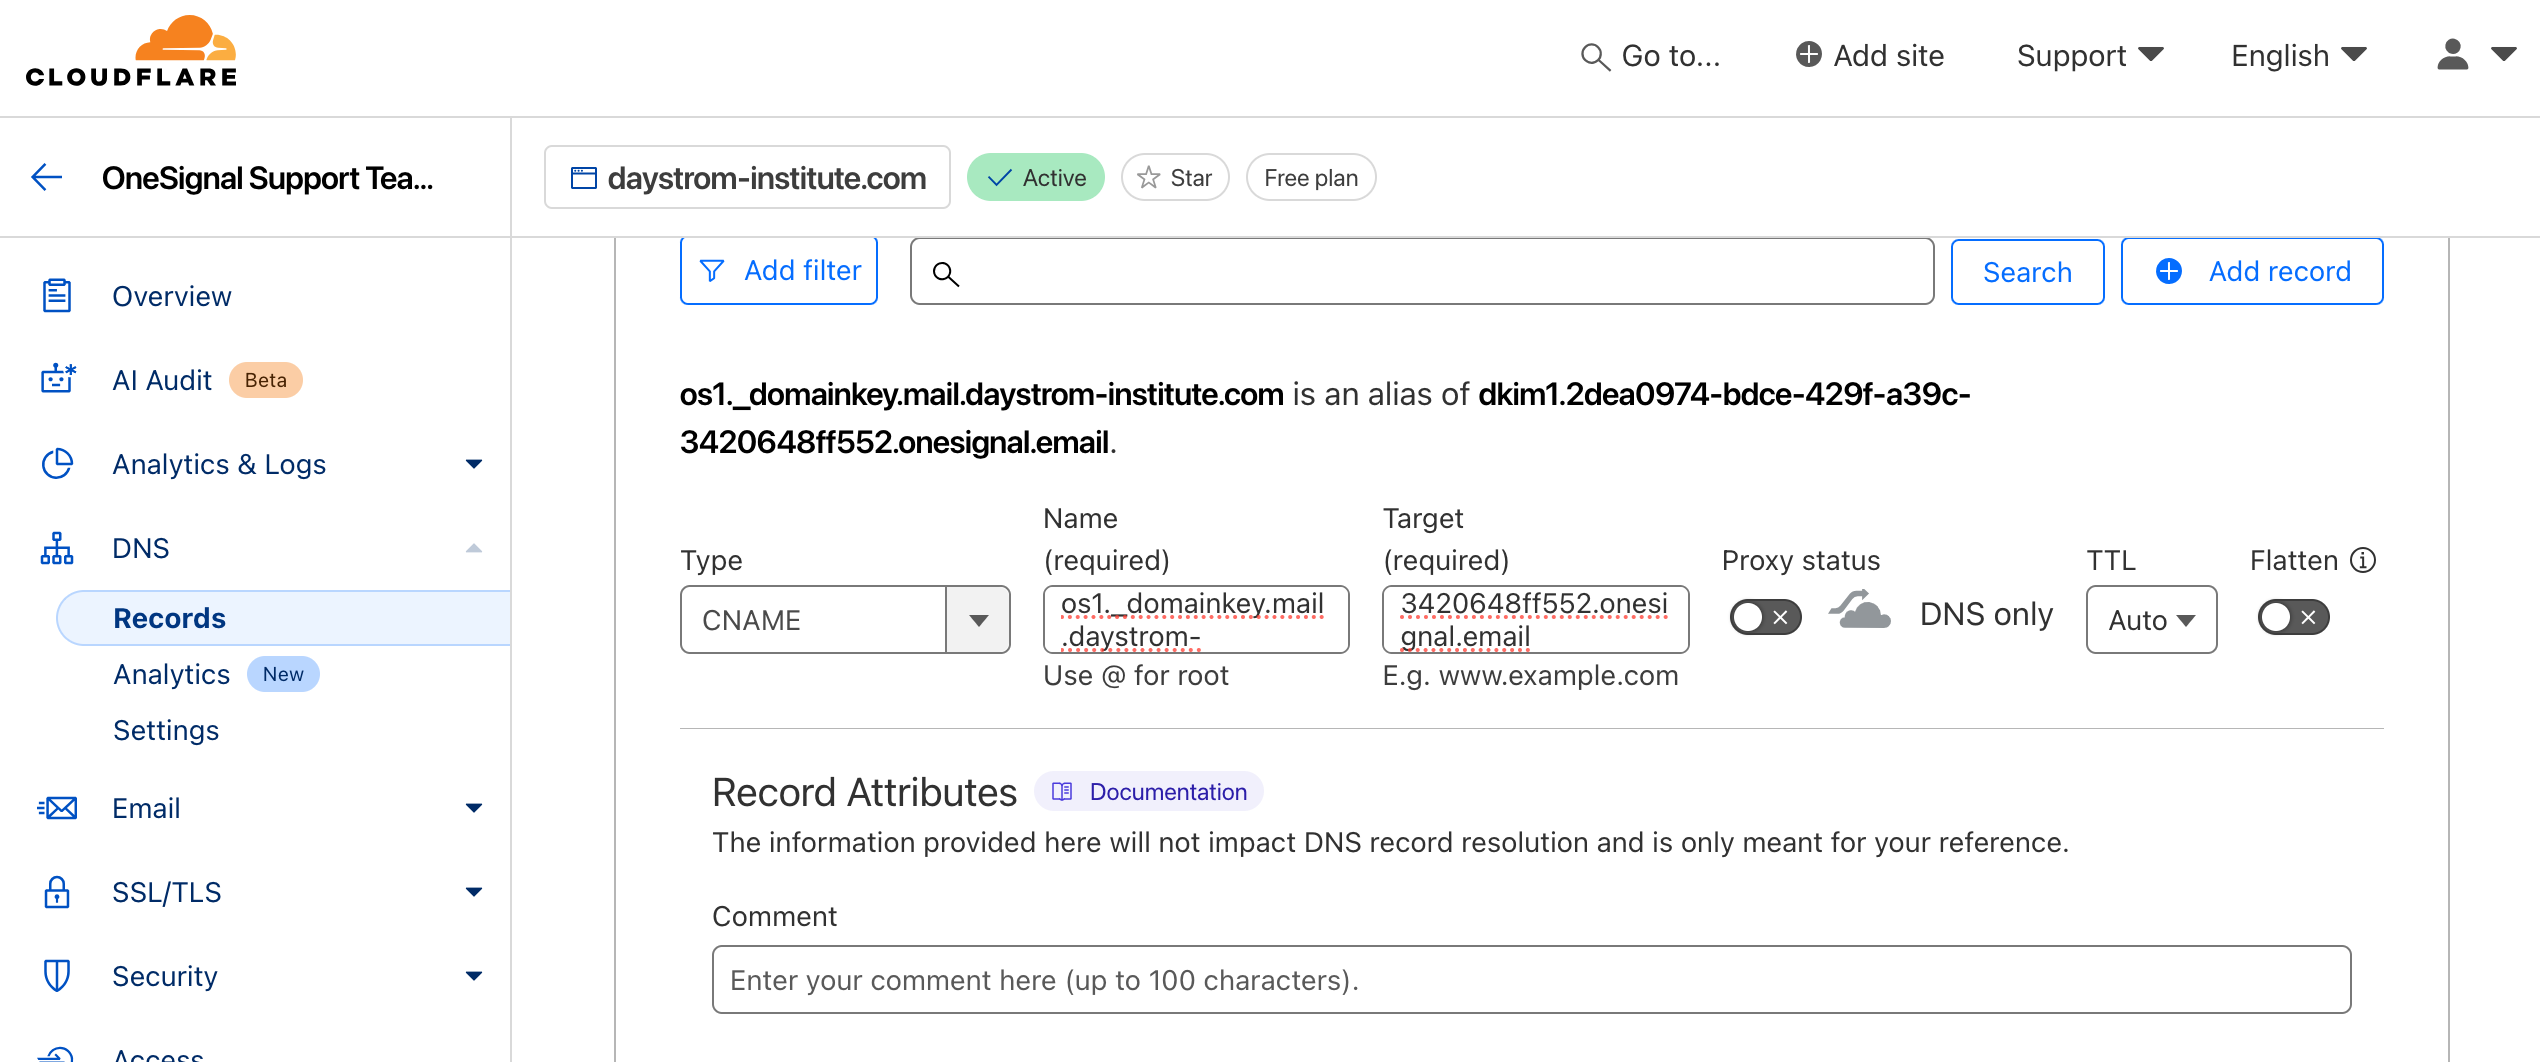
CNAME record setup
DKIM (DomainKeys Identified Mail)
Verifies the message’s content was not altered and was sent by you. The public key is included in the DNS record from OneSignal.MX records
- Type:
MX - Name: OneSignal “Hostname”
- Mail server: OneSignal “Value”
- TTL: Auto or lowest
- Priority:
10
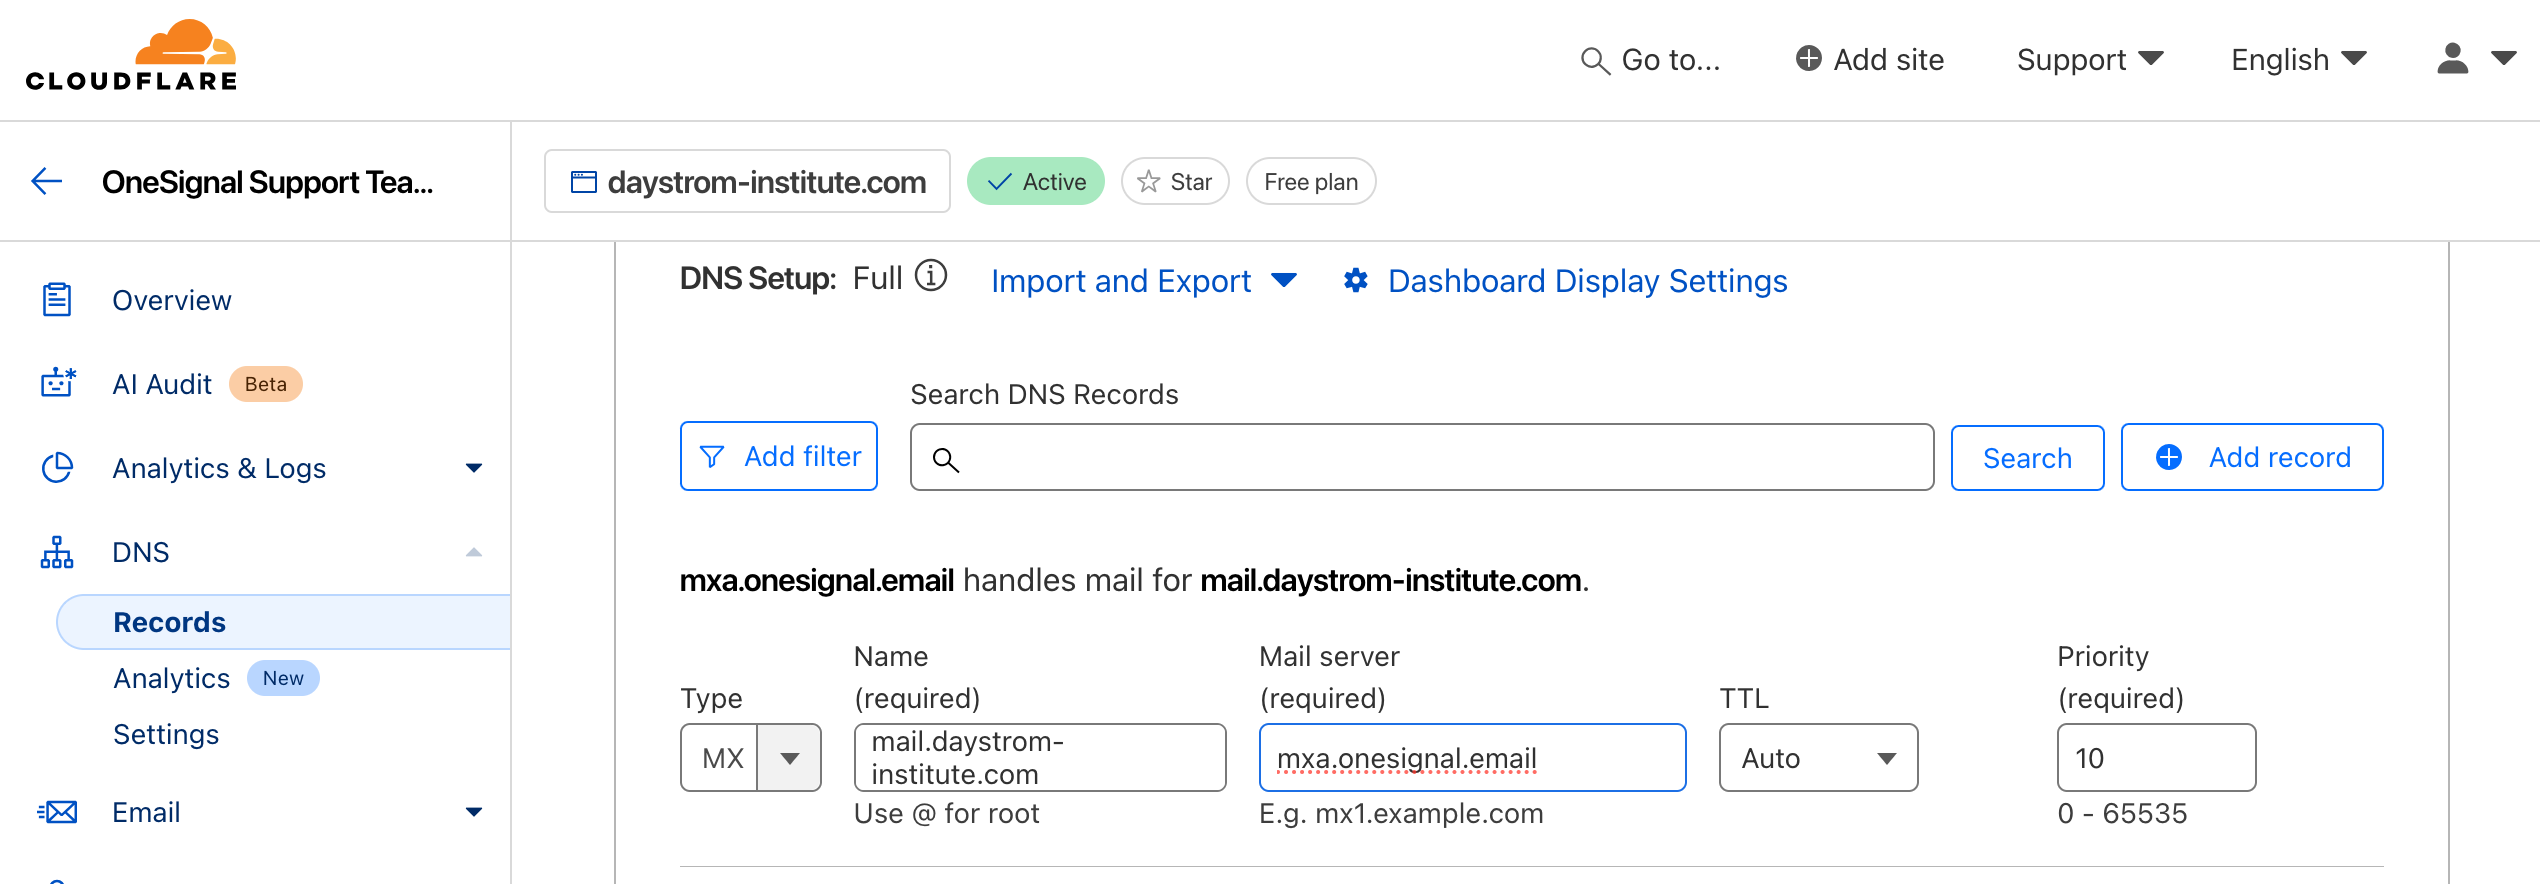
DNS records overview
MX (Mail Exchange)
Receives email responses or bounces. Even if you’re only sending, these help avoid domain verification errors.If you already use another email provider (e.g. Gmail), do not overwrite existing MX records.
DNS verification
After adding records:- Return to the OneSignal dashboard.
- Click Check Records.
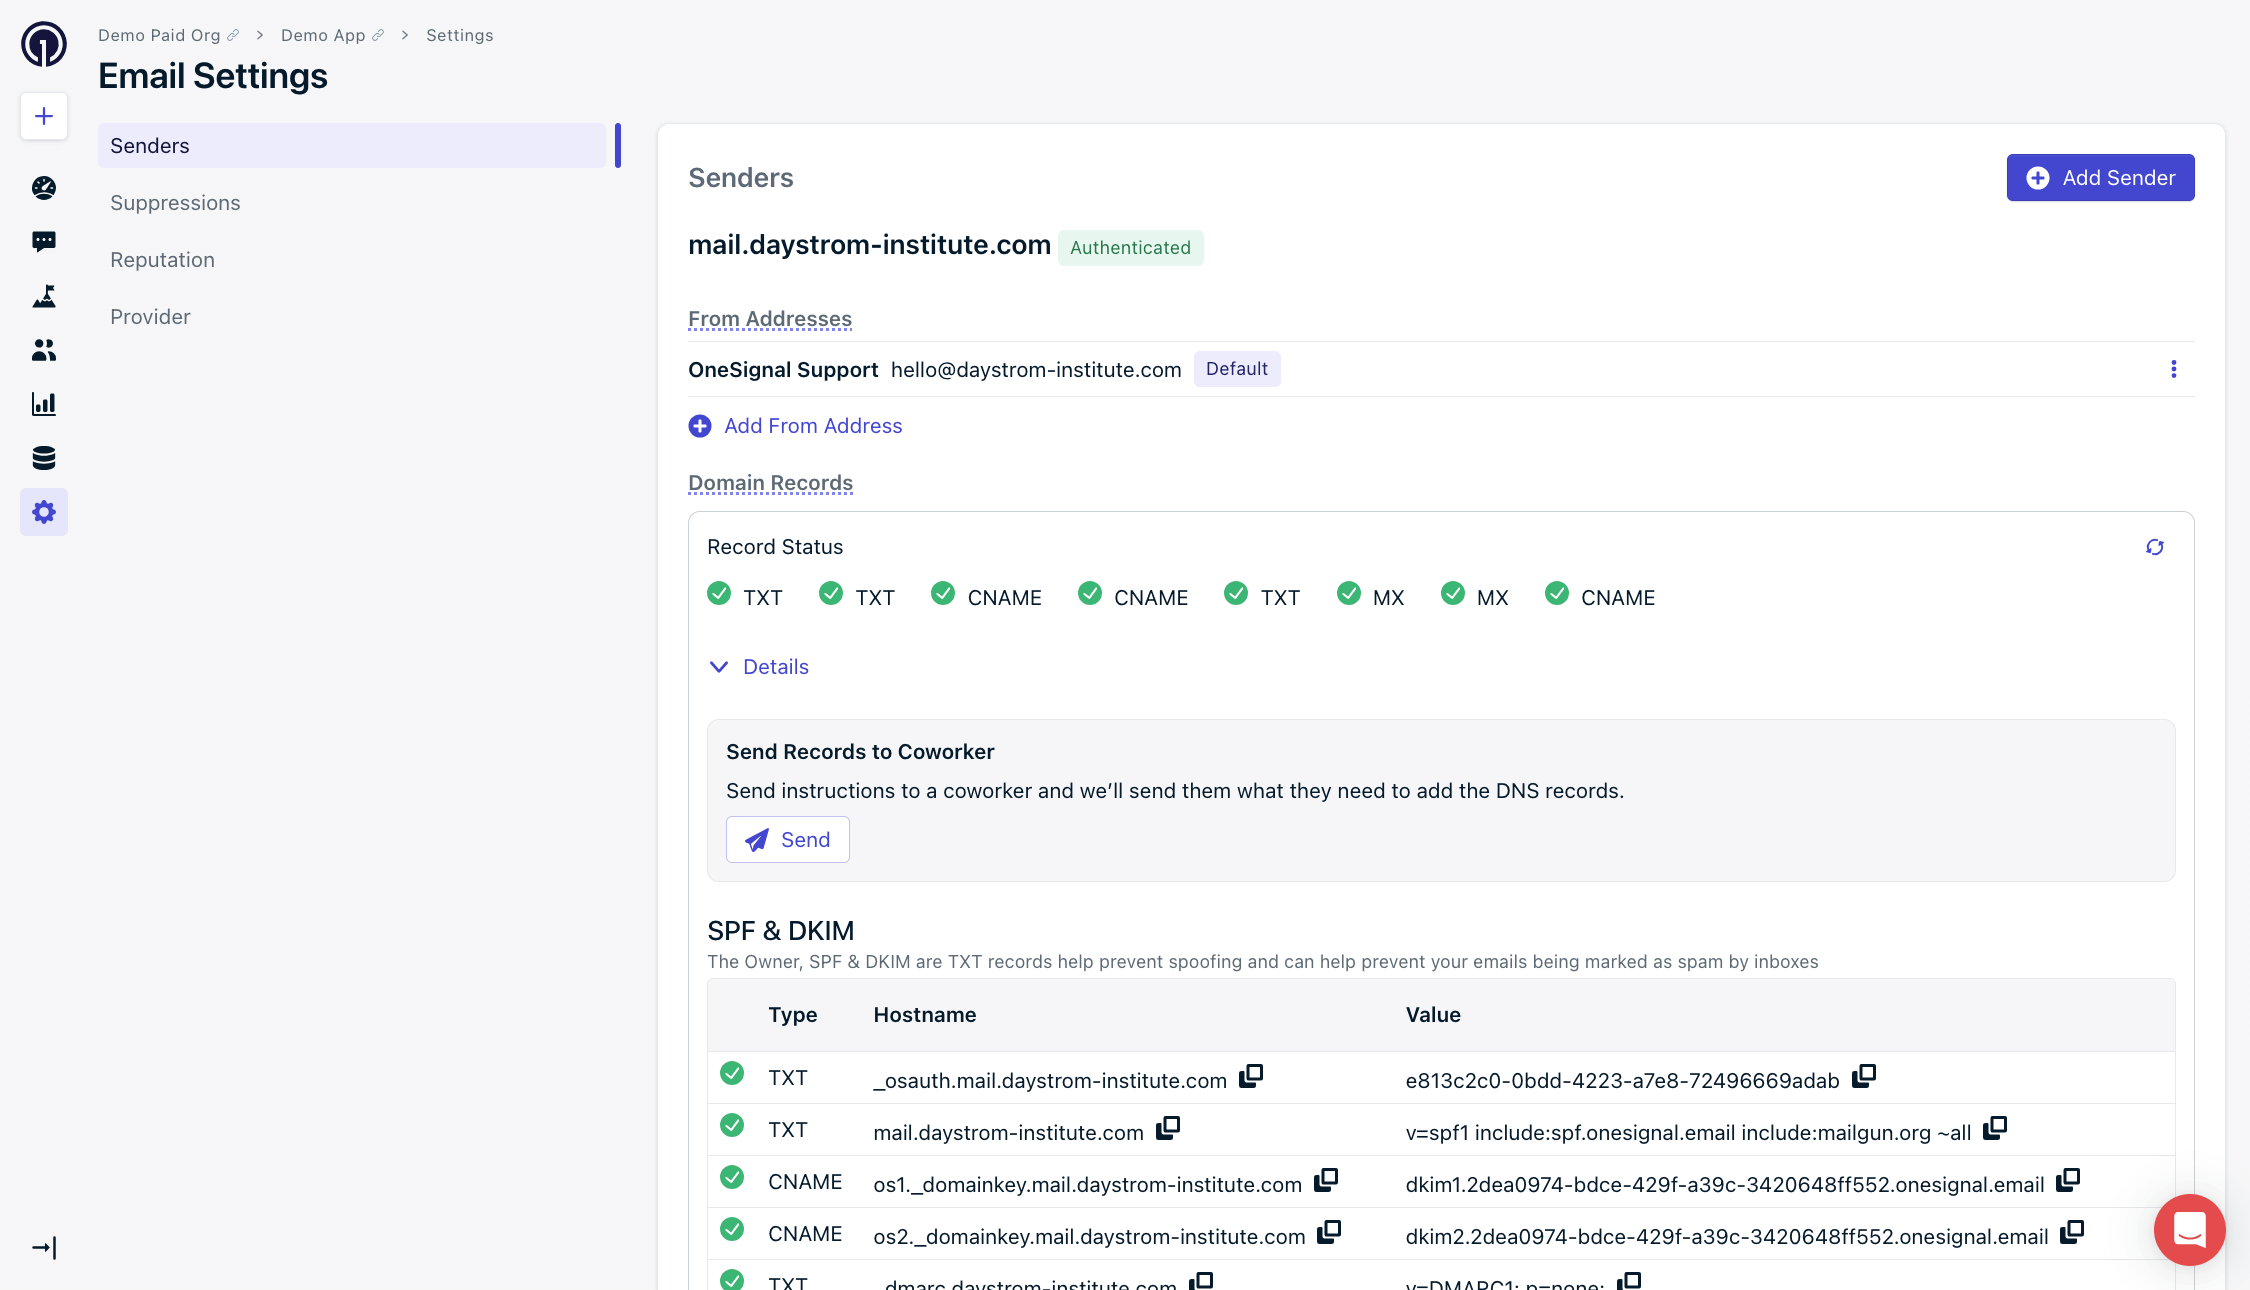
Verified DNS records in OneSignal
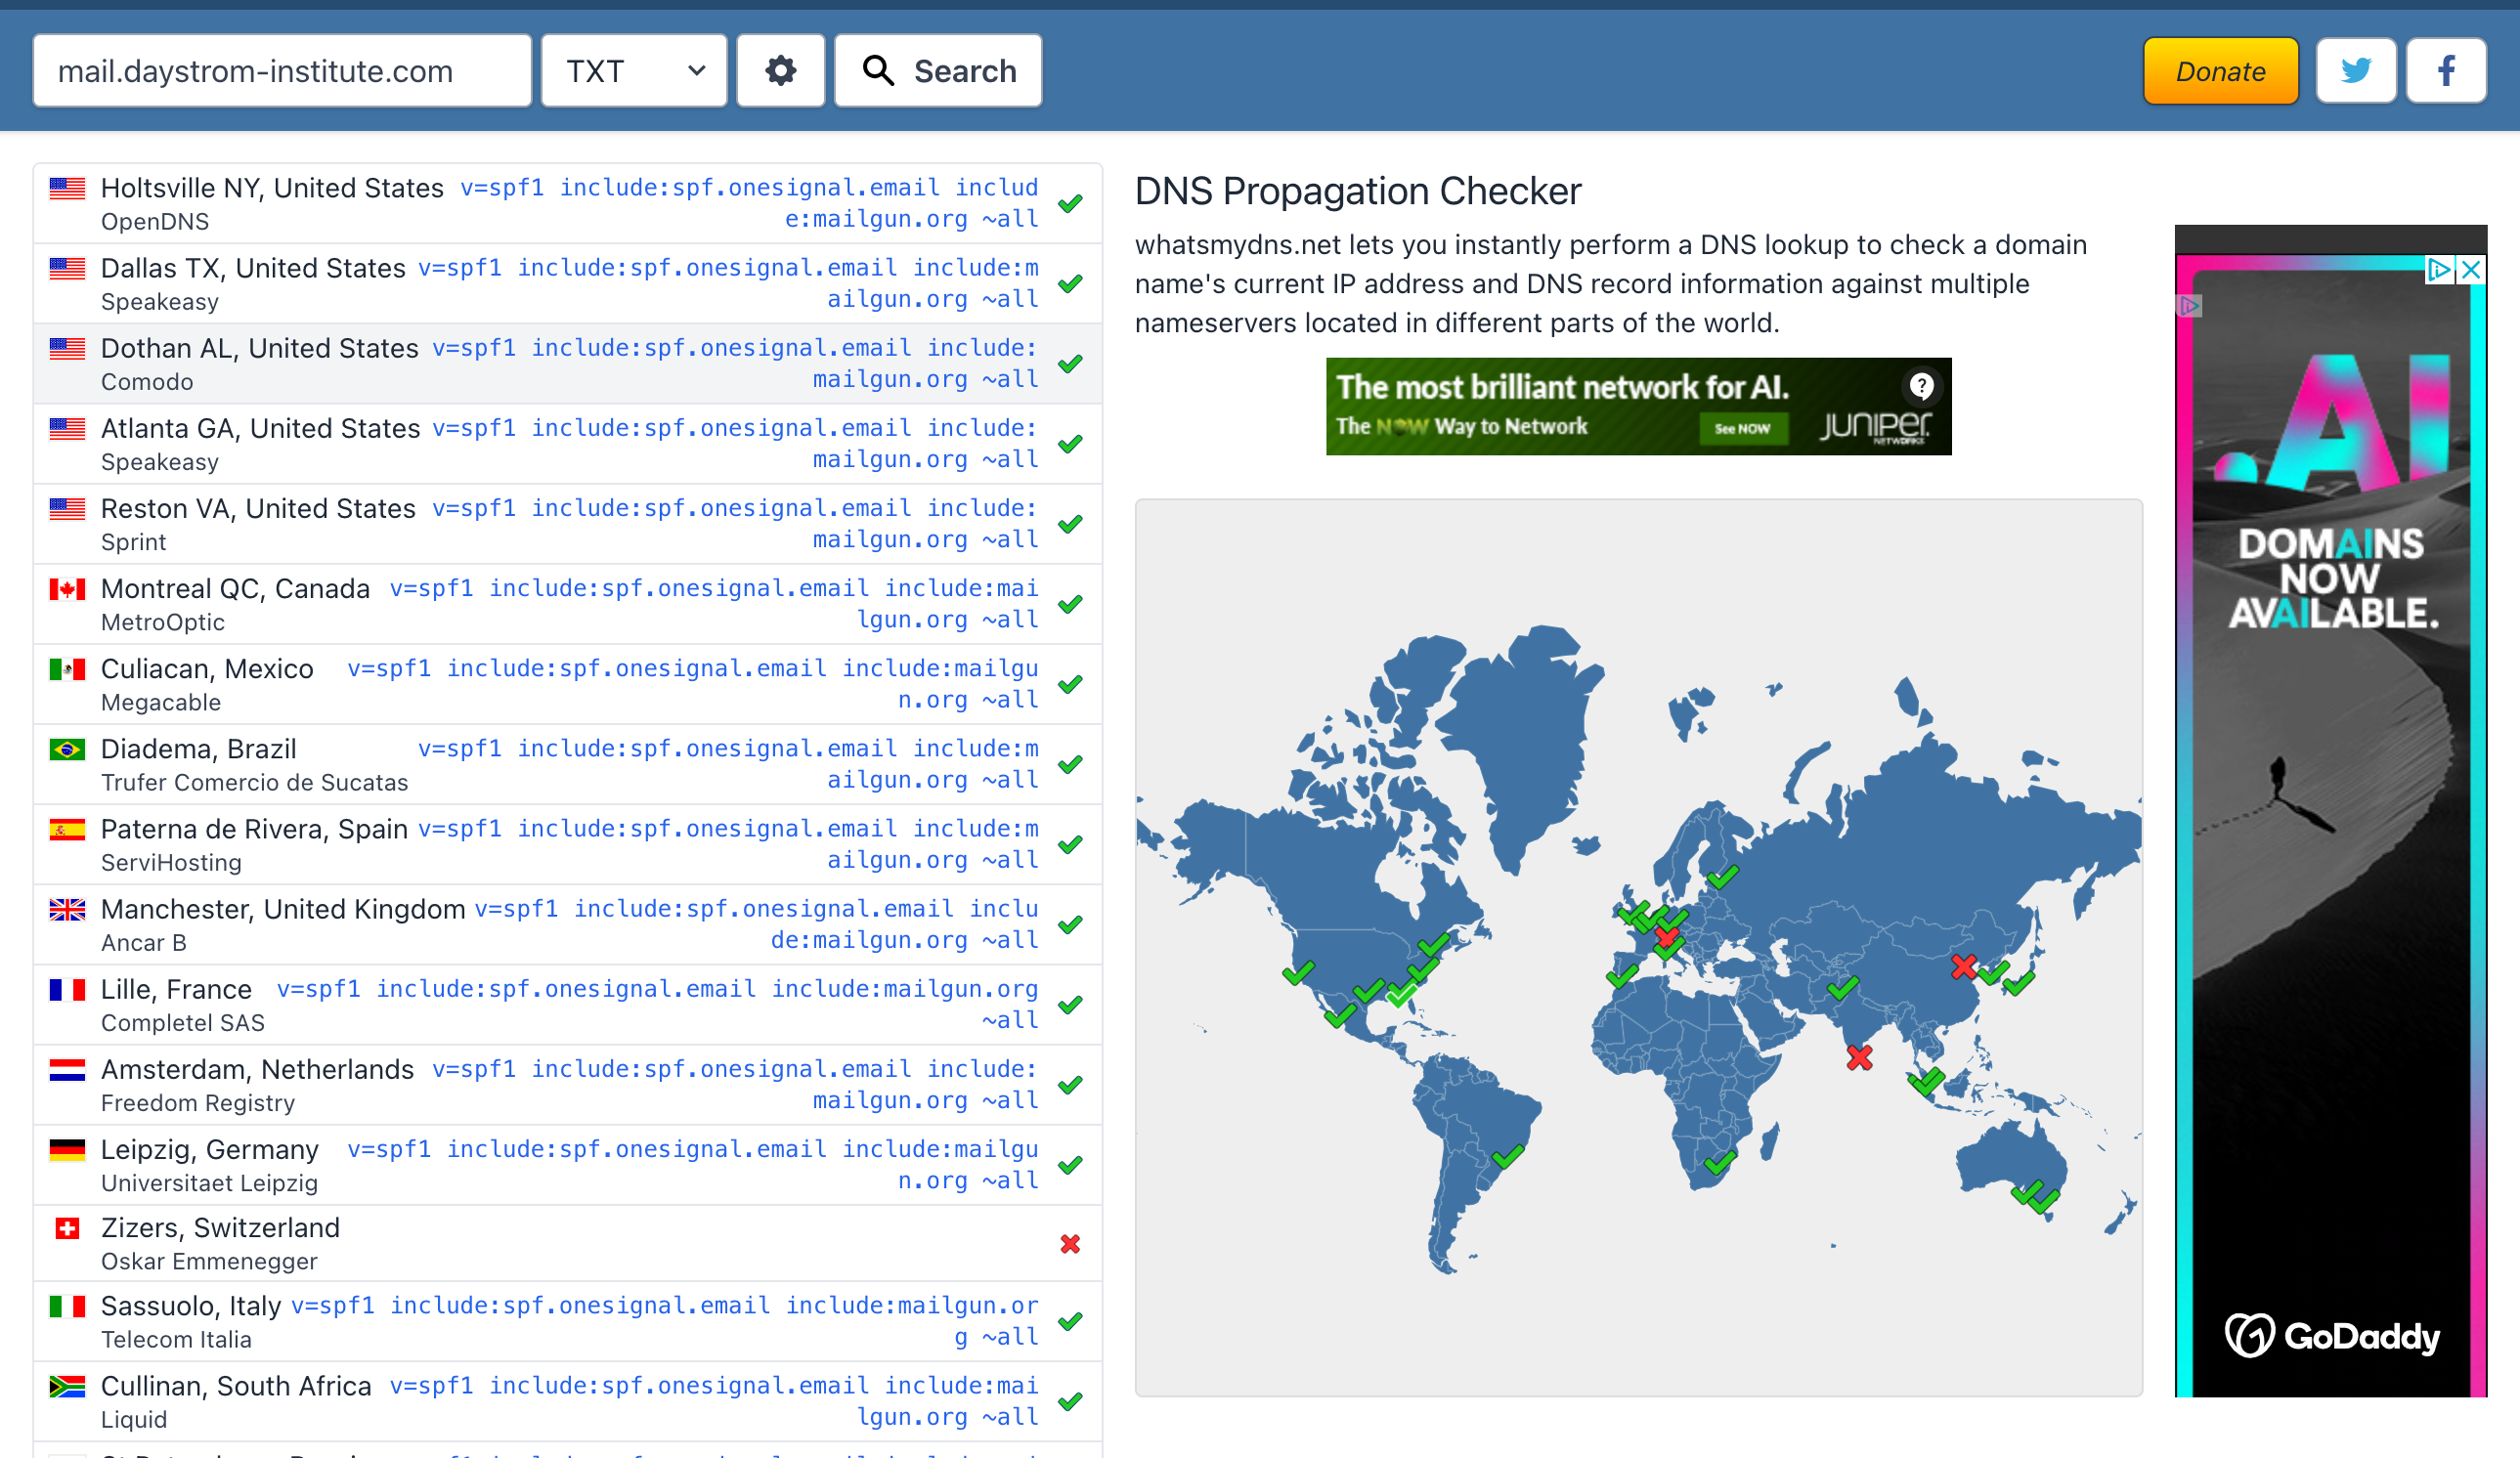
Check DNS propagation with whatsmydns.net
- Confirm the domain is correct.
- Double-check each record was added exactly as shown in the dashboard.
Return to Email Setup to complete configuration and begin sending emails.