

Requirements
- Flutterflow plan: Standard or higher
- Configured OneSignal app and platform
- macOS with Xcode 14+ (setup instructions use Xcode 16.2)
- Device with iOS 15+, iPadOS 15+, or Xcode simulator running iOS 16.2+
- CocoaPods 1.16.2+
- Android 7.0+ device or emulator with Google Play Store (Services) installed
Configure your OneSignal app and platform
Configure your OneSignal app with the platforms you support — Apple (APNs), Google (FCM), Huawei (HMS), and/or Amazon (ADM).Step-by-step setup instructions
Step-by-step setup instructions
Create or select your app
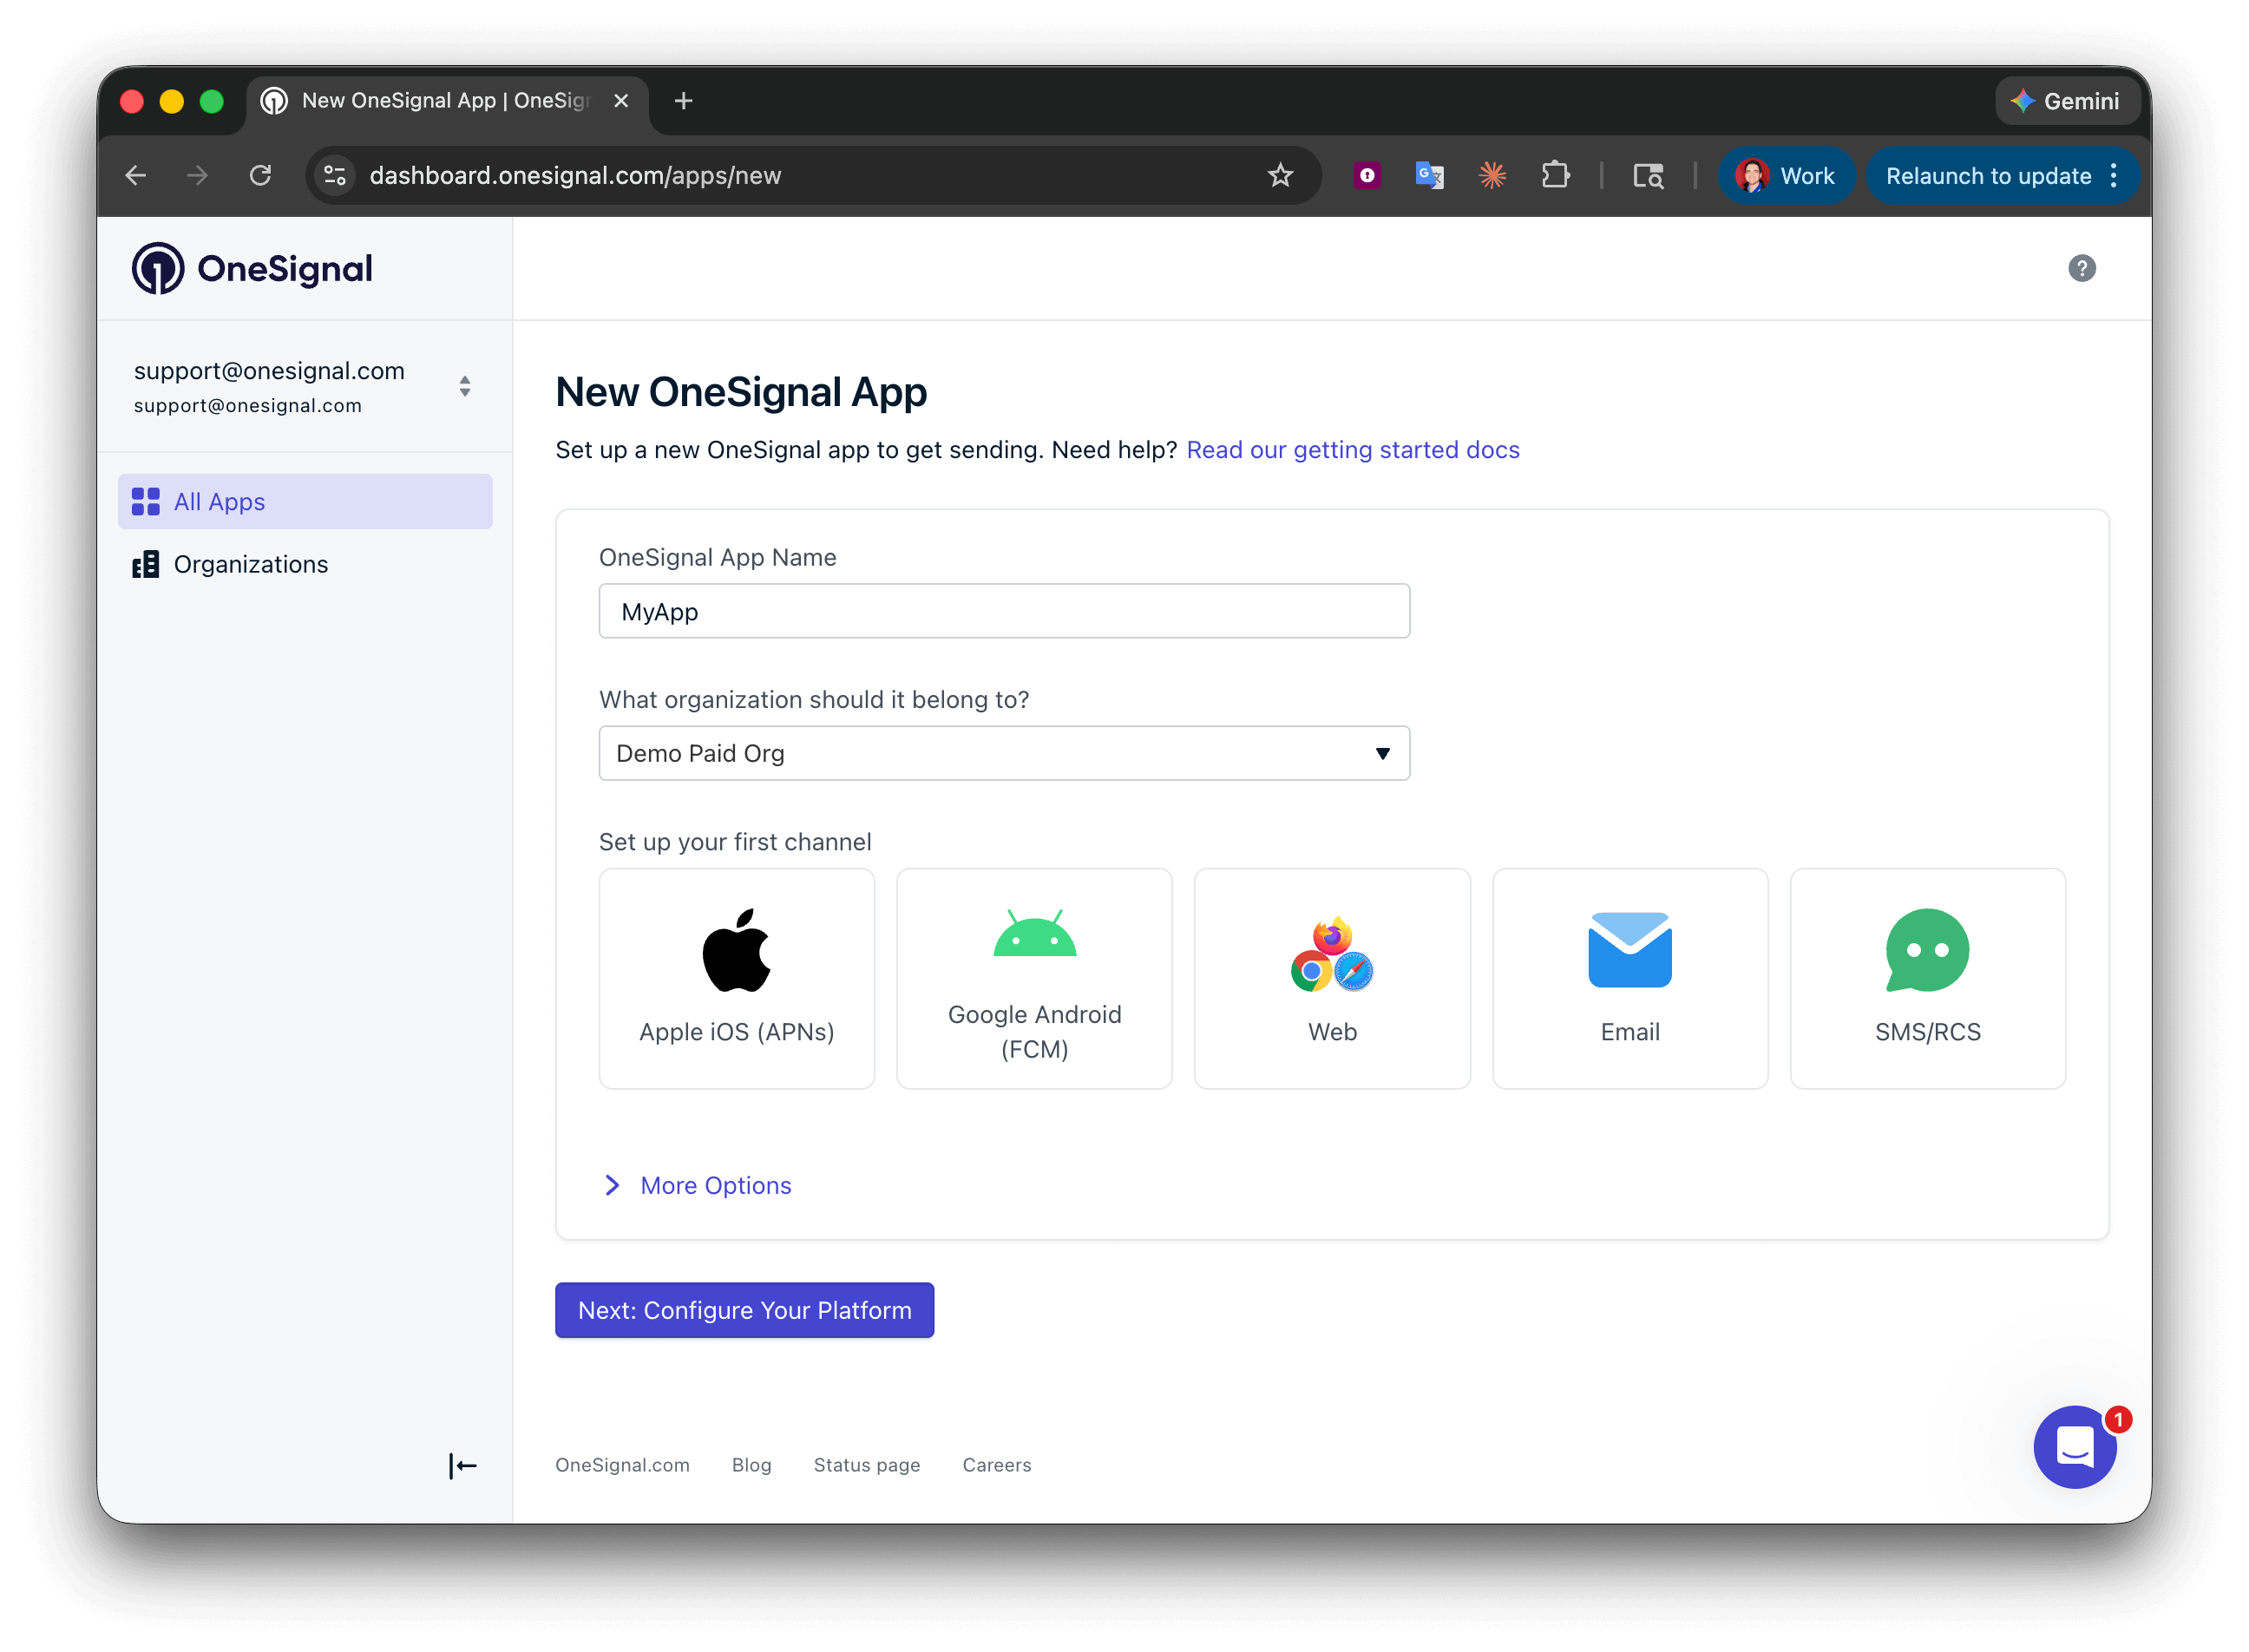
Setting up your first OneSignal app, Organization, and channel.
Configure platform credentials
- Android: Set up Firebase credentials
- iOS: p8 token (recommended) or p12 certificate
- Amazon: Generate API key
- Huawei: Authorize OneSignal
Save your App ID and install the SDK
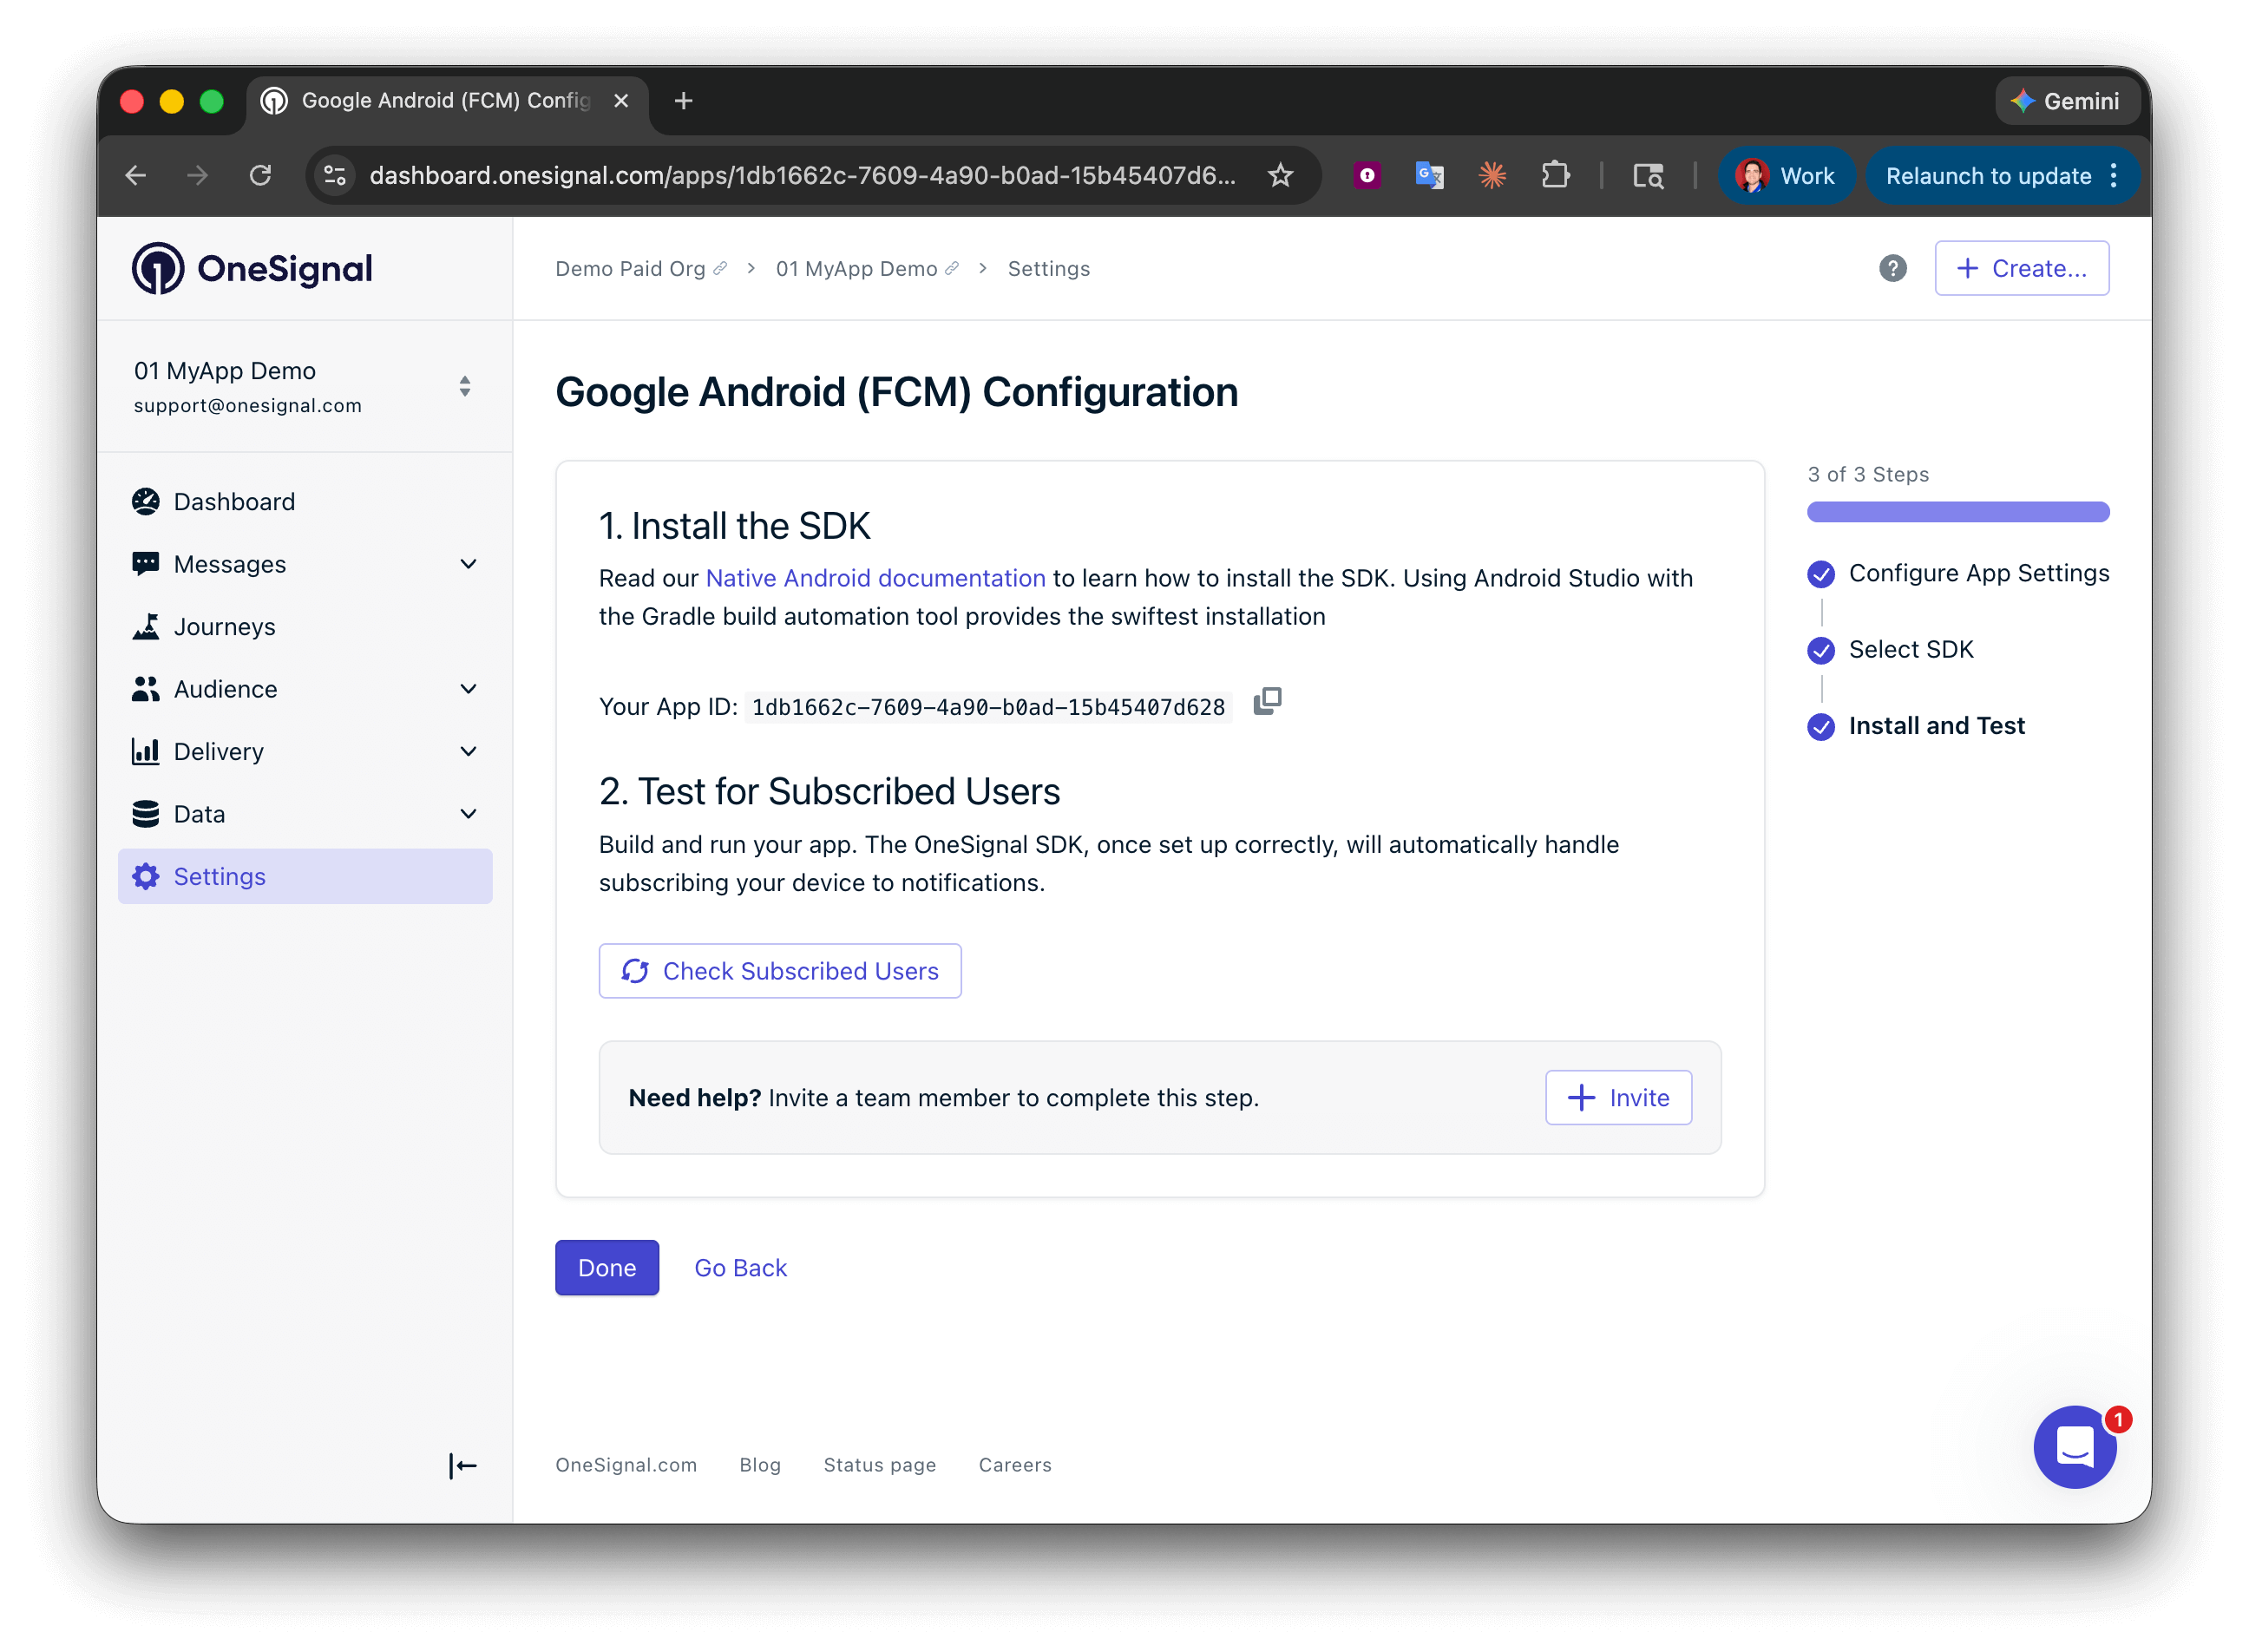
Save your App ID and invite additional team members.
Setup
1. Create a new custom action
In your Flutterflow project, navigate to Custom Code, then click the +Add button and select Action.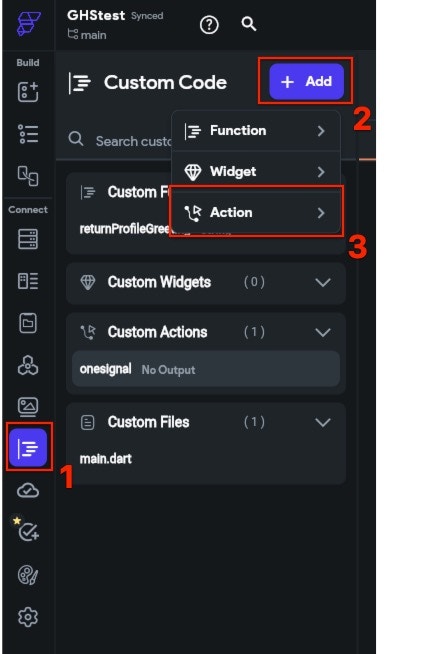
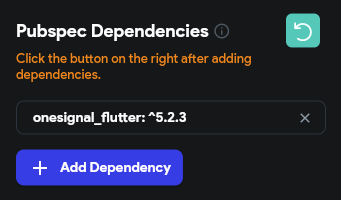
YOUR_APP_ID with your OneSignal App ID found in your OneSignal dashboard Settings > Keys & IDs.
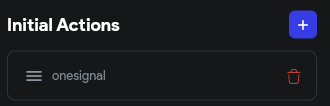
onesignal action that has just been created.

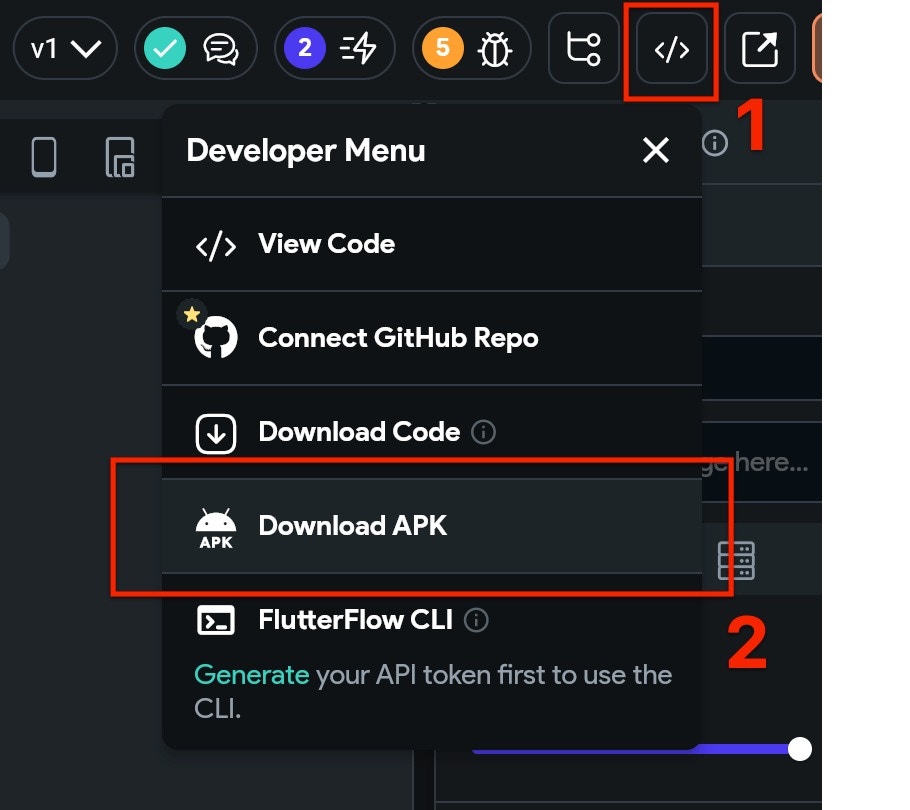
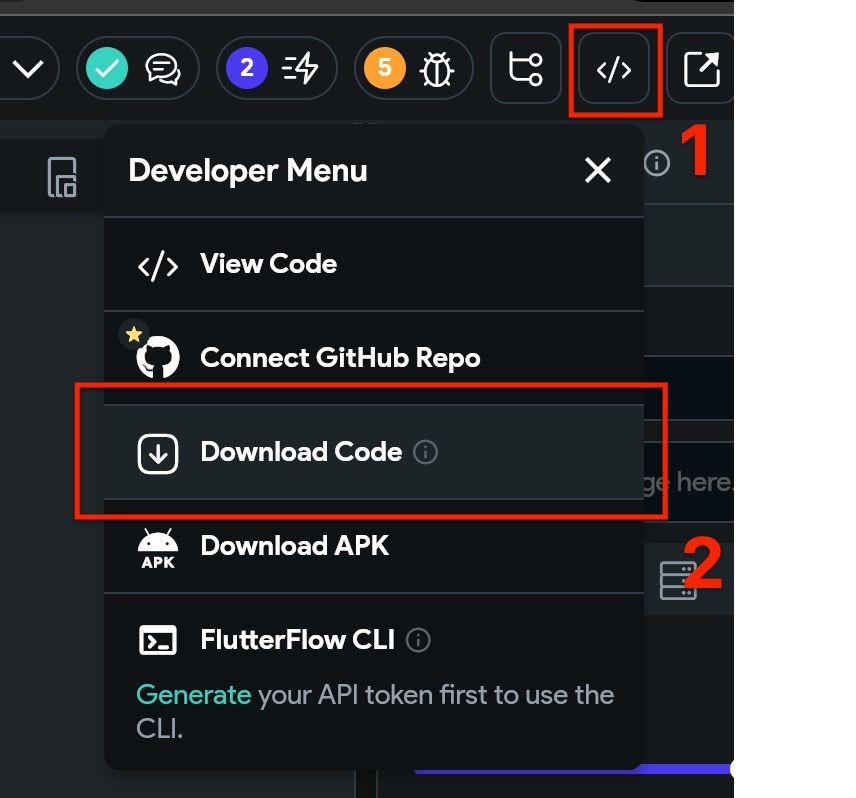
2. Exporting the project
- APK download (Android only)
- Full project download (iOS and Android)
3. iOS Setup
The downloaded project will likely not be ready to launch in iOS. Before setting up the OneSignal specific additions, you will need to make sure that the project is fully built. To do so:- Open up a Terminal window, cd (change directory) to the
iosfolder of your downloaded project. - In Terminal type
flutter build iosand press enter. Wait for the build to complete, this may take some time depending on the size of your project. - Still in Terminal type
pod installand press enter. Wait for the pod install to complete.
.xcworkspace file in Xcode located your project’s ios folder.
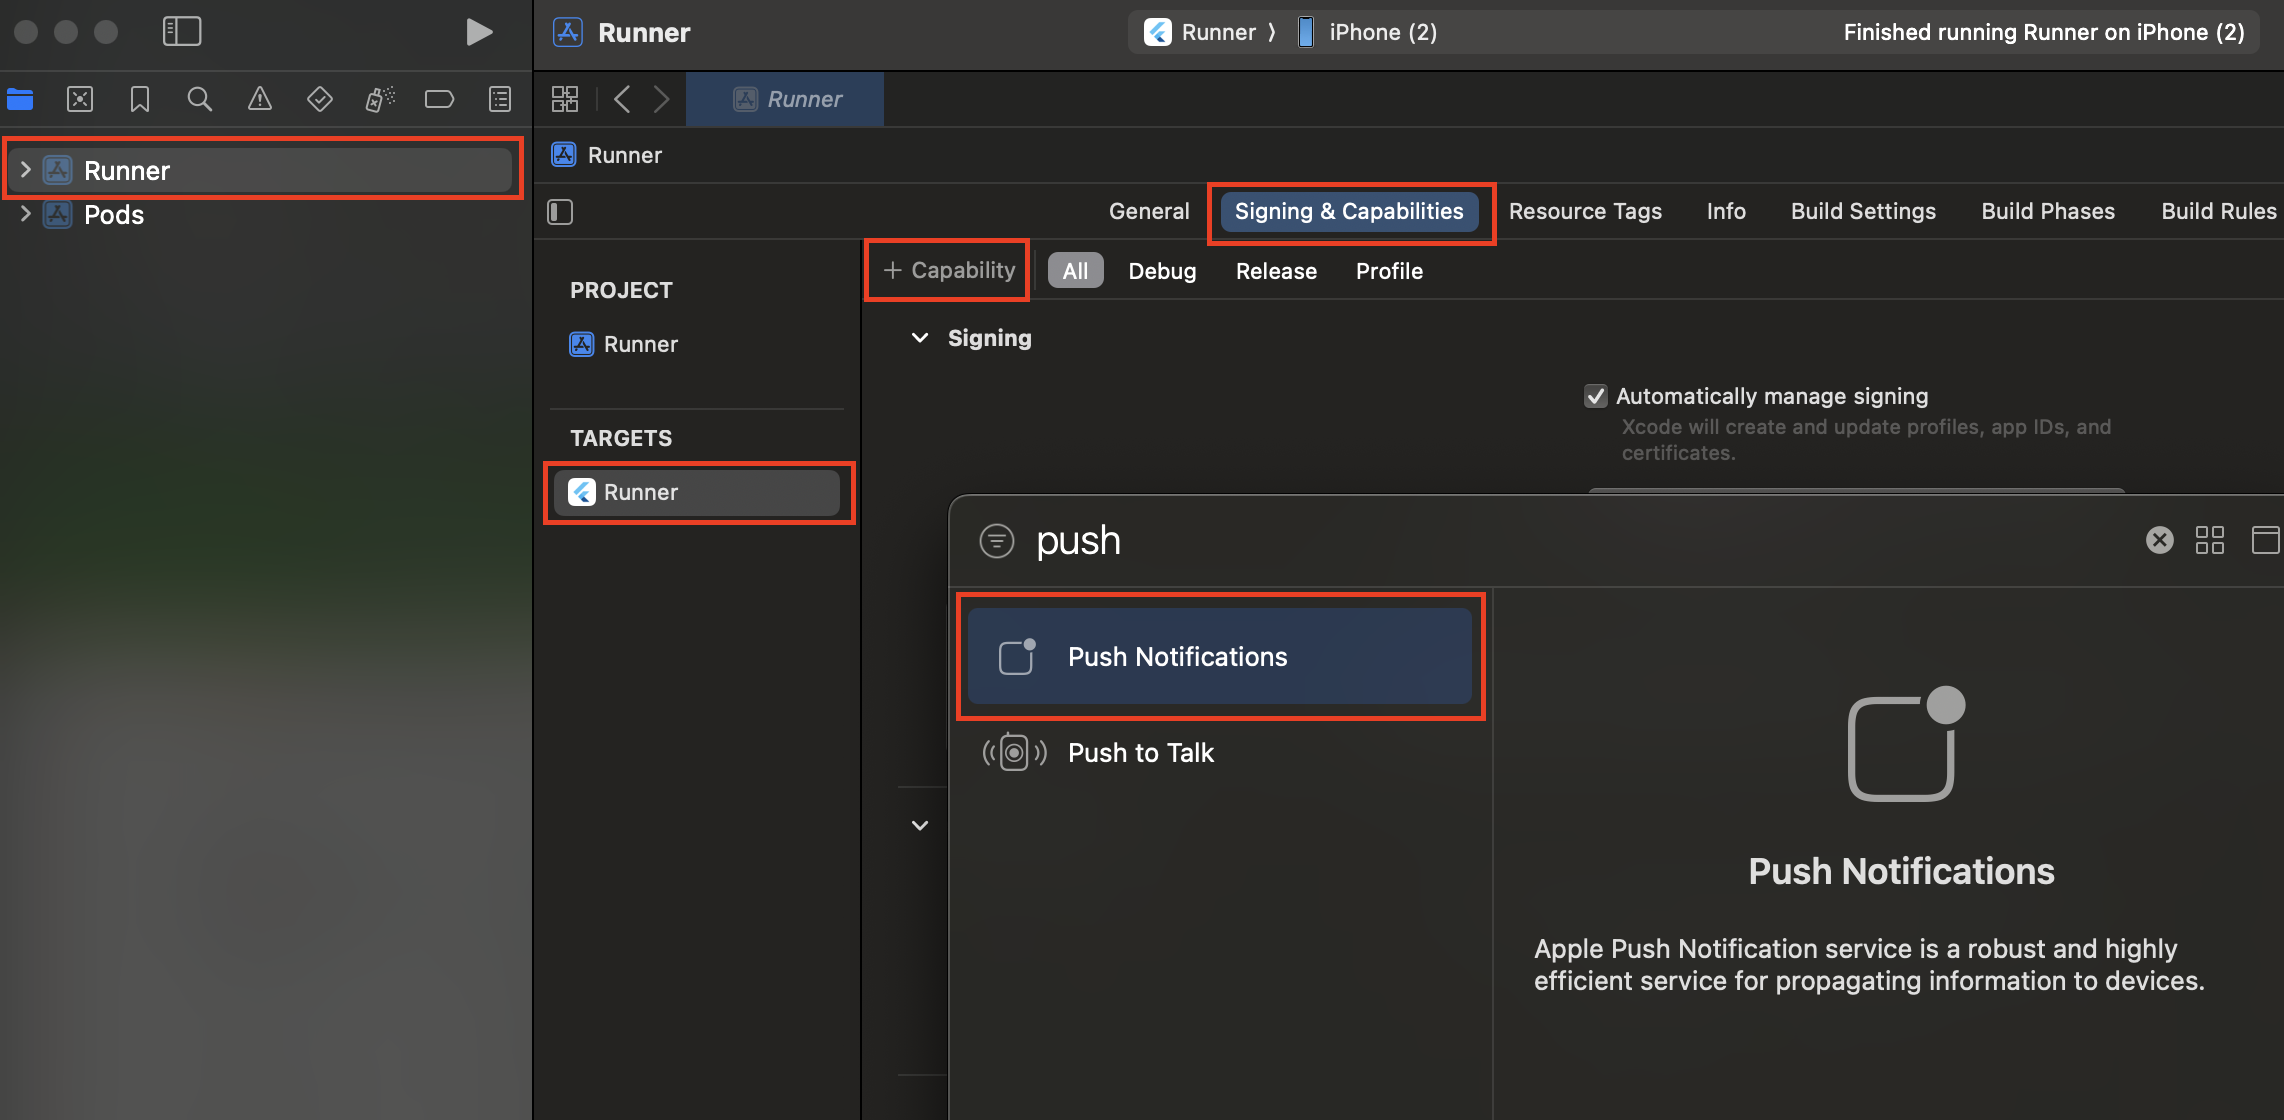
Select the root project > your main app target > Signing & Capabilities.
If you do not see Push Notifications enabled, click + Capability and add Push Notifications. Ensure that you enter the correct details for your Team and Bundle Identifier.
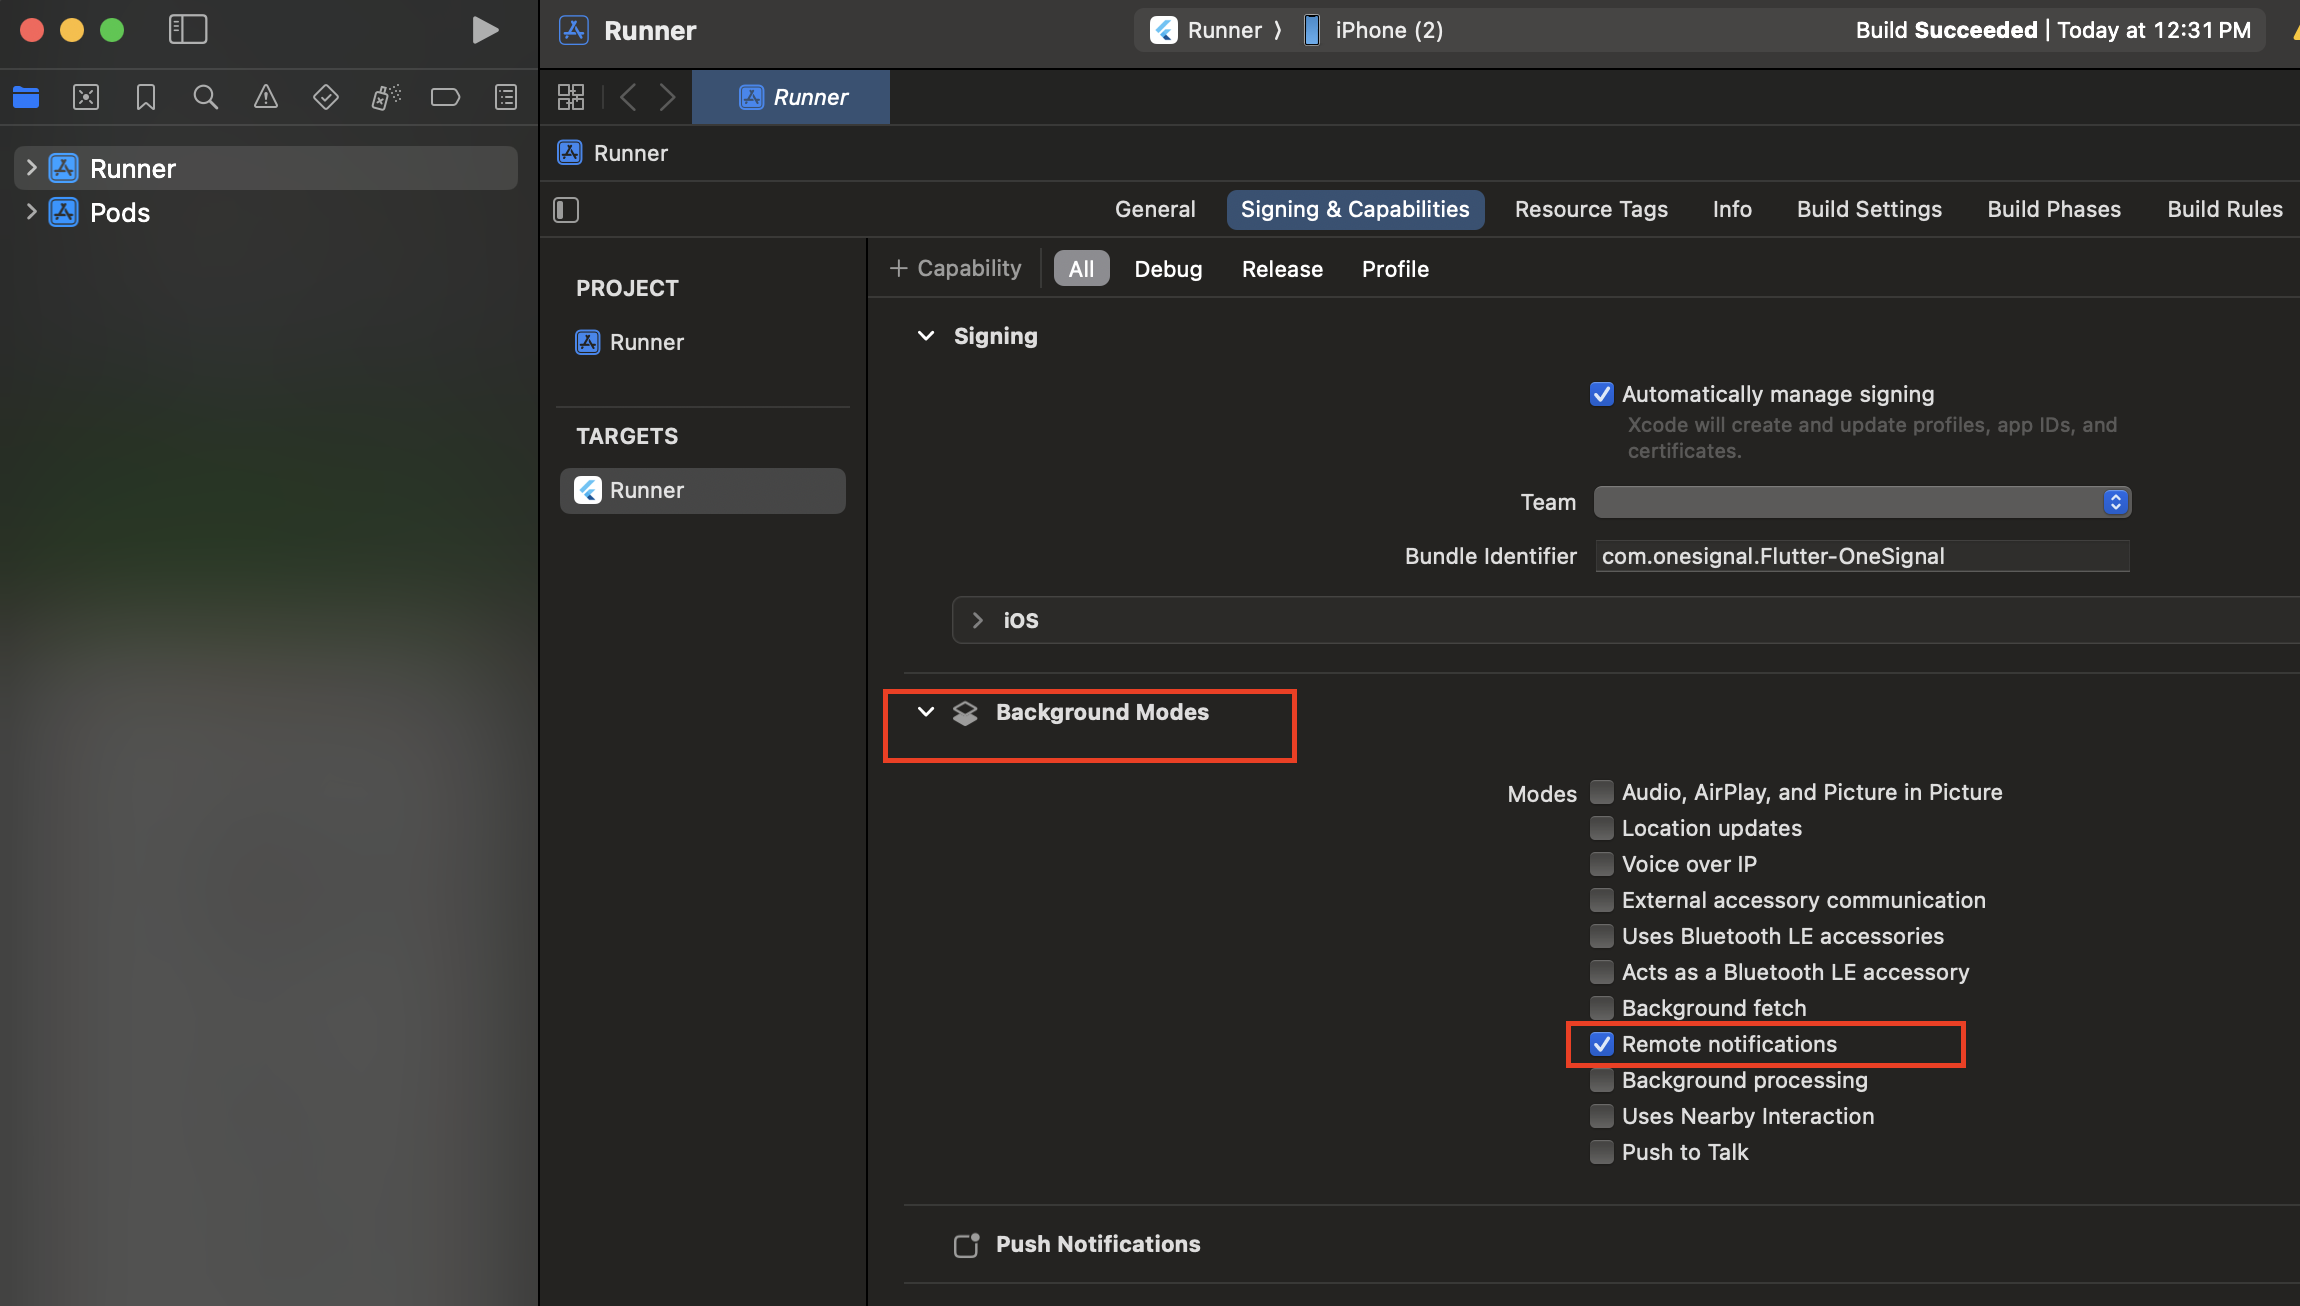
Add Notification Service Extension
The OneSignalNotificationServiceExtension allows your iOS application to receive rich notifications with images, buttons, and badges. It’s also required for OneSignal’s confirmed receipt analytics features. In Xcode Select File > New > Target… Select Notification Service Extension then Next.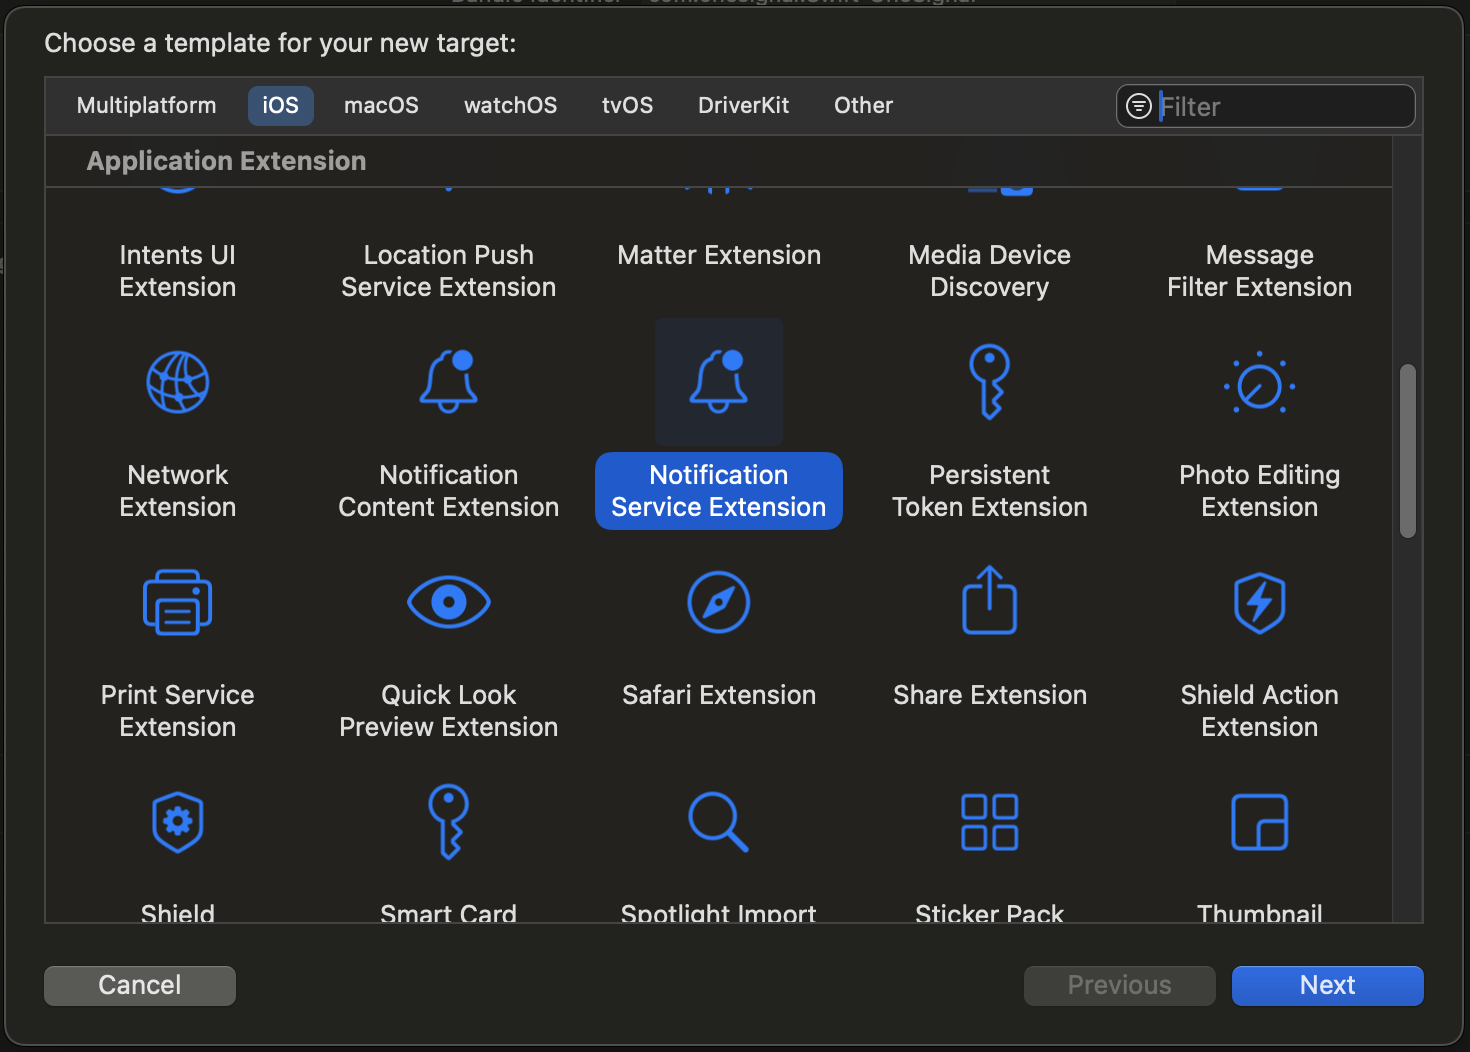
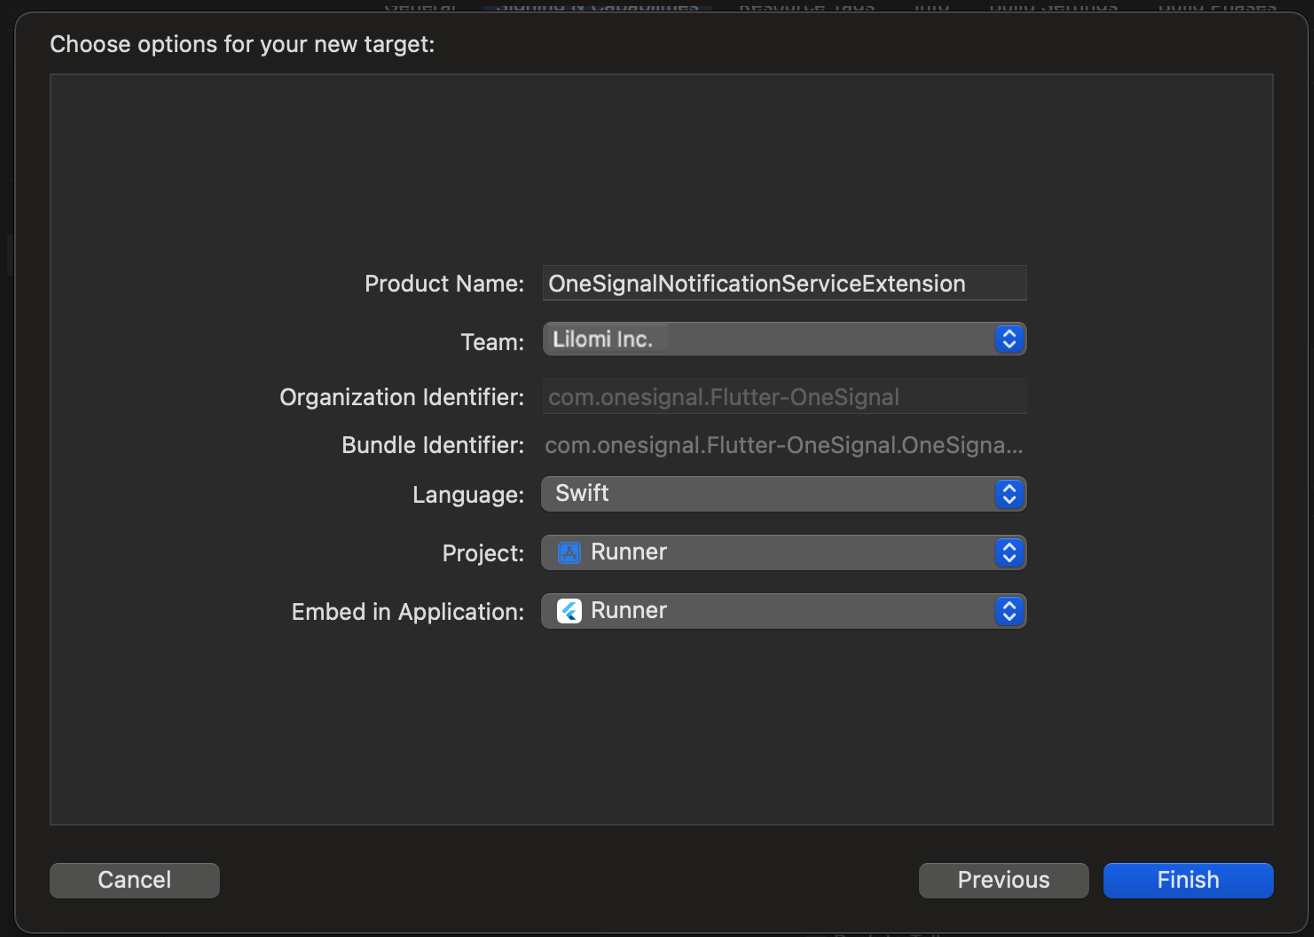
OneSignalNotificationServiceExtension and press Finish.
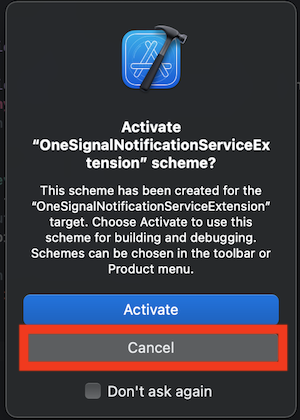
By canceling, you keep debugging your app instead of the extension you just created. If you activated by accident, you can switch back to debug your app target near the middle-top next to the device selector.
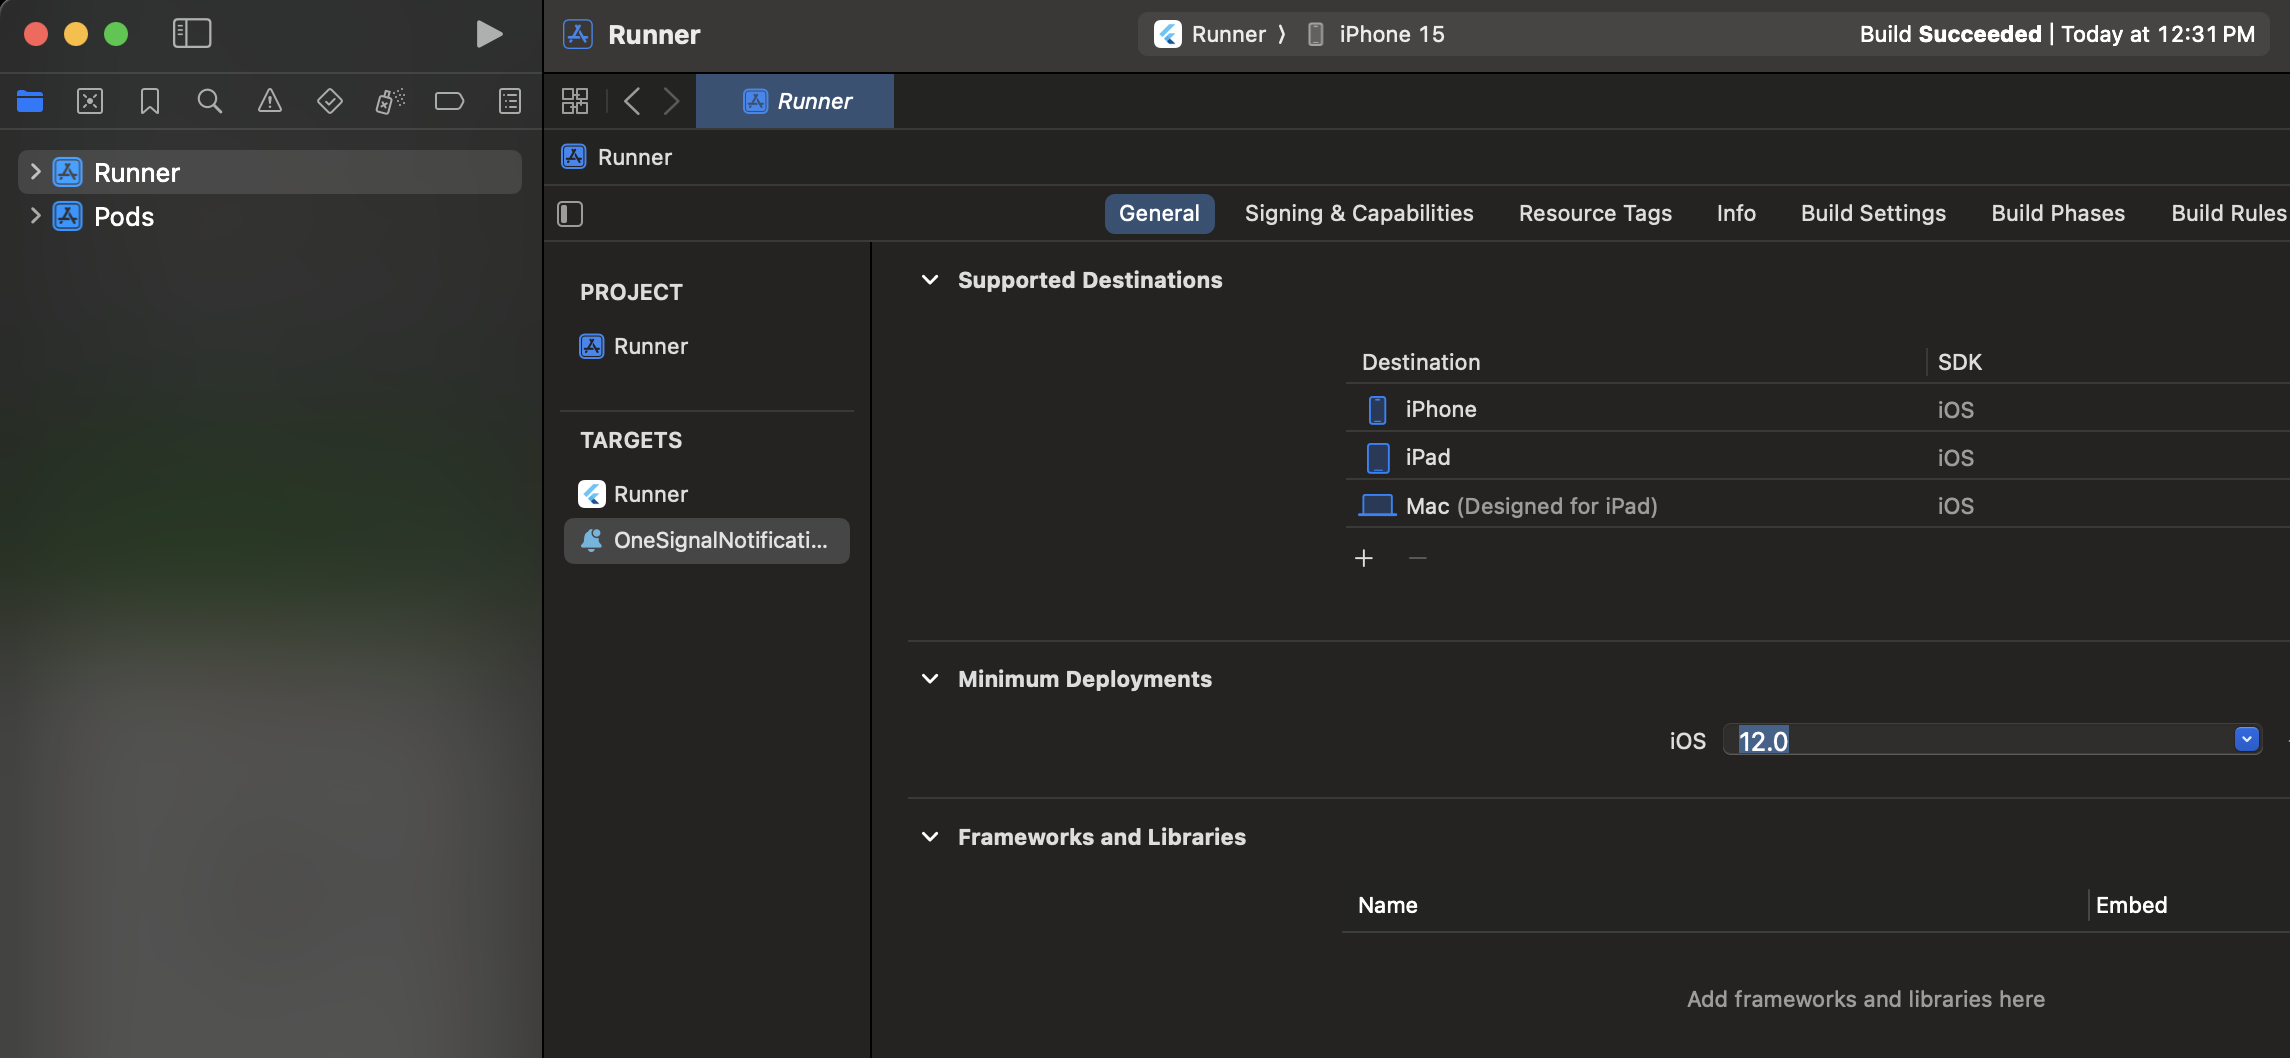
This should be the same value as your Main Application Target.
Add App Groups
App Groups allow your app and the OneSignalNotificationServiceExtension to communicate when a notification is received, even if your app is not active. This is required for badges and Confirmed Deliveries. Select your Main App Target > Signing & Capabilities > + Capability > App Groups.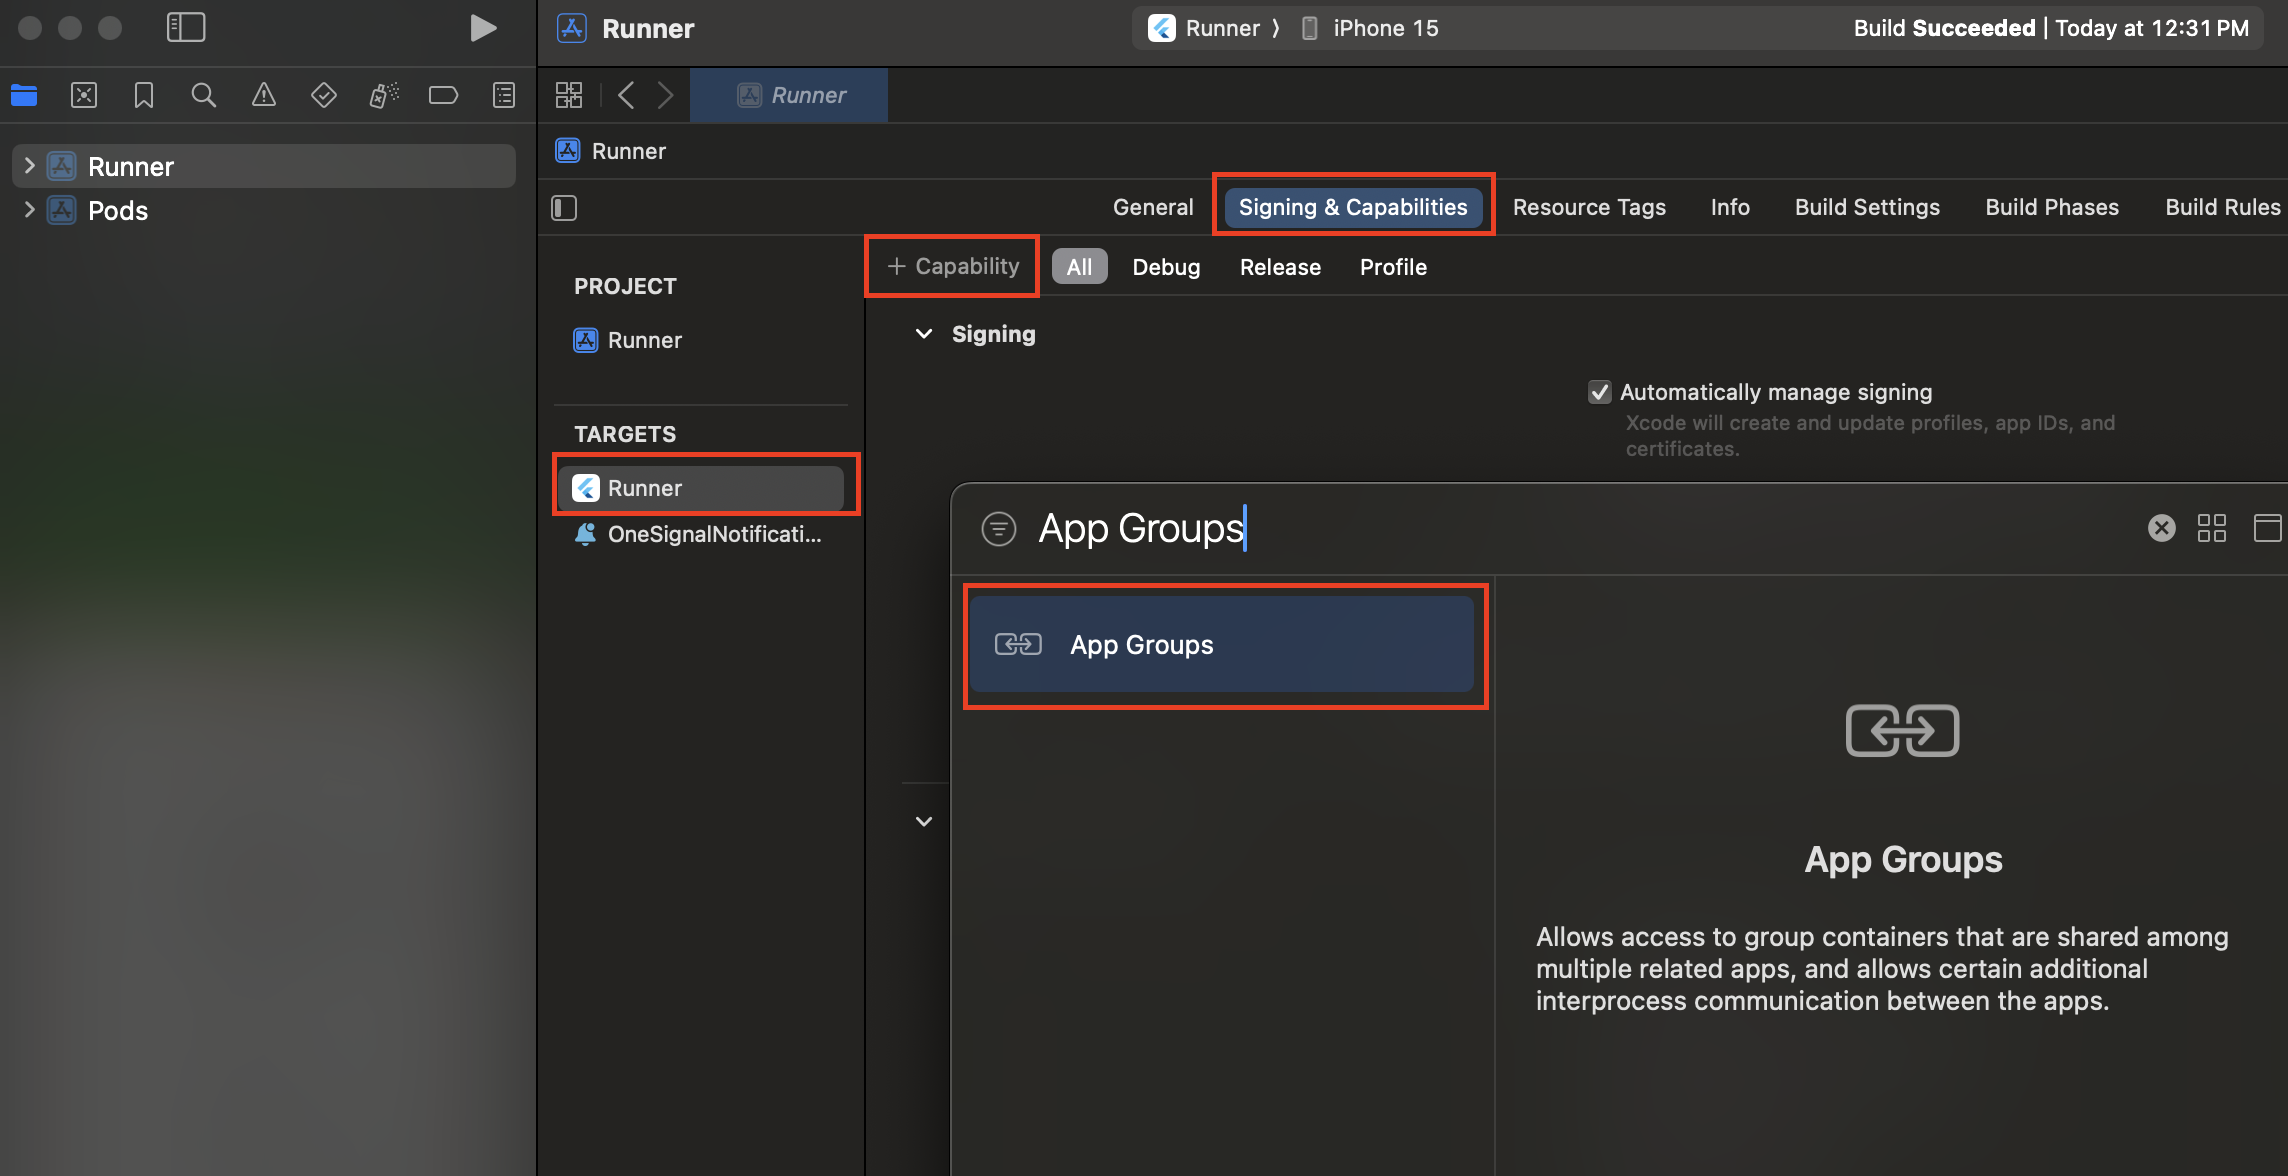
group.YOUR_BUNDLE_IDENTIFIER.onesignal where YOUR_BUNDLE_IDENTIFIER is the same as your Main Application “Bundle Identifier”.
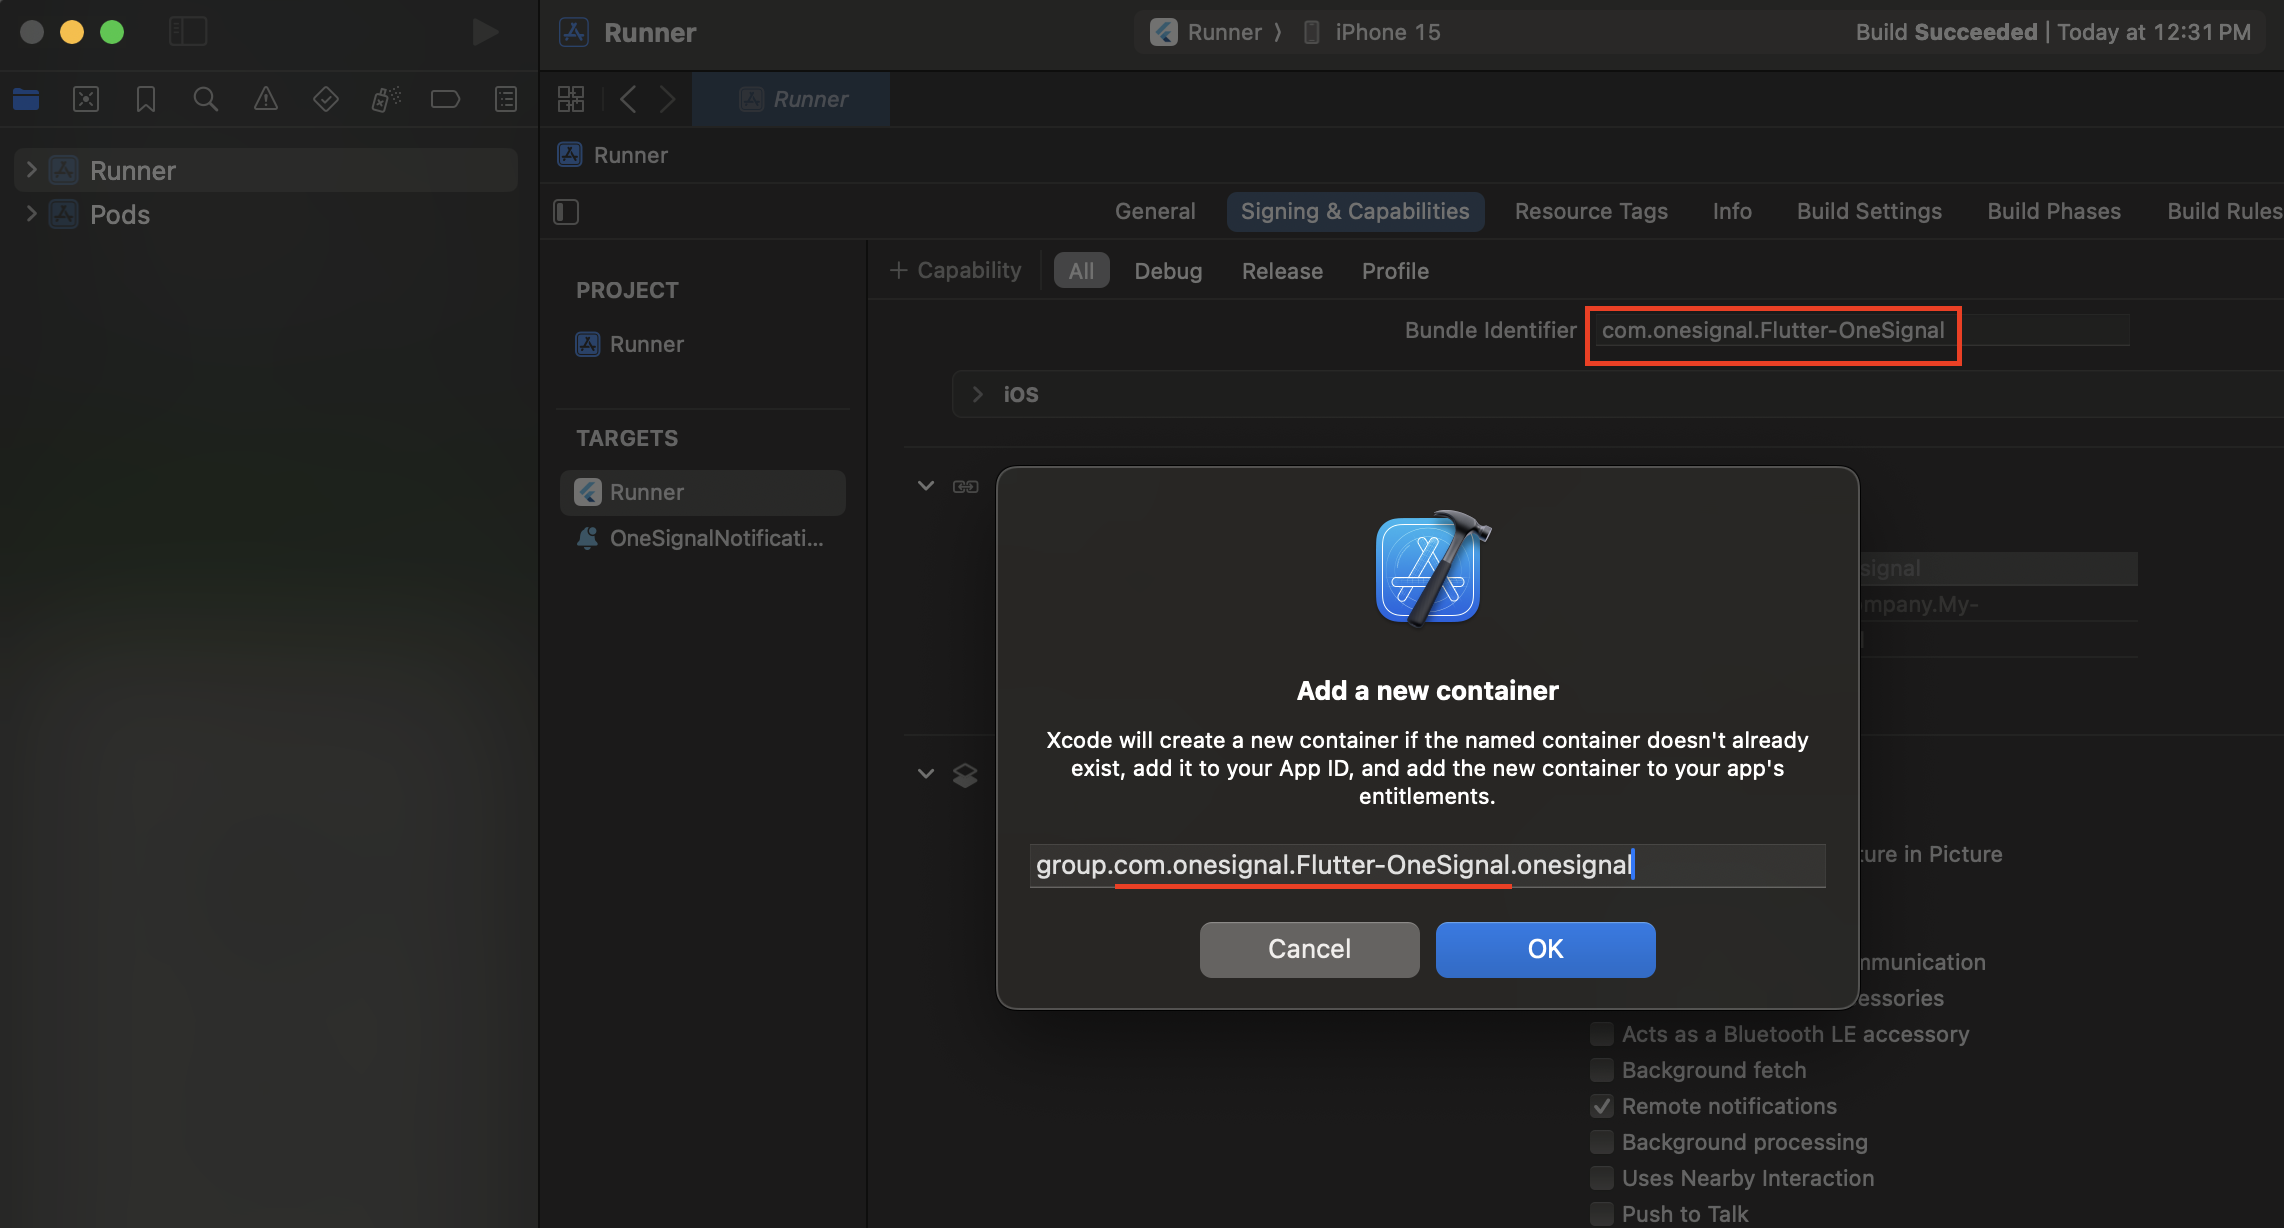
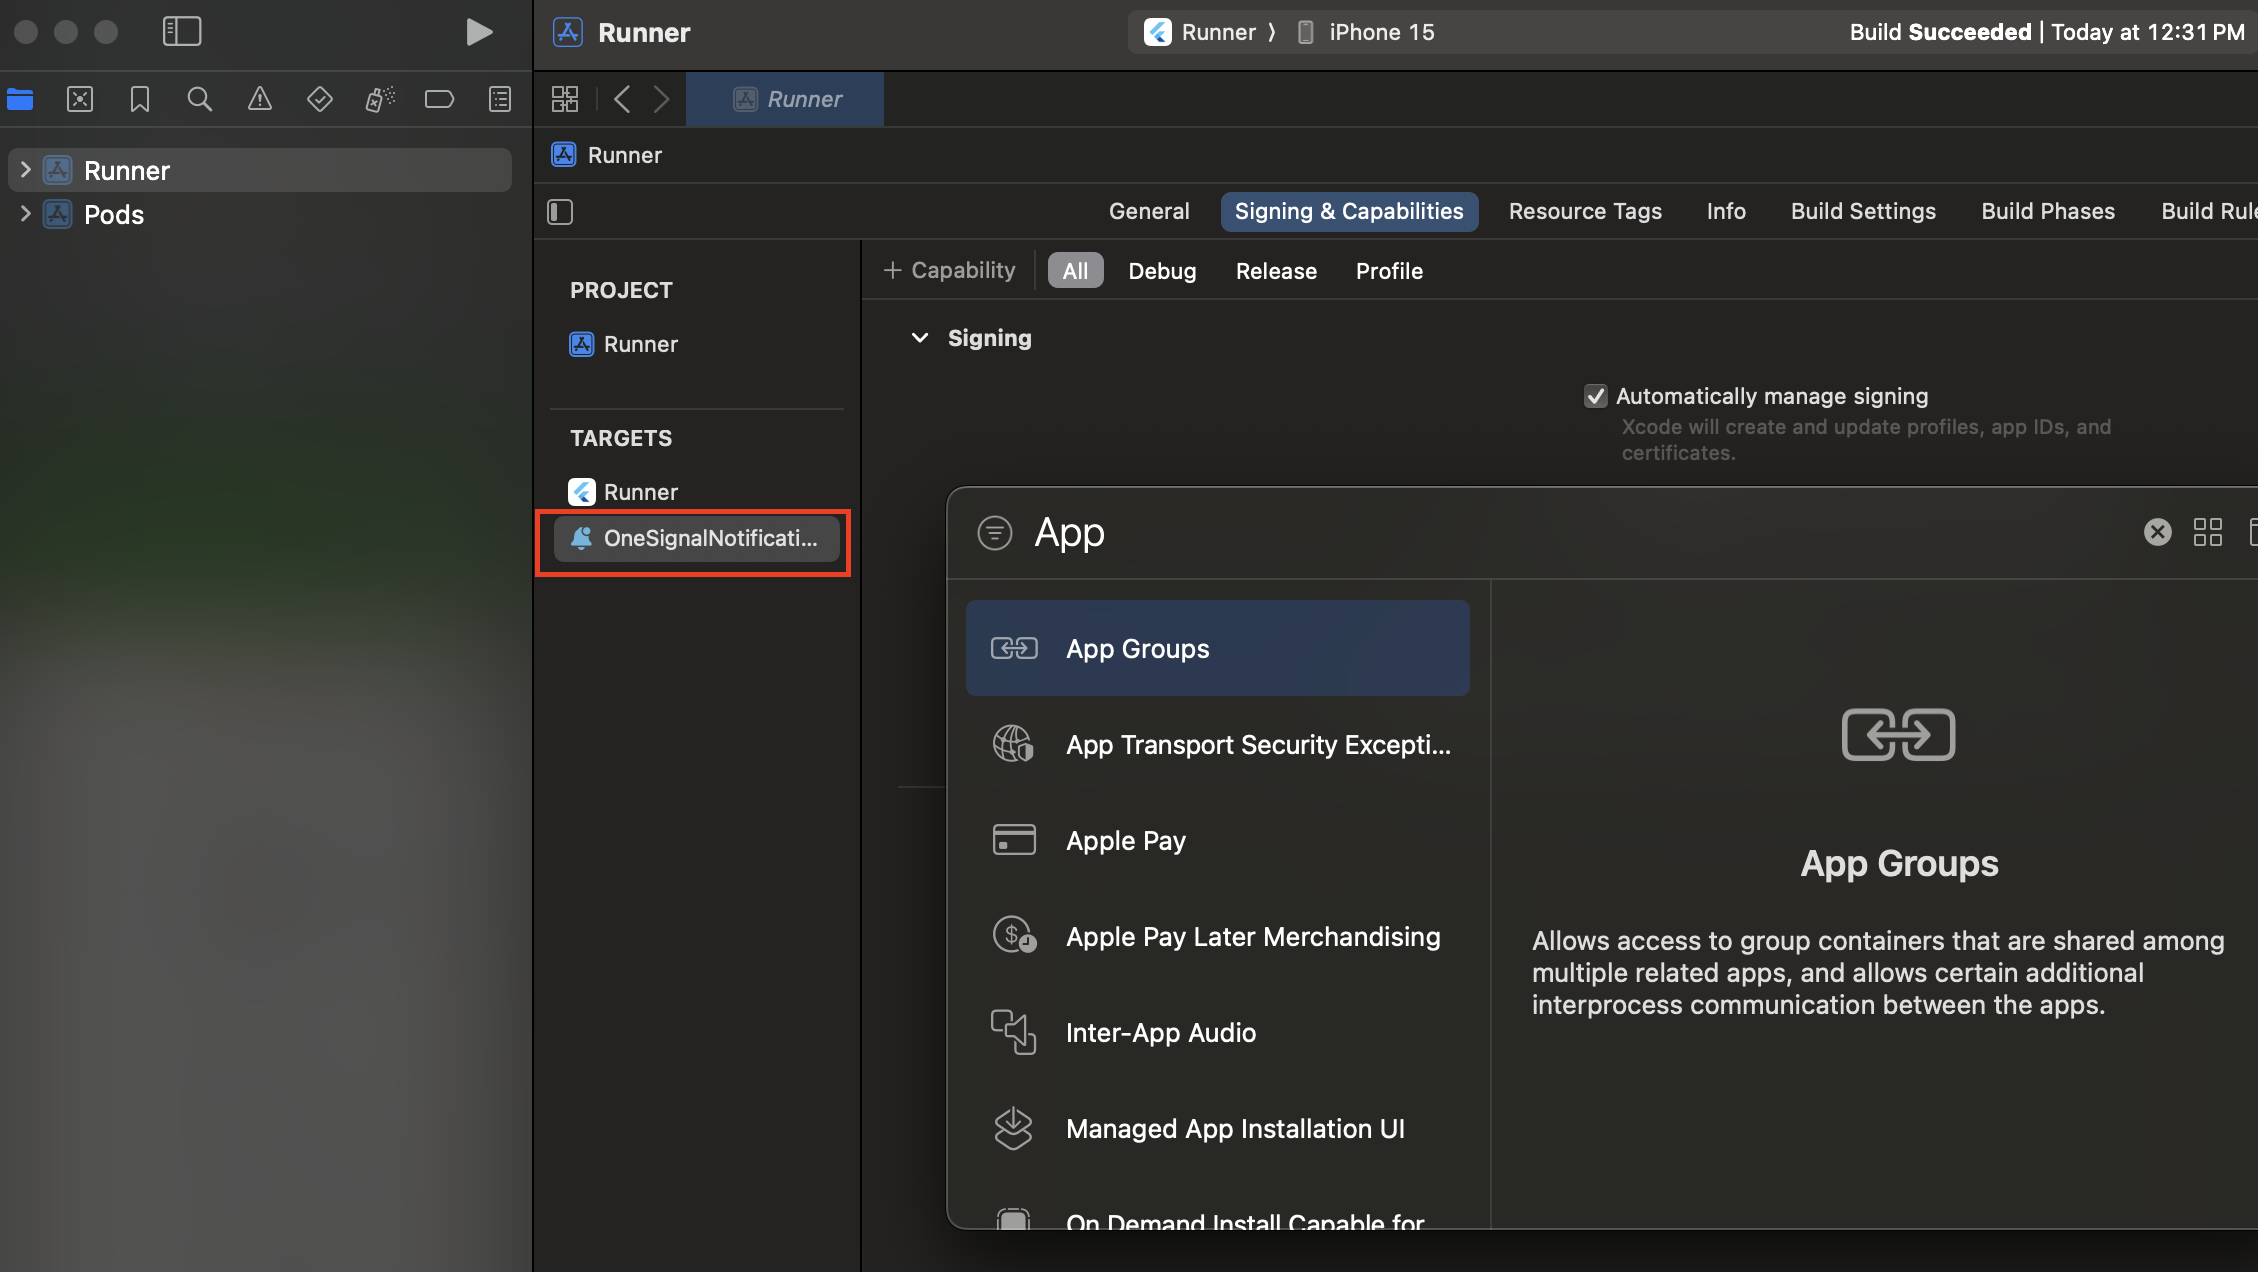
group.YOUR_BUNDLE_IDENTIFIER.onesignal where YOUR_BUNDLE_IDENTIFIER is the same as your Main Application “Bundle Identifier”.
DO NOT INCLUDE OneSignalNotificationServiceExtension.
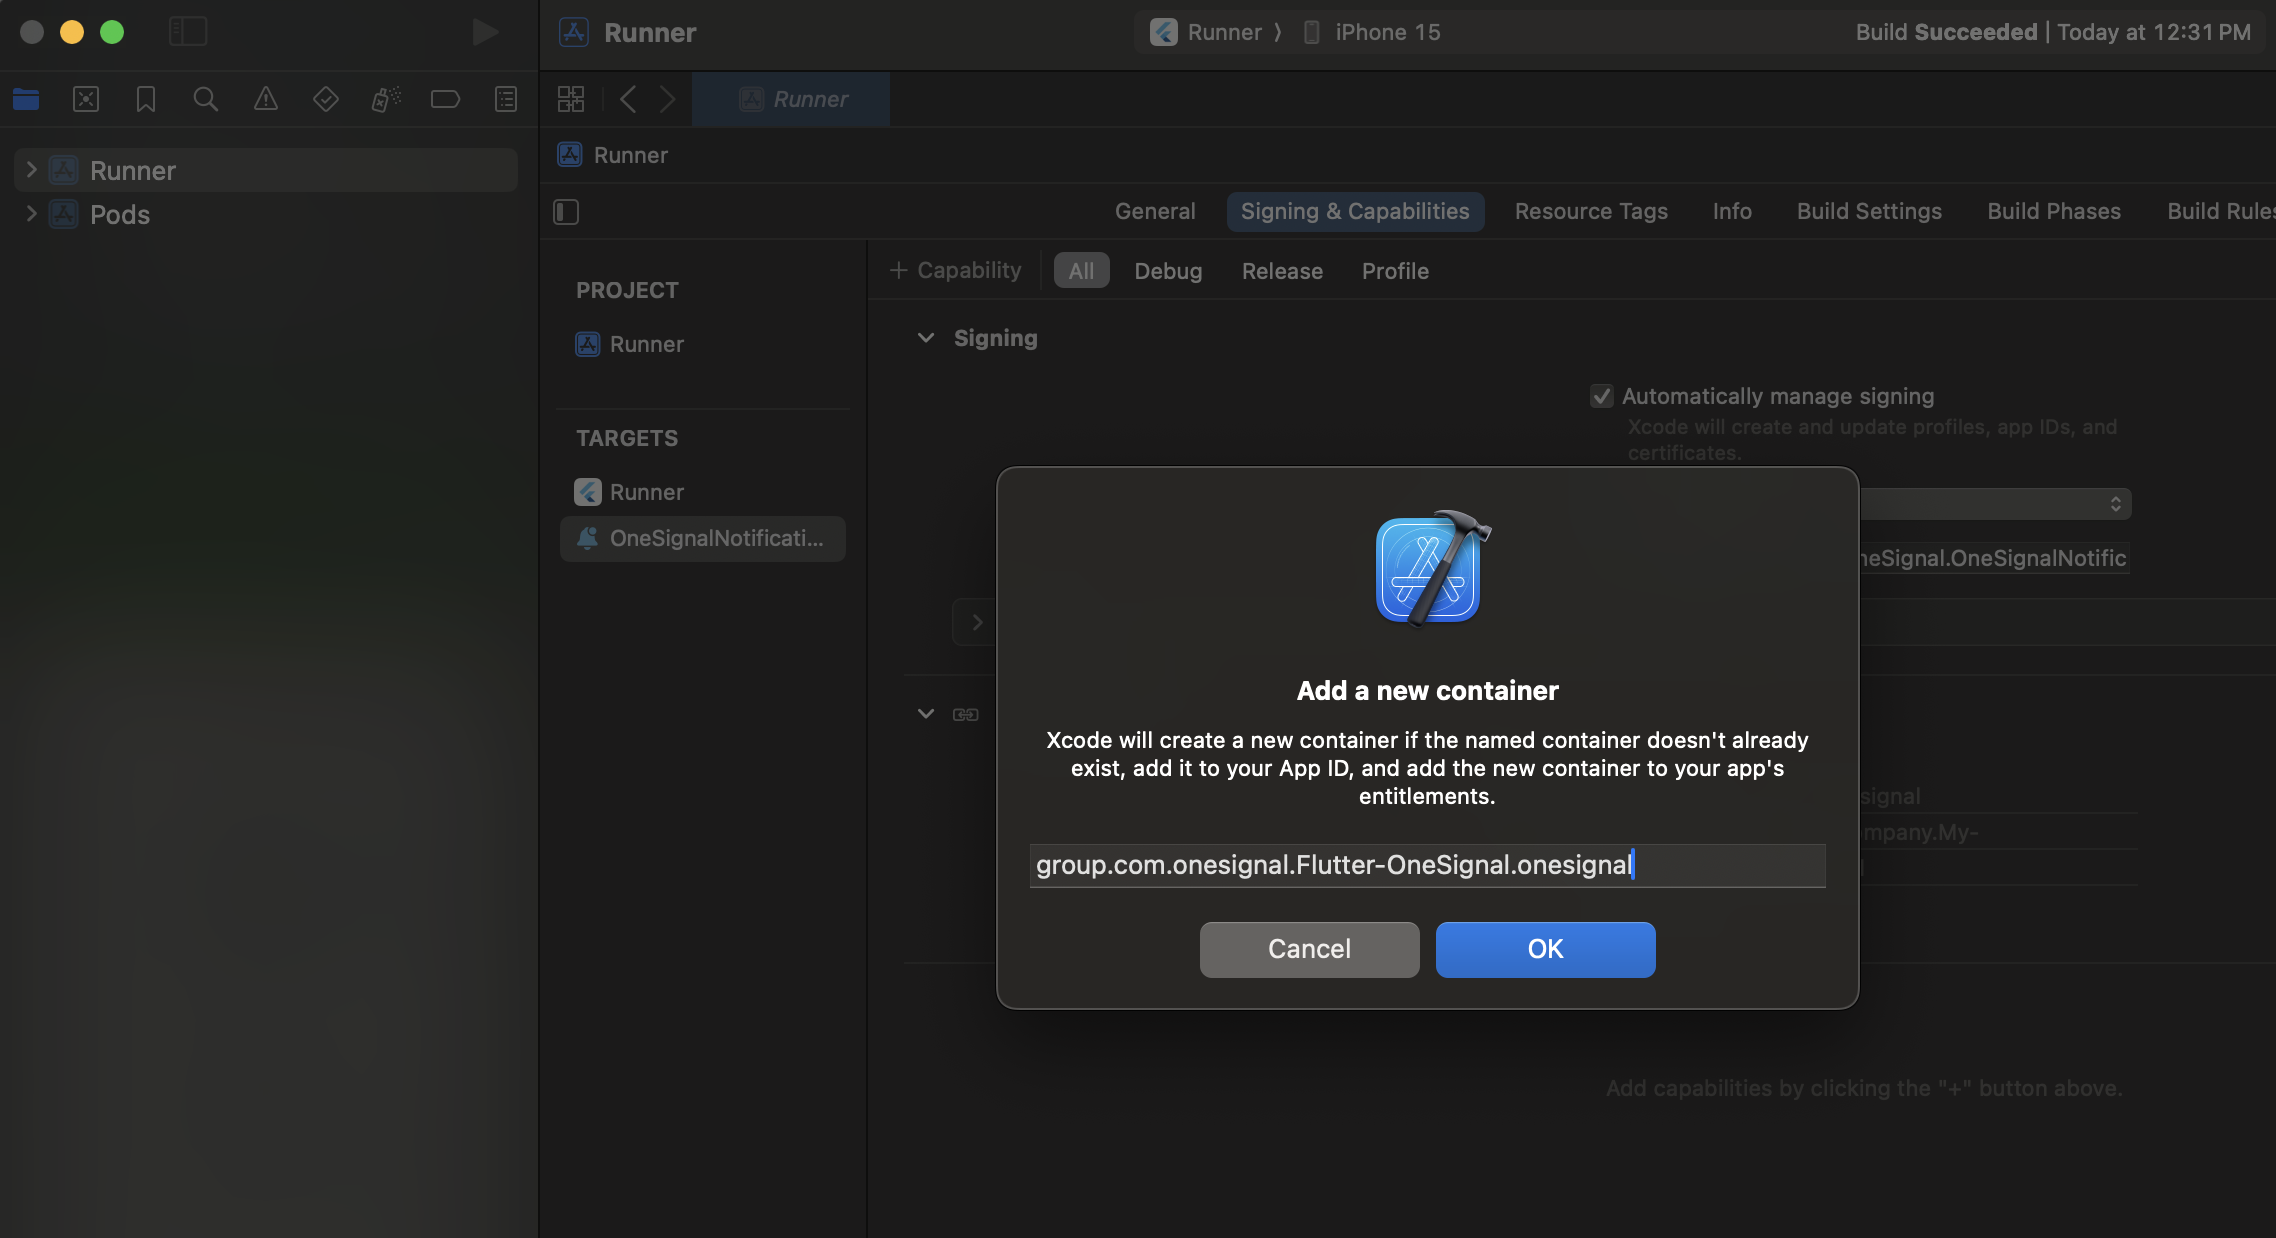
Do not include OneSignalNotificationServiceExtension
Optional instructions to setup custom App Group Name
Optional instructions to setup custom App Group Name
group.{your_bundle_id}.onesignal).Open your Info.plist file and add a new OneSignal_app_groups_key as a String type.Enter the group name you checked in the last step as it’s value.Make sure to do the same for the Info.plist under the OneSignalNotificationServiceExtension folder.Add OneSignal SDK to the OneSignalNotificationServiceExtension
Update yourios/Podfile to include:
Podfile make sure you have platform :ios, '15.0'. - Or a newer iOS version if your app requires it.
cd to the ios directory, and run pod install.
If you see the error below, add use_frameworks! to the top of your podfile and try again.
OneSignalNotificationServiceExtension Code
In the Xcode project navigator, select the OneSignalNotificationServiceExtension folder and open theNotificationService.m or NotificationService.swift file.
Replace the whole file’s contents with the following code.
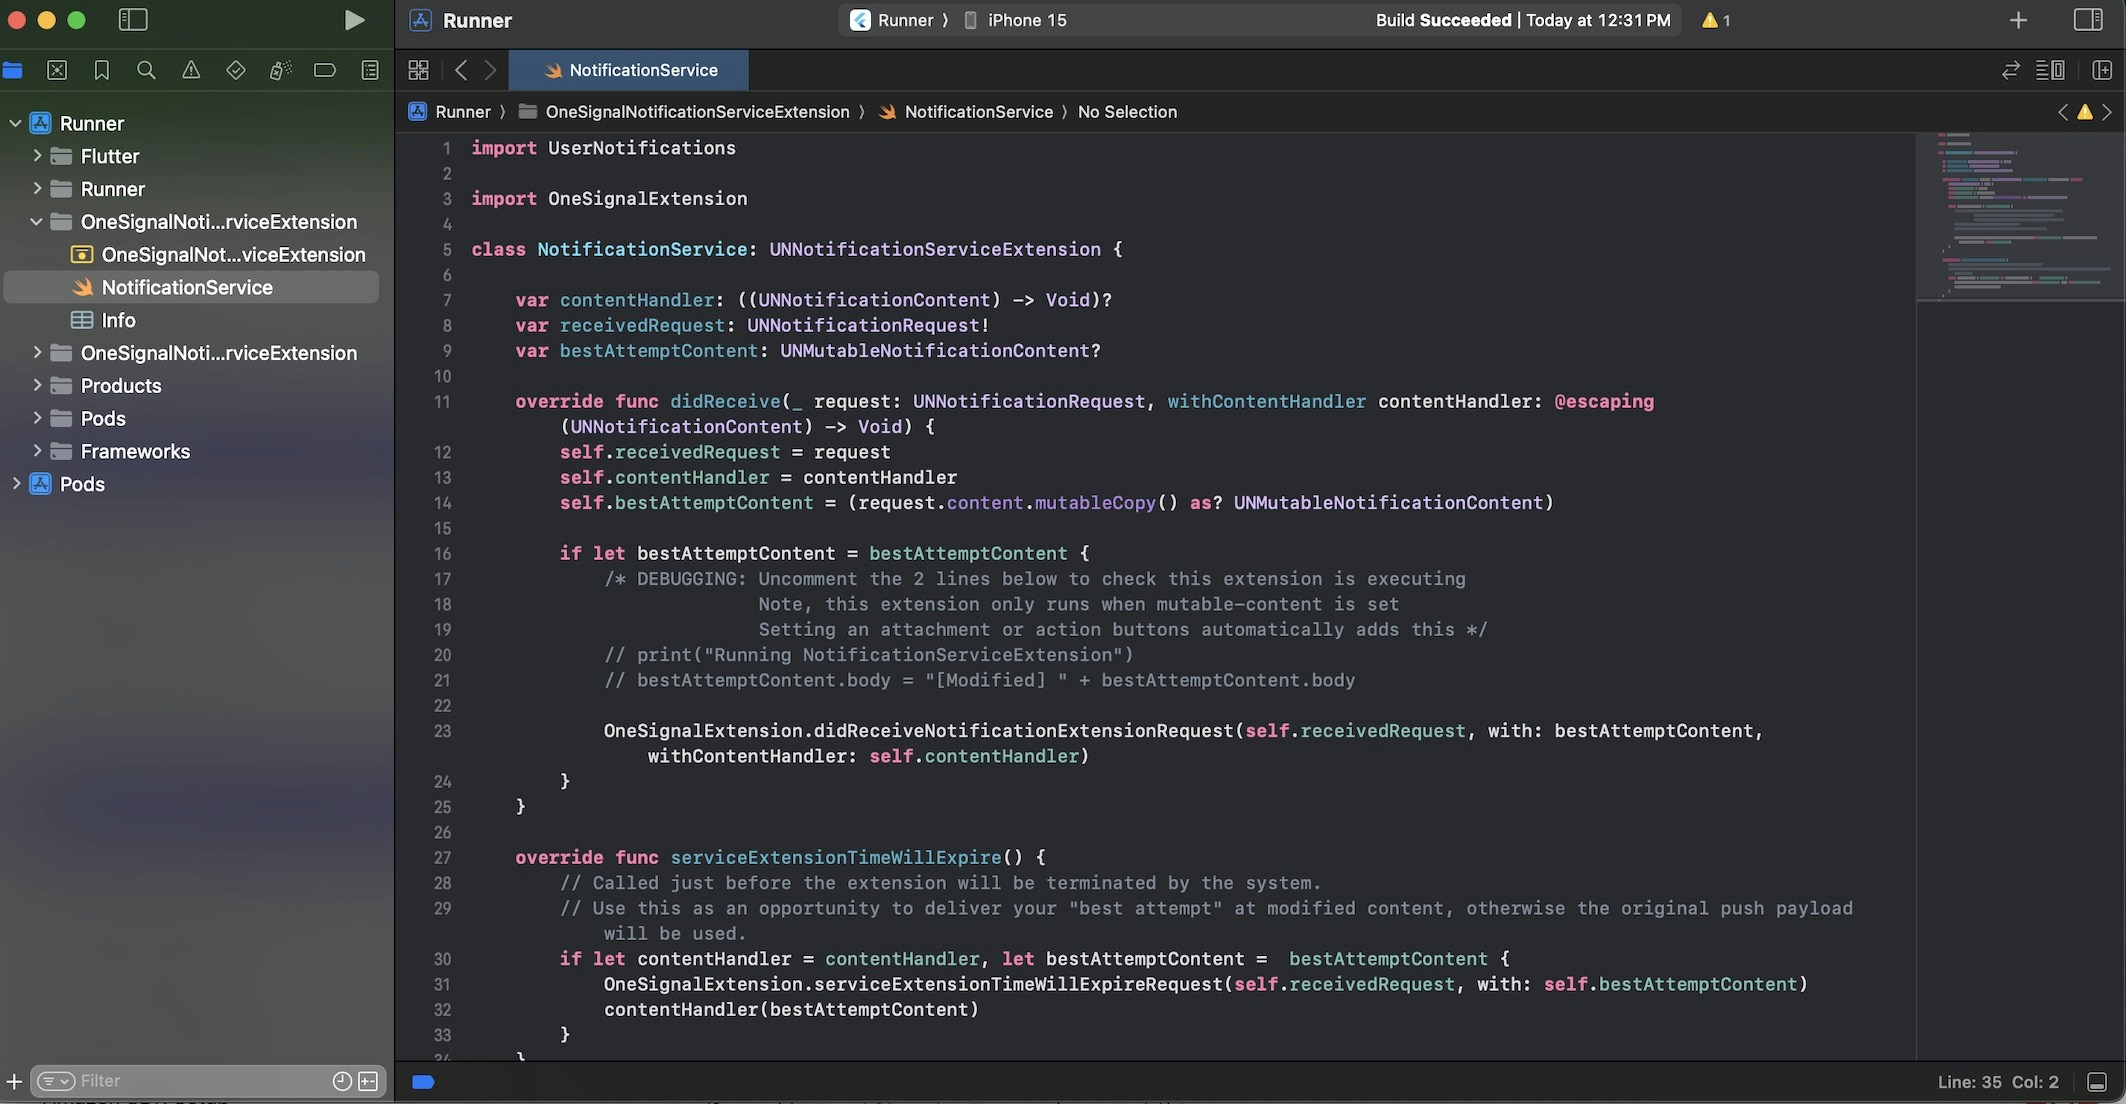
Example of the NotificationService.swift file.
Testing the OneSignal SDK integration
This guide helps you verify that your OneSignal SDK integration is working correctly by testing push notifications, subscription registration, and in-app messaging.Check mobile subscriptions
Launch your app on a test device.
requestPermission method during initialization.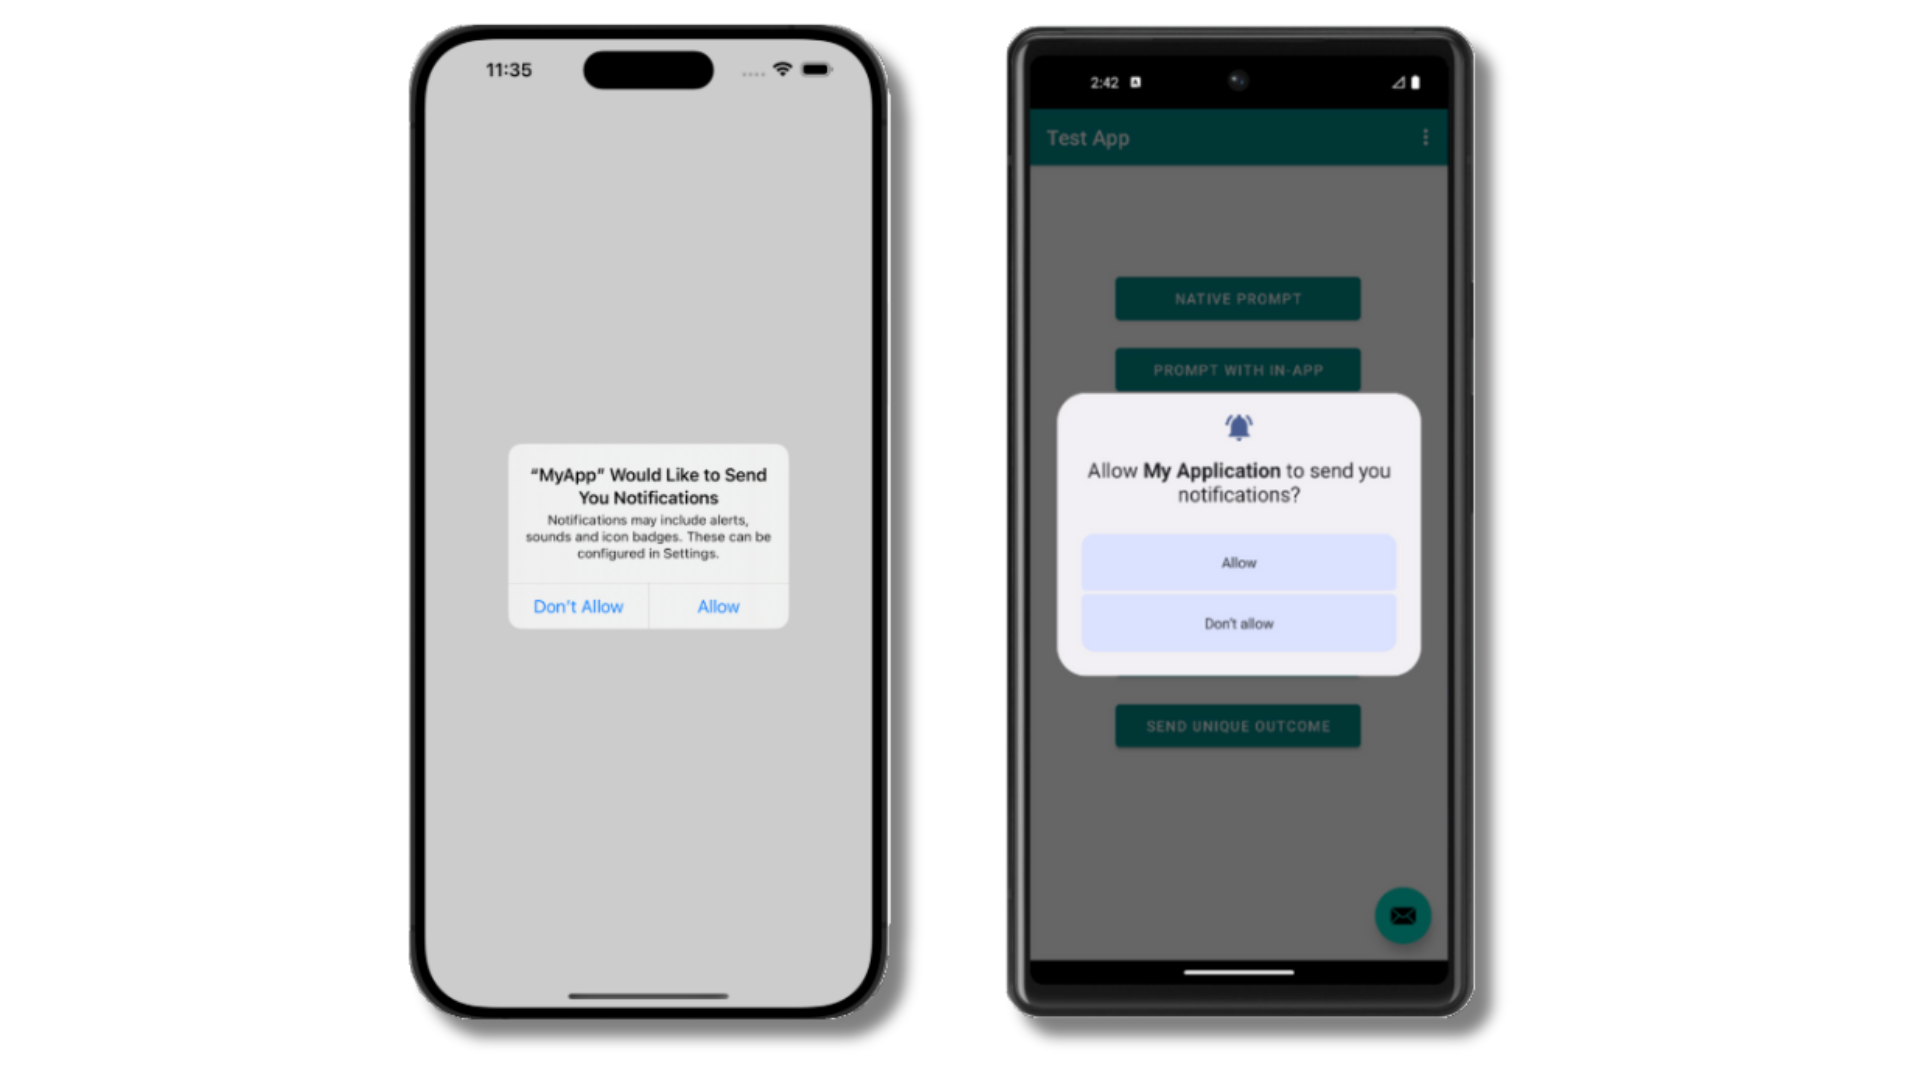
iOS and Android push permission prompts
Check your OneSignal dashboard
- Go to Audience > Users & subscriptions > Subscriptions.
- You should see a new entry with the status “Never Subscribed”.
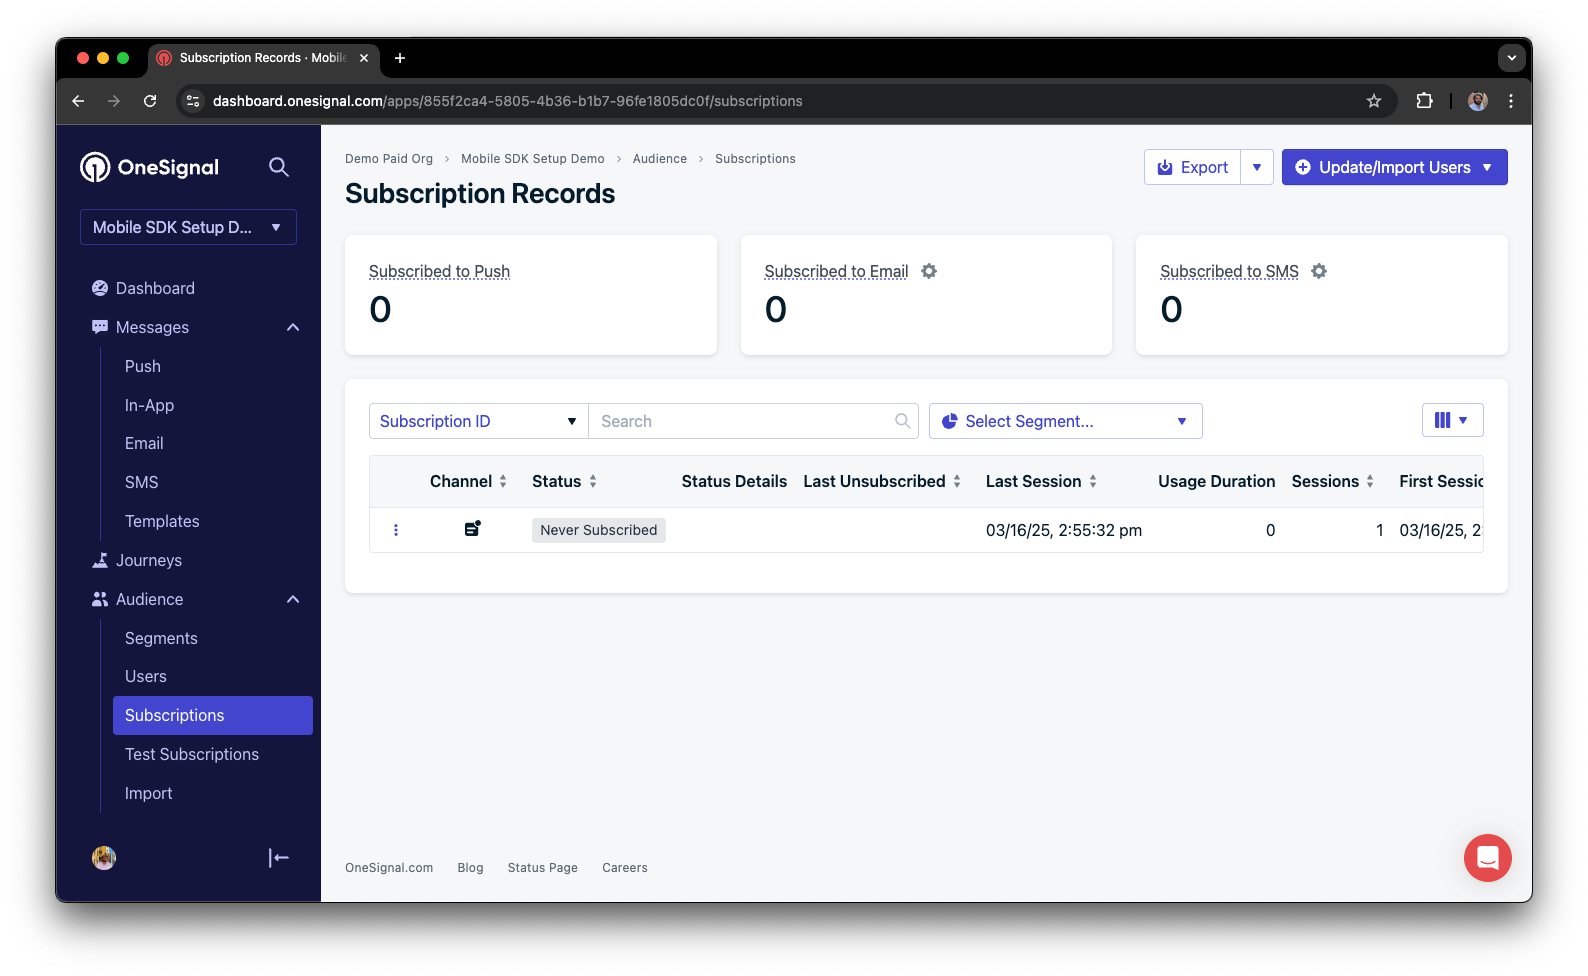
Dashboard showing subscription with 'Never Subscribed' status
Return to the app and tap Allow on the prompt.
Refresh the OneSignal dashboard Subscription's page.
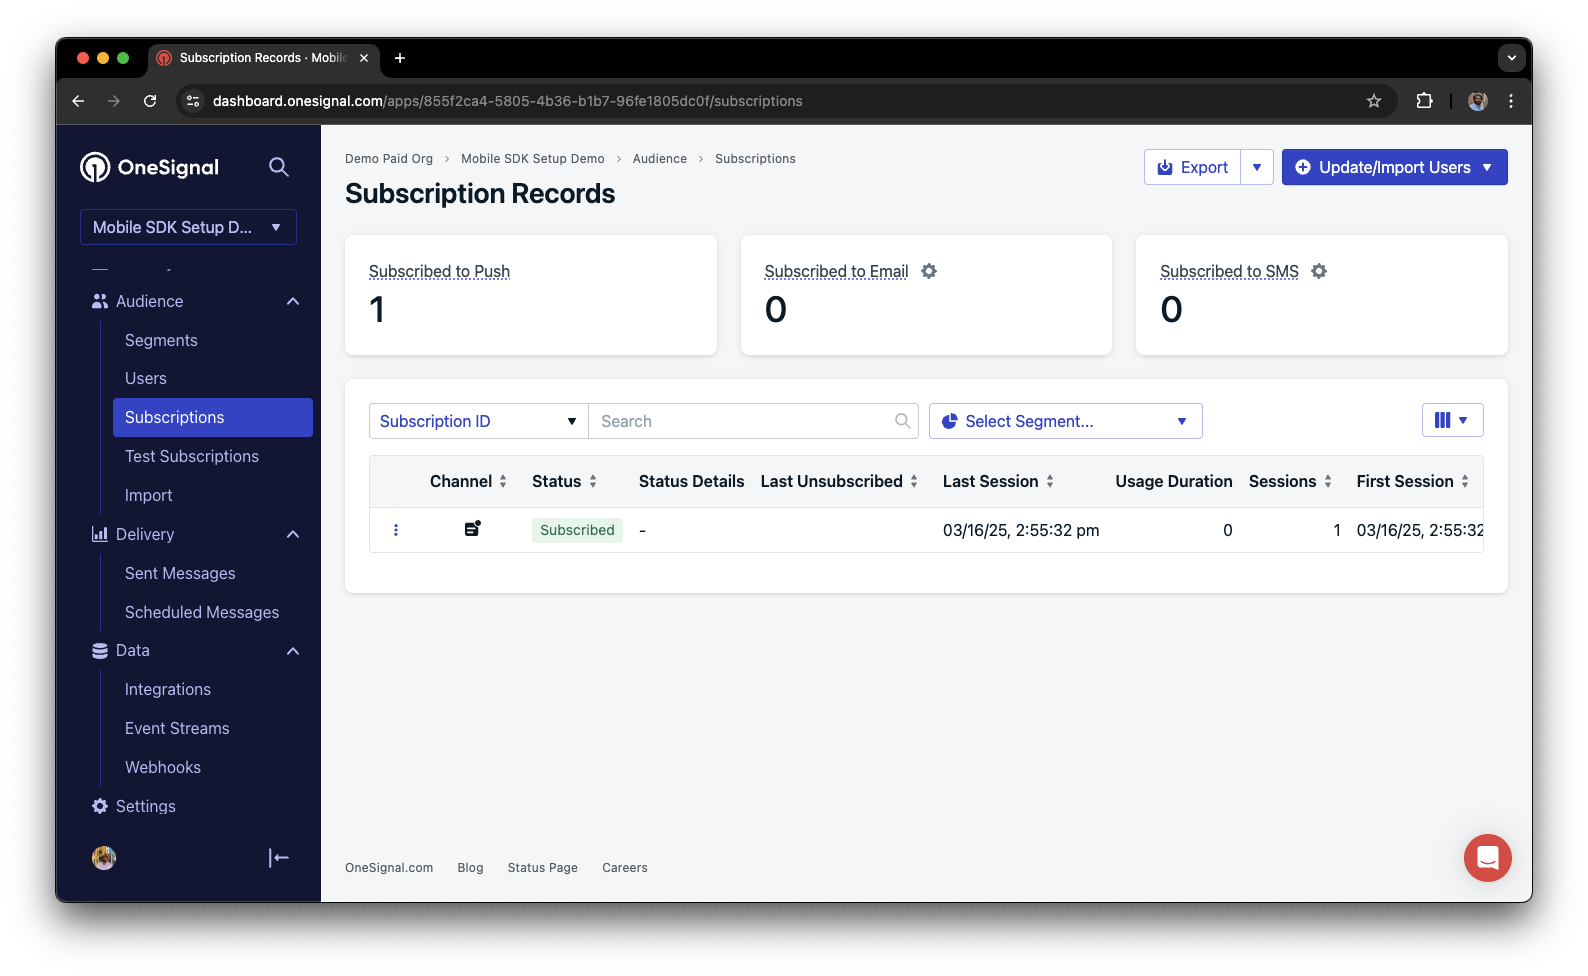
Dashboard showing subscription with 'Subscribed' status
Set up test users
test users are helpful for testing a push notification before sending a message.Add to Test Users.

Adding a device to Test Users
Name your subscription.
Create a test users segment.
Name the segment.
Test Users (the name is important because it will be used later).Add the Test Users filter and click Create Segment.
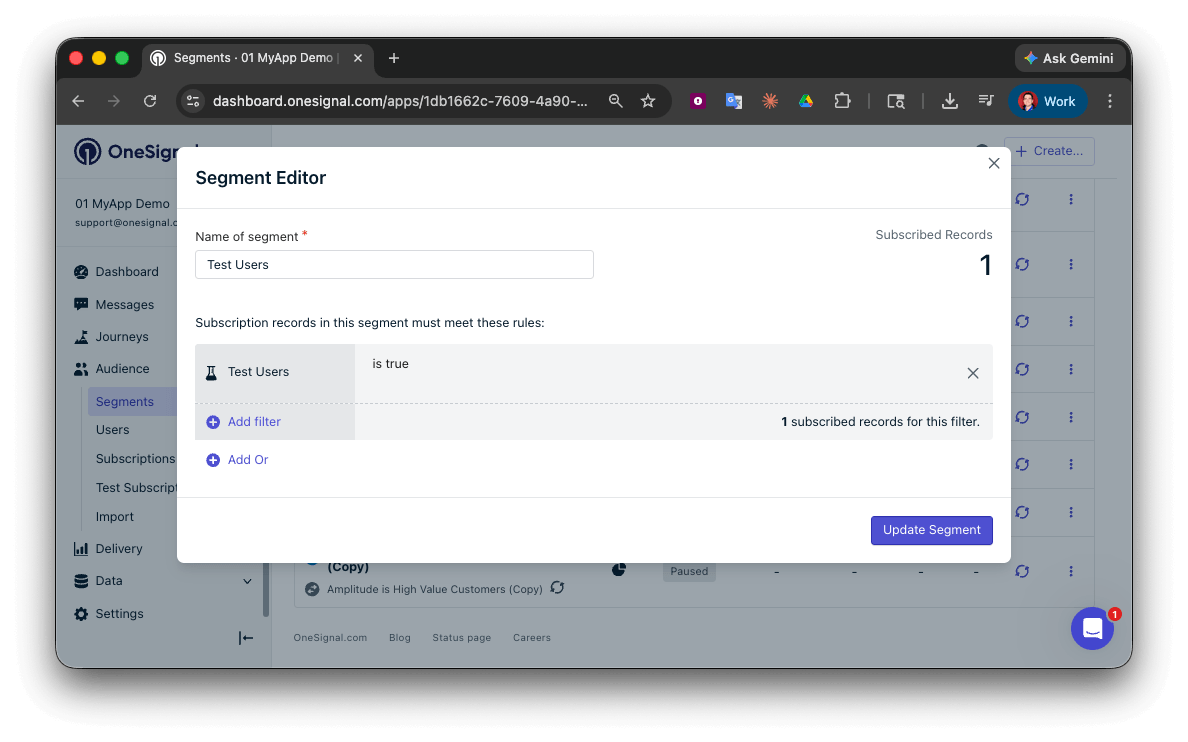
Creating a 'Test Users' segment with the Test Users filter
Send test push via API
Get your App API Key and App ID.
Update the provided code.
YOUR_APP_API_KEY and YOUR_APP_ID in the code below with your actual keys. This code uses the Test Users segment we created earlier.Run the code.
Check images and confirmed receipt.
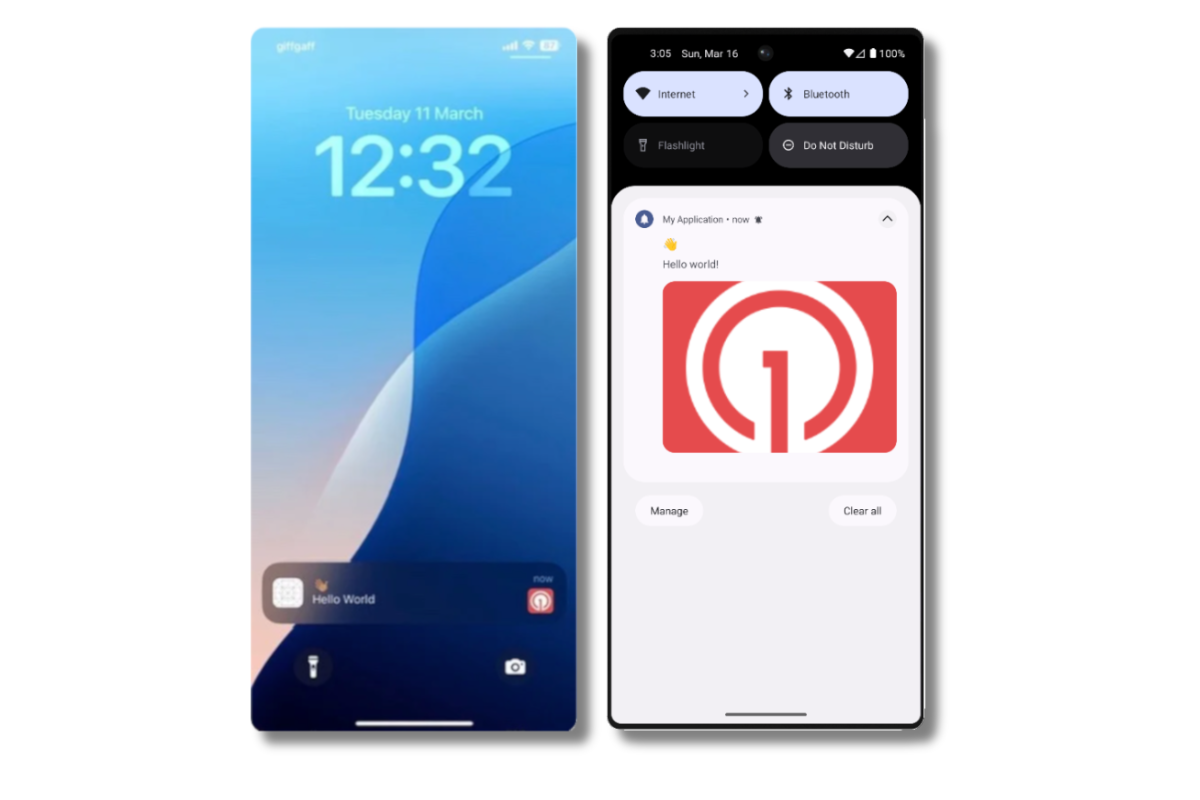
Push notification with image on iOS and Android
Check for confirmed receipt.
Send an in-app message
In-app messages let you communicate with users while they are using your app.Close or background your app on the device.
Create an in-app message.
- In your OneSignal dashboard, navigate to Messages > In-App > New In-App.
- Find and select the Welcome message.
- Set your Audience as the Test Users segment we used previously.
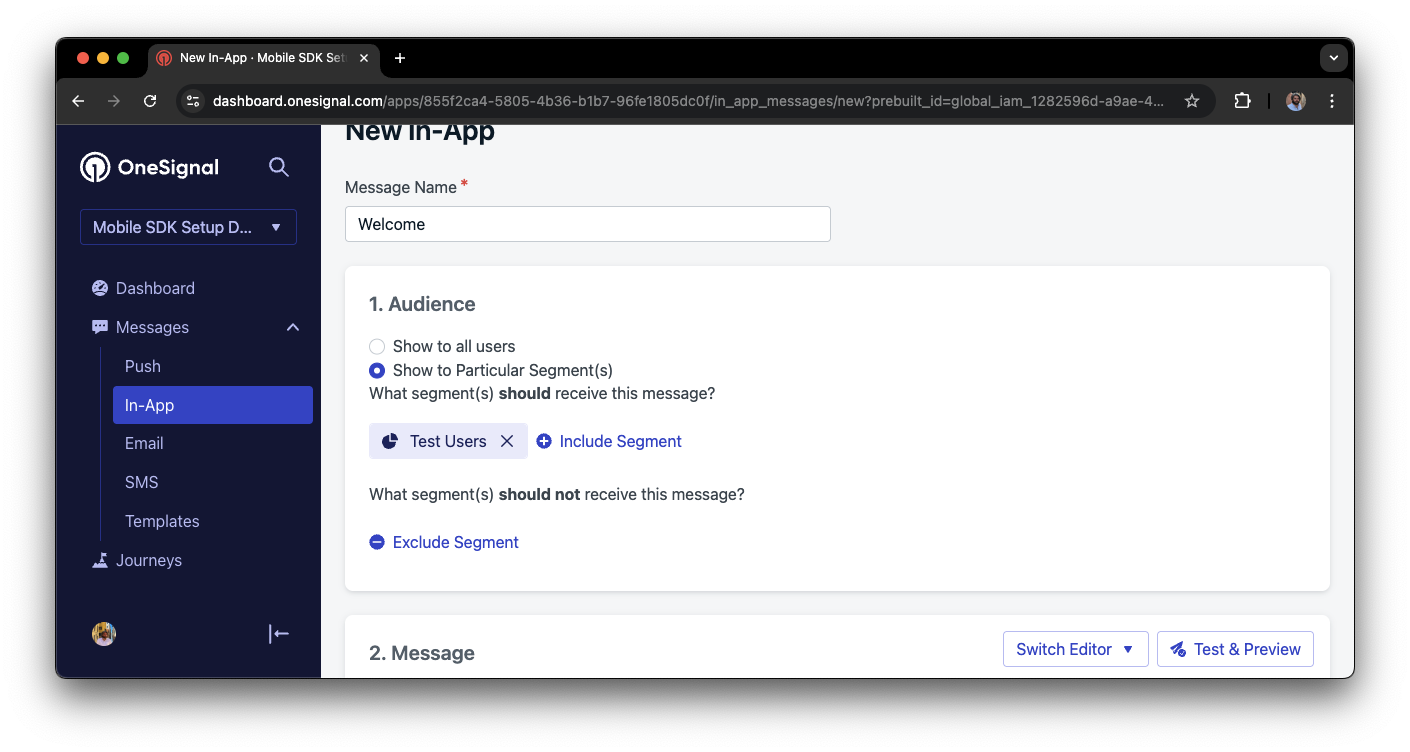
Targeting the 'Test Users' segment with an in-app message
Customize the message content if desired.
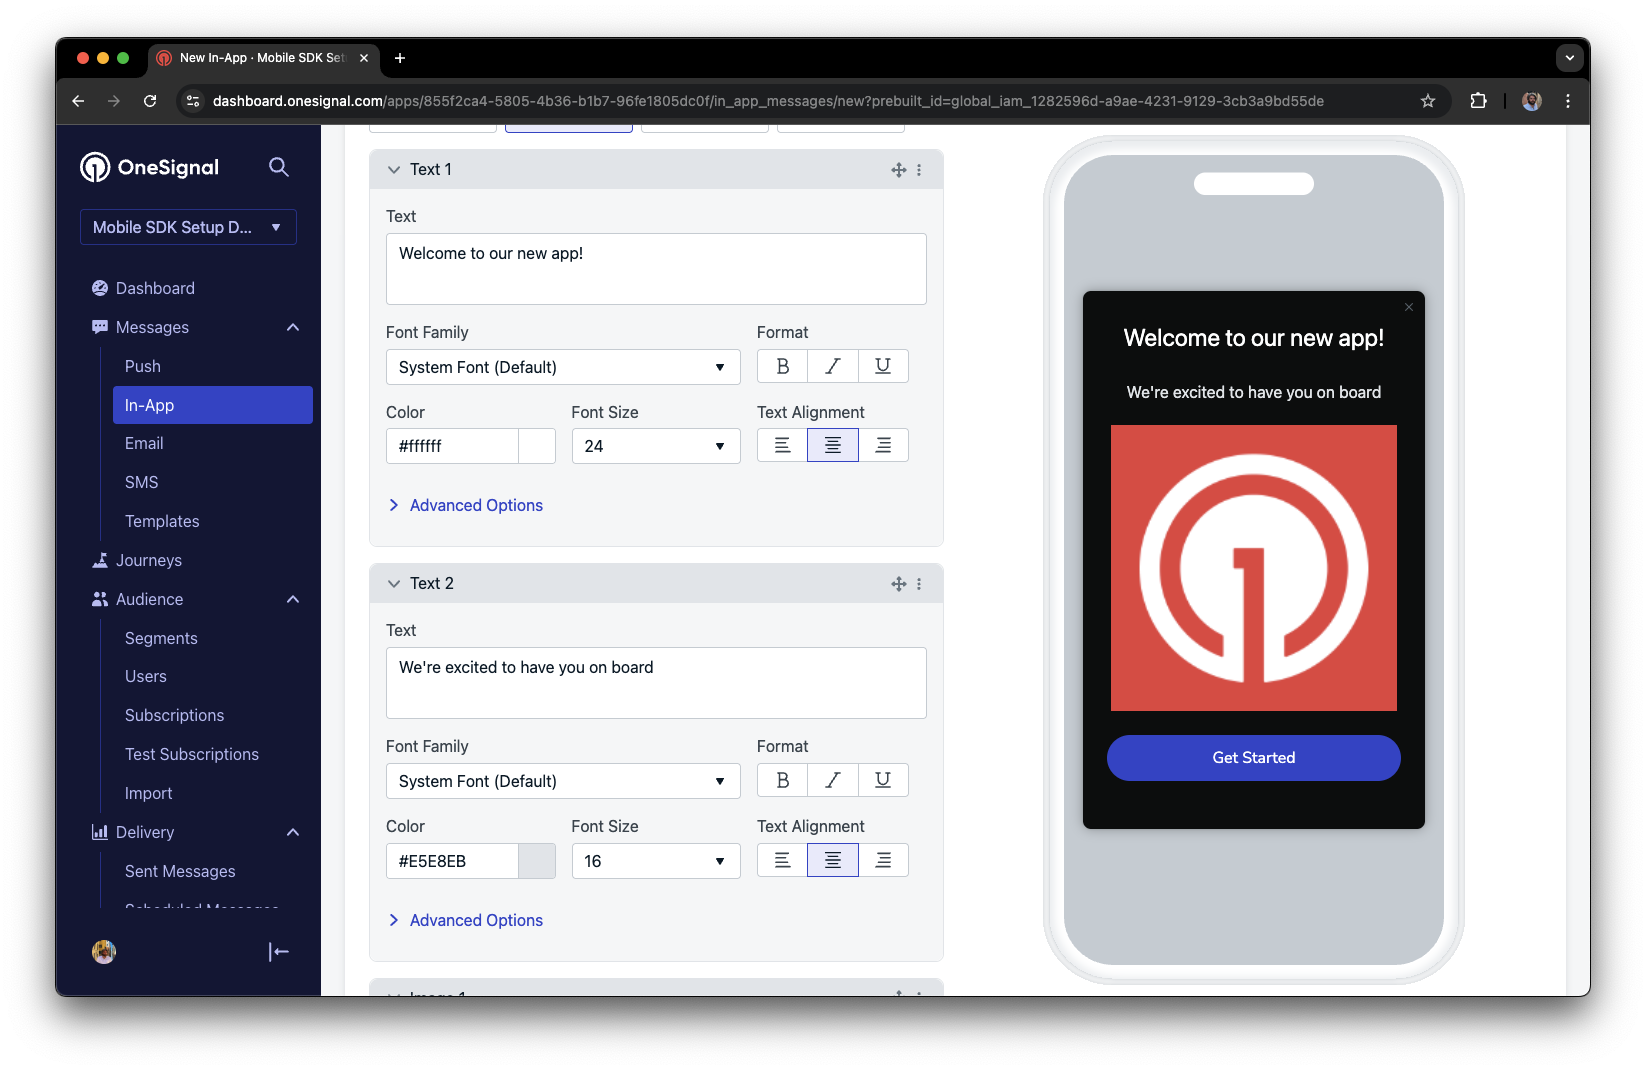
Example customization of in-app Welcome message
Set Trigger to 'On app open'.
Schedule frequency.
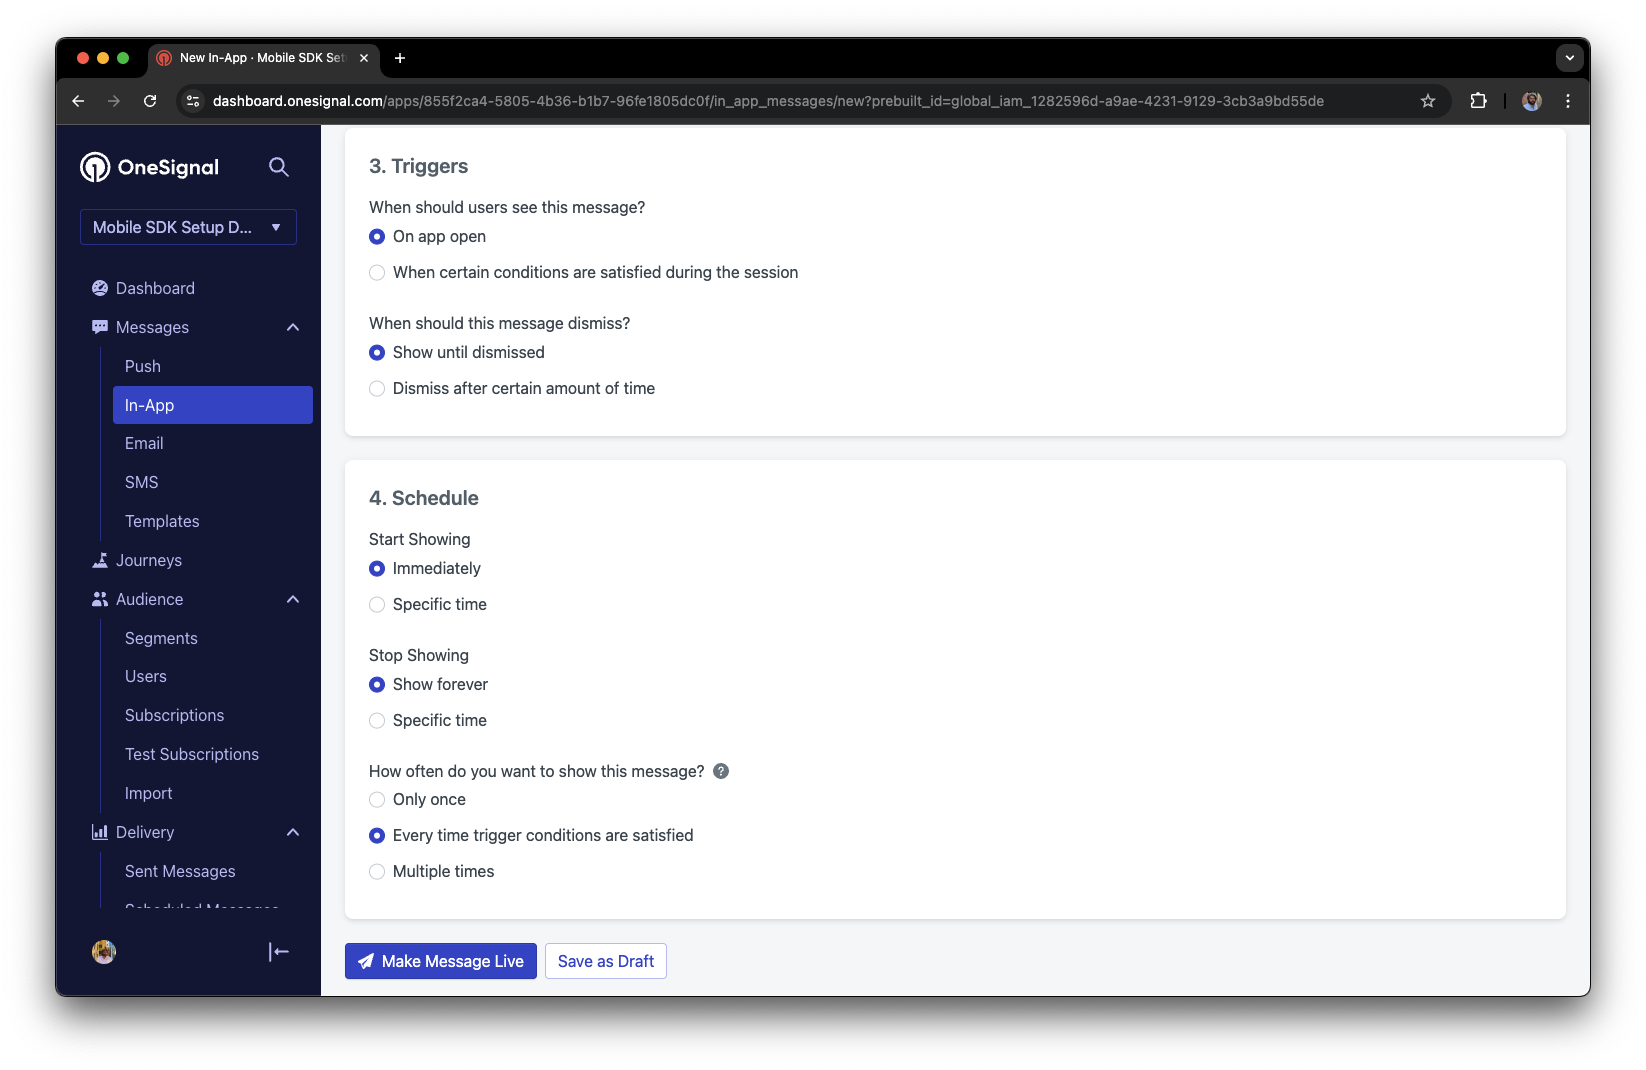
In-app message scheduling options
Make message live.
Open the app and see the message.
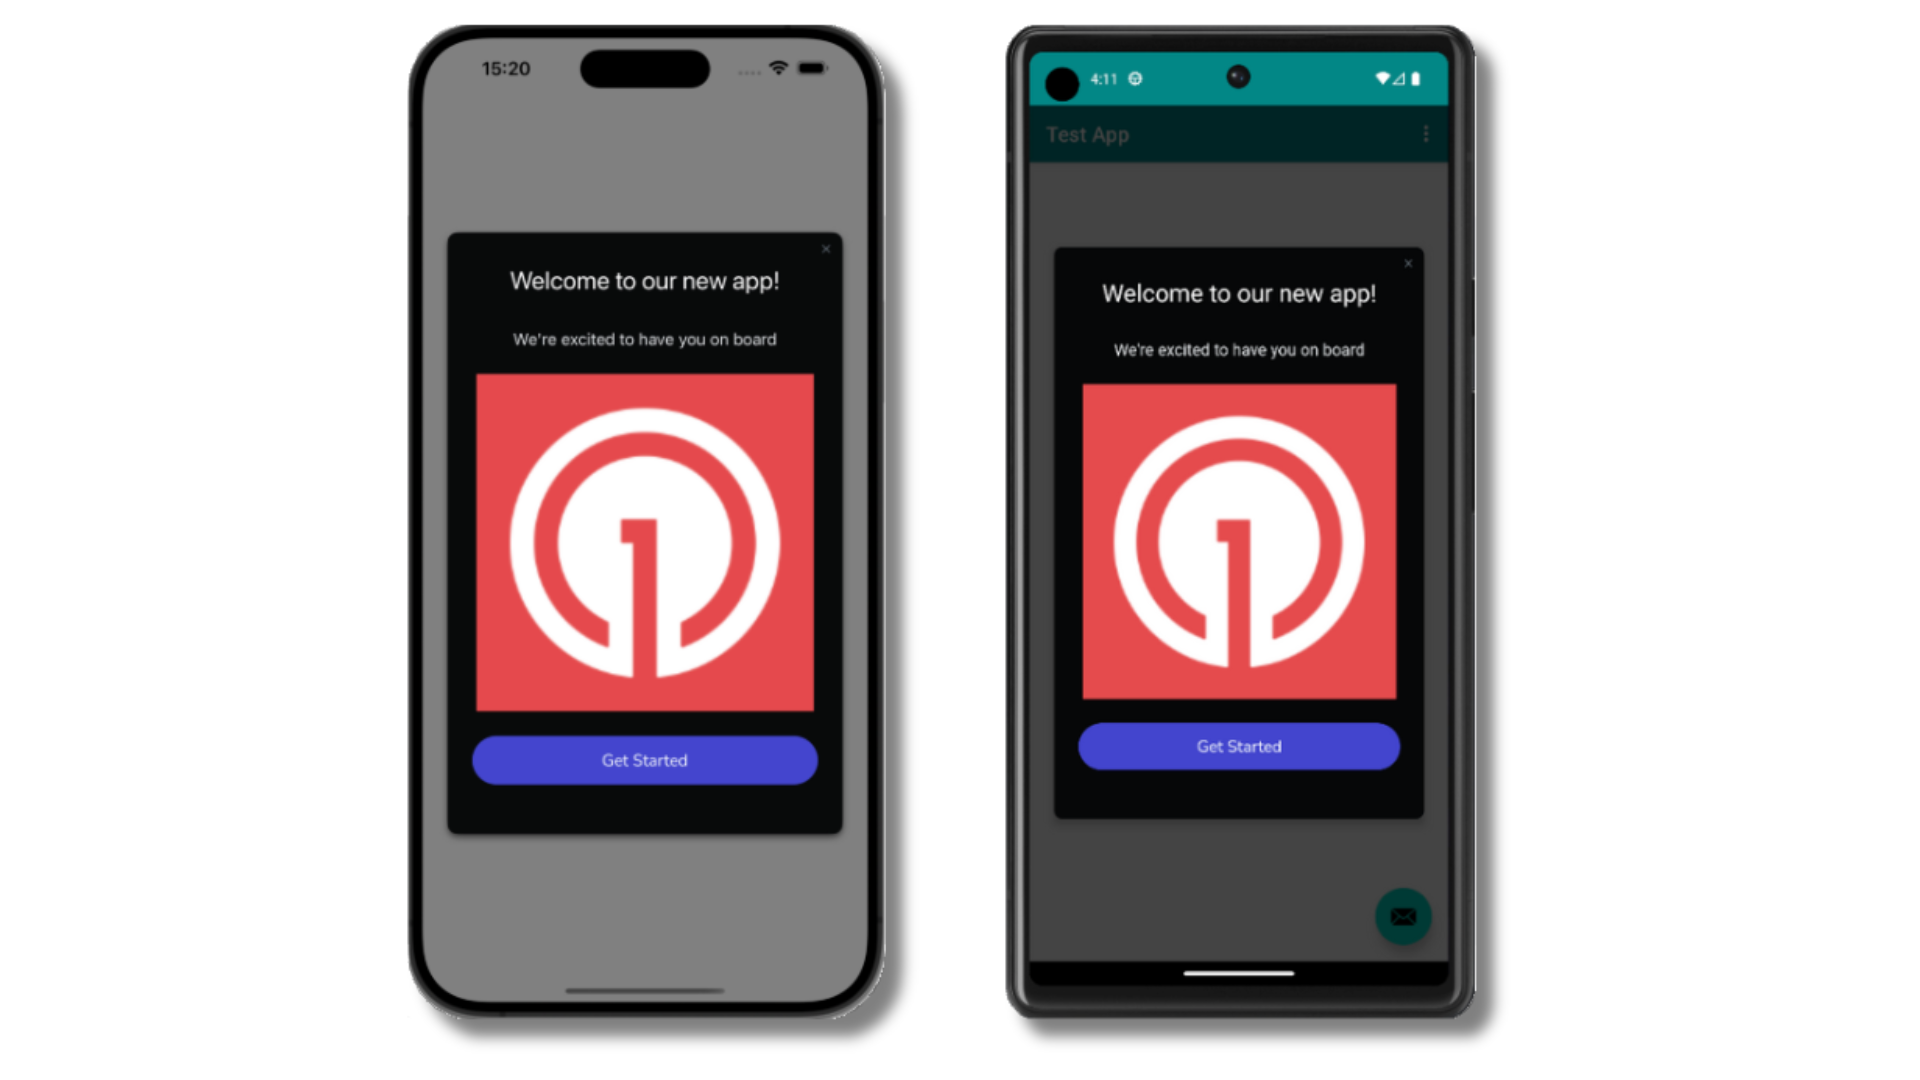
Welcome in-app message shown on devices
- Gathering Subscriptions, setting Test Users, and creating Segments.
- Sending Push with images and Confirmed receipt using Segments and our Create message API.
- Sending In-app messages.
User identification
Previously, we demonstrated how to create mobile Subscriptions. Now we’ll expand to identifying Users across all their subscriptions (including push, email, and SMS) using the OneSignal SDK. We’ll cover External IDs, tags, multi-channel subscriptions, privacy, and event tracking to help you unify and engage users across platforms.Assign External ID
Use an External ID to identify users consistently across devices, email addresses, and phone numbers using your backend’s user identifier. This ensures your messaging stays unified across channels and 3rd party systems (especially important for Integrations). Set the External ID with our SDK’slogin method each time they are identified by your app.
Add Tags
Tags are key-value pairs of string data you can use to store user properties (likeusername, role, or preferences) and events (like purchase_date, game_level, or user interactions). Tags power advanced Message Personalization and Segmentation allowing for more advanced use cases.
Set tags with our SDK addTag and addTags methods as events occur in your app.
In this example, the user reached level 6 identifiable by the tag called current_level set to a value of 6.
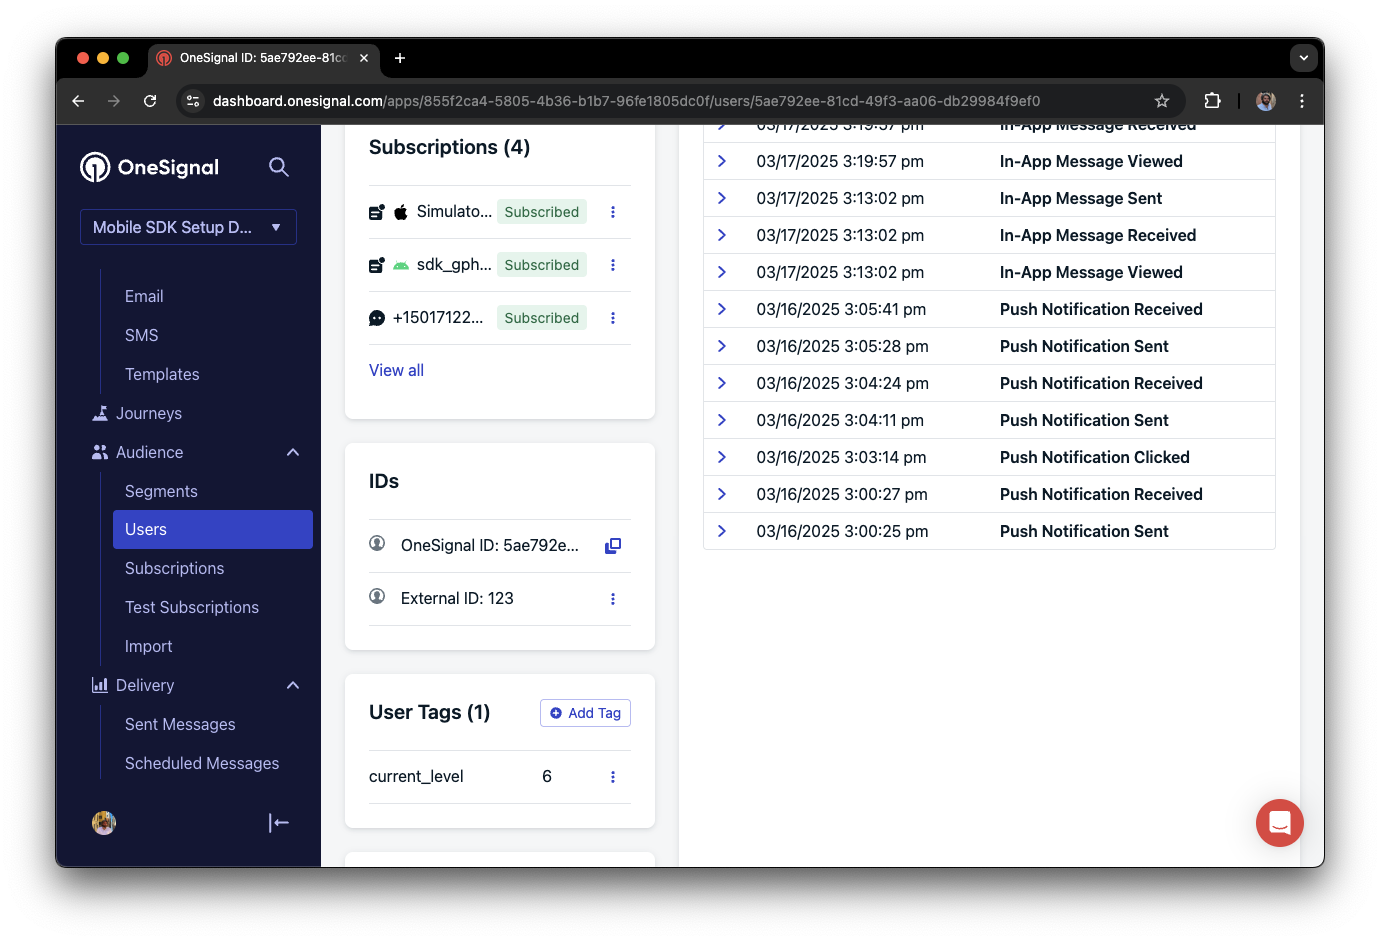
A user profile in OneSignal with a tag called "current_level" set to "6"
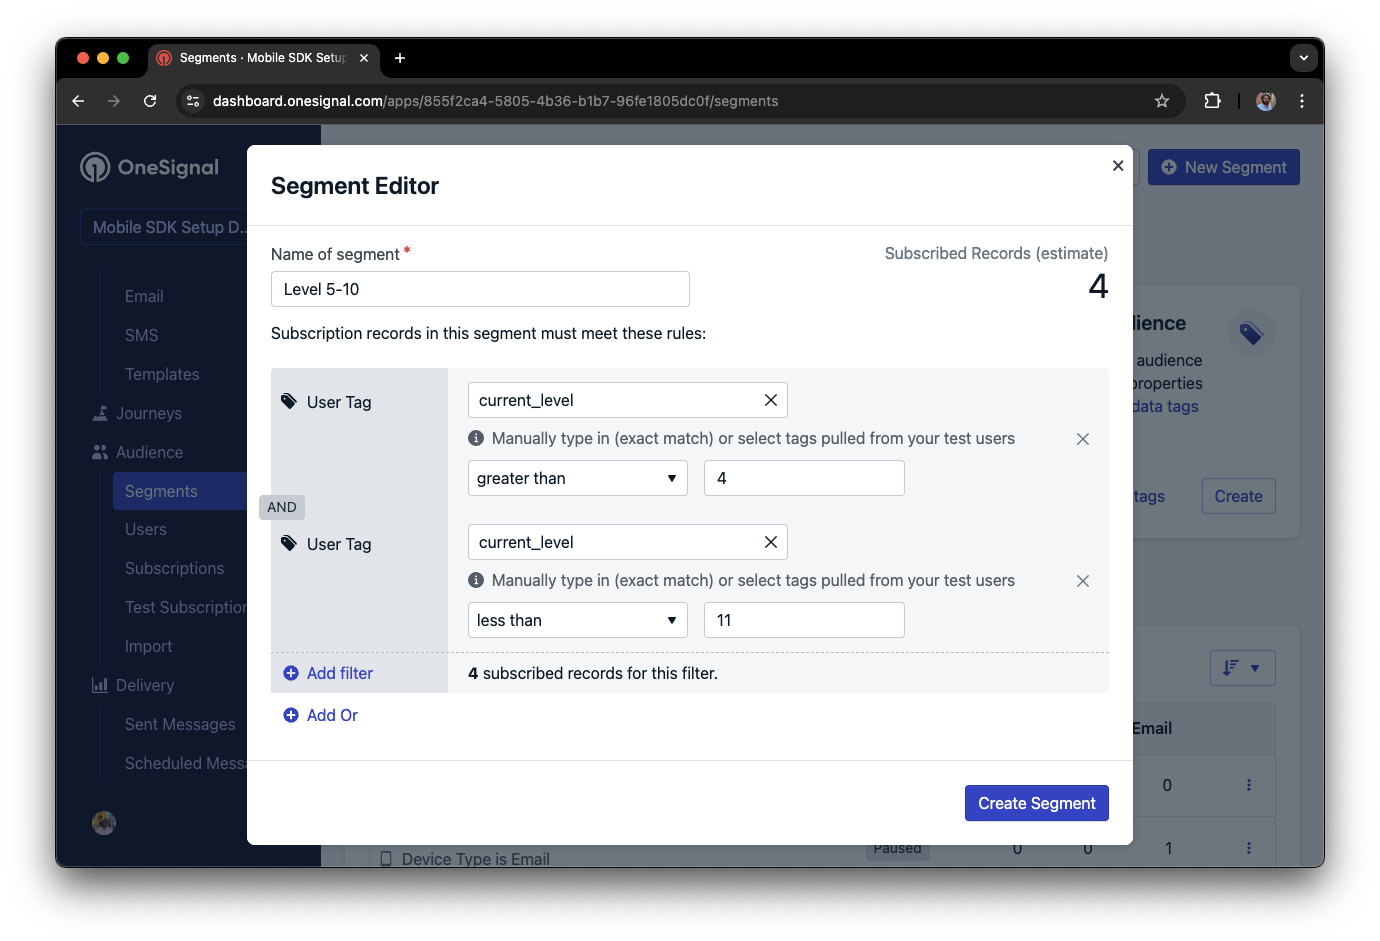
Segment editor showing a segment targeting users with a current_level value of greater than 4 and less than 10
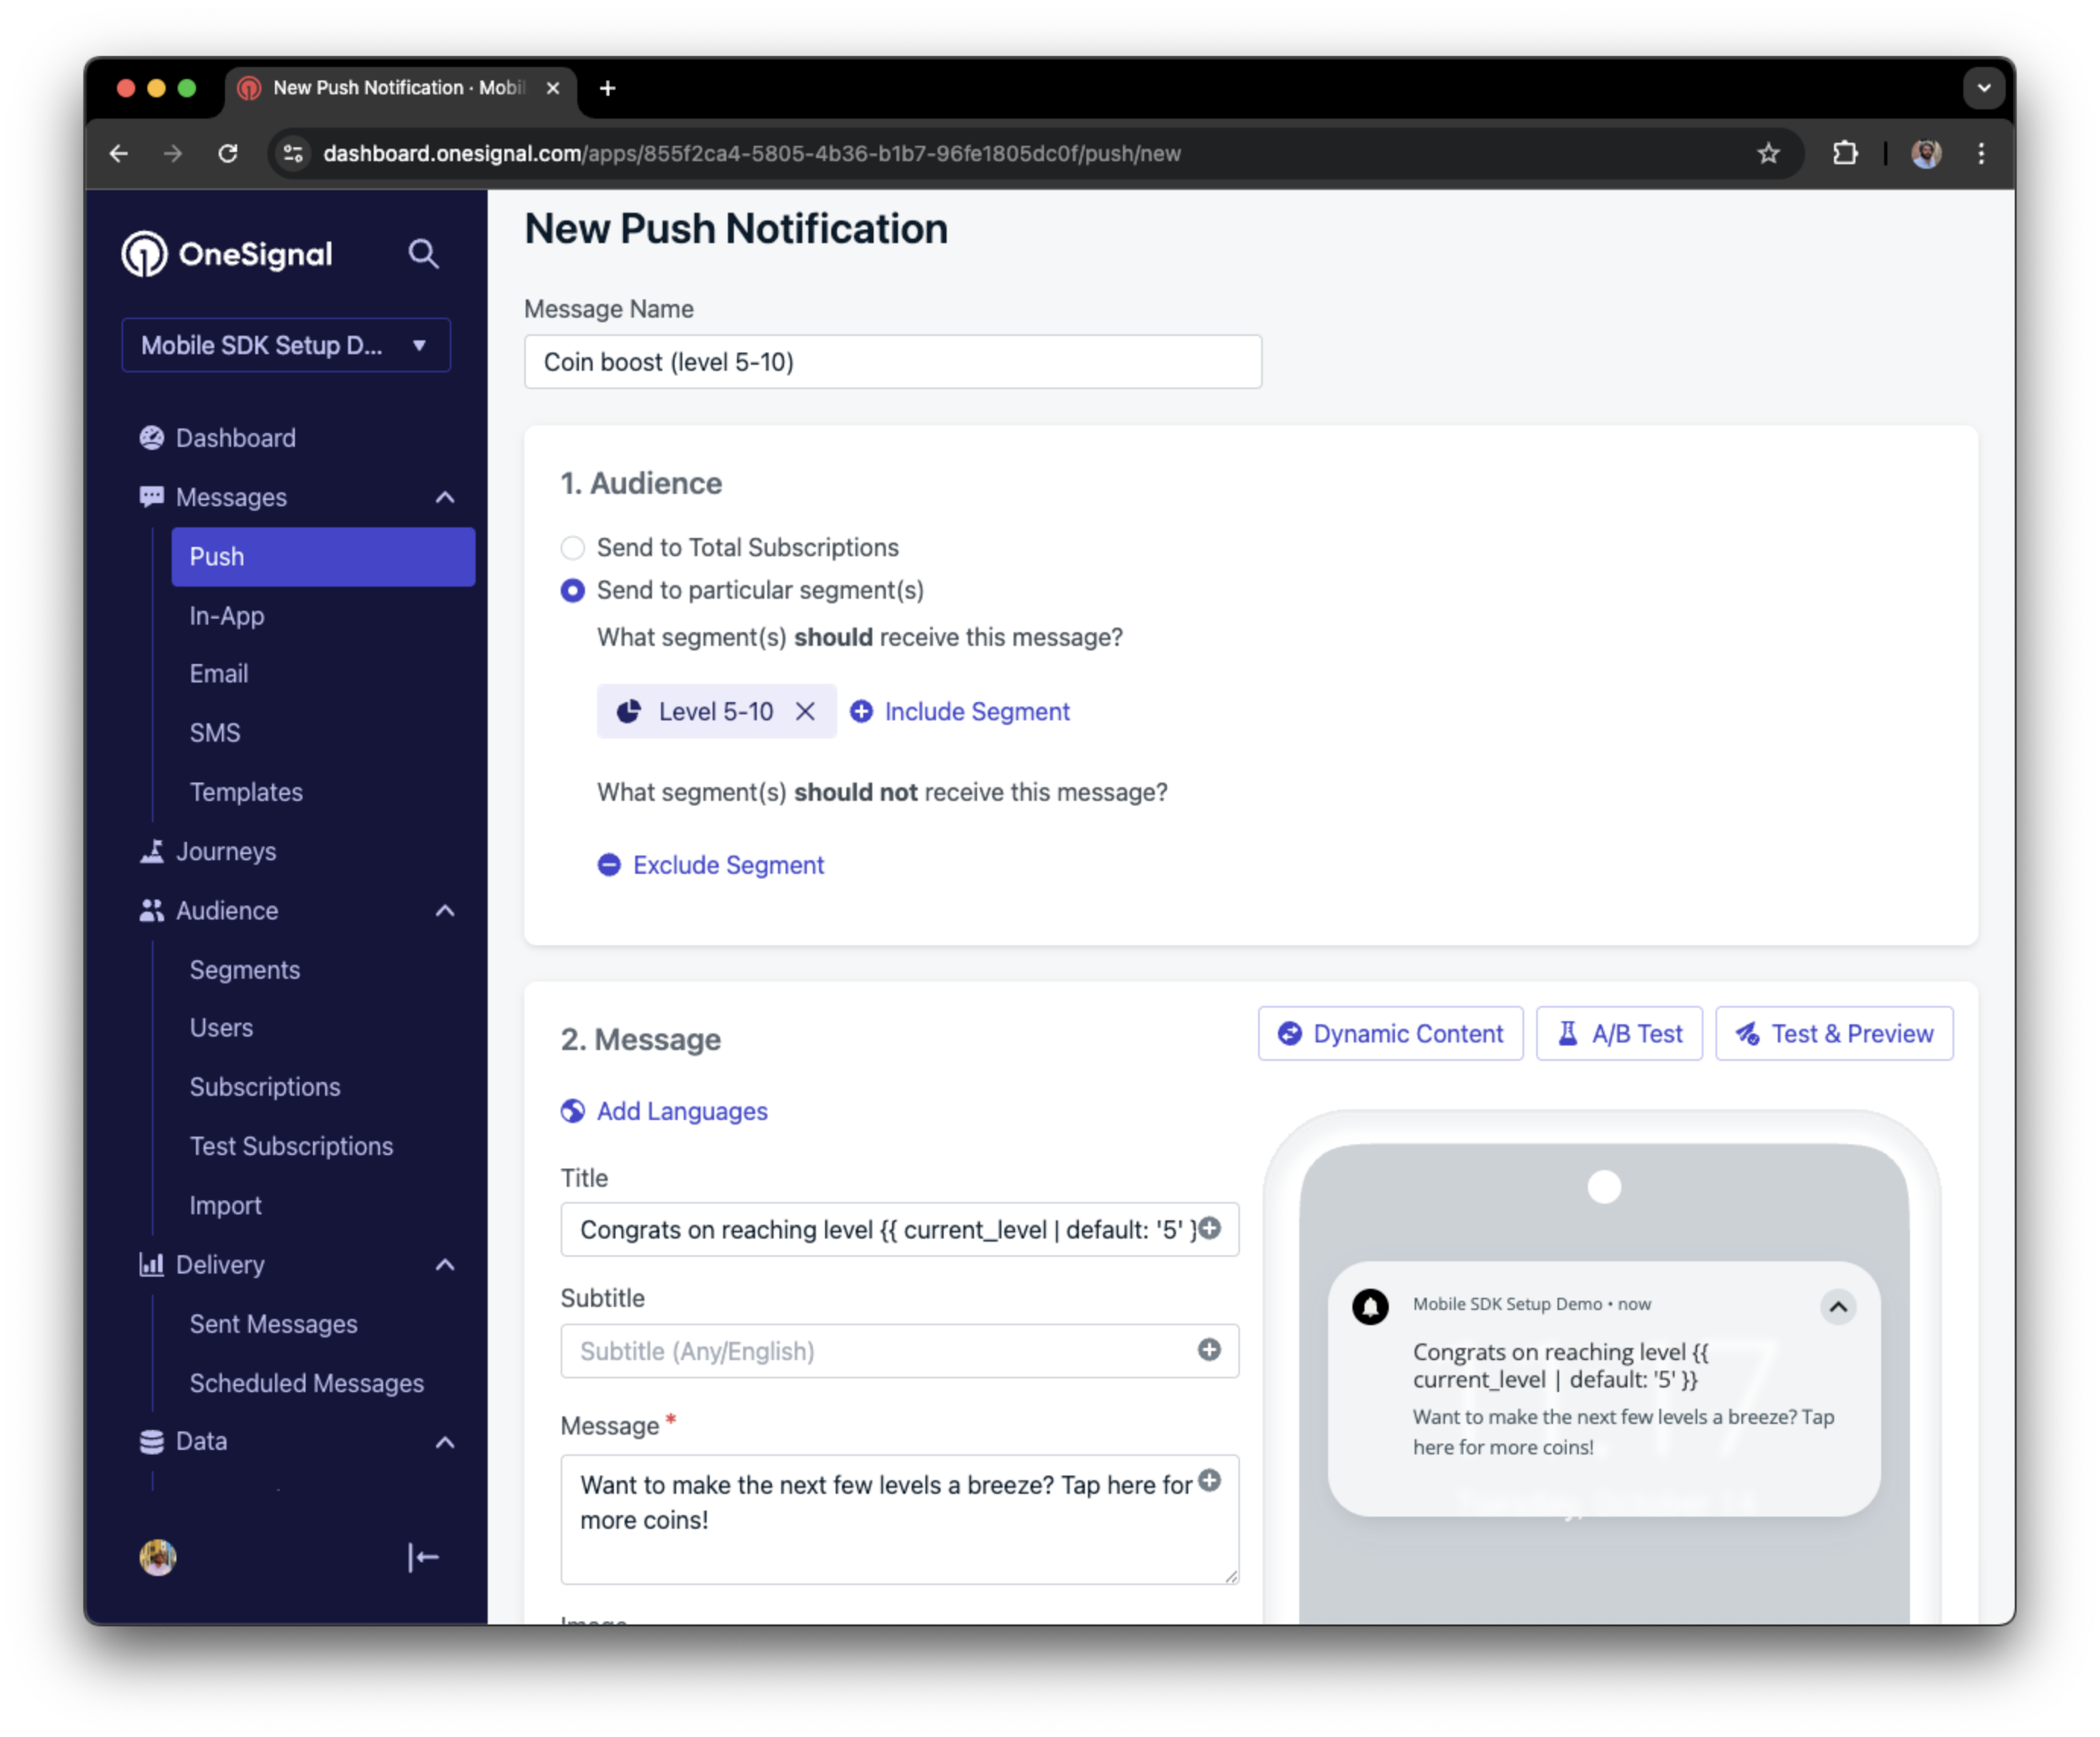
Screenshot showing a push notification targeting the Level 5-10 segment with a personalized message
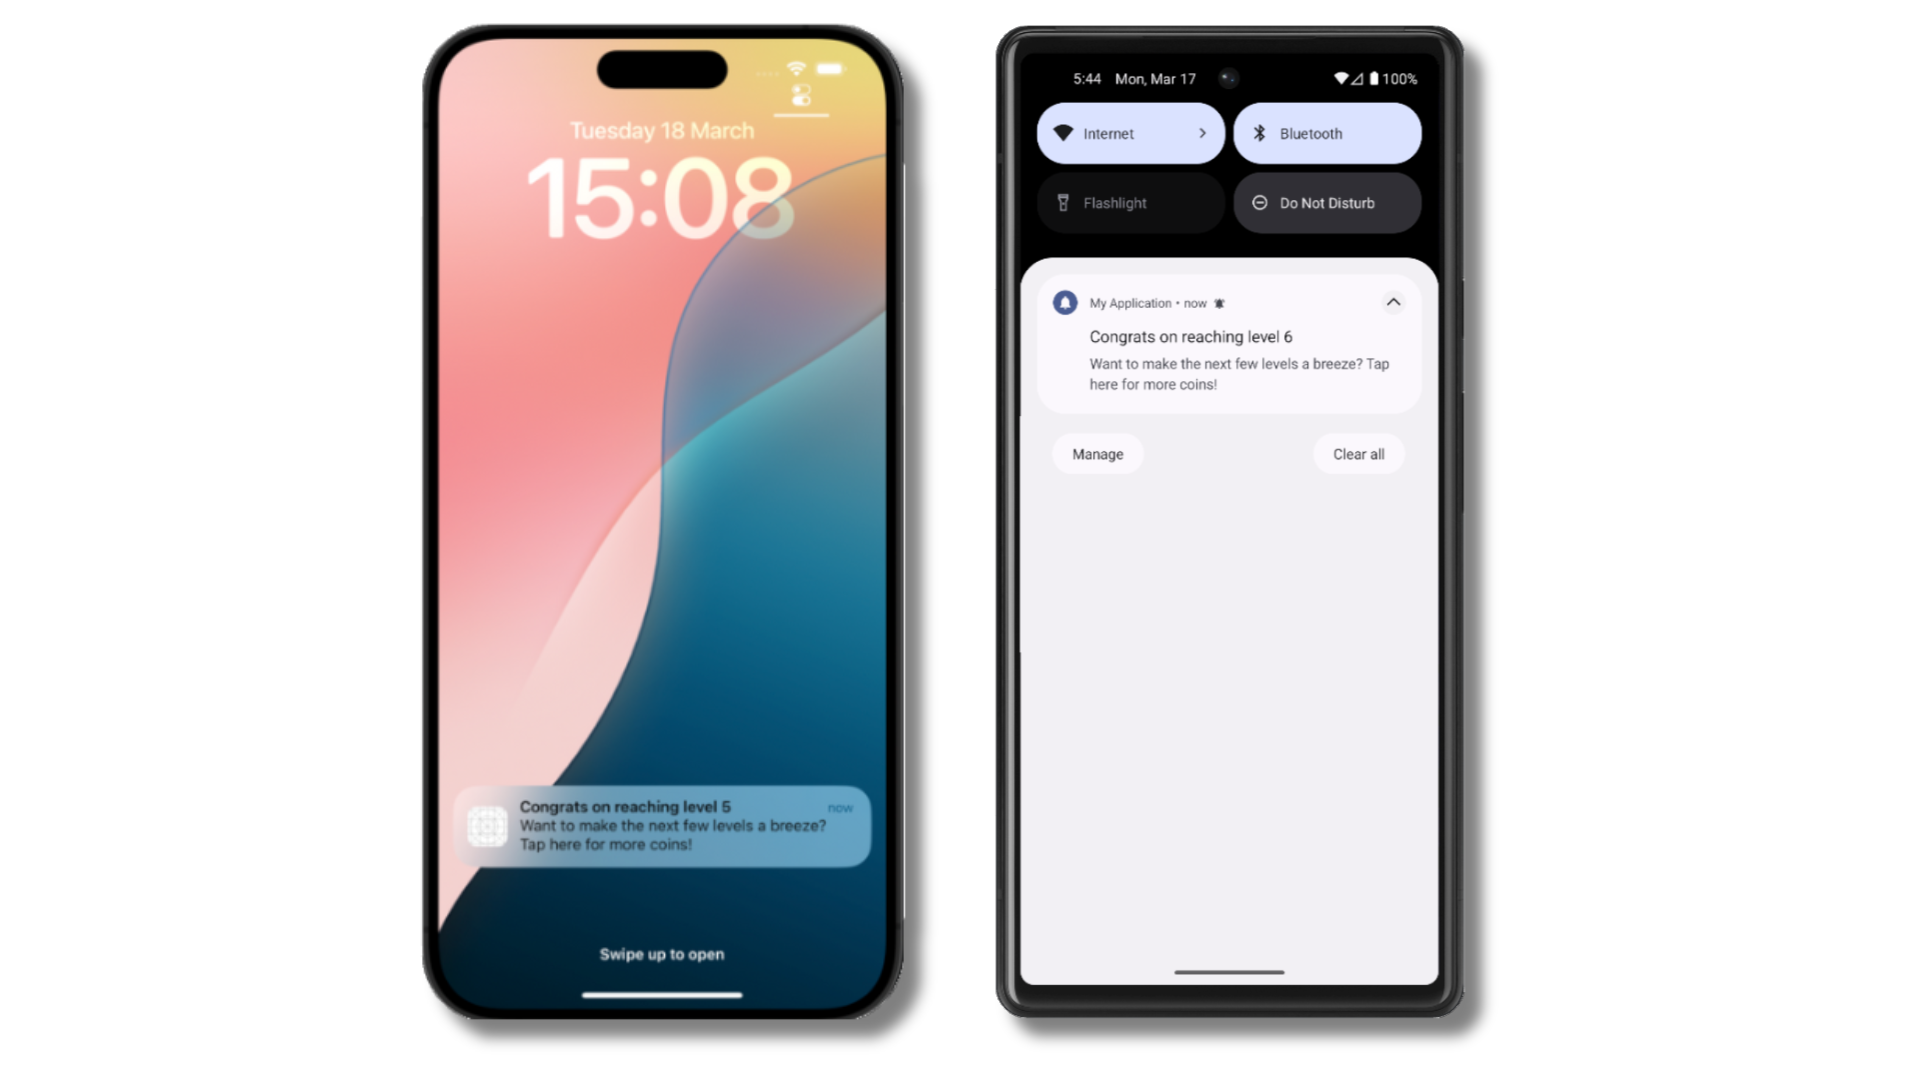
The push notification is received on an iOS and Android device with the personalized content
Add email and/or SMS subscriptions
Earlier we saw how our SDK creates mobile subscriptions to send push and in-app messages. You can also reach users through emails and SMS channels by creating the corresponding subscriptions.- Use the
addEmailmethod to create email subscriptions. - Use the
addSmsmethod to create SMS subscriptions.
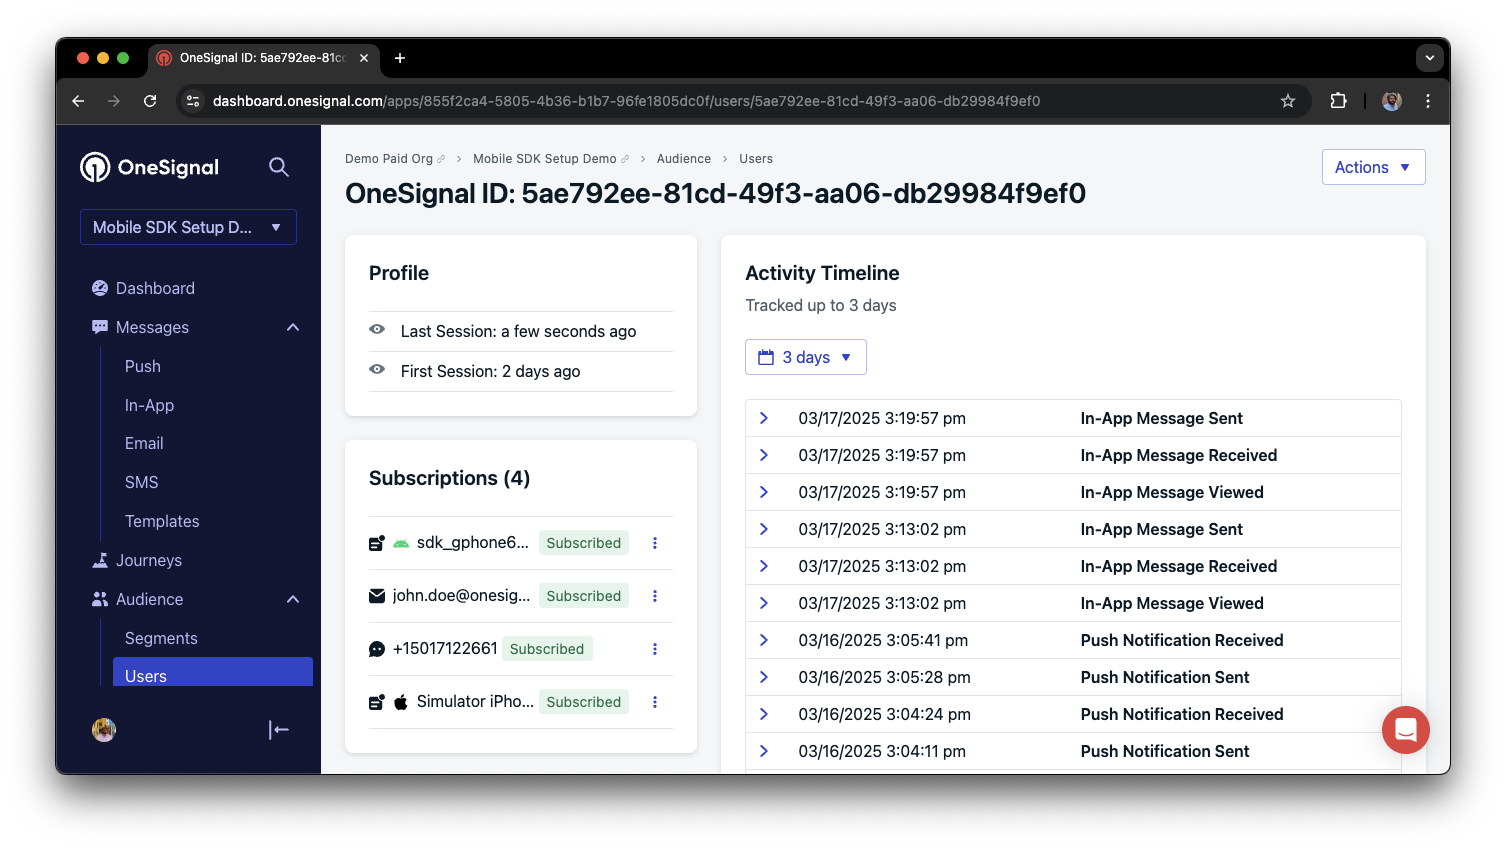
A user profile with push, email, and SMS subscriptions unified by External ID
- Obtain explicit consent before adding email or SMS subscriptions.
- Explain the benefits of each communication channel to users.
- Provide channel preferences so users can select which channels they prefer.
Privacy & user consent
To control when OneSignal collects user data, use the SDK’s consent gating methods:setConsentRequired(true): Prevents data collection until consent is given.setConsentGiven(true): Enables data collection once consent is granted.
Prompt for push permissions
Instead of callingrequestPermission() immediately on app open, take a more strategic approach. Use an in-app message to explain the value of push notifications before requesting permission.
For best practices and implementation details, see our Prompt for push permissions guide.
Listen to push, user, and in-app events
Use SDK listeners to react to user actions and state changes. The SDK provides several event listeners for you to hook into. See our SDK reference guide for more details.Push notification events
addClickListener(): Detect when a notification is tapped. Helpful for Deep Linking.addForegroundLifecycleListener(): Control how notifications behave in foreground.
User state changes
addObserver()for user state: Detect when the External ID is set.addPermissionObserver(): Track the user’s specific interaction with the native push permission prompt.addObserver()for push subscription: Track when the push subscription status changes.
In-app message events
addClickListener(): Handle in-app click actions. Ideal for deep linking or tracking events.addLifecycleListener(): Track full lifecycle of in-app messages (shown, clicked, dismissed, etc.).
Advanced setup & capabilities
Explore more capabilities to enhance your integration:- 🔁 Migrating to OneSignal from another service
- 🌍 Location tracking
- 🔗 Deep Linking
- 🔌 Integrations
- 🧩 Mobile Service Extensions
- 🛎️ Action buttons
- 🌐 Multi-language messaging
- 🛡️ Identity Verification
- 📊 Custom Outcomes
- 📲 Live Activities