- Use a CSV to personalize at scale – One message, custom experiences for everyone
- Dynamic personalization – Content adapts to user properties (language, region, campaign ID)
- HTML injection (email) – Include HTML markup in CSV cells to dynamically build rich email content
- Team collaboration – Non-technical users edit content in CSV files
- Cross-channel compatibility – Reuse CSV logic across channels
- Multi-language support – Automatic language switching per user
- Multi-language onboarding or marketing
- Region-specific promotions
- Event announcements per location
- Campaign-based personalization
Dynamic Content with CSV setup steps
Quick reference:- Create a CSV file with your content variations.
- Create a template
- Map the CSV data to the message using the
dynamic_contentproperty in liquid syntax. - Select the Dynamic Content or Personalization button.
- Upload the CSV file and send the message.
CSV requirements & setup
- File size: Under 200 KB
- Column headers:
- Reserve the first column header for the tag key or leave blank to reference sections
- Alphanumeric characters and underscores only
- Use underscores (
_) instead of spaces
- Encoding: UTF-8

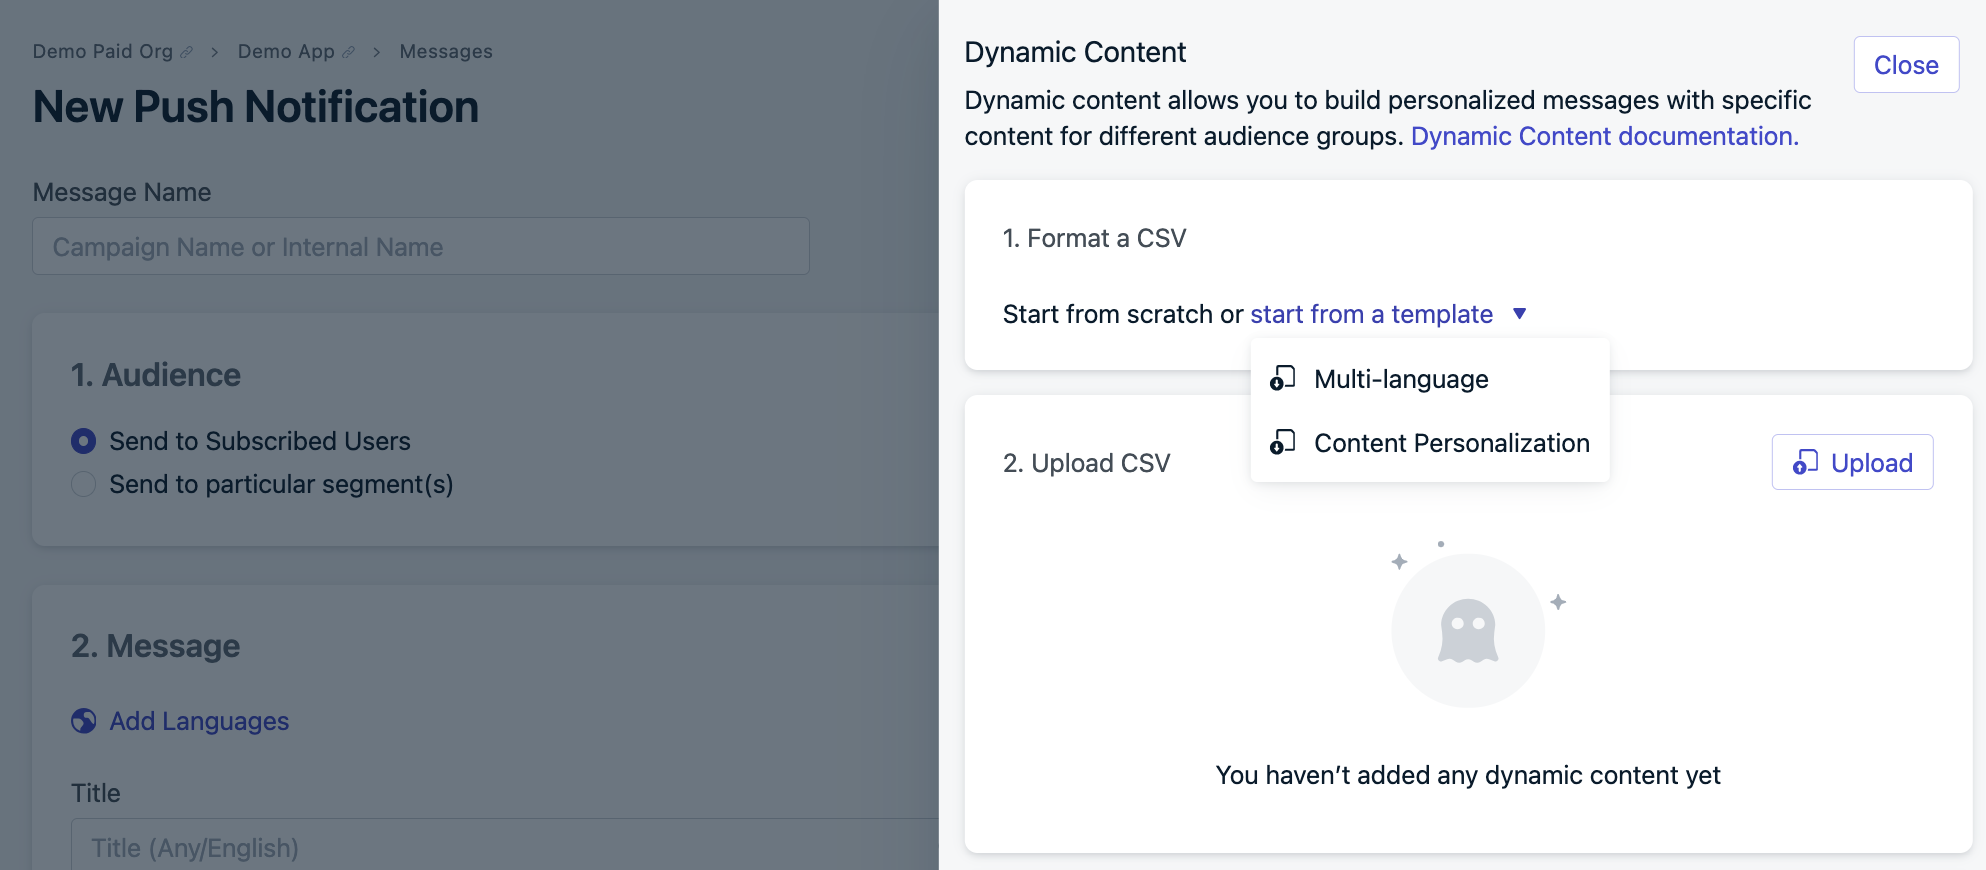
Dynamic Content button found in the message editor.
- Multi-language – Localize content by language
- Content personalization – Customize content by Tags
CSV template options in the OneSignal dashboard.
Example CSVs
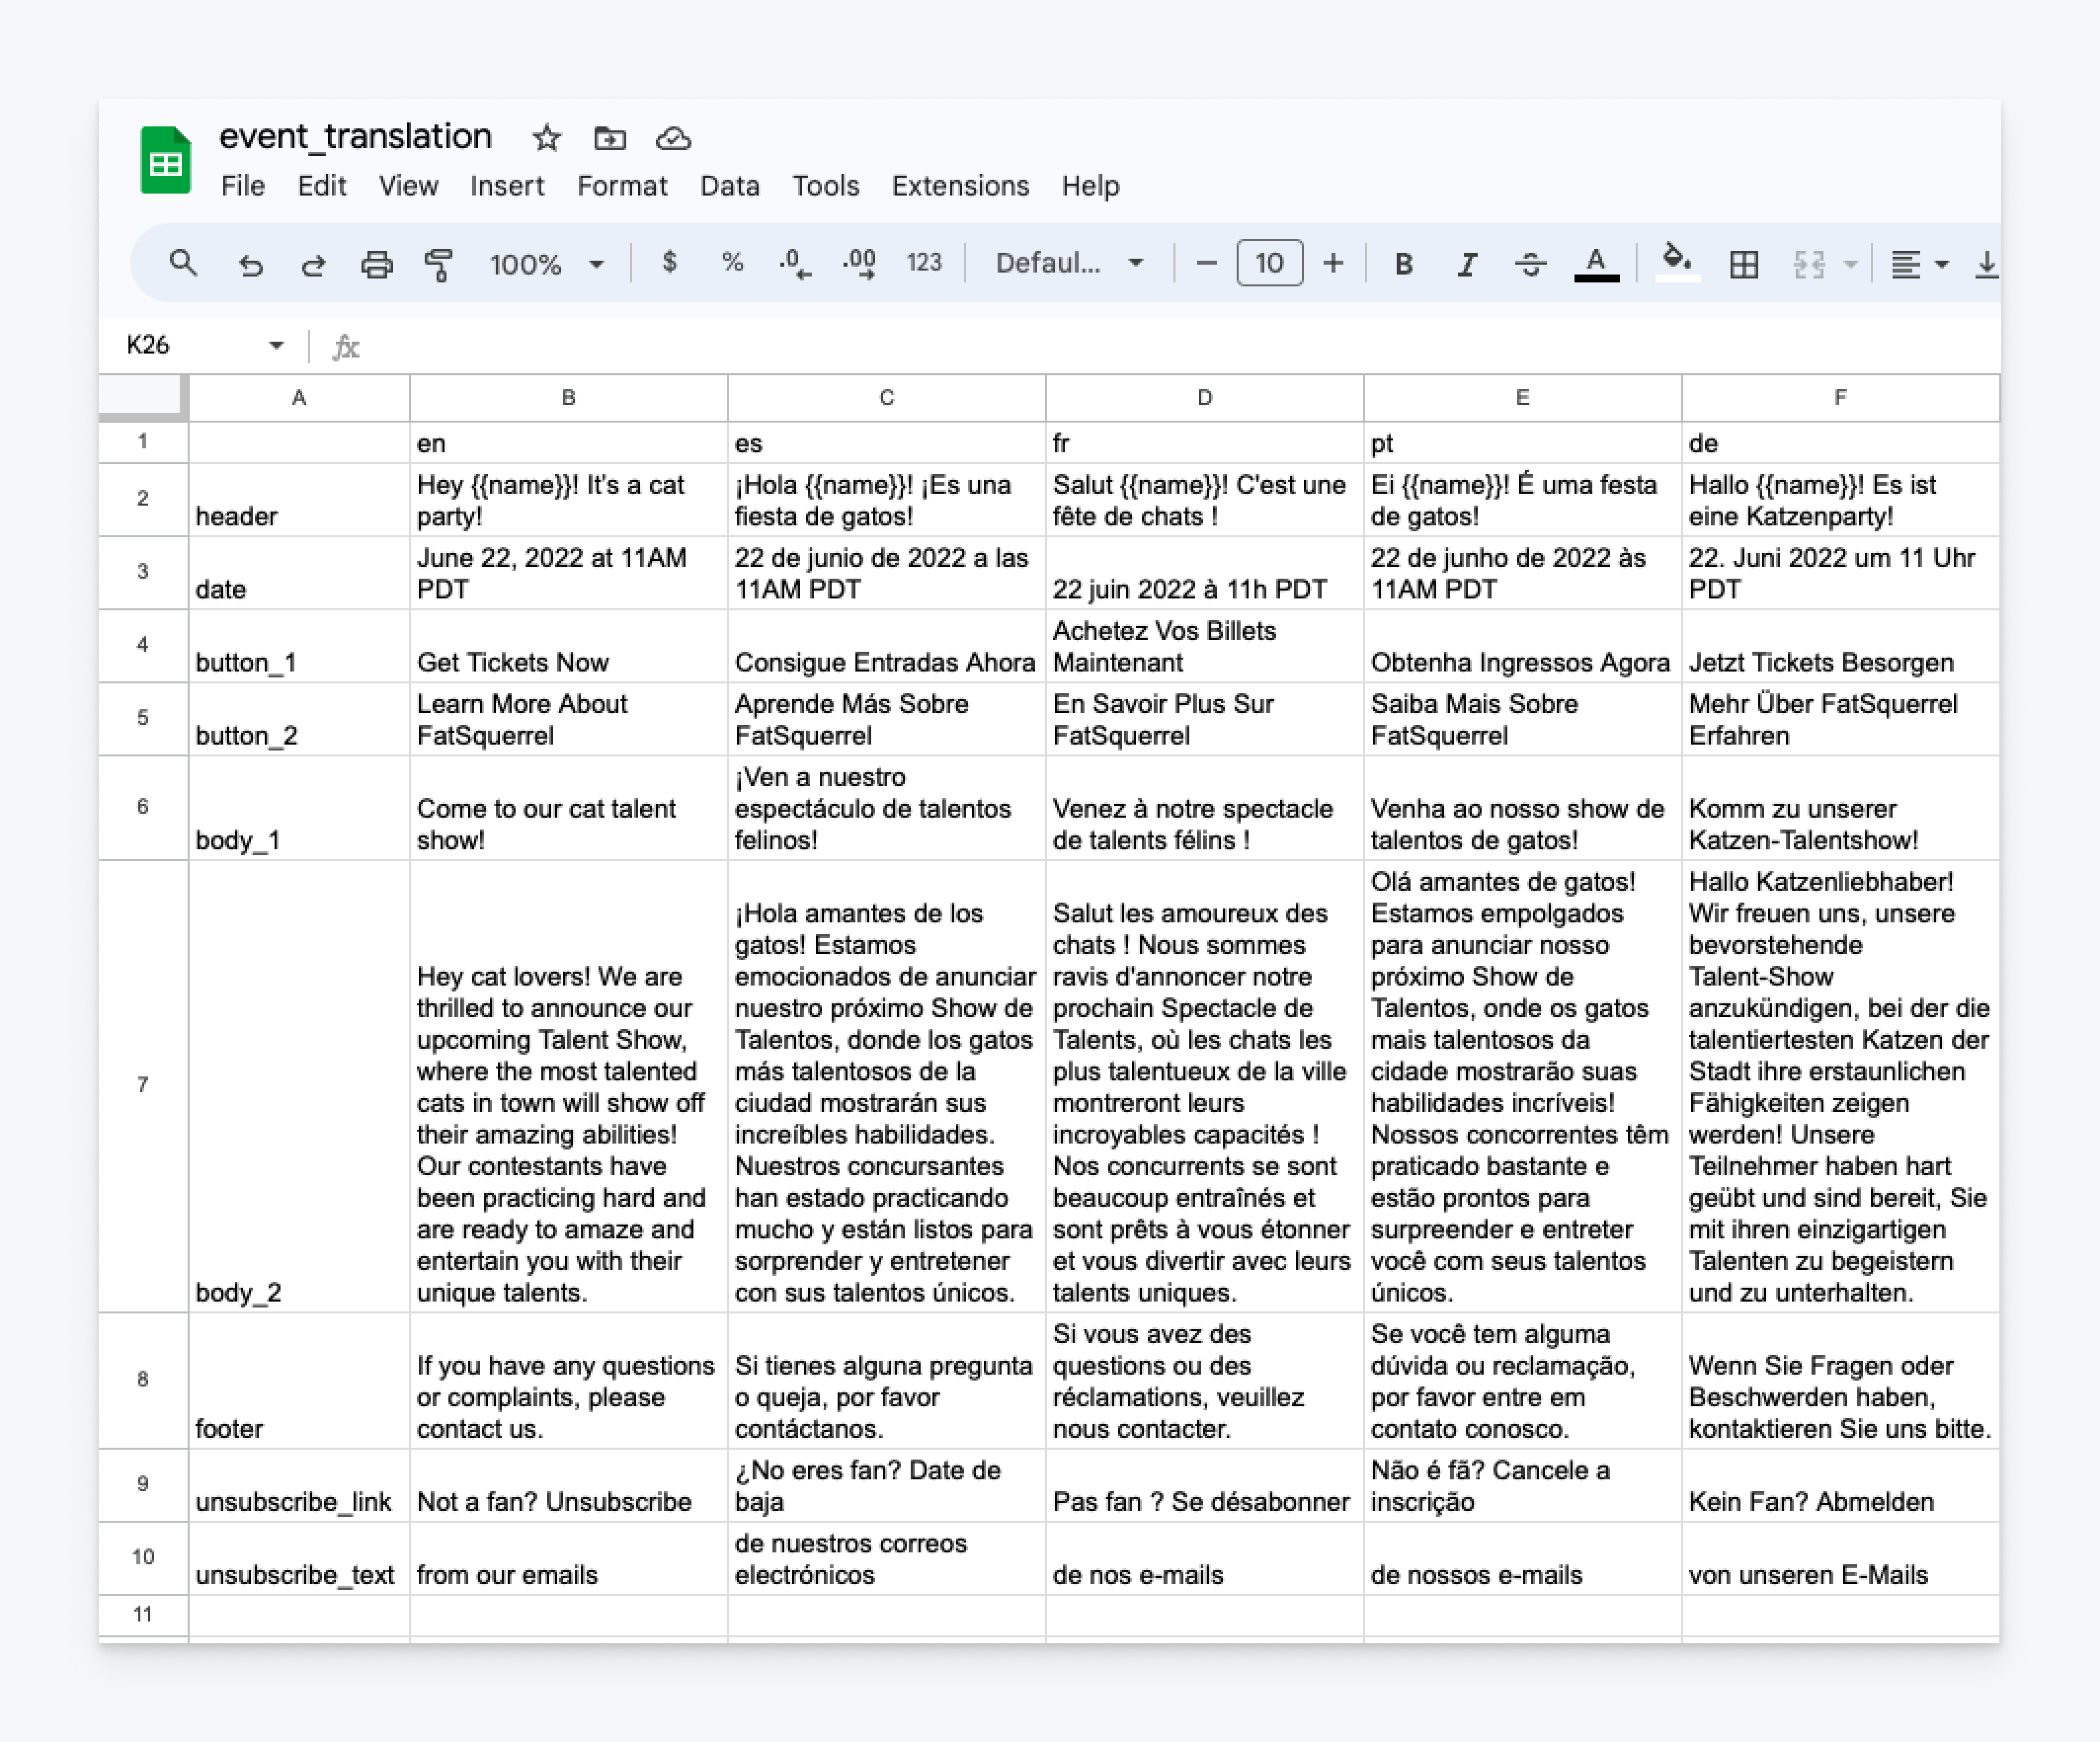
This guide will use the following example CSV data.- Multi-language Template Example
- Content Personalization Template Example
- Map the column headers to your supported language codes.
- Add your translations to each row for each language code.
- If you have multiple sections (like in an email), designate the first column as the section name.
- 3 languages: English, Spanish, and French.
- 2 sections: “section_1” and “section_2”.

Multi-language CSV matching user language attribute to content (similar to VLOOKUP).

Map CSV data to message content
Using Liquid syntax, reference the CSV data in your message using thedynamic_content property:
dynamic_content– The property name used to reference the CSV datafile_name– CSV file name (without.csvextension)message_component– The specific message component you want to personalize. This is the static text in the CSV column header or first row.user_property– The user property you want to reference.
default fallbacks to ensure messages render if the CSV lookup or Dynamic Content fails.
Liquid syntax for the fallback
"Welcome to our latest update".
This ensures:
- Dynamic Content is used when available
- A hard-coded message appears if Dynamic Content fails
- Users never receive blank content
- Multi-language Message Example
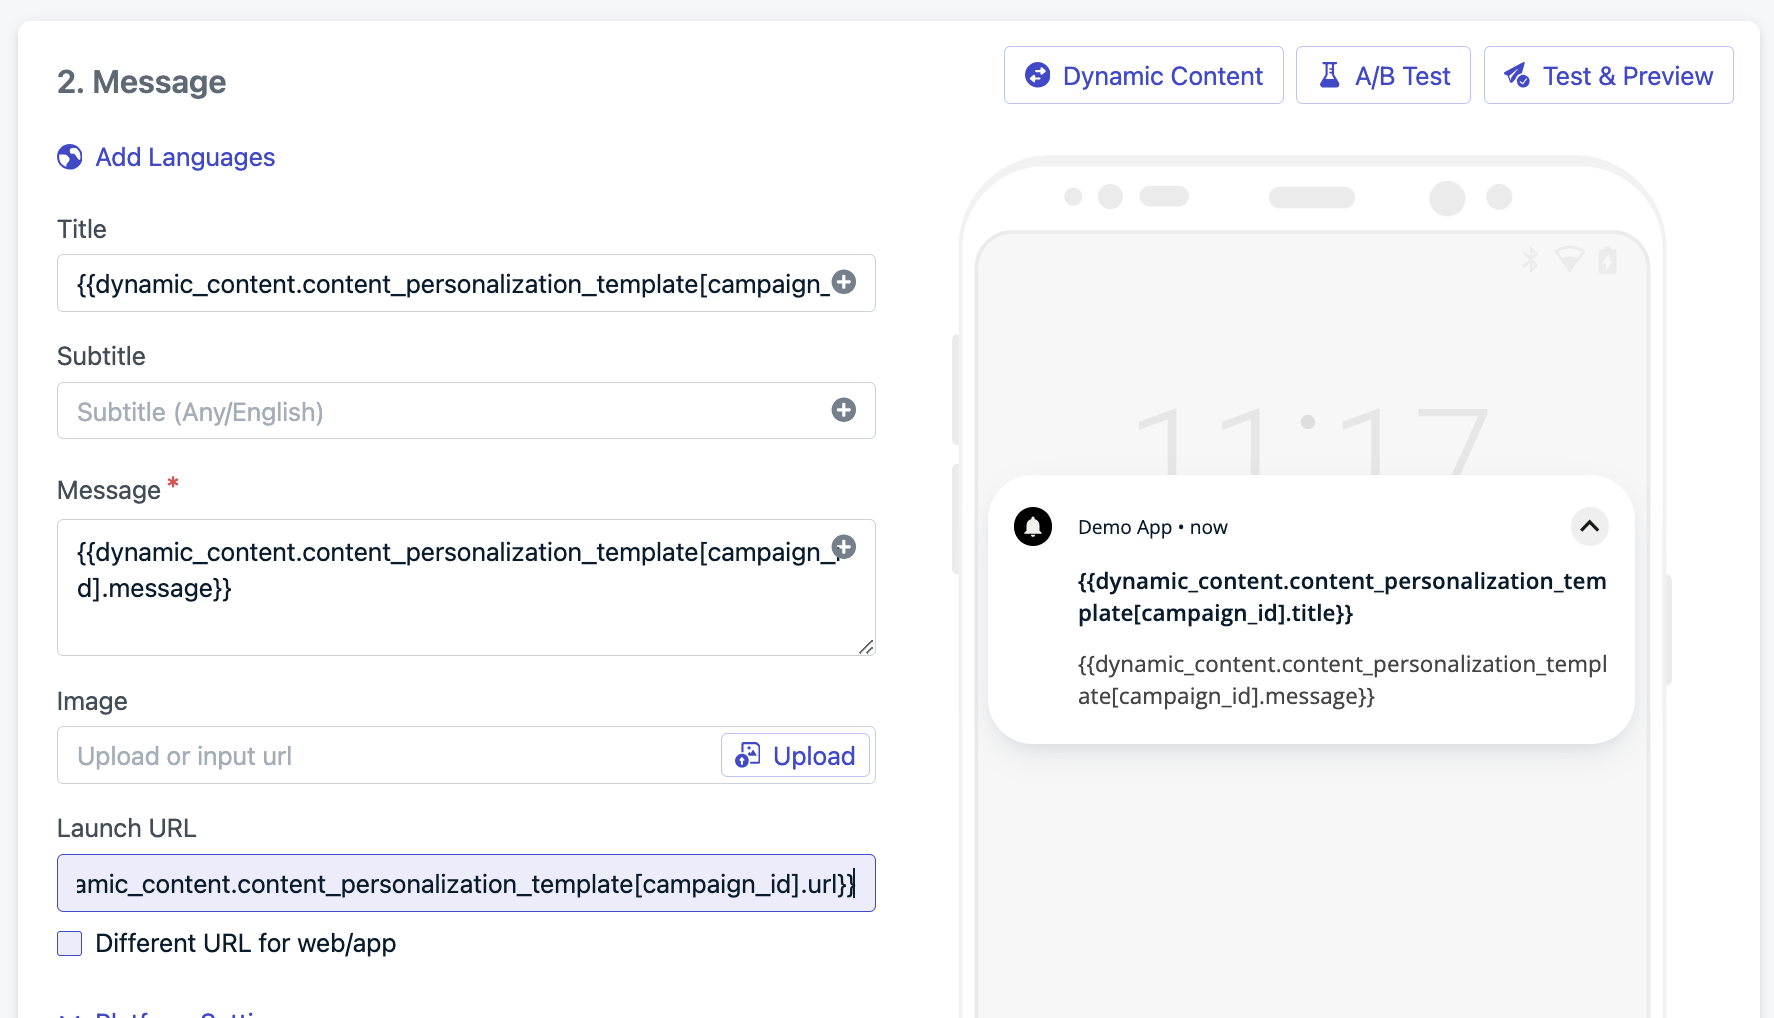
- Content Personalization Message Example
translations.csv
- The
file_nameistranslations.csv. - The
message_componentis in the rows of the first columnsection_1andsection_2. - The
user_propertyis the column header matching language code. We can reference this on the user with theuser.languageproperty.
Basic Liquid syntax for the multi-language message
(Recommended) Liquid syntax with default fallback for the multi-language message
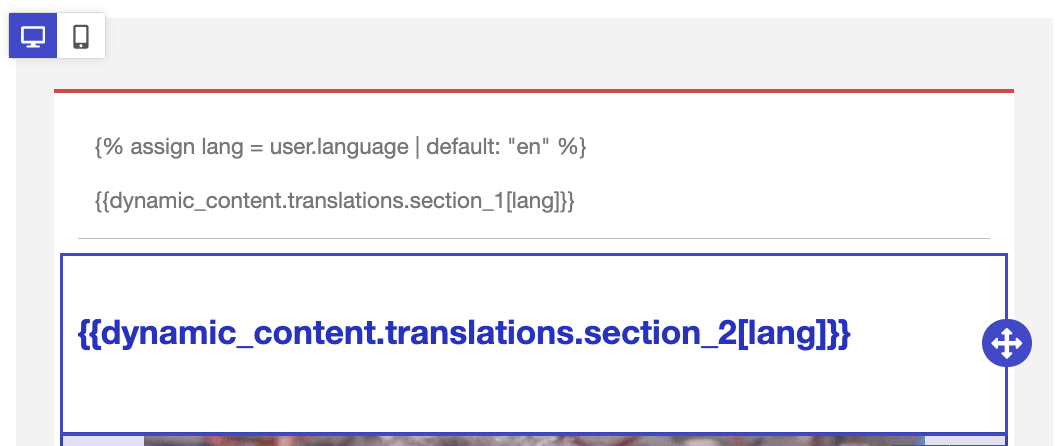
Adding Liquid syntax for multi-language email content.
Use Liquid with
default fallback to update subject lines, preheaders, button
labels, and URLs.Using HTML in CSV cells (email only)
You can include HTML markup directly in CSV cells to inject rich content into emails. This is useful for swapping entire sections of an email — such as banners, CTAs, or styled blocks — based on user properties.promo_banners.csv
Reference
Updating templates
Re-upload CSVs via the dashboard or use the Update Template APIdynamic_content property.
Special characters in keys
Hash notation (for non-alphanumeric keys):FAQ
How can I test Dynamic Content with CSV?
Use email to test multiple variations of the message.- Use
+addressing in emails to test multiple variations:username+test@example.com. - Set tags following the multi-language and content personalization examples above.
- See Import for more on uploading multiple users and tags.
When should I use Dynamic Content with CSV vs. other personalization options?
Use Dynamic Content with CSV when sending messages from the dashboard and you have user data in a CSV file. For other ways to add dynamic content to messages, see Message Personalization or Multi-language Messaging.Related pages
Message personalization
Overview of all personalization options available in OneSignal.
Using Liquid syntax
Complete Liquid syntax reference for OneSignal messages.
Import
Upload user data and segments to OneSignal.
Templates
Create and manage reusable message templates.