Overview

If you have a mobile-friendly website and want to convert it into a downloadable mobile app for the Apple App Store or Google Play Store, Median.co is a powerful solution. It also offers a seamless integration with OneSignal to enable push notifications.

Setup

1. Create your app with Median.co

  1. Follow the Median.co Getting Started Guide.
  2. Build an app at <https://median.co/app>.

2. Set up OneSignal

  1. Go to onesignal.com and create an account.
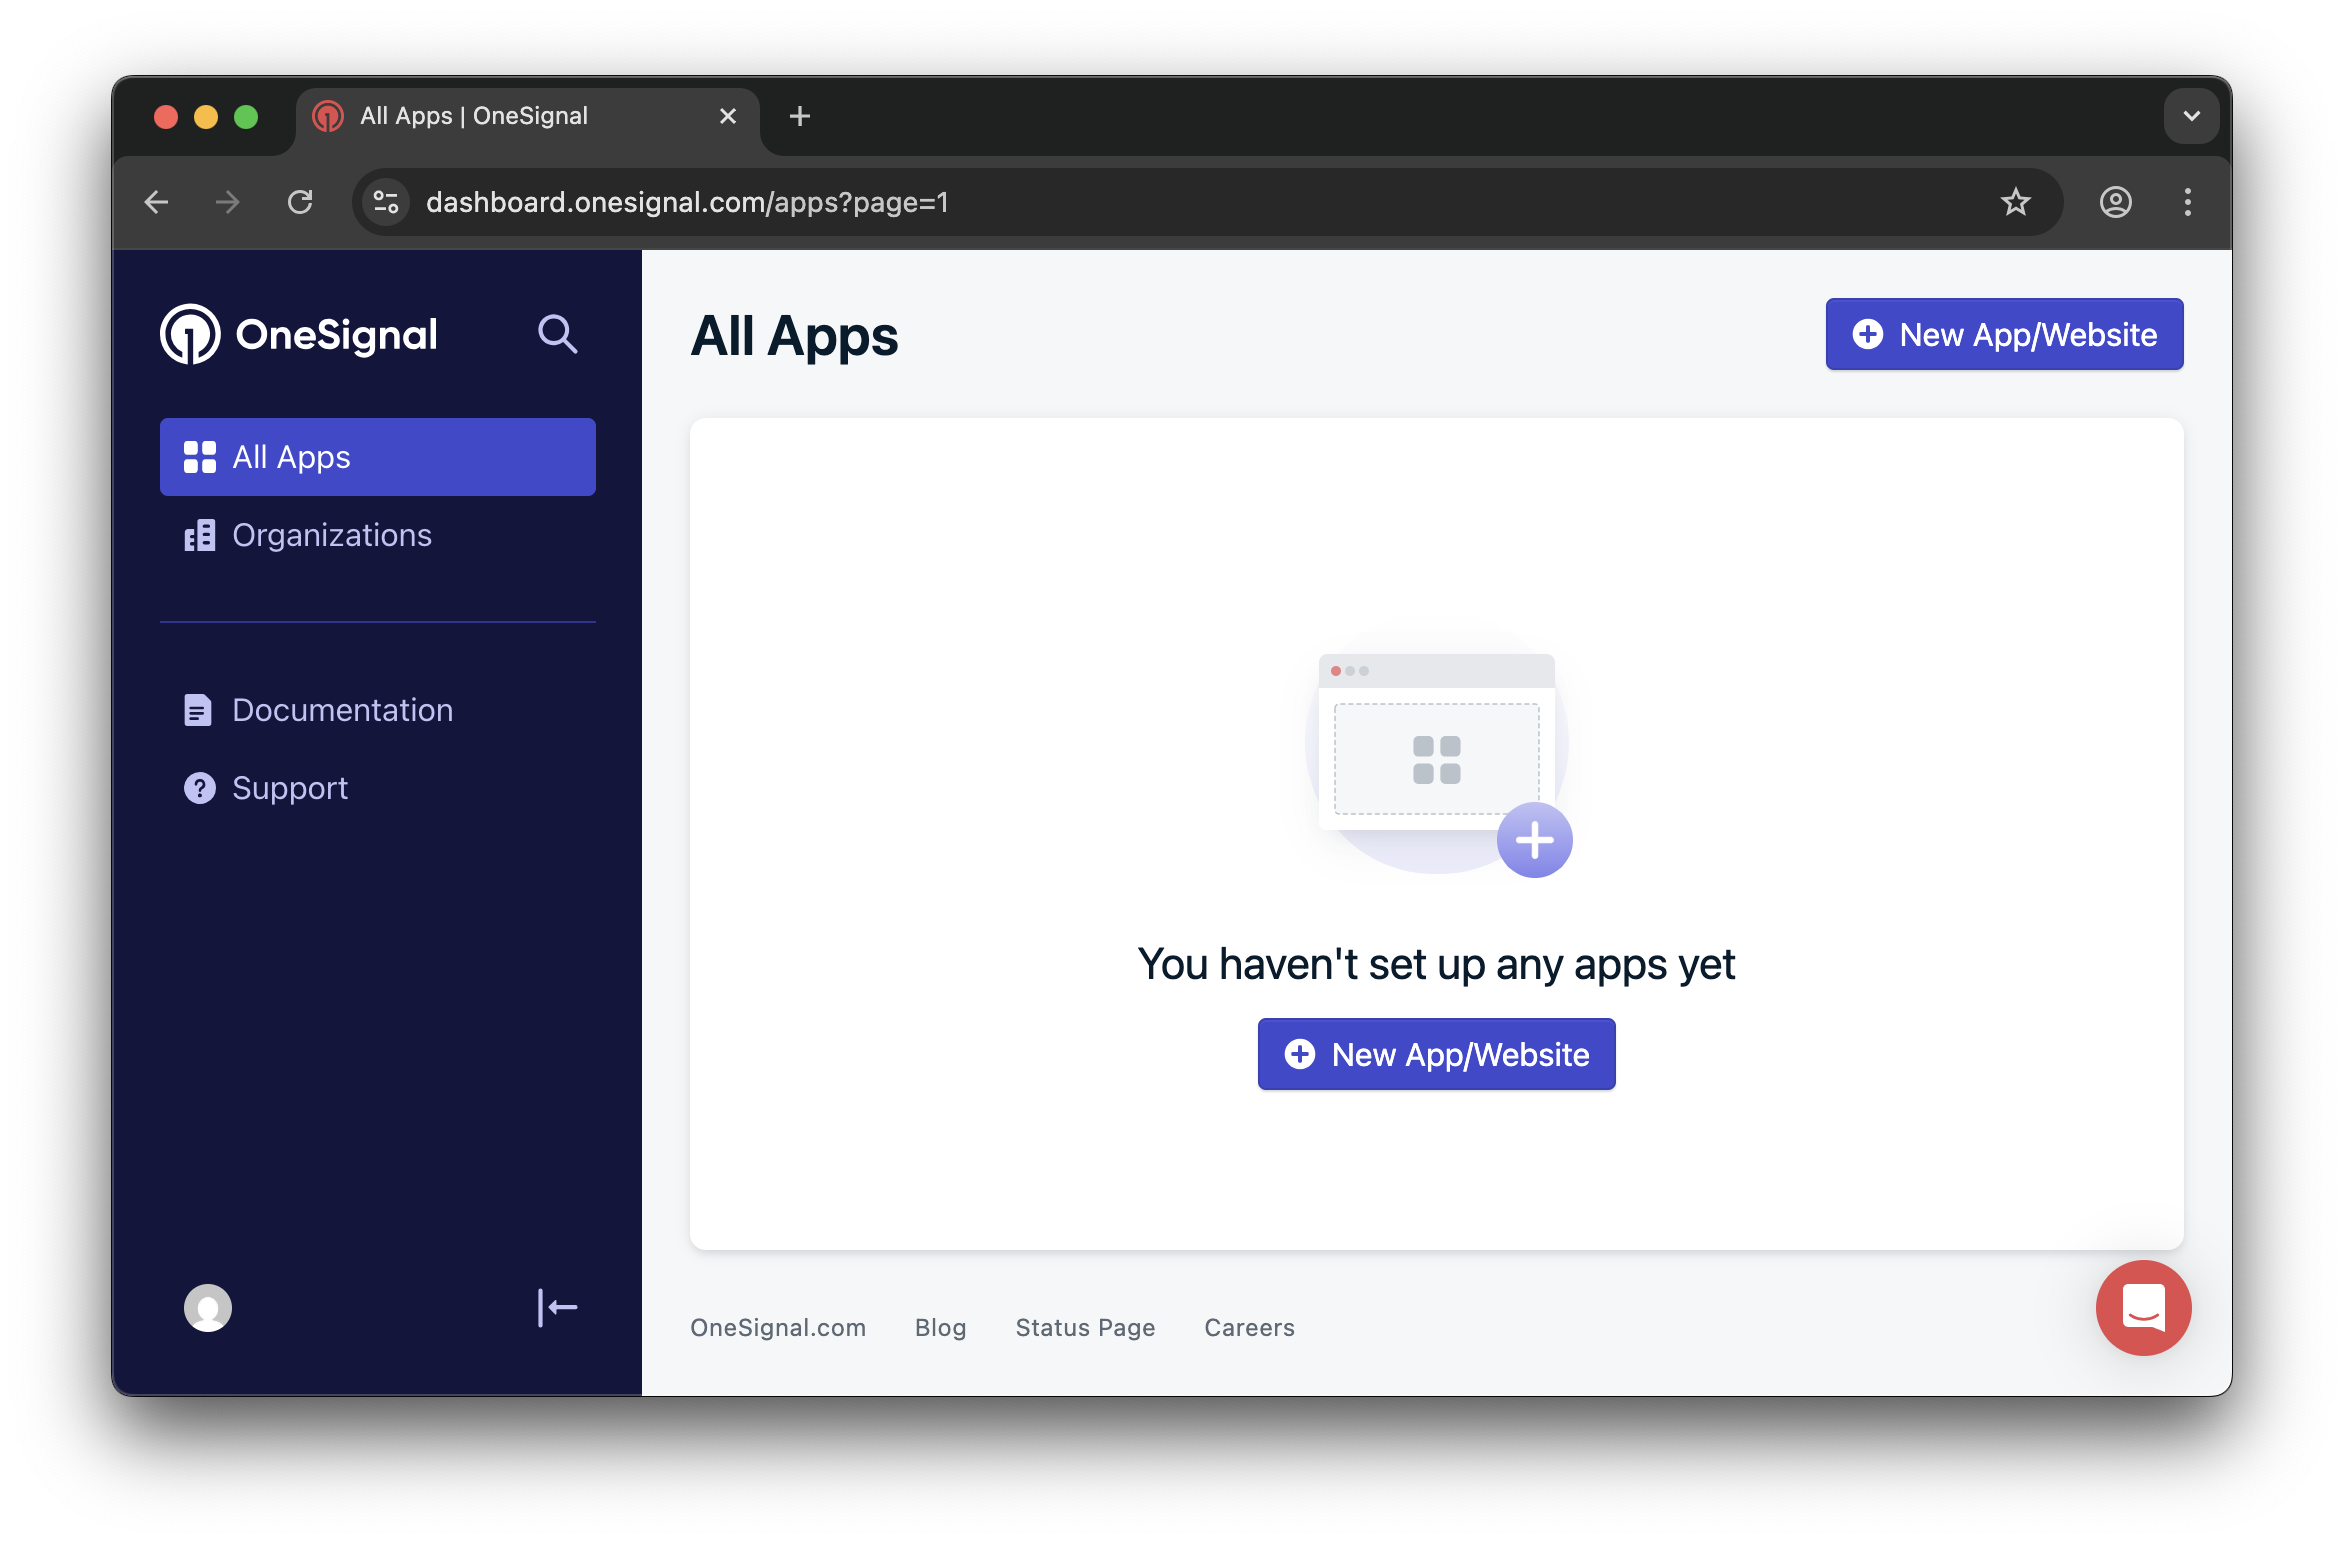
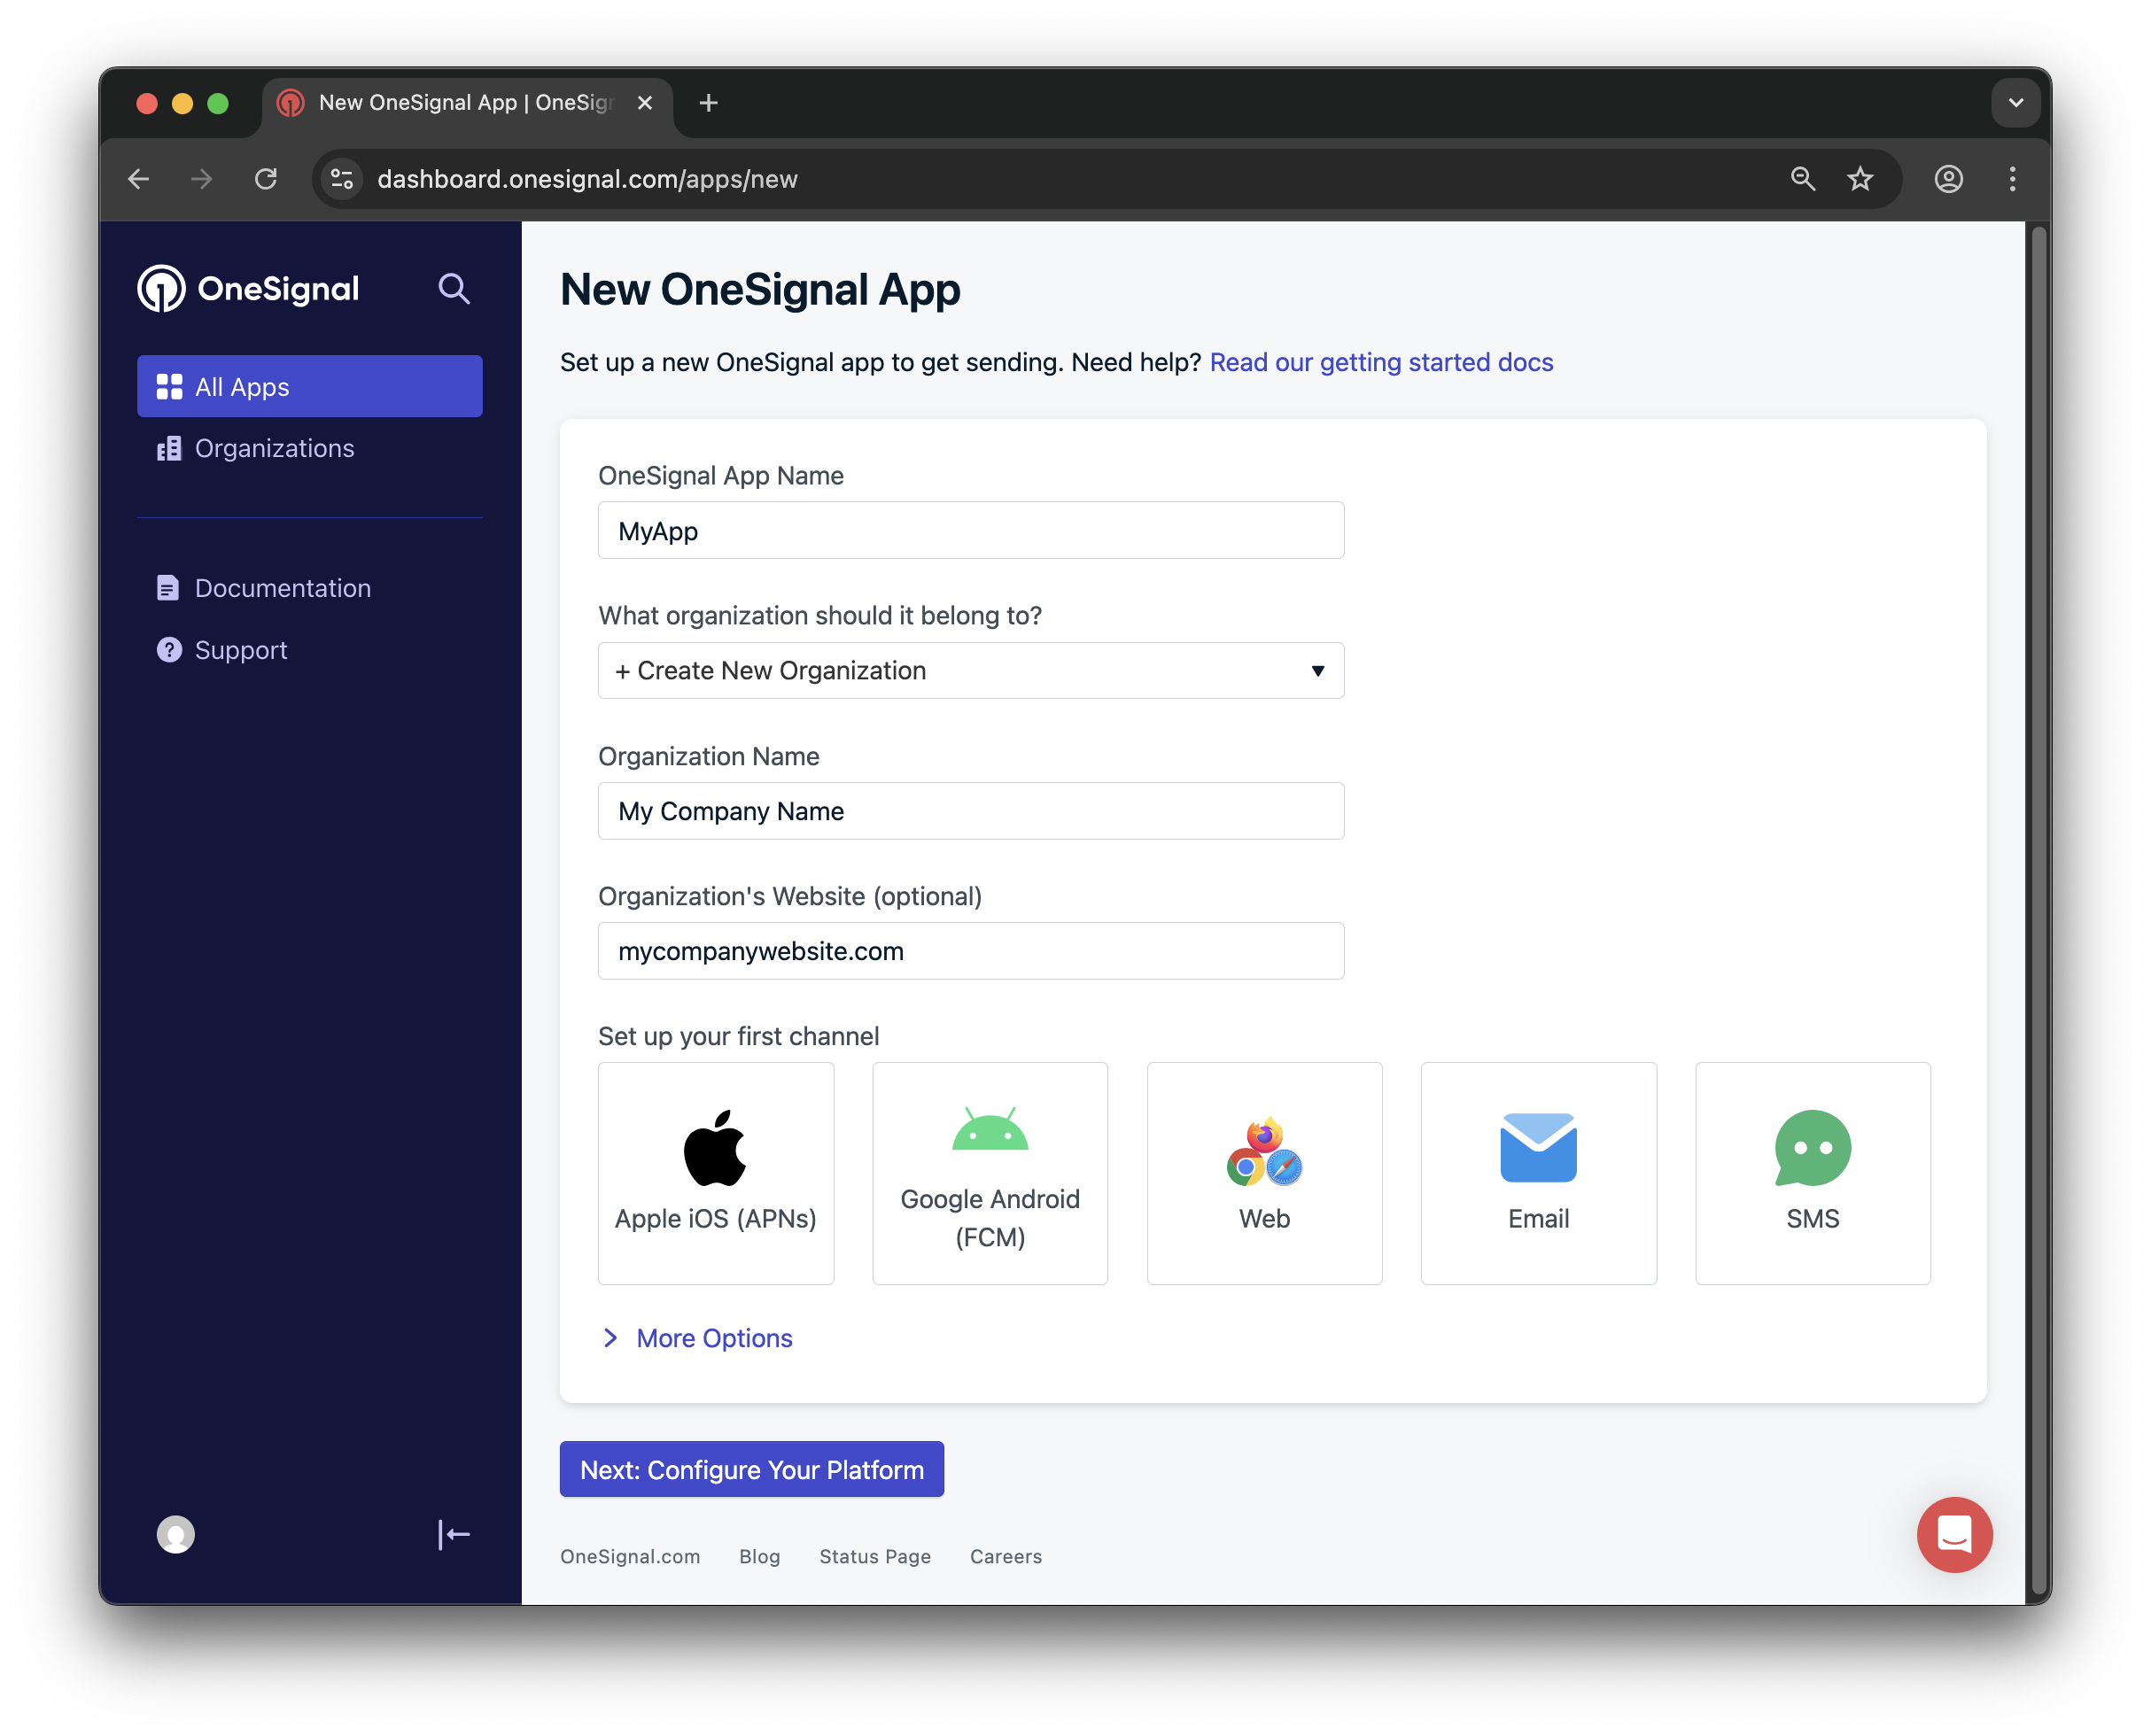
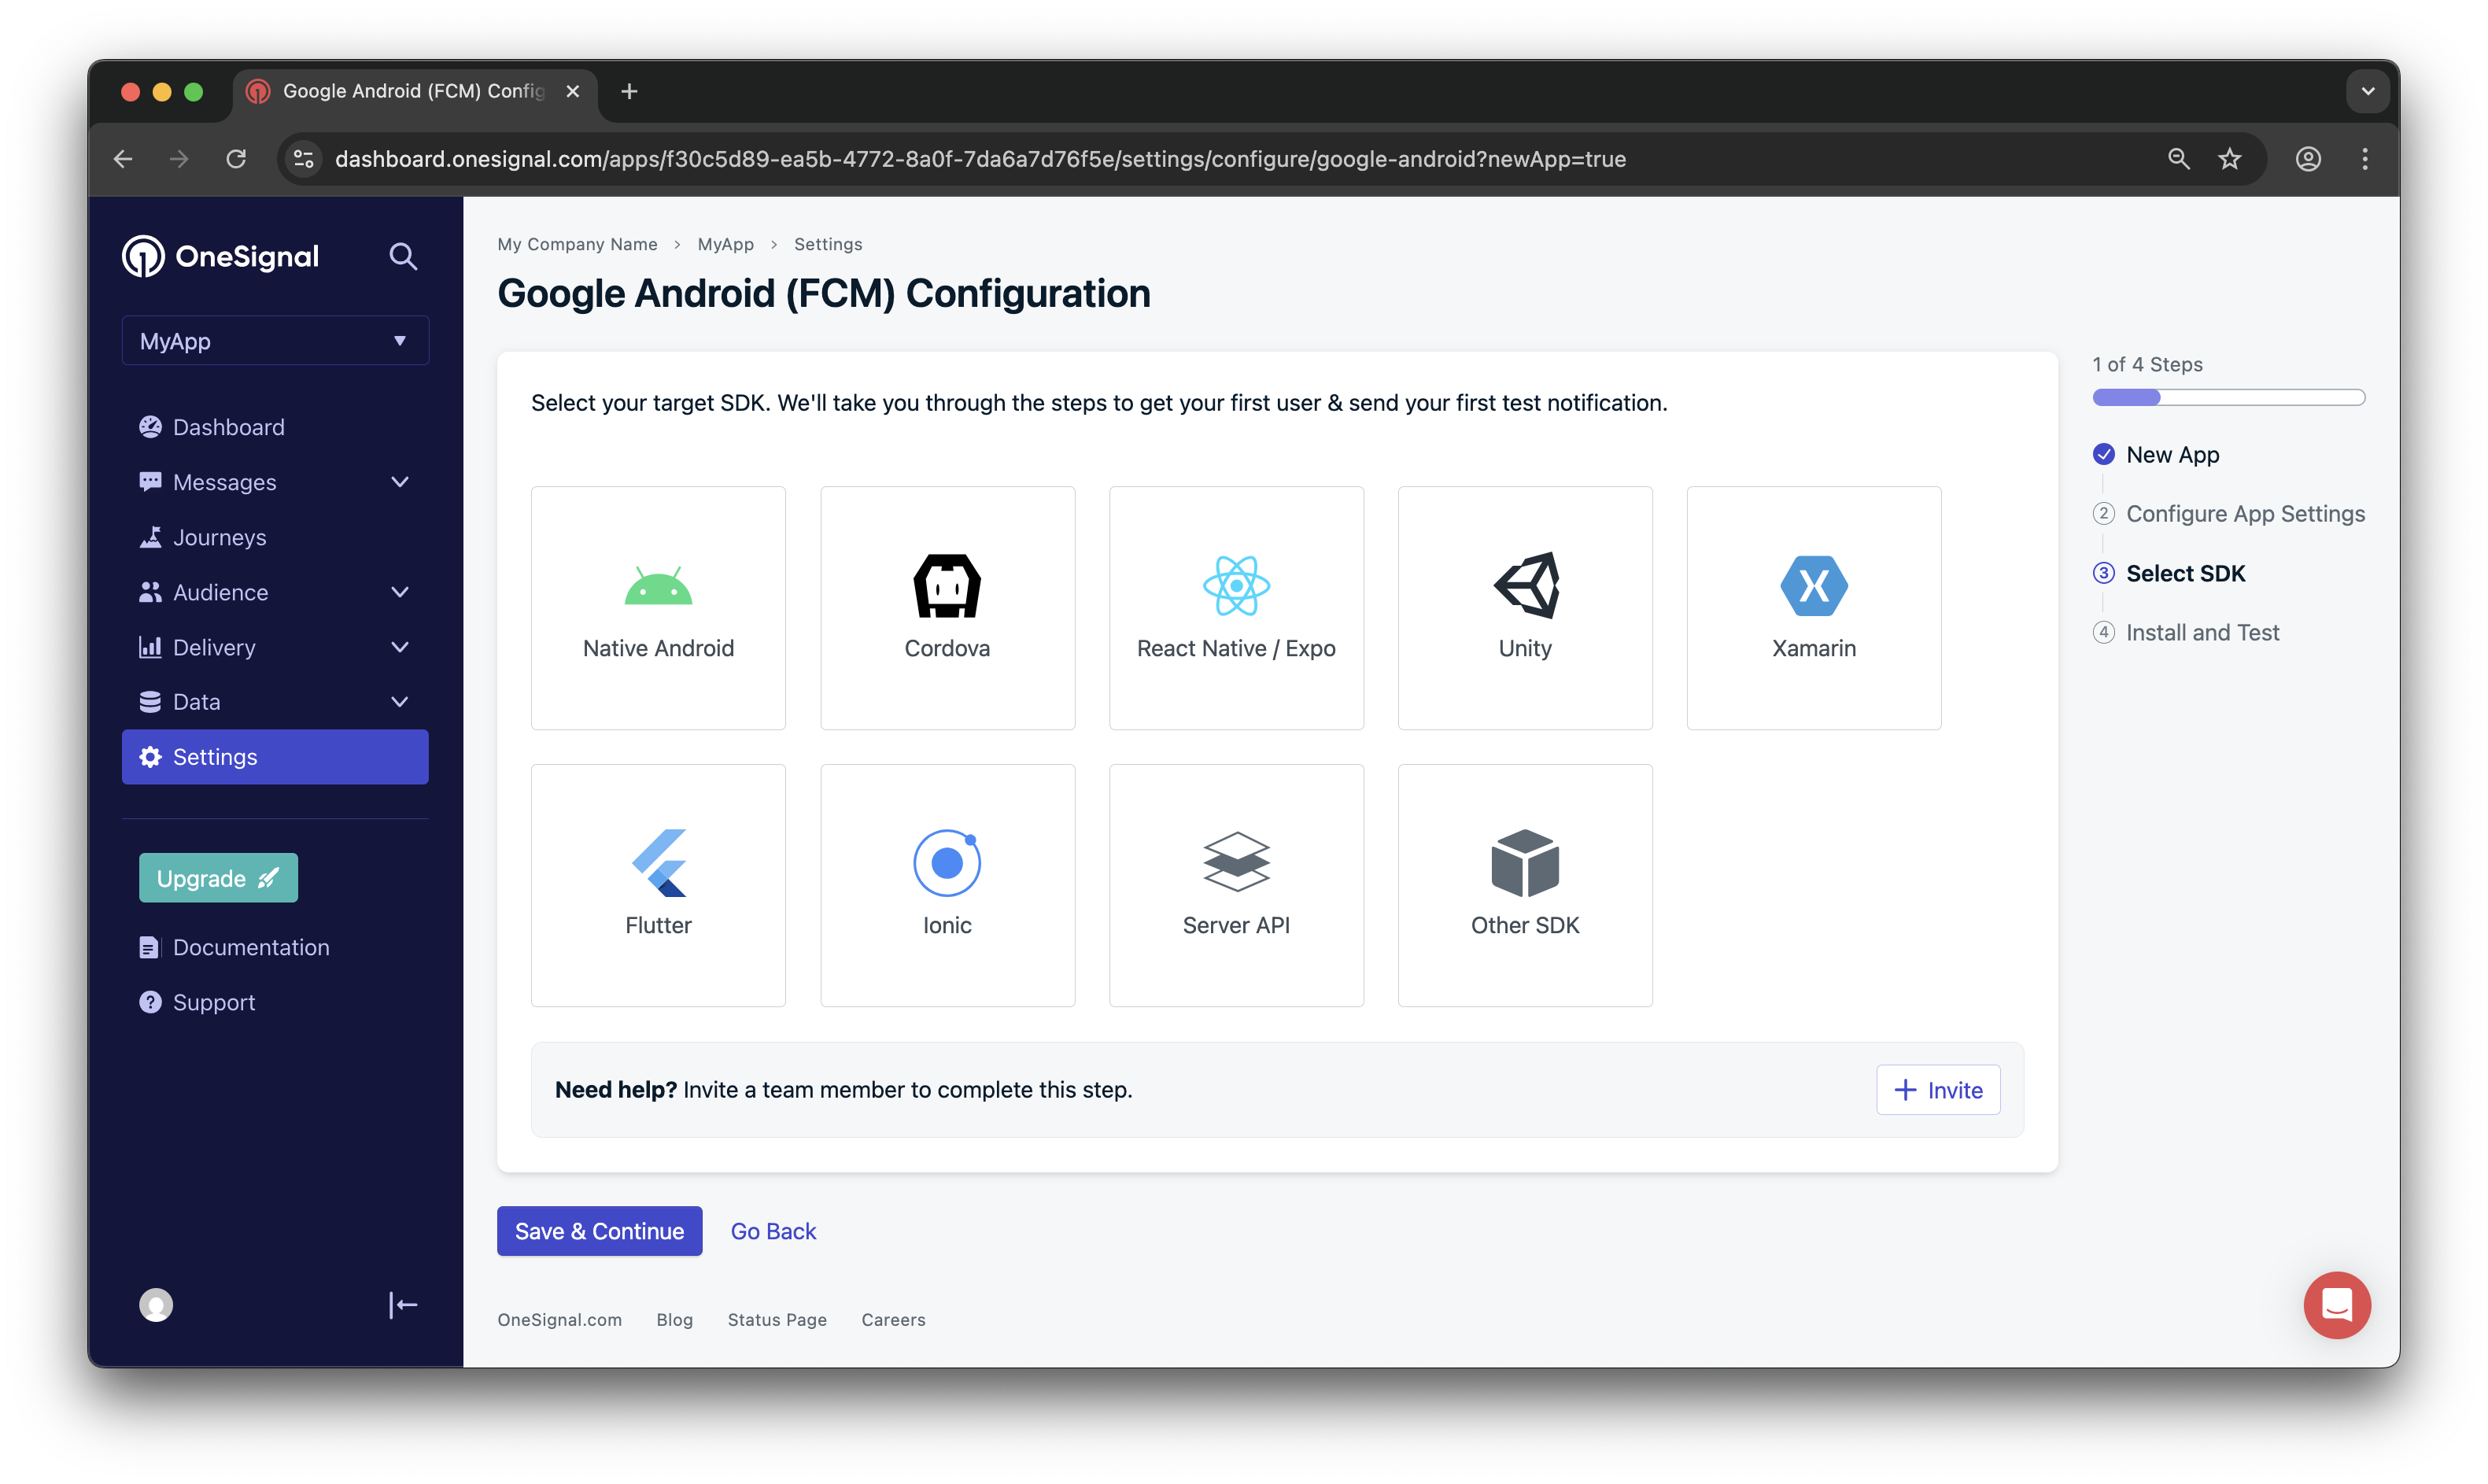
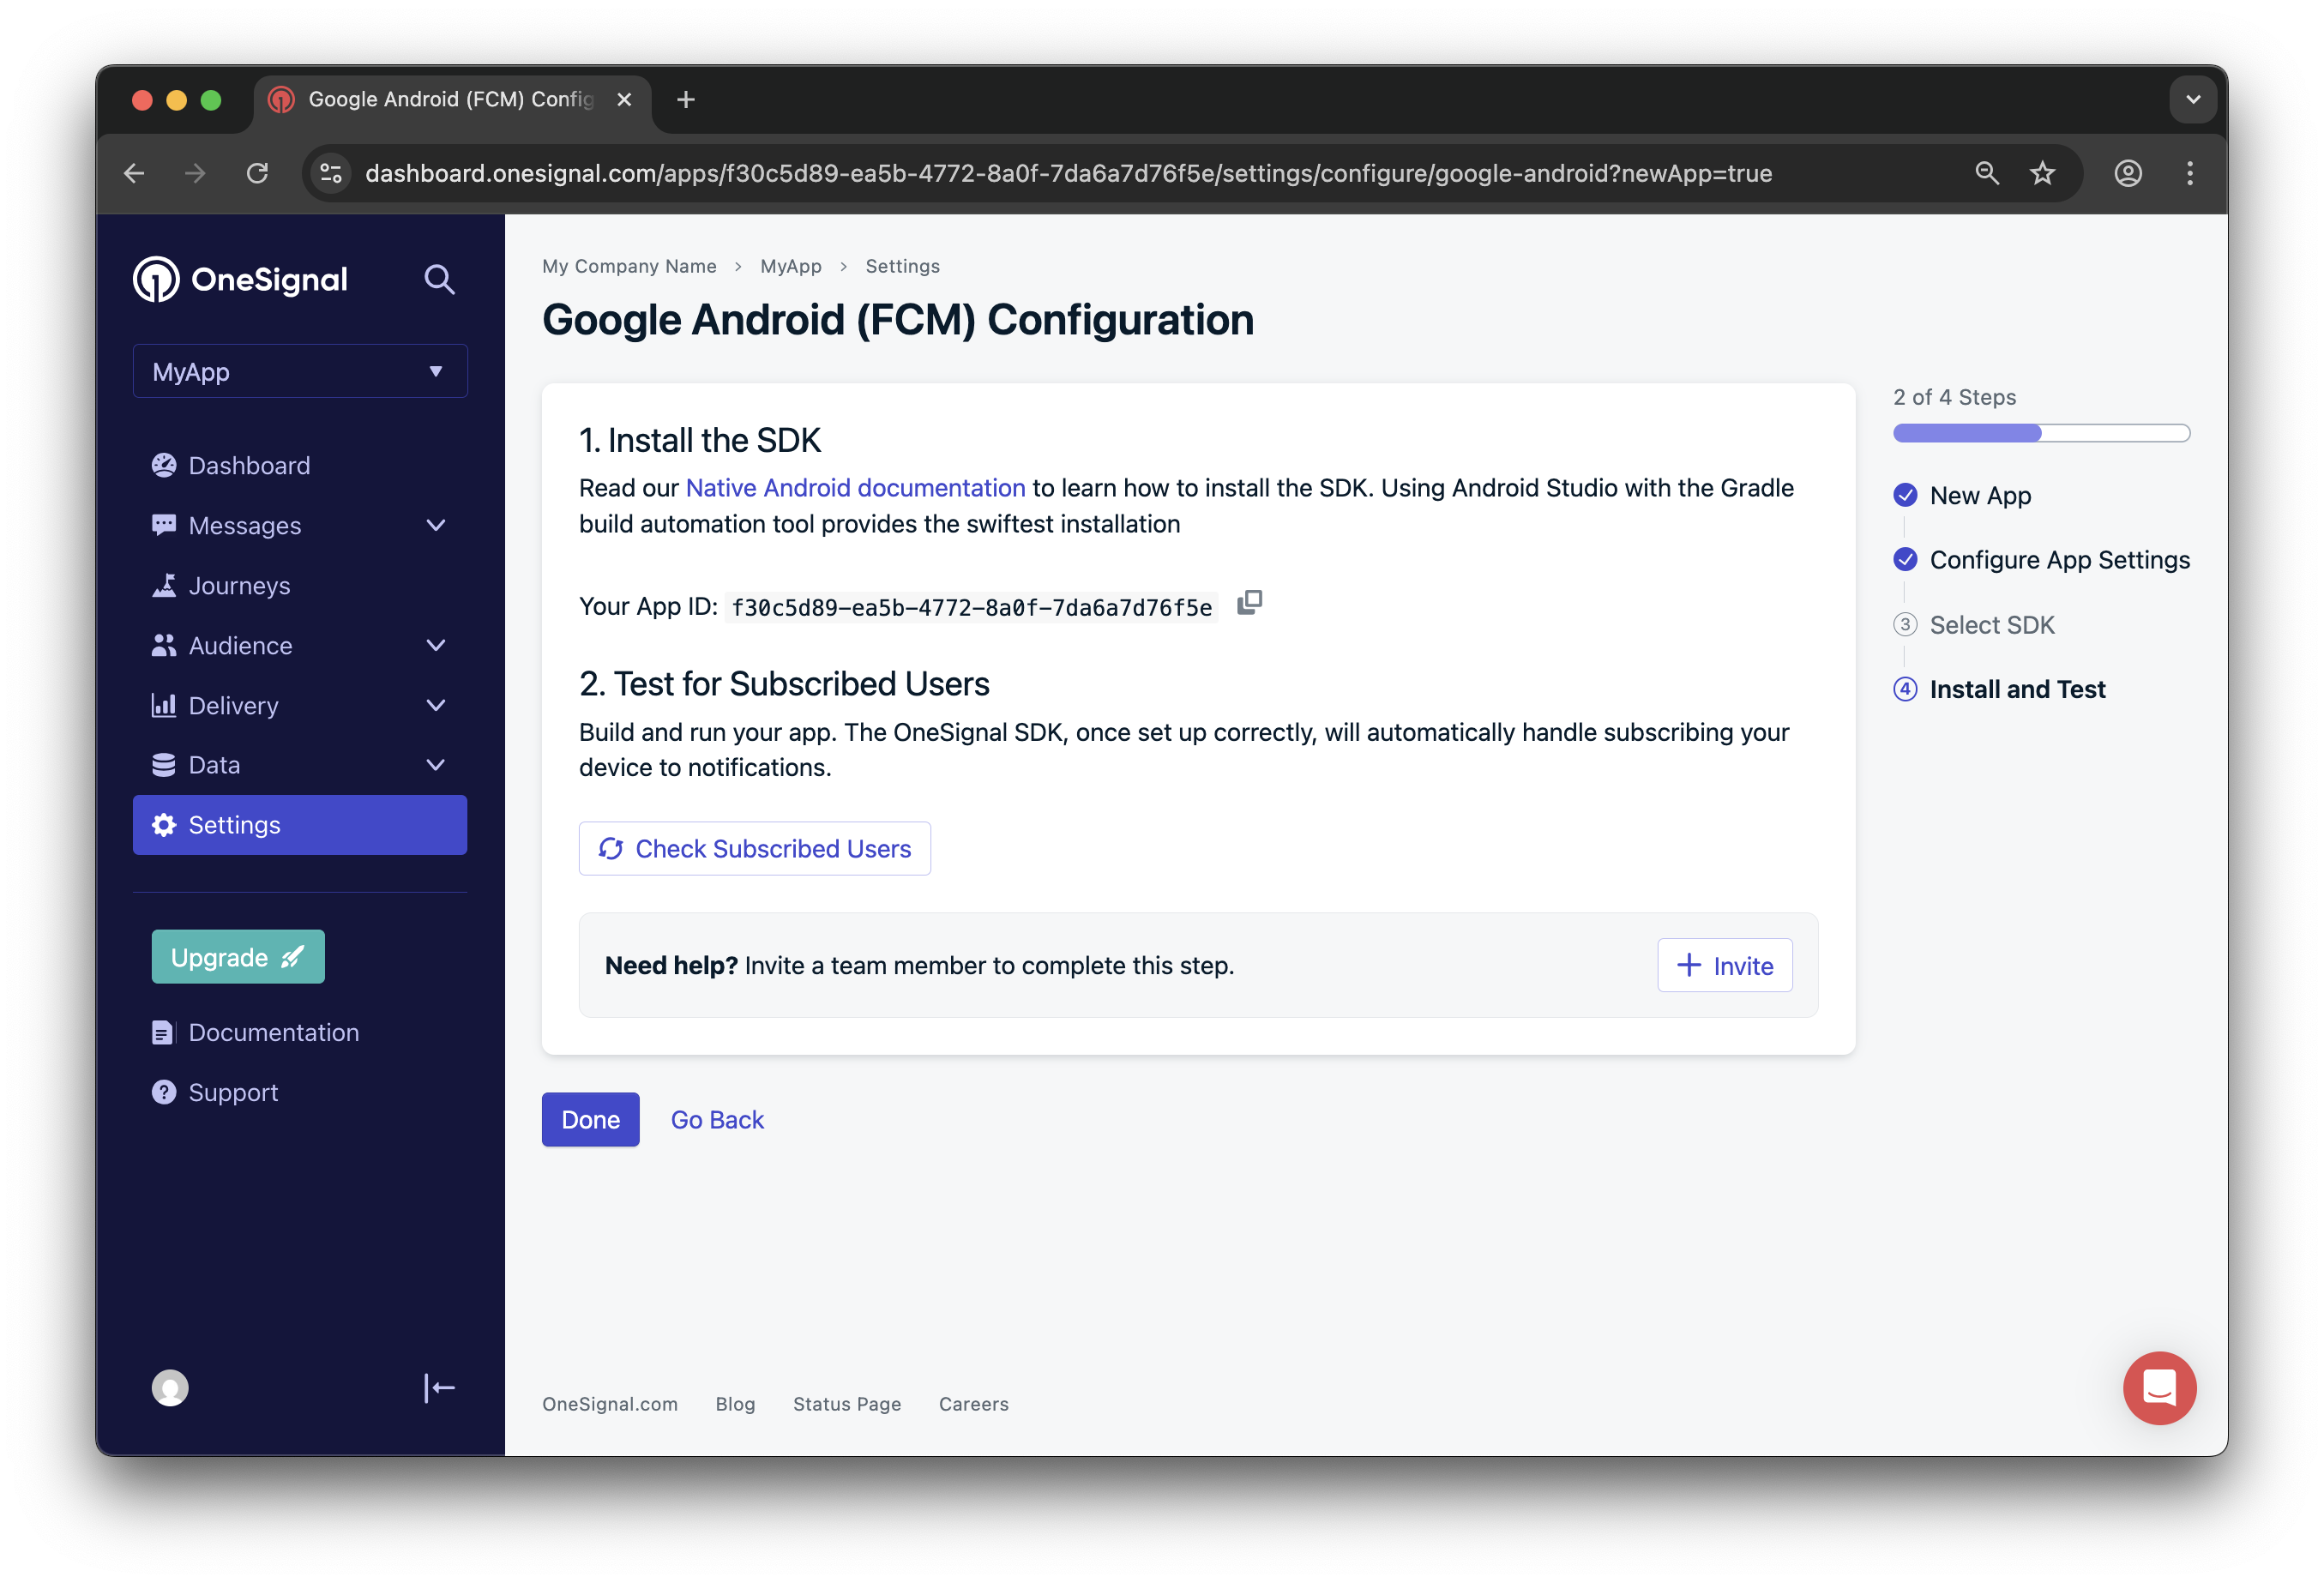
  2. Configure your OneSignal App and Platform.

Configure your OneSignal app and platform

Required setup for push notifications

To start sending push notifications with OneSignal, you must first configure your OneSignal app with all the platforms your support—Apple (APNs), Google (FCM), Huawei (HMS), and/or Amazon (ADM).

If your organization already has a OneSignal account, ask to be invited as an admin role to configure the app. Otherwise, sign up for a free account to get started.

Paste the OneSignal App ID into your Median.co (GoNative) app configuration.


Testing the OneSignal SDK integration

This guide helps you verify that your OneSignal SDK integration is working correctly by testing push notifications, subscription registration, and in-app messaging.

Check mobile subscriptions

1

Launch your app on a test device.

The native push permission prompt should appear automatically if you added the requestPermission method during initialization.
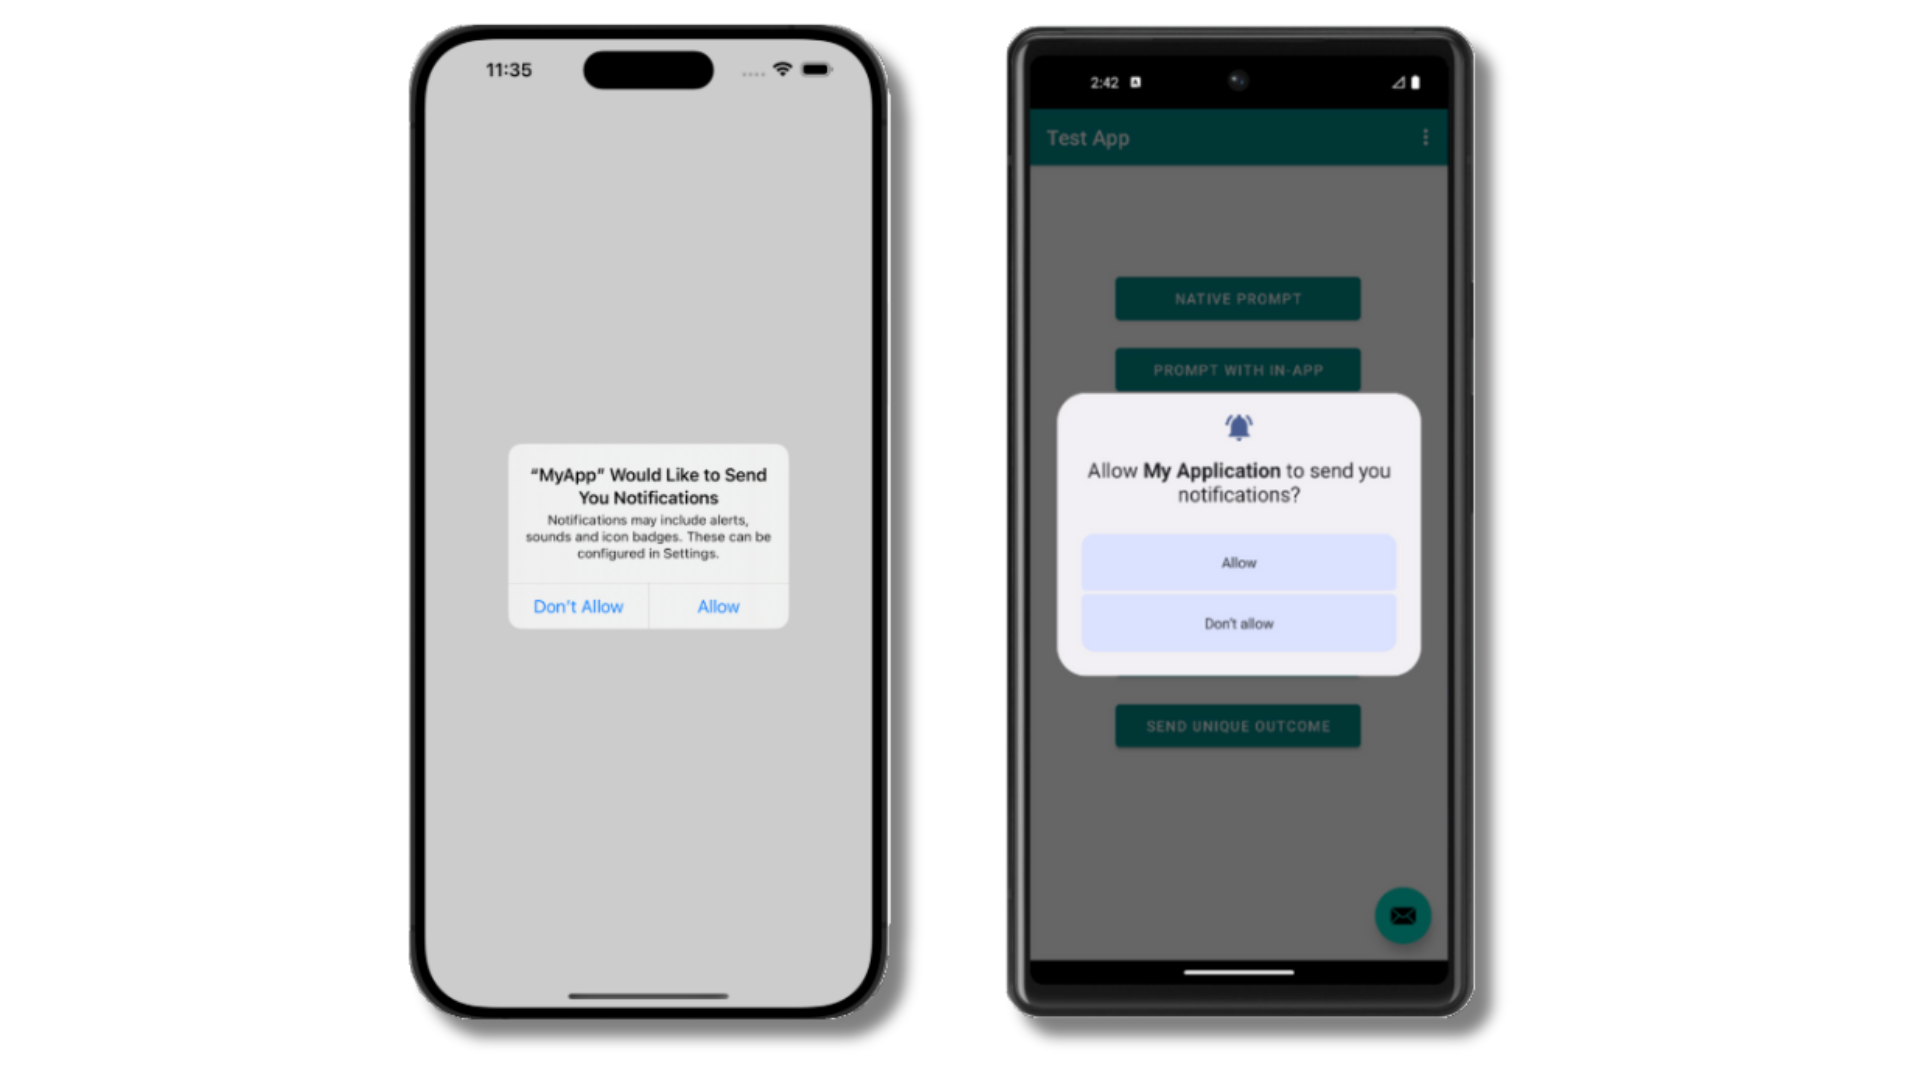
iOS and Android push permission prompts

2

Check your OneSignal dashboard

Before accepting the prompt, check the OneSignal dashboard:

  • Go to Audience > Subscriptions.
  • You should see a new entry with the status “Never Subscribed”.
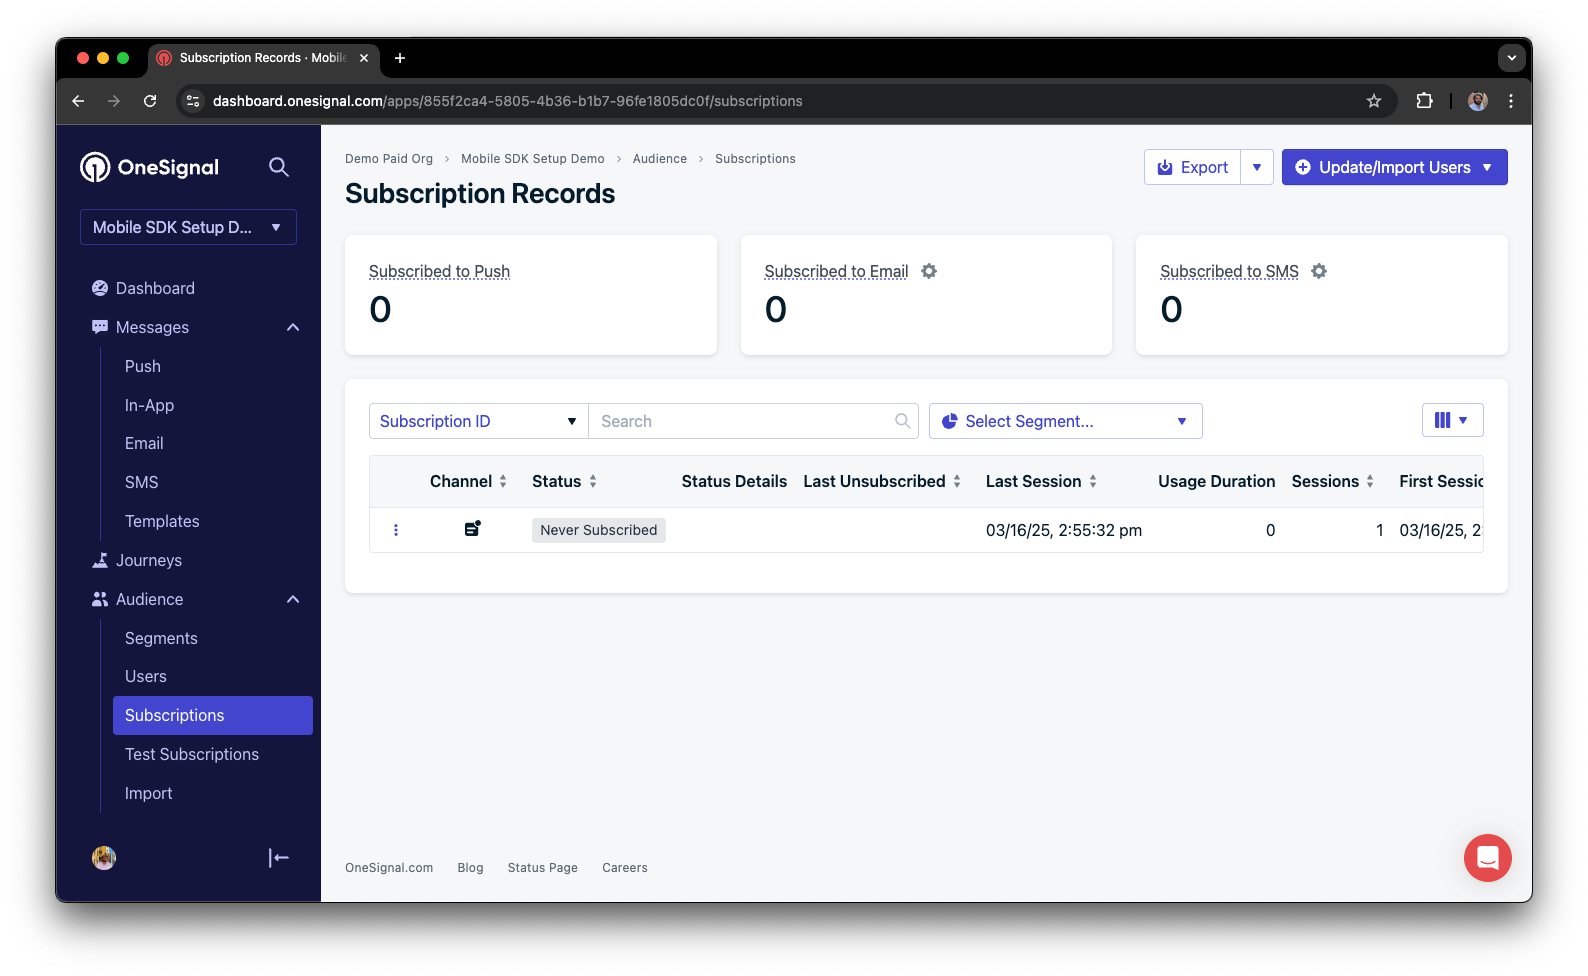
Dashboard showing subscription with 'Never Subscribed' status

3

Return to the app and tap Allow on the prompt.

4

Refresh the OneSignal dashboard Subscription's page.
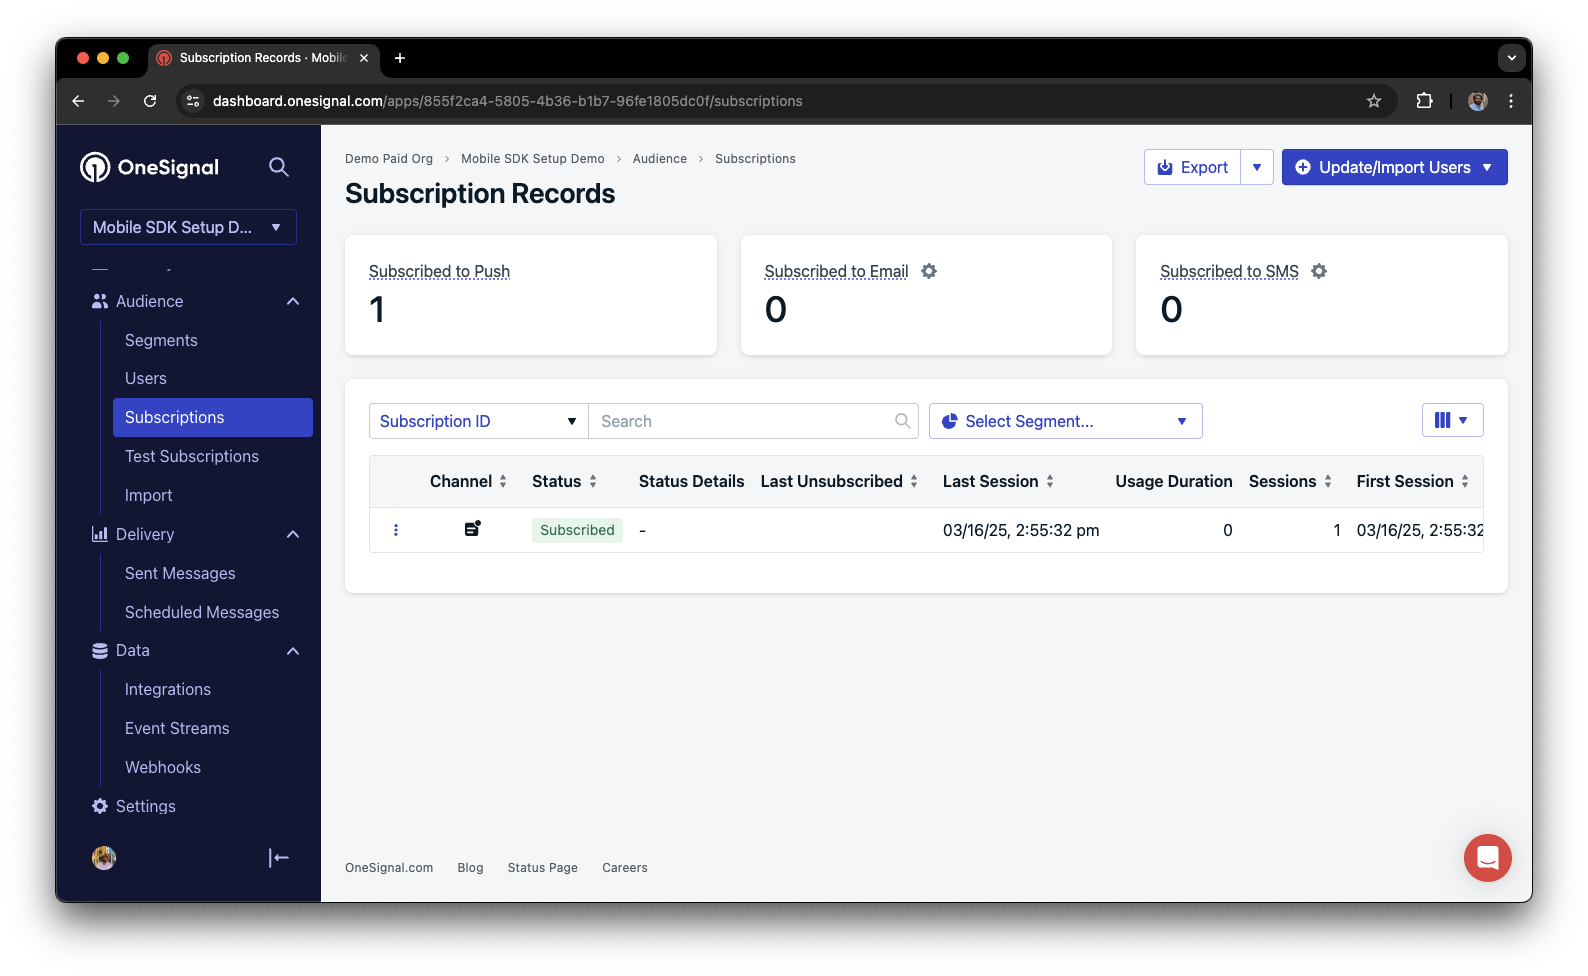
The subscription’s status should now show Subscribed.

Dashboard showing subscription with 'Subscribed' status

You have successfully created a mobile subscription. Mobile subscriptions are created when users first open your app on a device or if they uninstall and reinstall your app on the same device.

Set up test subscriptions

Test subscriptions are helpful for testing a push notification before sending a message.

1

Add to Test Subscriptions.

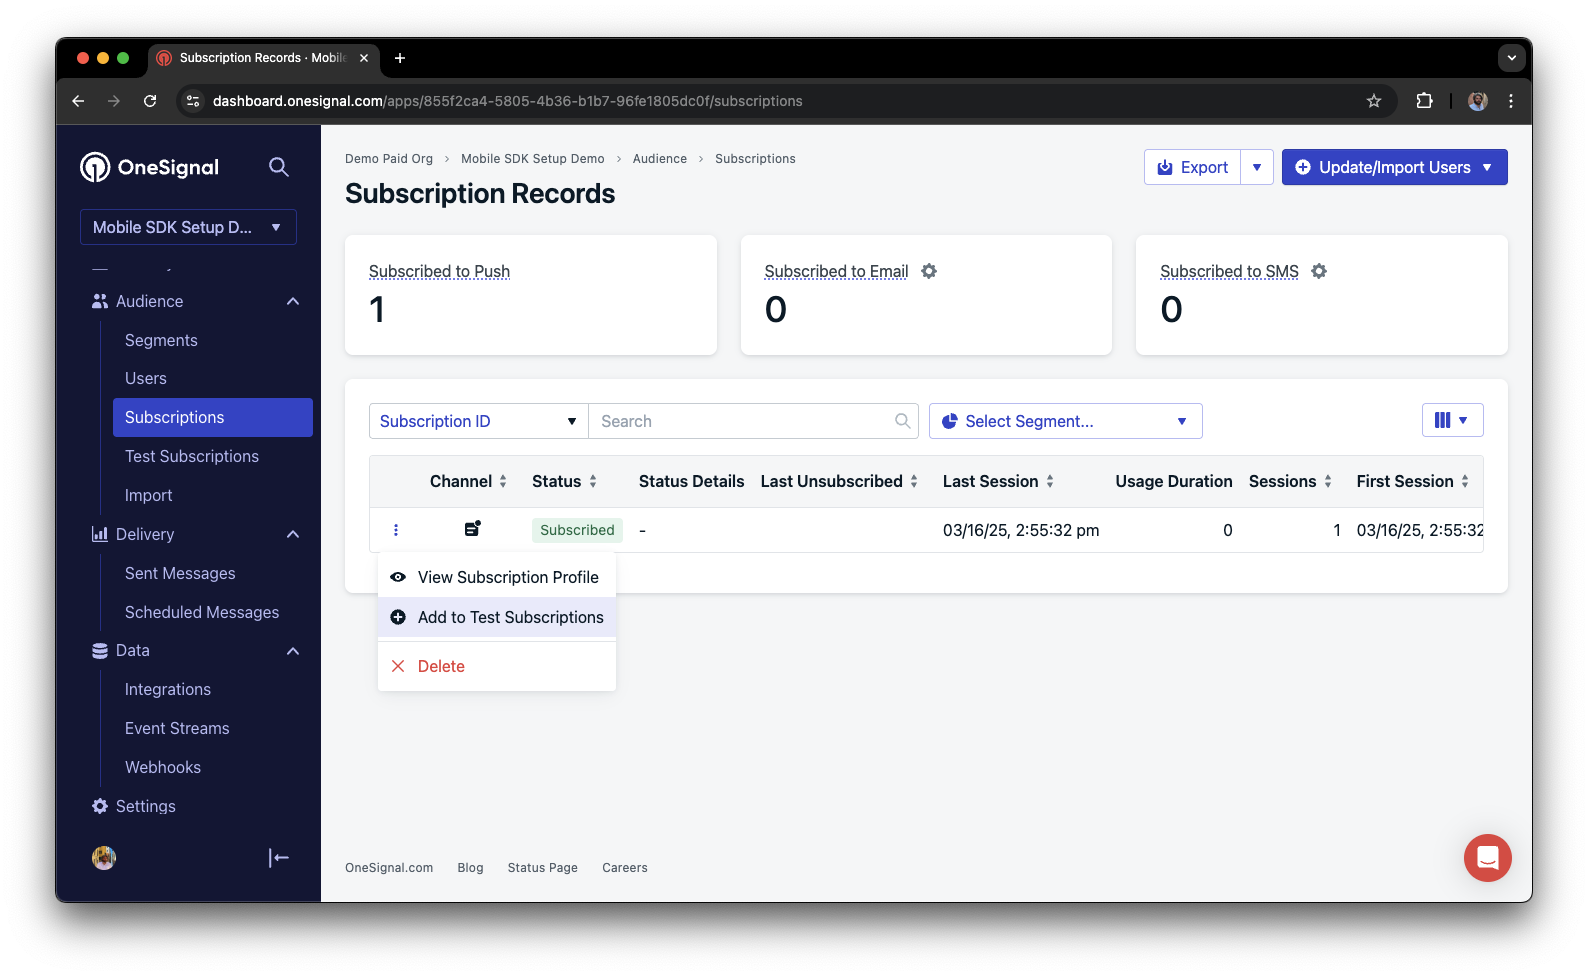
In the dashboard, next to the subscription, click the Options (three dots) button and select Add to Test Subscriptions.

Adding a device to Test Subscriptions

2

Name your subscription.

Name the subscription so you can easily identify your device later in the Test Subscriptions tab.

Dashboard showing the 'Name your subscription' field

3

Create a test users segment.

Go to Audience > Segments > New Segment.

4

Name the segment.

Name the segment Test Users (the name is important because it will be used later).

5

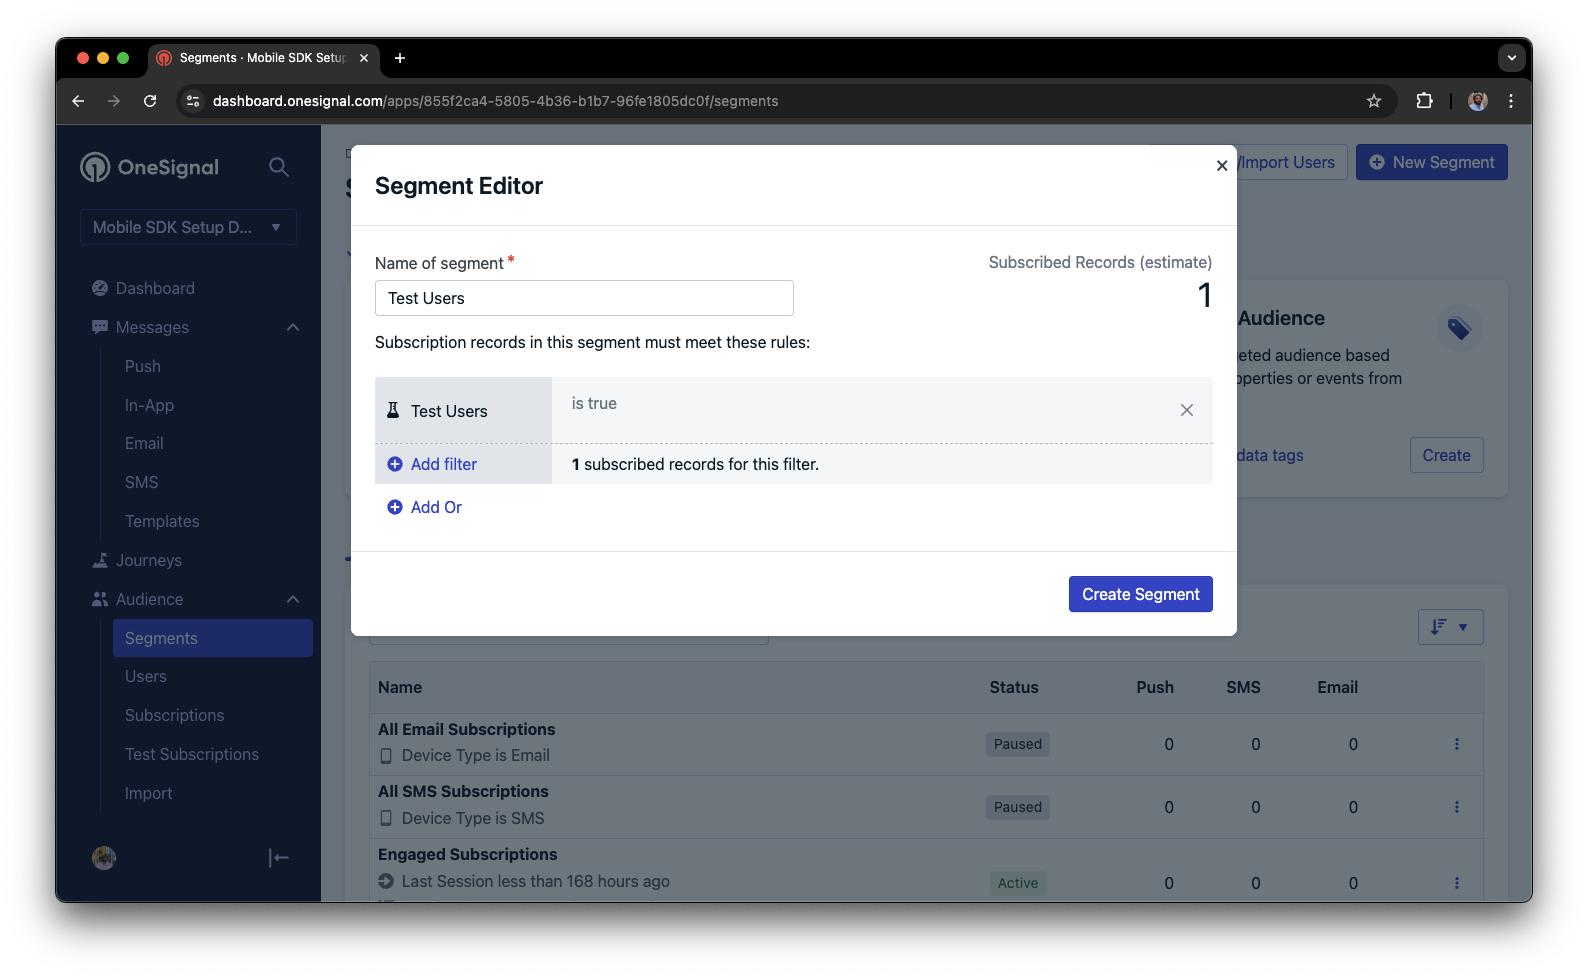
Add the Test Users filter and click Create Segment.

Creating a 'Test Users' segment with the Test Users filter

You have successfully created a segment of test users. We can now test sending messages to this individual device and groups of test users.

Send test push via API

1

Get your App API Key and App ID.

In your OneSignal dashboard, go to Settings > Keys & IDs.

2

Update the provided code.

Replace YOUR_APP_API_KEY and YOUR_APP_ID in the code below with your actual keys. This code uses the Test Users segment we created earlier.

curl -X \
POST --url 'https://api.onesignal.com/notifications' \
 --header 'content-type: application/json; charset=utf-8' \
 --header 'authorization: Key YOUR_APP_API_KEY' \
 --data \
 '{
  "app_id": "YOUR_APP_ID",
  "target_channel": "push",
  "name": "Testing basic setup",
  "headings": {
  	"en": "👋"
  },
  "contents": {
    "en": "Hello world!"
  },
  "included_segments": [
    "Test Users"
  ],
  "ios_attachments": {
    "onesignal_logo": "https://avatars.githubusercontent.com/u/11823027?s=200&v=4"
  },
  "big_picture": "https://avatars.githubusercontent.com/u/11823027?s=200&v=4"
}'
3

Run the code.

Run the code in your terminal.

4

Check images and confirmed delivery.

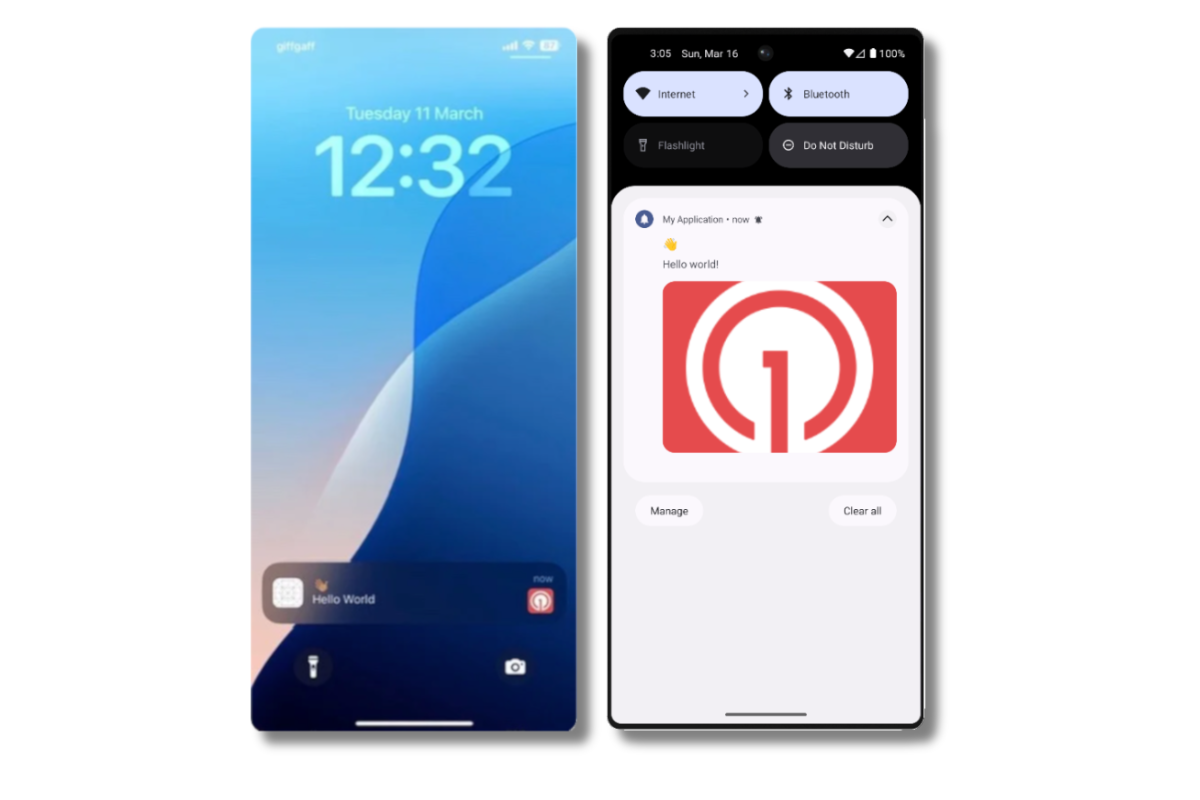
If all setup steps were completed successfully, the test subscriptions should receive a notification with an image included:

Push notification with image on iOS and Android

Images will appear small in the collapsed notification view. Expand the notification to see the full image.
5

Check for confirmed delivery.

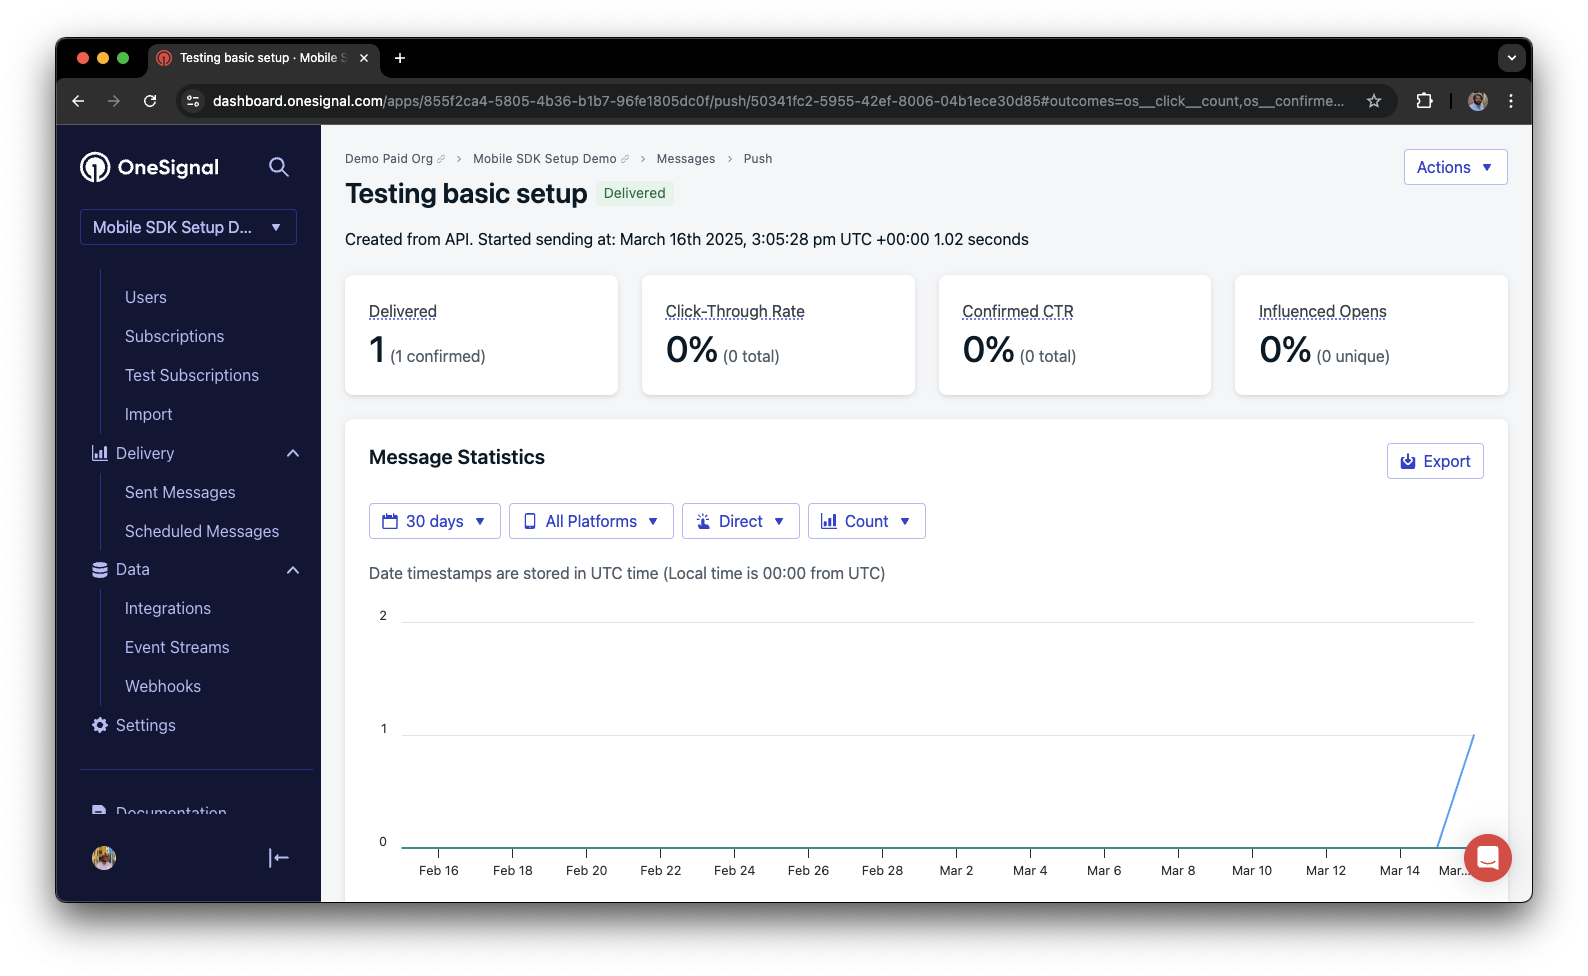
In your dashboard, go to Delivery > Sent Messages, then click the message to view stats.

You should see the confirmed stat, meaning the device received the push.

Delivery stats showing confirmed delivery

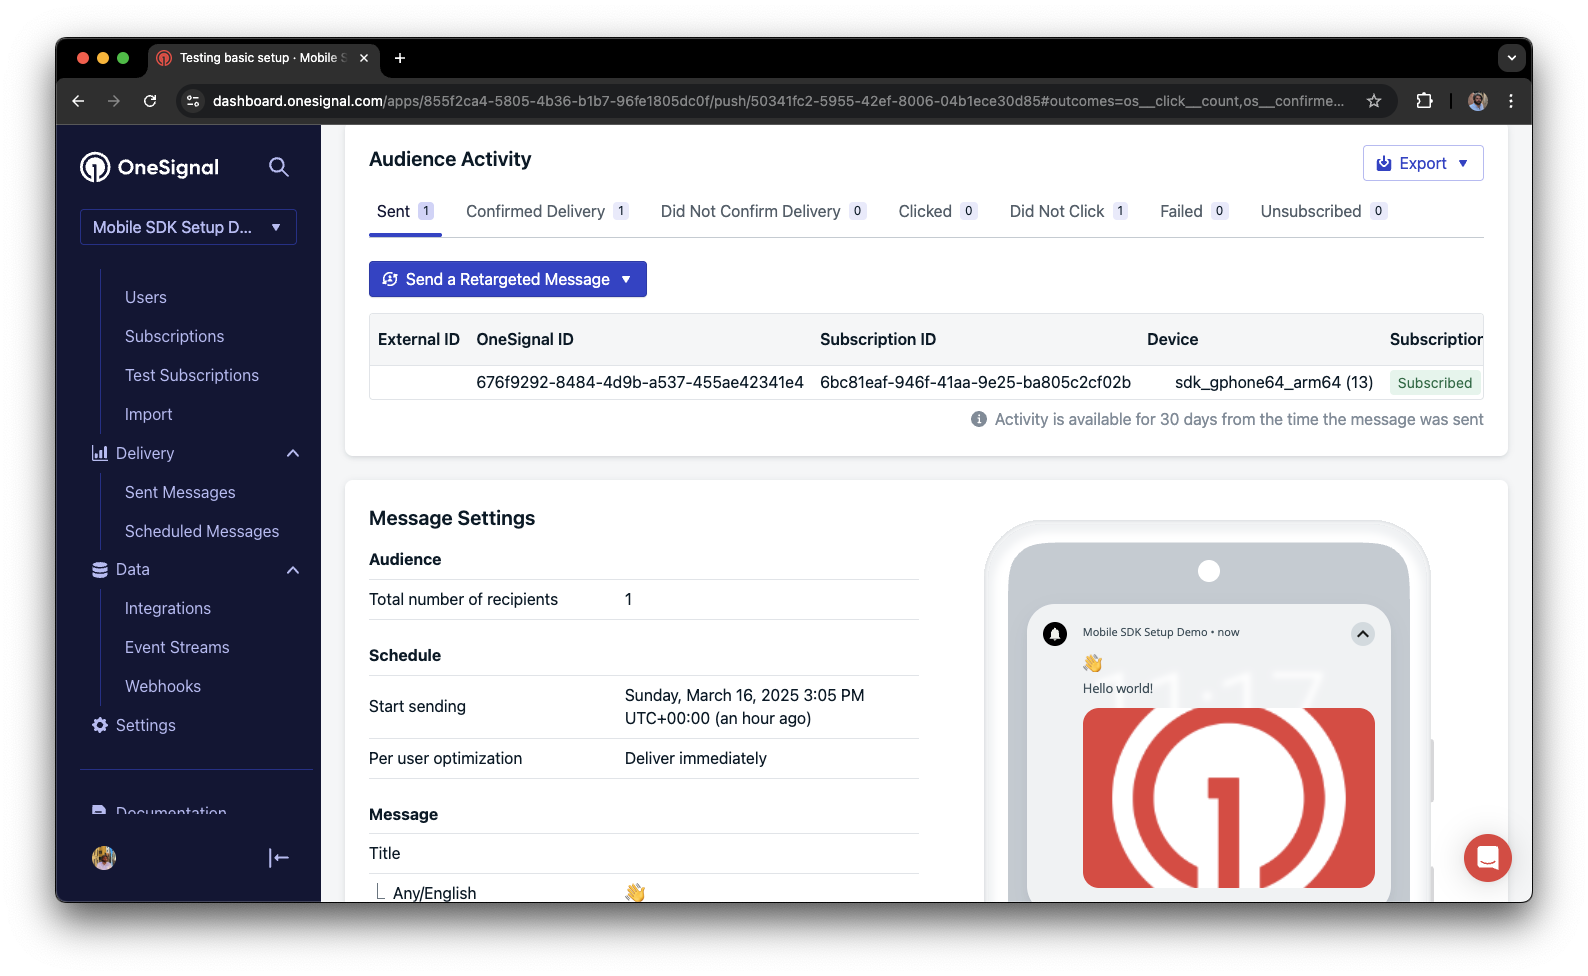
If you’re on a Professional plan or higher, scroll to Audience Activity to see subscription-level confirmation:

Confirmed delivery at the device level in Audience Activity

You have successfully sent a notification via our API to a segment.
  • No image received? Your Notification Service Extension might be missing.
  • No confirmed delivery? Review your App Groups setup.
  • Having issues? Copy-paste the api request and a log from start to finish of app launch into a .txt file. Then share both with support@onesignal.com.

Send an in-app message

In-app messages let you communicate with users while they are using your app.

1

Close or background your app on the device.

This is because users must meet the in-app audience criteria before a new session starts. In OneSignal, a new session starts when the user opens your app after it has been in the background or closed for at least 30 seconds. For more details, see our guide on how in-app messages are displayed.

2

Create an in-app message.

  • In your OneSignal dashboard, navigate to Messages > In-App > New In-App.
  • Find and select the Welcome message.
  • Set your Audience as the Test Users segment we used previously.
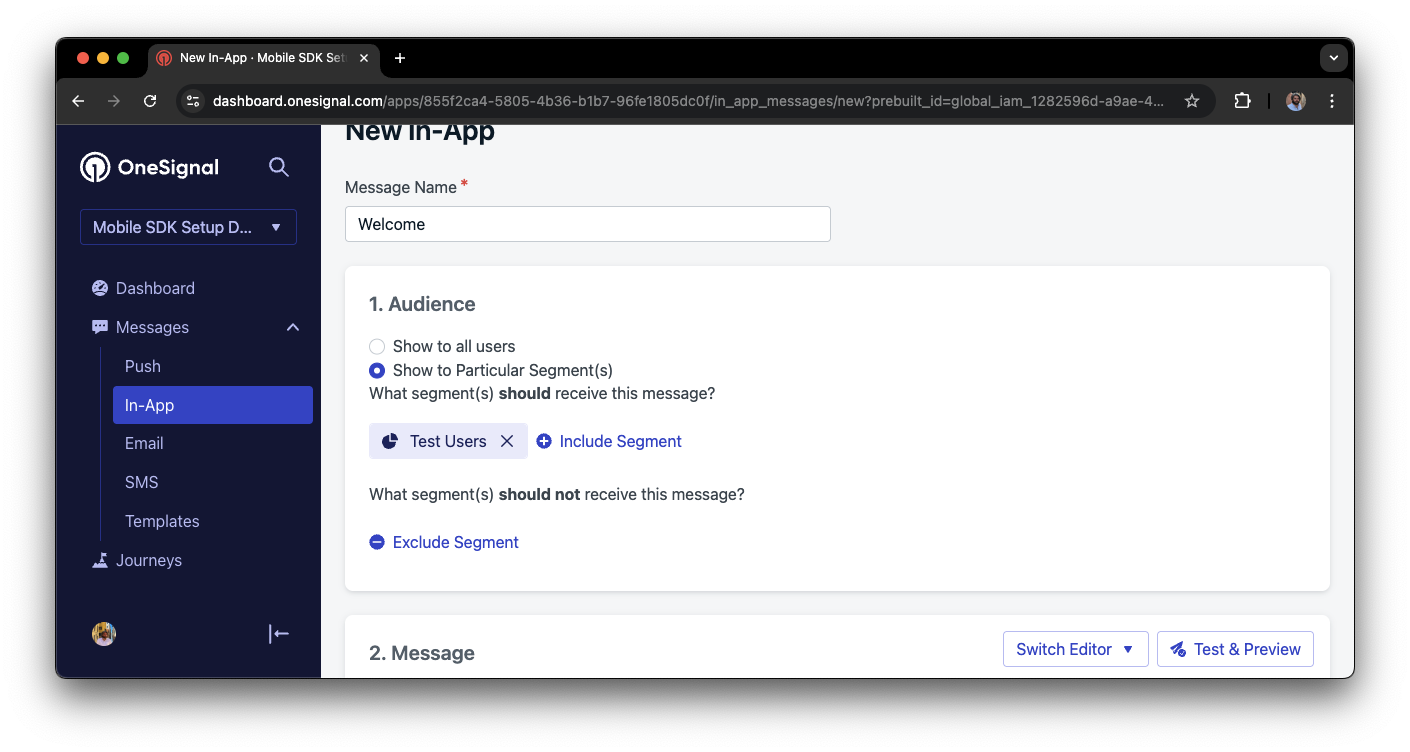
Targeting the 'Test Users' segment with an in-app message

3

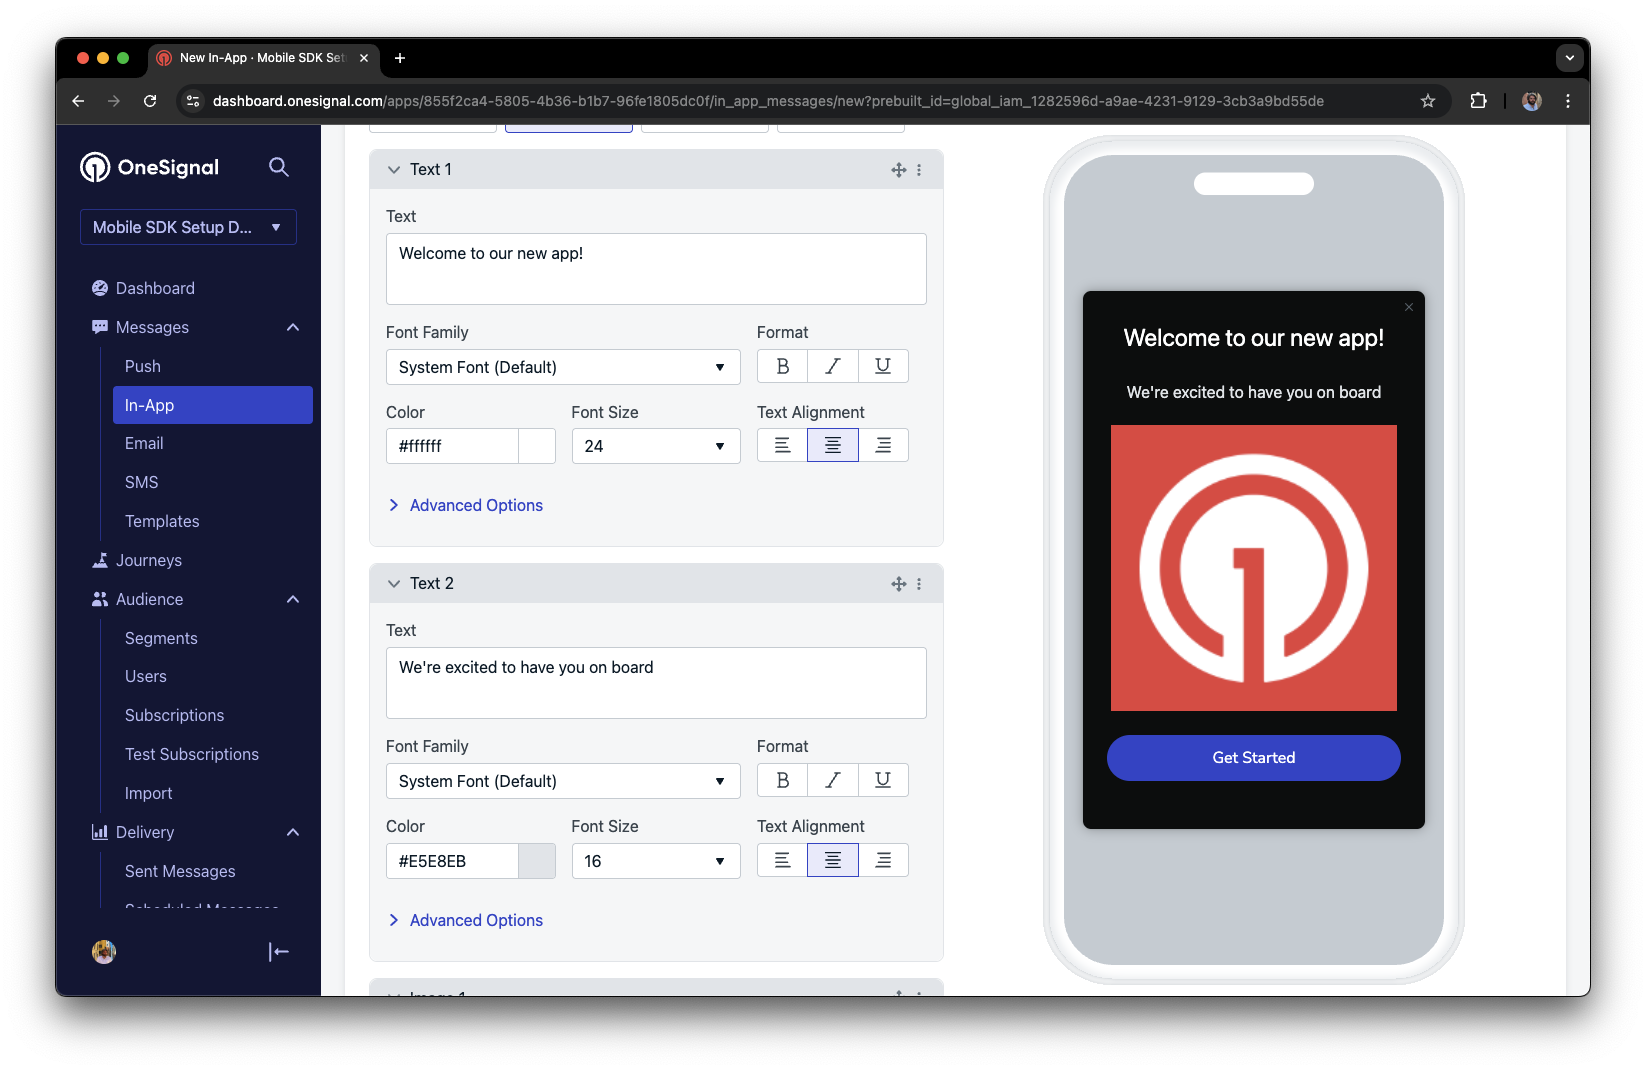
Customize the message content if desired.

Example customization of in-app Welcome message

4

Set Trigger to 'On app open'.

5

Schedule frequency.

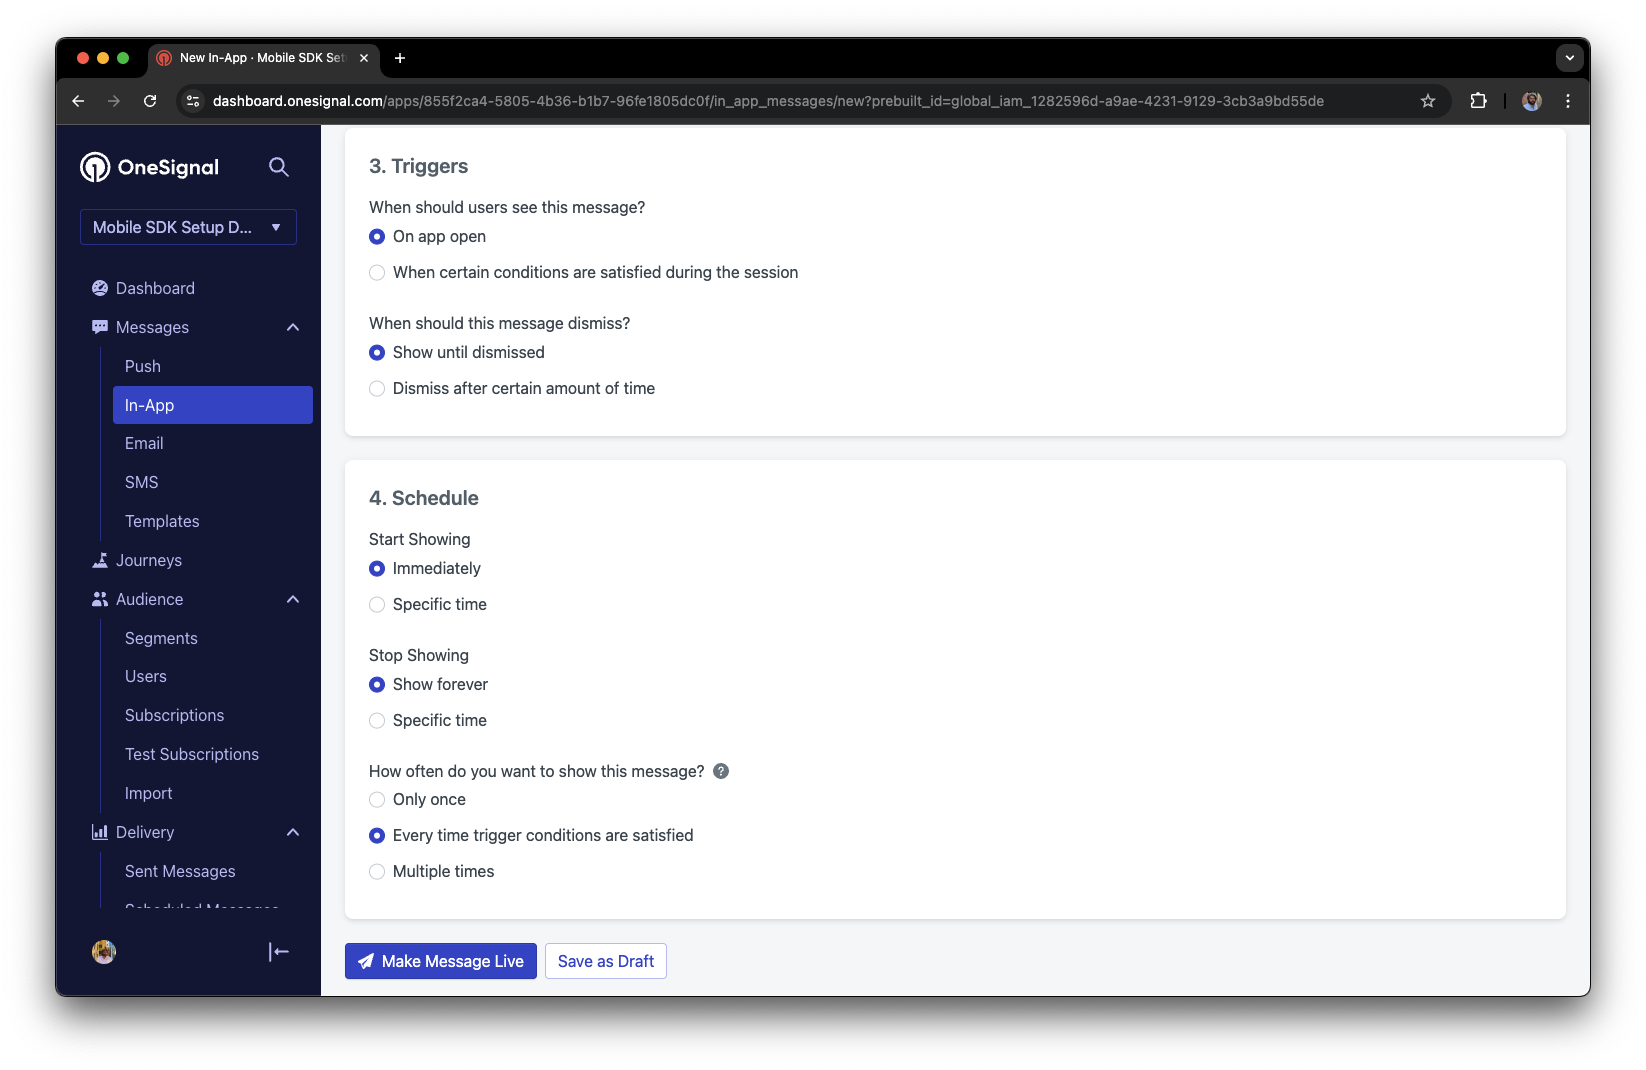
Under Schedule > How often do you want to show this message? select Every time trigger conditions are satisfied.

In-app message scheduling options

6

Make message live.

Click Make Message Live so it is available to your Test Users each time they open the app.

7

Open the app and see the message.

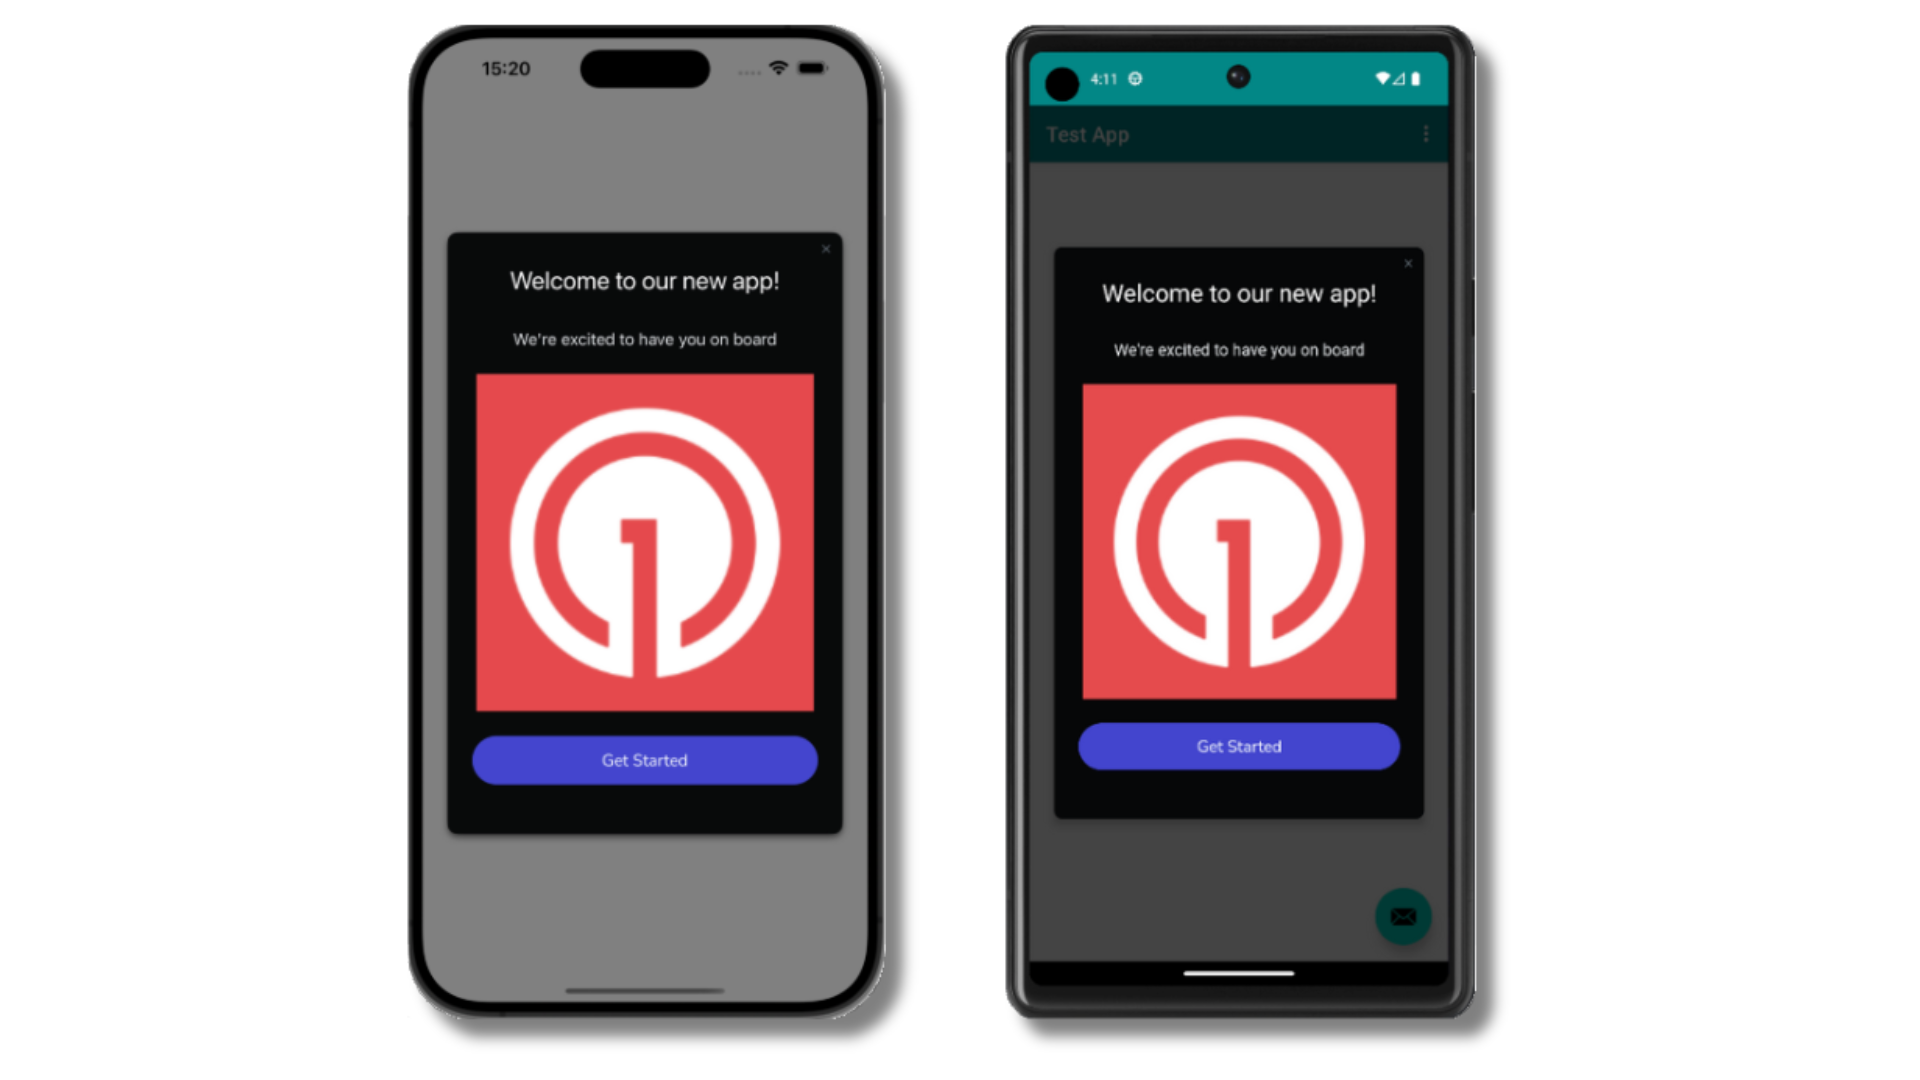
After the in-app message is live, open your app. You should see it display:

Welcome in-app message shown on devices

Not seeing the message?

  • Start a new session
    • You must close or background the app for at least 30 seconds before reopening. This ensures a new session is started.
    • For more, see how in-app messages are displayed.
  • Still in the Test Users segment?
    • If you reinstalled or switched devices, re-add the device to Test Subscriptions and confirm it’s part of the Test Users segment.
  • Having issues?
    • Follow Getting a Debug Log while reproducing the steps above. This will generate additional logging that you can share with support@onesignal.com and we will help investigate what’s going on.

You have successfully setup the OneSignal SDK and learned important concepts like:


Prompt for push permissions

Instead of calling requestPermission() immediately on app open, take a more strategic approach. Use an in-app message to explain the value of push notifications before requesting permission.

For best practices and implementation details, see our Prompt for push permissions guide.


FAQ

How can I access OneSignal data on the client side?

Use the Median Native JavaScript Bridge method median_onesignal_info to retrieve the OneSignal Subscription ID (oneSignalUserId) and the subscription status.

javascript
  var osSubscriptionId = "the OneSignal Subscription ID string";
  var isSubscribedToPushNotifications;

  median.onesignal.onesignalInfo().then(function (oneSignalInfo) {
    console.log(oneSignalInfo);
    osSubscriptionId = oneSignalInfo.oneSignalUserId;
    isSubscribedToPushNotifications = oneSignalInfo.oneSignalSubscribed;
  });

More details in Median.co Docs

Median apps use deep linking for a native experience instead of opening a pop-up browser.

When using OneSignal dashboard:

  • Do not use the Launch URL field.
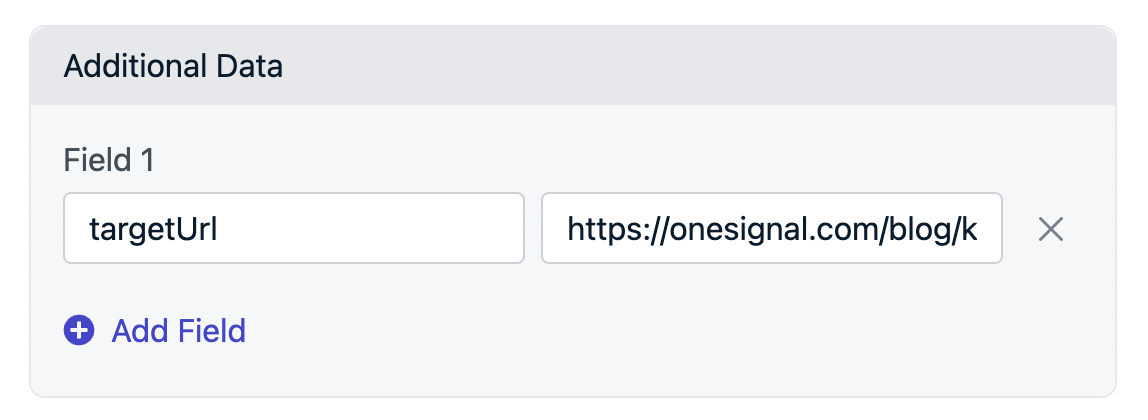
  • Instead, use the Additional Data field.
    • Add a key: targetUrl (capital “U”)
    • Add a value: the URL you want users to open.

Using Additional Data with targetUrl

When using the REST API:

Include targetUrl in the data object of your push payload. Example:

{
  "app_id": "YOUR-APP-ID",
  "include_player_ids": ["USER-ID"],
  "data": { "targetUrl": "https://example.com/page" },
  "contents": { "en": "Check out this page!" }
}

Sending to both web and mobile?

If you send to web and mobile simultaneously:

In the Launch URL section, select “Different URL for web/app”.

Leave the APP URL field blank to prevent override.
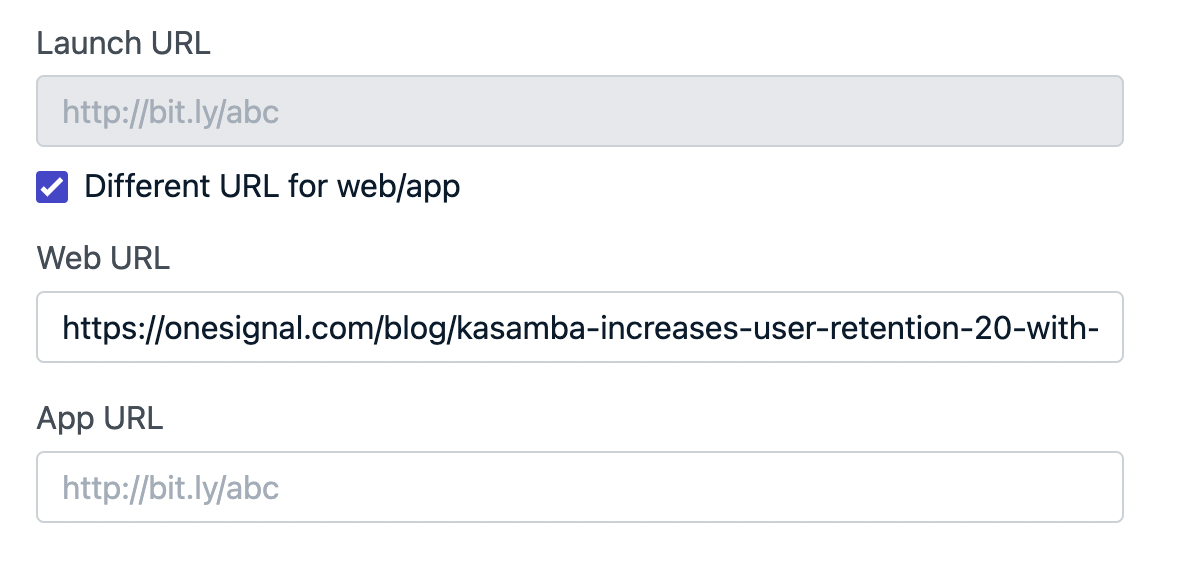
Configuring different URLs for web and mobile


Overview

If you have a mobile-friendly website and want to convert it into a downloadable mobile app for the Apple App Store or Google Play Store, Median.co is a powerful solution. It also offers a seamless integration with OneSignal to enable push notifications.

Setup

1. Create your app with Median.co

  1. Follow the Median.co Getting Started Guide.
  2. Build an app at <https://median.co/app>.

2. Set up OneSignal

  1. Go to onesignal.com and create an account.
  2. Configure your OneSignal App and Platform.

Configure your OneSignal app and platform

Required setup for push notifications

To start sending push notifications with OneSignal, you must first configure your OneSignal app with all the platforms your support—Apple (APNs), Google (FCM), Huawei (HMS), and/or Amazon (ADM).

If your organization already has a OneSignal account, ask to be invited as an admin role to configure the app. Otherwise, sign up for a free account to get started.

Paste the OneSignal App ID into your Median.co (GoNative) app configuration.


Testing the OneSignal SDK integration

This guide helps you verify that your OneSignal SDK integration is working correctly by testing push notifications, subscription registration, and in-app messaging.

Check mobile subscriptions

1

Launch your app on a test device.

The native push permission prompt should appear automatically if you added the requestPermission method during initialization.

iOS and Android push permission prompts

2

Check your OneSignal dashboard

Before accepting the prompt, check the OneSignal dashboard:

  • Go to Audience > Subscriptions.
  • You should see a new entry with the status “Never Subscribed”.

Dashboard showing subscription with 'Never Subscribed' status

3

Return to the app and tap Allow on the prompt.

4

Refresh the OneSignal dashboard Subscription's page.

The subscription’s status should now show Subscribed.

Dashboard showing subscription with 'Subscribed' status

You have successfully created a mobile subscription. Mobile subscriptions are created when users first open your app on a device or if they uninstall and reinstall your app on the same device.

Set up test subscriptions

Test subscriptions are helpful for testing a push notification before sending a message.

1

Add to Test Subscriptions.

In the dashboard, next to the subscription, click the Options (three dots) button and select Add to Test Subscriptions.

Adding a device to Test Subscriptions

2

Name your subscription.

Name the subscription so you can easily identify your device later in the Test Subscriptions tab.

Dashboard showing the 'Name your subscription' field

3

Create a test users segment.

Go to Audience > Segments > New Segment.

4

Name the segment.

Name the segment Test Users (the name is important because it will be used later).

5

Add the Test Users filter and click Create Segment.

Creating a 'Test Users' segment with the Test Users filter

You have successfully created a segment of test users. We can now test sending messages to this individual device and groups of test users.

Send test push via API

1

Get your App API Key and App ID.

In your OneSignal dashboard, go to Settings > Keys & IDs.

2

Update the provided code.

Replace YOUR_APP_API_KEY and YOUR_APP_ID in the code below with your actual keys. This code uses the Test Users segment we created earlier.

curl -X \
POST --url 'https://api.onesignal.com/notifications' \
 --header 'content-type: application/json; charset=utf-8' \
 --header 'authorization: Key YOUR_APP_API_KEY' \
 --data \
 '{
  "app_id": "YOUR_APP_ID",
  "target_channel": "push",
  "name": "Testing basic setup",
  "headings": {
  	"en": "👋"
  },
  "contents": {
    "en": "Hello world!"
  },
  "included_segments": [
    "Test Users"
  ],
  "ios_attachments": {
    "onesignal_logo": "https://avatars.githubusercontent.com/u/11823027?s=200&v=4"
  },
  "big_picture": "https://avatars.githubusercontent.com/u/11823027?s=200&v=4"
}'
3

Run the code.

Run the code in your terminal.

4

Check images and confirmed delivery.

If all setup steps were completed successfully, the test subscriptions should receive a notification with an image included:

Push notification with image on iOS and Android

Images will appear small in the collapsed notification view. Expand the notification to see the full image.
5

Check for confirmed delivery.

In your dashboard, go to Delivery > Sent Messages, then click the message to view stats.

You should see the confirmed stat, meaning the device received the push.

Delivery stats showing confirmed delivery

If you’re on a Professional plan or higher, scroll to Audience Activity to see subscription-level confirmation:

Confirmed delivery at the device level in Audience Activity

You have successfully sent a notification via our API to a segment.
  • No image received? Your Notification Service Extension might be missing.
  • No confirmed delivery? Review your App Groups setup.
  • Having issues? Copy-paste the api request and a log from start to finish of app launch into a .txt file. Then share both with support@onesignal.com.

Send an in-app message

In-app messages let you communicate with users while they are using your app.

1

Close or background your app on the device.

This is because users must meet the in-app audience criteria before a new session starts. In OneSignal, a new session starts when the user opens your app after it has been in the background or closed for at least 30 seconds. For more details, see our guide on how in-app messages are displayed.

2

Create an in-app message.

  • In your OneSignal dashboard, navigate to Messages > In-App > New In-App.
  • Find and select the Welcome message.
  • Set your Audience as the Test Users segment we used previously.

Targeting the 'Test Users' segment with an in-app message

3

Customize the message content if desired.

Example customization of in-app Welcome message

4

Set Trigger to 'On app open'.

5

Schedule frequency.

Under Schedule > How often do you want to show this message? select Every time trigger conditions are satisfied.

In-app message scheduling options

6

Make message live.

Click Make Message Live so it is available to your Test Users each time they open the app.

7

Open the app and see the message.

After the in-app message is live, open your app. You should see it display:

Welcome in-app message shown on devices

Not seeing the message?

  • Start a new session
    • You must close or background the app for at least 30 seconds before reopening. This ensures a new session is started.
    • For more, see how in-app messages are displayed.
  • Still in the Test Users segment?
    • If you reinstalled or switched devices, re-add the device to Test Subscriptions and confirm it’s part of the Test Users segment.
  • Having issues?
    • Follow Getting a Debug Log while reproducing the steps above. This will generate additional logging that you can share with support@onesignal.com and we will help investigate what’s going on.

You have successfully setup the OneSignal SDK and learned important concepts like:


Prompt for push permissions

Instead of calling requestPermission() immediately on app open, take a more strategic approach. Use an in-app message to explain the value of push notifications before requesting permission.

For best practices and implementation details, see our Prompt for push permissions guide.


FAQ

How can I access OneSignal data on the client side?

Use the Median Native JavaScript Bridge method median_onesignal_info to retrieve the OneSignal Subscription ID (oneSignalUserId) and the subscription status.

javascript
  var osSubscriptionId = "the OneSignal Subscription ID string";
  var isSubscribedToPushNotifications;

  median.onesignal.onesignalInfo().then(function (oneSignalInfo) {
    console.log(oneSignalInfo);
    osSubscriptionId = oneSignalInfo.oneSignalUserId;
    isSubscribedToPushNotifications = oneSignalInfo.oneSignalSubscribed;
  });

More details in Median.co Docs

Median apps use deep linking for a native experience instead of opening a pop-up browser.

When using OneSignal dashboard:

  • Do not use the Launch URL field.
  • Instead, use the Additional Data field.
    • Add a key: targetUrl (capital “U”)
    • Add a value: the URL you want users to open.

Using Additional Data with targetUrl

When using the REST API:

Include targetUrl in the data object of your push payload. Example:

{
  "app_id": "YOUR-APP-ID",
  "include_player_ids": ["USER-ID"],
  "data": { "targetUrl": "https://example.com/page" },
  "contents": { "en": "Check out this page!" }
}

Sending to both web and mobile?

If you send to web and mobile simultaneously:

In the Launch URL section, select “Different URL for web/app”.

Leave the APP URL field blank to prevent override.
Configuring different URLs for web and mobile