Requirements
Make sure you have the following before starting:- An iOS or macOS app.
- A Paid Apple Developer Account with Admin access.
- A OneSignal Account.
- A Mac with Xcode 14+.
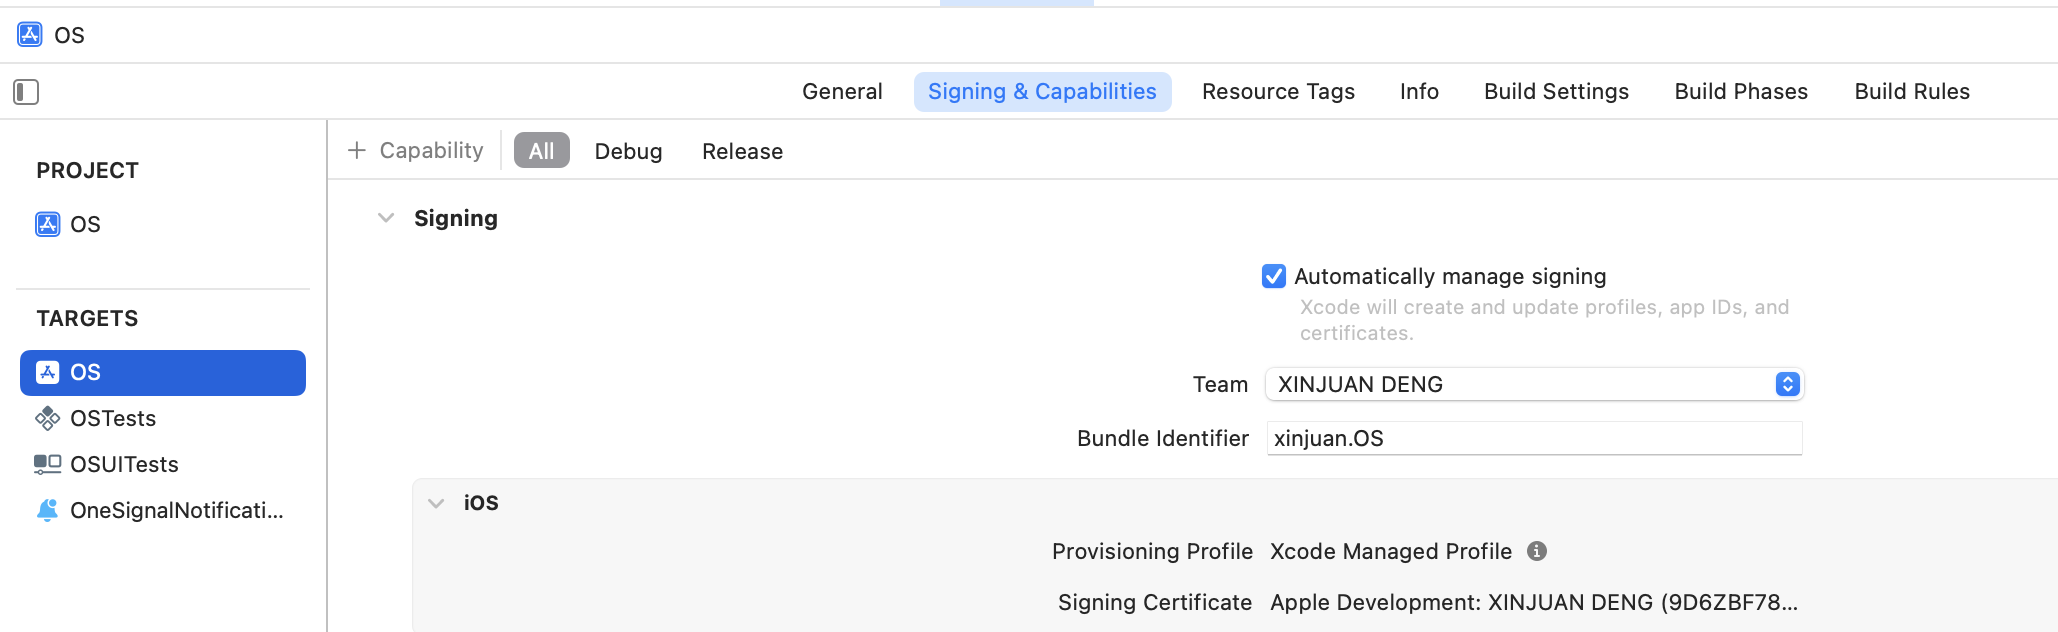
- The Bundle ID for your app target as set in Xcode.
- An Xcode project with Push Notification capability enabled.
Create a Certificate Signing Request (CSR)
You first need to create a.certSigningRequest file on macOS.
- Open Applications > Utilities > Keychain Access.
- From the menu bar, click Keychain Access > Certificate Assistant > Request a Certificate From a Certificate Authority…
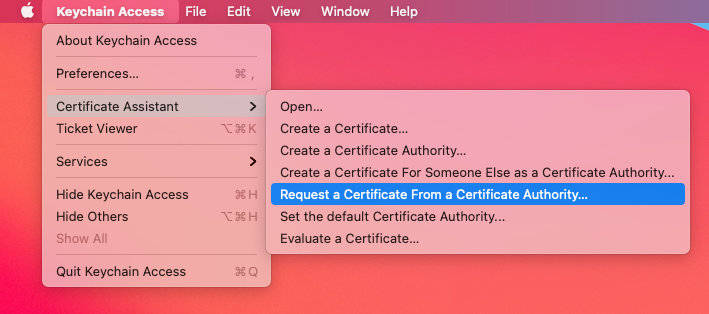
Mac keychain access
- Fill in the required fields:
- User Email Address:
[email protected] - Common Name: Your name or the name for the certificate
- CA Email Address: Leave this blank
- Request is: Select Saved to disk
- User Email Address:
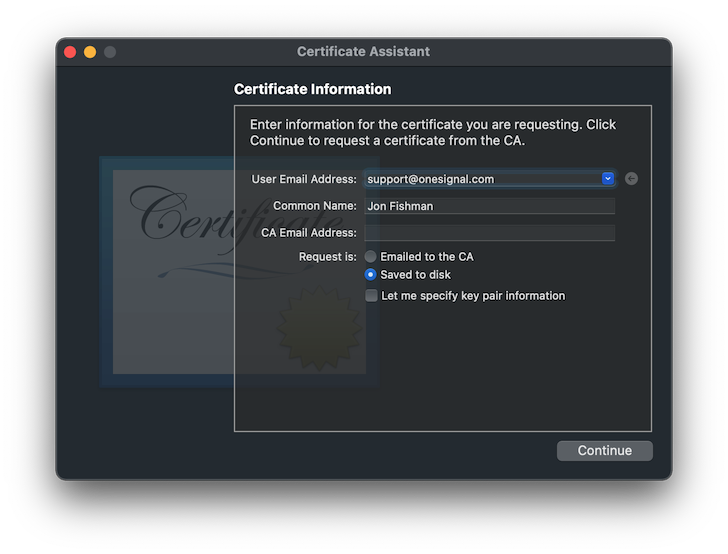
Certificate Assistant window
- Click Continue, choose a location to save the
.certSigningRequestfile, and click Save.
Enable push capabilities for the app
Skip this section if you use Automatically manage signing in Xcode.
- Go to the Identifiers section of the Apple Developer portal, locate and select your app’s App ID from the list.
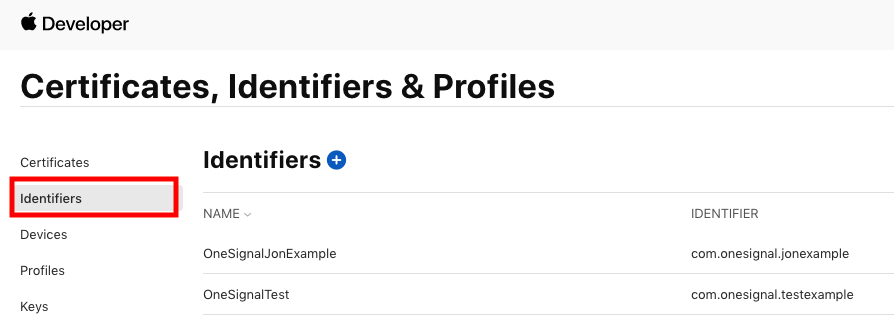
- Enable the Push Notifications capability by checking the box.

Create a push certificate
Follow these steps to generate the Apple Push Notification service (APNs) SSL certificate:- Visit the Apple Certificates page.
- Click the plus (+) button to create a new certificate.
-
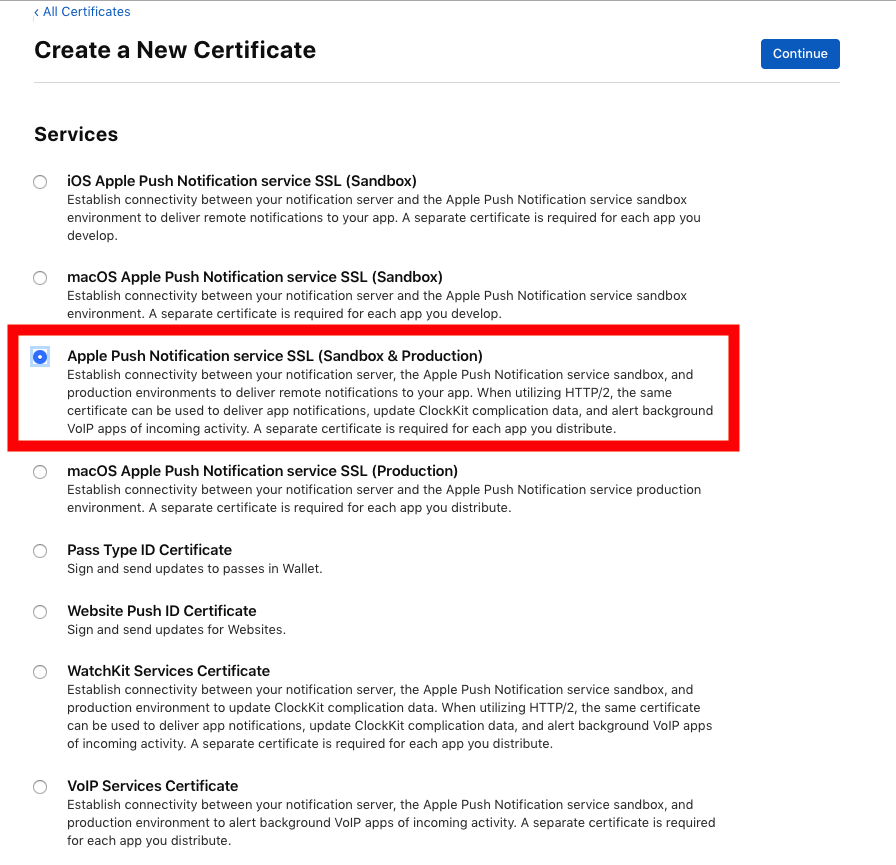
Under Services, select:
- Apple Push Notification service SSL (Sandbox & Production)
- Then click Continue
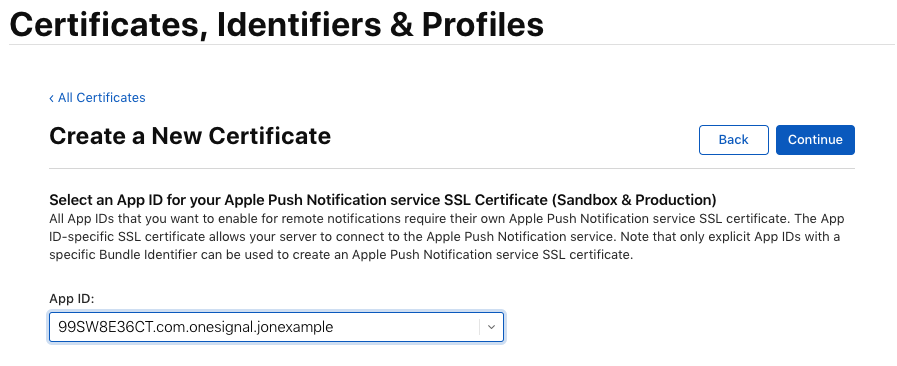
- Select your App ID from the list and click Continue.
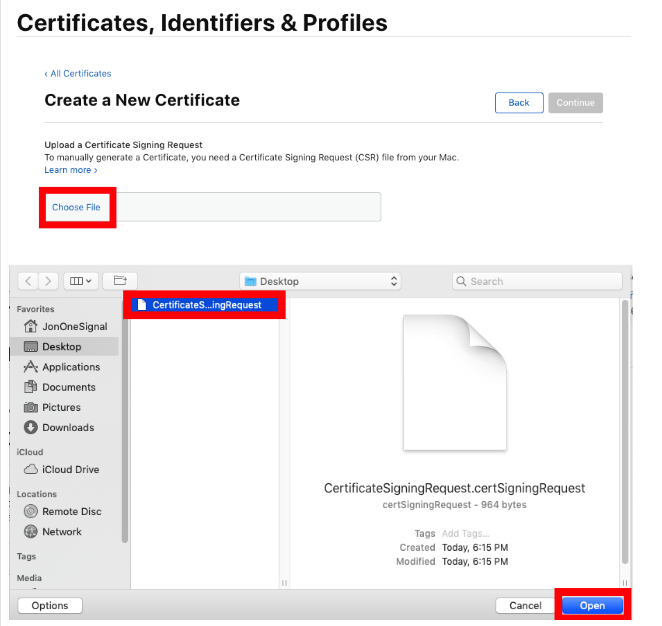
- Upload your previously generated
.certSigningRequestfile.
- Click Continue, then click Download to save the resulting
.cerfile to your computer.
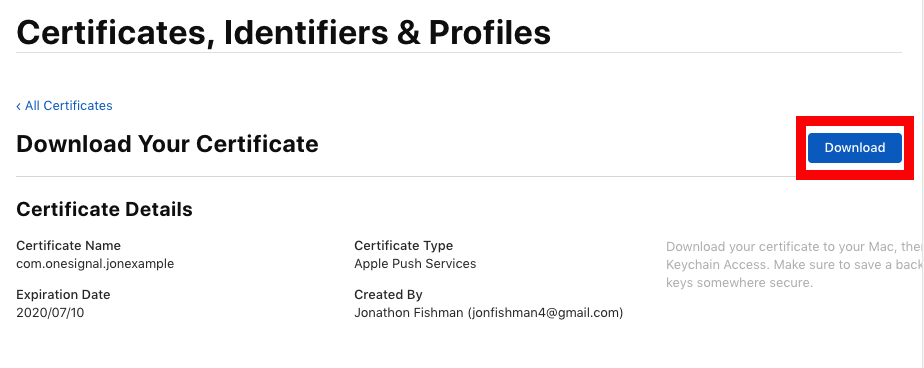
.cer file in the next section to create your .p12 certificate.
Create a private key and export the .p12 certificate
-
Double-click the downloaded
.cerfile to import it into Keychain Access. -
In Keychain Access, navigate to:
- Keychains > Login
- Category > My Certificates
- Locate the certificate named Apple Push Services.
- Right-click the certificate and select Export.
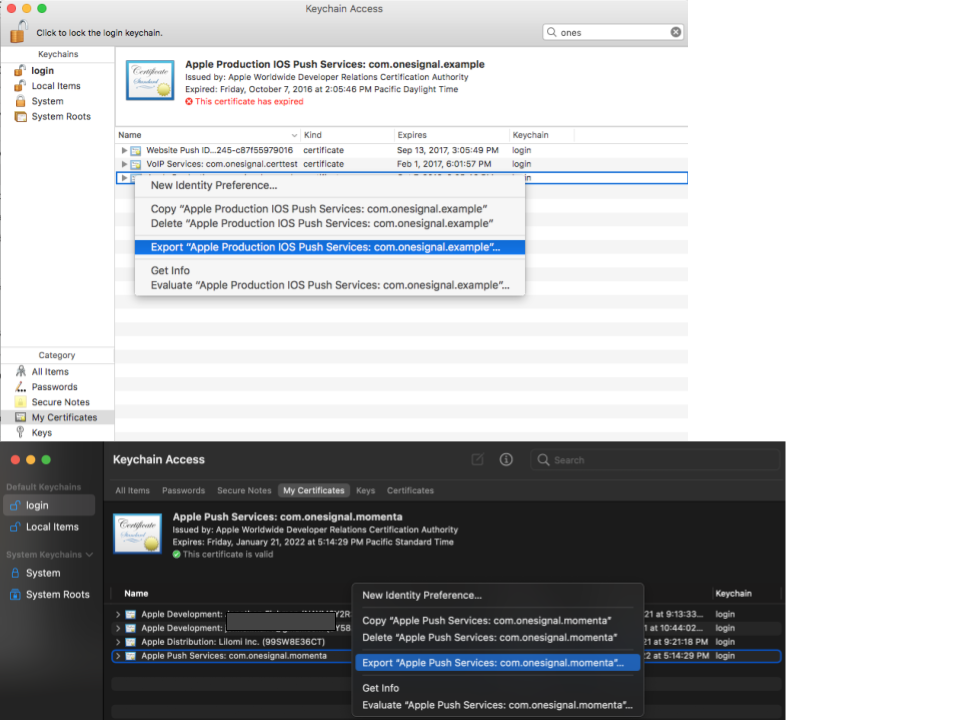
Export will generate a .p12 file at your desired file location
-
Choose a location to save the file, and select the file format as
.p12. -
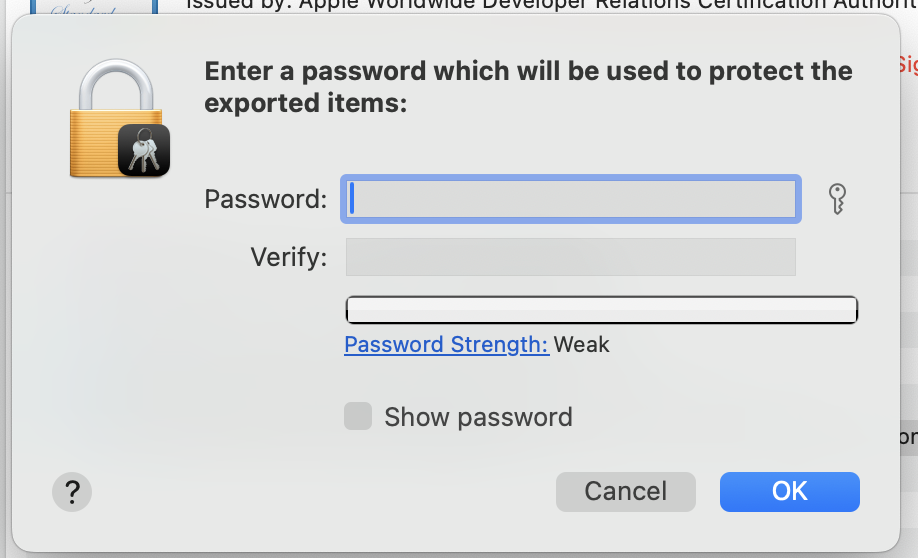
When prompted, set a password for the
.p12file. You will need this password when uploading to OneSignal.
Upload the .p12 to OneSignal
- In your OneSignal dashboard, go to your app > Settings > Push & In-App > Apple iOS.
- Upload the
.p12file (and enter the password if you set one). Click Save.
You’ve successfully set up APNs authentication using a .p12 certificate in OneSignal.Your iOS app is now ready to send and receive push notifications! 🎉
.p12 troubleshooting
Invalid certificate format error
Cause: The uploaded file is not in.p12 format.
Fix: Ensure you export the certificate from Keychain Access as .p12 (not .cer or .pem).
”Incorrect password” when uploading to OneSignal
Cause: Password was entered incorrectly or not set. Fix:- Try exporting again and set a new password.
- Ensure no extra spaces are added when pasting.
- If using Provisionator, the password is shown in the UI.
Missing private key in exported file
Cause: Certificate was imported but not paired with a private key. Fix:- Make sure you generate the CSR from Keychain Access on the same machine.
- After downloading the
.cerfile, double-click to install and check if the key appears under My Certificates.
Push notifications not working after upload
Cause: Incorrect App ID, or Provisioning Profile missing capabilities. Fix:- Confirm the
.p12matches the App ID used in the app. - In Apple Developer Portal, ensure the App ID has Push Notifications enabled.
- Make sure the Provisioning Profile includes Push.
Expired certificate
Cause:.p12 certificate is no longer valid.
Fix:
- Go to Apple Developer > Certificates and check expiry.
- Revoke the old certificate and create a new one.
Next steps
iOS SDK setup
Install the OneSignal SDK, initialize it in your app, and send a test notification.
Mobile SDK setup
Choose your platform and follow the full SDK integration guide for Android, iOS, or cross-platform frameworks.
FAQ
When does my .p12 certificate expire, and how do I renew it?
.p12 certificates expire one year after creation. To renew, generate a new CSR, create a new push certificate in Apple Developer, export it as .p12, and re-upload it to your OneSignal dashboard. Set a calendar reminder to avoid disruption. Alternatively, switch to a .p8 key, which does not expire.Should I use .p8 or .p12?
OneSignal recommends .p8 keys for most apps. A .p8 key does not expire, works across all apps under your Apple Developer account, and is simpler to manage. A .p12 certificate is app-specific and must be renewed annually. See the .p8 key guide for setup instructions.Do I need a provisioning profile, and how do I create one?
Yes, Apple requires different types of profiles for development, testing (Ad Hoc), and distribution to the App Store. In Xcode, select Automatically manage signing to create one automatically.