Requirements
Setup
1. SendGrid Sender Authentication
It is recommended to use SendGrid’s “Domain Authentication” so that SendGrid sends emails via your domain rather thanvia sendgrid.net, and the links your users click as coming from your domain.
Recommended: Follow SendGrid’s guide on How to set up domain authentication.
SendGrid also provides Single Sender Verification if you do not have a domain.
2. Install DNS Records
If you selected Domain Authentication make sure your DNS Records are verified.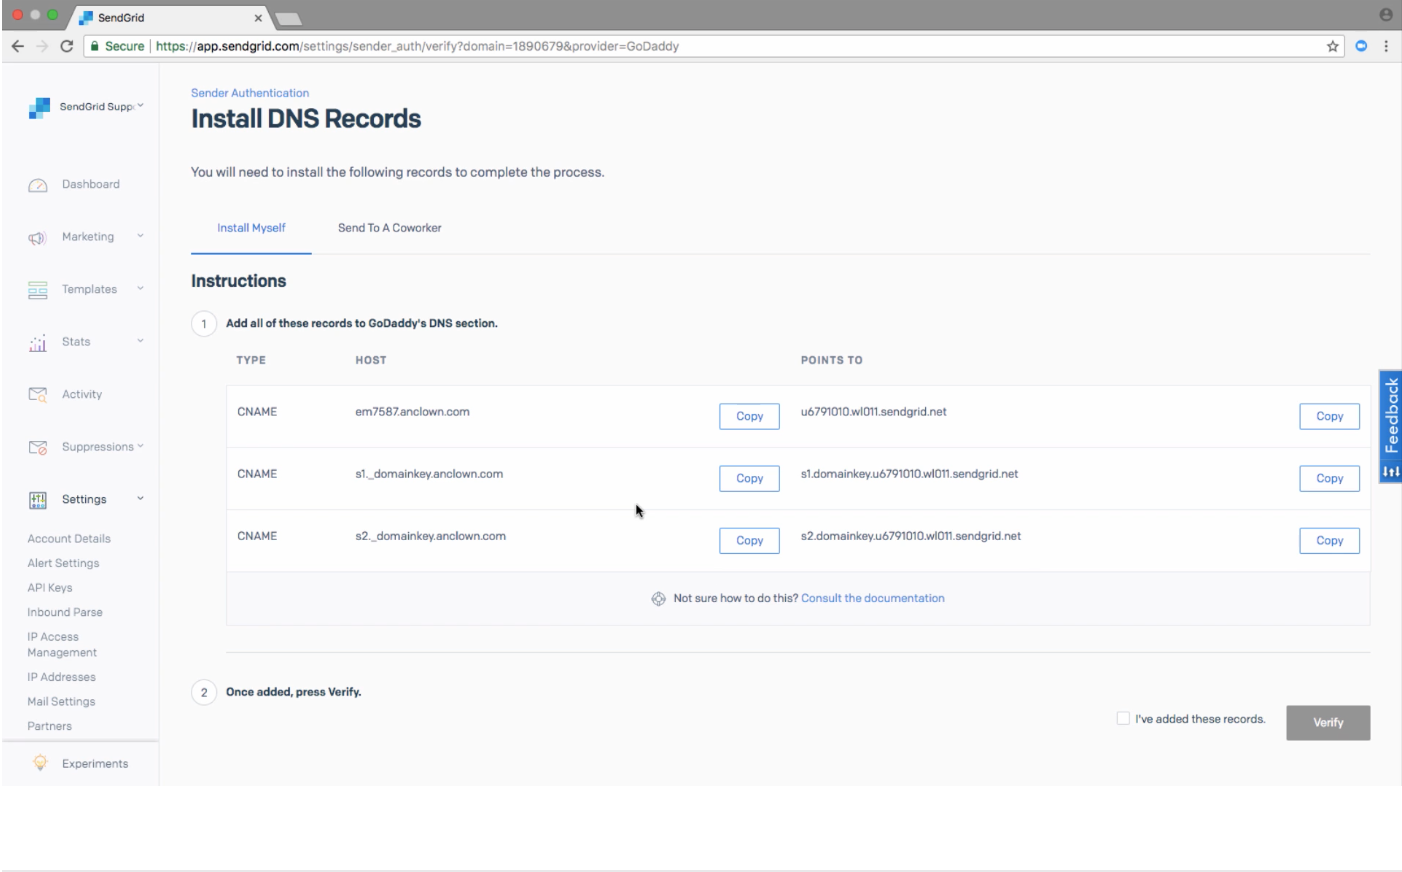
SendGrid DNS verification status
SendGrid domain authentication setup
3. Create API Key
In the SendGrid dashboard, go to Settings -> API Keys and click ‘Create API Key’.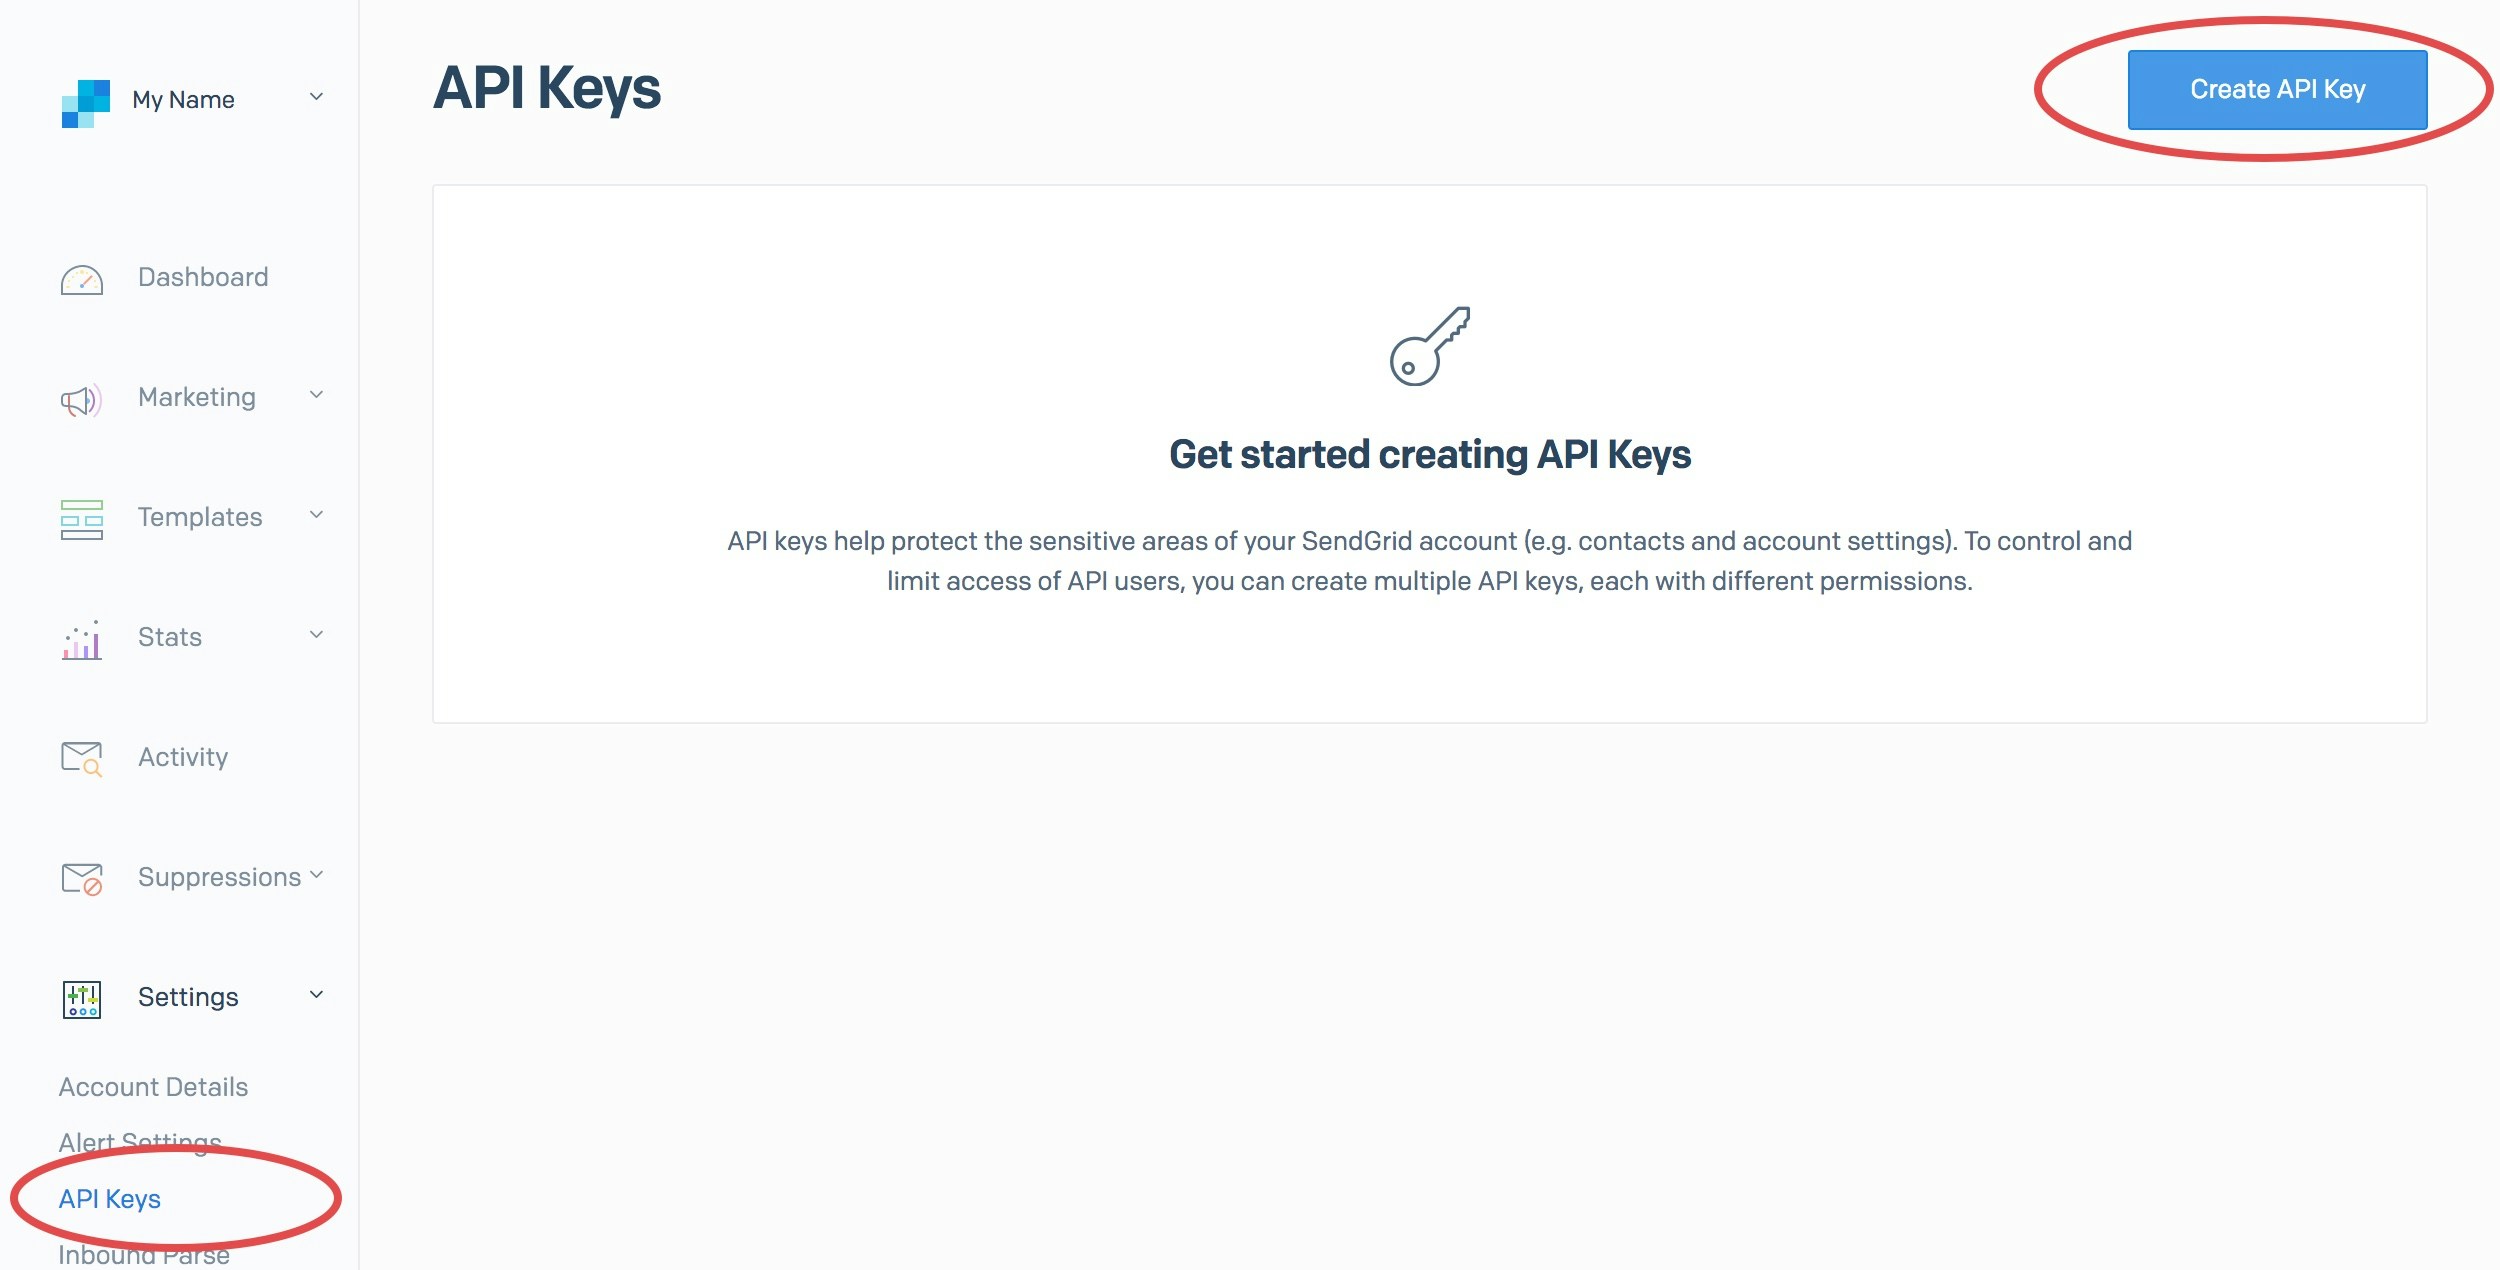
SendGrid API key creation screen
OneSignal API Key and be sure to set permissions to Full Access. Click ‘Create & View’ when you are ready.
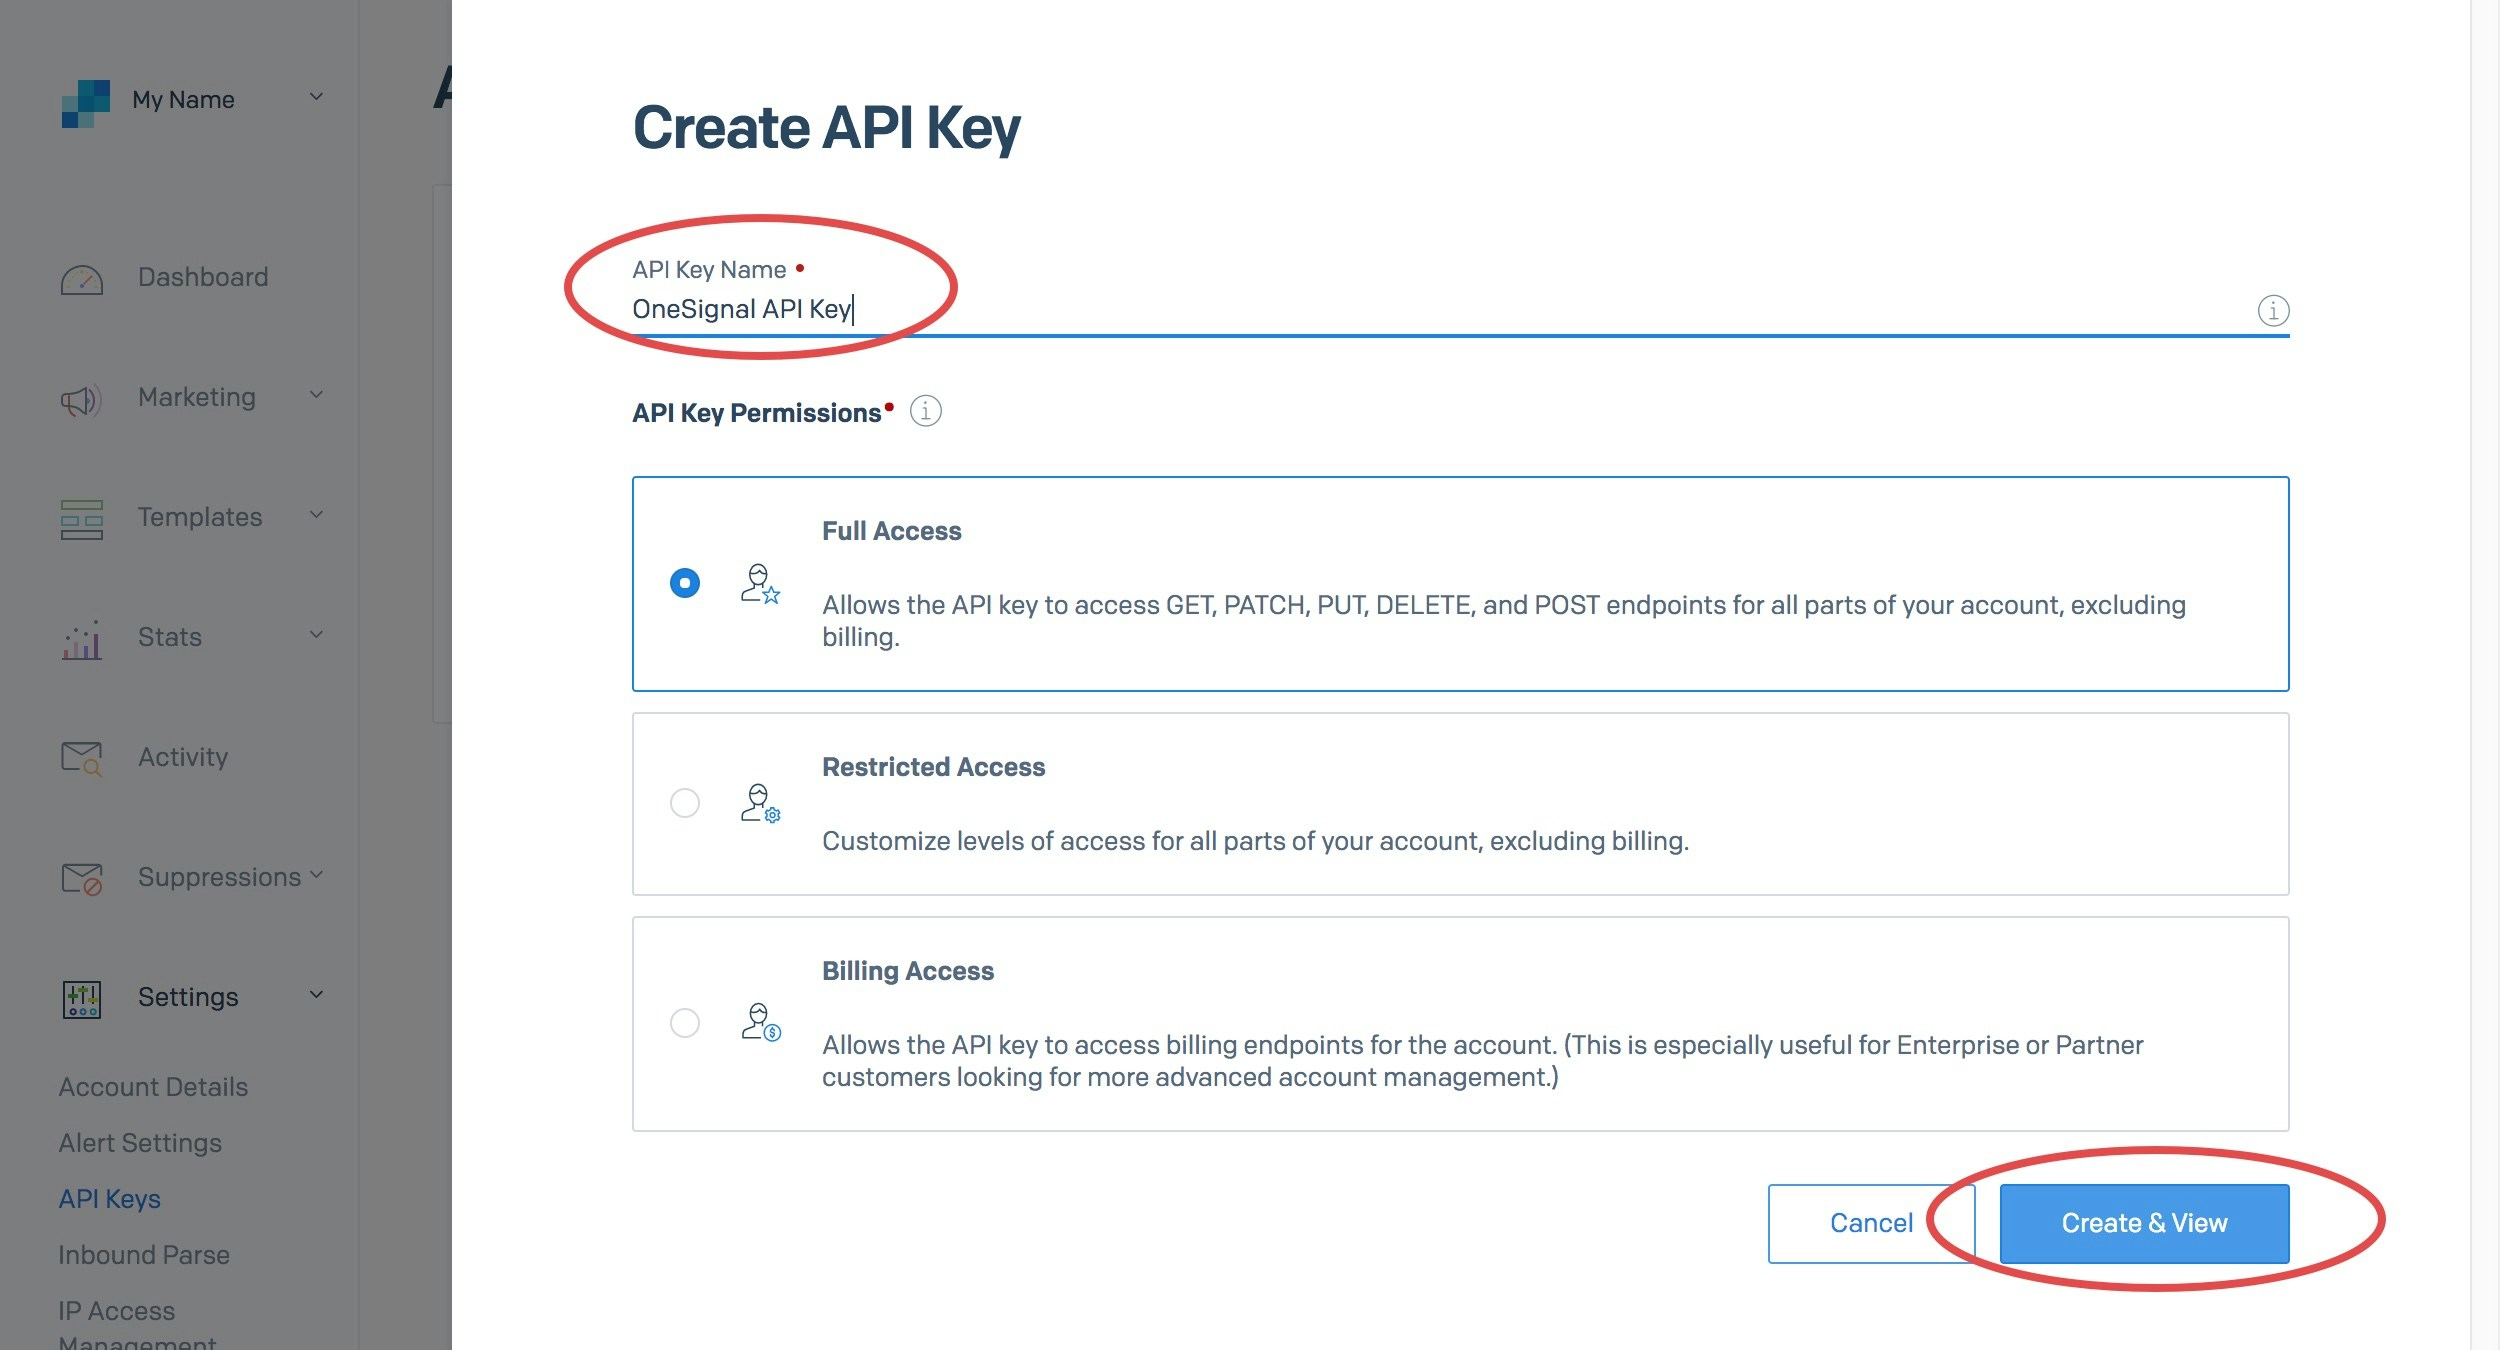
SendGrid API key permission settings
Copying the SendGrid API key
What are the minimum API restrictions I can allow?
The minimum access you need to allow is as follows: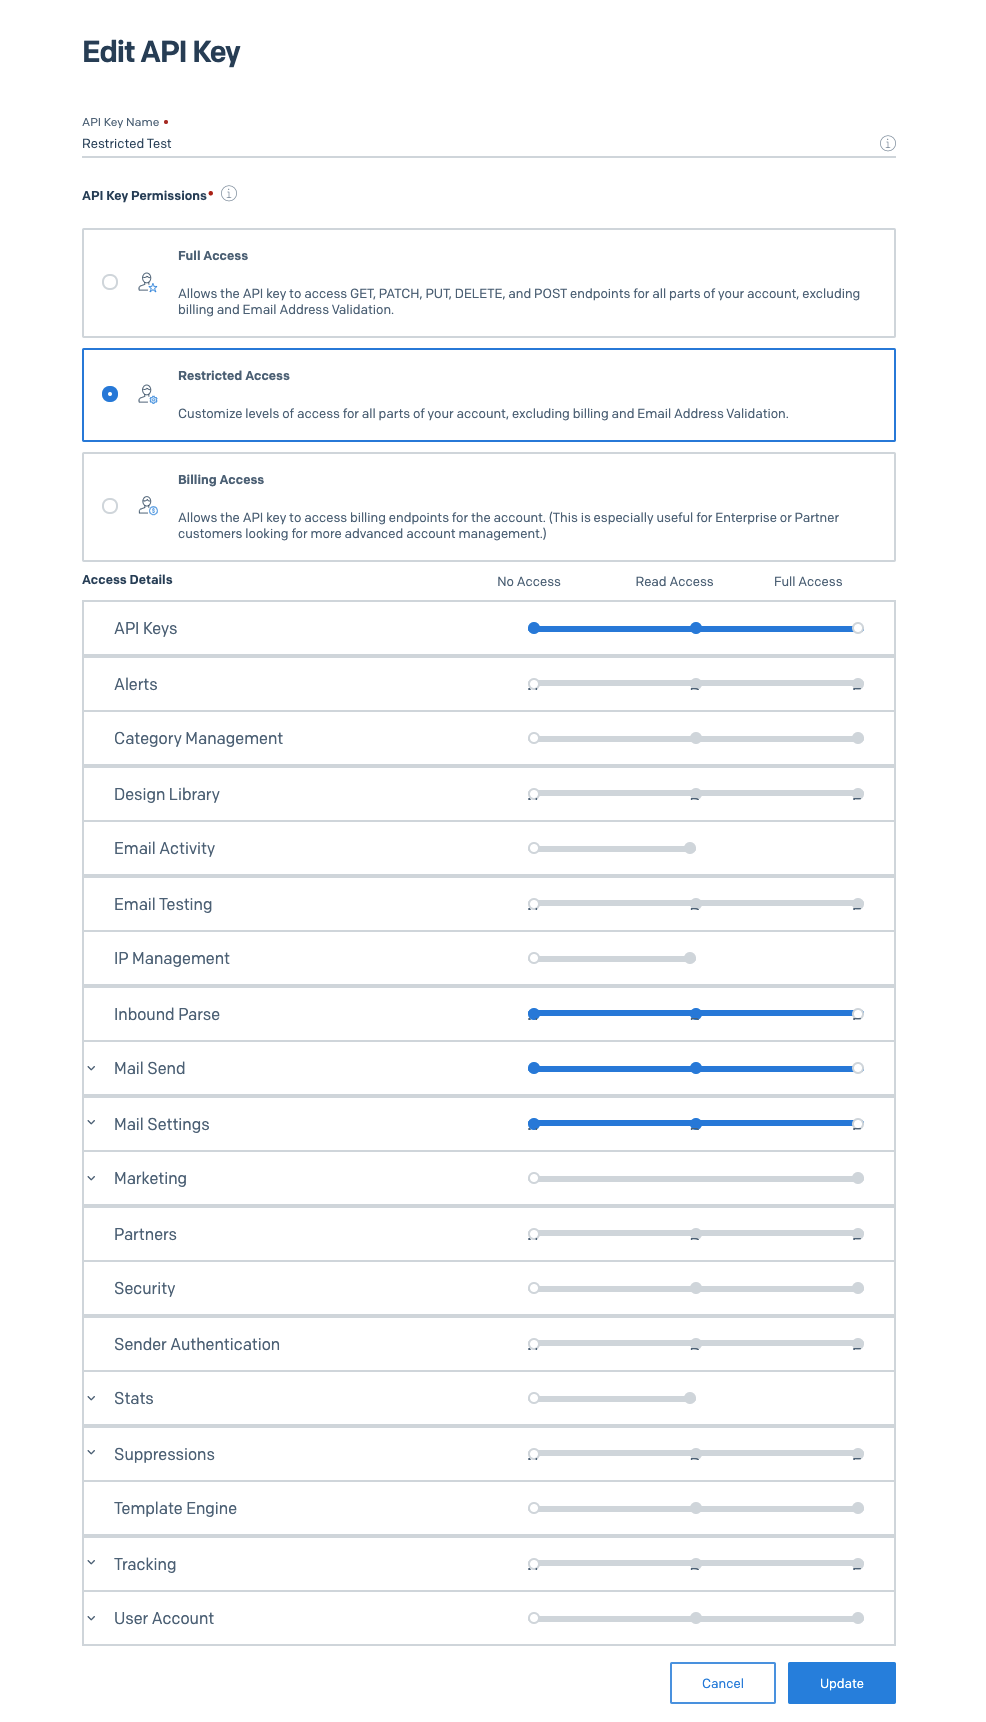
Minimum API permission requirements
4. Disable Sendgrid Subscription Tracking
OneSignal automatically adds its own default unsubscribe links for every email sent. Disable Subscription Tracking in sendgrid to prevent Sendgrid from automatically adding its own unsubscribe link to the bottom of text and HTML emails.SendGrid subscription tracking settings
5. Enable Email Messaging
In OneSignal, navigate to Settings > Platforms > Email and Activate Email to configure your email settings. Select SendGrid as the provider.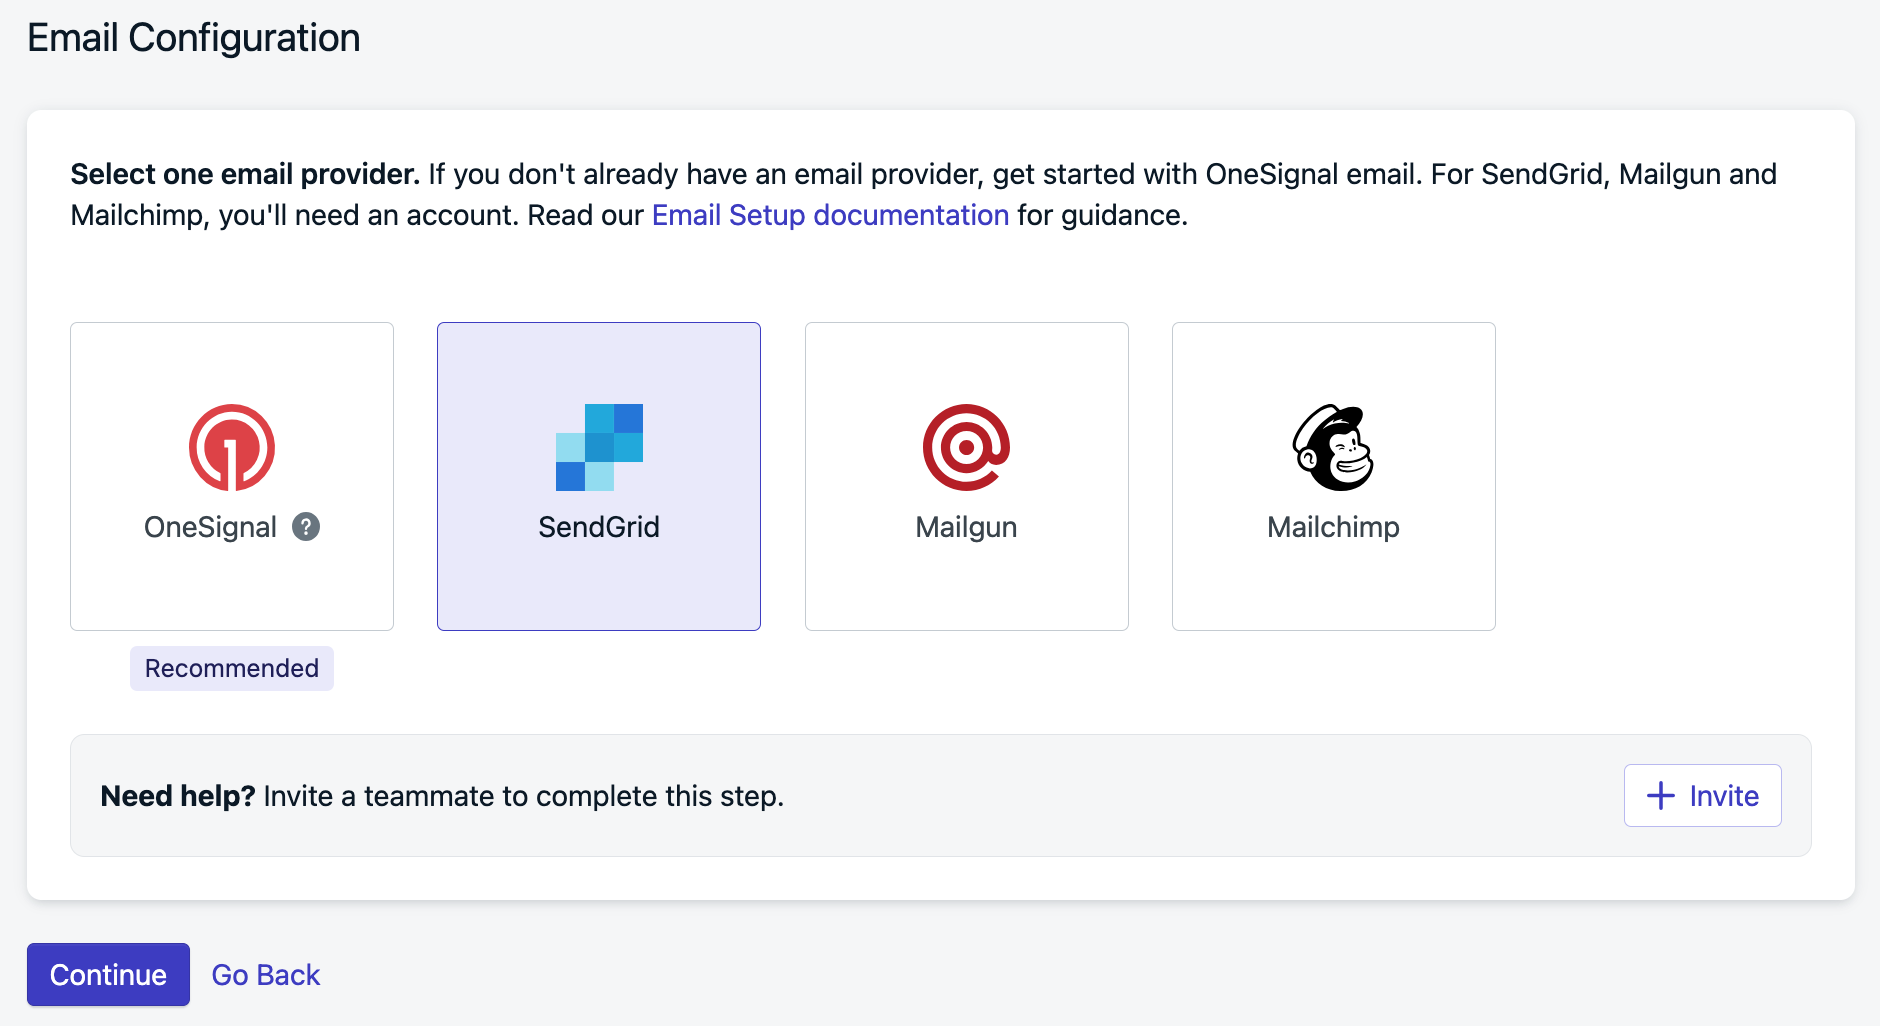
Image selecting SendGrid from email settings
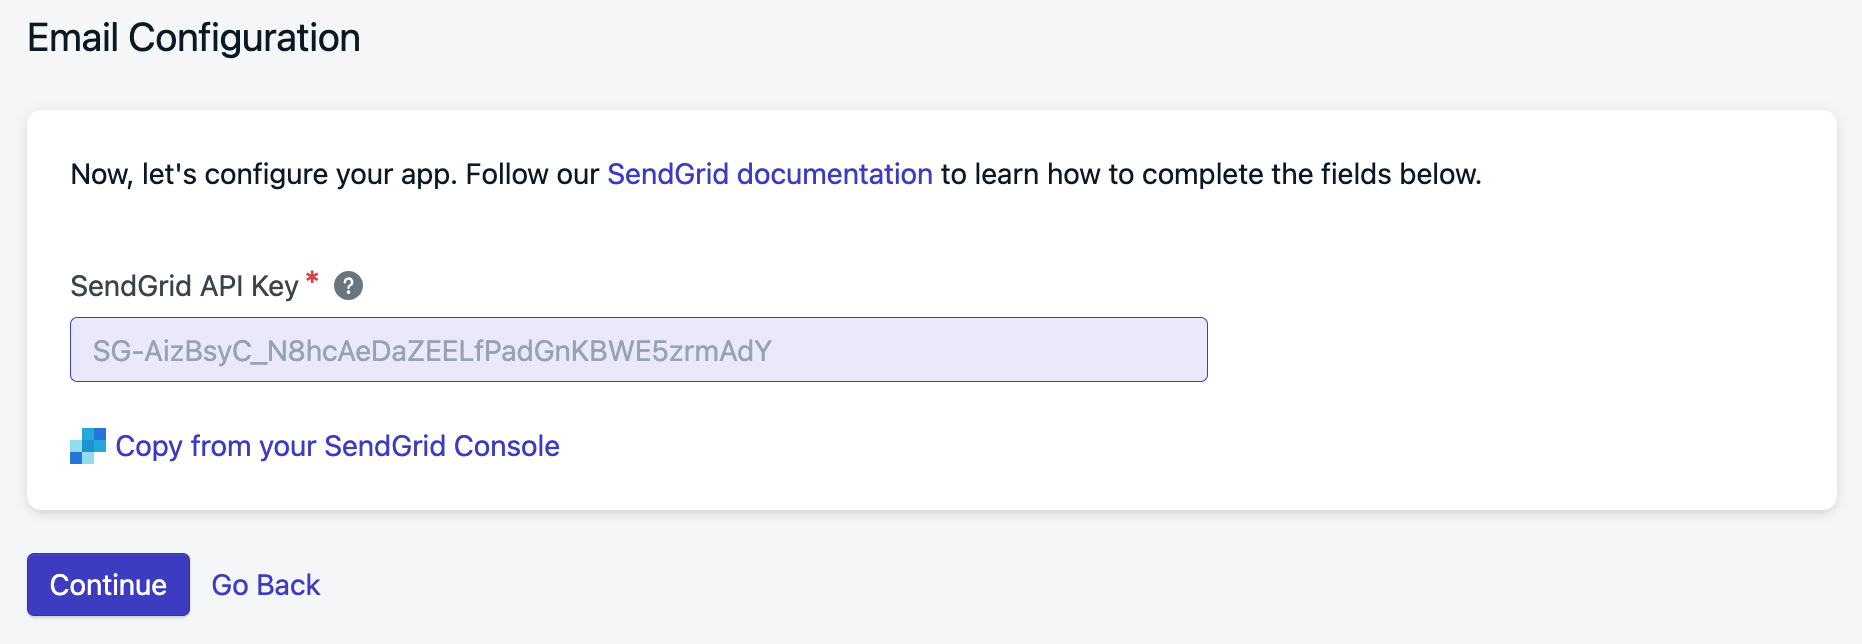
Image showing where to enter your API Key
Delivery Defaults
Add the default name and email address you want your emails to come from (these can be changed later). Press Done when finished.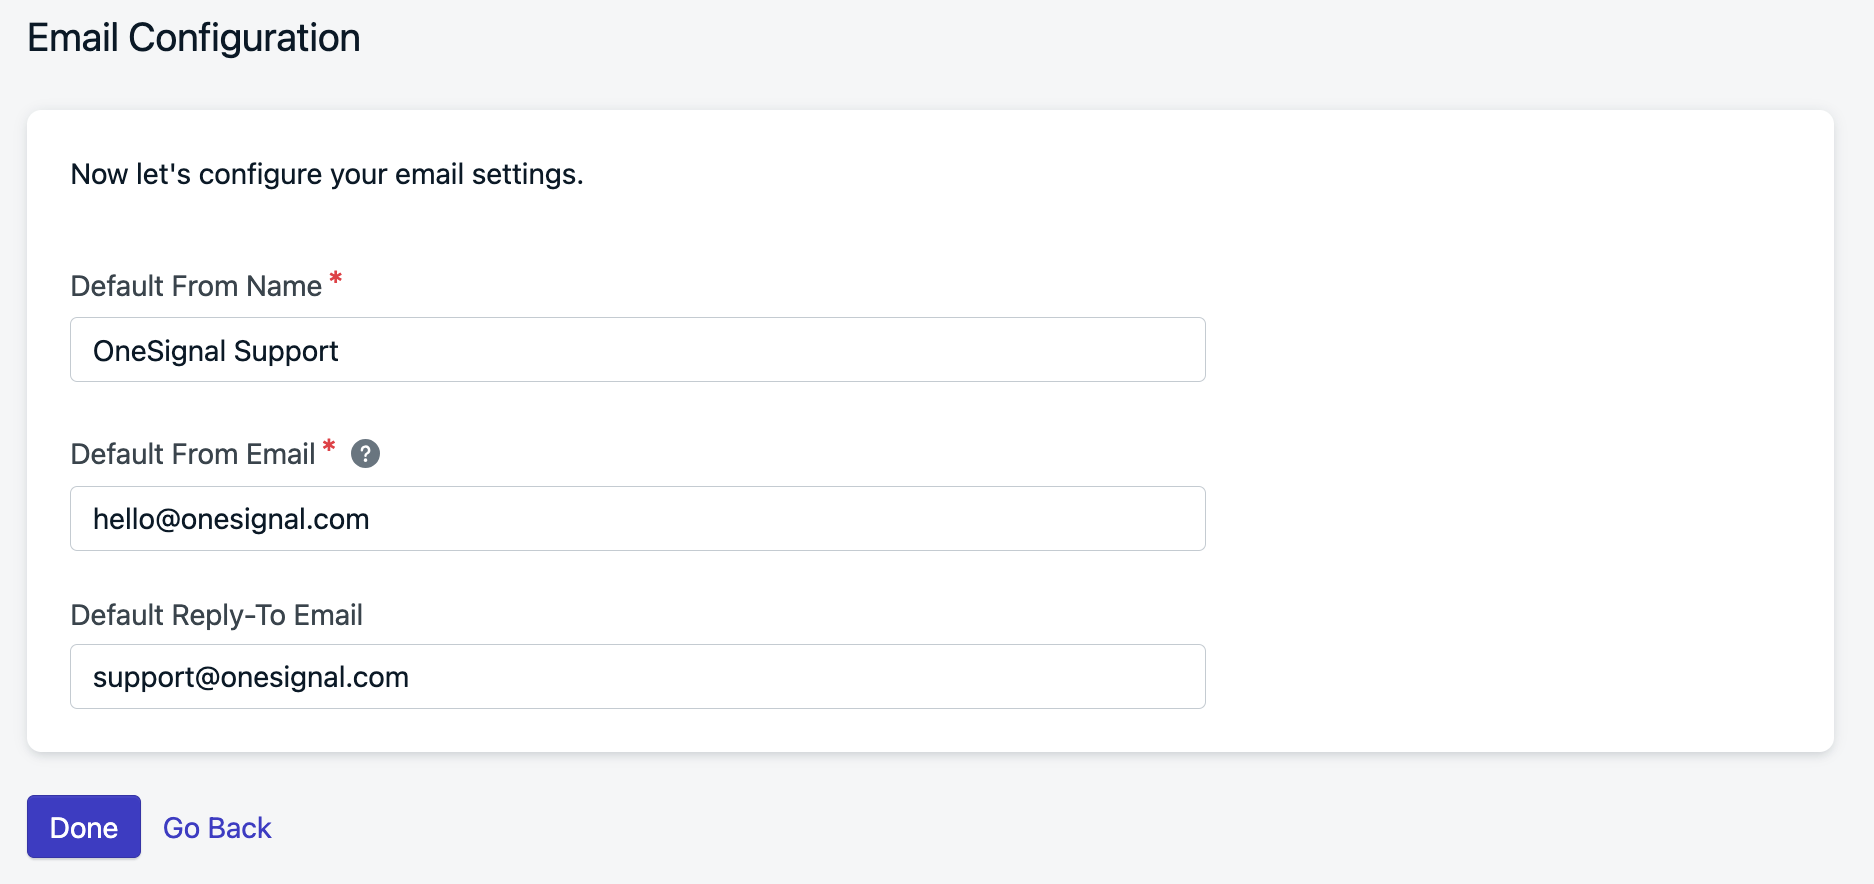
Email configuration success banner
6. Add Subscribers
If you have a list of emails ready, select Upload CSV or you can always do this again later. If you have a website and want to prompt users to provide their email. Select Add Web Prompt to use OneSignal’s Email Web Prompt.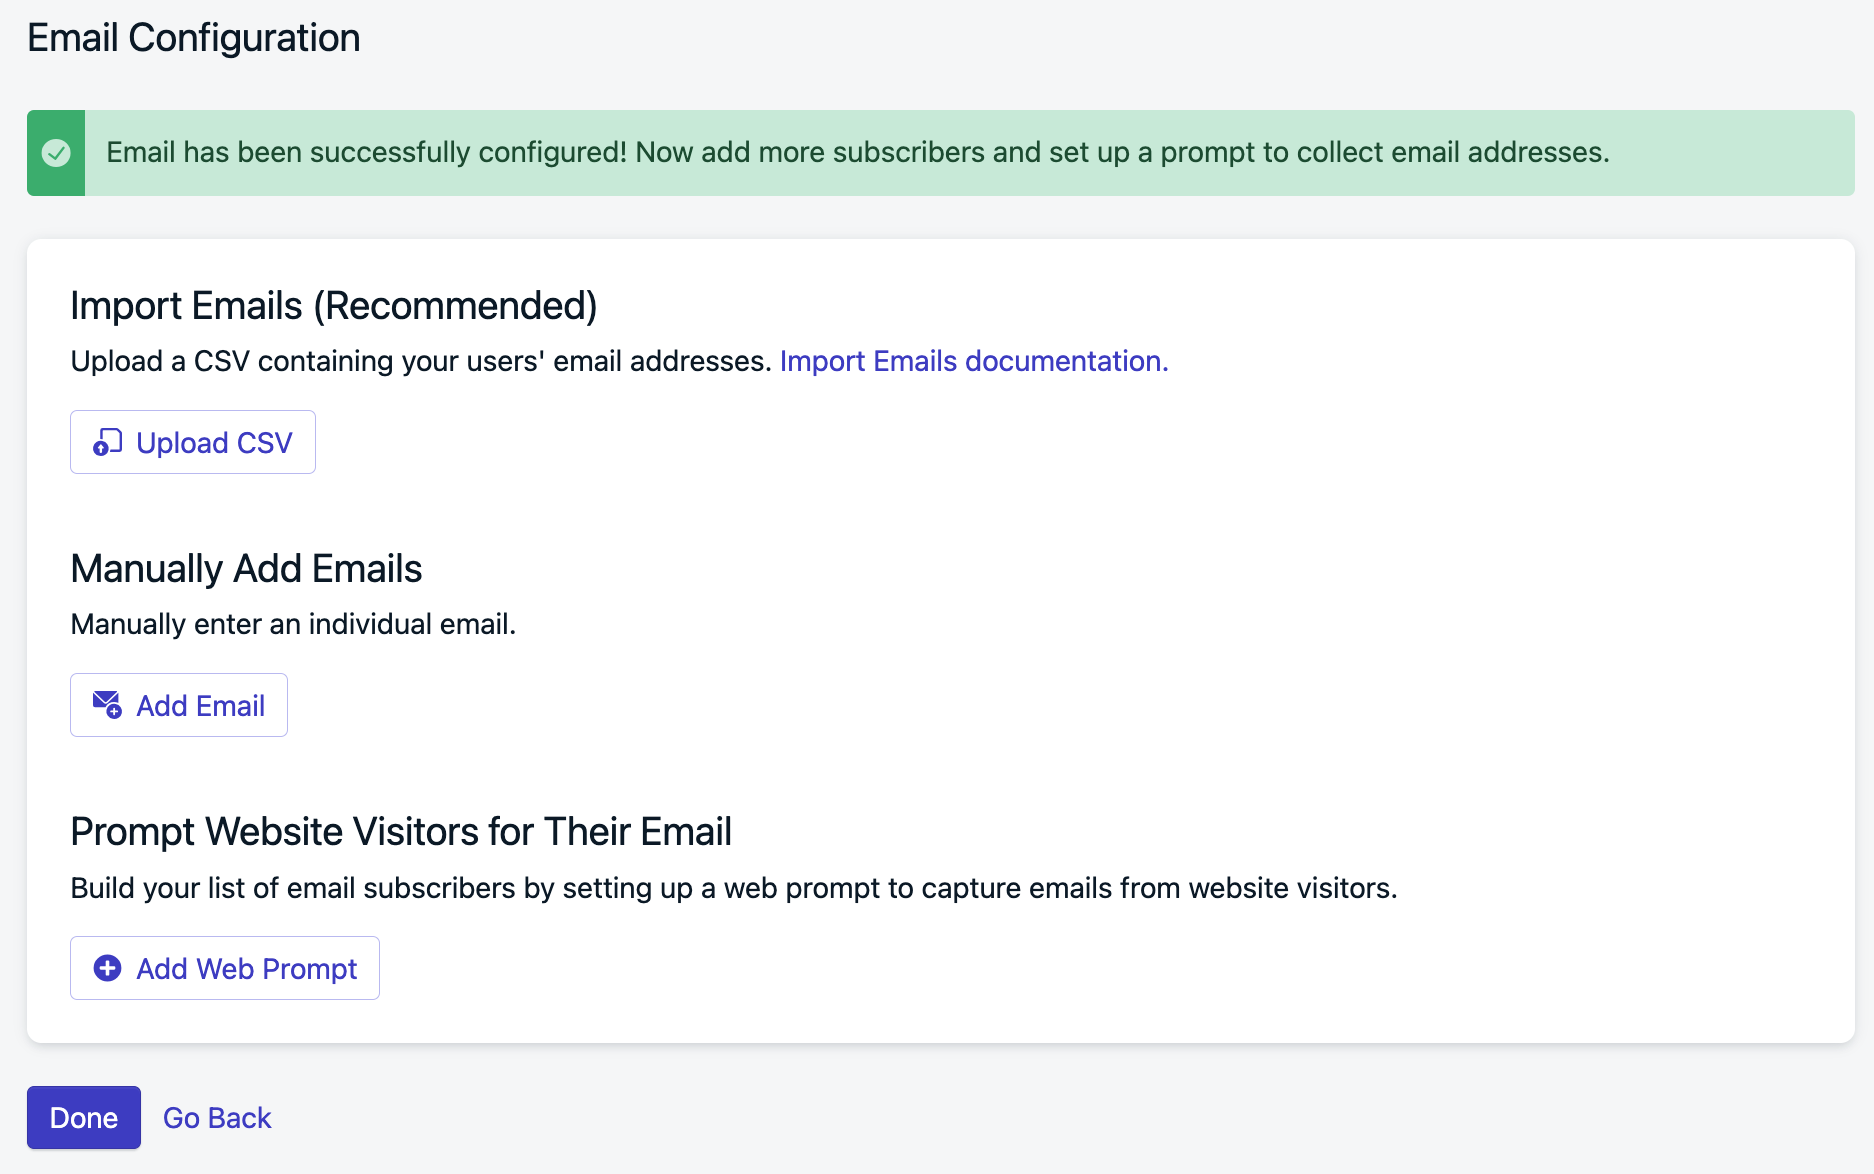
Email subscriber setup options
7. Testing
Navigate to Messages > Email, select New Email. Add aSubject, select an Editing experience (Drag & Drop Editor is a good start) and click Send Test Email.
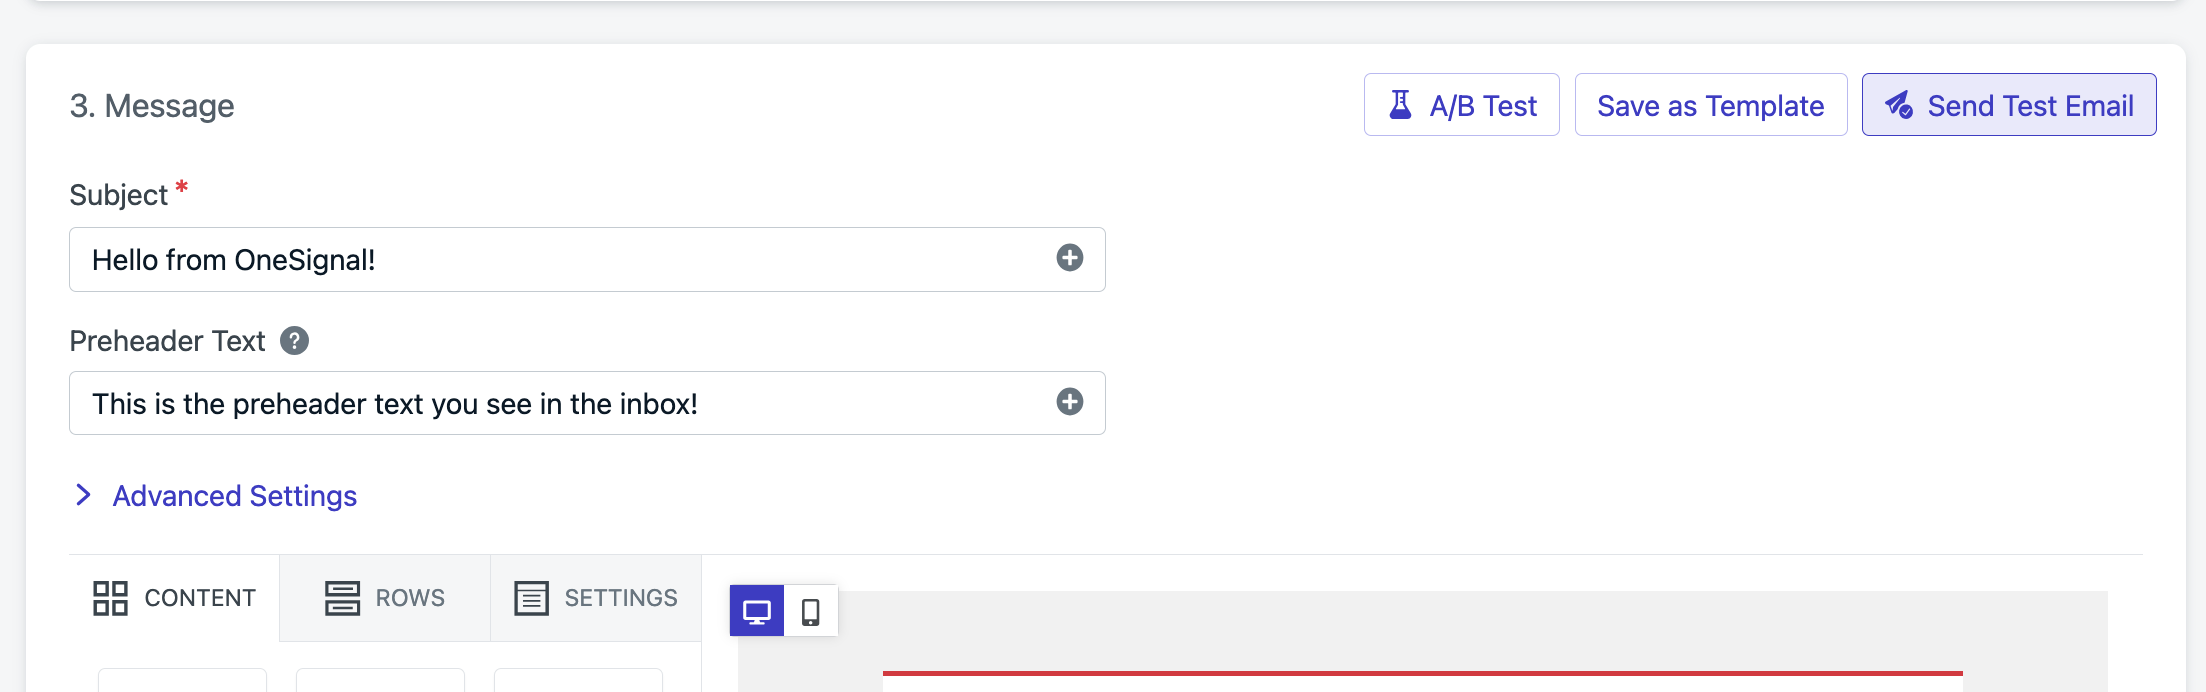
Email testing interface
support@onesignal.com for help.For faster assistance, please provide:- Your OneSignal App Id
- Details, logs, and/or screenshots of the issue.
- Steps to reproduce
Recommended
Identify Users
Required if using integrations. Recommended for messaging across multiple channels (push, email, sms). OneSignal creates subscription-level records under a unique ID called the subscription_id. A single user can have multiple subscription_id records based on how many devices, email addresses, and phone numbers they use to interact with your app. If your app has its own login system to track users, calllogin at any time to link all channels to a single user. For more details, see Aliases & External ID.
Collect New Emails
Recommended if using Email and SMS messaging. There are several ways to pass new email addresses into OneSignal:- Use OneSignal’s Frontend SDK to capture new emails. See Email SDK Methods.
- Use the Create user or Create subscription APIs to add emails from your server.
- If you want to import emails via CSV, see Import Email Addresses.
Add Tags
Optional Tags are customkey : value pairs of String data used for tracking user events and properties. Setting tags is required for more complex segmentation and message personalization.
See Tags for more details.
Exporting Emails
-
Contact Lists Navigation: Go to
Marketing > Contacts. -

Navigating to Contacts page
- List Identification: Locate the list you want to export.
- Export Selection: Open the context menu under the Action list header.
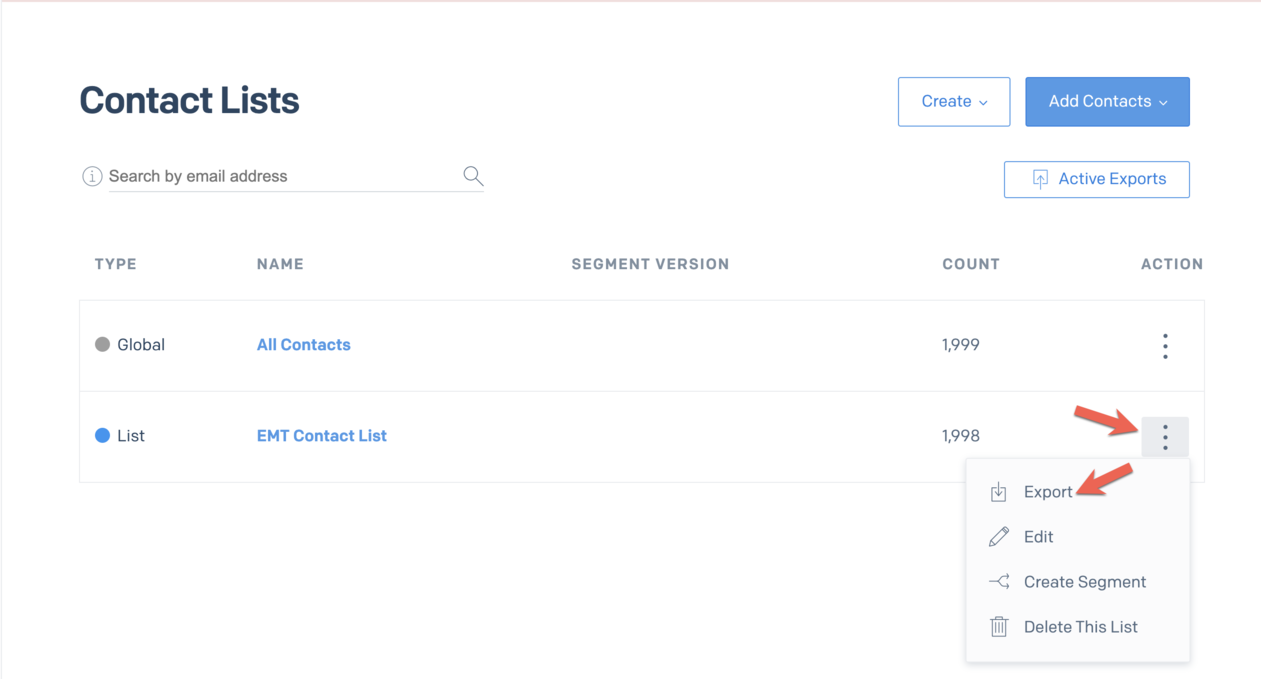
Selecting Contact List to export
- Begin Export: Click Export. This takes you to
Contact > Active Exports. - Download File: Wait until the Status shows ‘Ready for Download’, then click Download CSV.
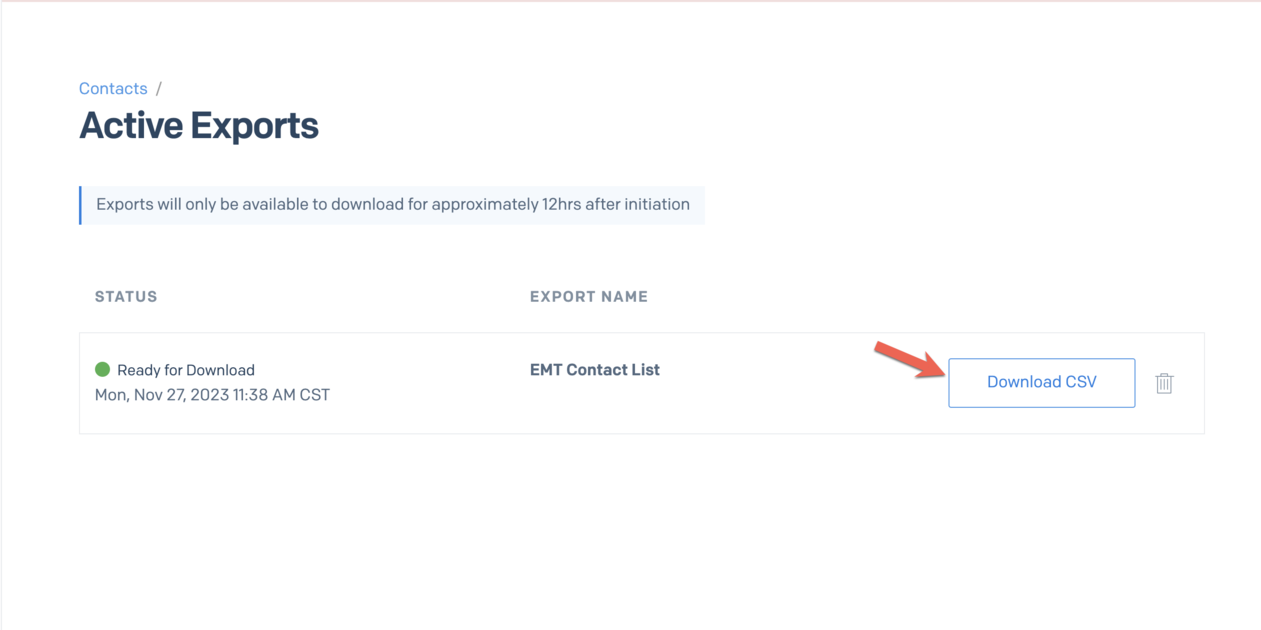
Downloading the exported CSV
- File Retrieval: The file will be saved in your downloads directory.
Obtaining API Key
- Navigate to your Sendgrid dashboard and open Settings from the left sidebar.
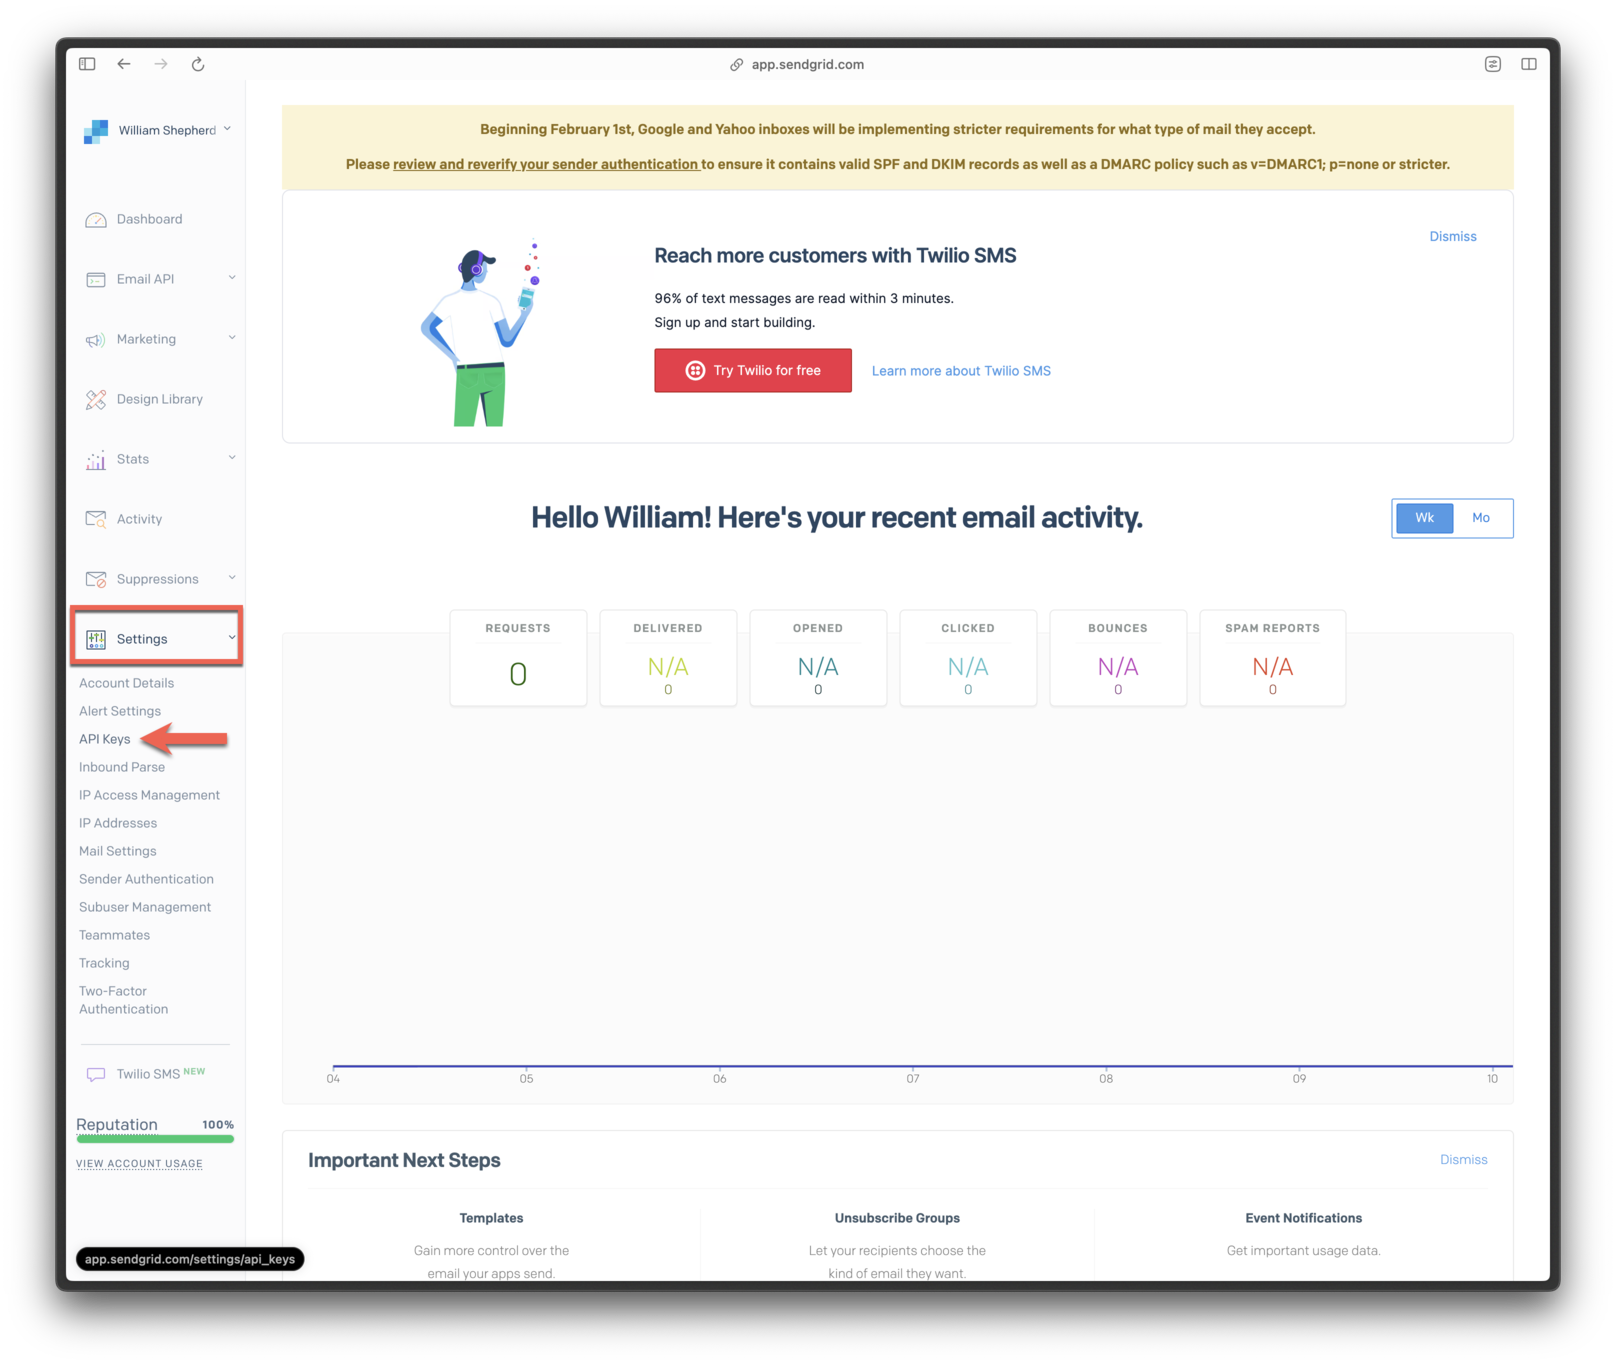
Navigating to Settings > API Keys
- Select API Keys.
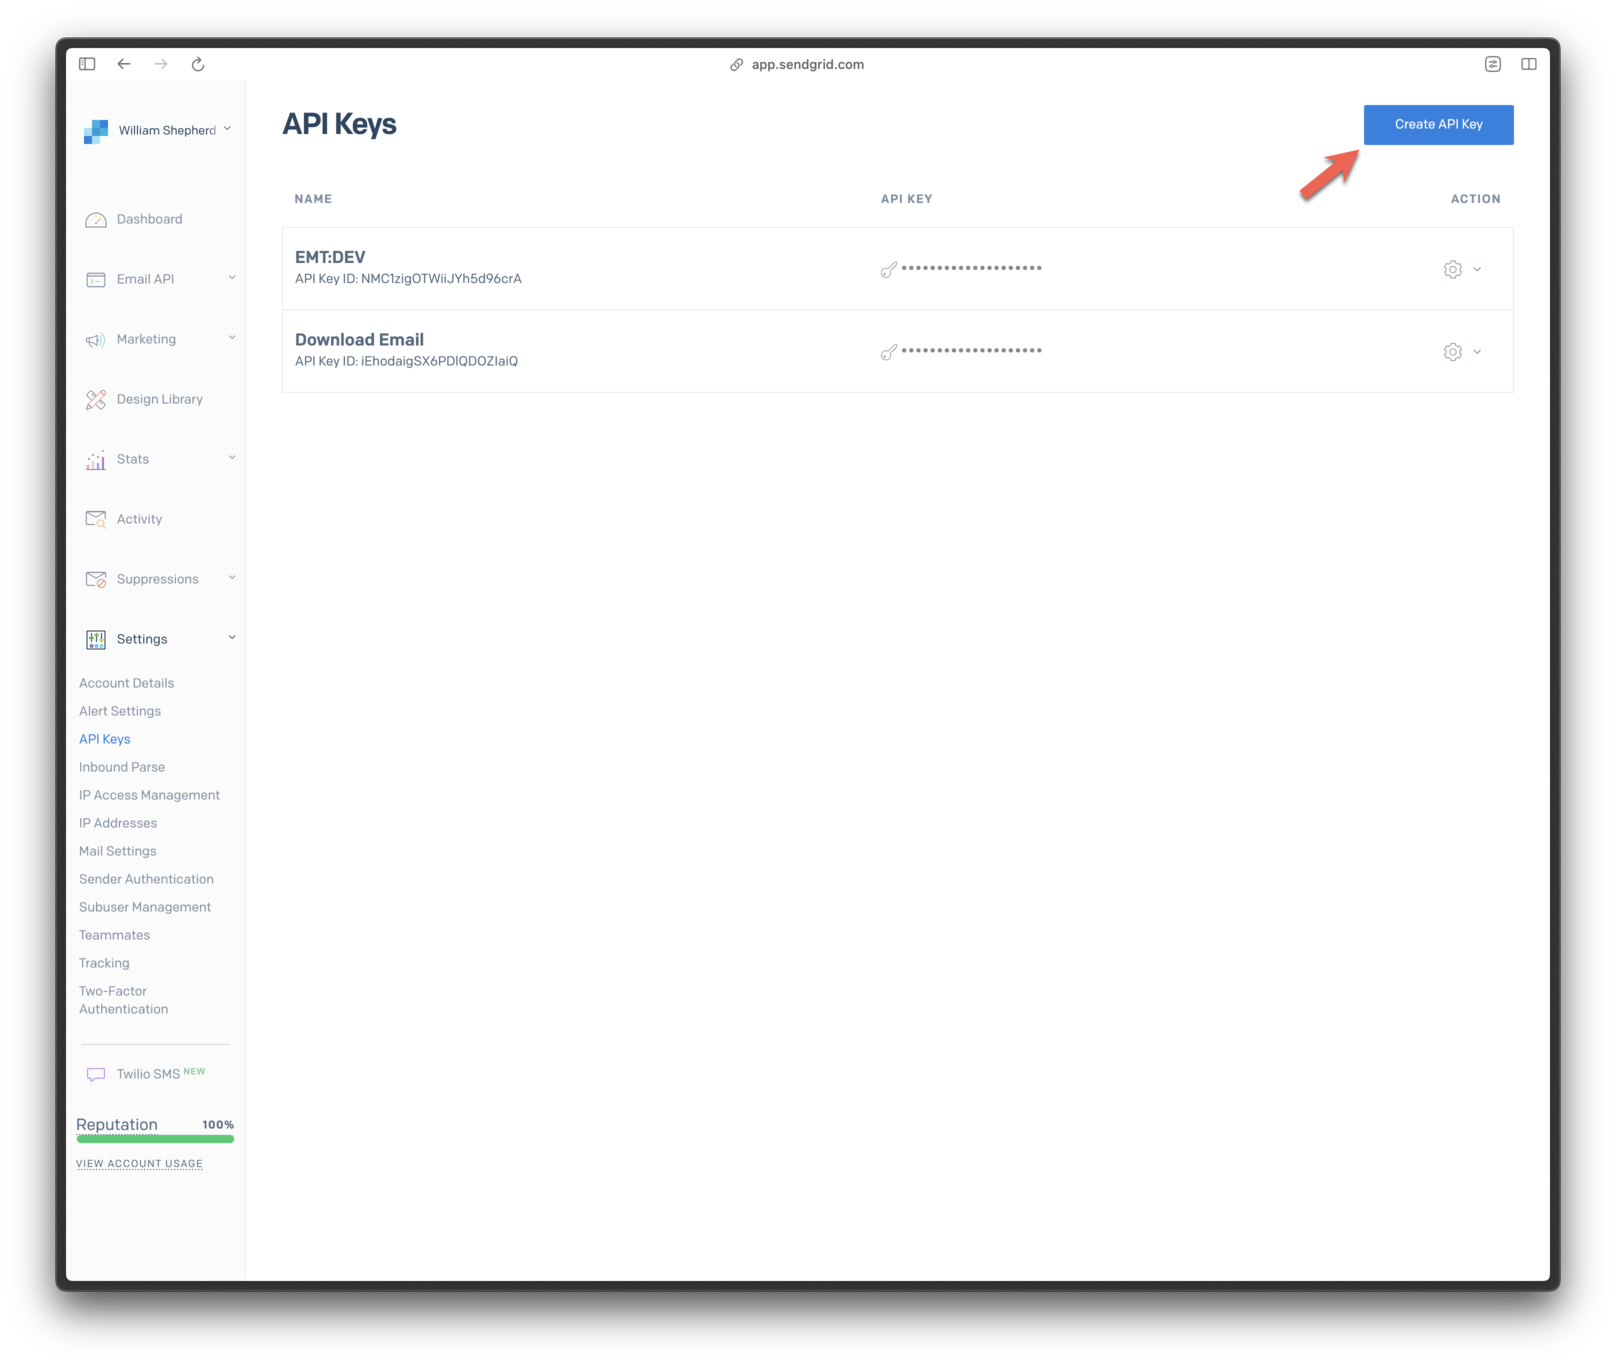
Clicking the Create API Key button
- Name your key. Optionally, opt for Restricted Access for specific permissions.
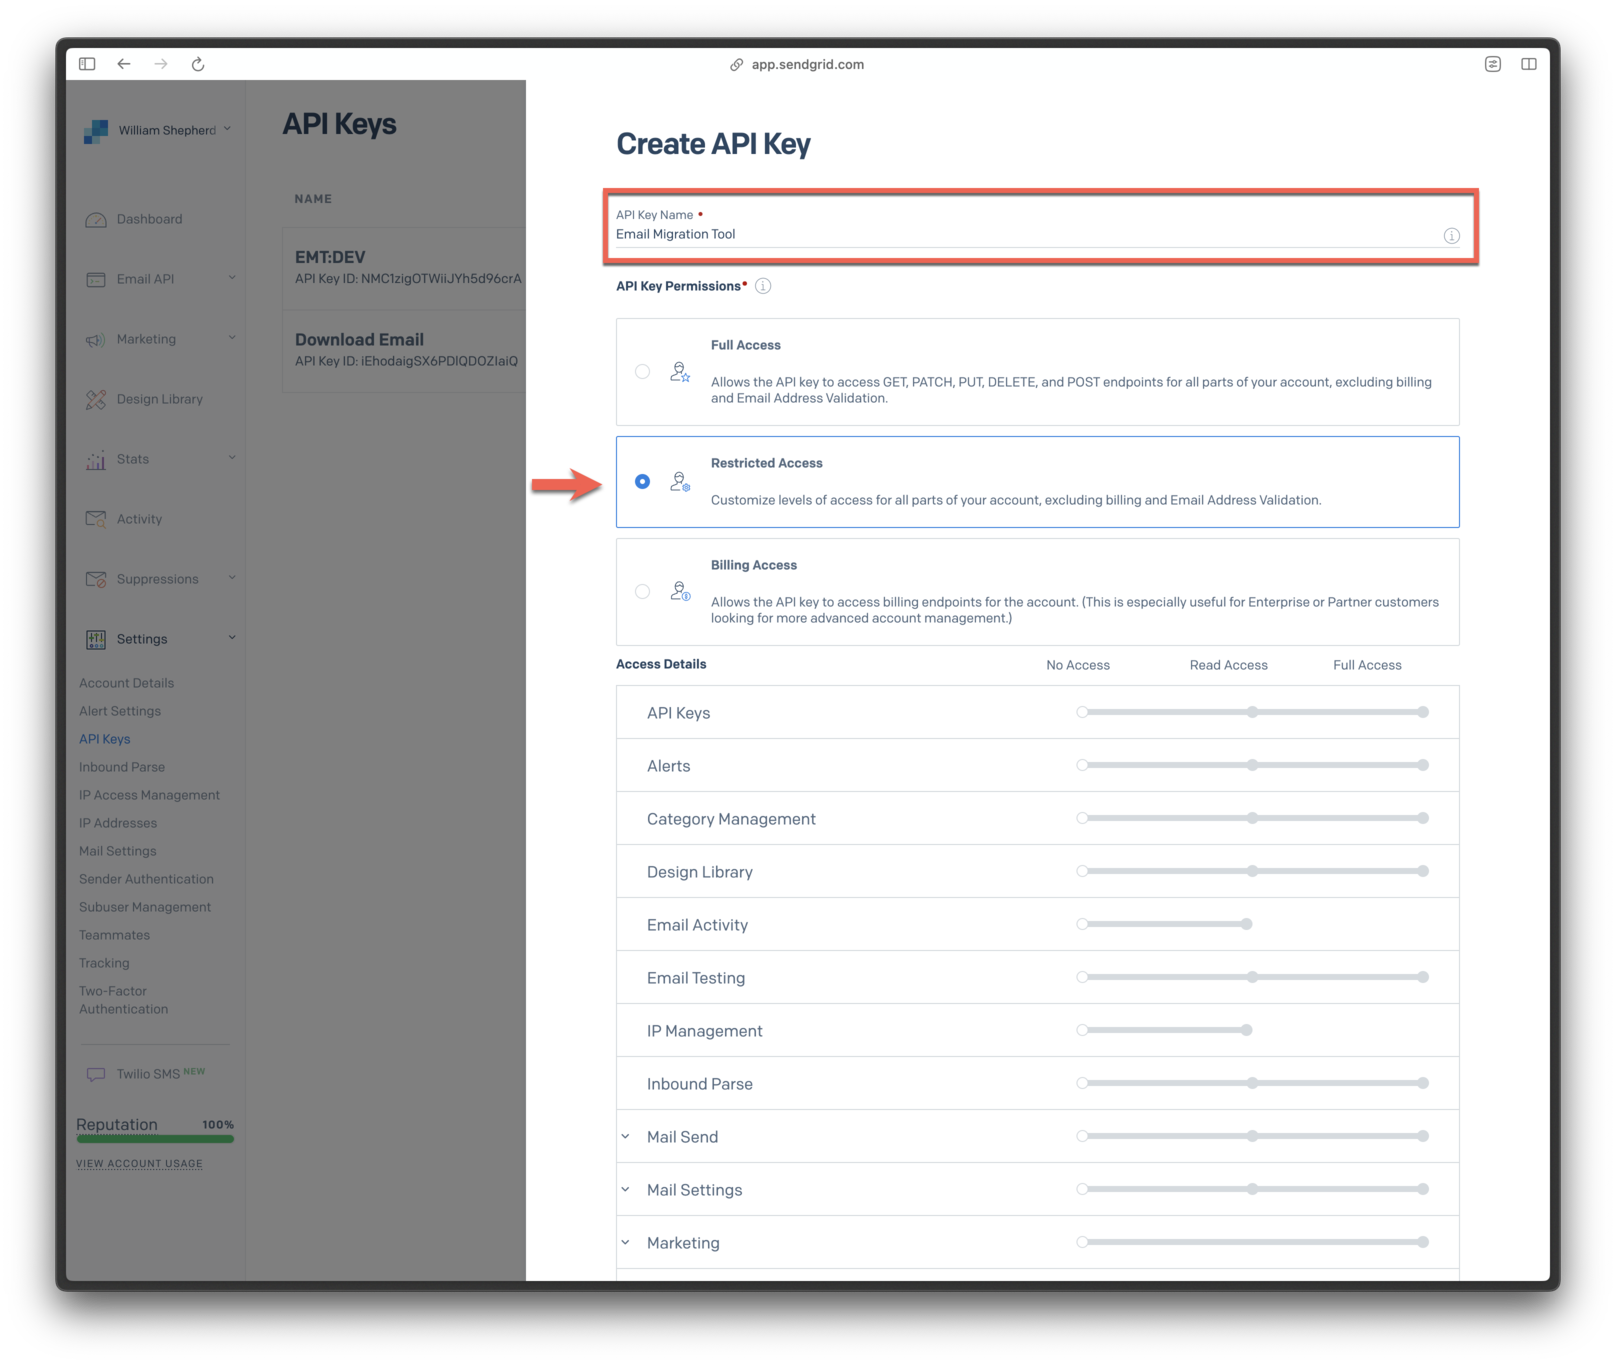
Naming the key and setting permissions
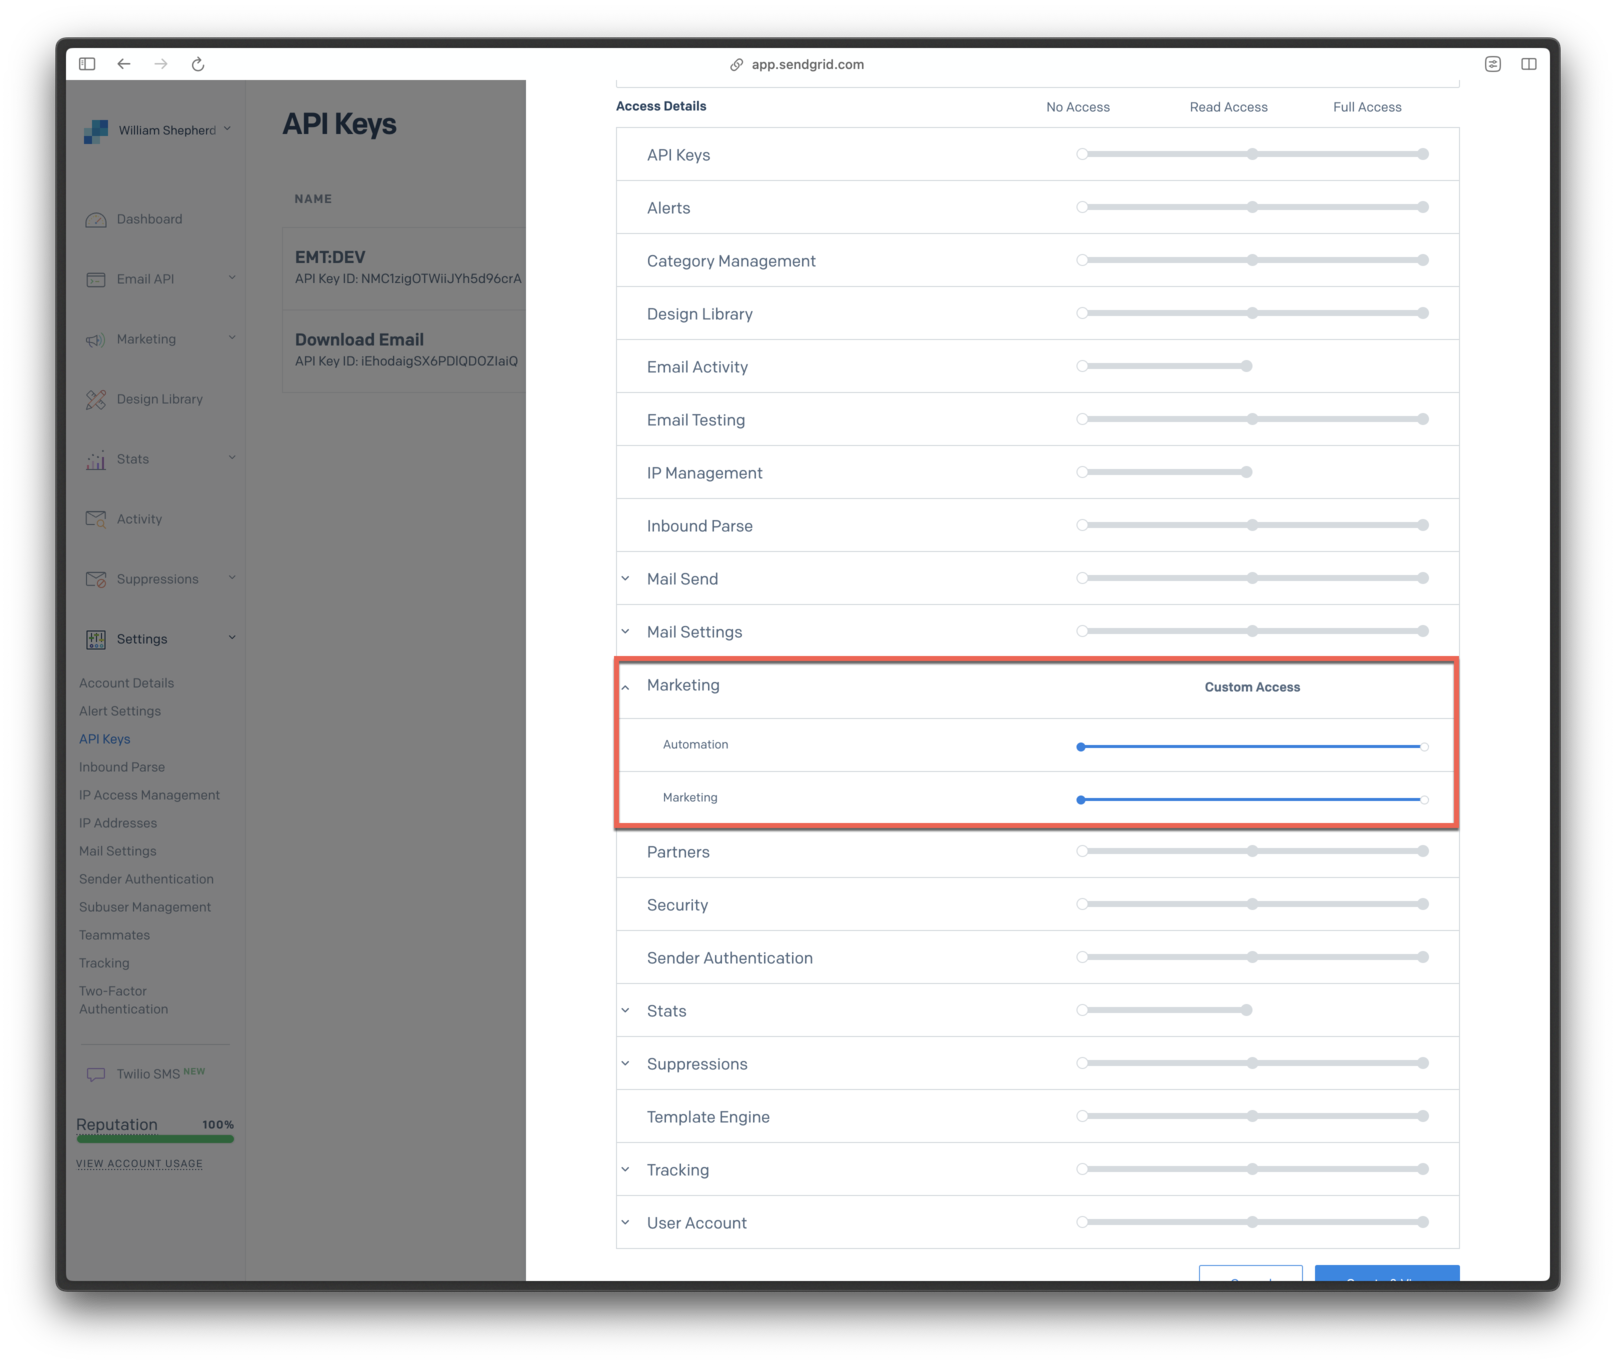
Granting Full Access to Marketing
- Click Create & View.
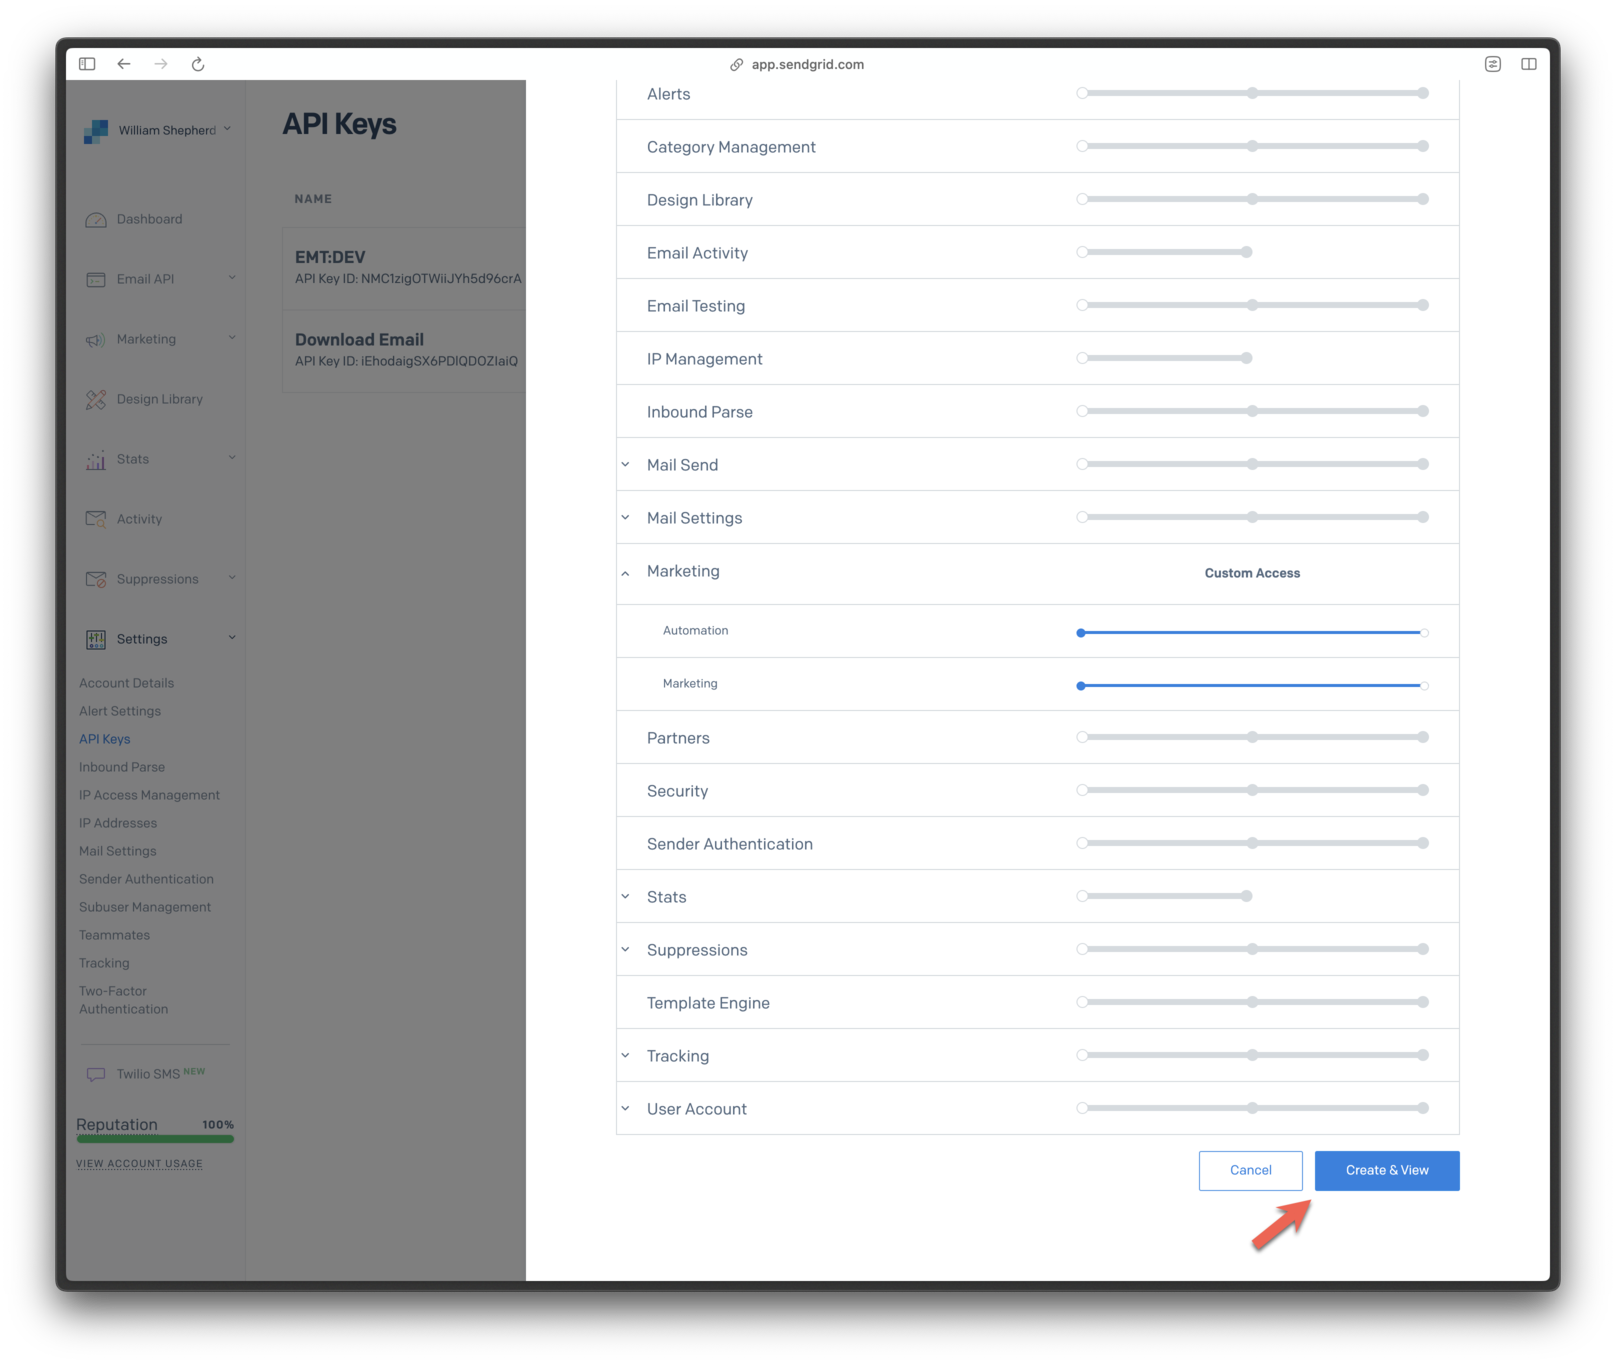
Clicking the Create & View button
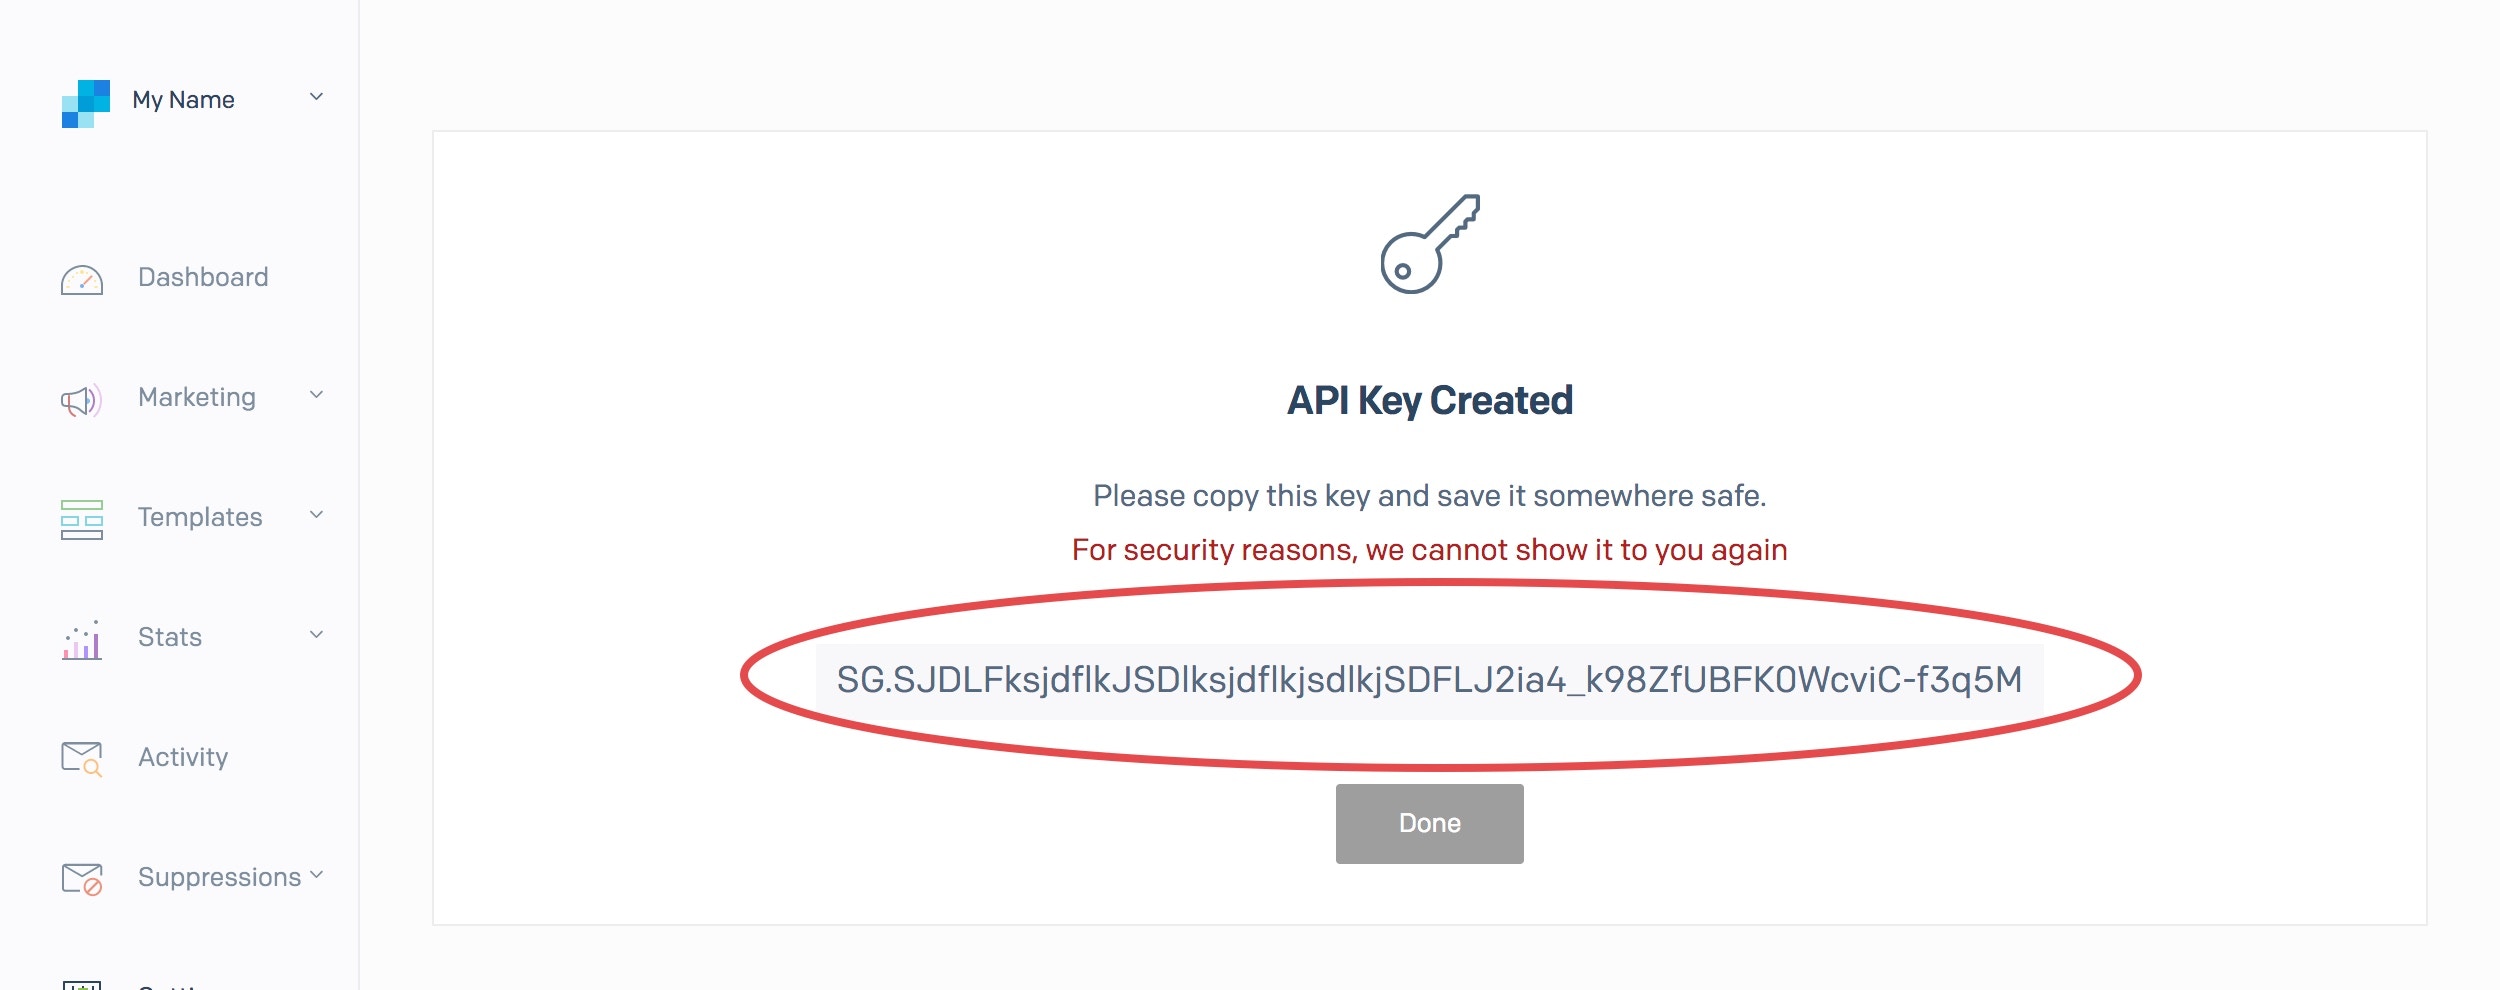
- Copy your API key.
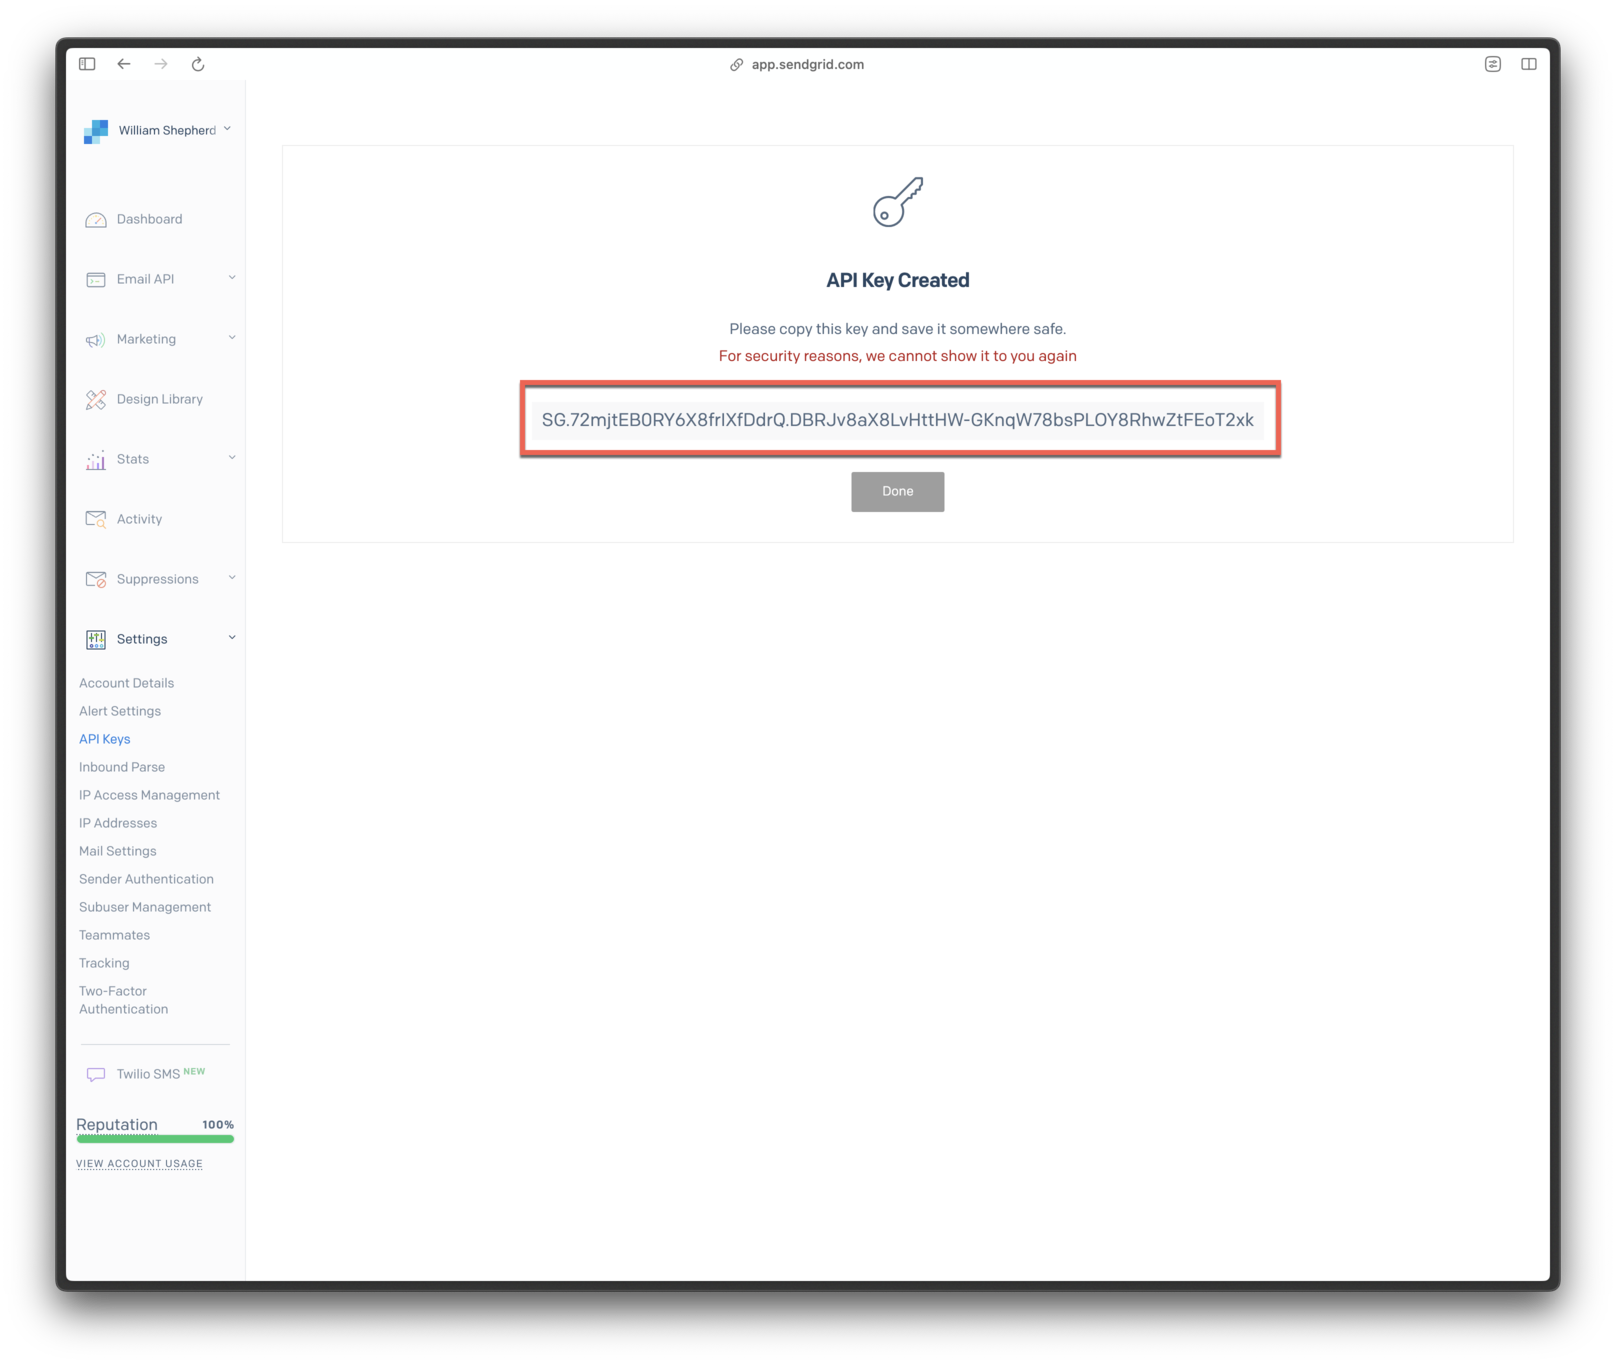
Copying the API key
FAQ
How do I set up OneSignal if I already have an active Webhook in SendGrid?
To simplify setup and be able to access email delivery statistics, OneSignal will automatically configure Webhooks with SendGrid. Unfortunately, SendGrid only supports a single webhook for a given account. OneSignal requires webhooks for email analytics, which may conflict with webhooks previously set up (e.g. for an analytics integration). If you need the webhook you have currently set up, you can forward the request tohttps://onesignal.com/email/hooks/sendgrid. Setup a timeout of 30 seconds for best results.
If you do not need the webhook you previously set up, you must change it. In SendGrid, go to Settings > Mail Settings and click ‘Event Webhook’. The HTTP Post URL should be https://onesignal.com/email/hooks/sendgrid and have the minimum settings shown:
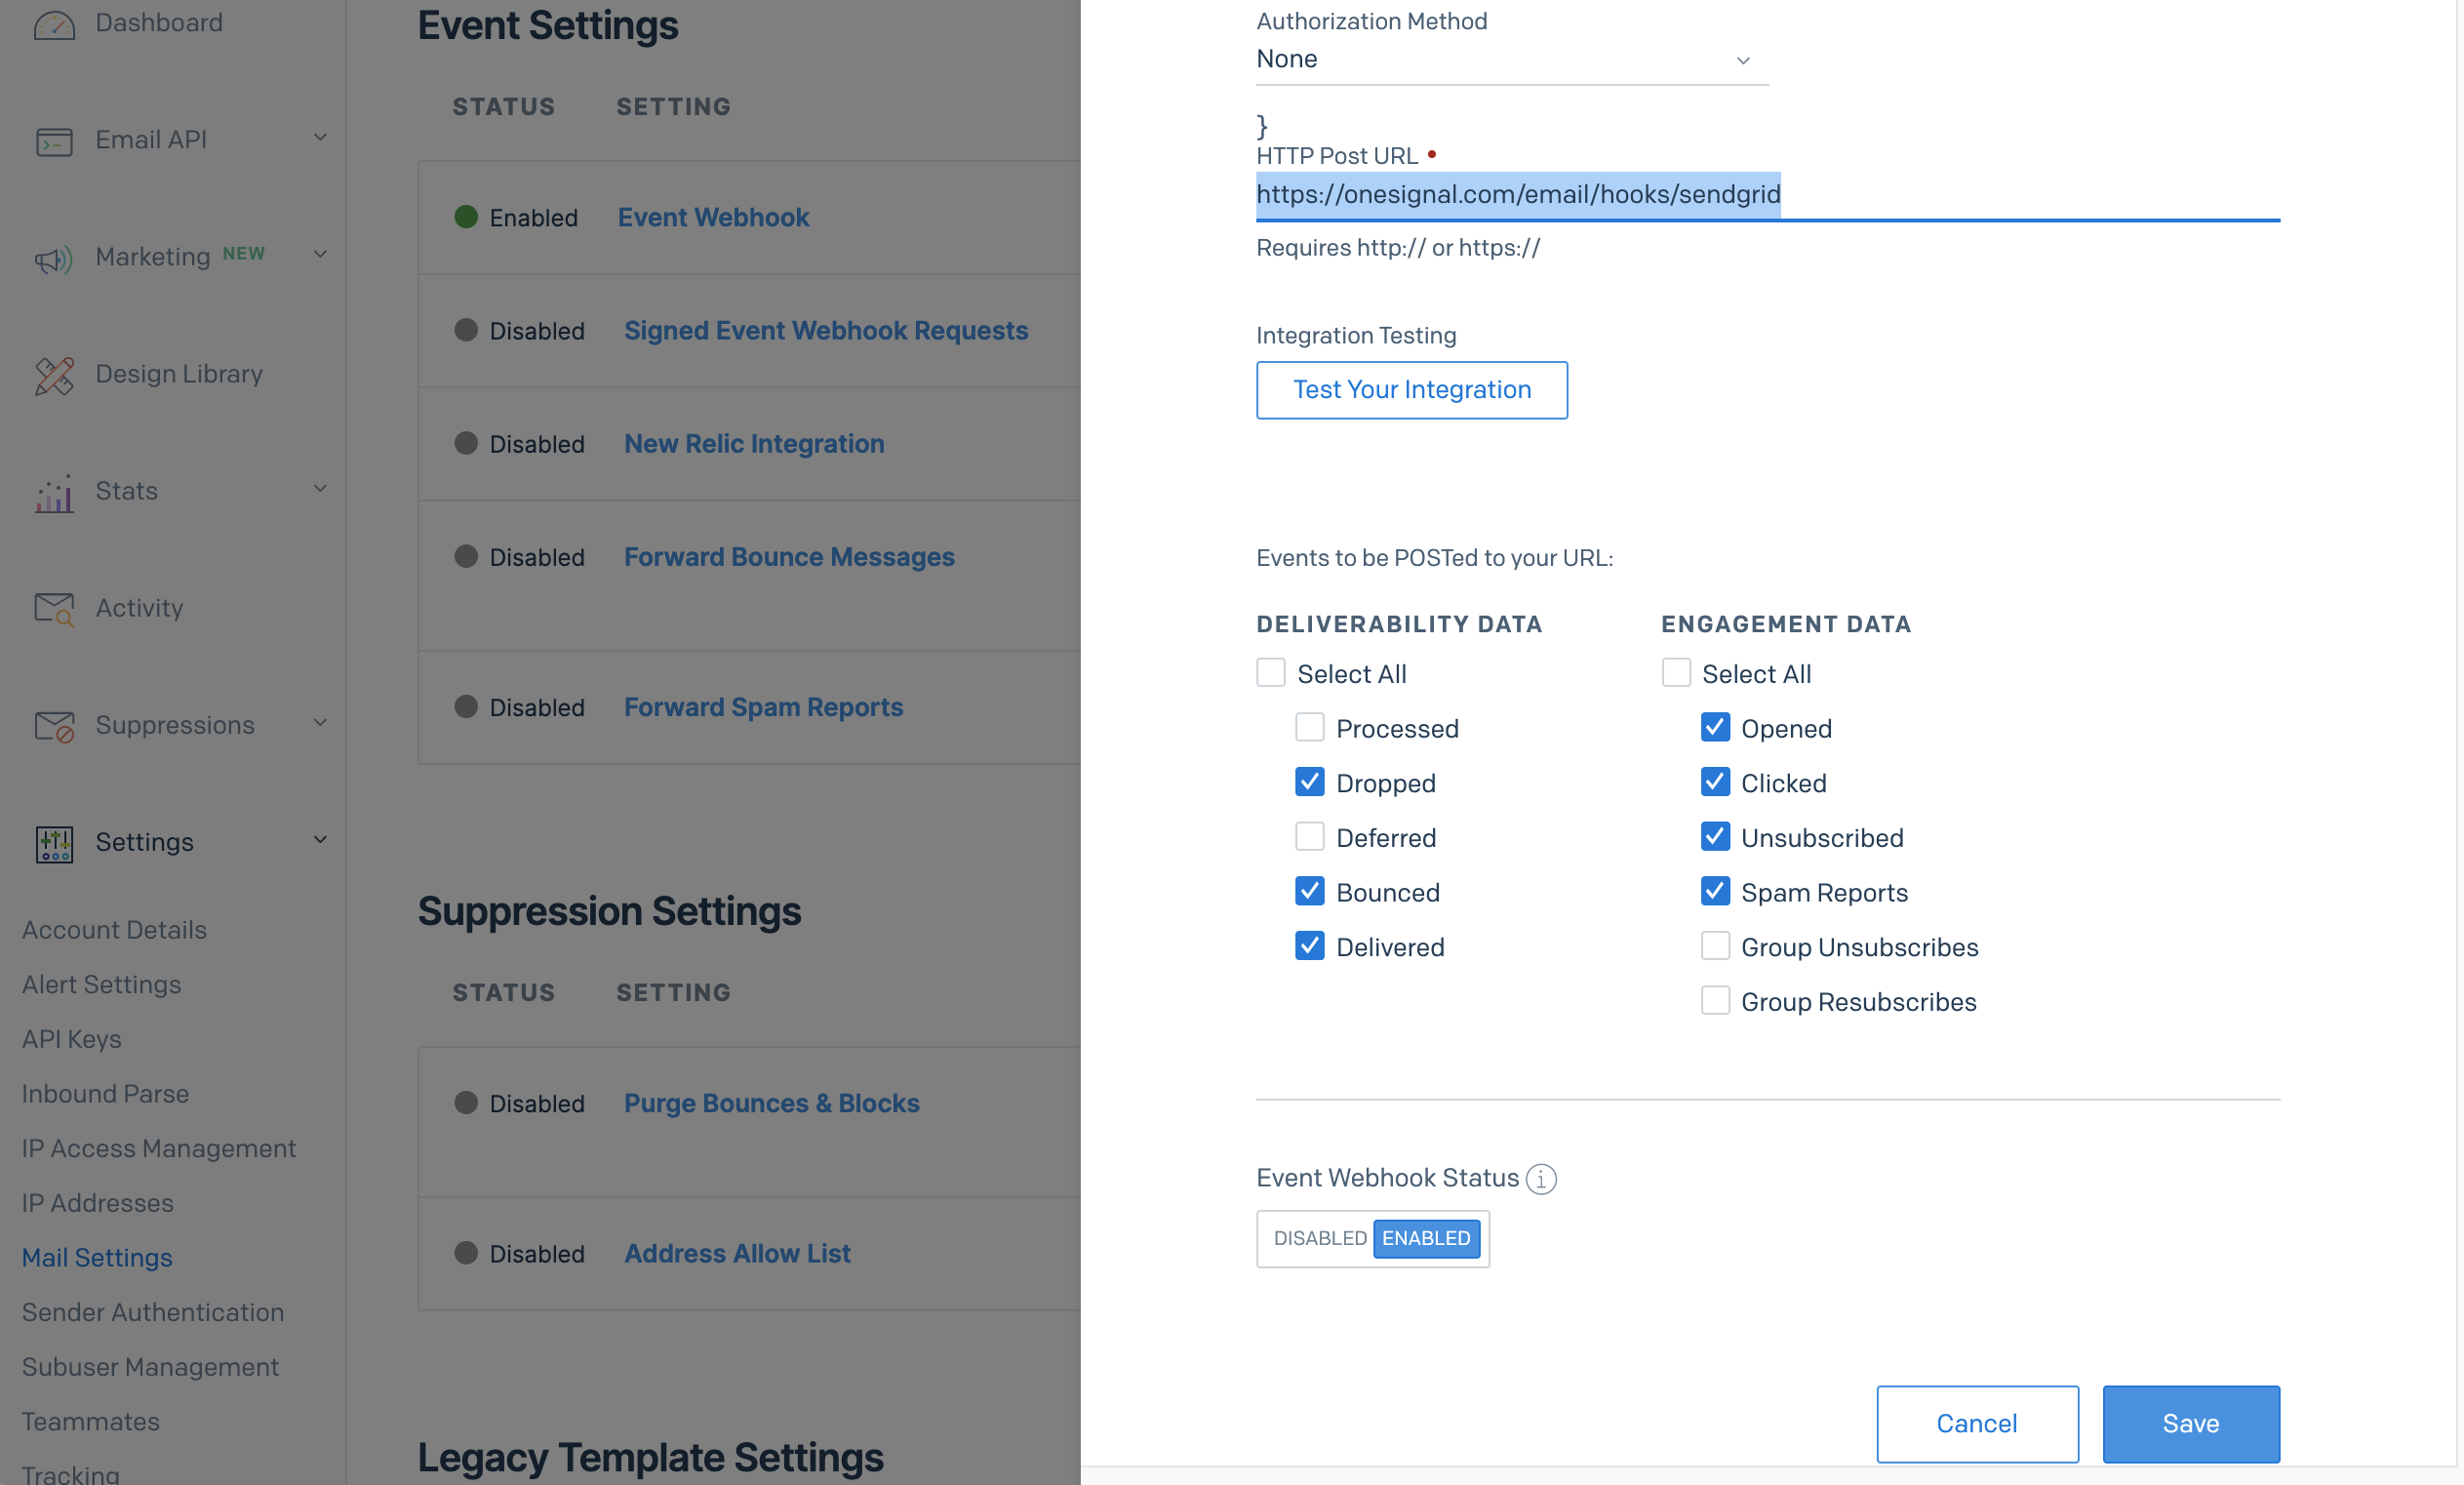
SendGrid webhook configuration settings
How do I allowlist OneSignal’s IPs?
See the requirements in our REST API Overview for details.
OneSignal IP allowlist requirements