Step 0. Configure FCM in OneSignal (required to deliver push)
You can install and initialize the OneSignal Android SDK without completing this step. However, push notifications will not deliver until Firebase Cloud Messaging (FCM) credentials are configured in your OneSignal app.Steps to configure your OneSignal app.
Steps to configure your OneSignal app.
- Login to https://onesignal.com and create or select your App.
- Navigate to Settings > Push & In-App.
- Select Google Android (FCM) and Continue through the setup wizard.
- Input your Firebase Server Key or Service Account details.
- Continue through the setup wizard to get your App ID. This will be used to initialize the SDK.
Setup contract & requirements
This section summarizes the tools, versions, and assumptions used throughout the guide.- SDK version:
5.6.1+(latest: check releases) - AI setup instructions:
https://raw.githubusercontent.com/OneSignal/sdk-ai-prompts/main/docs/android/ai-prompt.md - SDK repo:
https://github.com/OneSignal/OneSignal-Android-SDK - Android Studio: Meerkat+ (2024.2.1+)
- Android API: 23+ minimum (Android 6.0+), 31+ recommended (Android 12+)
- Device/Emulator: Android 7.0+ with Google Play Services installed
- Required dependency:
com.onesignal:OneSignal:[5.6.1, 5.9.99] - Application class: Required for proper SDK initialization
- App ID format: 36-character UUID (example:
12345678-1234-1234-1234-123456789012) — find at OneSignal Dashboard > Settings > Keys & IDs - Initialize:
OneSignal.initWithContext(this, "YOUR_APP_ID") - Battery Optimization: May affect background notifications
- Recommended: Assign External ID via
OneSignal.login("user_id")to unify users across devices
Android setup steps
By the end of the steps below, you will have:- The OneSignal SDK installed and initialized in your Android app
- Push notification permissions prompting correctly on a real device
- A test push and in-app message successfully delivered
Step 1. Add the OneSignal SDK
- In Android Studio, open your
build.gradle.kts (Module: app)orbuild.gradle (Module: app)file - Add OneSignal to your
dependenciessection:
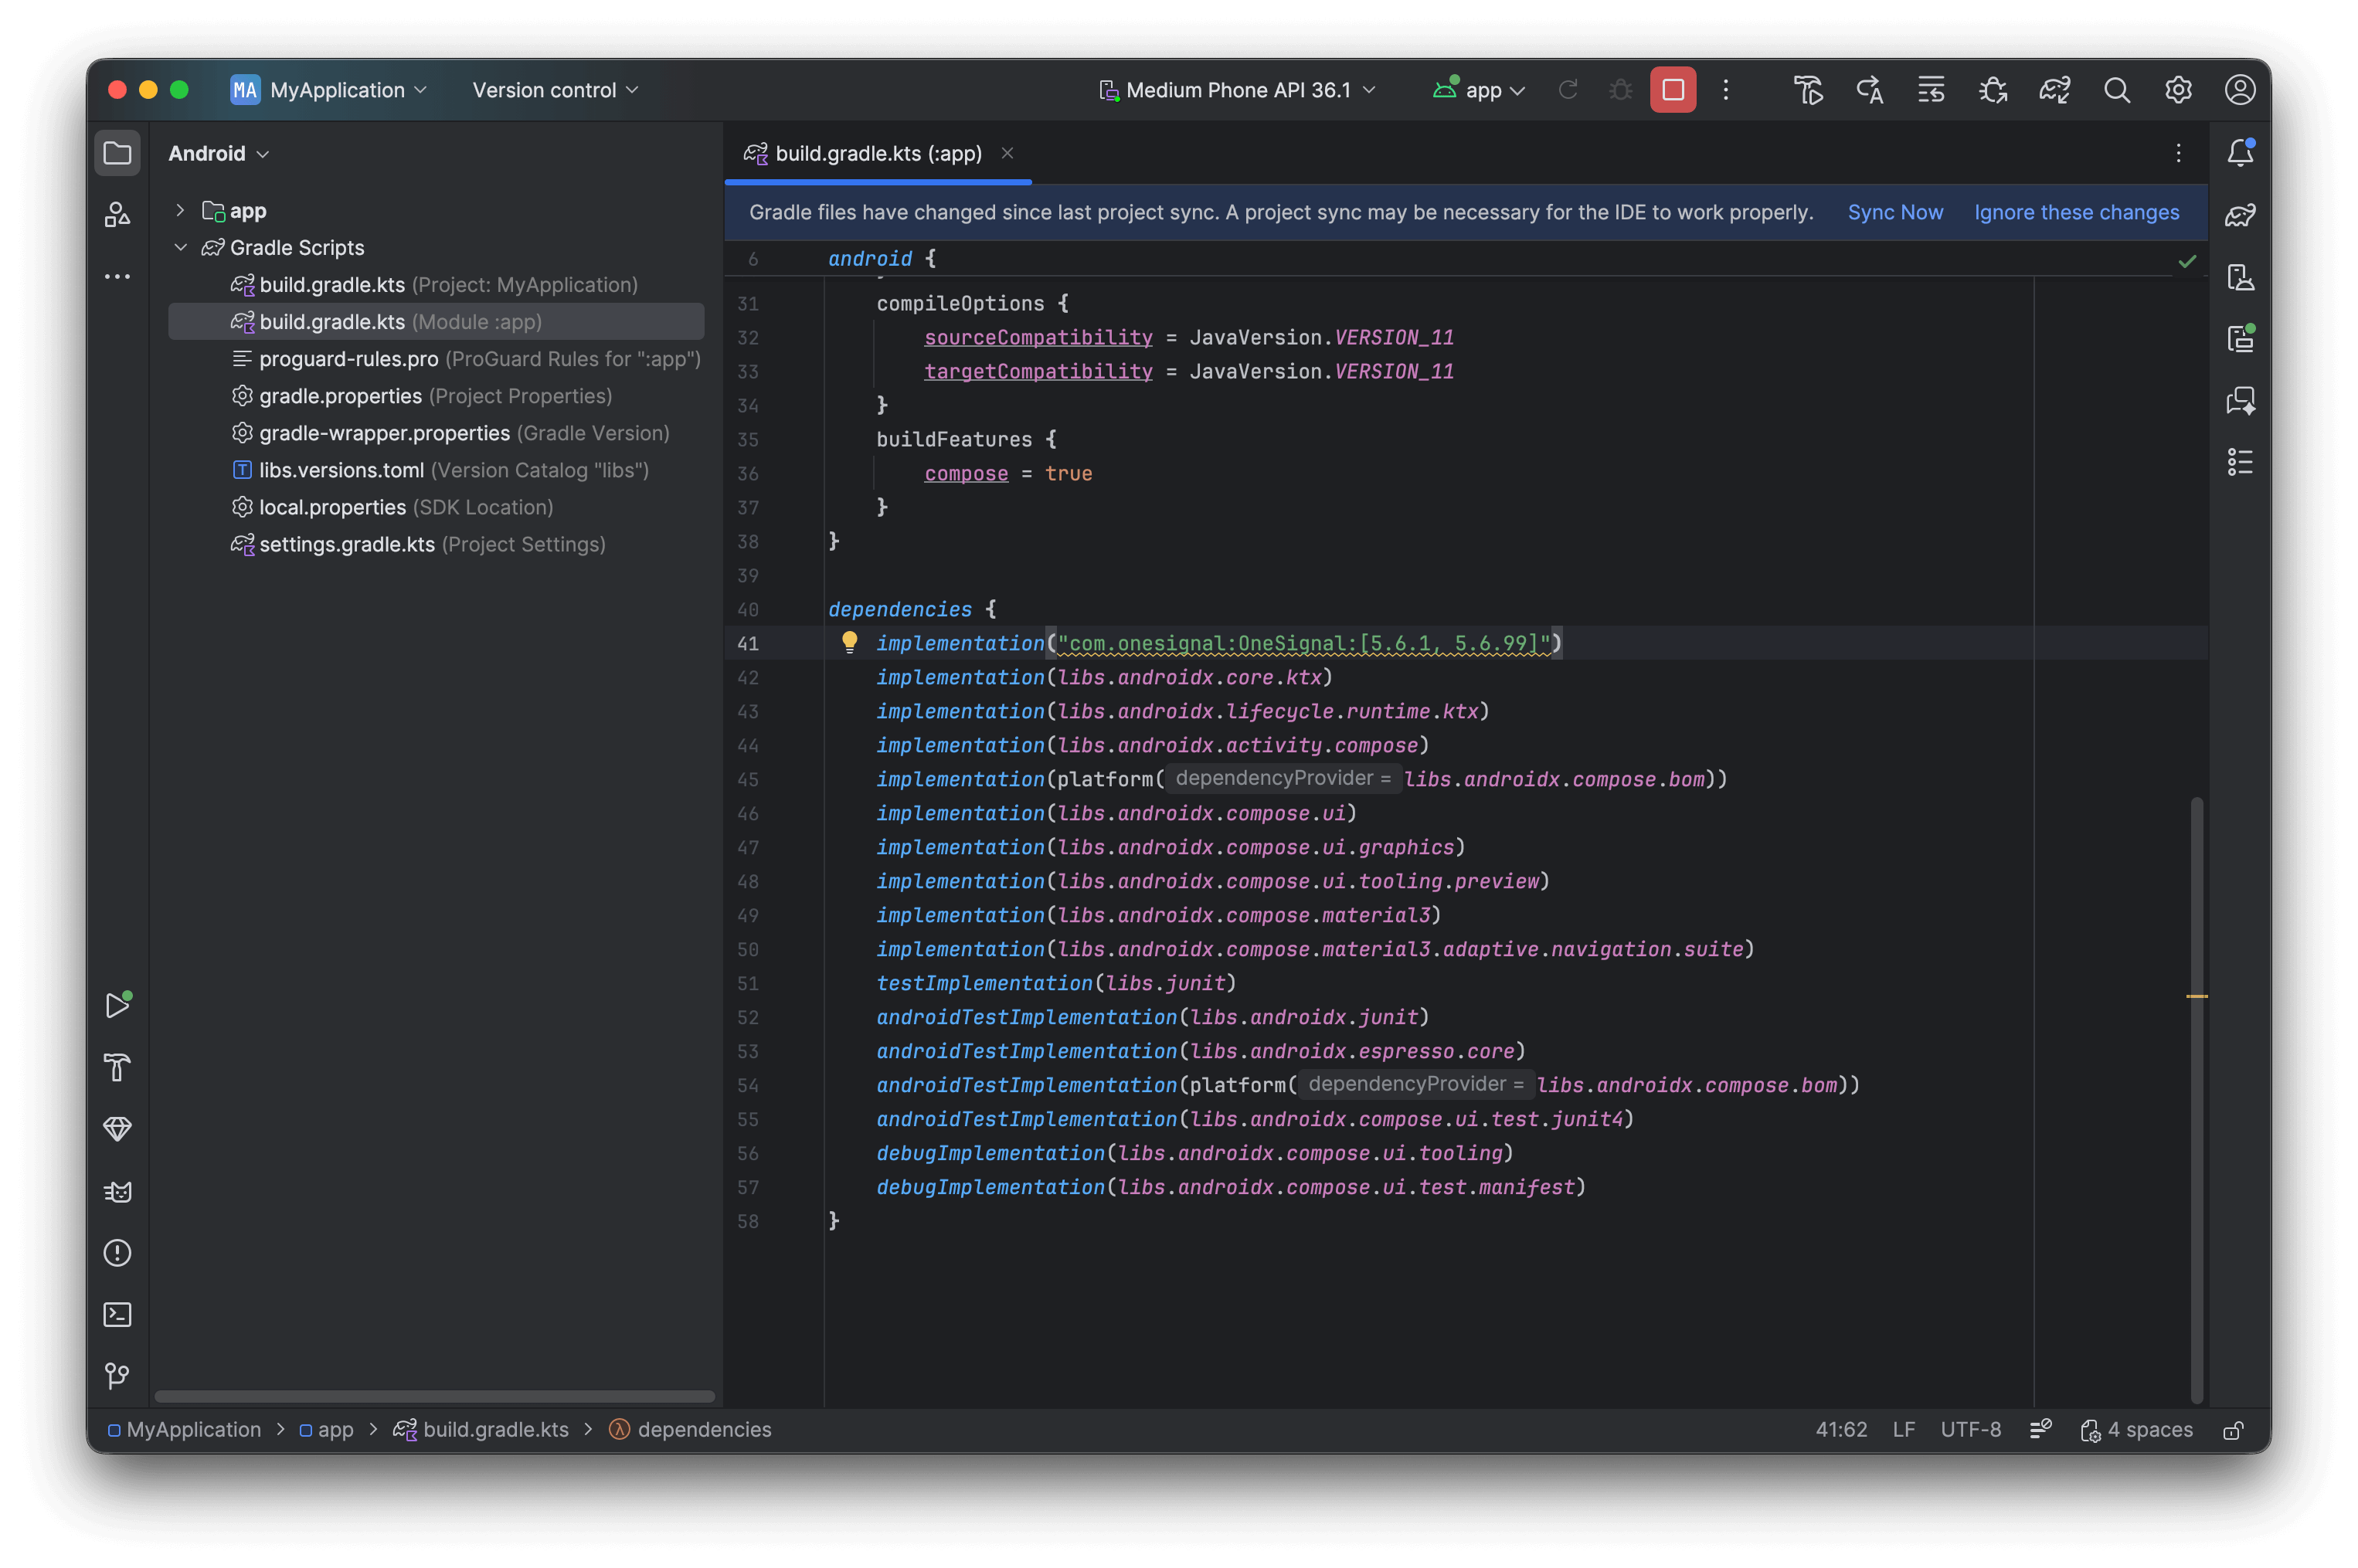
Example shows adding OneSignal to your App's build.gradle.kts file.
- Sync Gradle: Click Sync Now in the banner that appears or go to File > Sync Project with Gradle Files
Step 2. Create and configure Application class
It’s best practice to initialize OneSignal in theonCreate method of your Application class to ensure proper SDK setup across all entry points.
Create an Application class if you don’t already have one:
- File > New > Kotlin Class/File (or Java Class)
- Name:
ApplicationClass(or your preferred name)
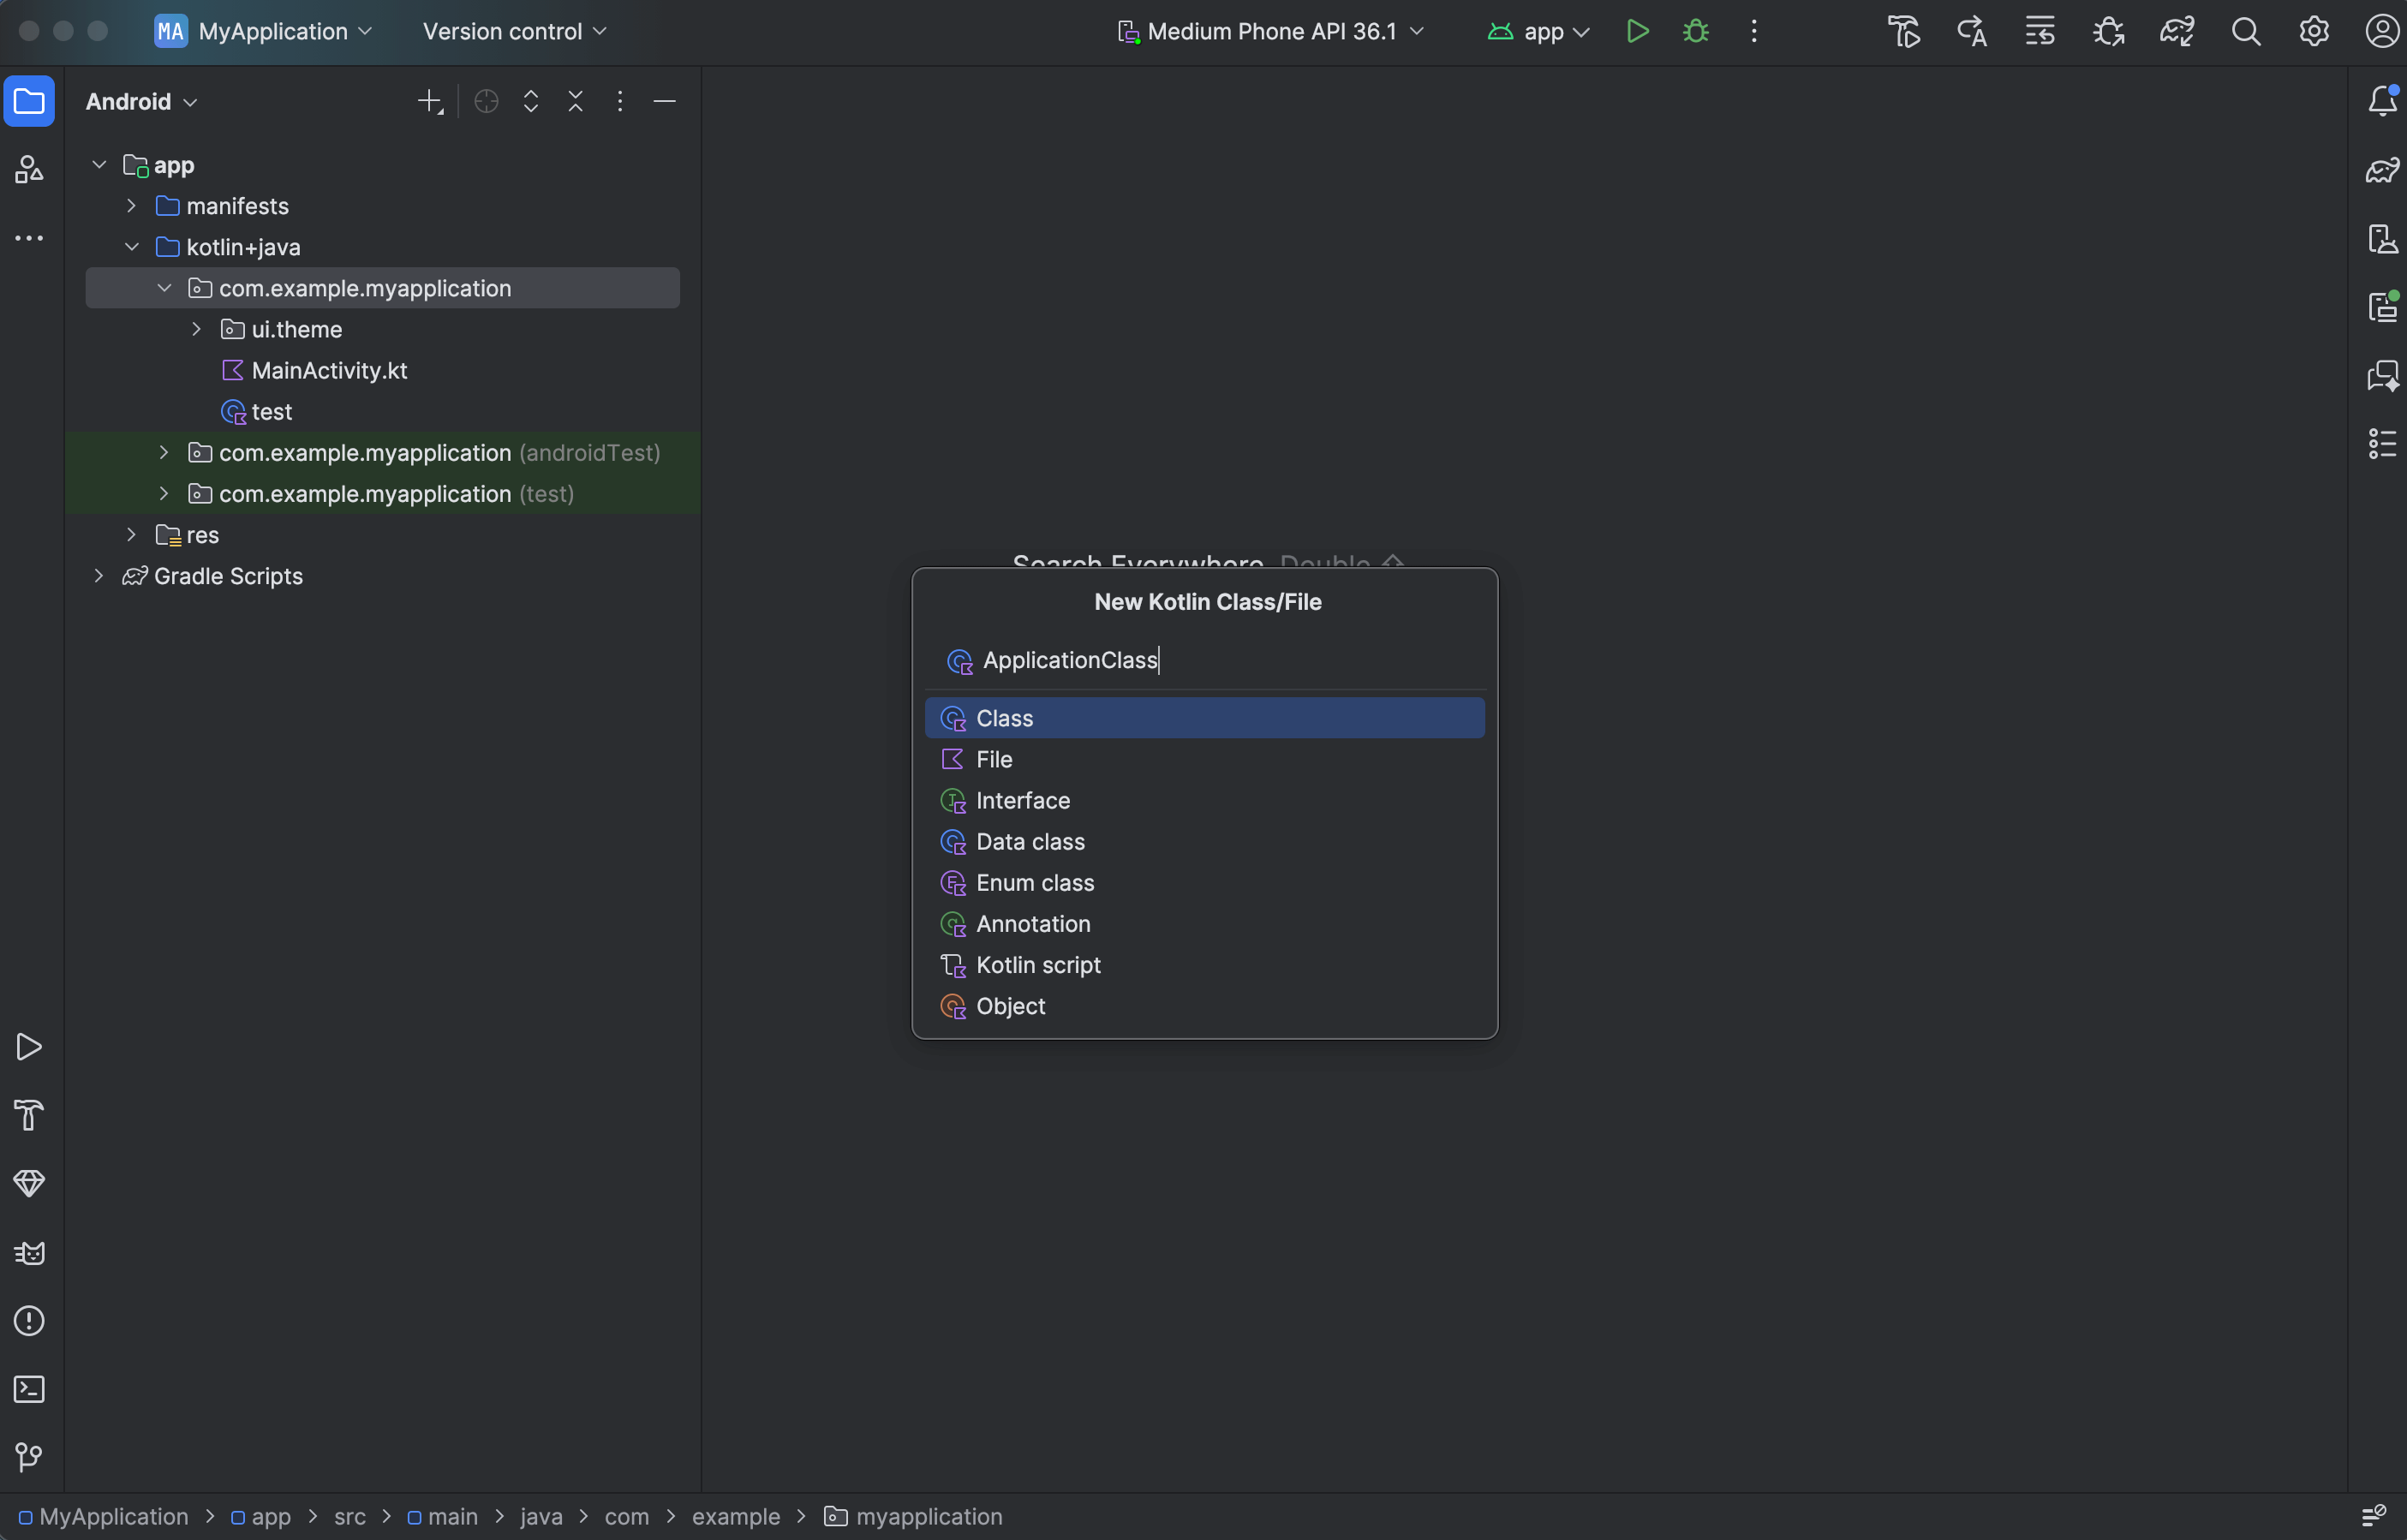
Example shows creating a new Kotlin class named ApplicationClass.
YOUR_APP_ID with your actual OneSignal App ID from the Dashboard > Settings > Keys & IDs.

Example ApplicationClass.kt file.
- Open your app’s
AndroidManifest.xml - In your
<application>tag addandroid:name=".ApplicationClass"(replace.ApplicationClasswith your actual class name if set it to something different).
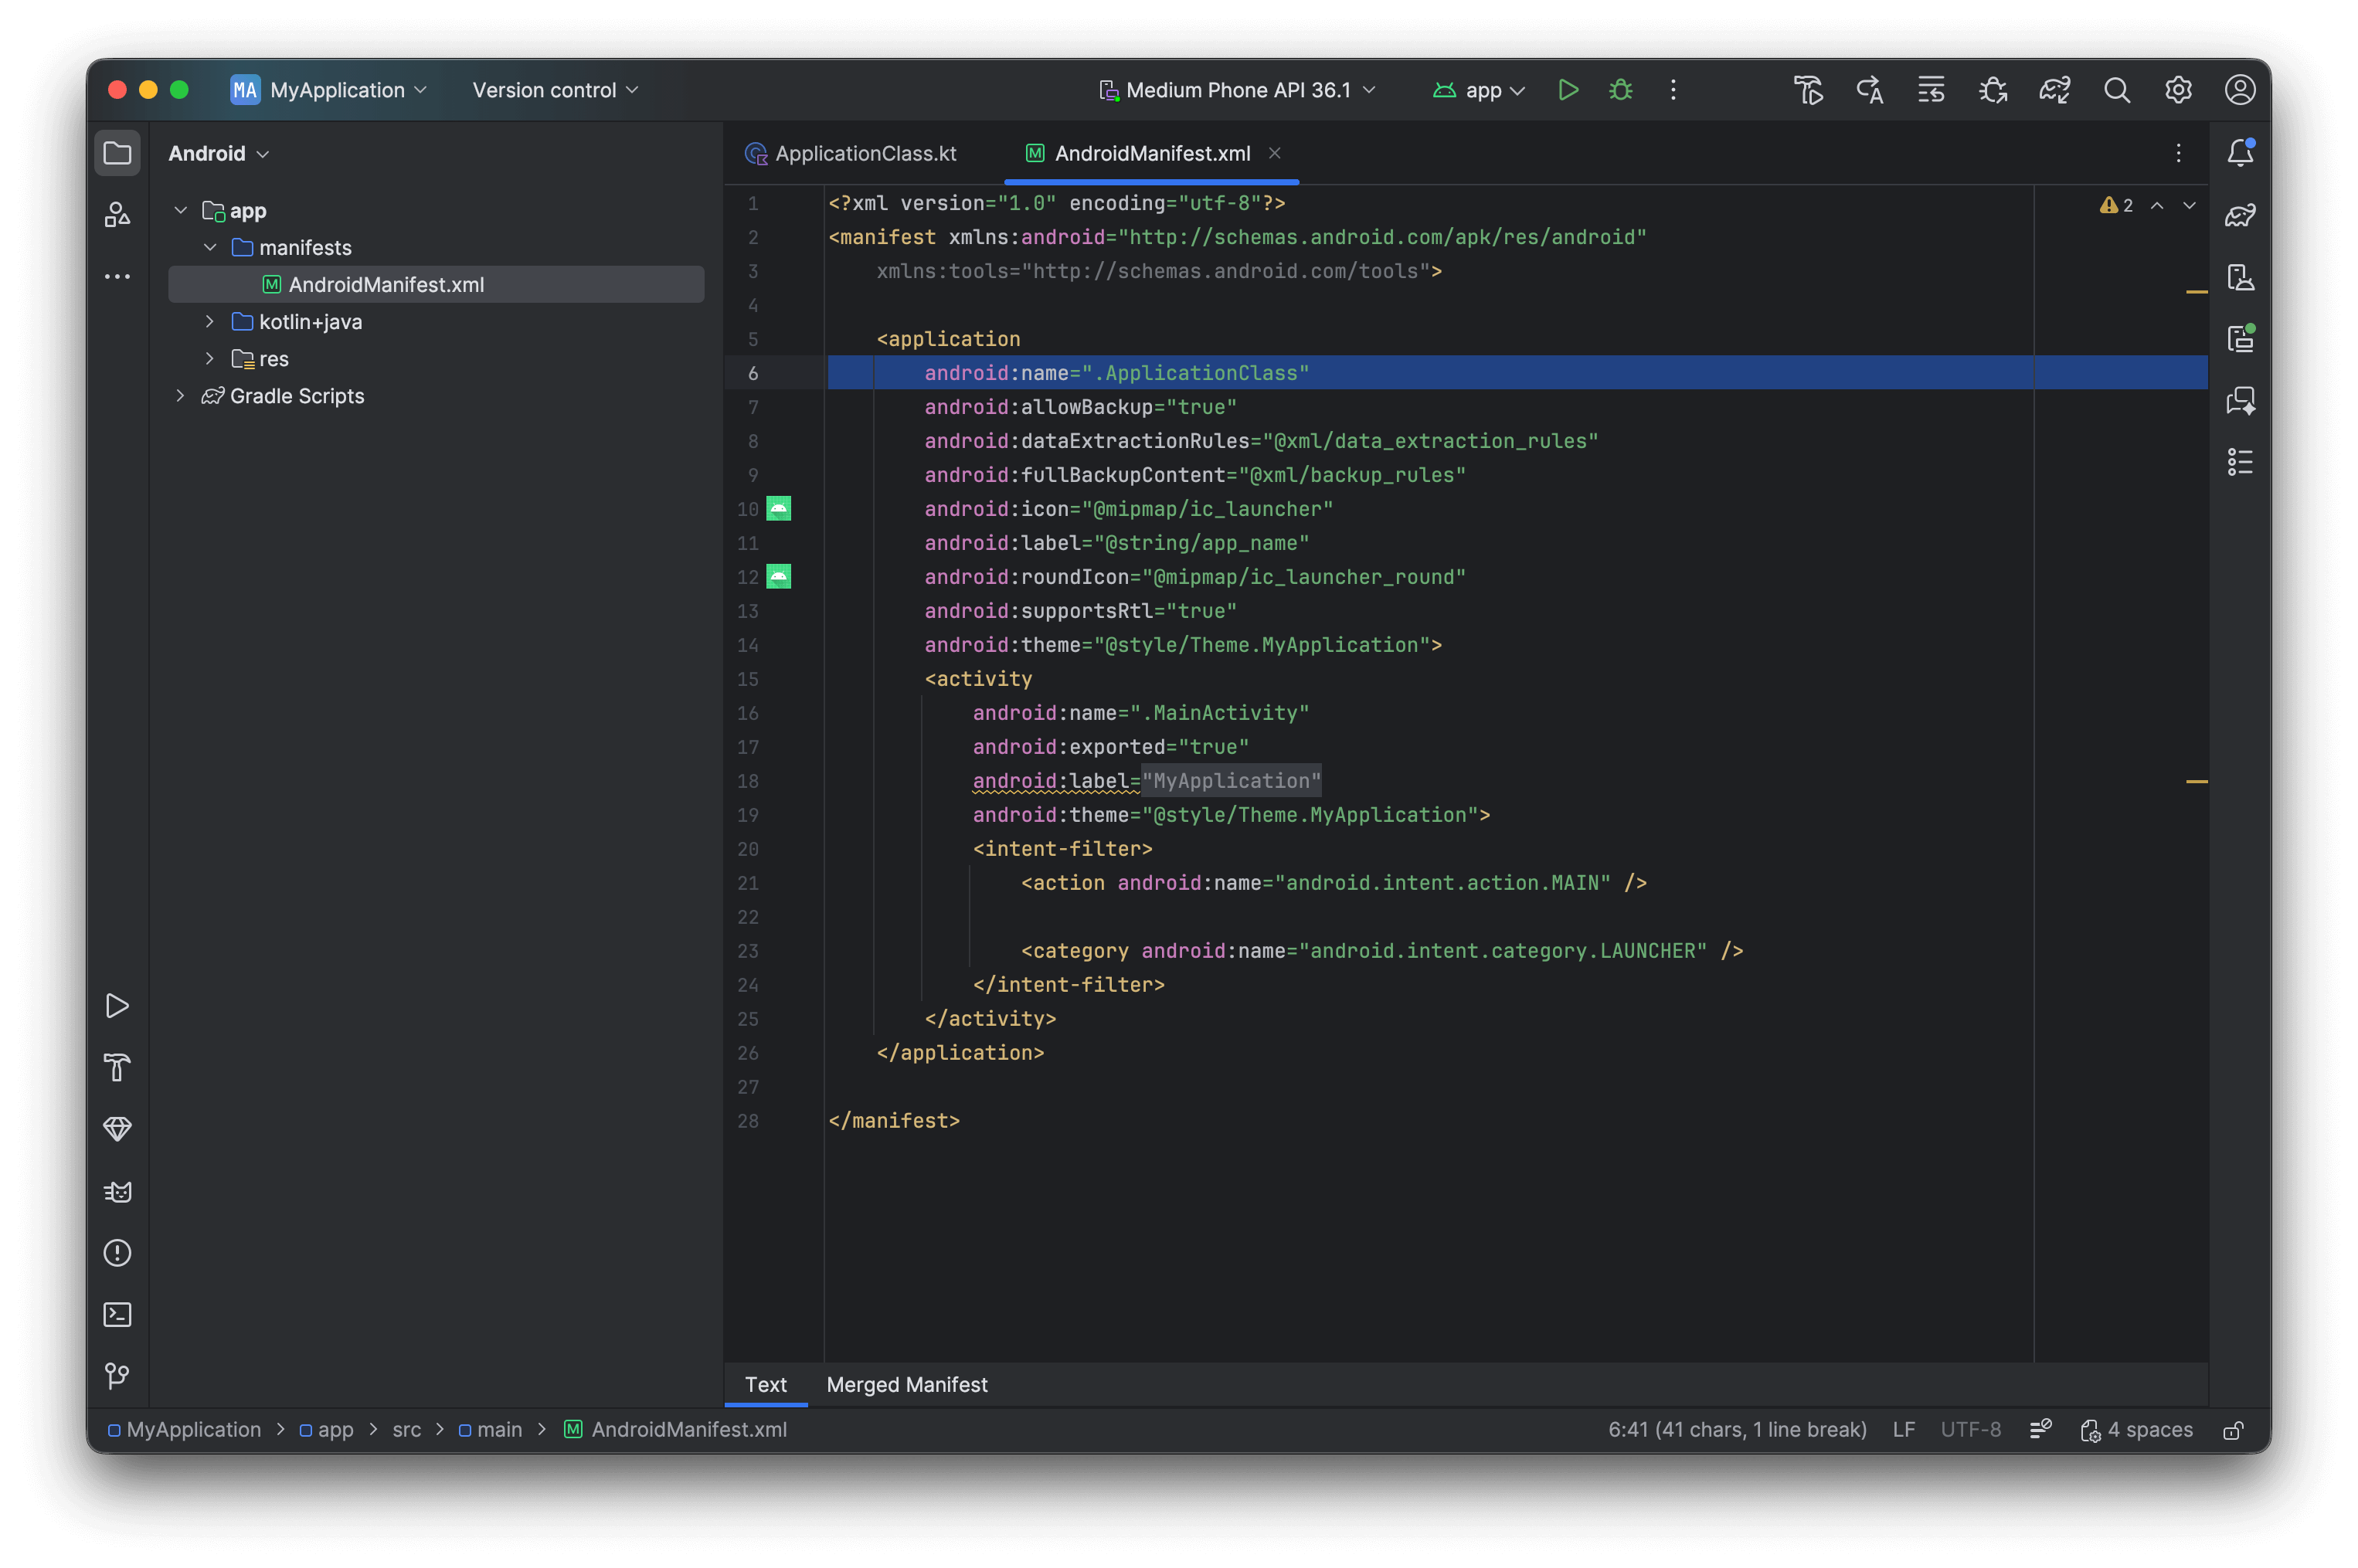
AndroidManifest.xml with the .ApplicationClass name.
Step 3. Configure default notification icons (recommended)
Customize notification icons to match your app’s branding. This step is optional but recommended for a professional appearance.Step 4. Test the integration
Verify Subscription creation:- Launch app on device or emulator with Google Play Services
- Check Dashboard > Audience > Subscriptions — status shows “Never Subscribed”
- Accept the permission prompt when it appears
- Refresh dashboard — status changes to “Subscribed”
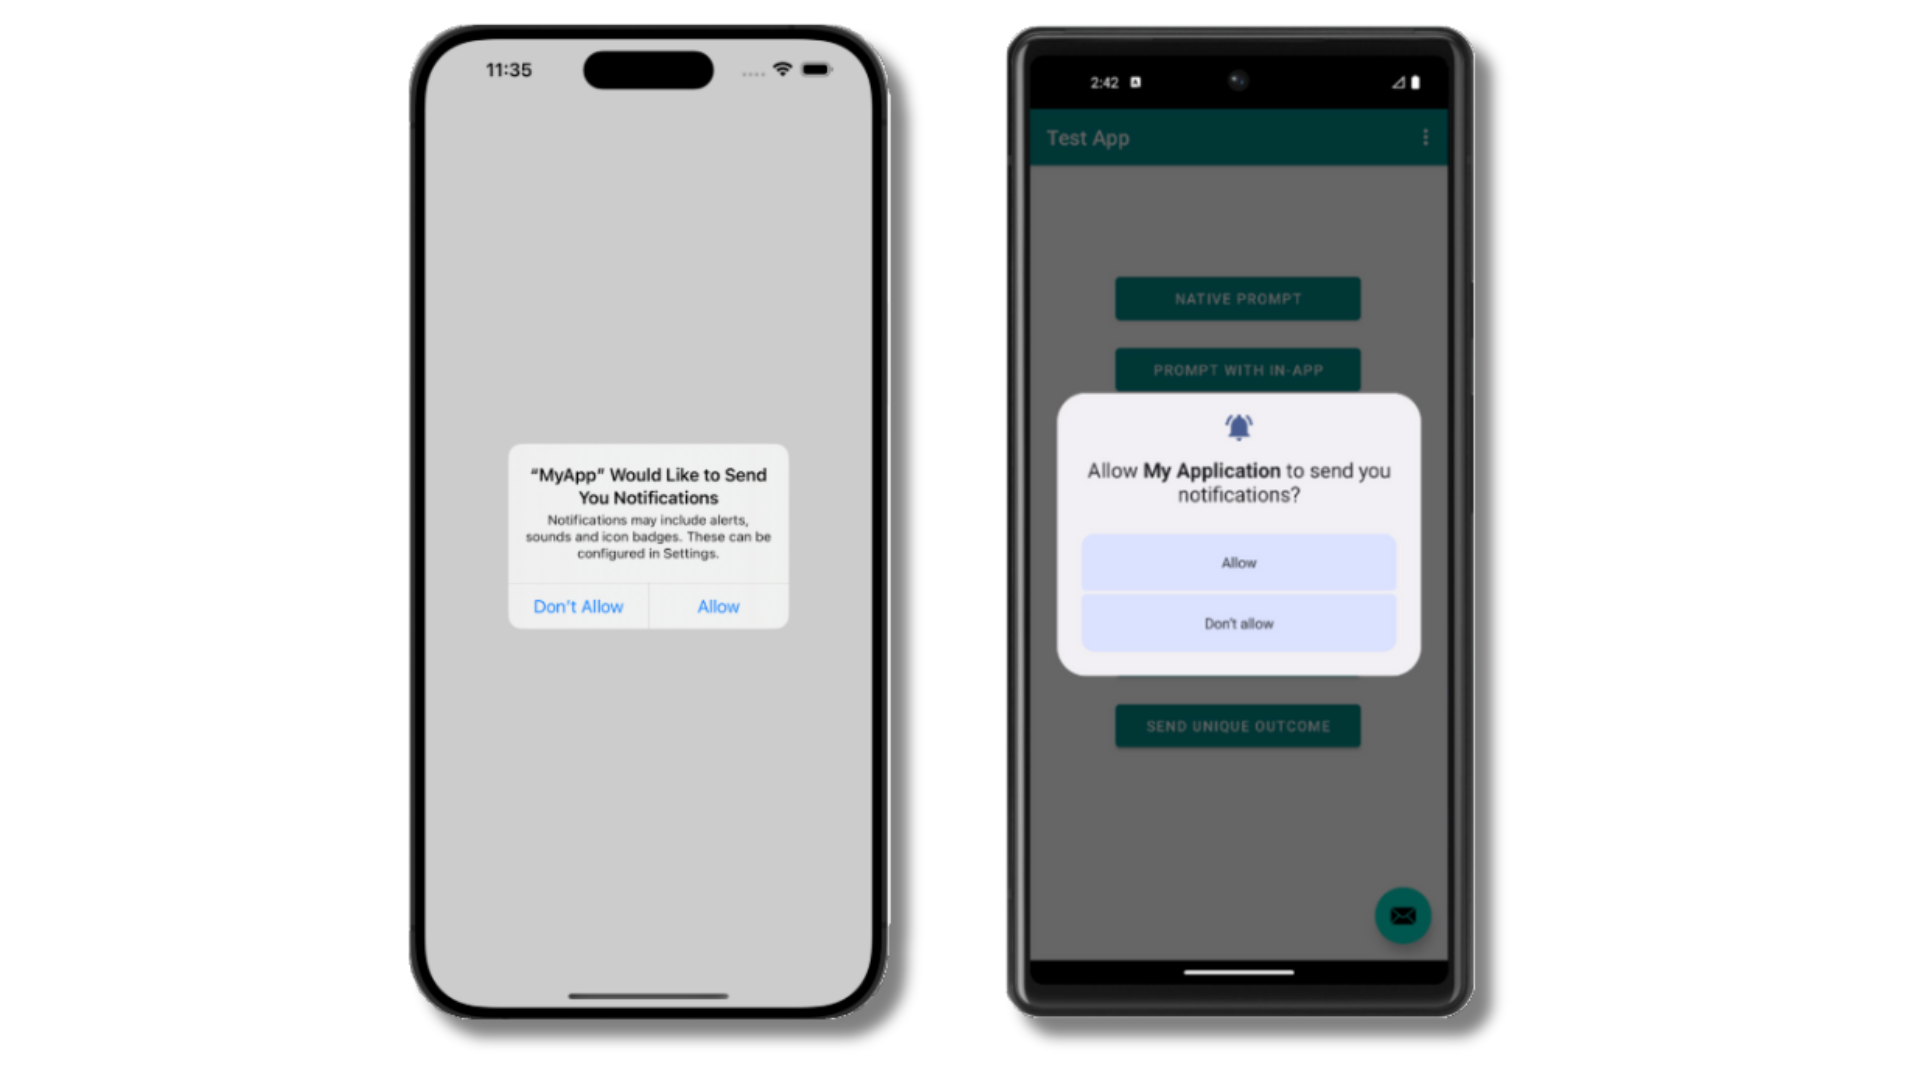
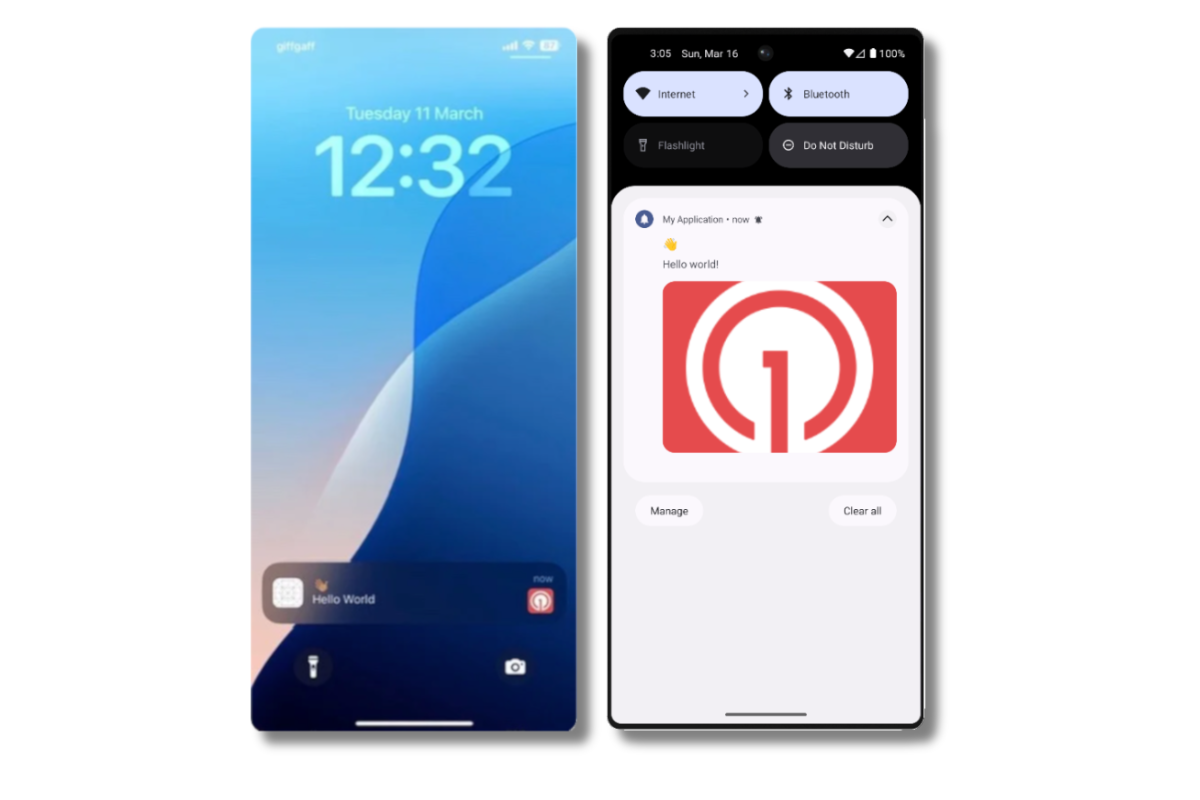
Example of the iOS and Android push permission prompts
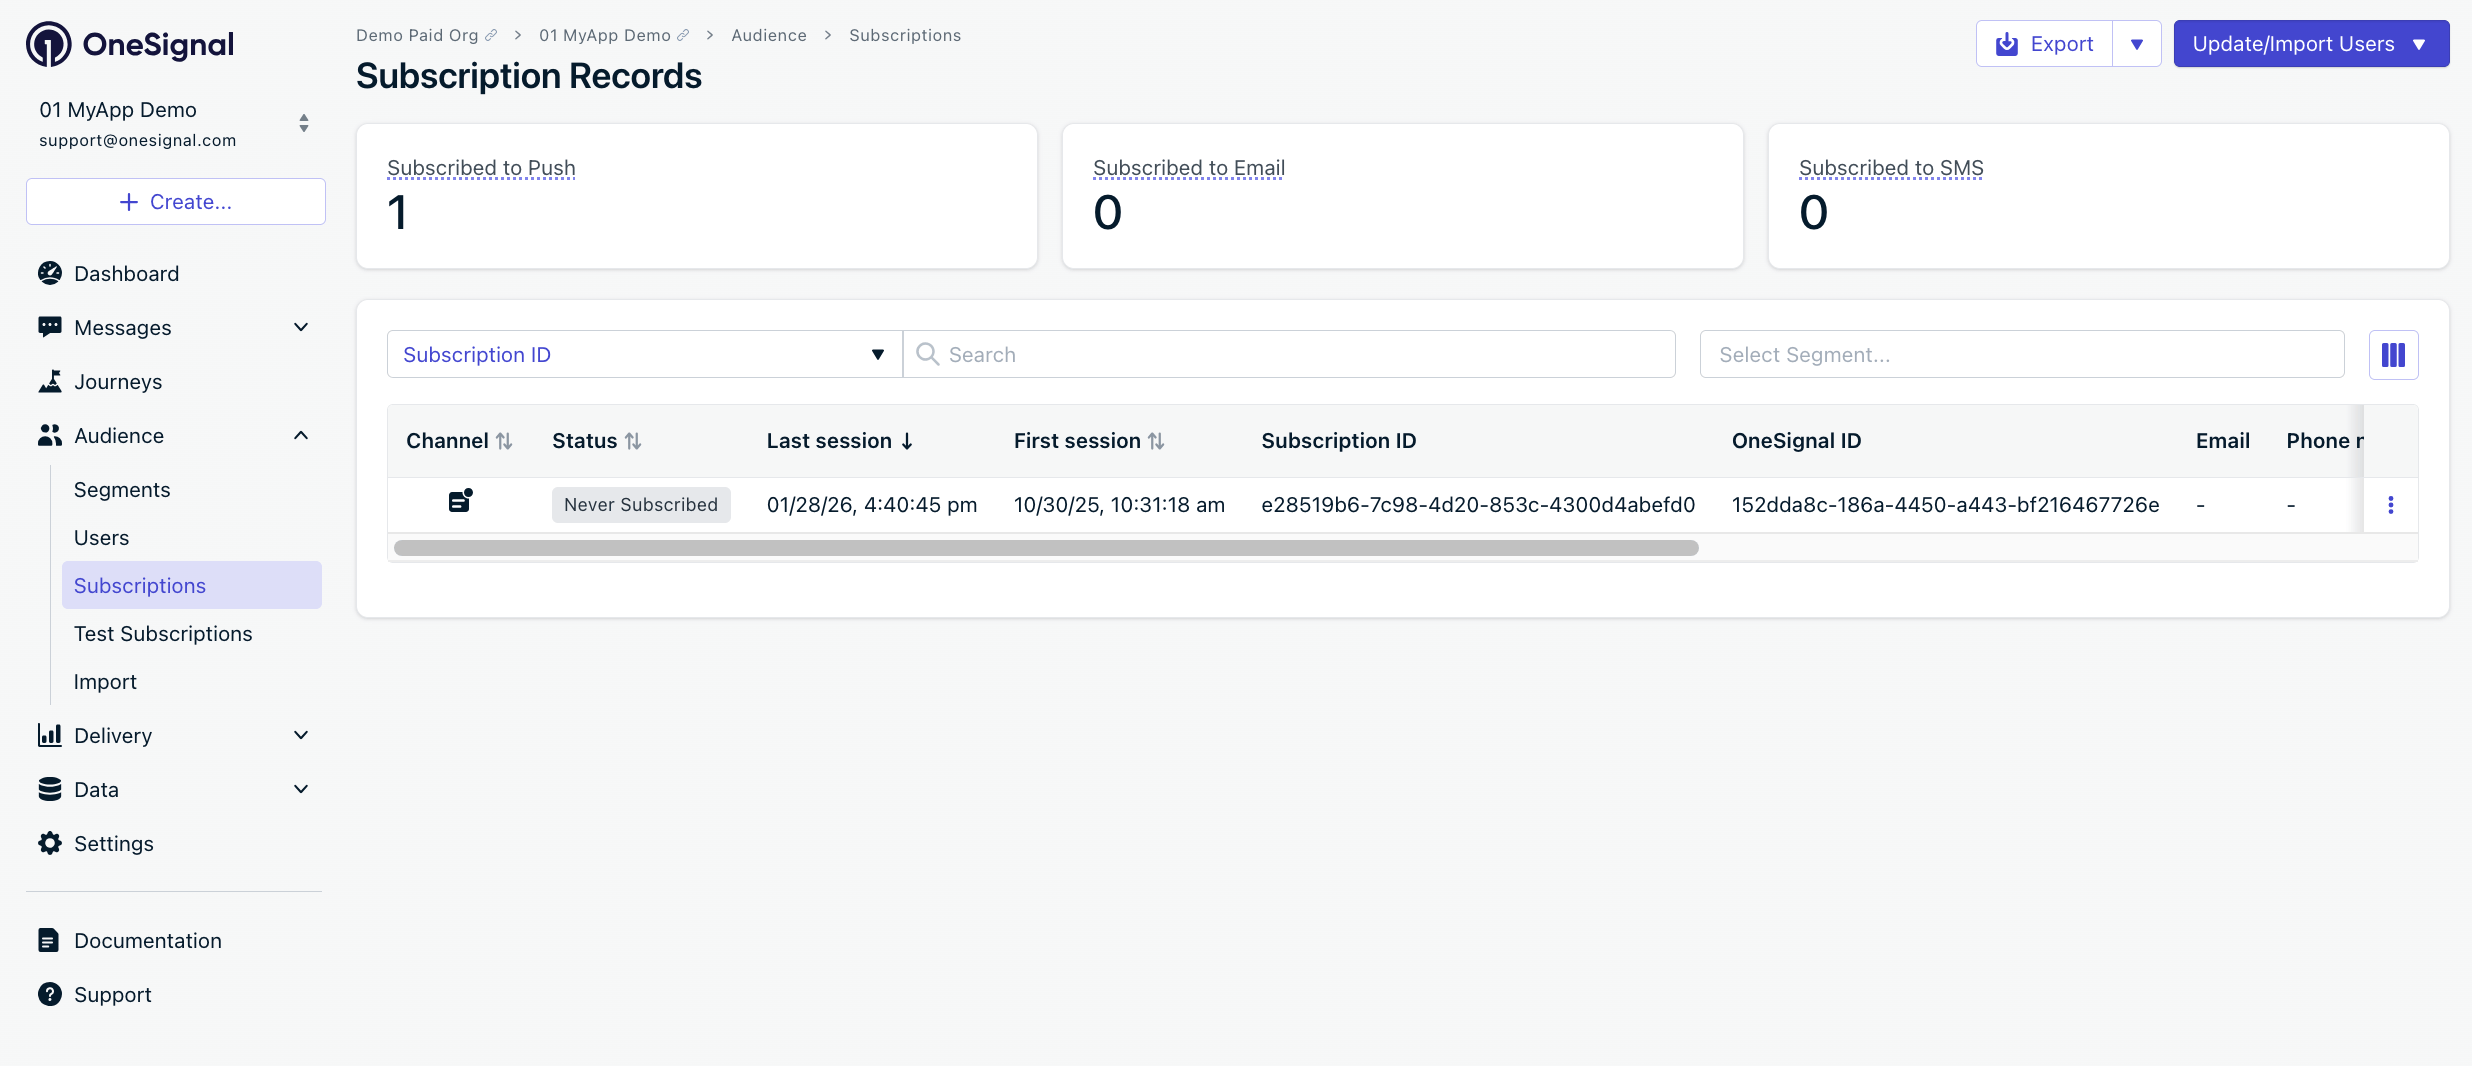
Dashboard showing Subscription with 'Never Subscribed' status
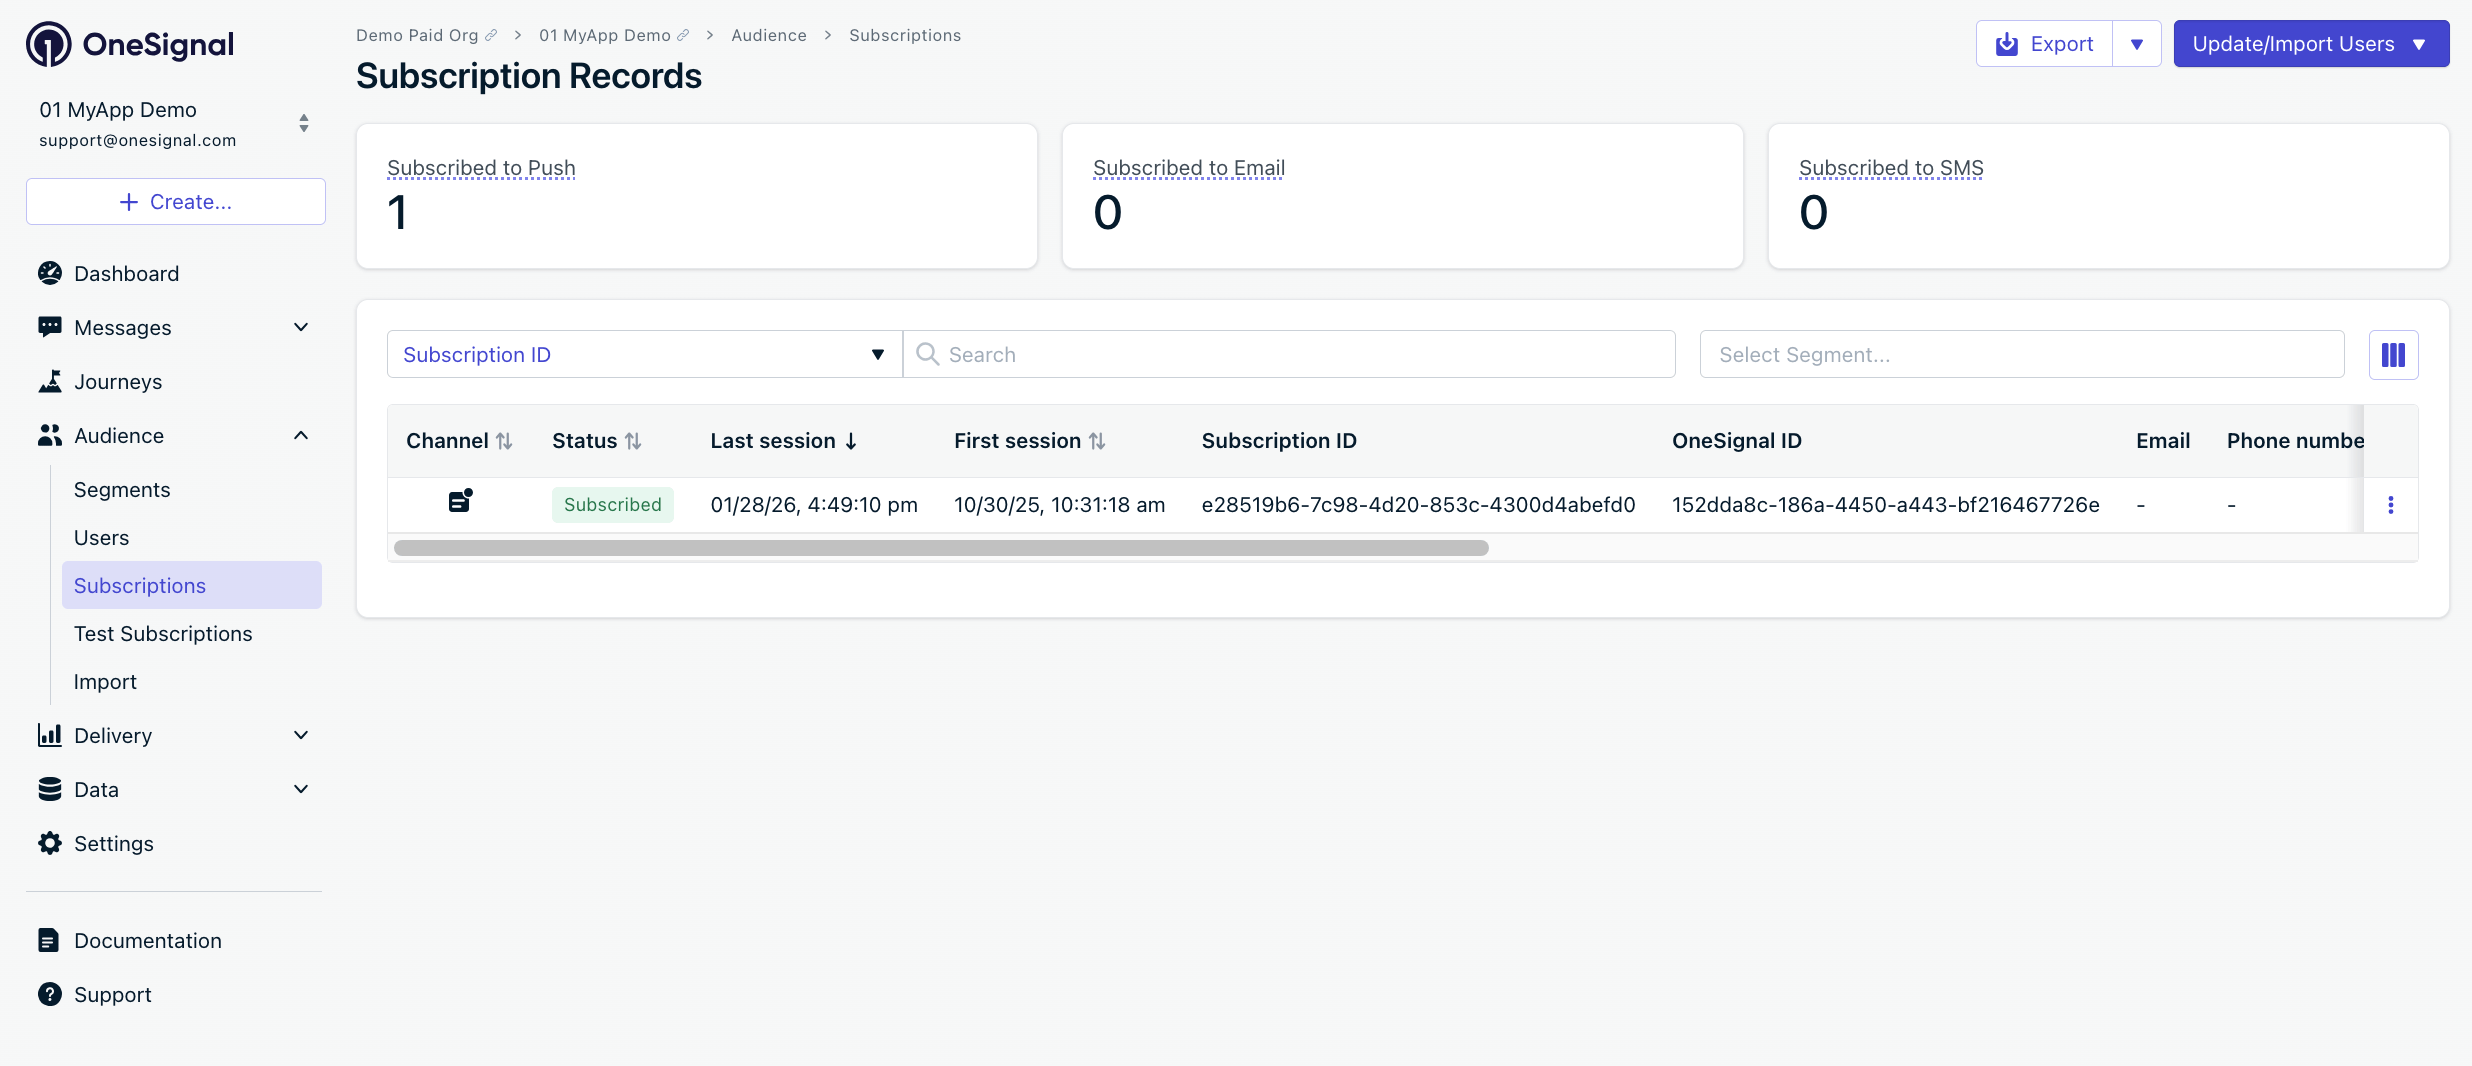
After allowing push permissions, refresh the dashboard to see the Subscription status update to 'Subscribed'
Create test user and segment
- Click ⋮ next to the Subscription > Add to Test Users > name it
- Go to Audience > Segments > New Segment
- Name:
Test Users, add filter Test Users > Create Segment

Add a test user

Create a 'Test Users' segment with the Test Users filter
Send test push via API
- Navigate to Settings > Keys & IDs.
- In the provided code, replace
YOUR_APP_API_KEYandYOUR_APP_IDin the code below with your actual keys. This code uses theTest Userssegment we created earlier.
Images will appear small in the collapsed notification view. Expand the notification to see the full image.
Delivery stats showing confirmed receipt (unavailable on free plans)
- Your custom icon (if configured)
- Large image when expanded
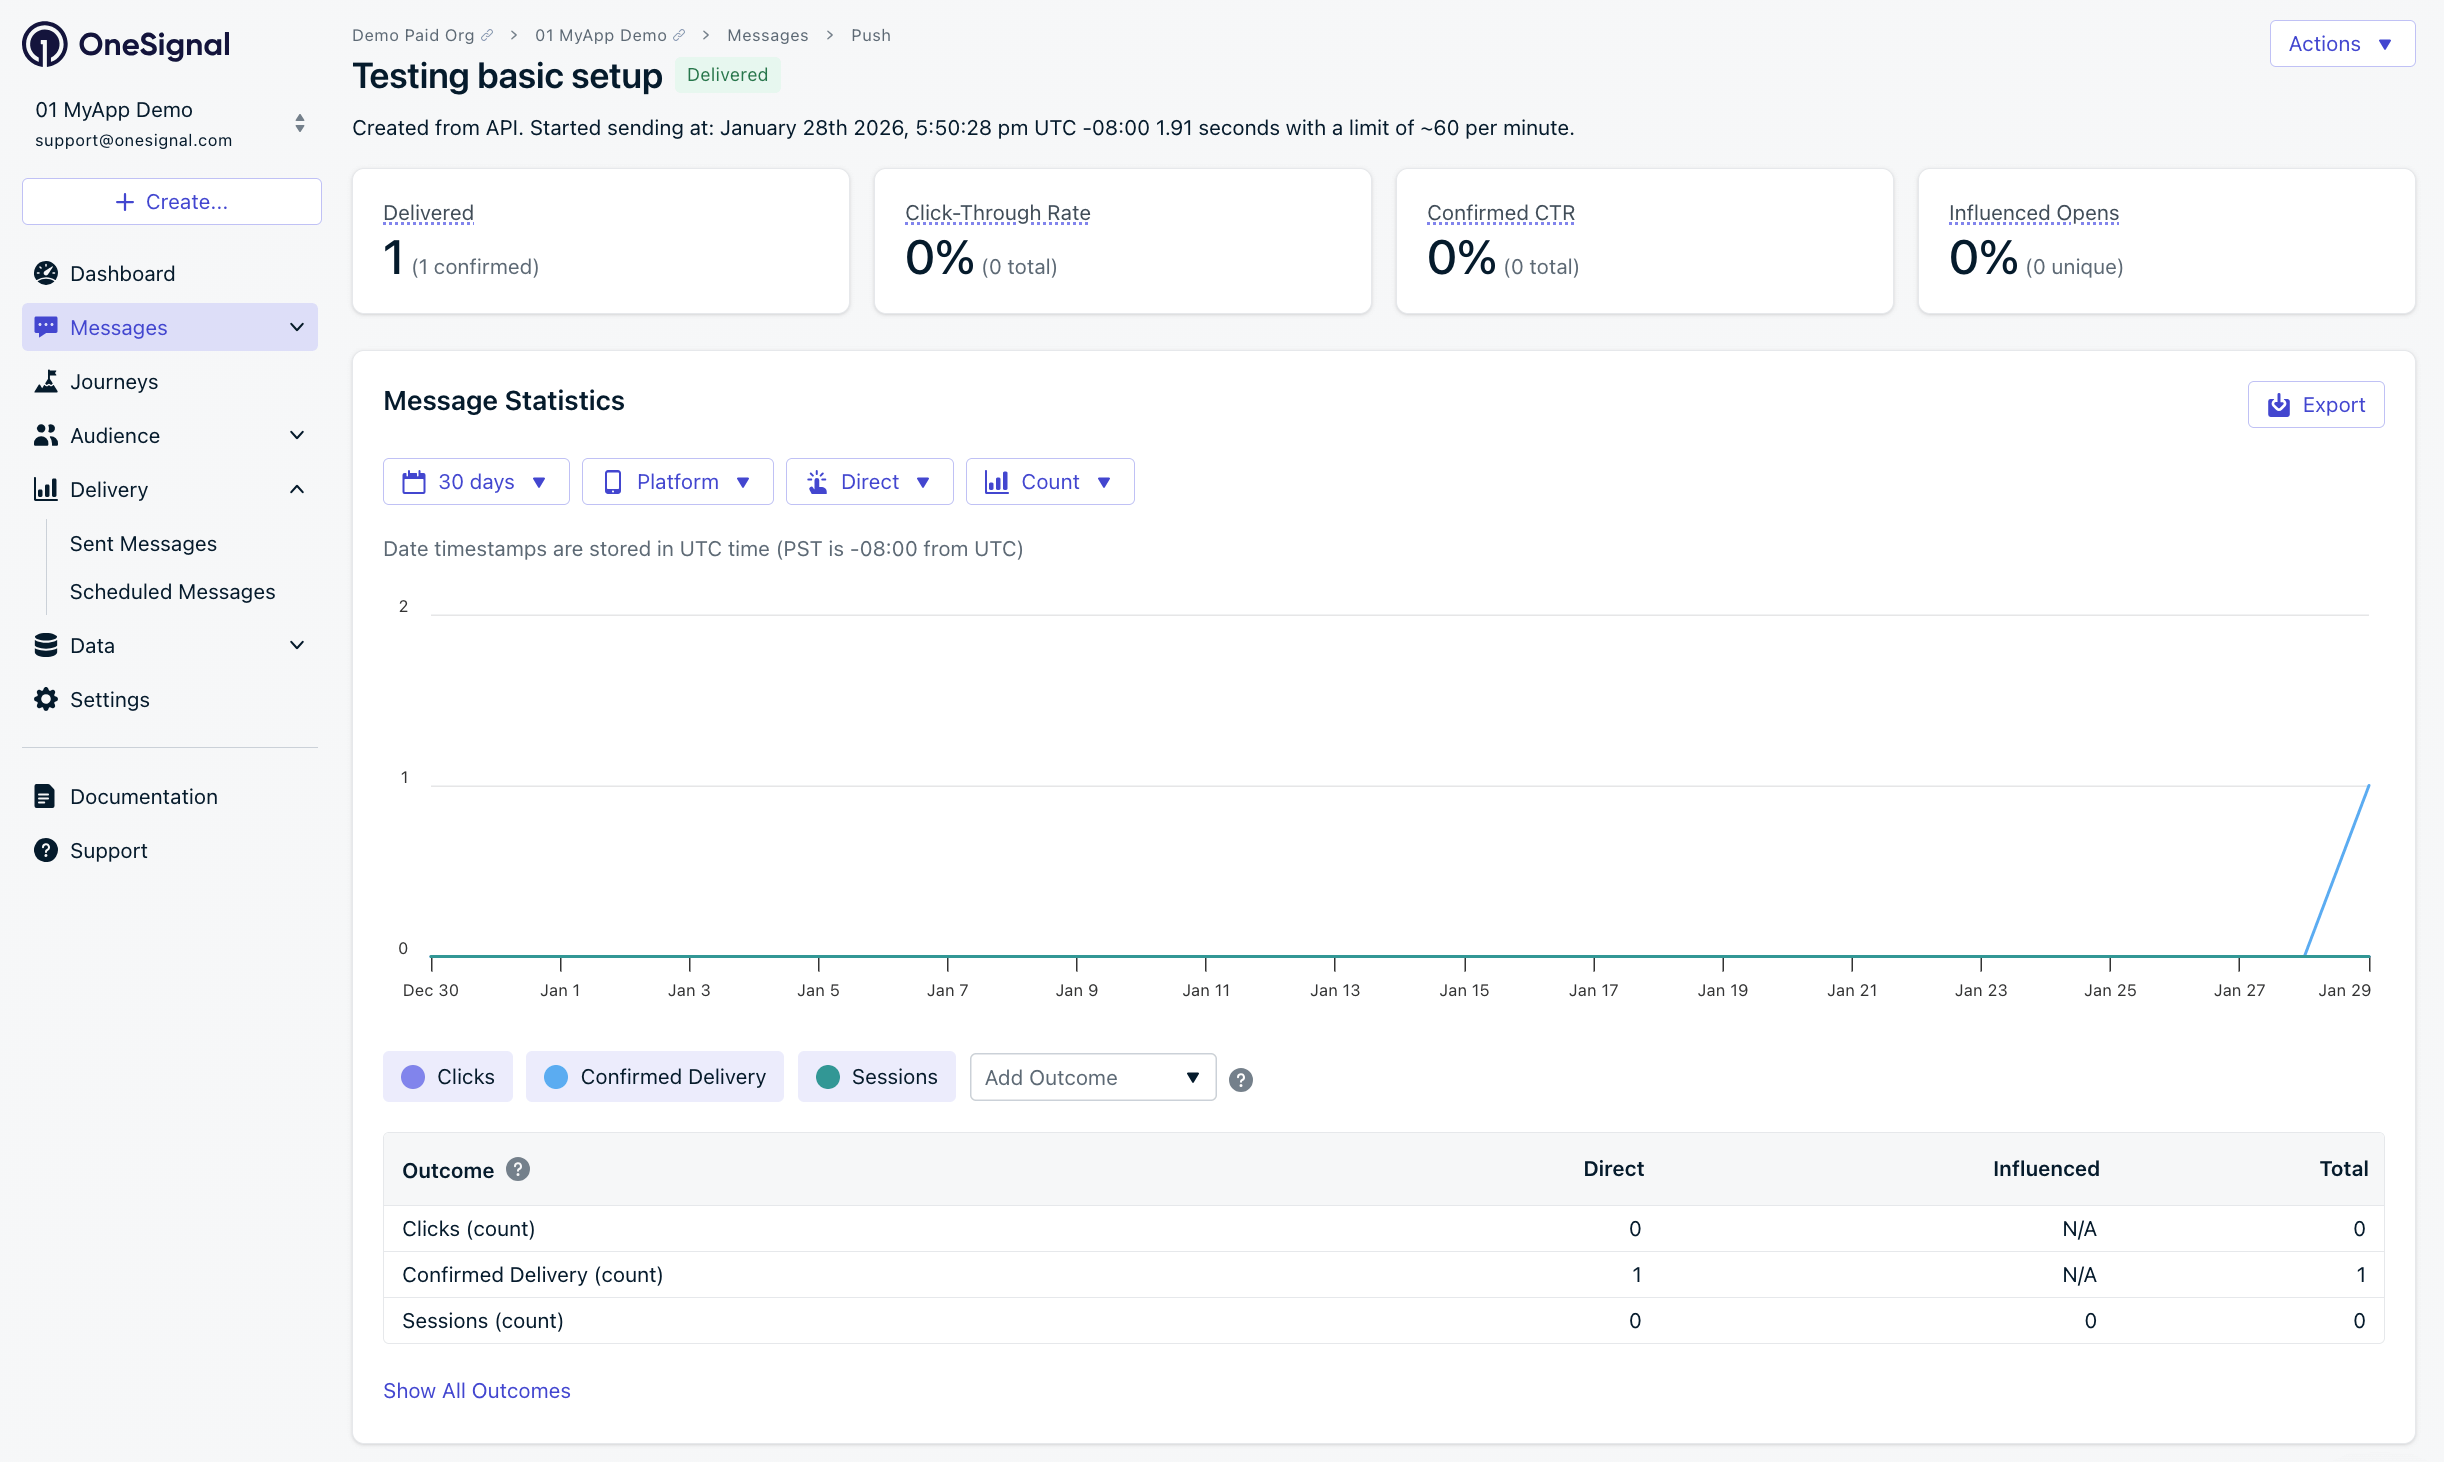
- Dashboard > Delivery > Sent Messages shows “Confirmed” status (unavailable on free plans).
Test in-app messages
- Close app for 30+ seconds
- Dashboard > Messages > In-App > New In-App > select Welcome template
- Audience: Test Users segment
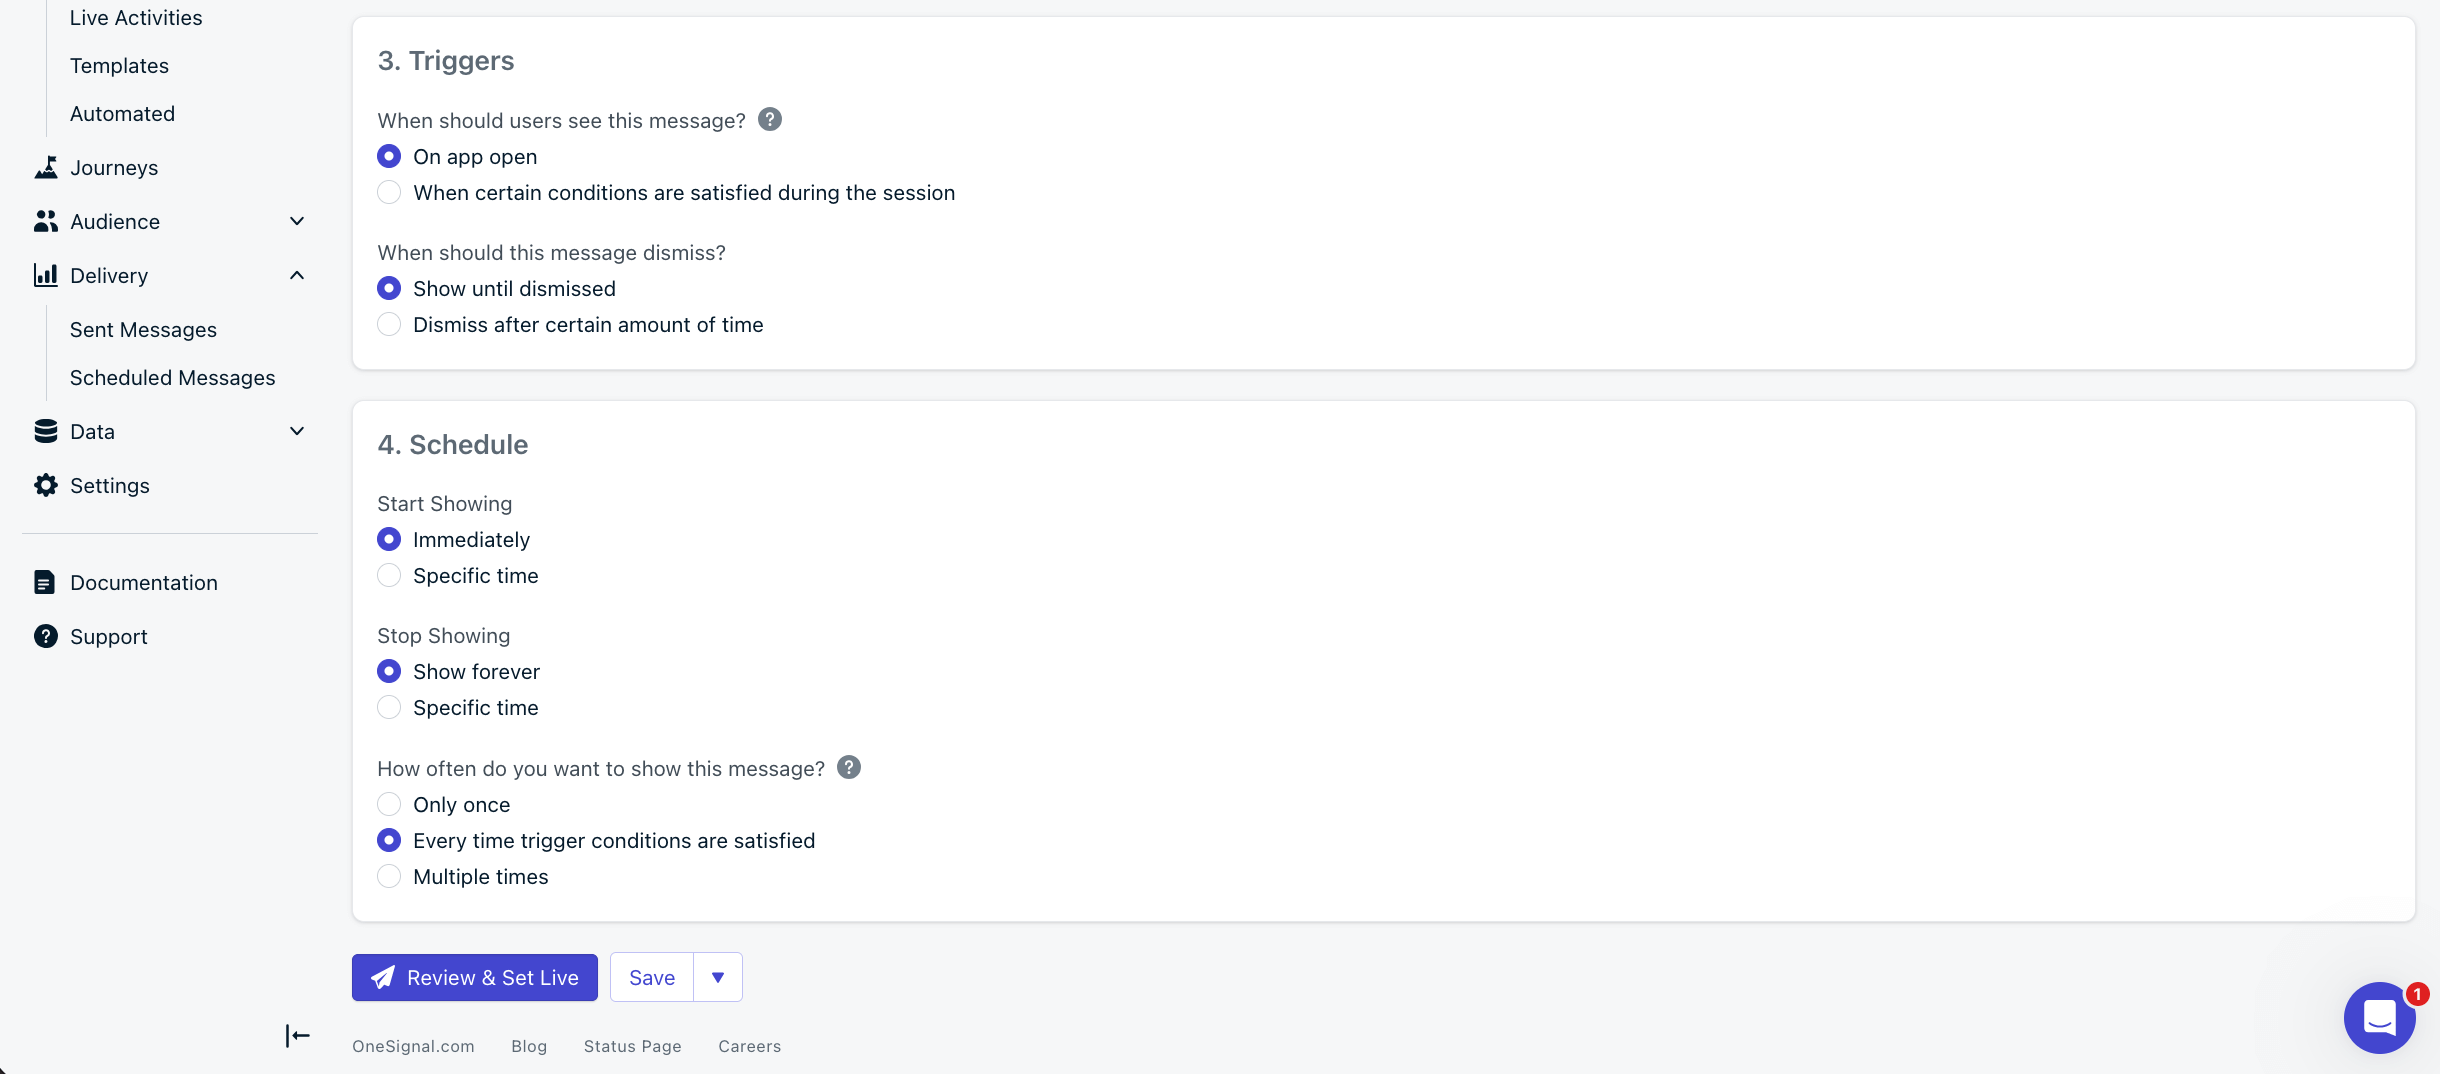
- Trigger: On app open
- Schedule: Every time trigger conditions are satisfied
- Click Make Message Live
- Open app
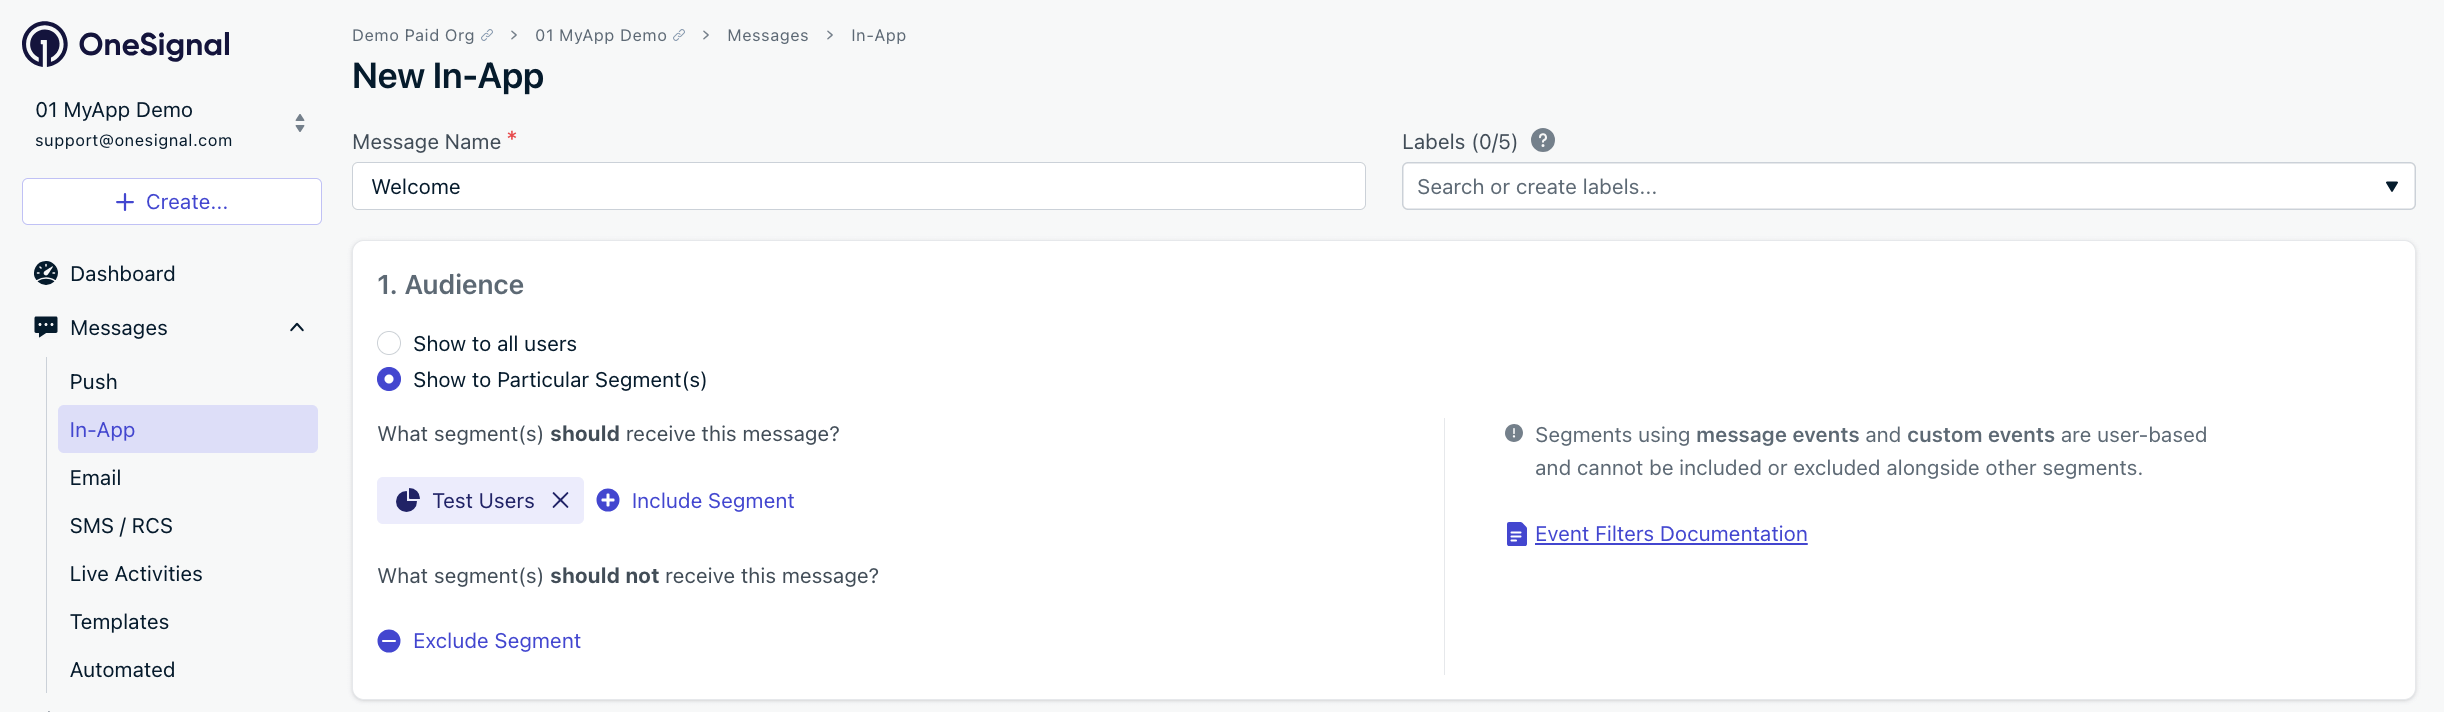
Targeting the 'Test Users' segment with an in-app message
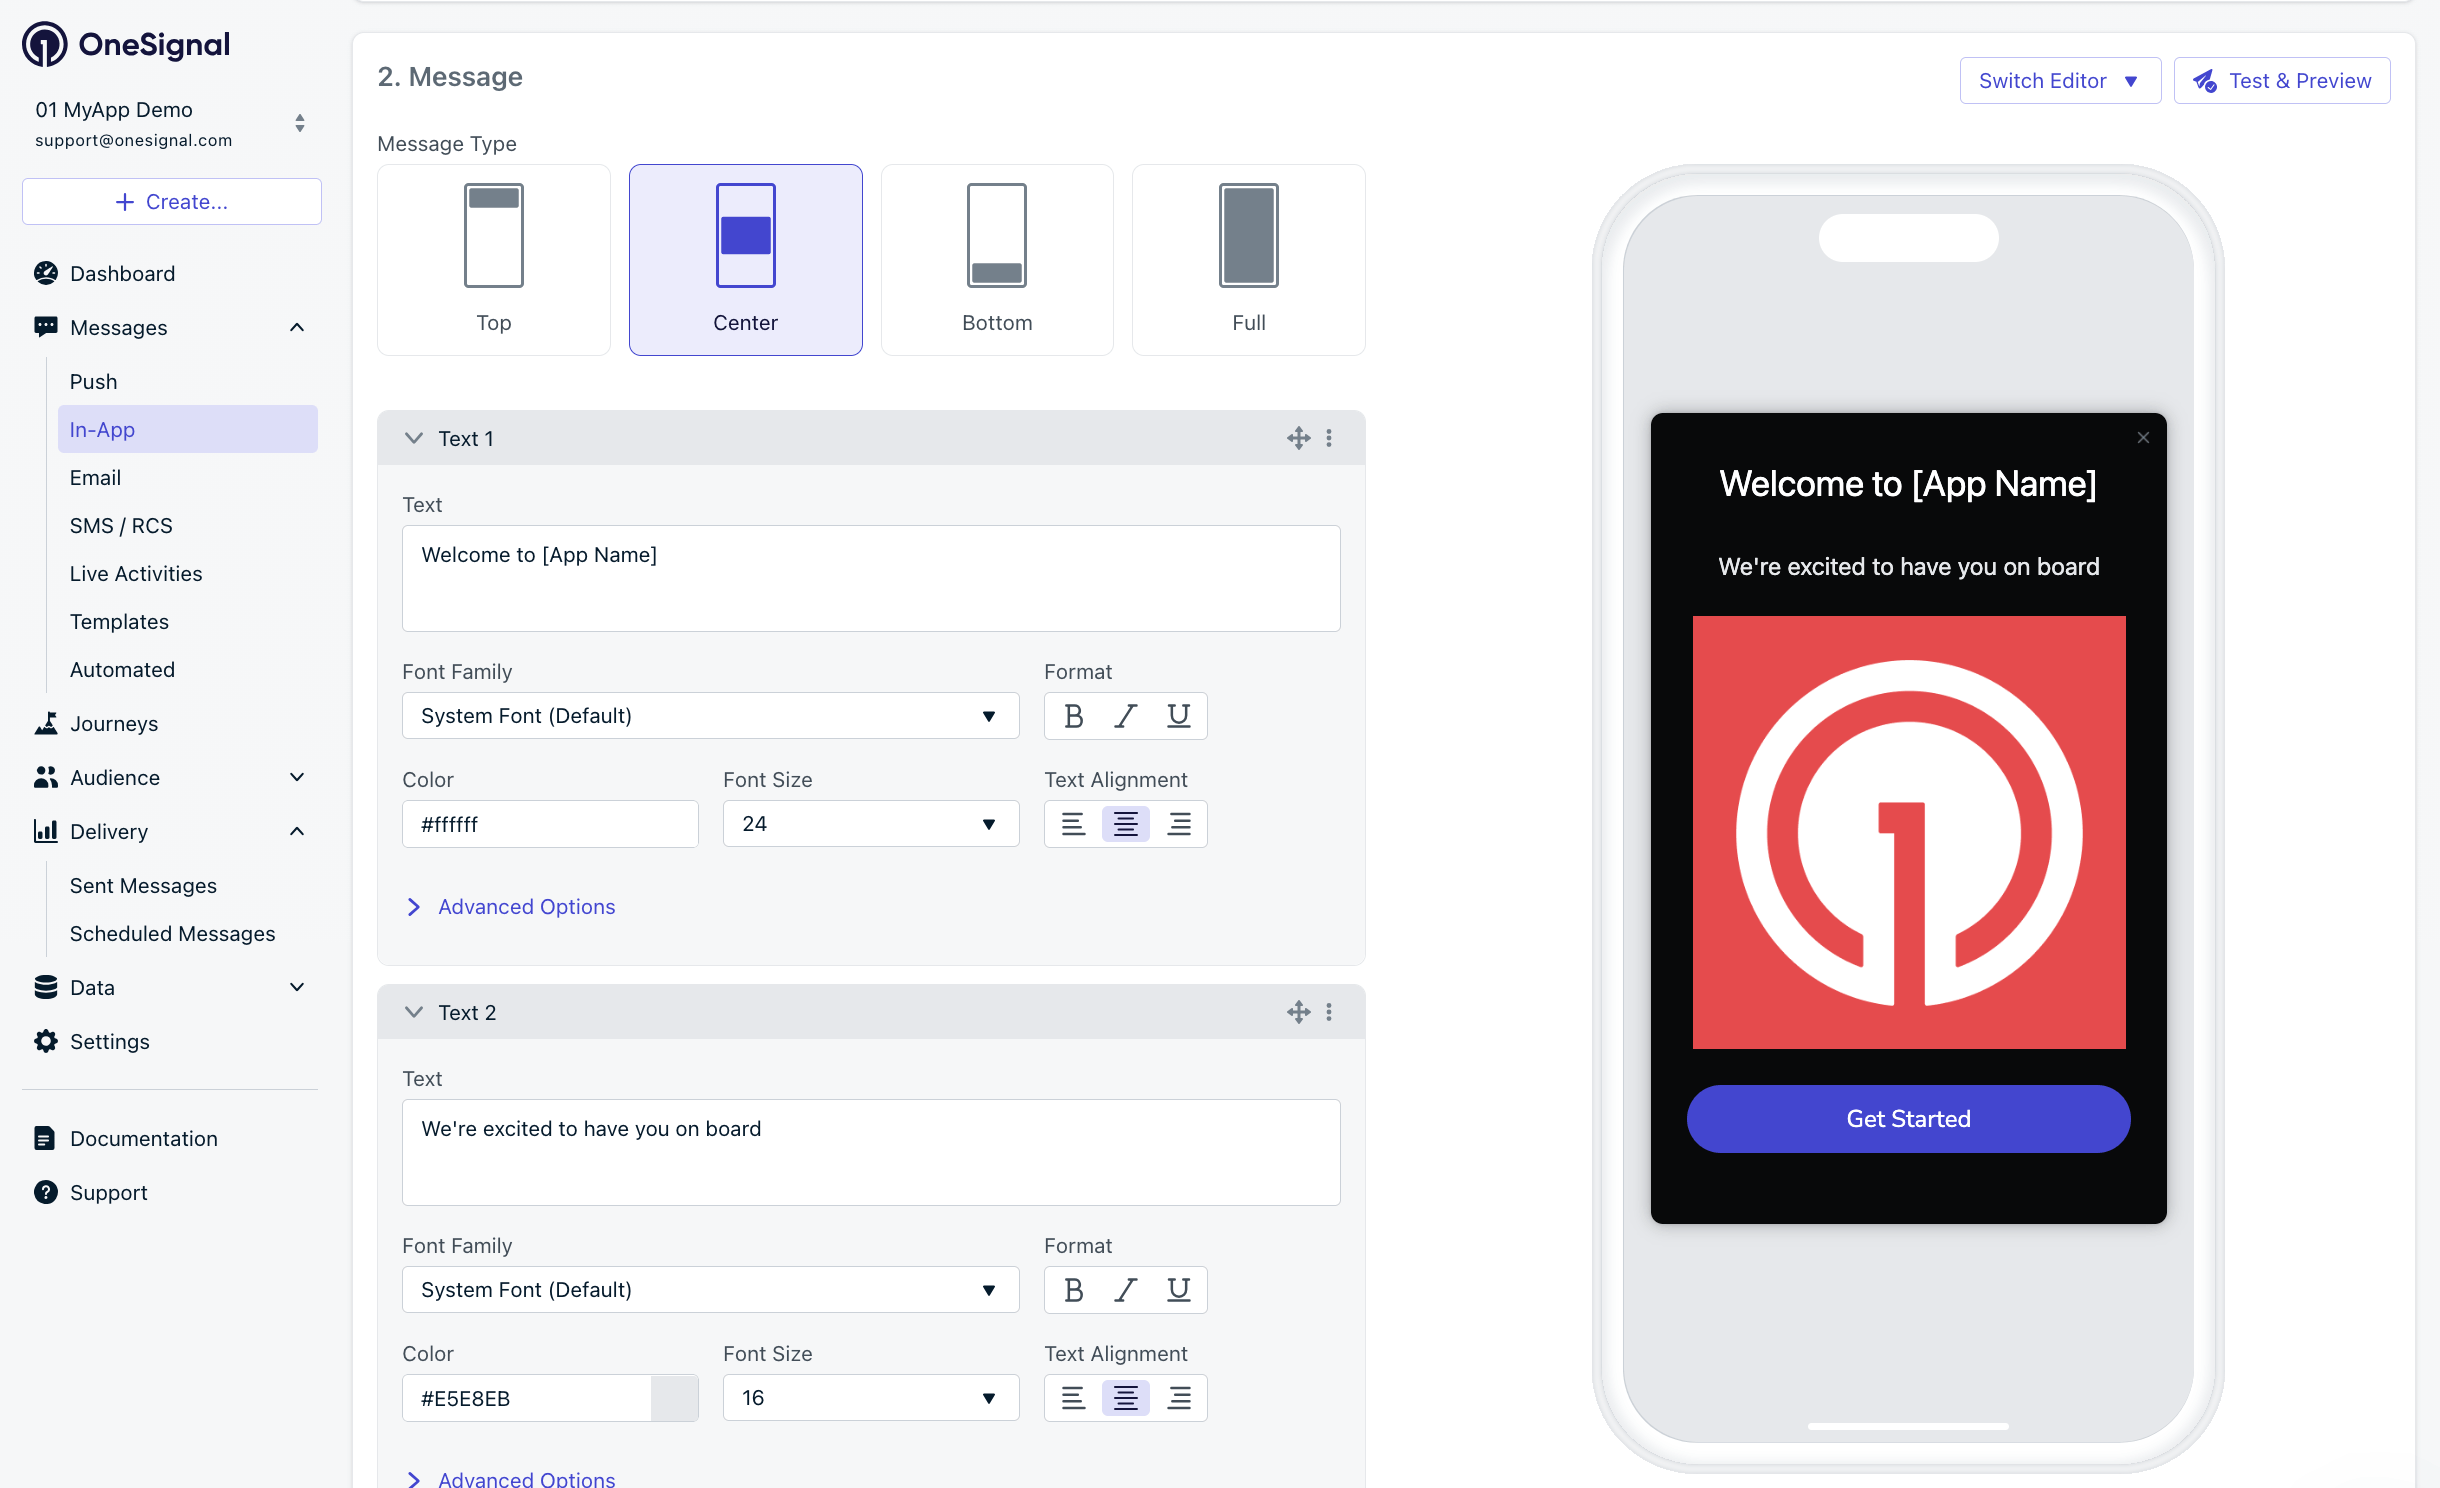
Example customization of in-app Welcome message
In-app message scheduling options
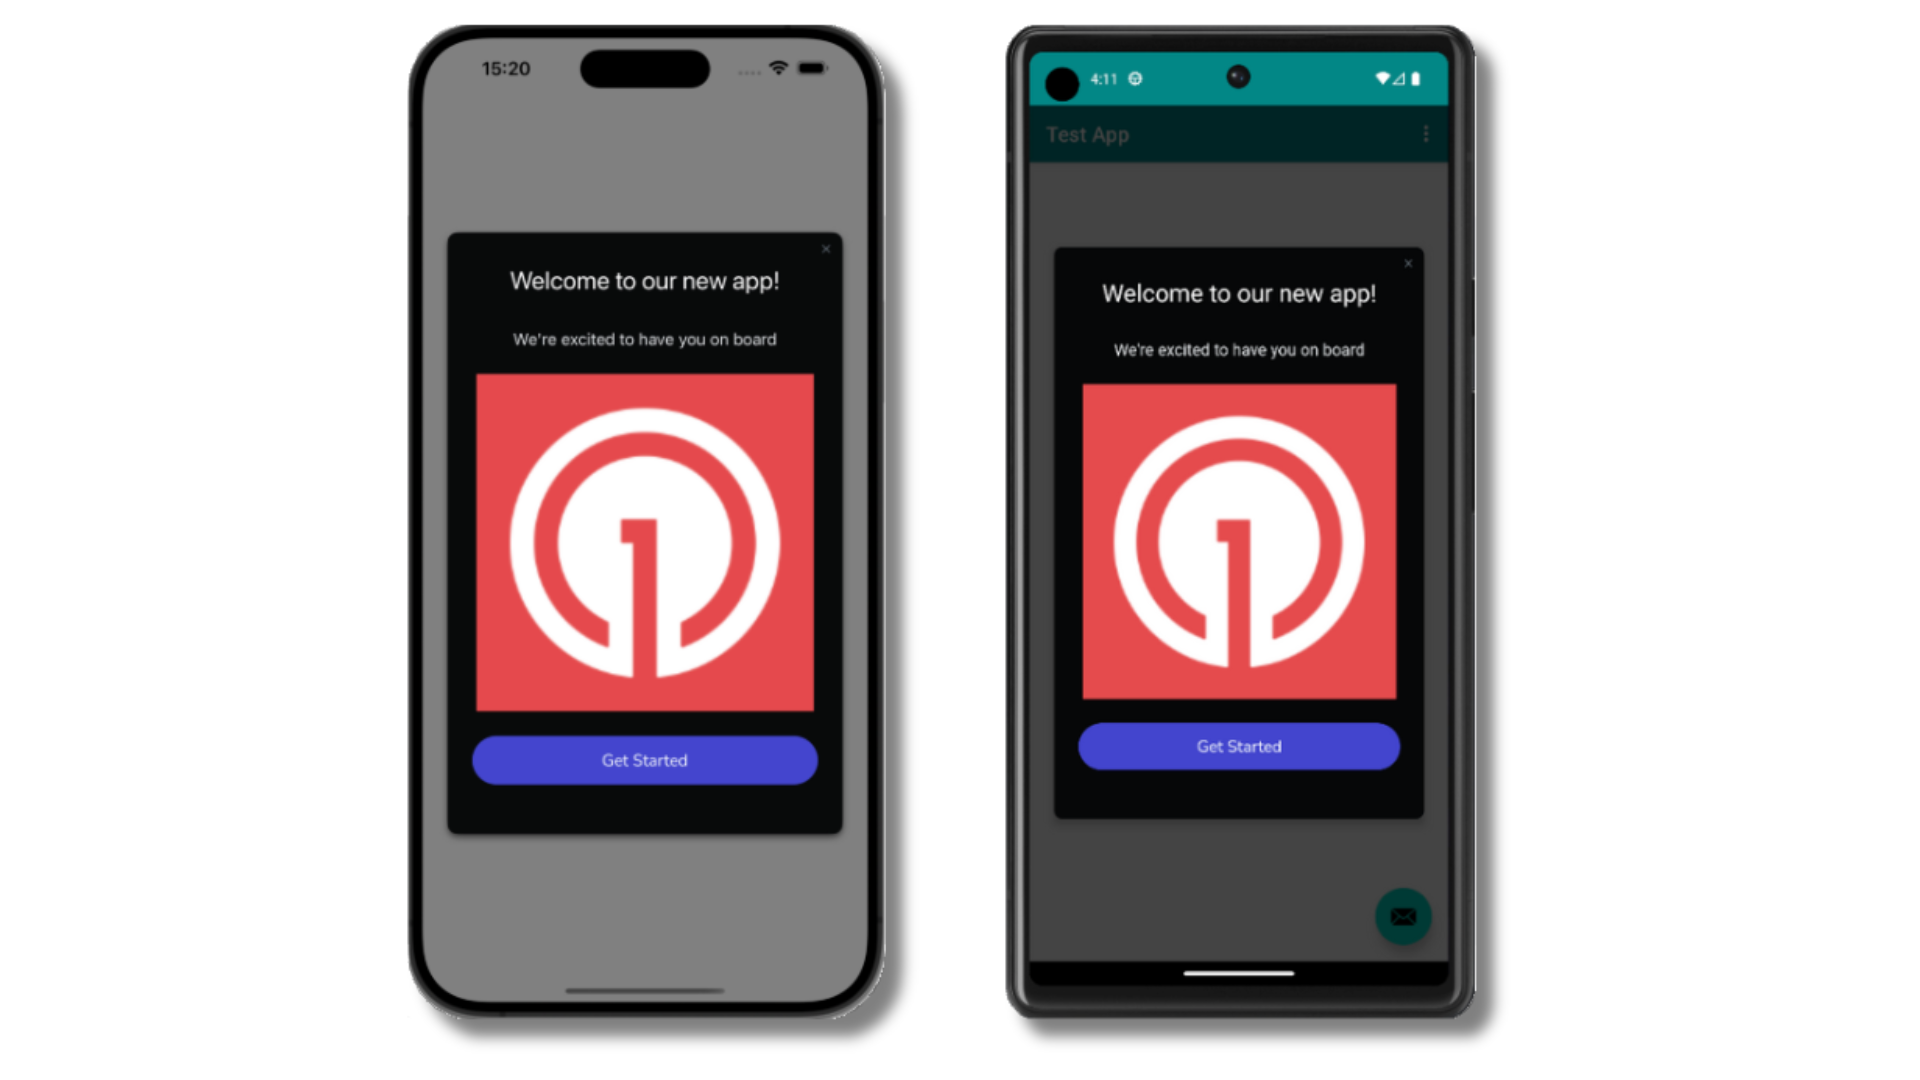
Welcome in-app message shown on devices
- Gathering Subscriptions, setting Test Users, and creating Segments.
- Sending Push with images using Segments and our Create message API.
- Sending In-app messages.
Common Errors & Fixes
User management
Previously, we demonstrated how to create mobile Subscriptions. Now we’ll expand to identifying Users across all their Subscriptions (including push, email, and SMS) using the OneSignal SDK.Assign External ID (recommended)
Use an External ID to identify users consistently across devices, email addresses, and phone numbers using your backend’s user identifier. This ensures your messaging stays unified across channels and 3rd party systems. See our Mobile SDK reference for more details and Java code examples.login method in the SDK reference guide.Add Tags & Custom Events
Tags and Custom Events are both ways to add data to your users. Tags arekey-value strings and are generally associated with user properties (like username, role, or status) while Custom Events have a JSON format and are usually associated with actions (like new_purchase, abandoned_cart, and associated properties). Both can be used to power advanced Message Personalization and Journeys. See our Mobile SDK reference for more details and Java code examples.
Add email and/or SMS subscriptions
You can reach users through email and SMS channels in addition to push notifications. If the email address and/or phone number already exist in the OneSignal app, the SDK will add it to the existing user — it will not create duplicates. See our Mobile SDK reference for more details and Java code examples.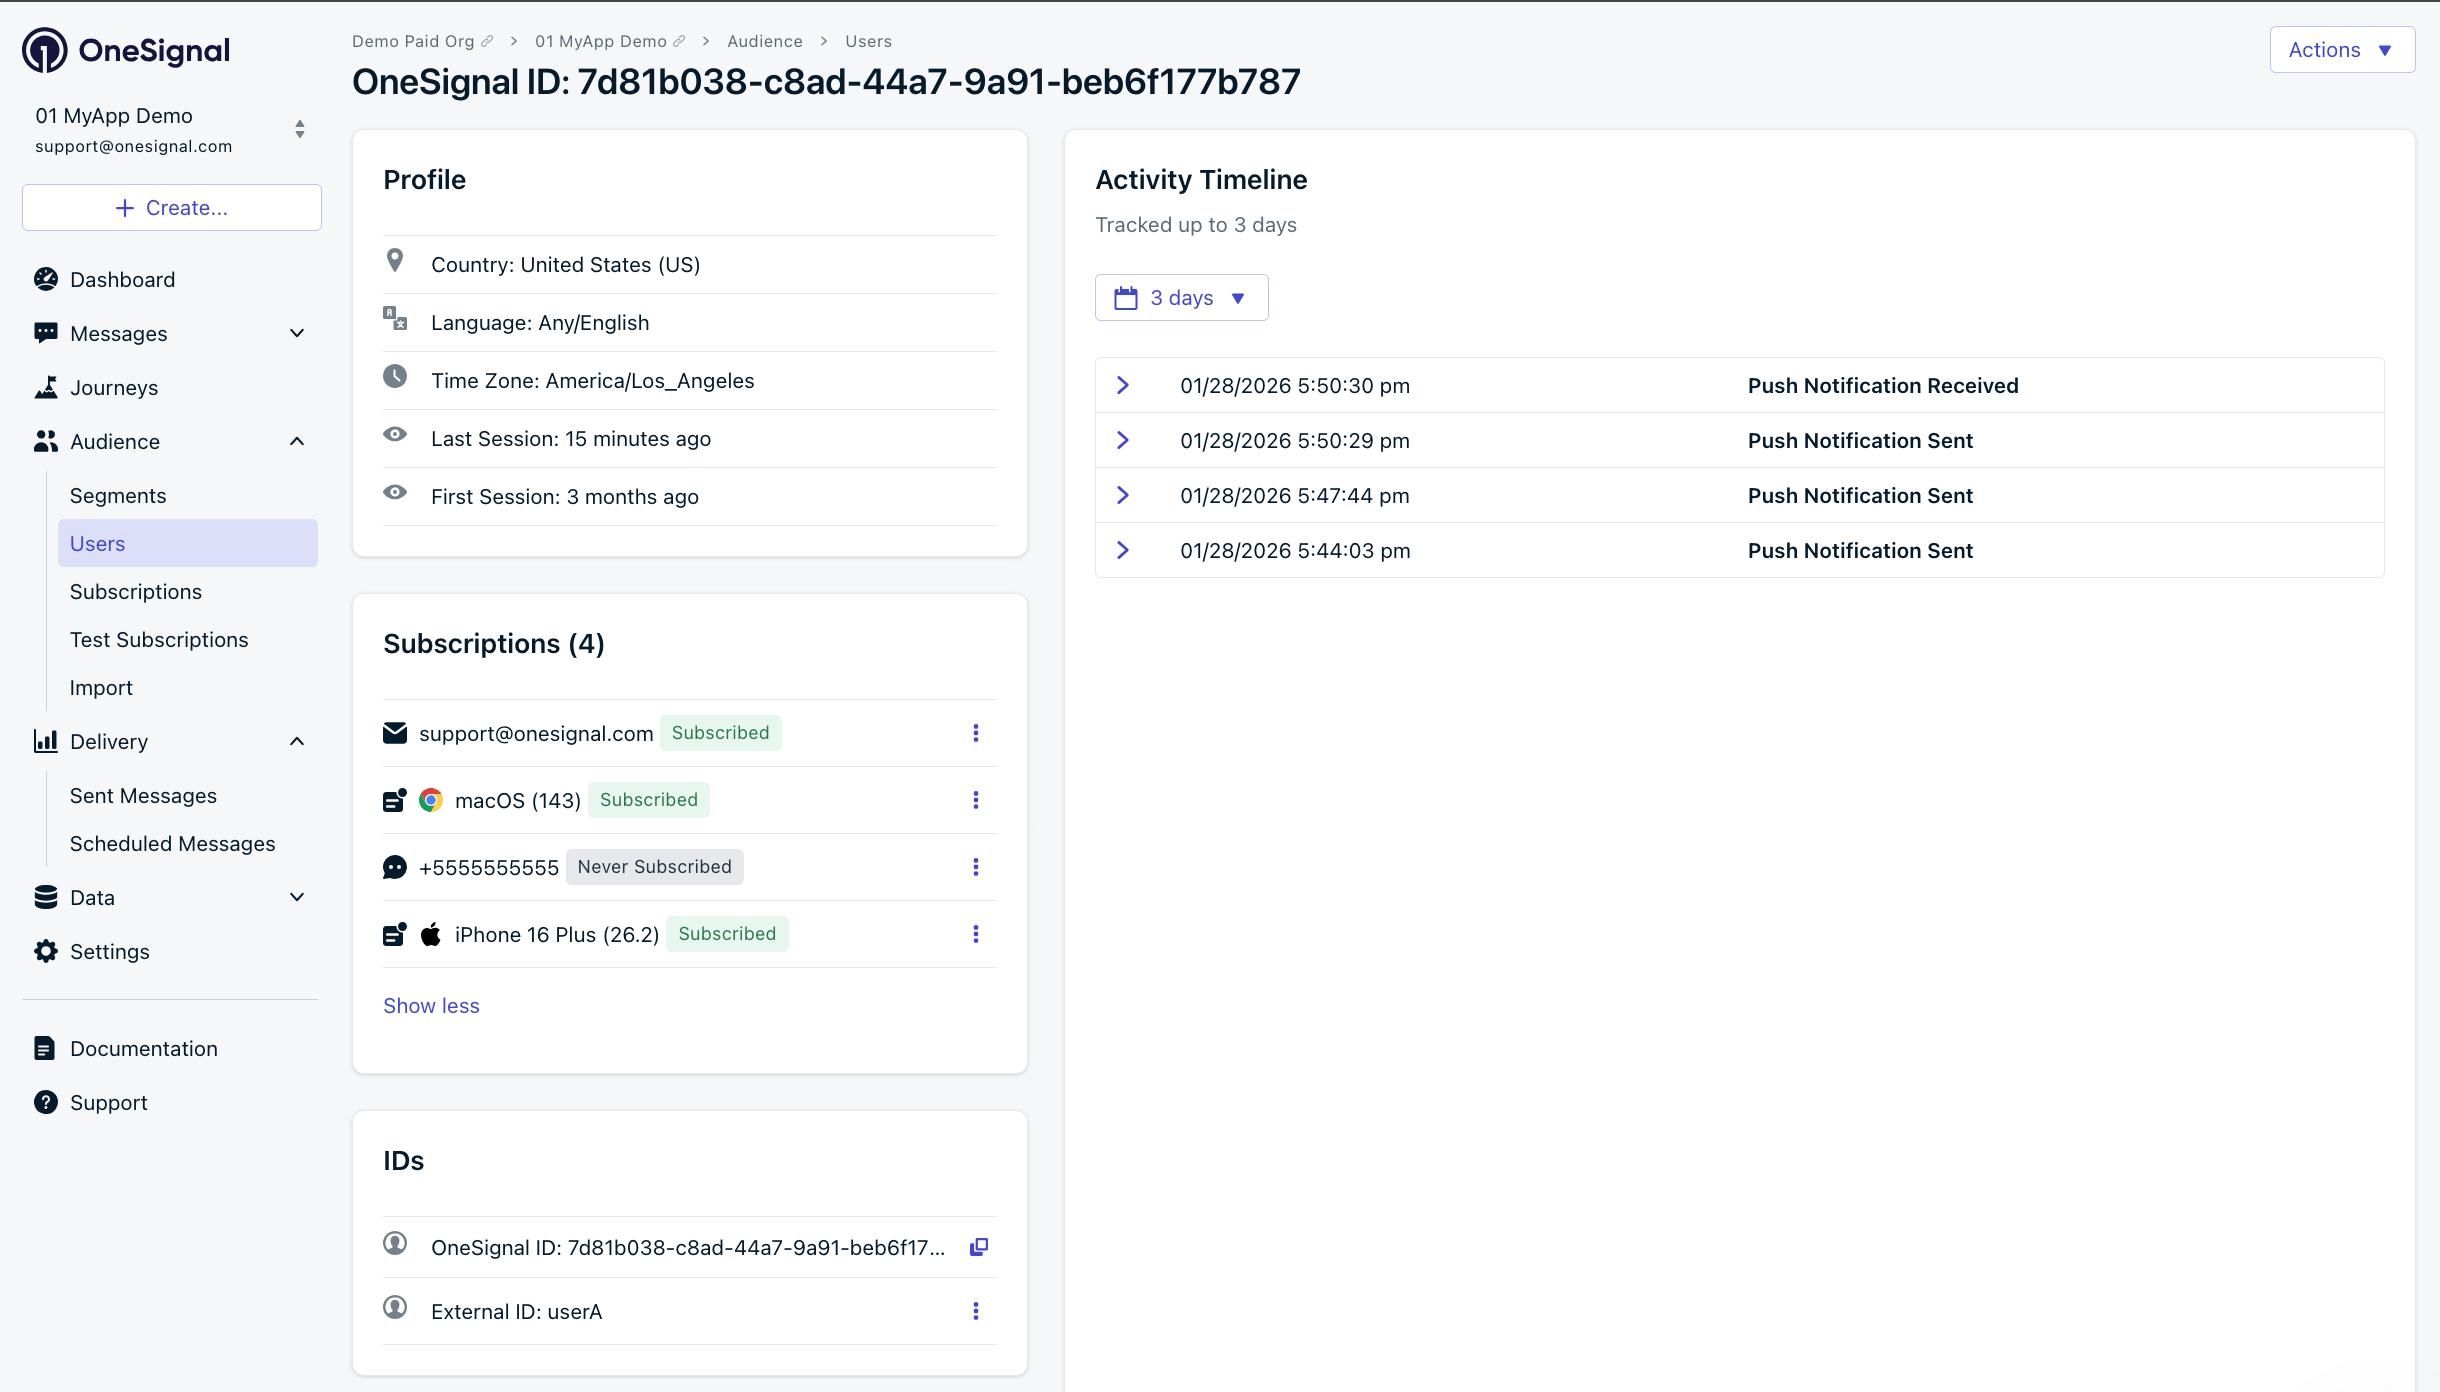
A user profile with push, email, and SMS subscriptions unified by External ID
- Obtain explicit consent before adding email or SMS subscriptions.
- Explain the benefits of each communication channel to users.
- Provide channel preferences so users can select which channels they prefer.
Privacy & user consent
To control when OneSignal collects user data, use the SDK’s consent gating methods. See our Mobile SDK reference for more details and Java code examples.Prompt for push permissions
Instead of callingrequestPermission() immediately on app open, take a more strategic approach. Use an in-app message to explain the value of push notifications before requesting permission.
For best practices and implementation details, see our Prompt for push permissions guide.
Listen to push, user, and in-app events
Use SDK listeners to react to user actions and state changes. Add these in your Application class afterOneSignal.initWithContext().
Push notification events
User state changes
Example shows how to use push subscription observer. Other user state events like the user state observer and notification permission observer are available in the Mobile SDK Reference.In-app message events
Additional in-app message methods are available in the Mobile SDK Reference.Advanced setup & capabilities
Android-specific features
- Notification Channels — Organize notifications into categories (Android 8.0+)
- Service Extensions — Advanced notification customization
- Huawei/HMS Support — Alternative to Google Play Services
Universal features
- Deep Linking — Navigate users to specific screens from notifications
- Action Buttons — Add interactive buttons to notifications
- Identity Verification — Secure user identification
- Location Tracking — Location-based targeting
- Integrations — Connect with analytics and data platforms
- Multi-language Messaging — Localized notifications
support@onesignal.comPlease include:- Details of the issue you’re experiencing and steps to reproduce if available
- Your OneSignal App ID
- The External ID or Subscription ID if applicable
- The URL to the message you tested in the OneSignal Dashboard if applicable
- Any relevant logs or error messages