Paso 0. Configure FCM en OneSignal (requerido para enviar push)
Puede instalar e inicializar el SDK de Android de OneSignal sin completar este paso. Sin embargo, las notificaciones push no se entregarán hasta que las credenciales de Firebase Cloud Messaging (FCM) estén configuradas en su aplicación de OneSignal.Pasos para configurar su aplicación de OneSignal.
Pasos para configurar su aplicación de OneSignal.
- Inicie sesión en https://onesignal.com y cree o seleccione su aplicación.
- Navegue a Settings > Push & In-App.
- Seleccione Google Android (FCM) y haga clic en Continue para avanzar por el asistente de configuración.
- Ingrese los detalles de su Firebase Server Key o Service Account.
- Continúe por el asistente de configuración para obtener su App ID. Este se usará para inicializar el SDK.
Contrato de configuración y requisitos
Esta sección resume las herramientas, versiones y supuestos utilizados a lo largo de la guía.- Versión del SDK:
5.6.1+(última versión: consulte los lanzamientos) - Instrucciones de configuración con IA:
https://raw.githubusercontent.com/OneSignal/sdk-ai-prompts/main/docs/android/ai-prompt.md - Repositorio del SDK:
https://github.com/OneSignal/OneSignal-Android-SDK - Android Studio: Meerkat+ (2024.2.1+)
- API de Android: 23+ mínimo (Android 6.0+), 31+ recomendado (Android 12+)
- Dispositivo/Emulador: Android 7.0+ con Google Play Services instalado
- Dependencia requerida:
com.onesignal:OneSignal:[5.6.1, 5.9.99] - Clase Application: Requerida para la inicialización correcta del SDK
- Formato del App ID: UUID de 36 caracteres (ejemplo:
12345678-1234-1234-1234-123456789012) — se encuentra en el Panel de OneSignal > Settings > Keys & IDs - Inicialización:
OneSignal.initWithContext(this, "YOUR_APP_ID") - Optimización de batería: Puede afectar las notificaciones en segundo plano
- Recomendado: Asigne un External ID mediante
OneSignal.login("user_id")para unificar usuarios entre dispositivos
Pasos de configuración de Android
Al finalizar los pasos a continuación, usted habrá:- Instalado e inicializado el SDK de OneSignal en su aplicación Android
- Configurado correctamente la solicitud de permisos de notificaciones push en un dispositivo real
- Entregado exitosamente una notificación push de prueba y un mensaje dentro de la aplicación
Paso 1. Agregue el SDK de OneSignal
- En Android Studio, abra su archivo
build.gradle.kts (Module: app)obuild.gradle (Module: app) - Agregue OneSignal a su sección
dependencies:
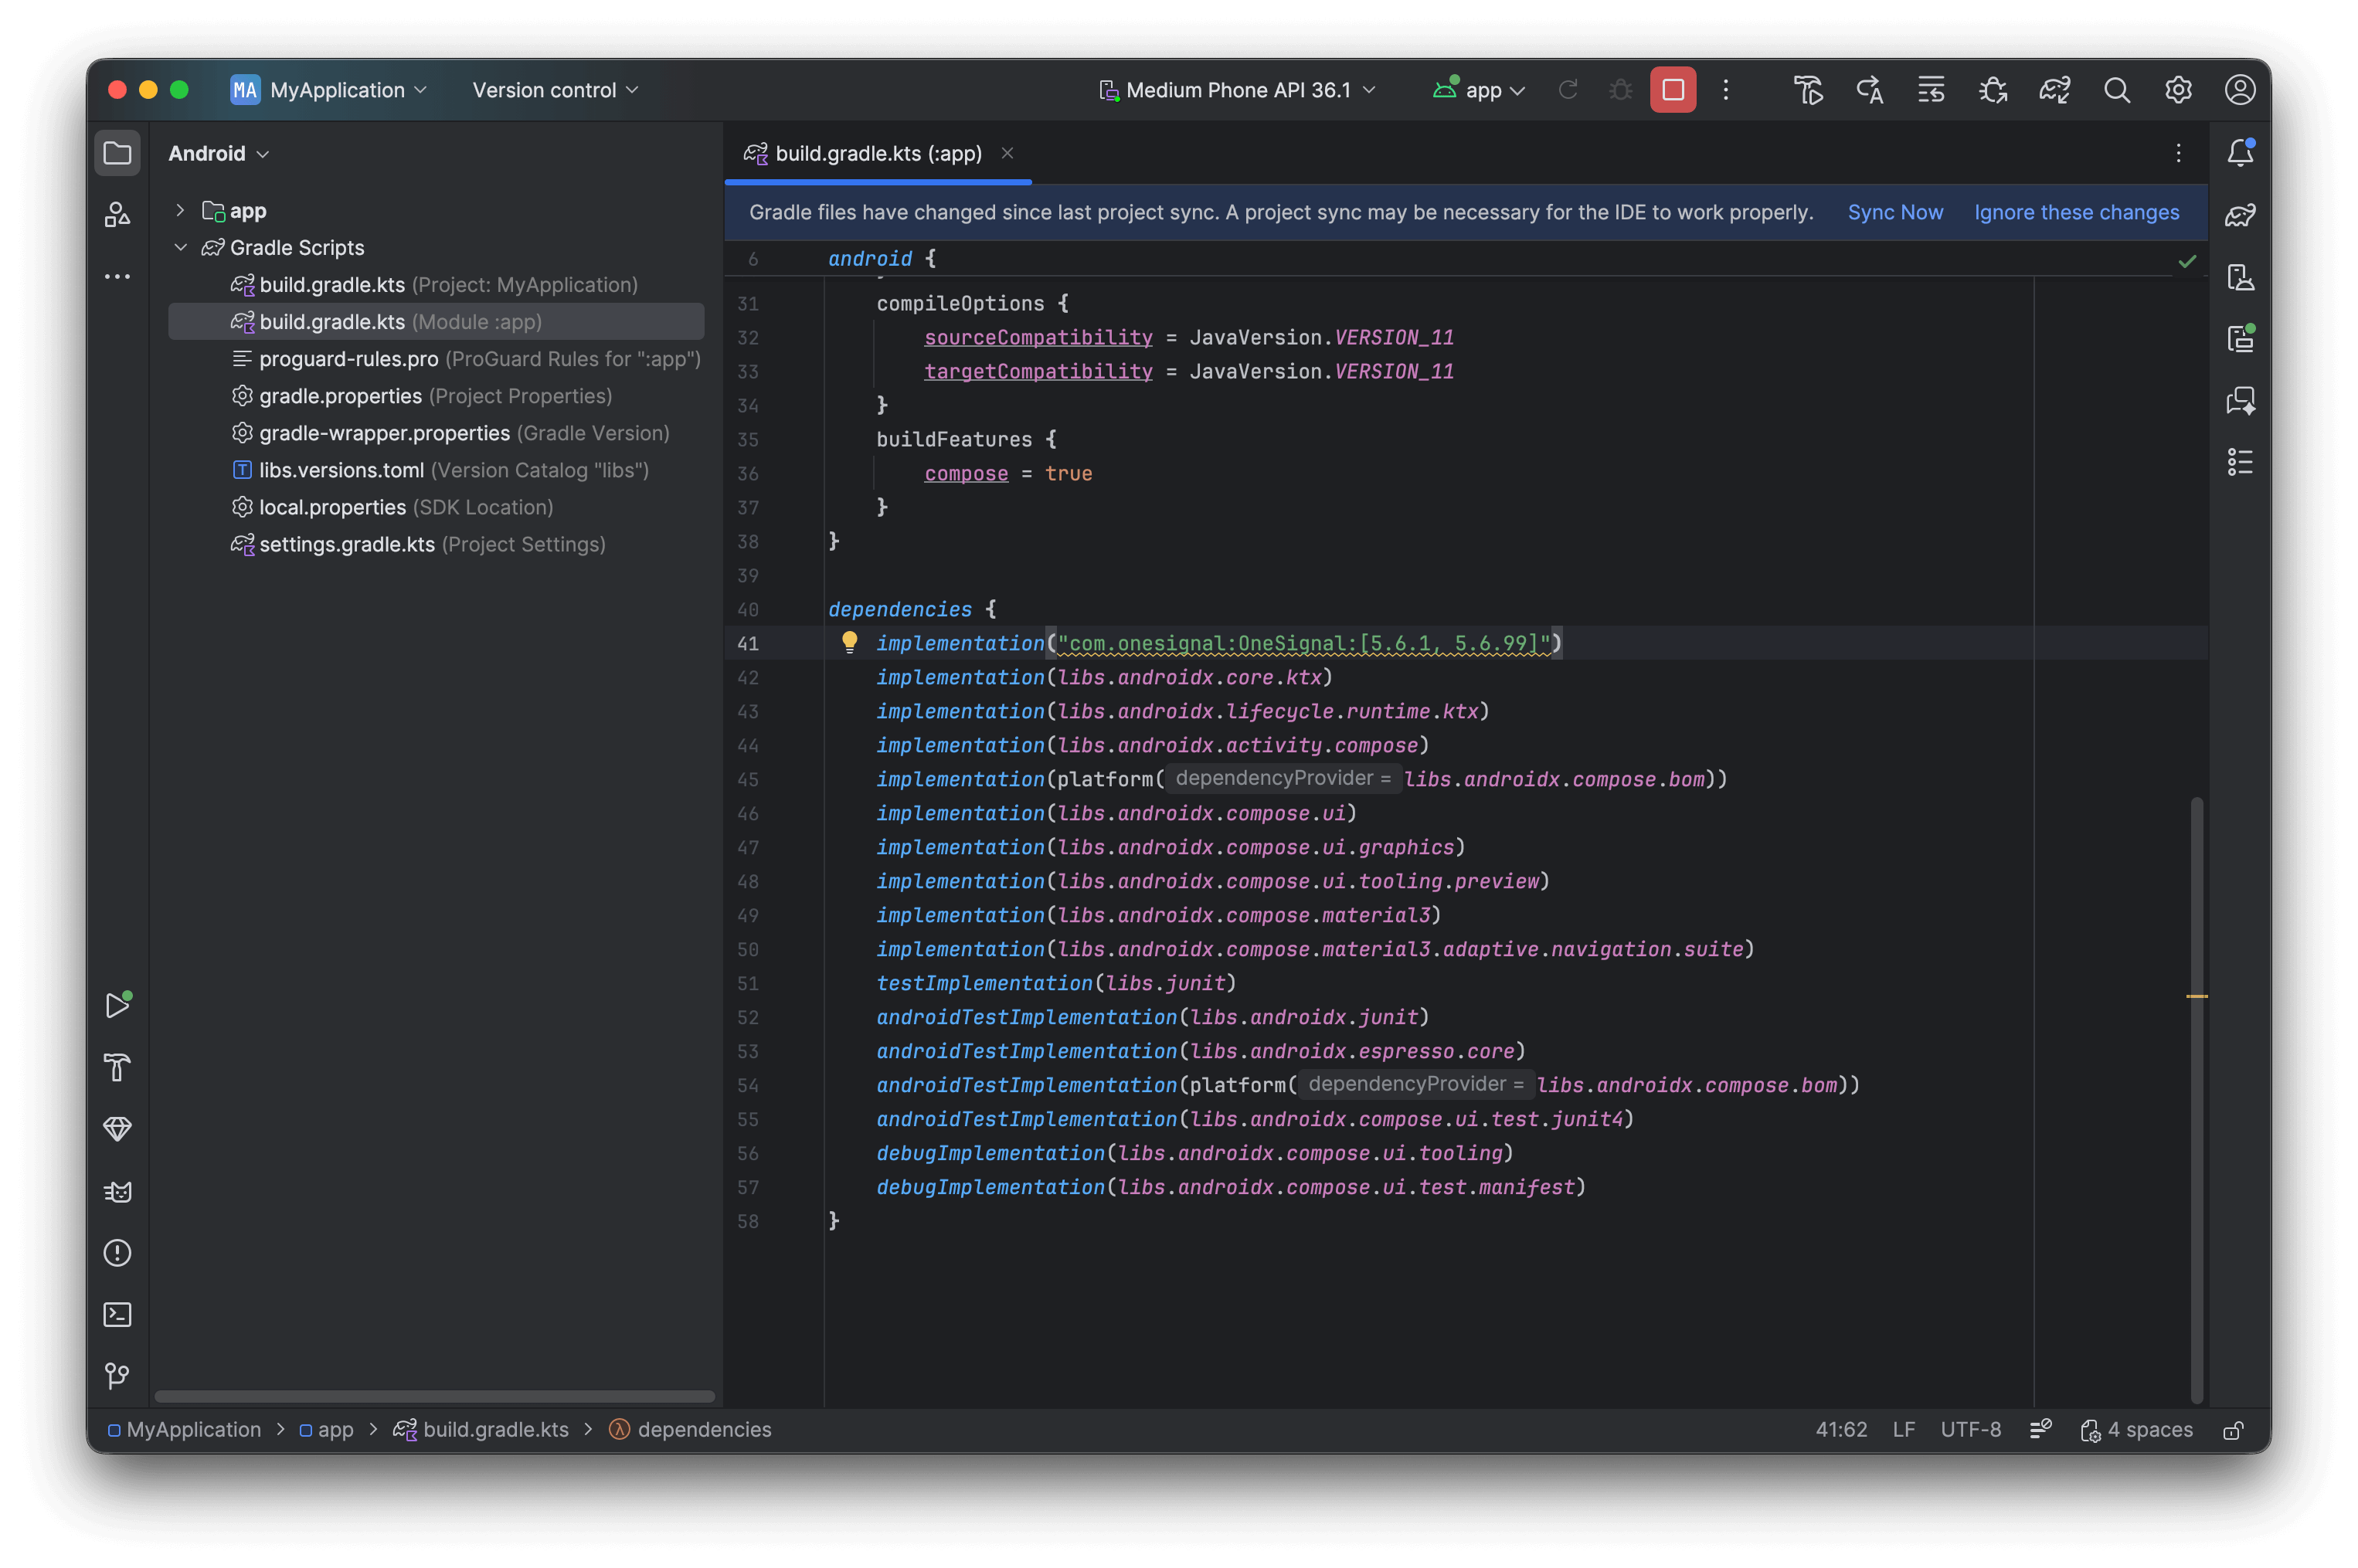
El ejemplo muestra cómo agregar OneSignal al archivo build.gradle.kts de su aplicación.
- Sincronice Gradle: Haga clic en Sync Now en el banner que aparece o vaya a File > Sync Project with Gradle Files
Paso 2. Cree y configure la clase Application
Es una práctica recomendada inicializar OneSignal en el métodoonCreate de su clase Application para asegurar la configuración correcta del SDK en todos los puntos de entrada.
Cree una clase Application si aún no tiene una:
- File > New > Kotlin Class/File (o Java Class)
- Nombre:
ApplicationClass(o el nombre que prefiera)
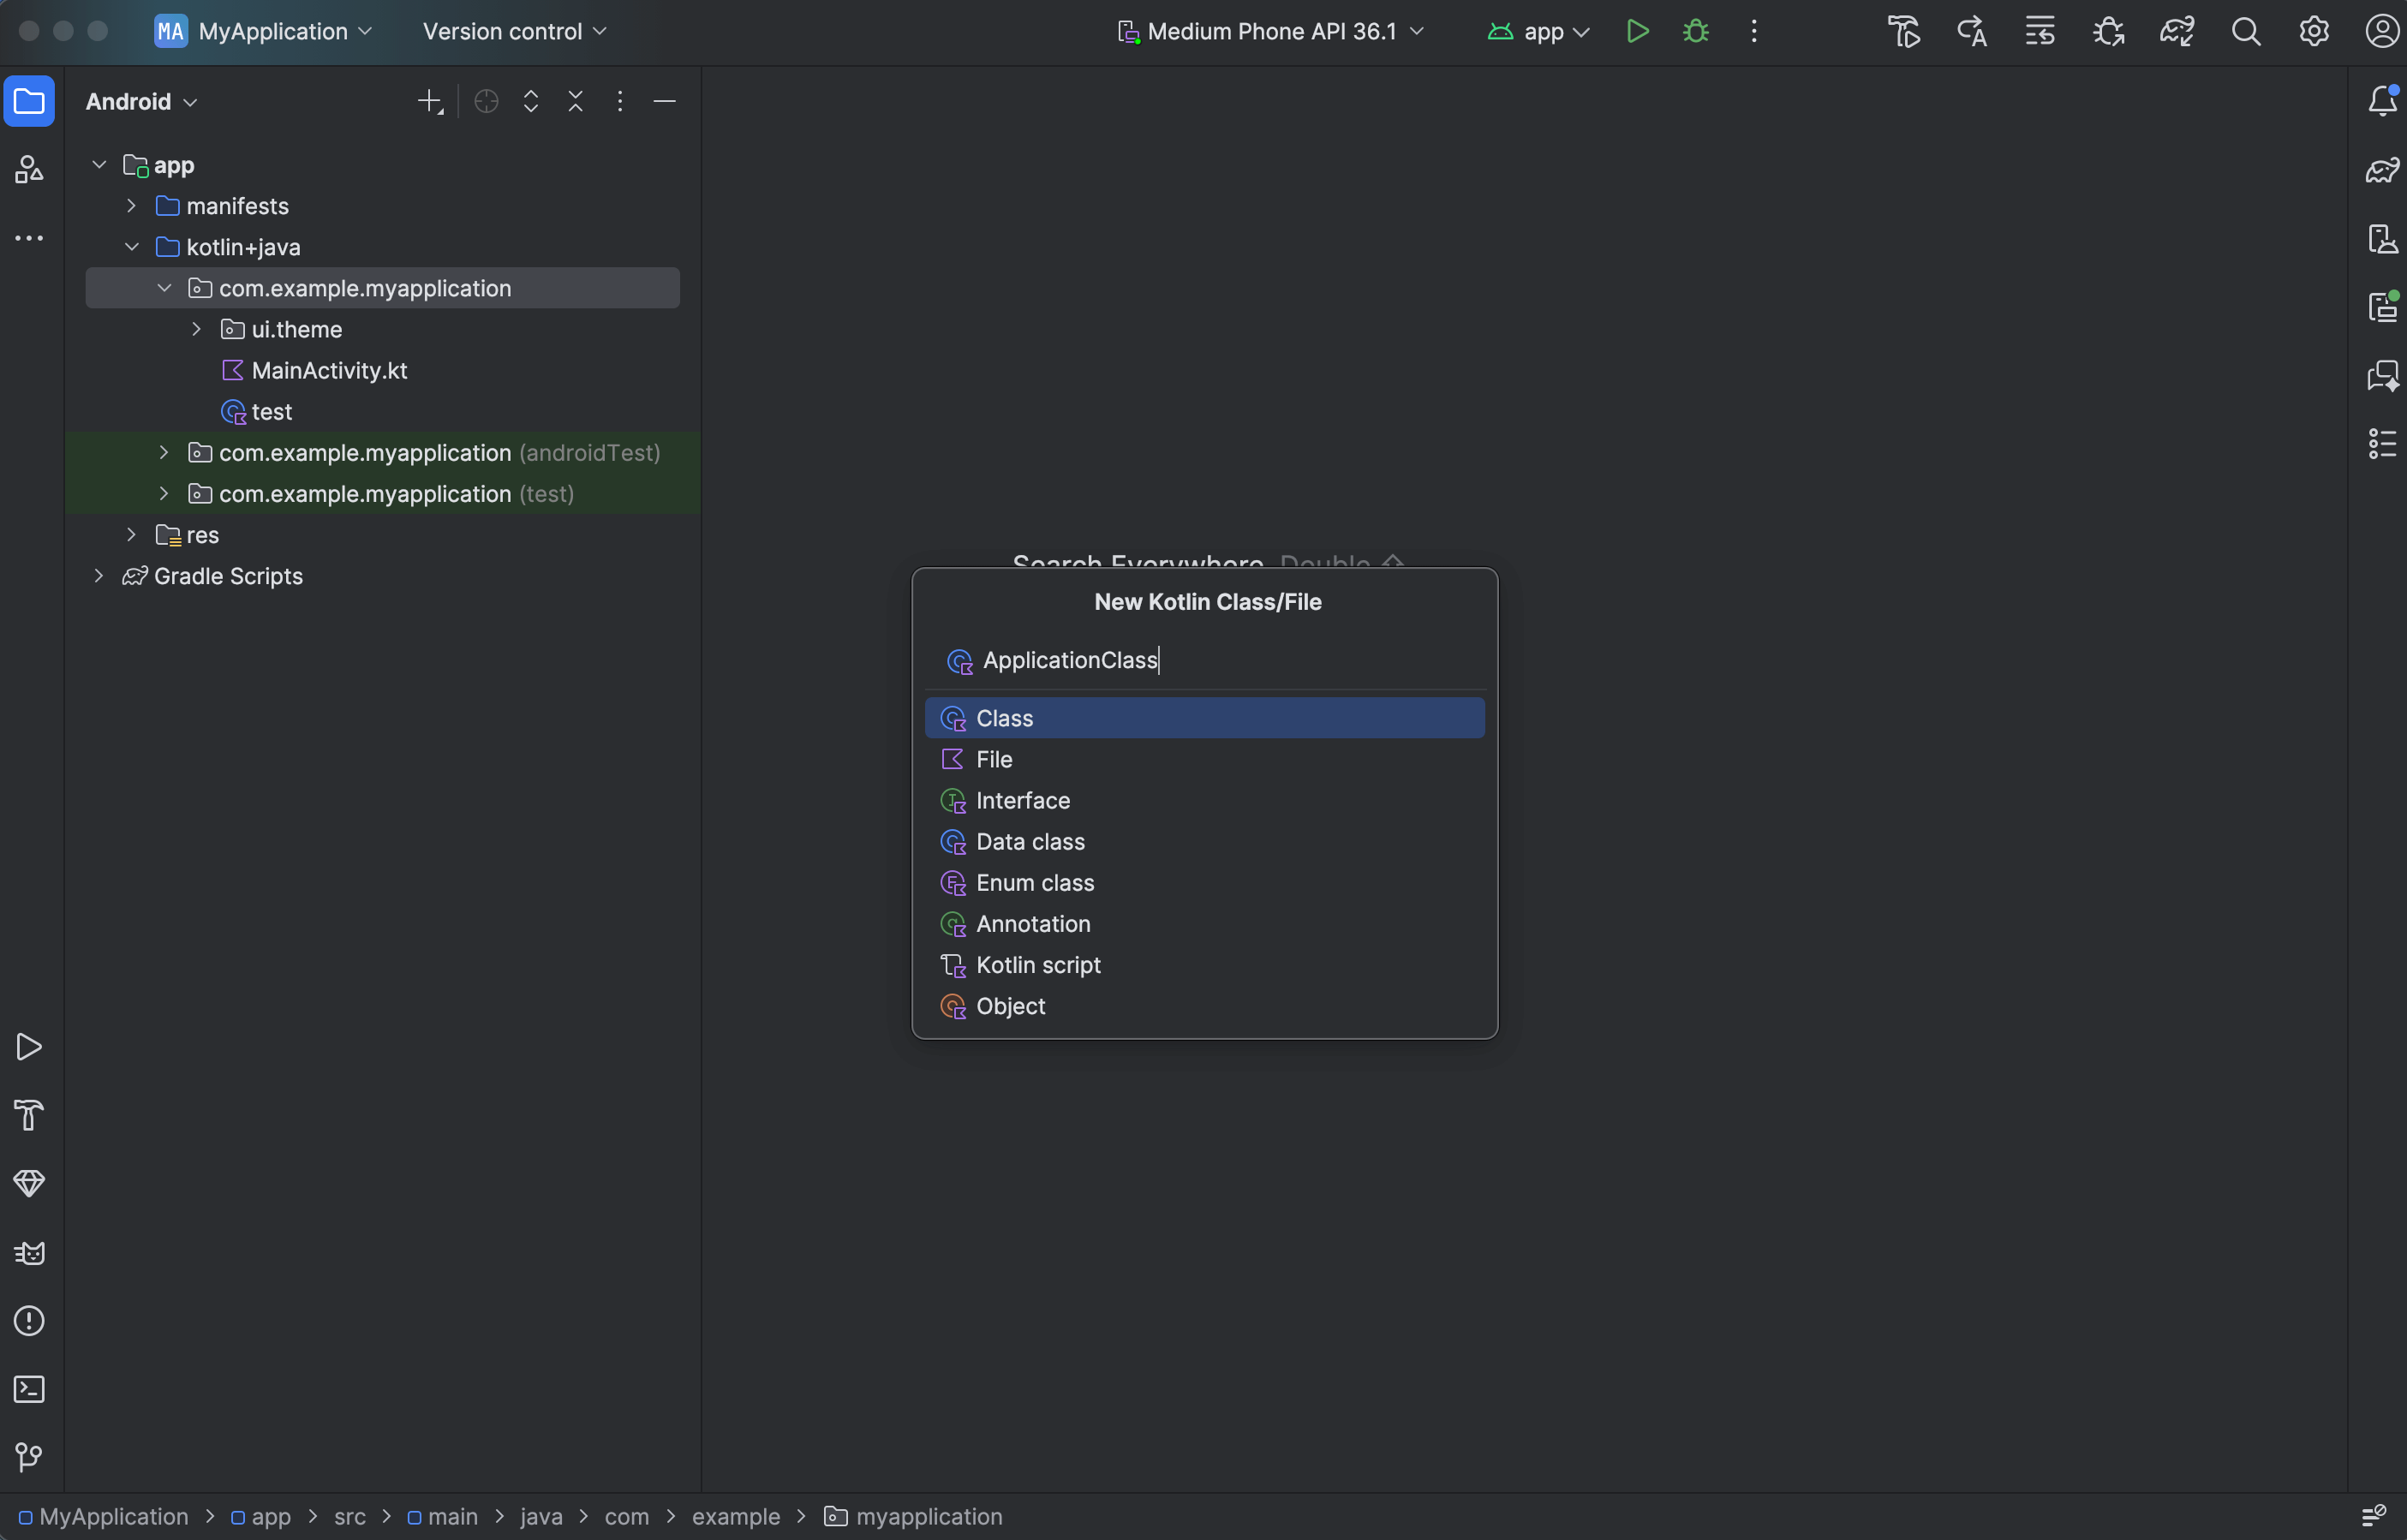
El ejemplo muestra la creación de una nueva clase Kotlin llamada ApplicationClass.
YOUR_APP_ID con su App ID real de OneSignal desde el Panel > Settings > Keys & IDs.

Ejemplo del archivo ApplicationClass.kt.
- Abra el archivo
AndroidManifest.xmlde su aplicación - En su etiqueta
<application>agregueandroid:name=".ApplicationClass"(reemplace.ApplicationClasscon el nombre real de su clase si lo configuró de manera diferente).
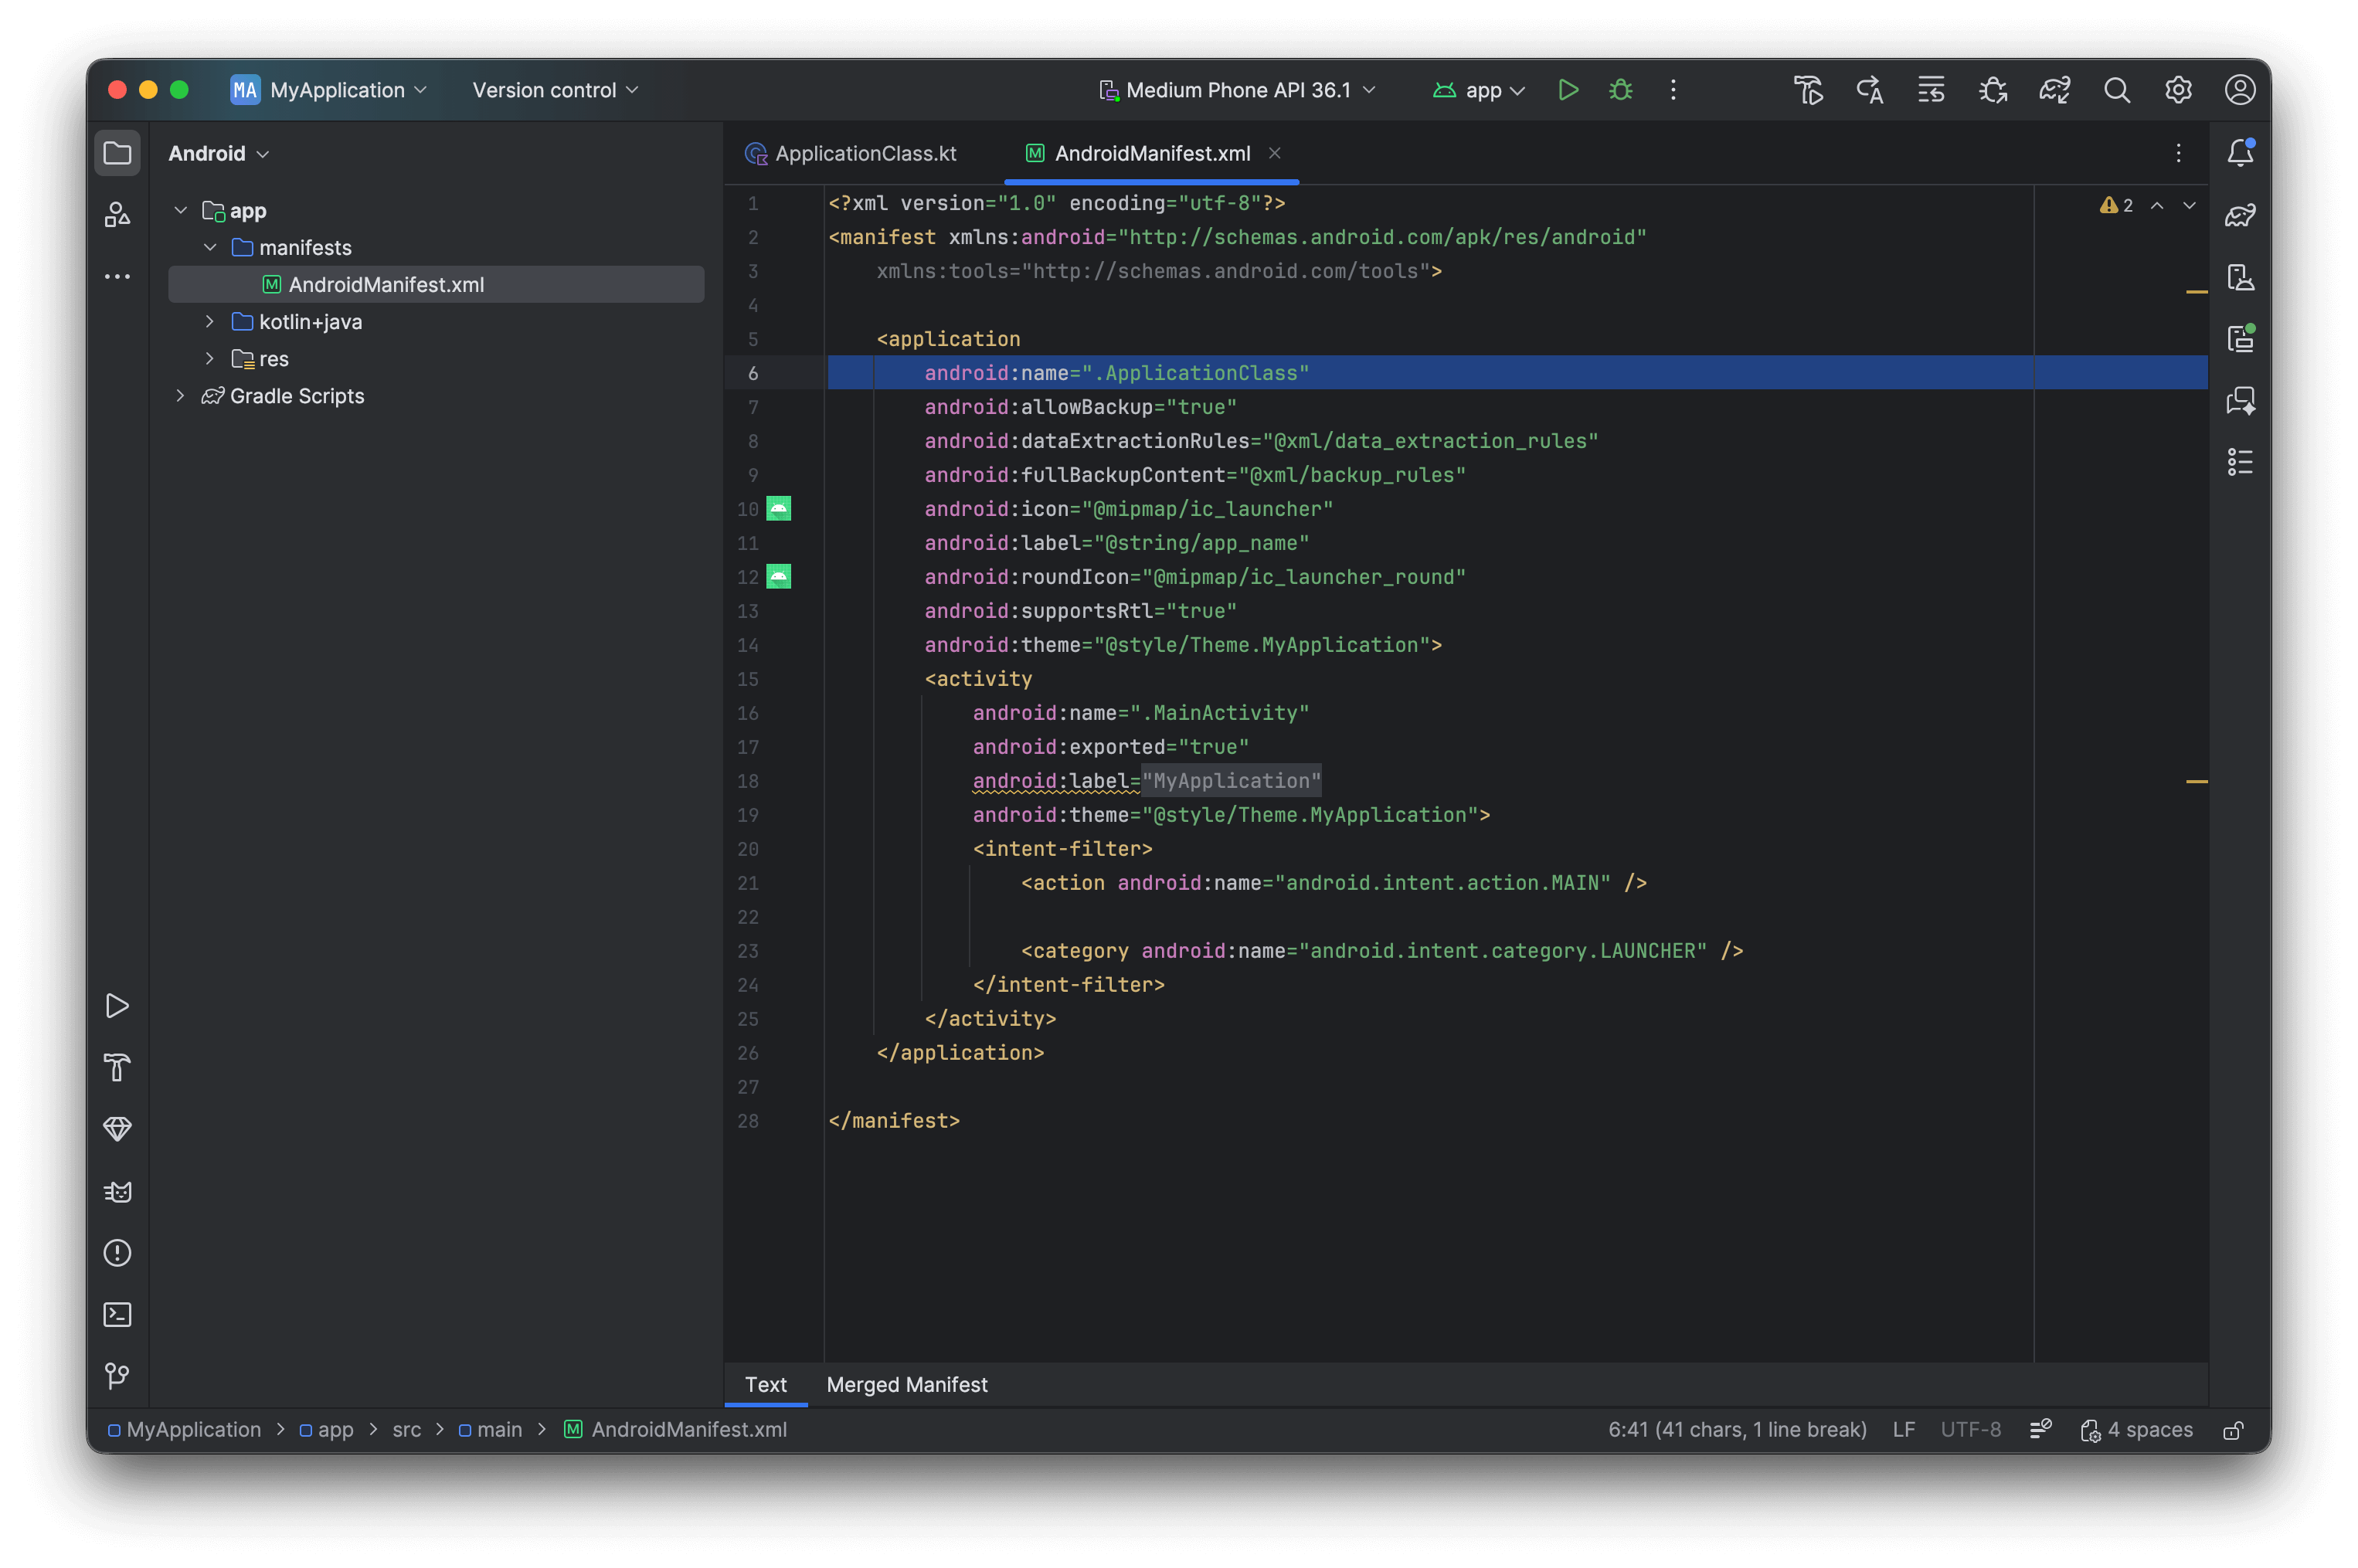
AndroidManifest.xml con el nombre .ApplicationClass.
Paso 3. Configure los iconos de notificación predeterminados (recomendado)
Personalice los iconos de notificación para que coincidan con la identidad visual de su aplicación. Este paso es opcional pero se recomienda para una apariencia profesional.Paso 4. Pruebe la integración
Verifique la creación de la Suscripción:- Inicie la aplicación en un dispositivo o emulador con Google Play Services
- Verifique en el Panel > Audience > Subscriptions — el estado muestra “Never Subscribed”
- Acepte el aviso de permisos cuando aparezca
- Actualice el panel — el estado cambia a “Subscribed”
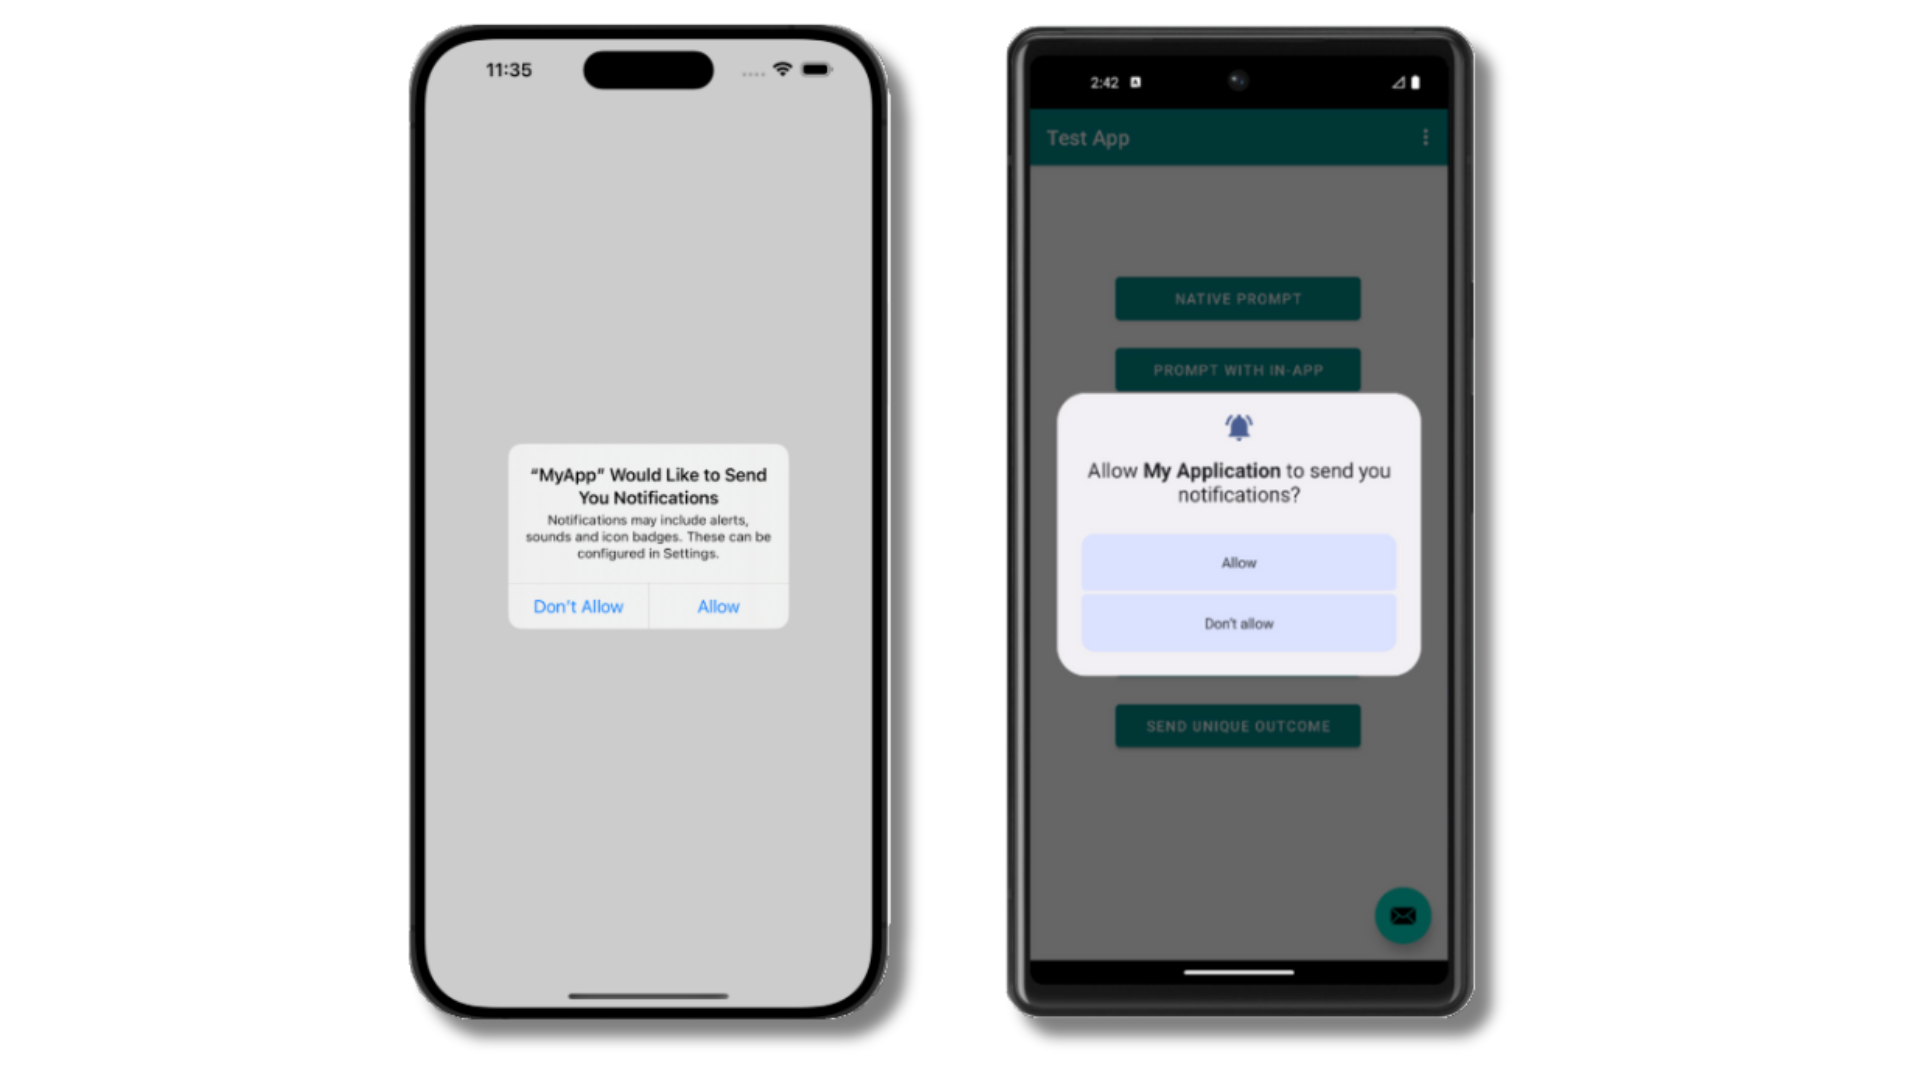
Ejemplo de los avisos de permisos de push en iOS y Android
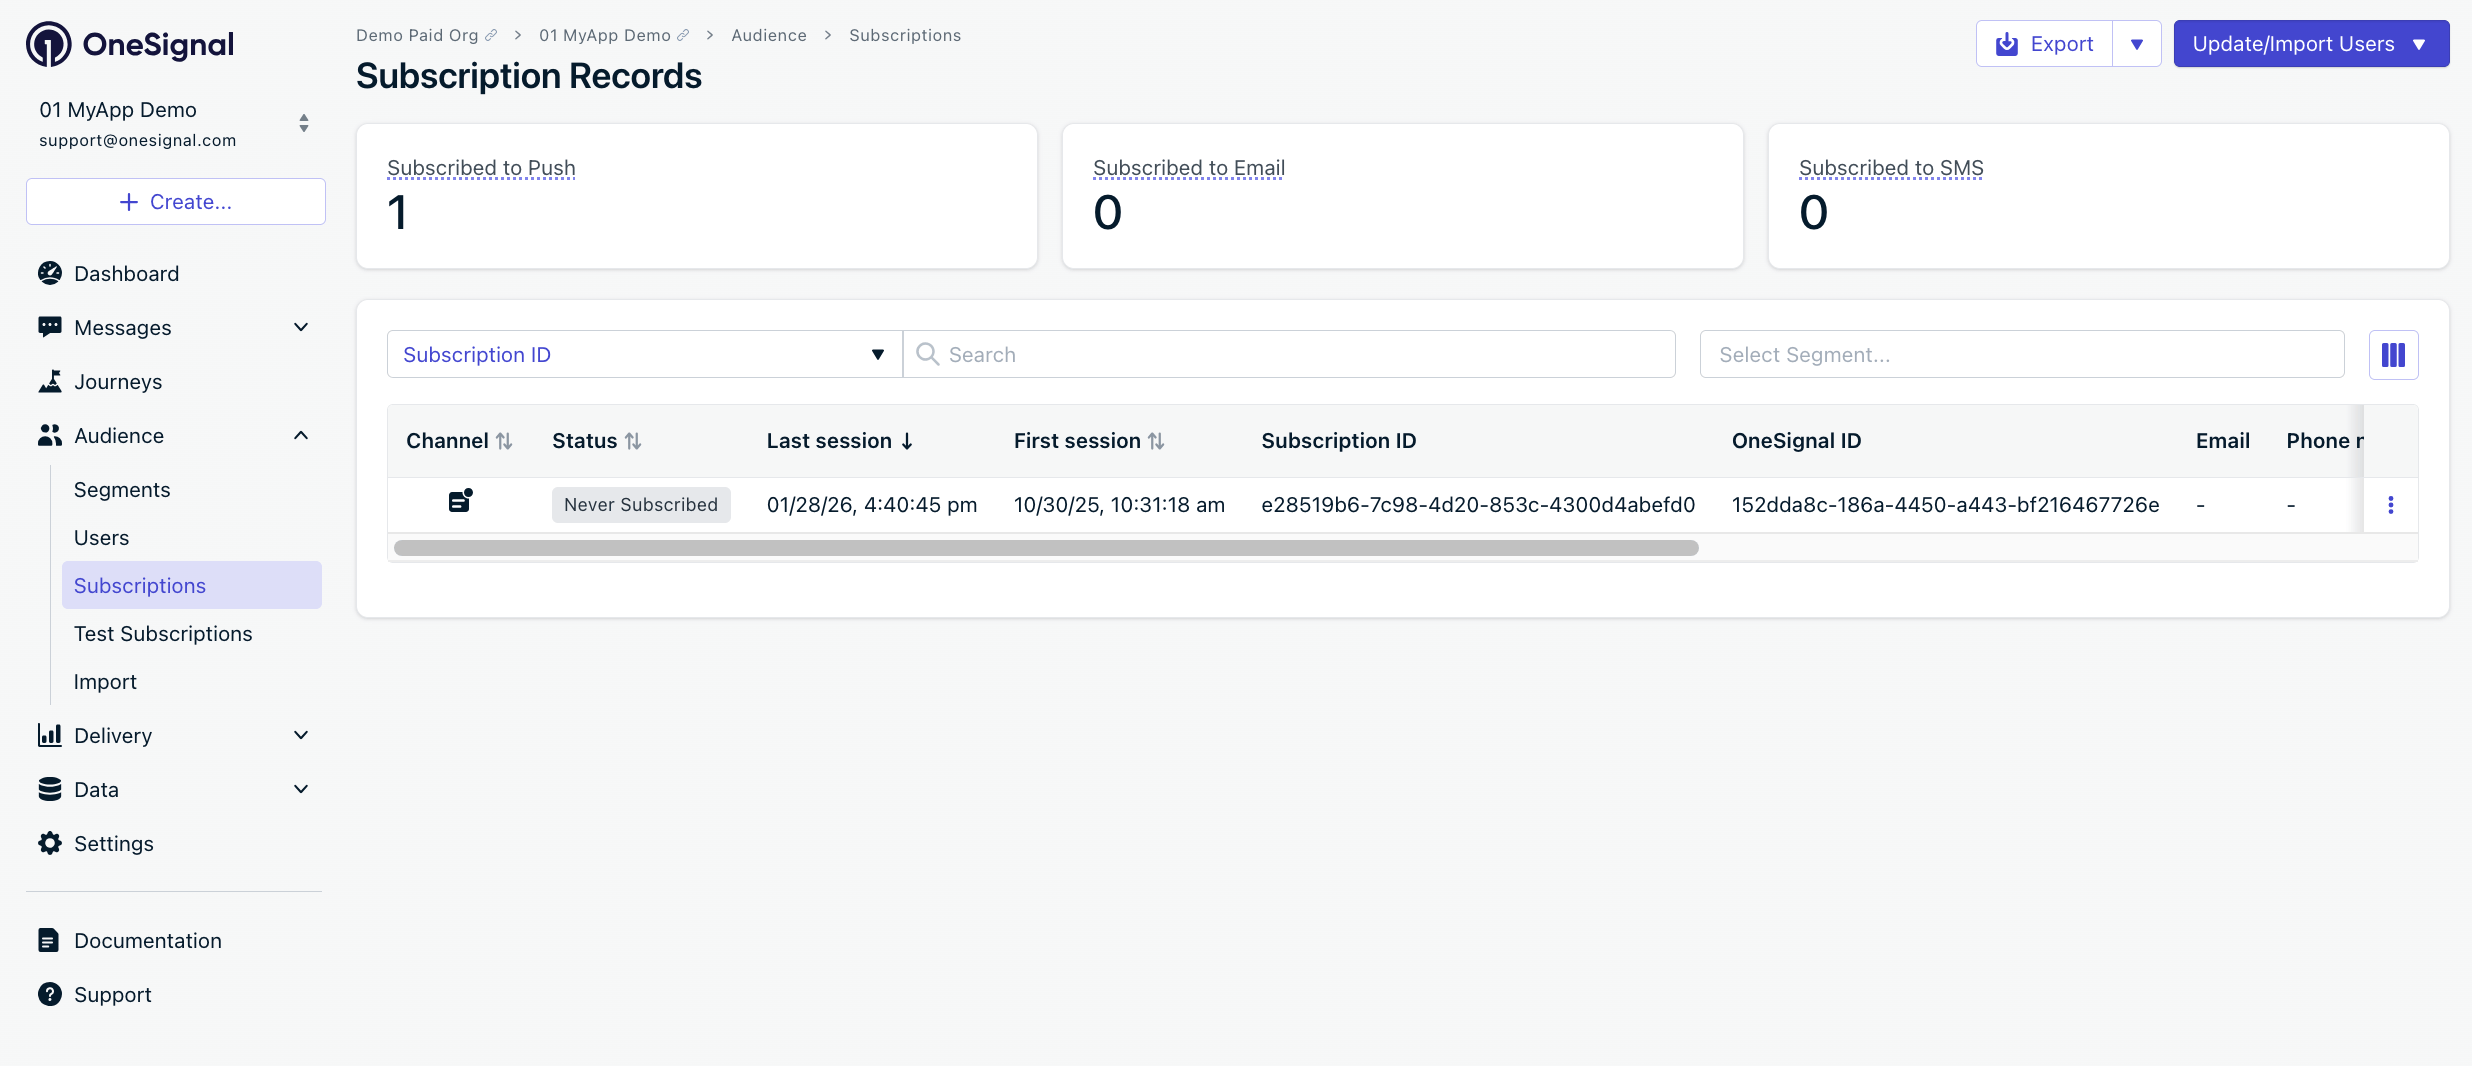
Panel mostrando la Suscripción con estado 'Never Subscribed'
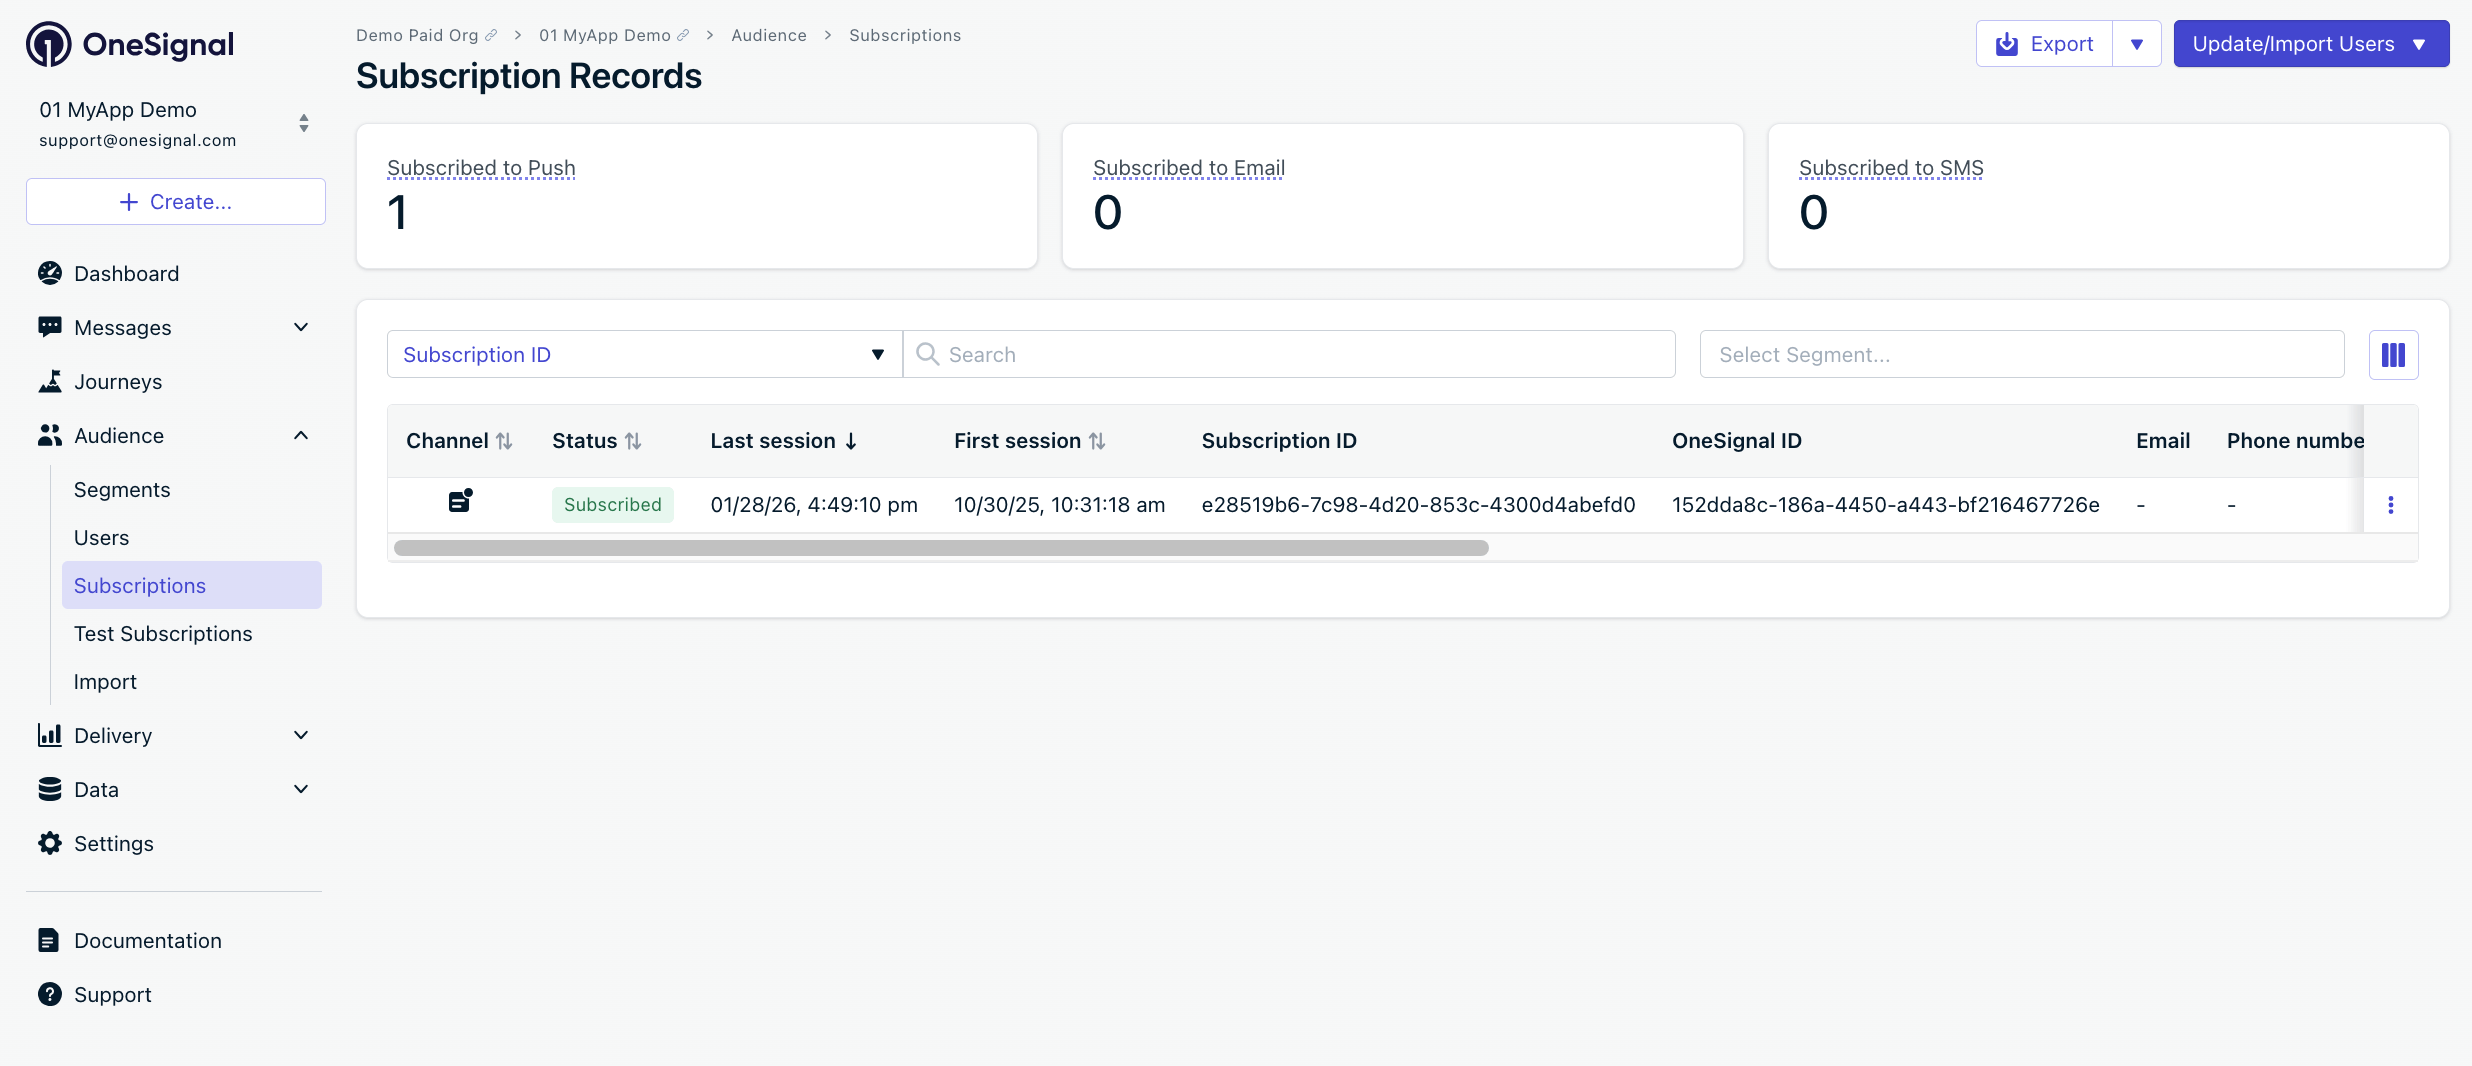
Después de permitir los permisos de push, actualice el panel para ver el estado de la Suscripción actualizado a 'Subscribed'
Cree una Suscripción de prueba y un segmento
- Haga clic en ⋮ junto a la Suscripción > Add to Test Users > asígnele un nombre
- Vaya a Audience > Segments > New Segment
- Nombre:
Test Users, agregue el filtro Test Users > Create Segment

Agregue una Suscripción de prueba

Cree un segmento 'Test Users' con el filtro Test Users
Envíe una notificación push de prueba vía API
- Navegue a Settings > Keys & IDs.
- En el código proporcionado, reemplace
YOUR_APP_API_KEYyYOUR_APP_IDen el código a continuación con sus claves reales. Este código utiliza el segmentoTest Usersque creamos anteriormente.
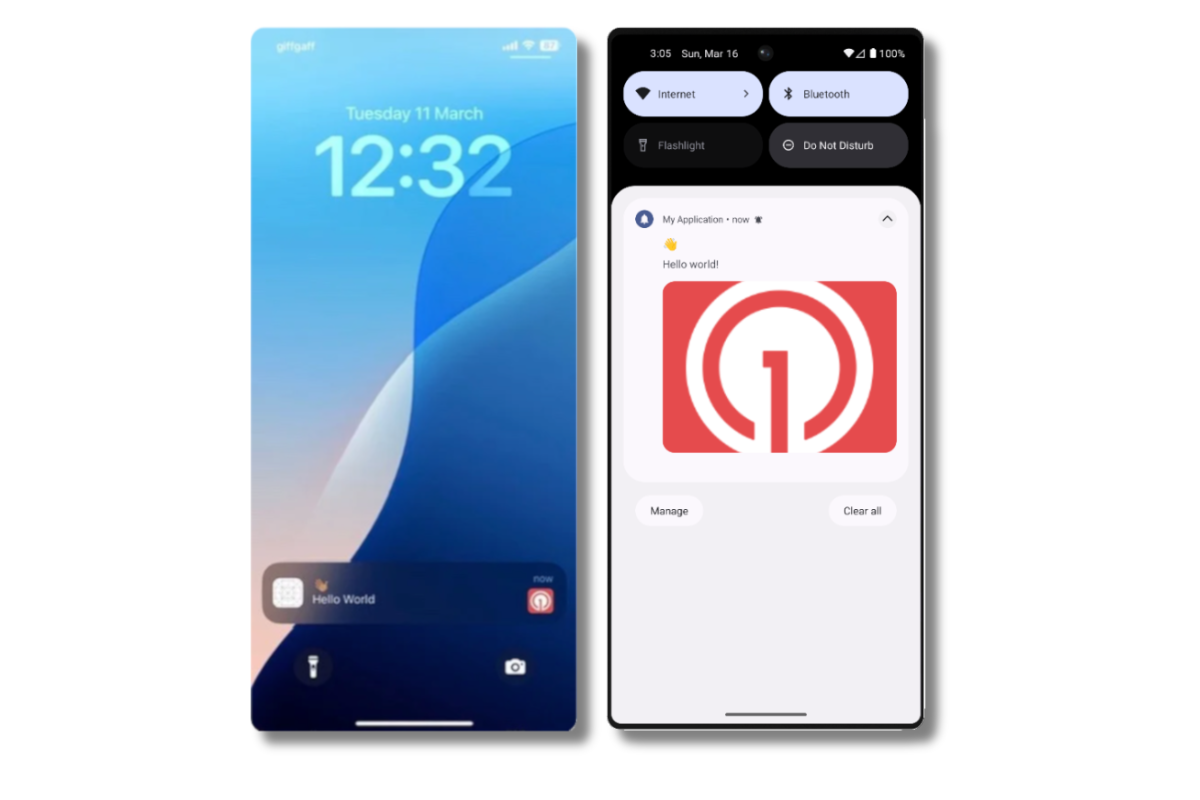
Las imágenes aparecerán pequeñas en la vista de notificación contraída. Expanda la notificación para ver la imagen completa.
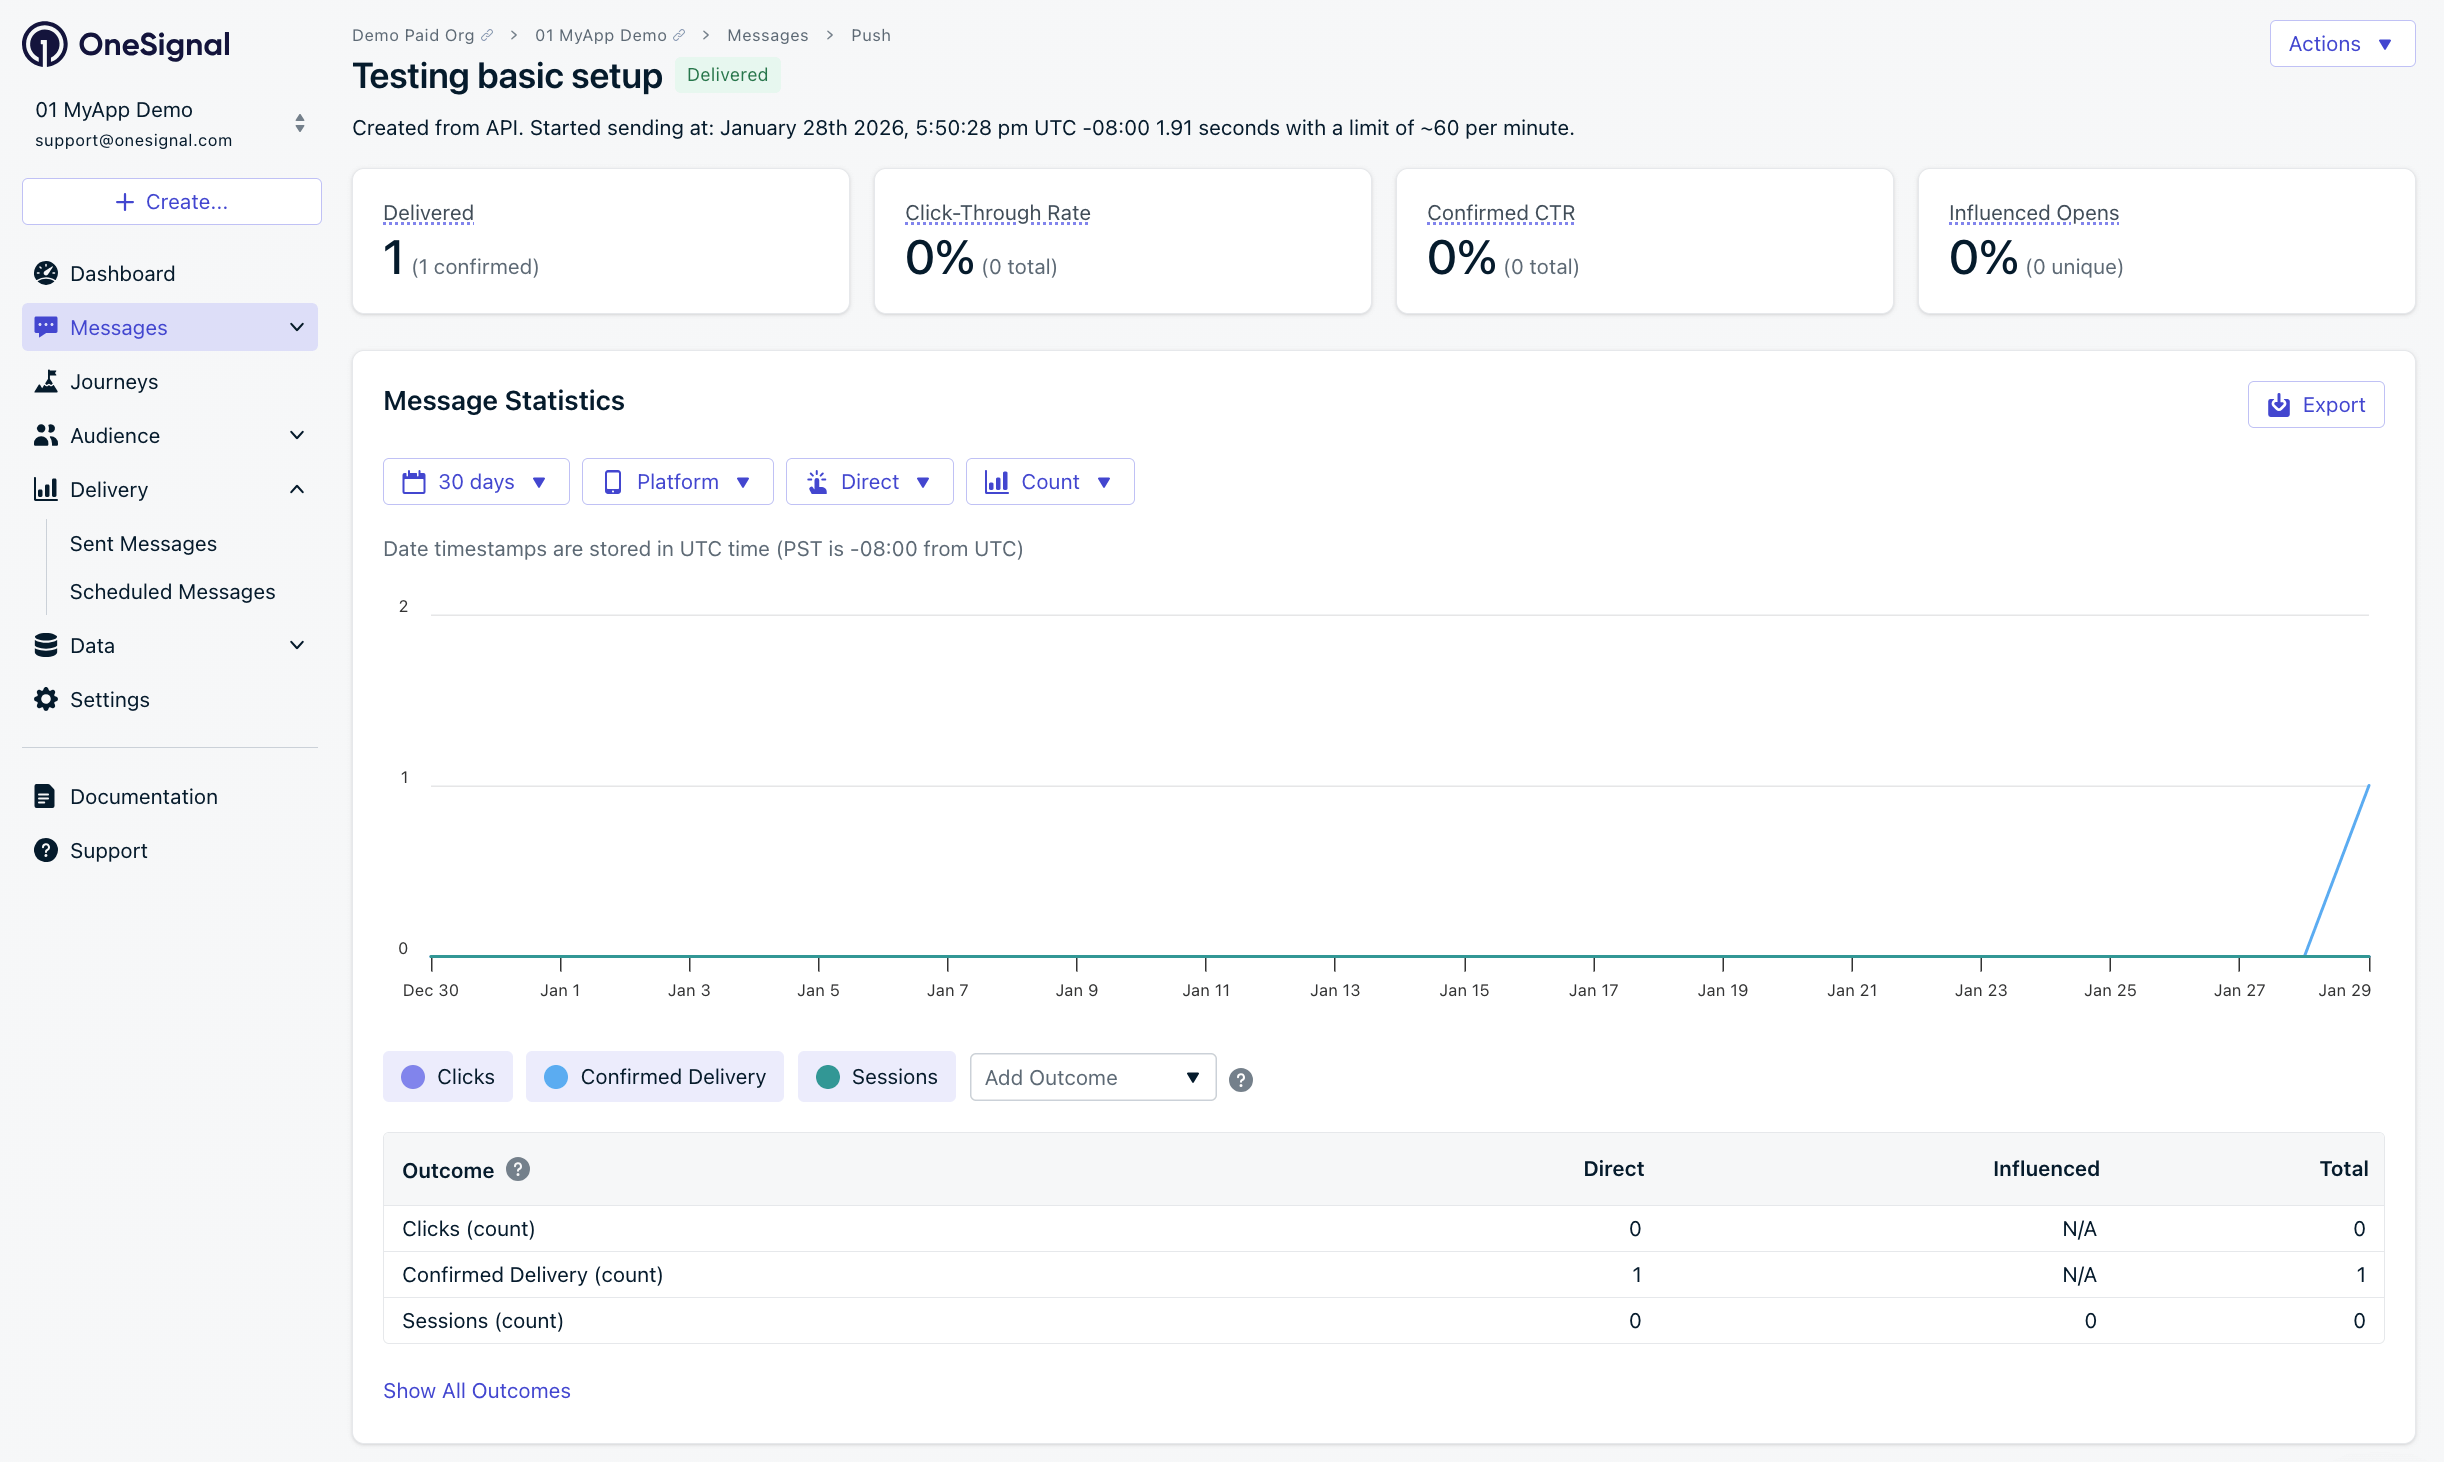
Estadísticas de entrega mostrando entrega confirmada (no disponible en planes gratuitos)
- Su icono personalizado (si fue configurado)
- Imagen grande al expandir
- Panel > Delivery > Sent Messages muestra el estado “Confirmed” (no disponible en planes gratuitos).
Pruebe los mensajes dentro de la aplicación
- Cierre la aplicación durante más de 30 segundos
- Panel > Messages > In-App > New In-App > seleccione la plantilla Welcome
- Audiencia: segmento Test Users
- Disparador: On app open
- Programación: Every time trigger conditions are satisfied
- Haga clic en Make Message Live
- Abra la aplicación
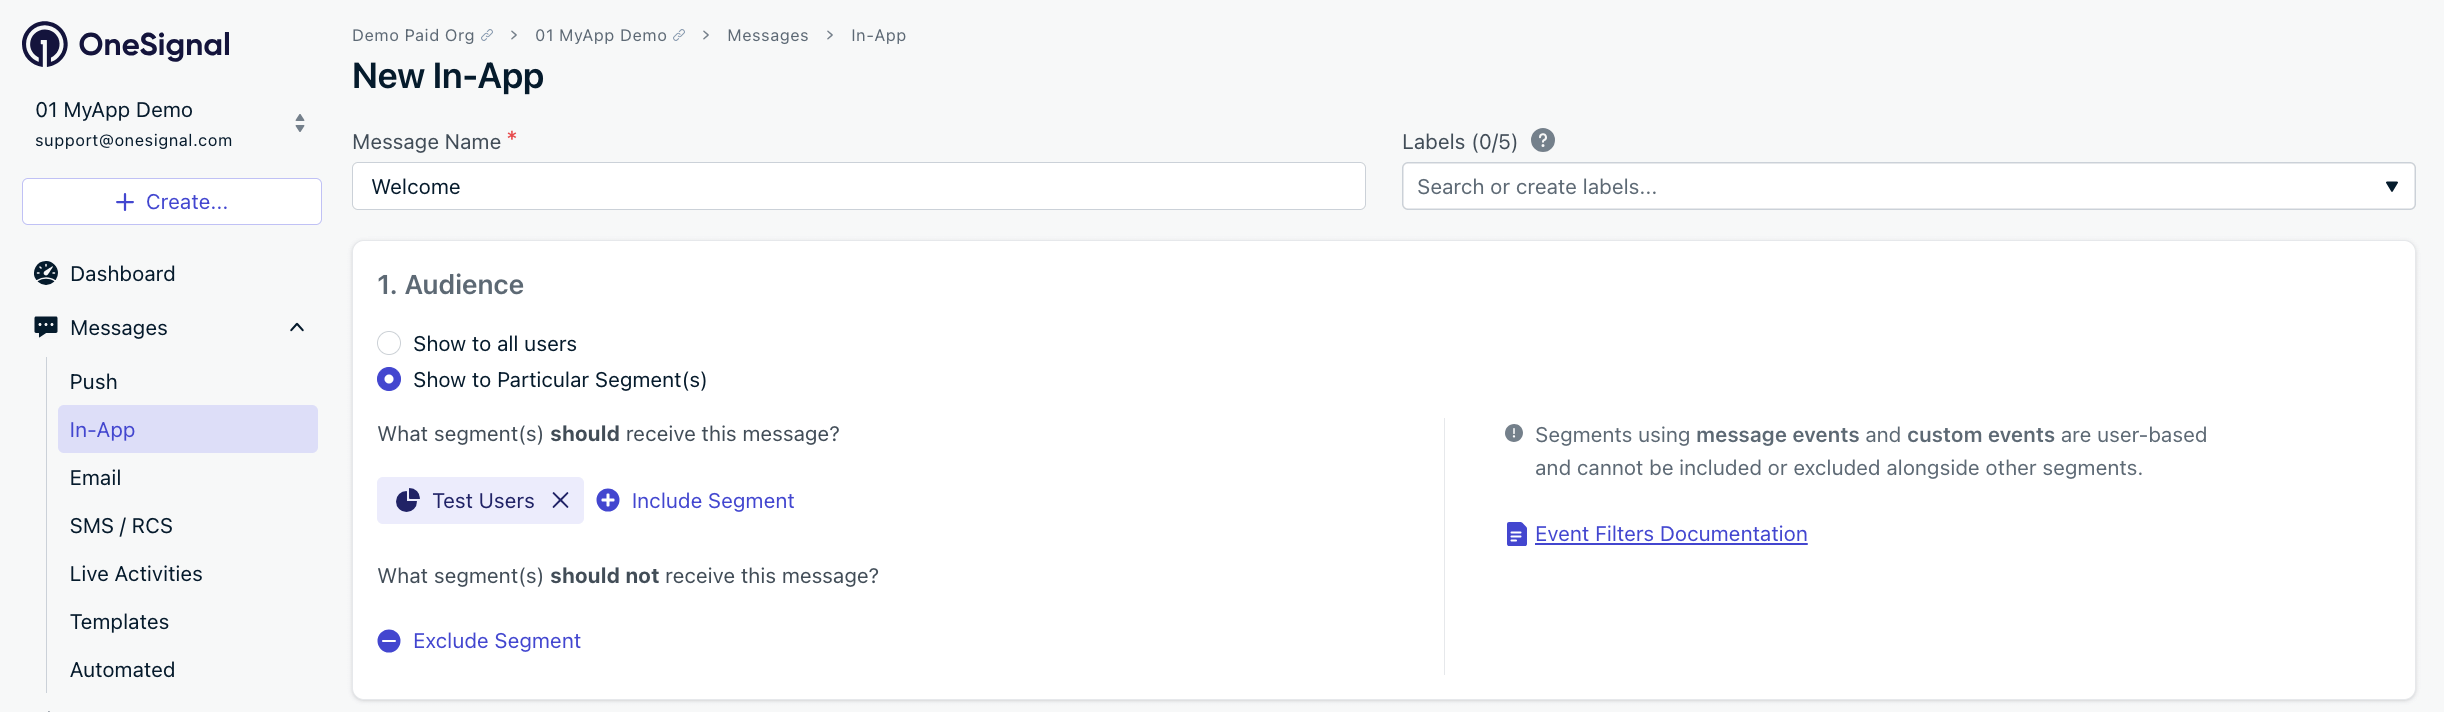
Segmentando el segmento 'Test Users' con un mensaje dentro de la aplicación
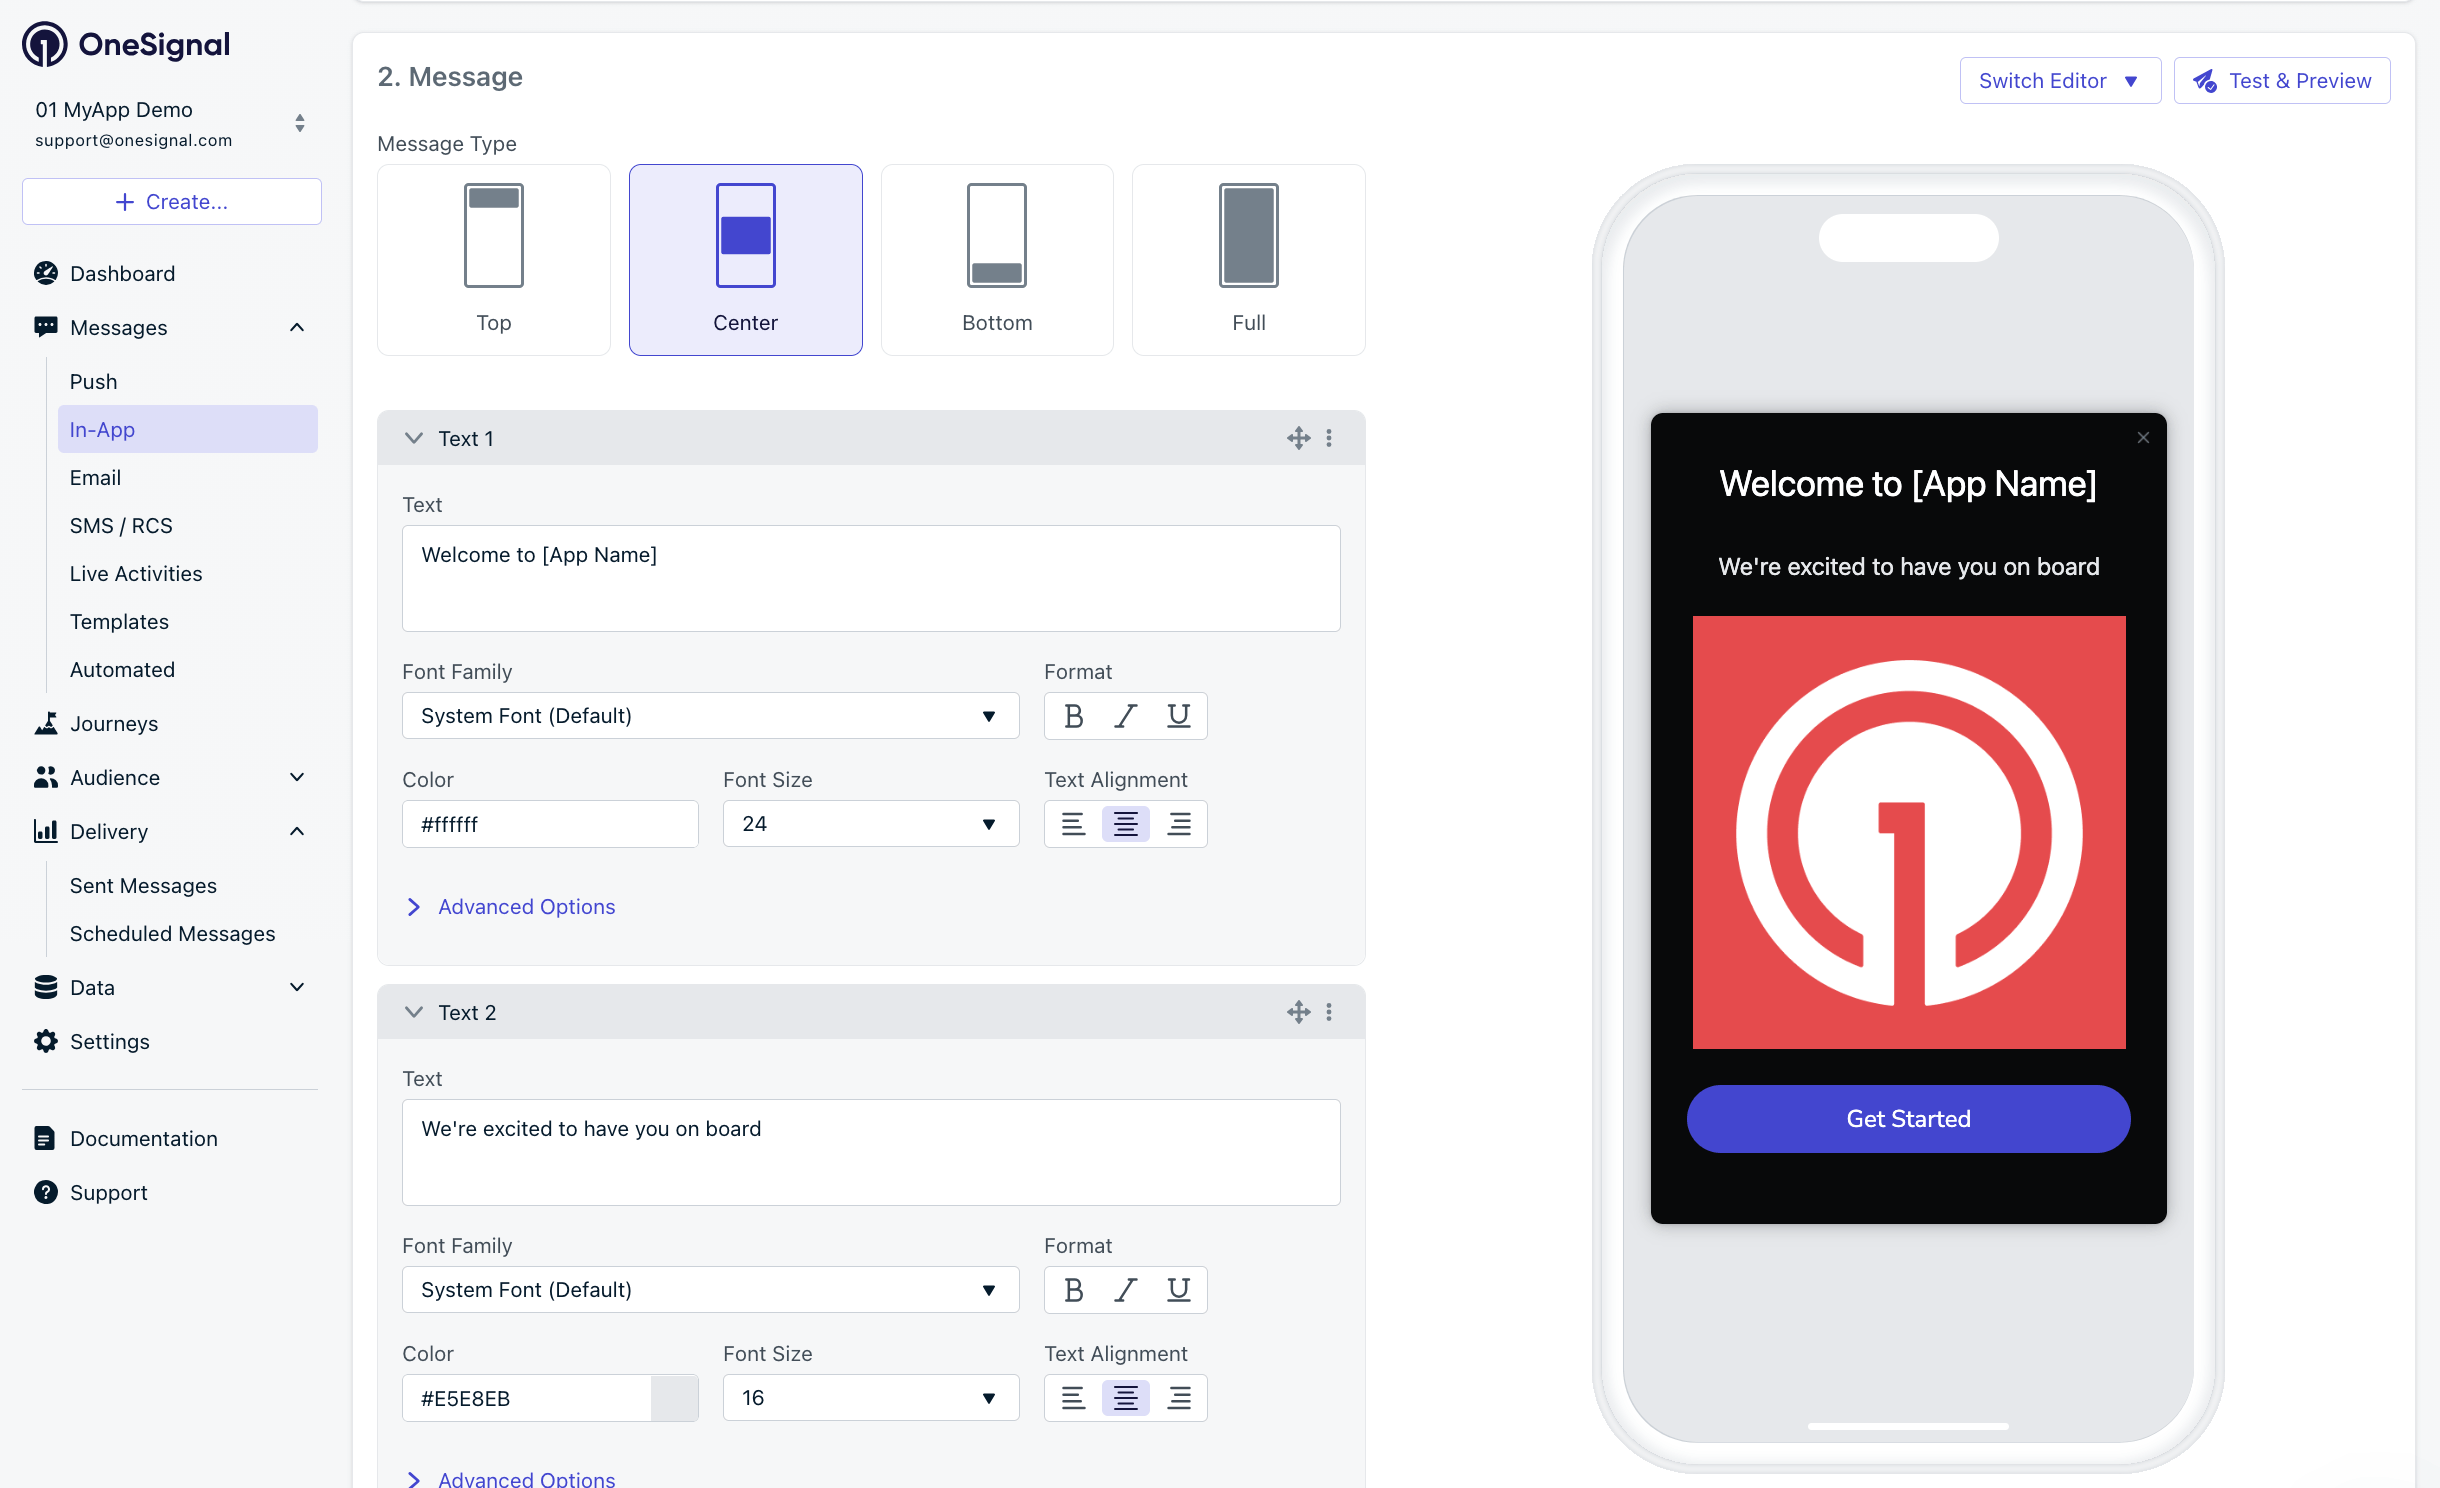
Ejemplo de personalización del mensaje de bienvenida dentro de la aplicación
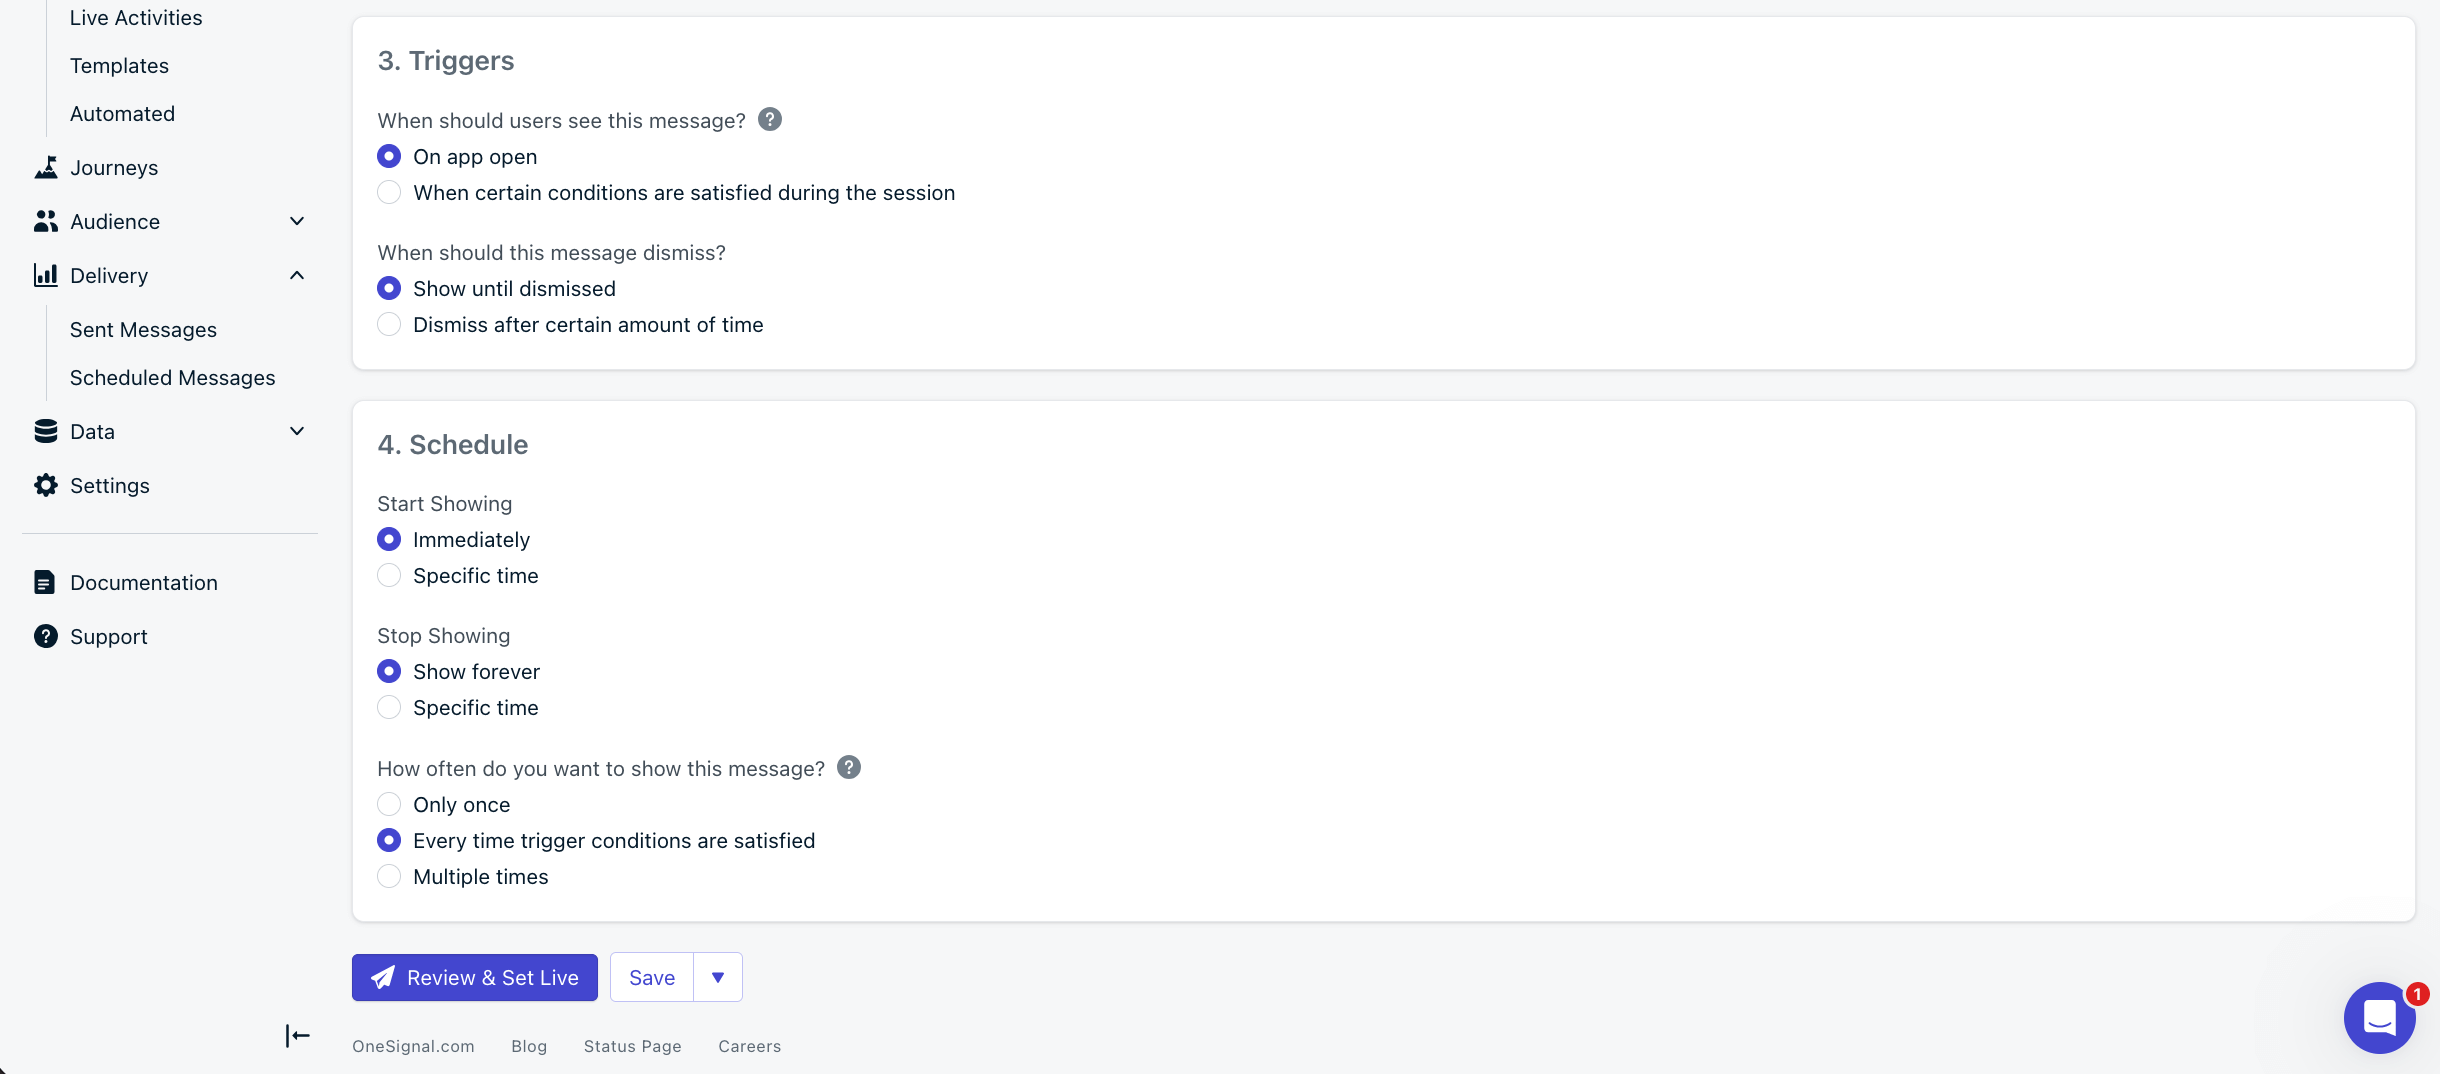
Opciones de programación de mensajes dentro de la aplicación
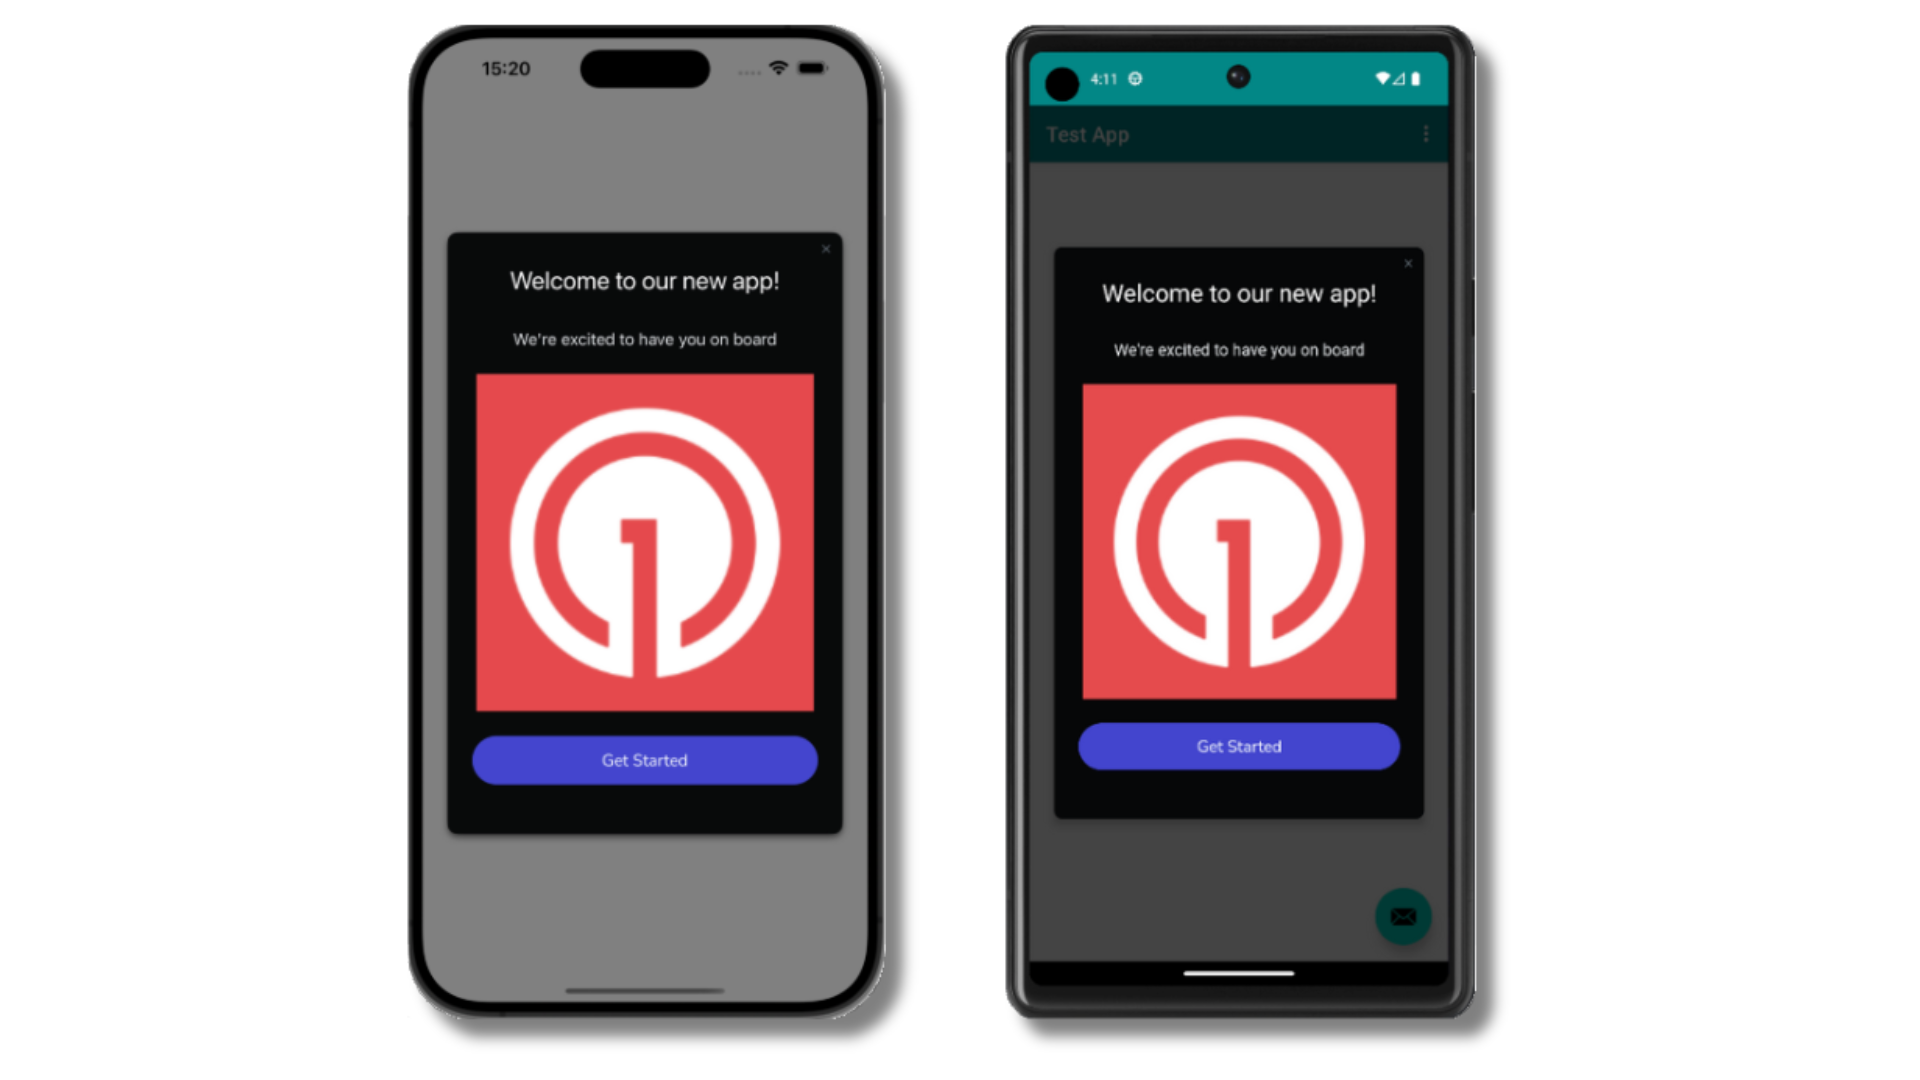
Mensaje de bienvenida dentro de la aplicación mostrado en dispositivos
- Recopilar Suscripciones, configurar Suscripciones de prueba y crear Segmentos.
- Enviar Push con imágenes usando Segmentos y nuestra API de Crear mensaje.
- Enviar Mensajes dentro de la aplicación.
Errores comunes y soluciones
Gestión de usuarios
Anteriormente, demostramos cómo crear Suscripciones móviles. Ahora expandiremos a la identificación de Usuarios a través de todas sus Suscripciones (incluyendo push, correo electrónico y SMS) usando el SDK de OneSignal.Asigne un External ID (recomendado)
Use un External ID para identificar usuarios de manera consistente entre dispositivos, direcciones de correo electrónico y números de teléfono usando el identificador de usuario de su backend. Esto asegura que sus mensajes se mantengan unificados entre canales y sistemas de terceros. Consulte nuestra Referencia del SDK móvil para más detalles y ejemplos de código en Java.login en la guía de referencia del SDK.Agregue Tags y Custom Events
Los Tags y Custom Events son formas de agregar datos a sus usuarios. Los Tags son cadenas dekey-value y generalmente se asocian con propiedades del usuario (como username, role o status), mientras que los Custom Events tienen un formato JSON y generalmente se asocian con acciones (como new_purchase, abandoned_cart y propiedades asociadas). Ambos se pueden usar para potenciar la Personalización de mensajes avanzada y Journeys. Consulte nuestra Referencia del SDK móvil para más detalles y ejemplos de código en Java.
Agregue suscripciones de correo electrónico y/o SMS
Puede llegar a los usuarios a través de canales de correo electrónico y SMS además de las notificaciones push. Si la dirección de correo electrónico y/o el número de teléfono ya existen en la aplicación de OneSignal, el SDK lo agregará al usuario existente — no creará duplicados. Consulte nuestra Referencia del SDK móvil para más detalles y ejemplos de código en Java.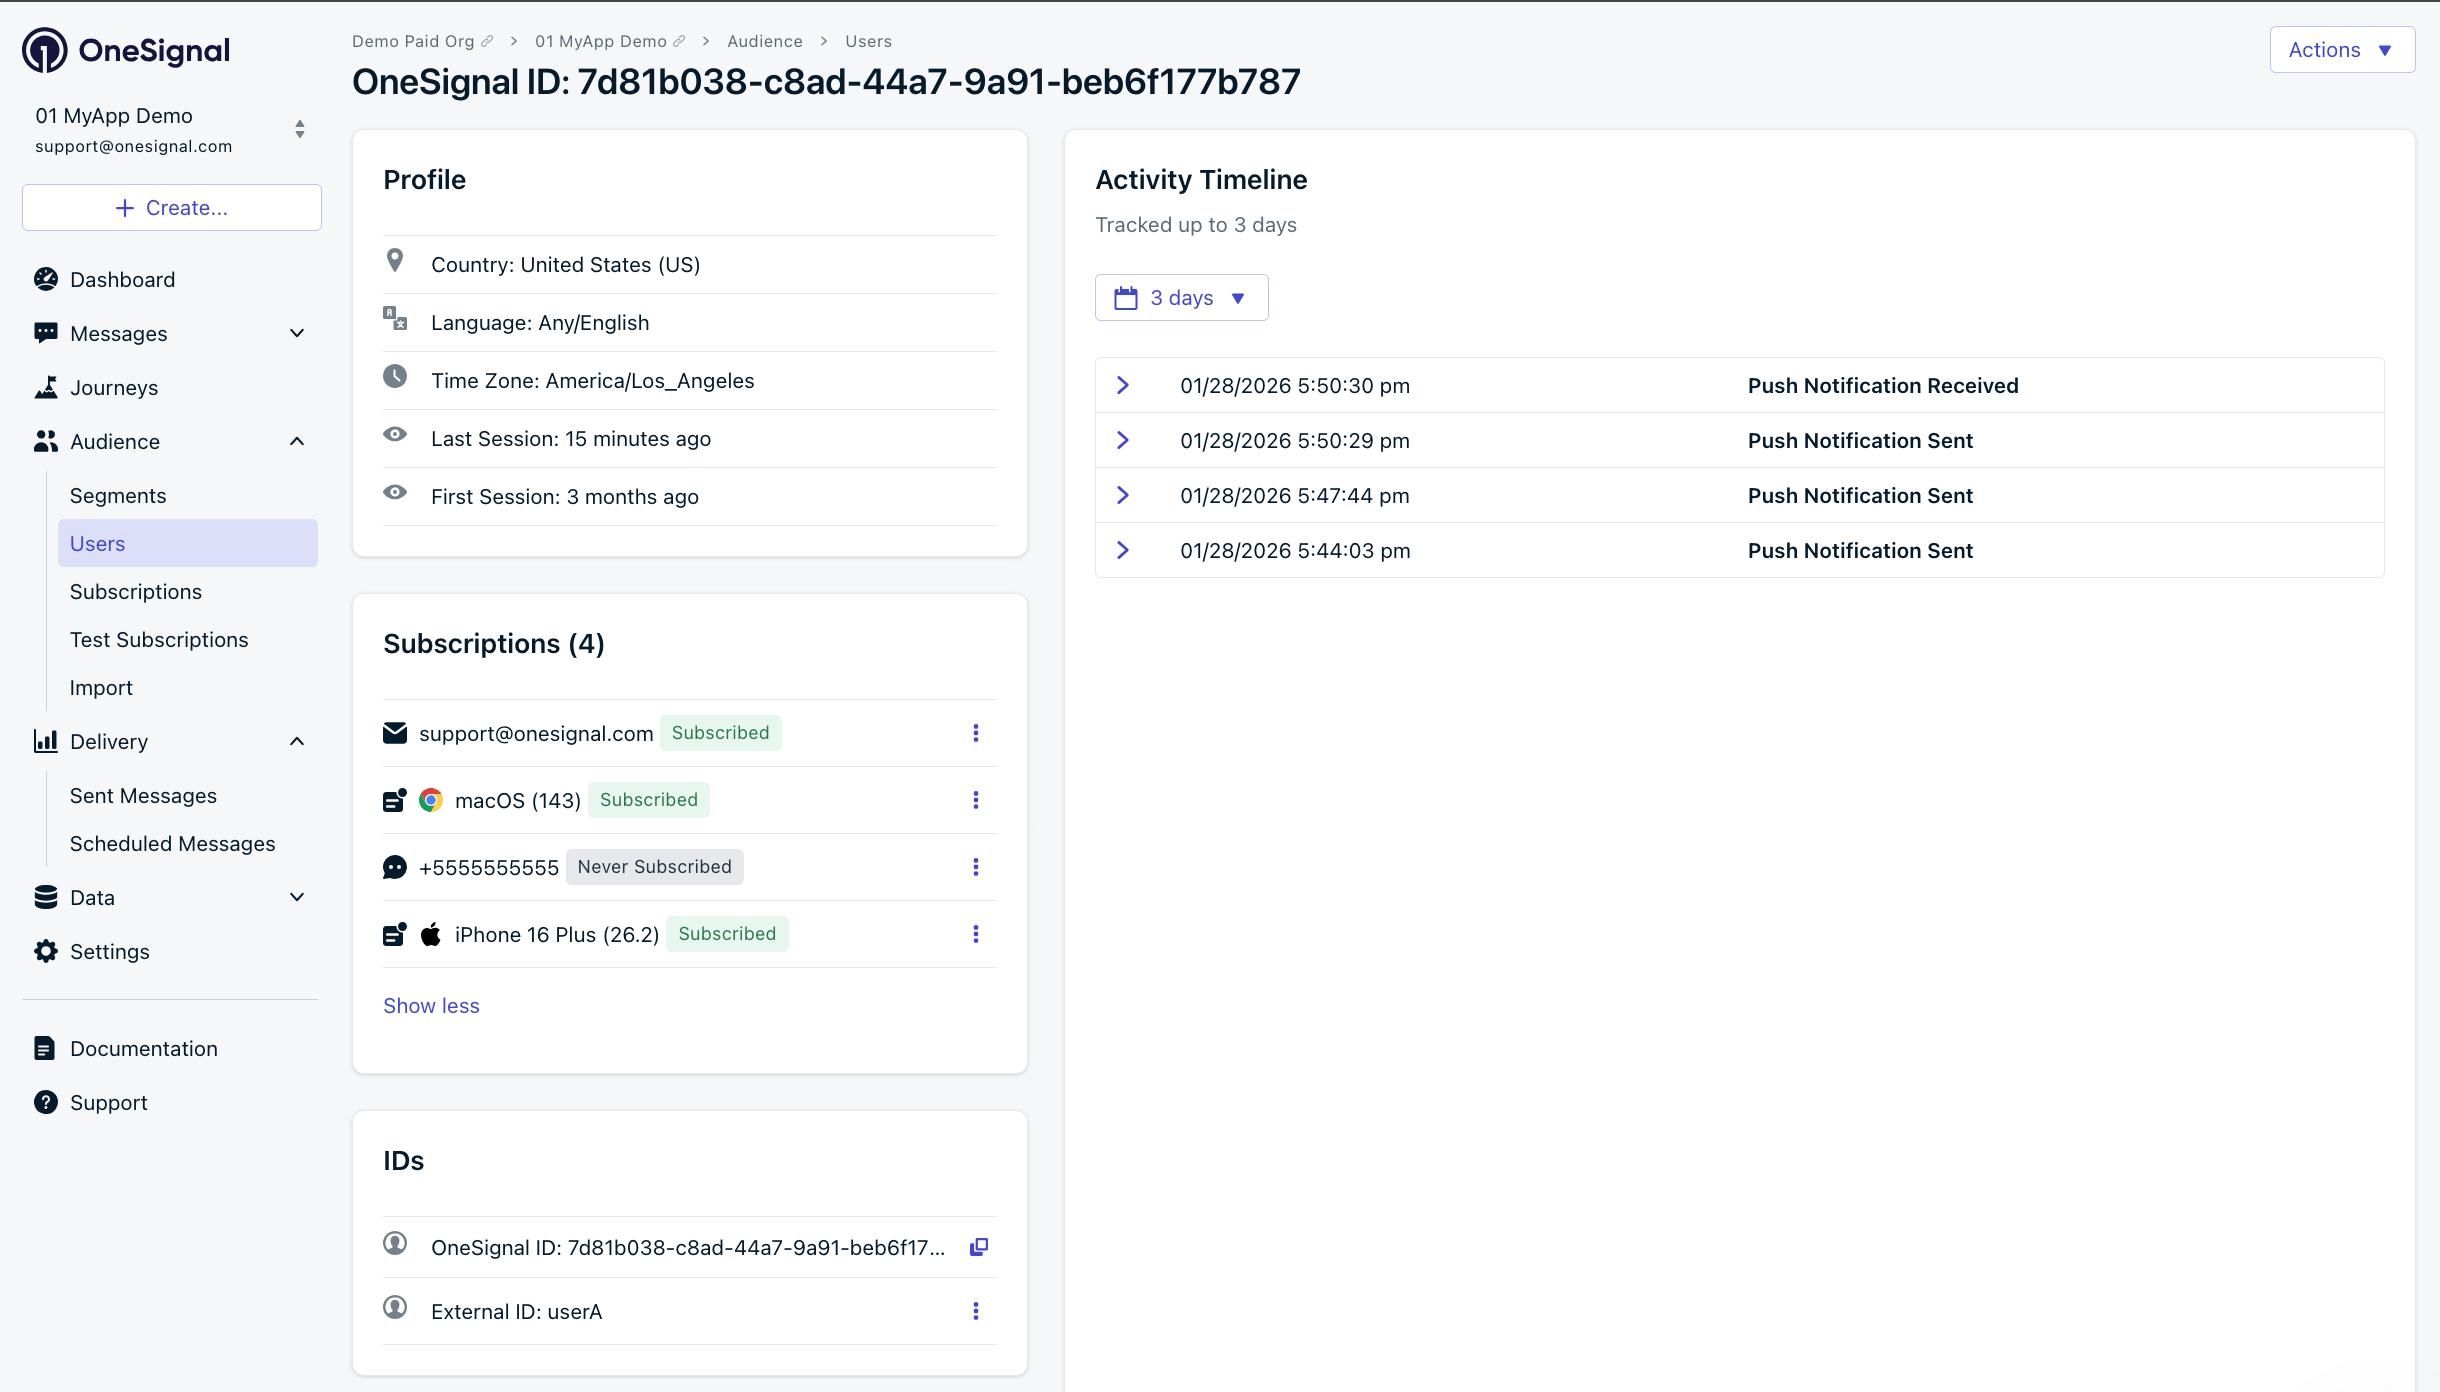
Un perfil de usuario con suscripciones de push, correo electrónico y SMS unificadas por External ID
- Obtenga consentimiento explícito antes de agregar suscripciones de correo electrónico o SMS.
- Explique los beneficios de cada canal de comunicación a los usuarios.
- Proporcione preferencias de canal para que los usuarios puedan seleccionar qué canales prefieren.
Privacidad y consentimiento del usuario
Para controlar cuándo OneSignal recopila datos del usuario, use los métodos de control de consentimiento del SDK. Consulte nuestra Referencia del SDK móvil para más detalles y ejemplos de código en Java.Solicitar permisos de push
En lugar de llamar arequestPermission() inmediatamente al abrir la aplicación, adopte un enfoque más estratégico. Use un mensaje dentro de la aplicación para explicar el valor de las notificaciones push antes de solicitar el permiso.
Para mejores prácticas y detalles de implementación, consulte nuestra guía de Solicitar permisos de push.
Escuchar eventos de push, usuario y mensajes dentro de la aplicación
Use los listeners del SDK para reaccionar a las acciones del usuario y cambios de estado. Agréguelos en su clase Application después deOneSignal.initWithContext().
Eventos de notificaciones push
Cambios de estado del usuario
El ejemplo muestra cómo usar el observador de suscripción push. Otros eventos de estado del usuario como el observador de estado del usuario y el observador de permisos de notificación están disponibles en la Referencia del SDK móvil.Eventos de mensajes dentro de la aplicación
Los métodos adicionales de mensajes dentro de la aplicación están disponibles en la Referencia del SDK móvil.Configuración avanzada y capacidades
Funciones específicas de Android
- Canales de notificación — Organice las notificaciones en categorías (Android 8.0+)
- Extensiones de servicio — Personalización avanzada de notificaciones
- Soporte de Huawei/HMS — Alternativa a Google Play Services
Funciones universales
- Deep Linking — Navegue a los usuarios a pantallas específicas desde las notificaciones
- Botones de acción — Agregue botones interactivos a las notificaciones
- Verificación de identidad — Identificación segura de usuarios
- Seguimiento de ubicación — Segmentación basada en ubicación
- Integraciones — Conecte con plataformas de análisis y datos
- Mensajería multilingüe — Notificaciones localizadas
support@onesignal.comPor favor incluya:- Detalles del problema que está experimentando y pasos para reproducir si están disponibles
- Su ID de aplicación de OneSignal
- El ID externo o ID de suscripción si corresponde
- La URL del mensaje que probó en el panel de OneSignal si corresponde
- Cualquier registro o mensaje de error relevante