Descripción general
Esta es una guía paso a paso para integrar el SDK React Native y Expo de OneSignal en tus apps iOS y Android. Al final de esta guía, podrás enviar notificaciones push y mensajes in-app con OneSignal.Requisitos
- Una app Expo administrada. Para apps React Native simples, consulta Configuración del SDK React Native.
- Expo development build
- Expo SDK 48+ (las instrucciones usan versión 54.0.8)
- EAS CLI (documentación EAS Build)
- React Native 0.71+ (las instrucciones usan versión 0.81.4)
- App y plataforma de OneSignal configuradas
- macOS con Xcode 14+ (las instrucciones de configuración usan Xcode 16.2)
- Dispositivo con iOS 12+, iPadOS 12+ o simulador Xcode ejecutando iOS 16.2+
- CocoaPods 1.16.2+
- Dispositivo o emulador Android 7.0+ con Google Play Store (Services) instalado
Configure your OneSignal app and platform
Required setup for push notifications To start sending push notifications with OneSignal, you must first configure your OneSignal app with all the platforms your support—Apple (APNs), Google (FCM), Huawei (HMS), and/or Amazon (ADM).Step-by-step instructions for configuring your OneSignal app.
Step-by-step instructions for configuring your OneSignal app.
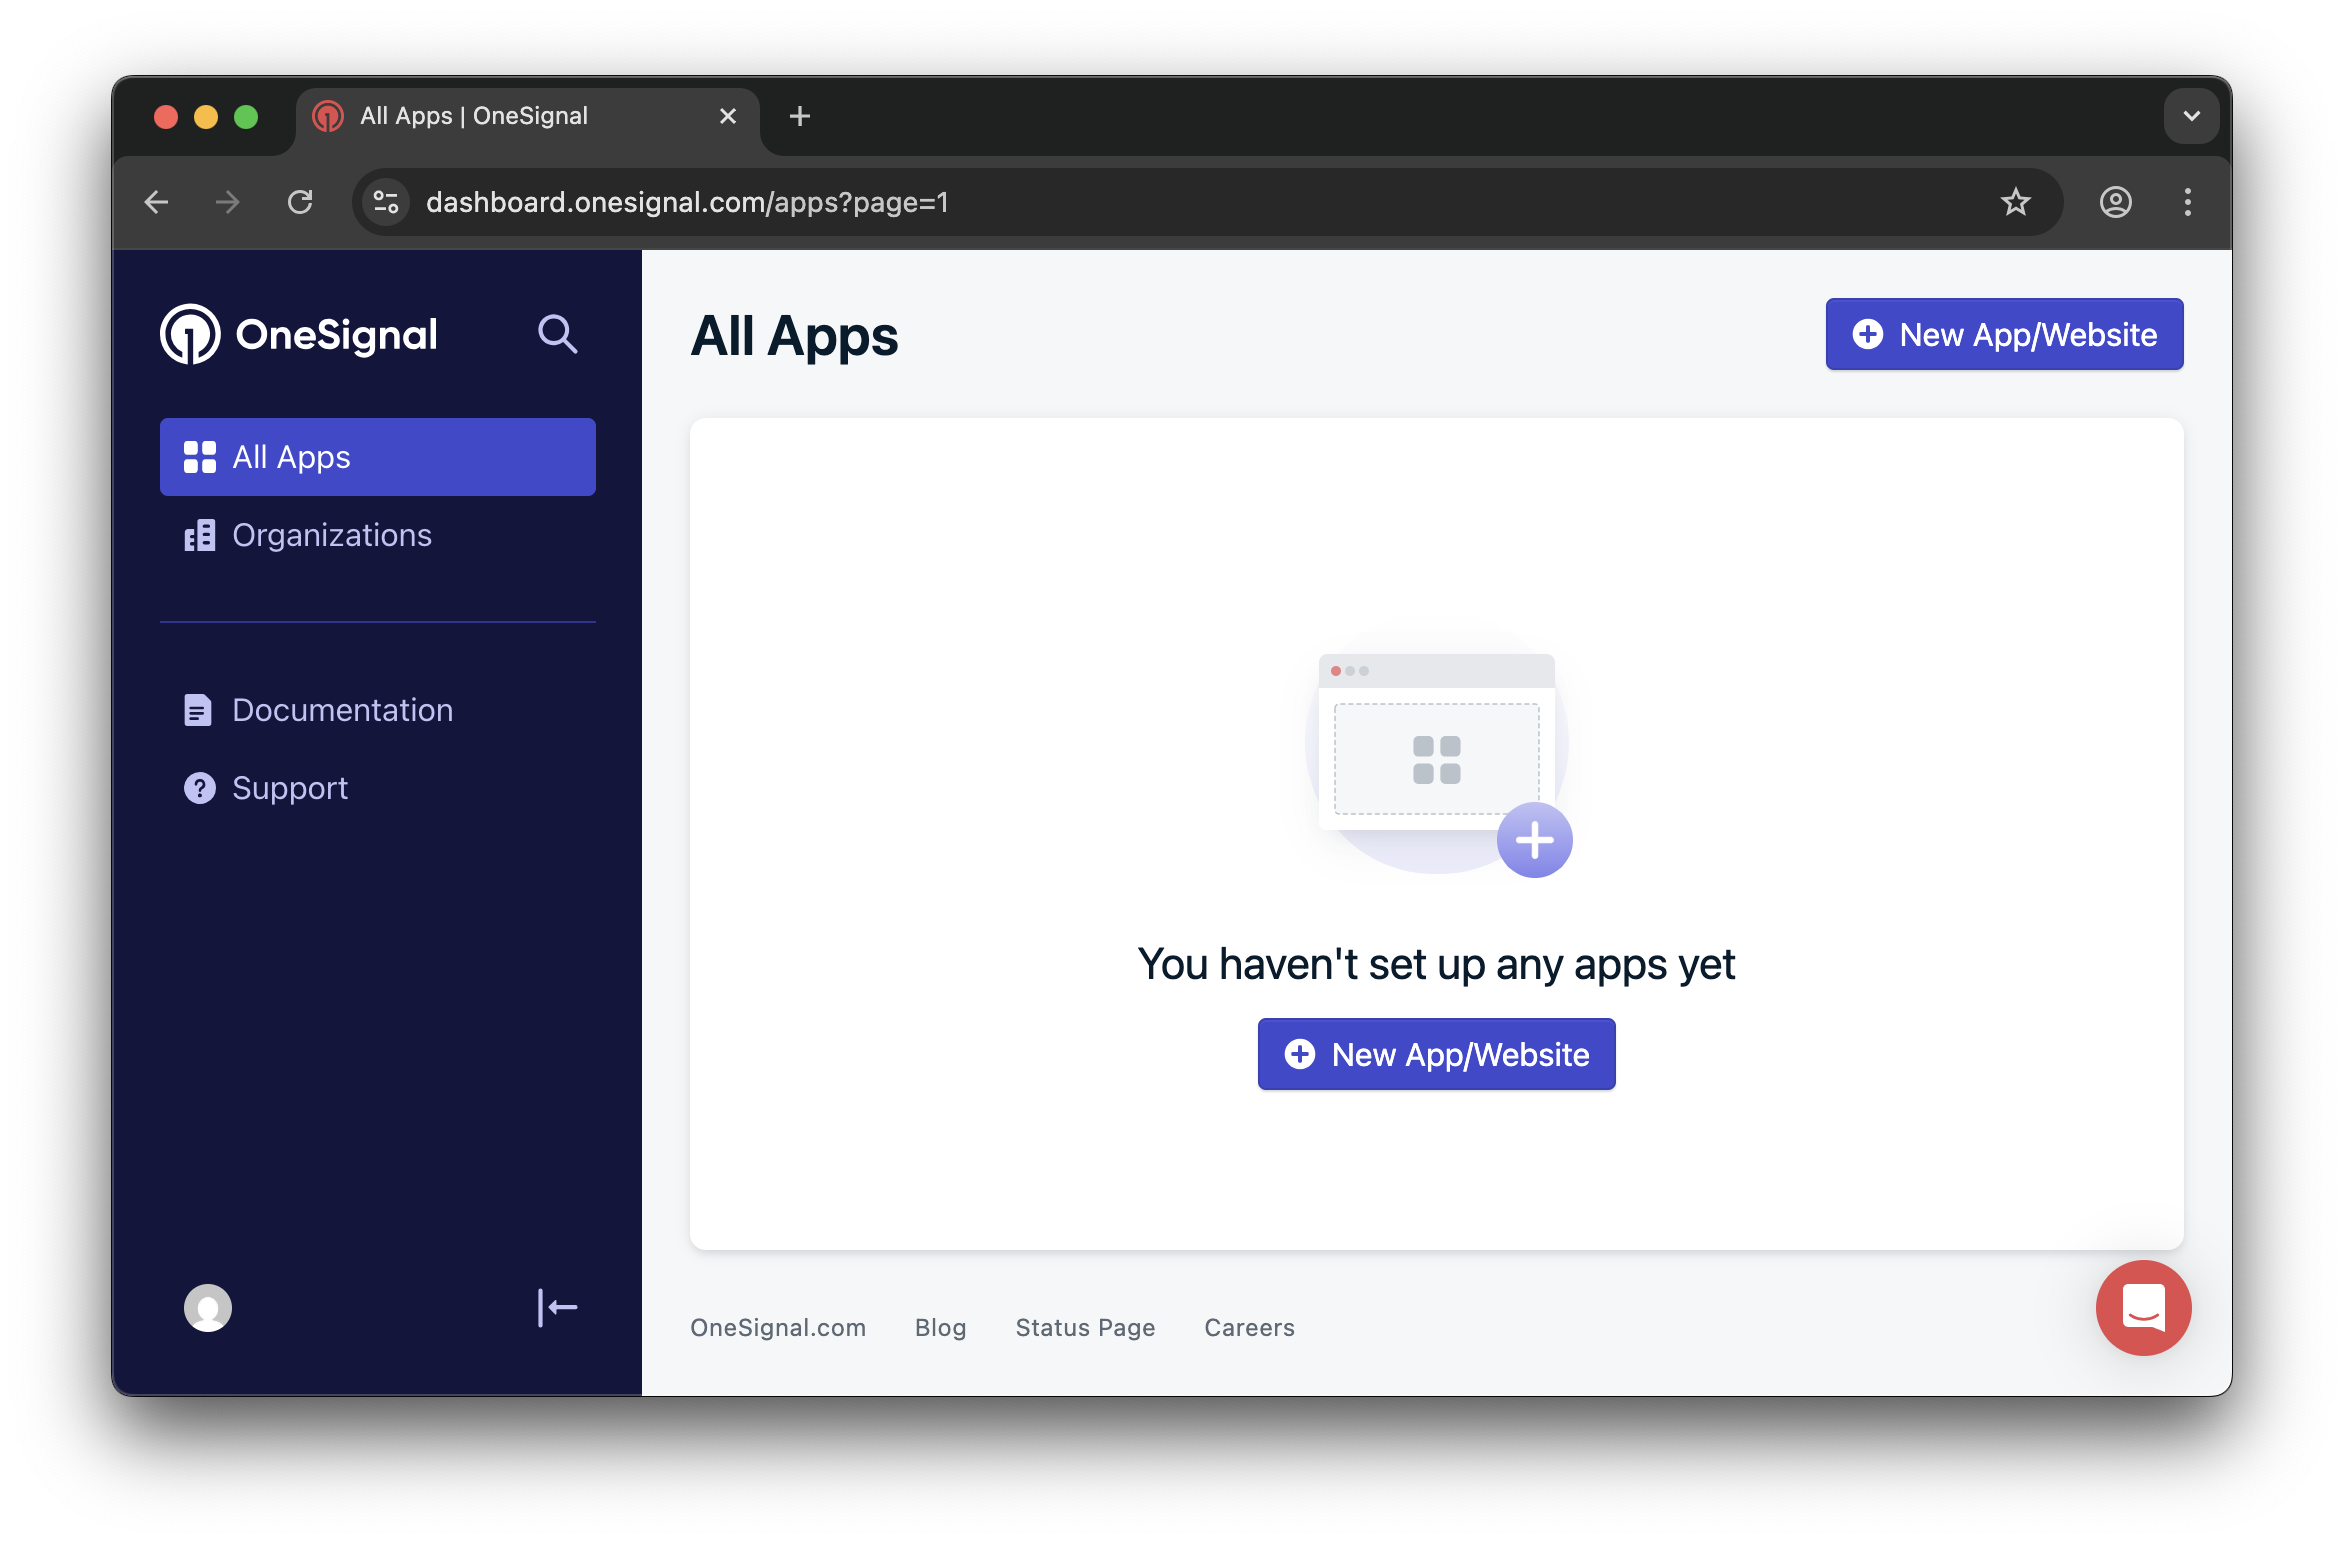
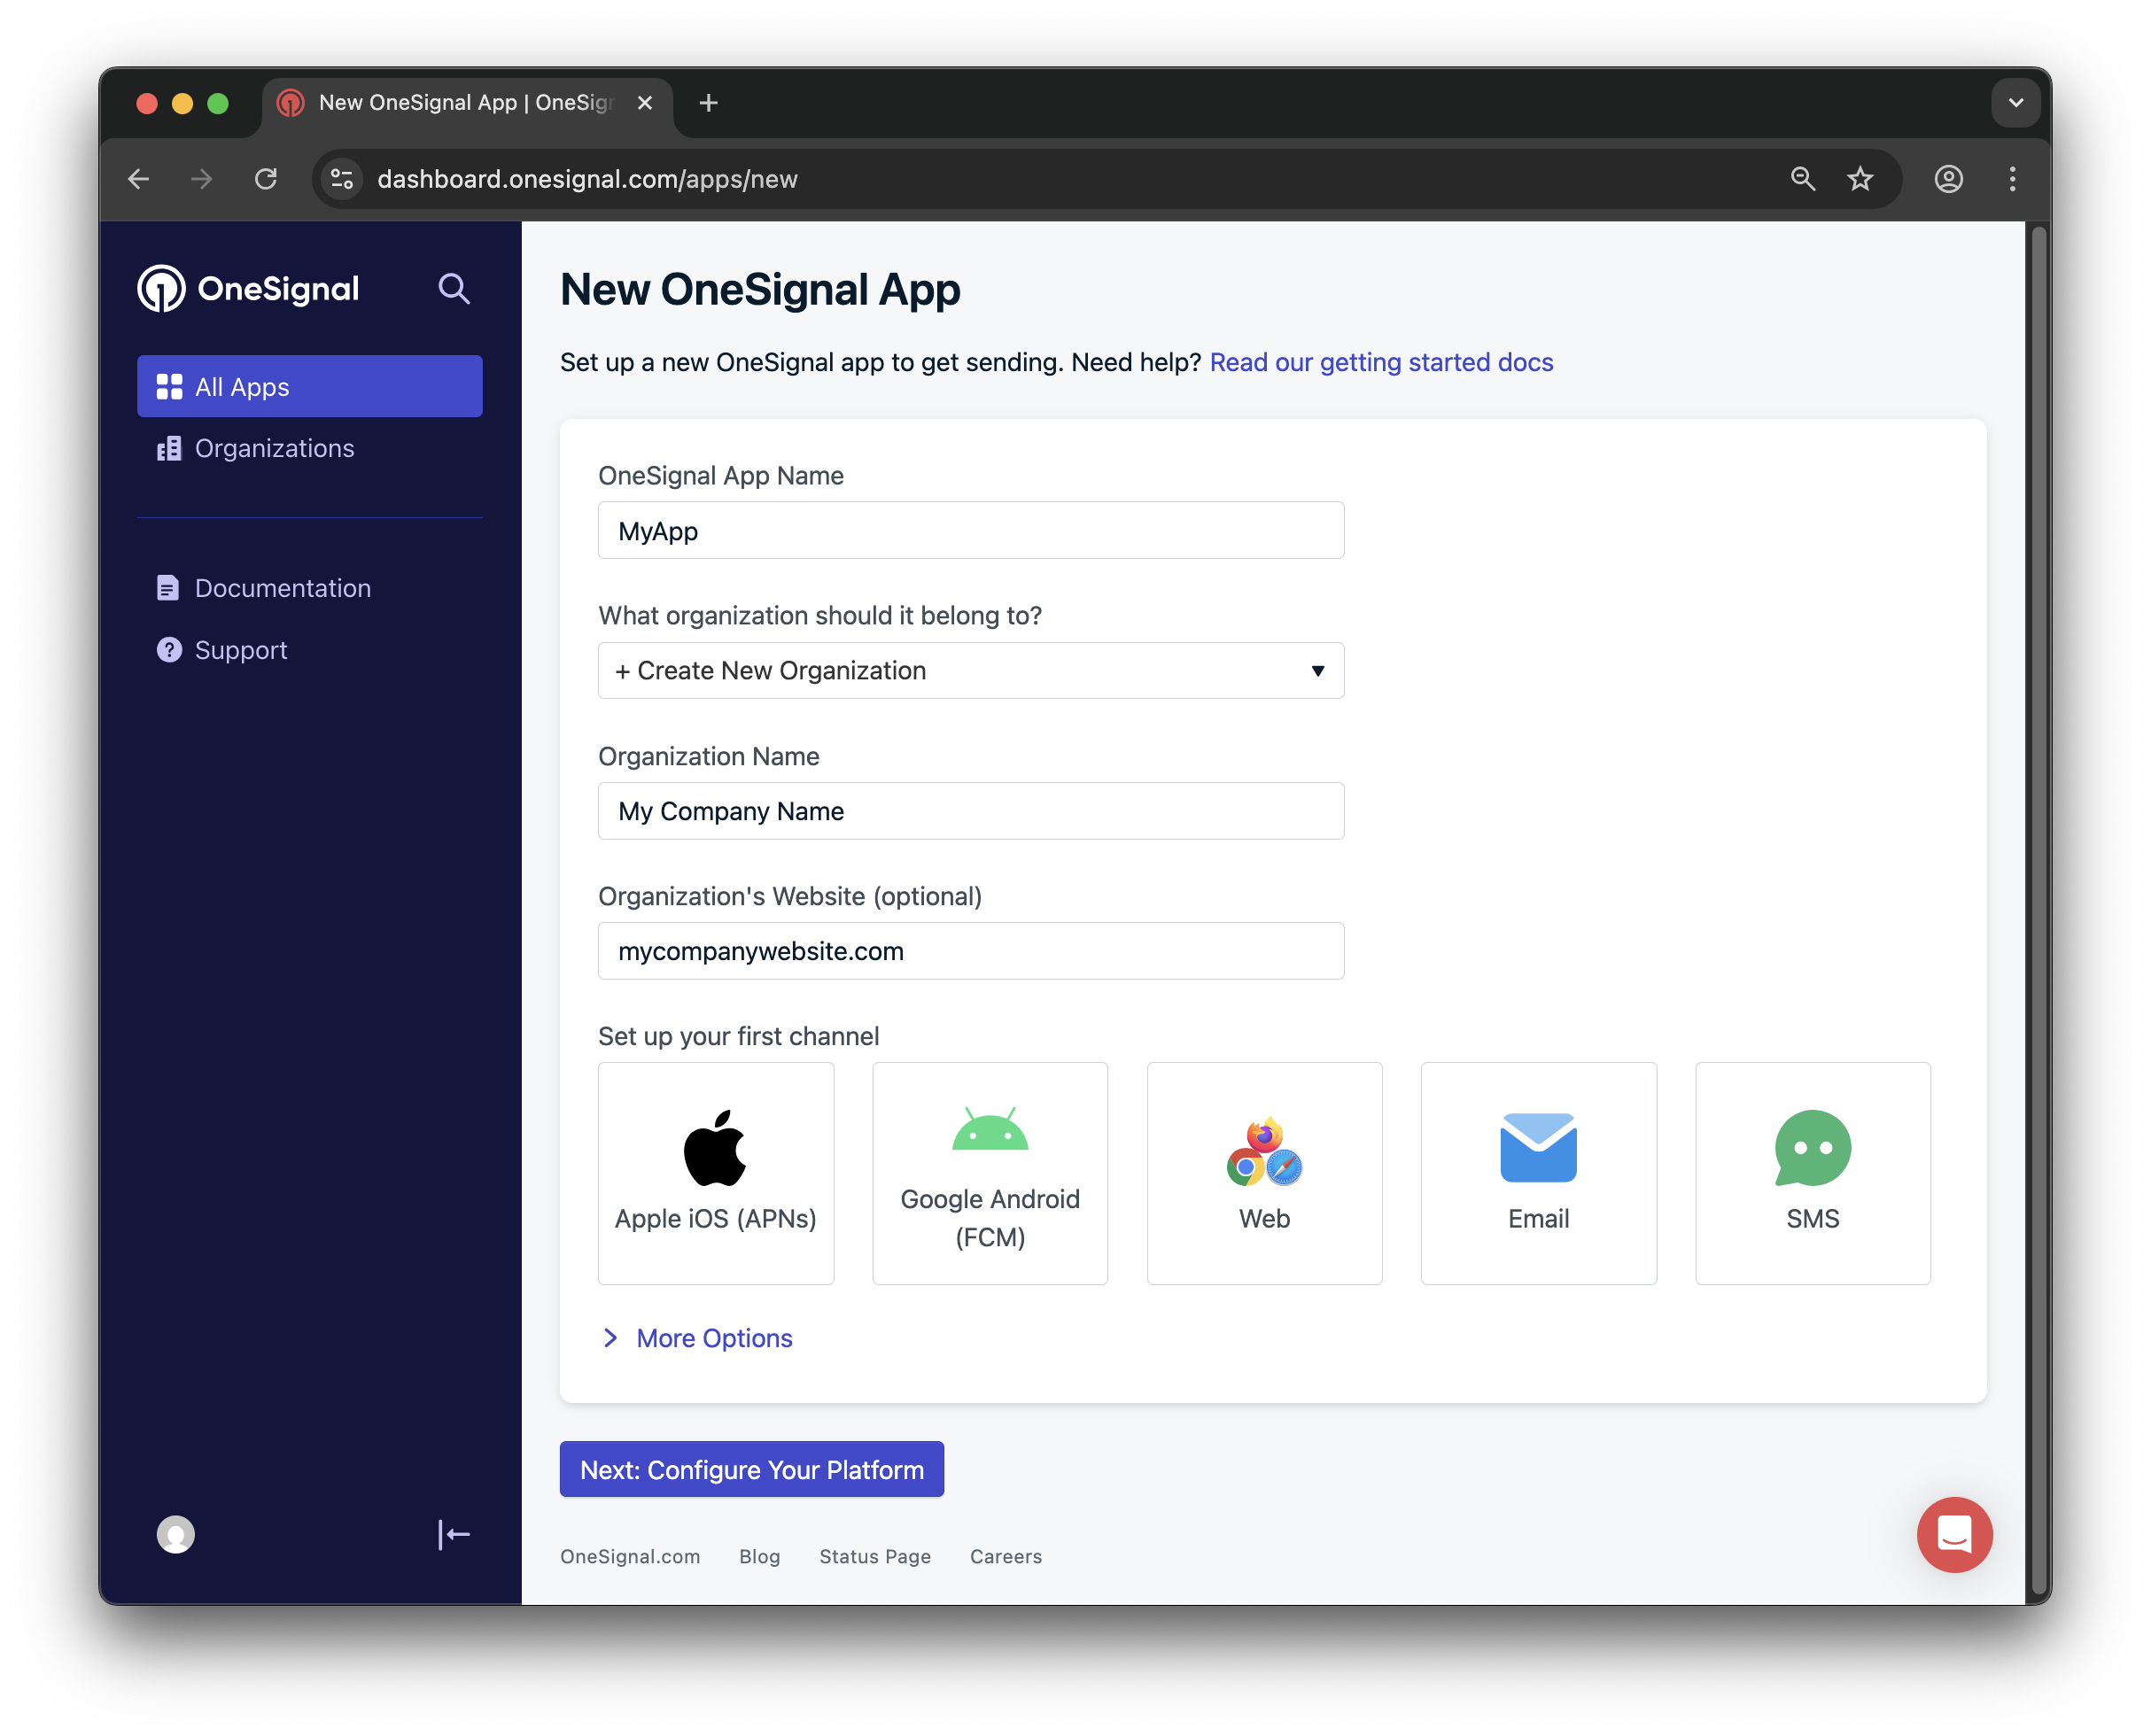
Create or select your app
- To add platforms to an existing app, go to Settings > Push & In-App in the OneSignal dashboard.
- To start fresh, click New App/Website and follow the prompts.
Set up and activate a platform
- Choose a clear and recognizable name for your app and organization.
- Select the platform(s) you want to configure (iOS, Android, etc.).
- Click Next: Configure Your Platform.
Configure platform credentials
- Android: Set up Firebase Credentials
- iOS: p8 Token (Recommended) or p12 Certificate
- Amazon: Generate API Key
- Huawei: Authorize OneSignal
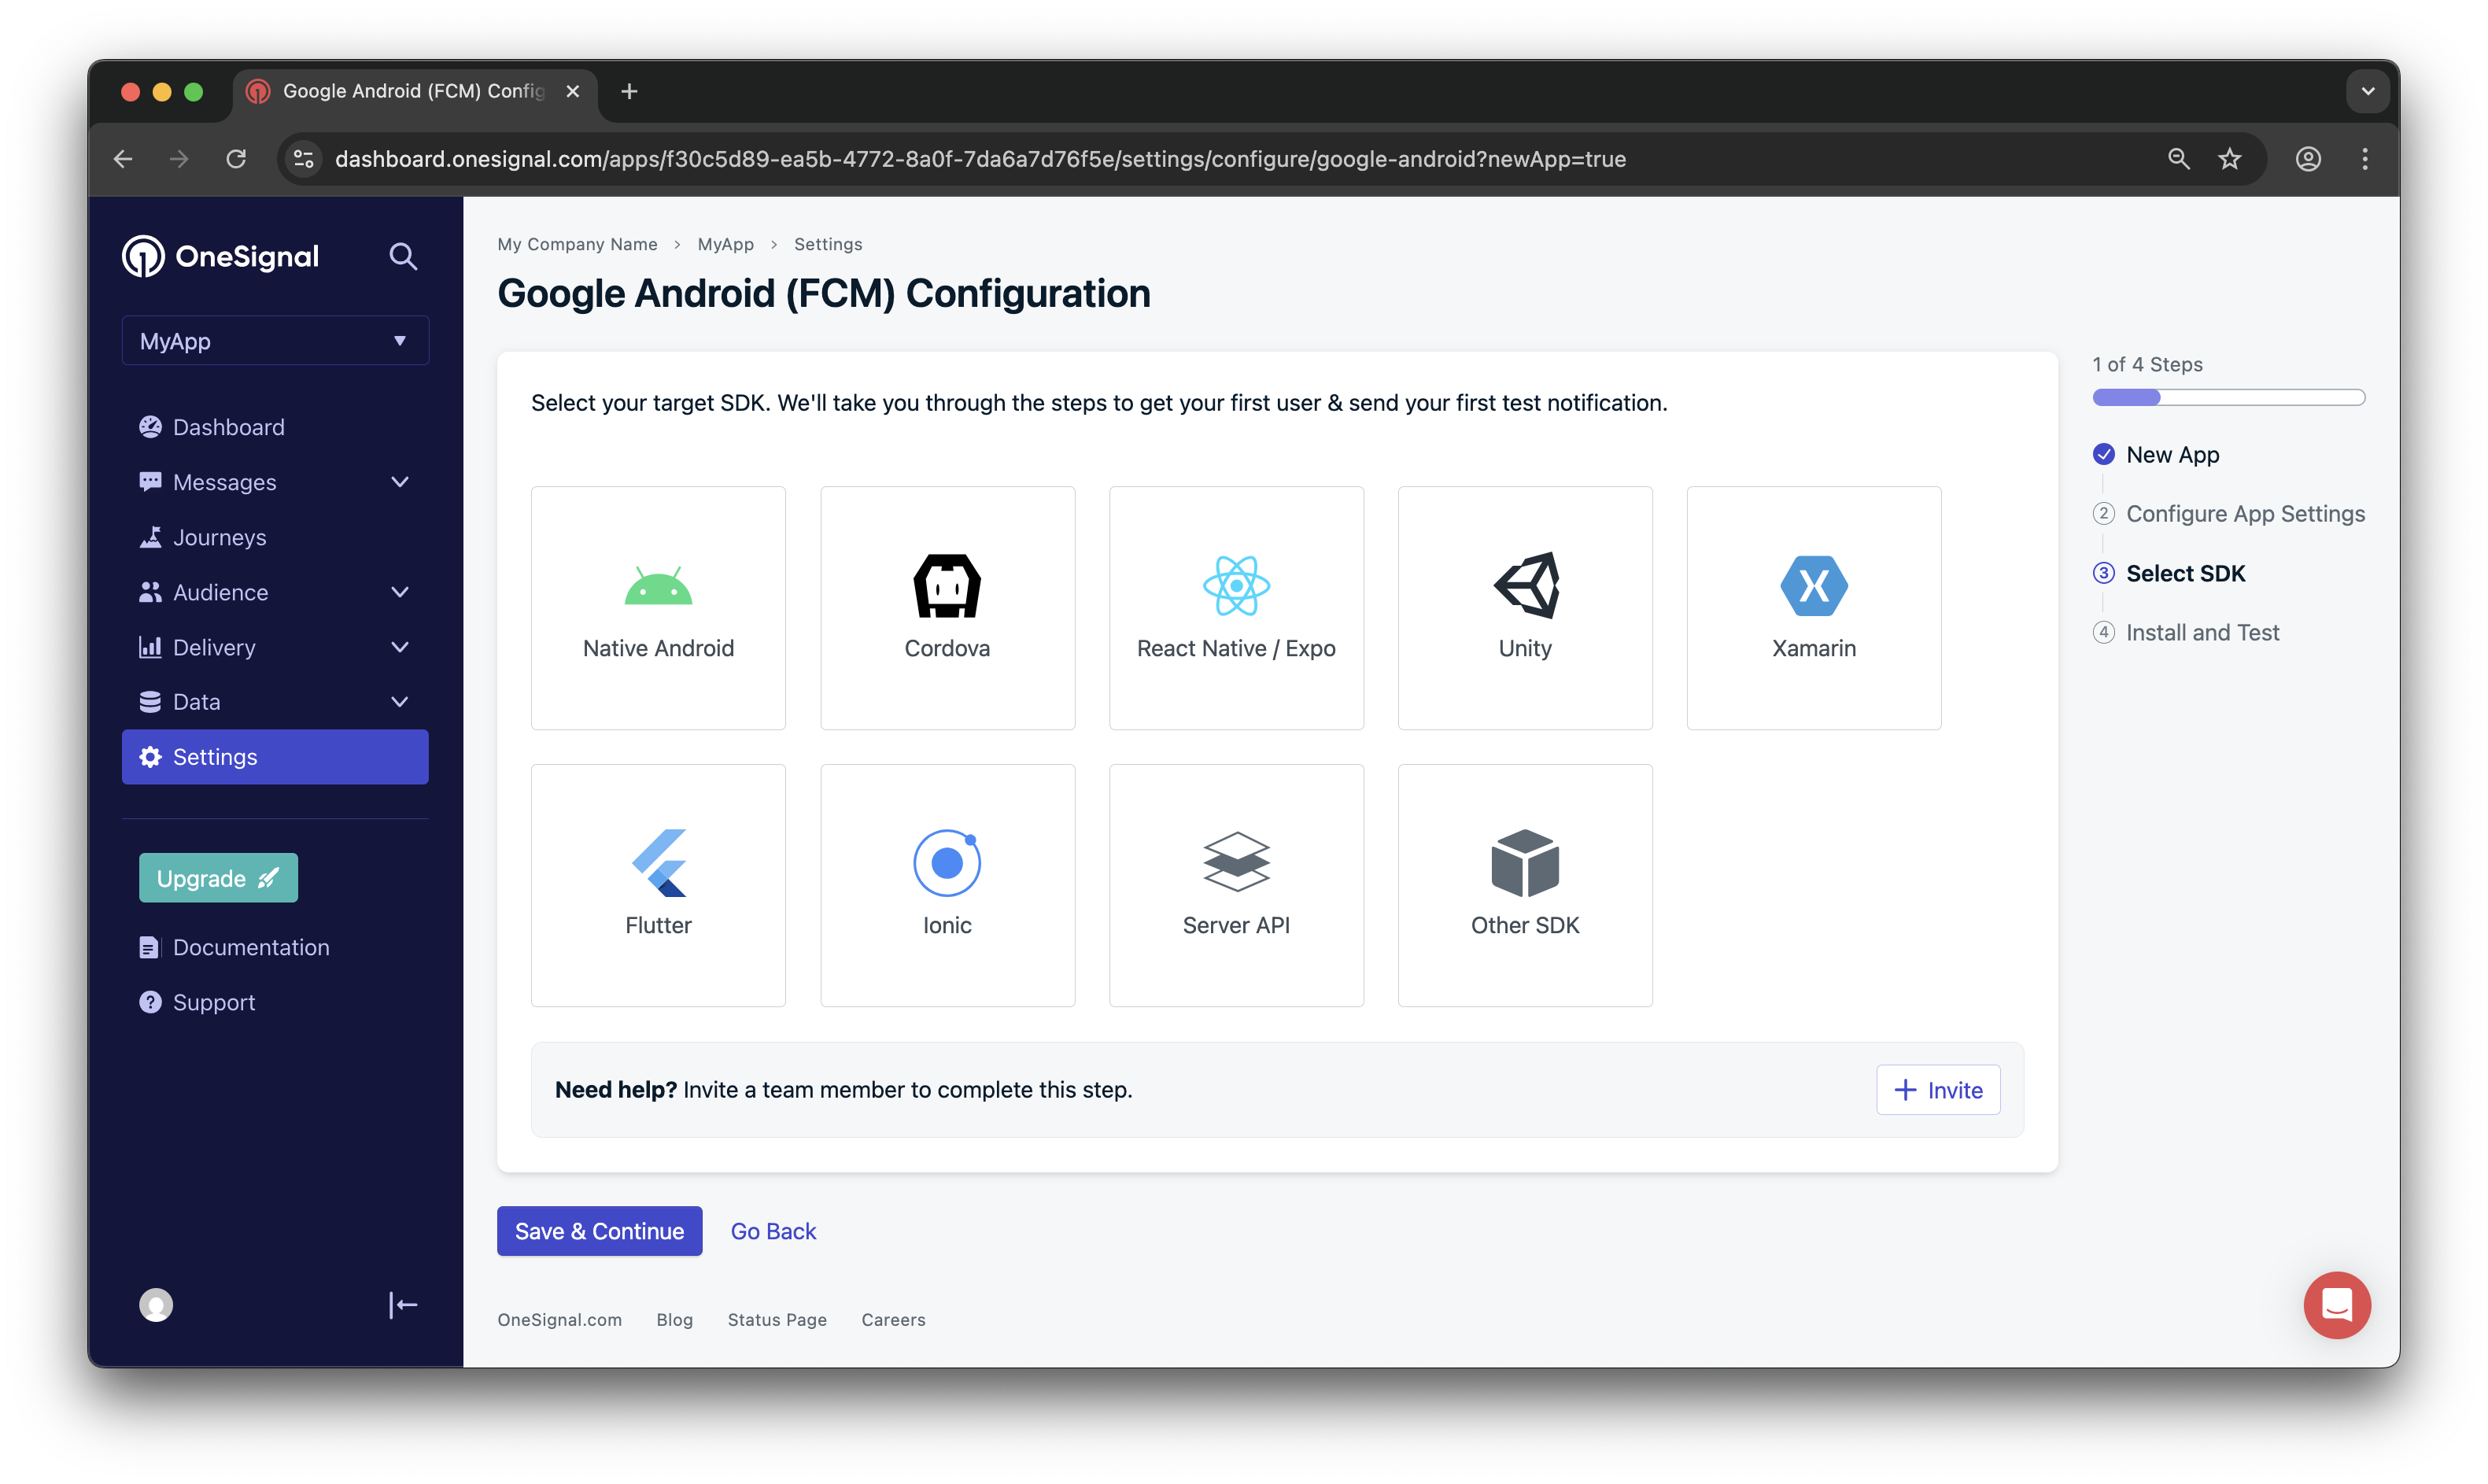
Choose target SDK
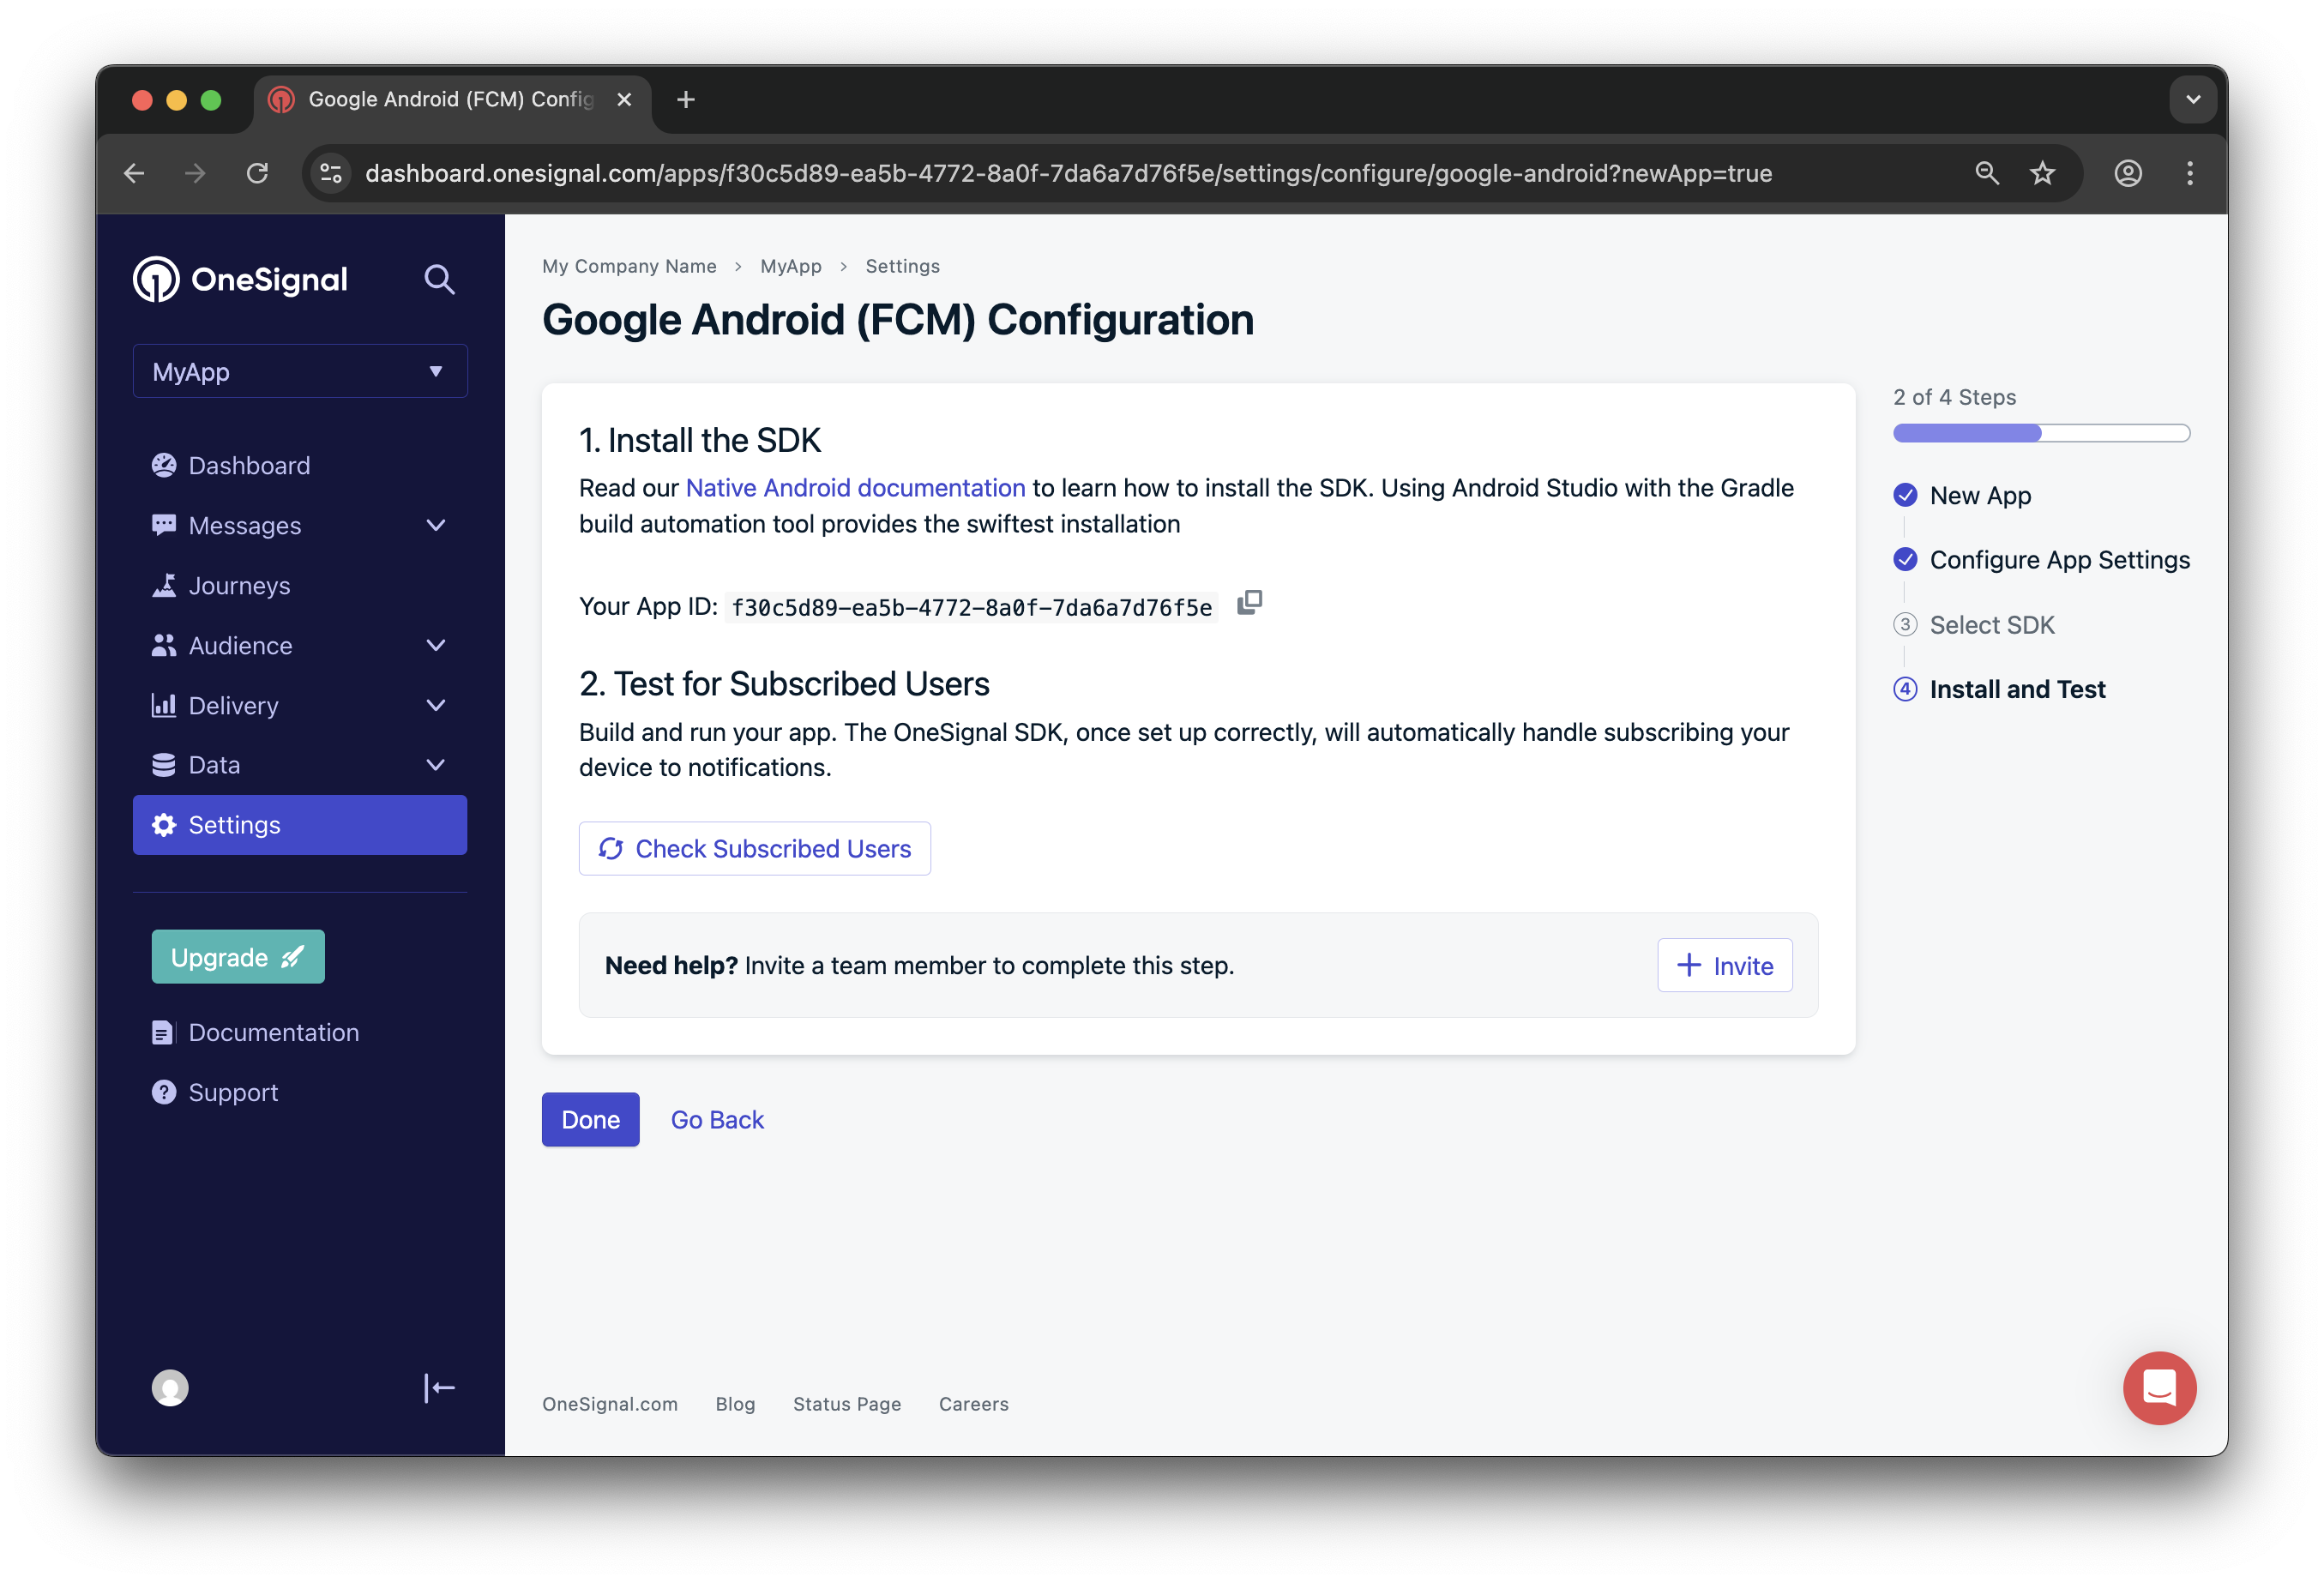
Install SDK and save your App ID
Configuración del SDK
1. Agregar SDK
Instala el plugin Expo de OneSignal usando la CLI de Expo.react-native-onesignal a tu proyecto.
2. Configurar el plugin
Abre tuapp.json (o app.config.js). Debes incluir las siguientes configuraciones.
Configuraciones requeridas
"bundleIdentifier": El identificador de paquete de tu app que coincide con la autenticación p8 o p12 que estás usando en tu app de OneSignal."infoPlist": Requiere que la claveUIBackgroundModesesté establecida en["remote-notification"]."entitlements"- Requiere que la clave
aps-environmentesté establecida en"development"para pruebas y"production"para compilaciones Testflight y App Store. - Requiere que la clave
com.apple.security.application-groupsesté establecida en["group.${ios.bundleIdentifier}.onesignal"].
- Requiere que la clave
"android": Requiere que la clavepackageesté establecida en el nombre de paquete de tu app."plugins": El arraypluginsde tu app. Se requiere agregar el plugin[onesignal-expo-plugin]al inicio del array de plugins. También requiere que la clavemodeesté establecida en"development"para pruebas y"production"para compilaciones Testflight y App Store.
Props adicionales del plugin.
Props adicionales del plugin.
| Prop | Requerido | Descripción |
|---|---|---|
mode | ✅ | Configura el derecho entorno APNs. Usa "development" para pruebas y cambia a "production" para compilaciones TestFlight y App Store. |
devTeam | ❌ | Tu Apple Team ID, encontrado al ejecutar expo credentials:manager (ej., "91SW8A37CR"). |
iPhoneDeploymentTarget | ❌ | Establece la versión mínima de iOS que tu app soporta. Debe coincidir con el valor en tu Podfile (ej., "15.0"). |
smallIcons | ❌ | Array de rutas a iconos pequeños de notificación Android (blanco, transparente, 96x96px). Estas imágenes se escalarán automáticamente. Ejemplo: ["./assets/ic_stat_onesignal_default.png"] |
largeIcons | ❌ | Array de rutas a iconos grandes de notificación Android (blanco, transparente, 256x256px). Ejemplo: ["./assets/ic_onesignal_large_icon_default.png"] |
smallIconAccentColor | ❌ | Valor de color hexadecimal usado como color de acento del icono de notificación Android. Ejemplo: "#FF0000" |
iosNSEFilePath | ❌ | Ruta a tu archivo personalizado de Notification Service Extension de iOS en Objective-C. Ejemplo: "./assets/NotificationService.m" |
3. Inicializar SDK
Dependiendo de tu estructura Expo (entrada de App tradicional o Expo Router), inicializa OneSignal siguiendo estas opciones.- Entrada de App Tradicional
- Expo Router
App.tsx o App.js inicializa OneSignal con los métodos proporcionados.Reemplaza YOUR_APP_ID con tu ID de App de OneSignal que se encuentra en tu dashboard de OneSignal Settings > Keys & IDs.Android setup
Make sure your OneSignal app is configured for the Android platform using your Firebase credentials. Set up your notification icons to match your app’s branding. If this step is skipped, a default bell icon will display for your push notifications. Build for Android At this point, you should be able to build and run your app on a physical Android device or emulator without issues.- Continue with the iOS setup, if applicable.
- Or jump ahead to Testing the OneSignal SDK integration.
Configuración iOS
Asegúrate de que tu app de OneSignal esté configurada para la plataforma iOS usando ya sea el Token p8 (Recomendado) o Certificado p12.Compilar para iOS
Ahora deberías poder compilar y ejecutar tu app en un dispositivo iOS real o simulador iOS (16.2+).Errores comunes de compilación iOS
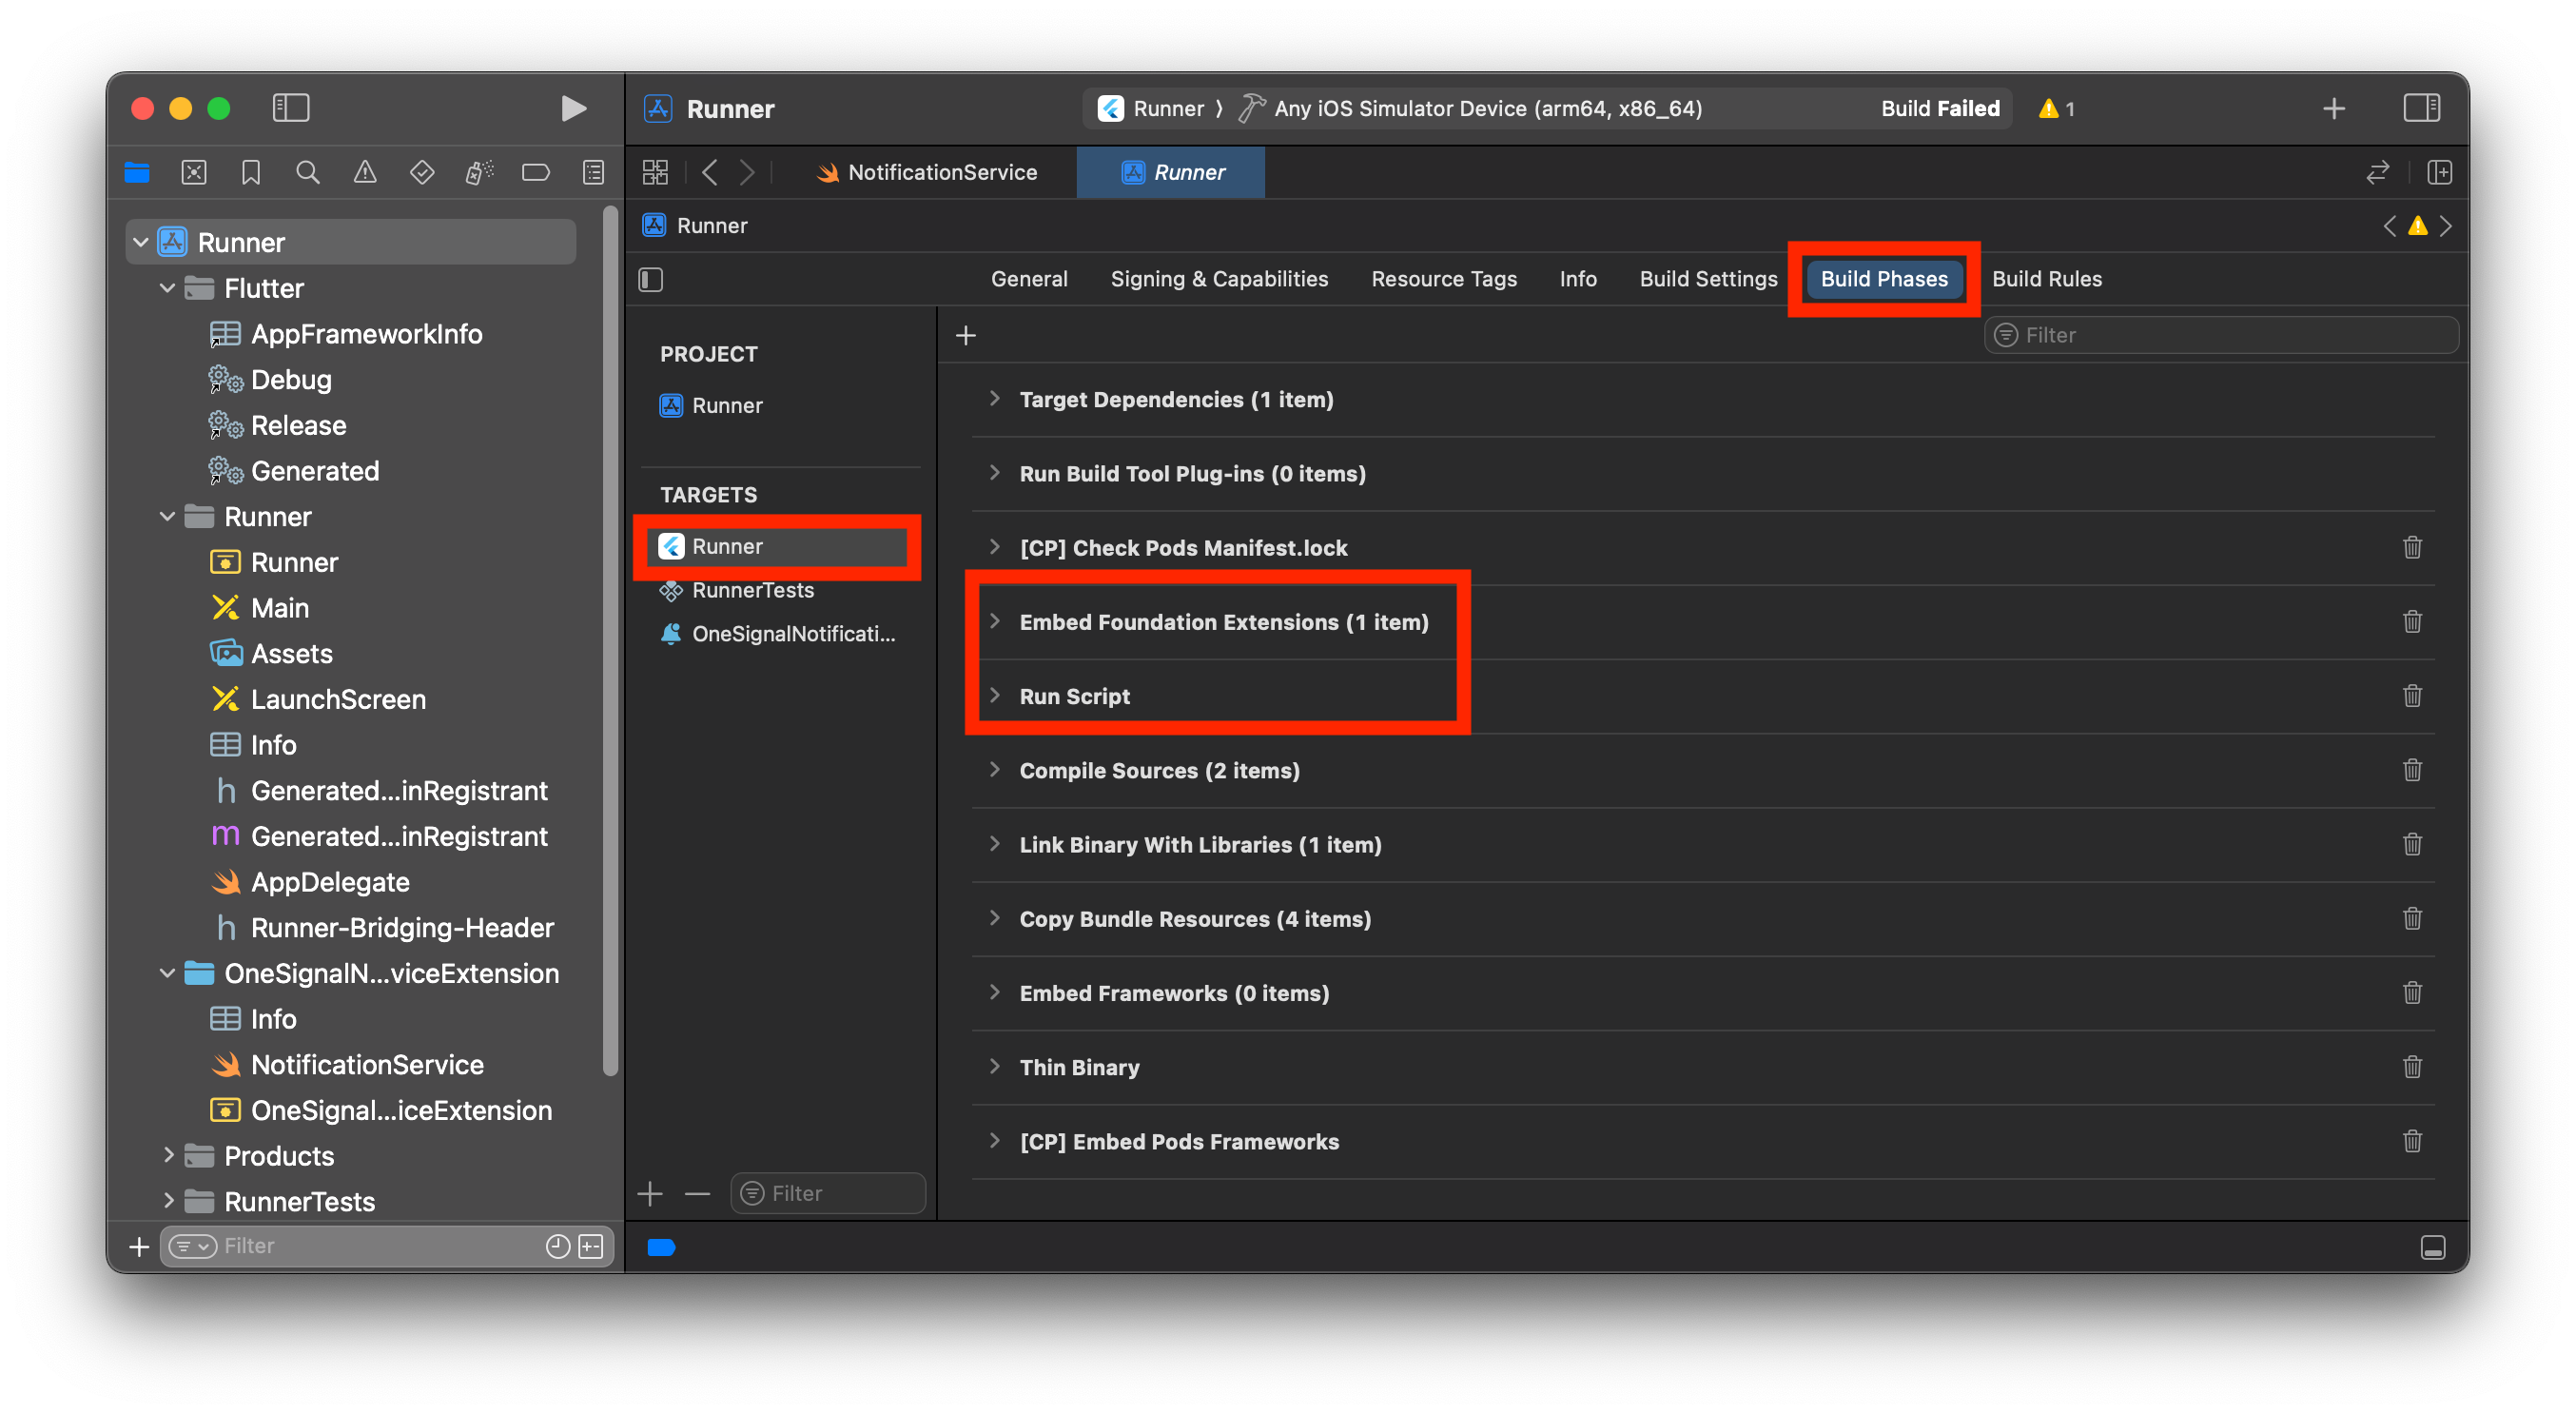
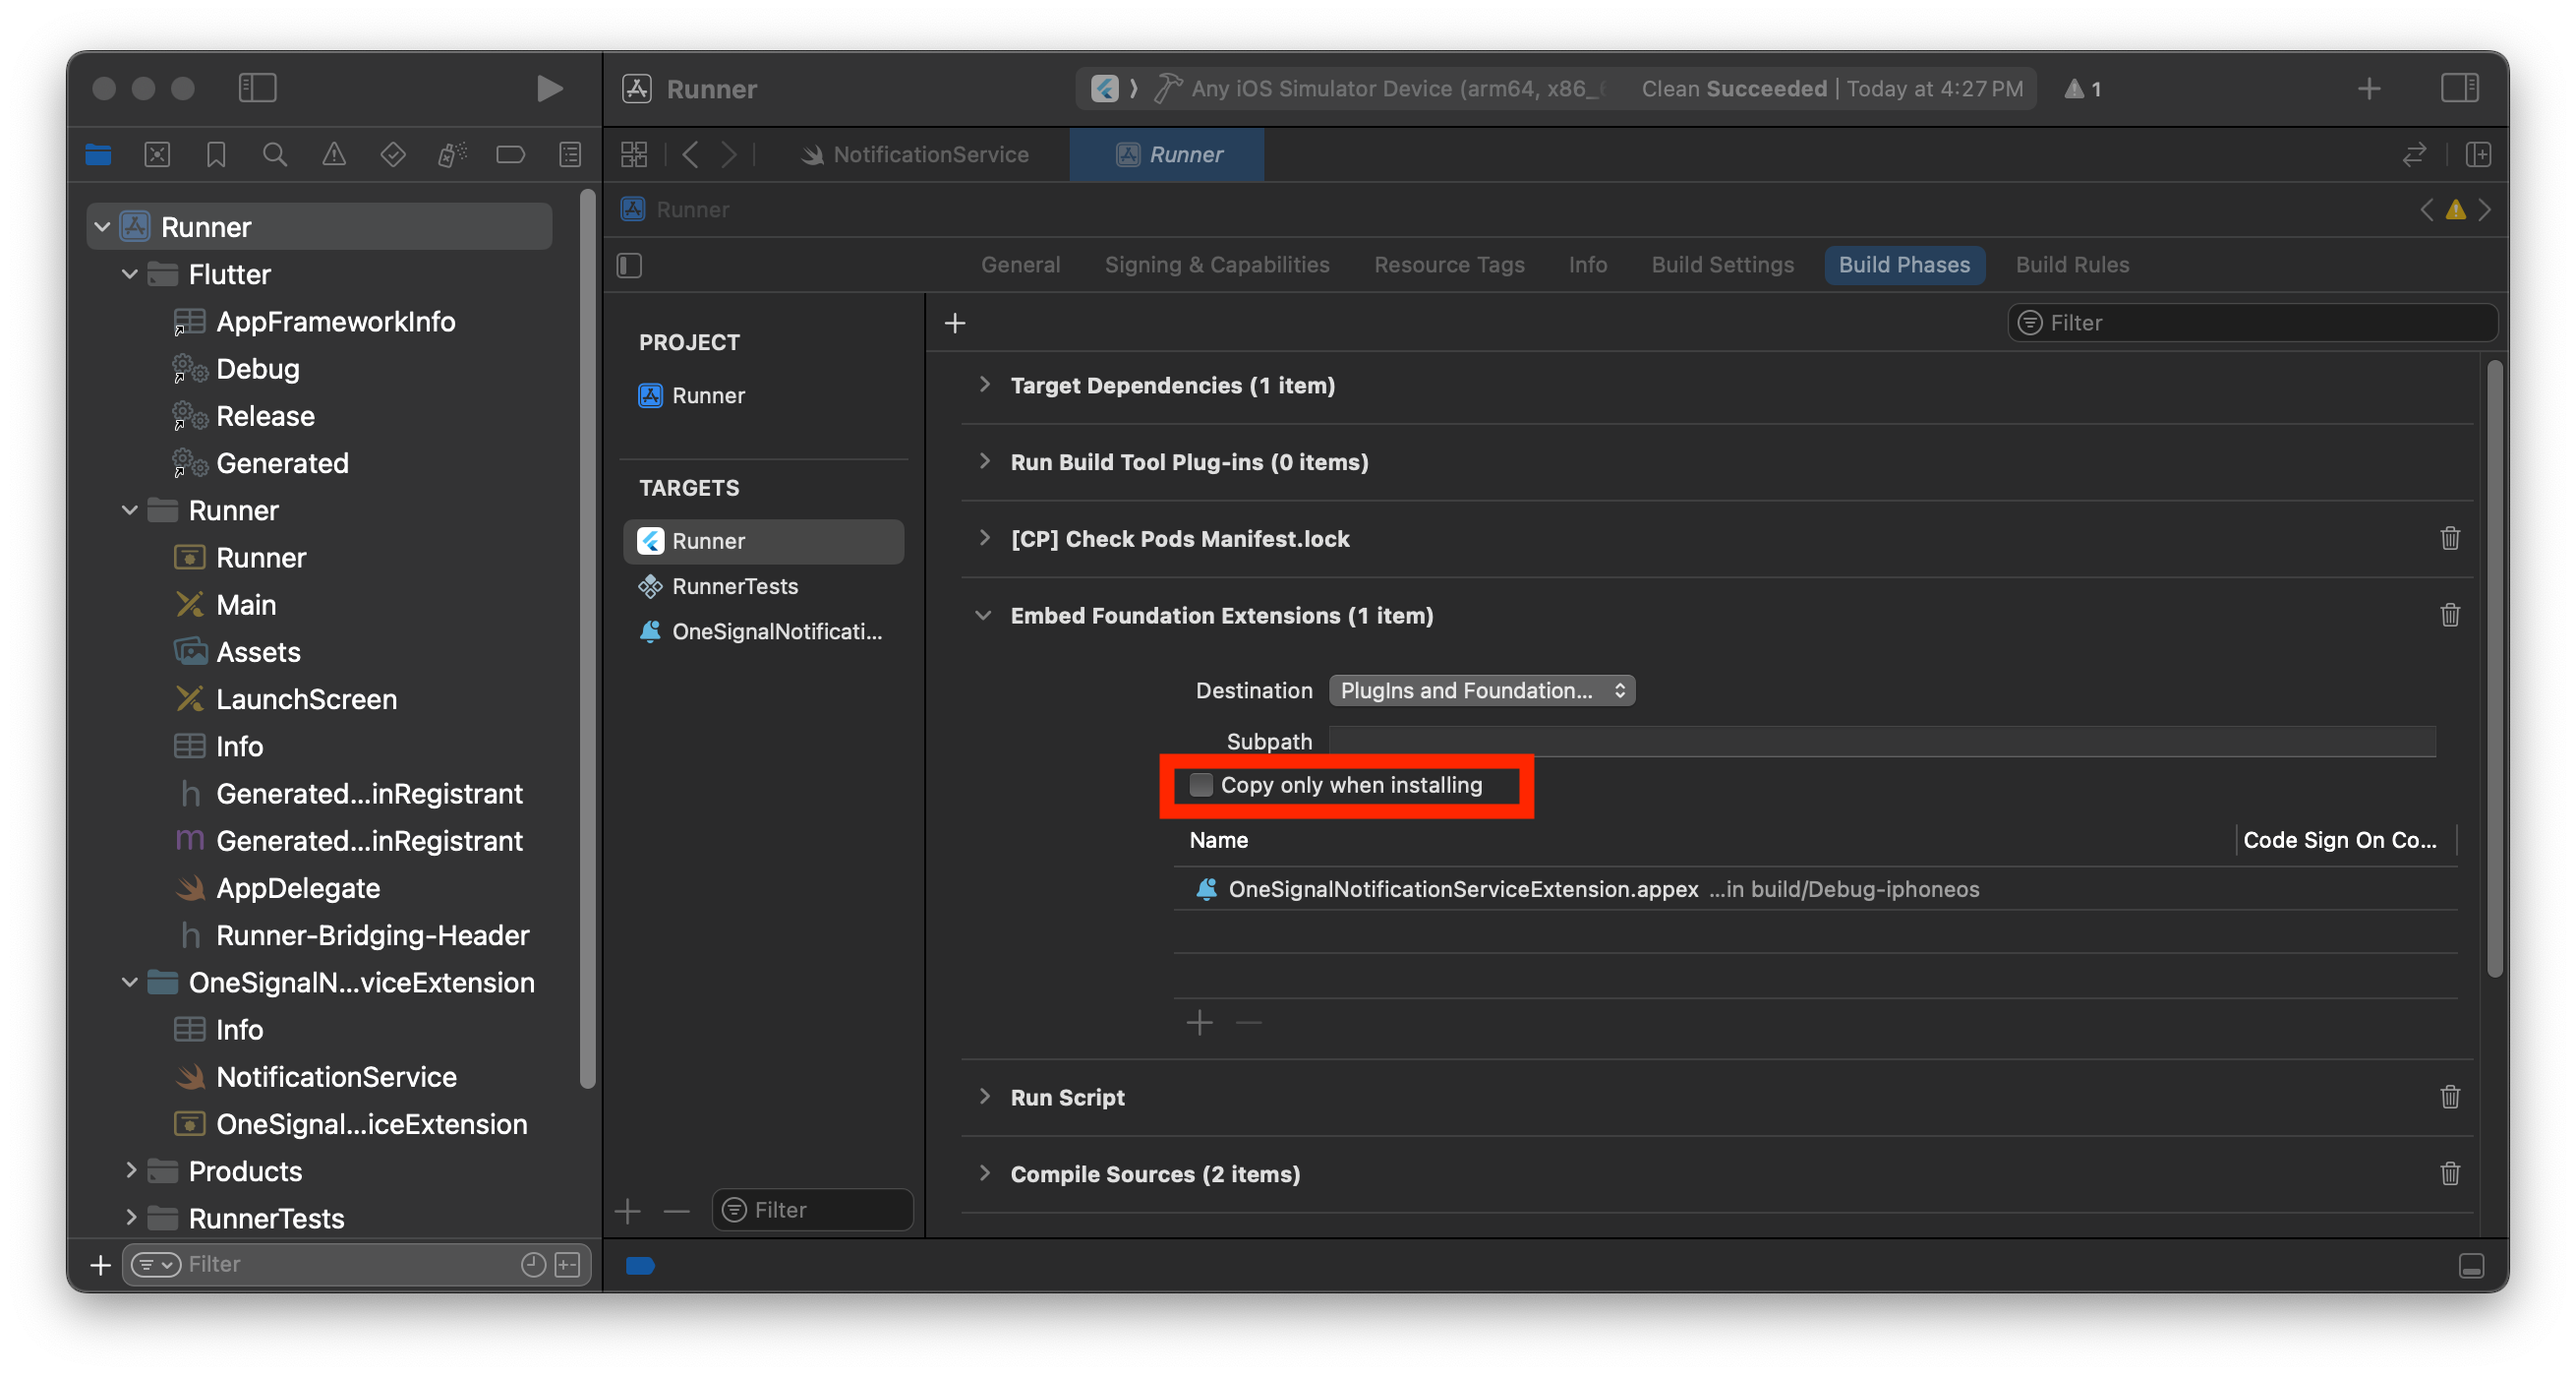
Cycle Inside... building could produce unreliable results.
Cycle Inside... building could produce unreliable results.
- Abre tu carpeta
.xcworkspaceen Xcode y navega a tu objetivo de app > Build Phases. - Deberías tener una fase llamada “Embed Foundation Extensions” o “Embed App Extensions”.
- Arrastra y mueve esta fase de compilación a arriba de “Run Script”.
- Compila y ejecuta tu app. El error debería estar resuelto.
Error PBXGroup
Error PBXGroup
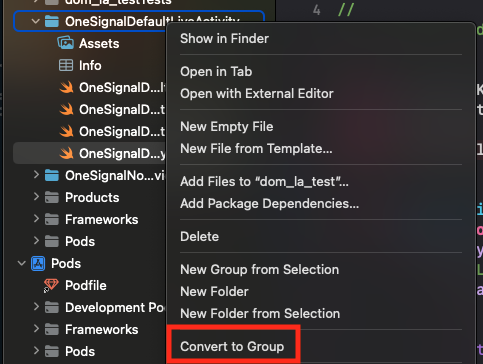
PBXGroup intentó inicializar un objeto con ISA desconocido PBXFileSystemSynchronizedRootGroup desde atributos: {"isa"=>"...", "exceptions"=>["//", "..."], "explicitFileTypes"=>{}, "explicitFolders"=>[], "path"=>"OneSignalNotificationServiceExtension", "sourceTree"=>"<group>"}- Encuentra la carpeta listada bajo “path” en el error
- En la barra lateral del proyecto Xcode, haz clic derecho en la carpeta
- Selecciona Convert to Group

Testing the OneSignal SDK integration
This guide helps you verify that your OneSignal SDK integration is working correctly by testing push notifications, subscription registration, and in-app messaging.Check mobile subscriptions
Launch your app on a test device.
requestPermission method during initialization.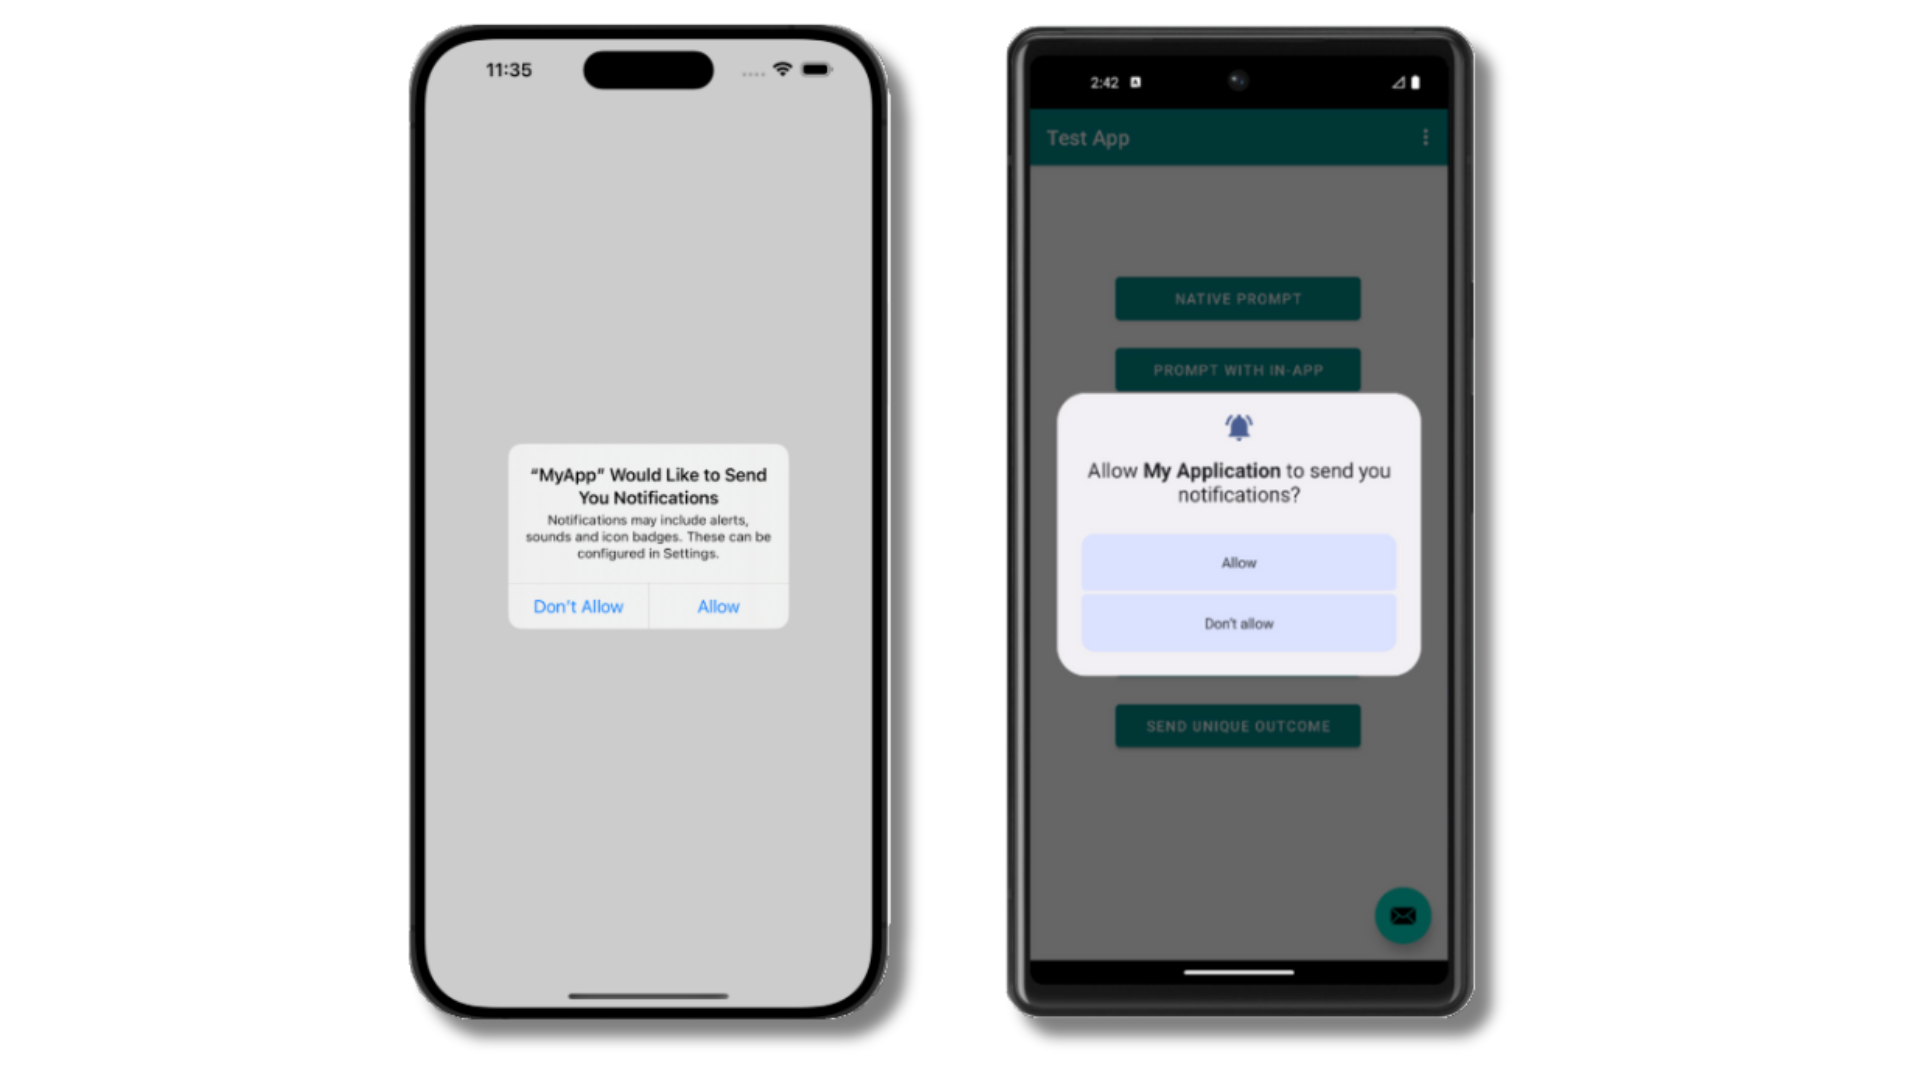
Check your OneSignal dashboard
- Go to Audience > Subscriptions.
- You should see a new entry with the status “Never Subscribed”.
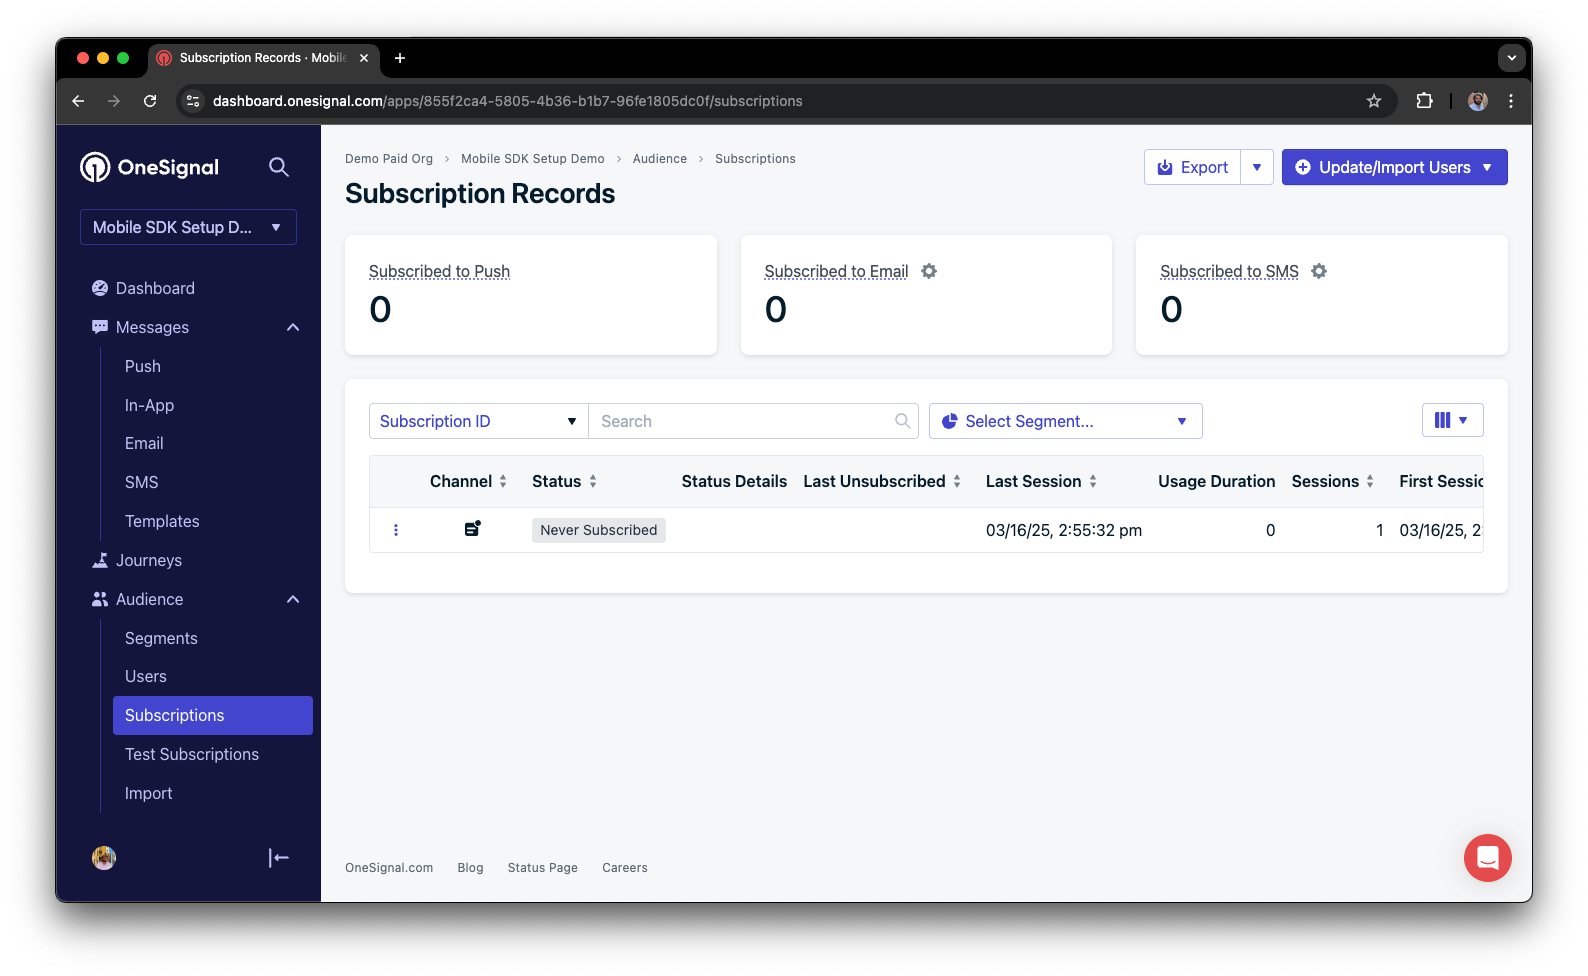
Refresh the OneSignal dashboard Subscription's page.
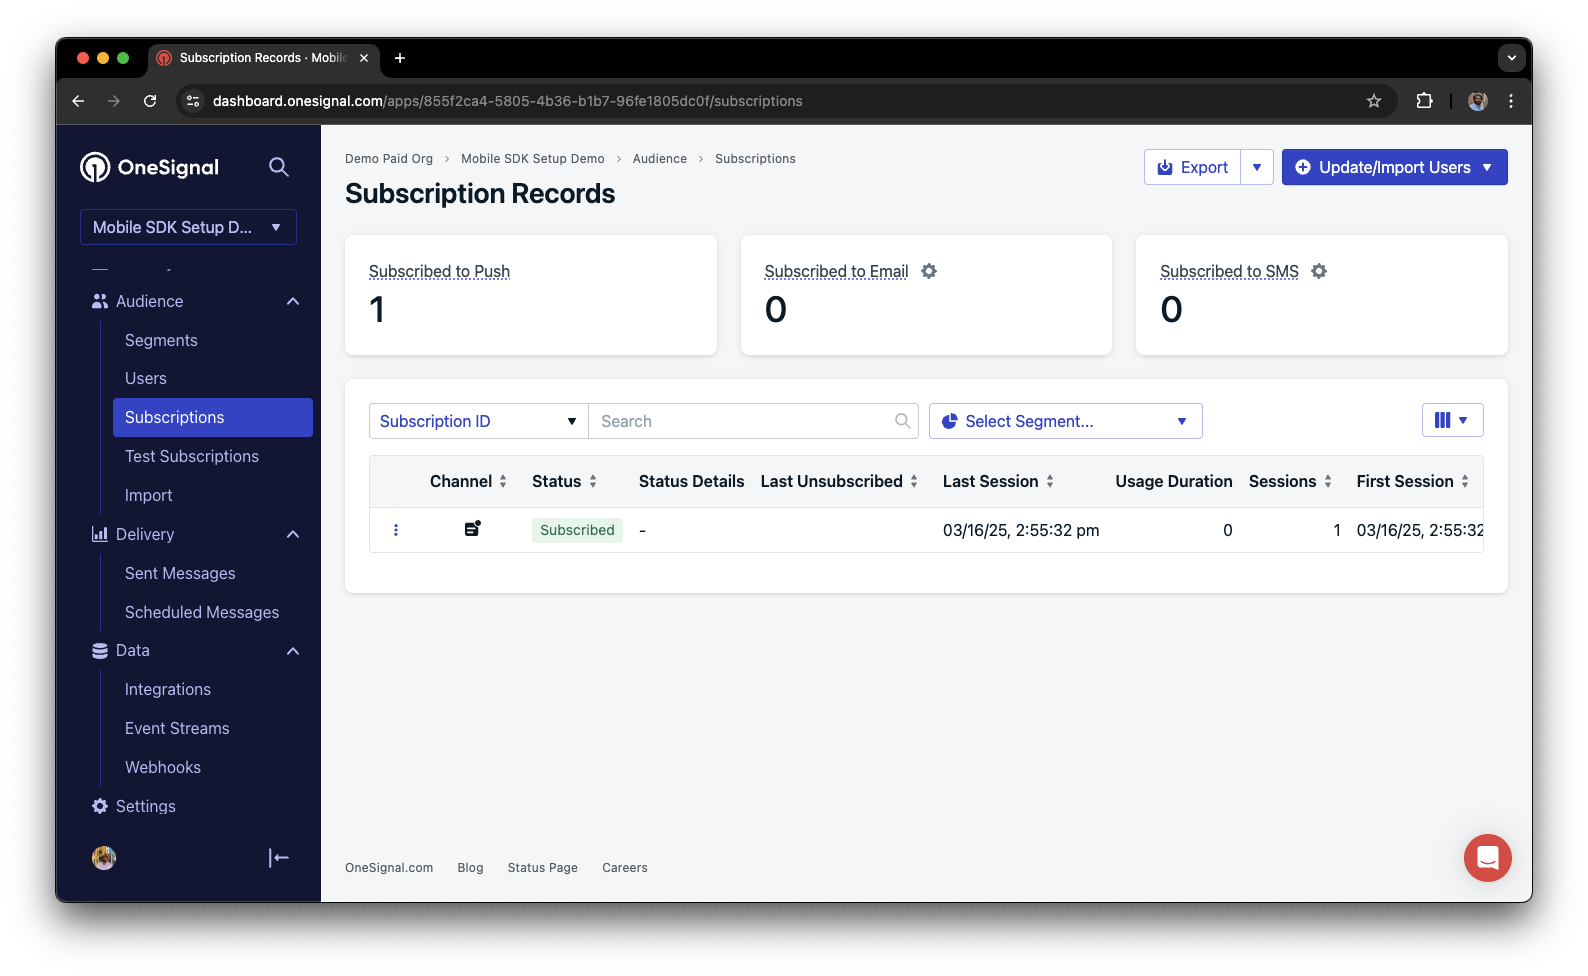
Set up test subscriptions
Test subscriptions are helpful for testing a push notification before sending a message.Add to Test Subscriptions.
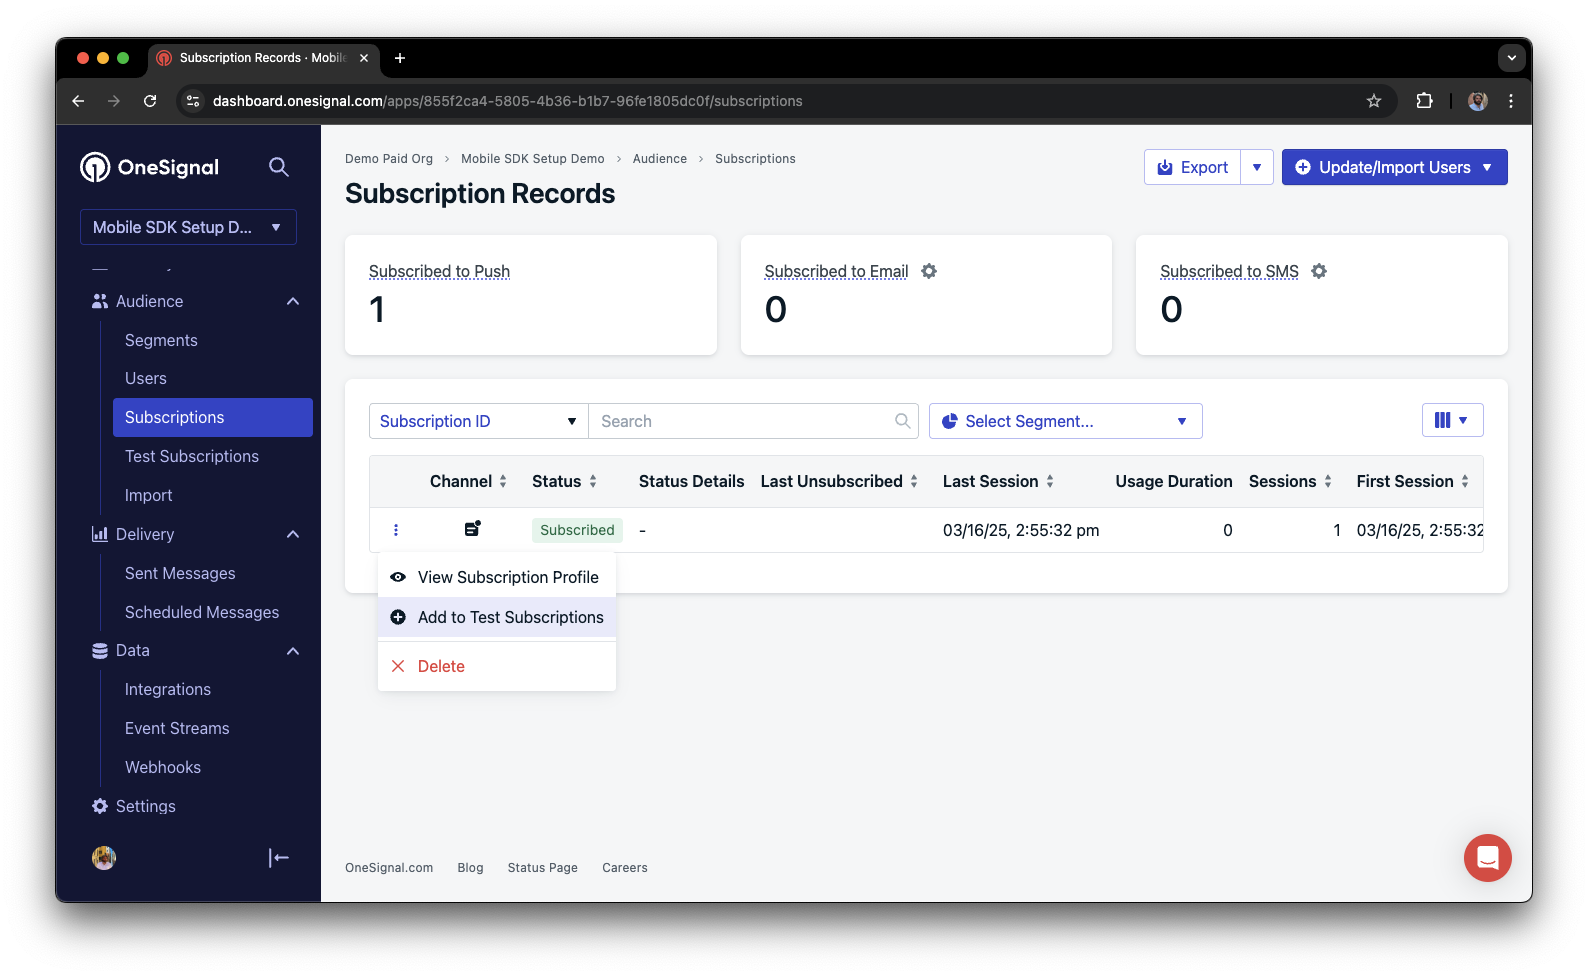
Name your subscription.
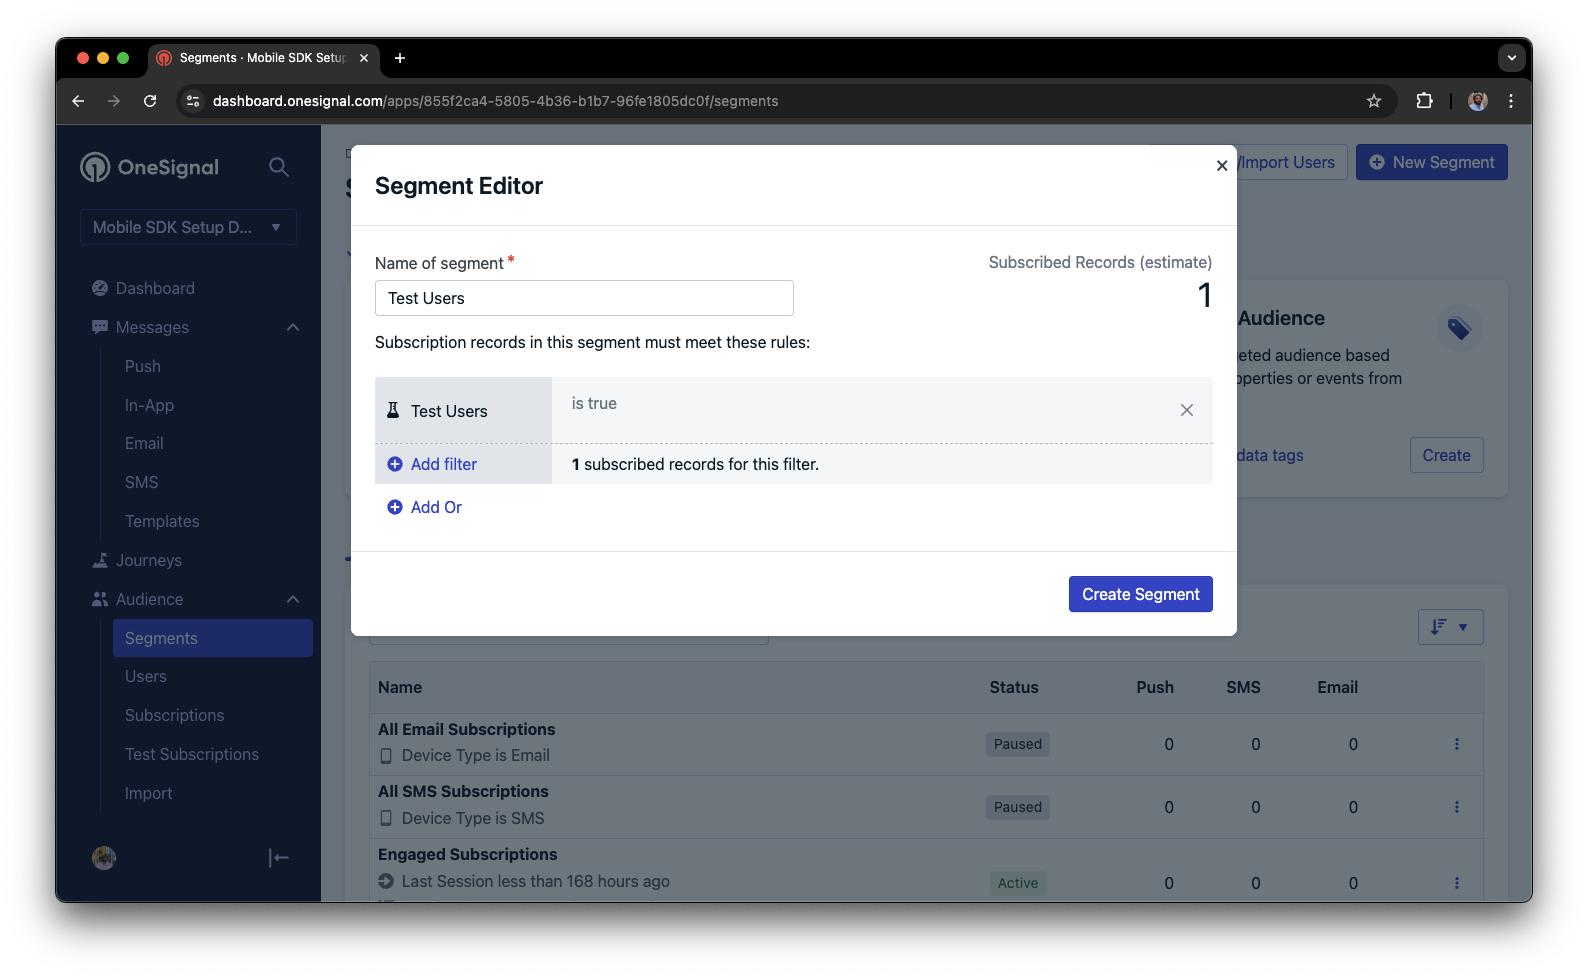
Name the segment.
Test Users (the name is important because it will be used later).Send test push via API
Get your App API Key and App ID.
Update the provided code.
YOUR_APP_API_KEY and YOUR_APP_ID in the code below with your actual keys. This code uses the Test Users segment we created earlier.Check images and confirmed delivery.
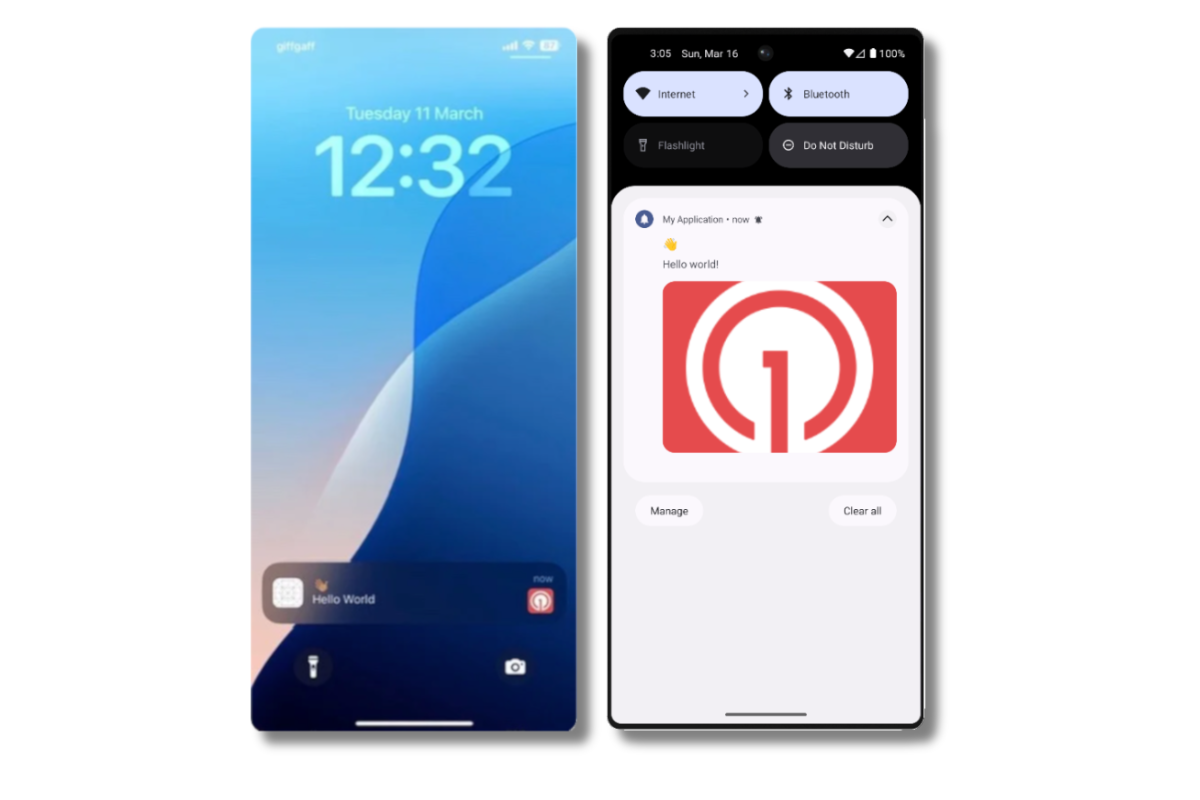
Check for confirmed delivery.
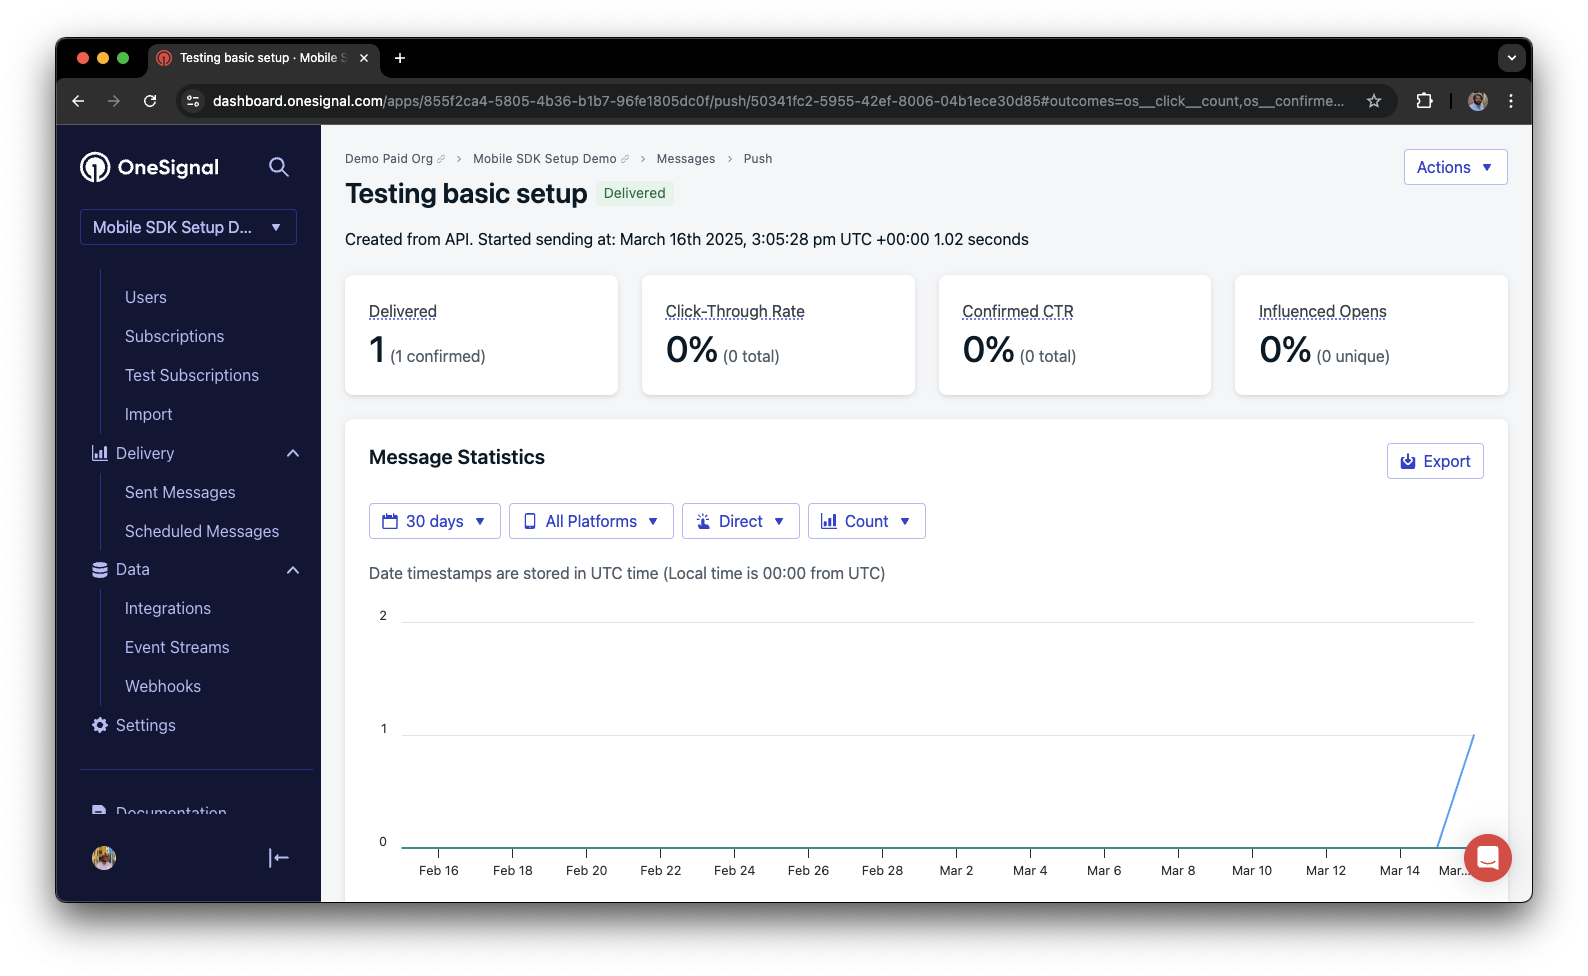
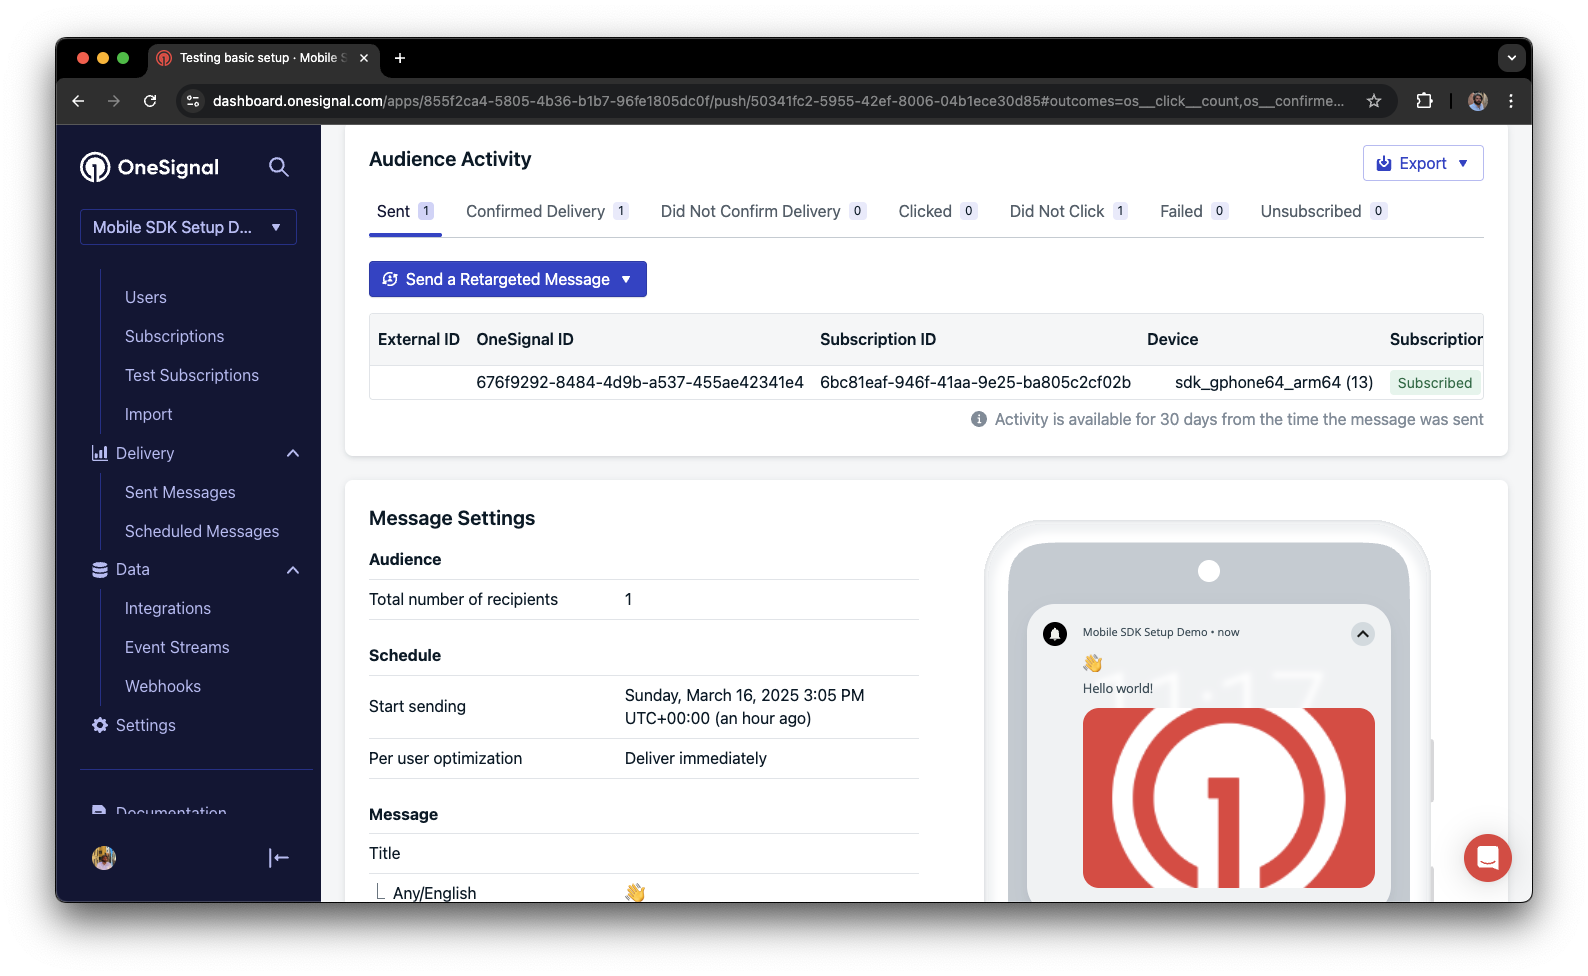
Send an in-app message
In-app messages let you communicate with users while they are using your app.Close or background your app on the device.
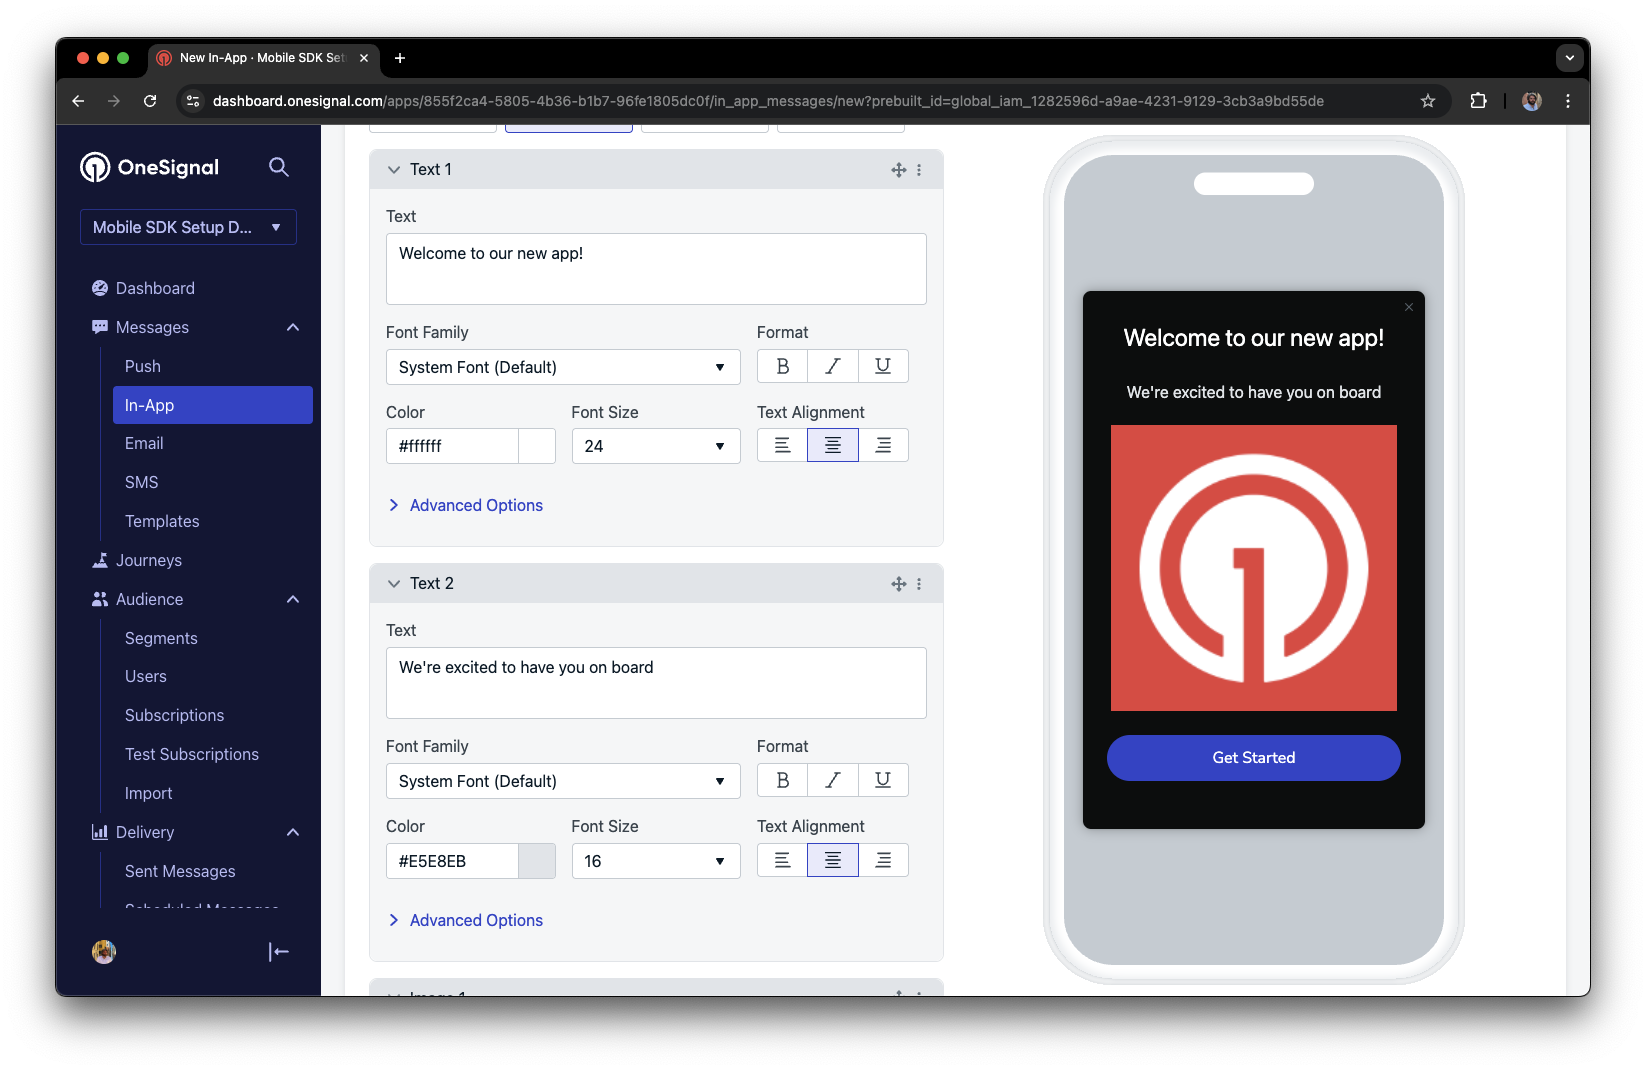
Create an in-app message.
- In your OneSignal dashboard, navigate to Messages > In-App > New In-App.
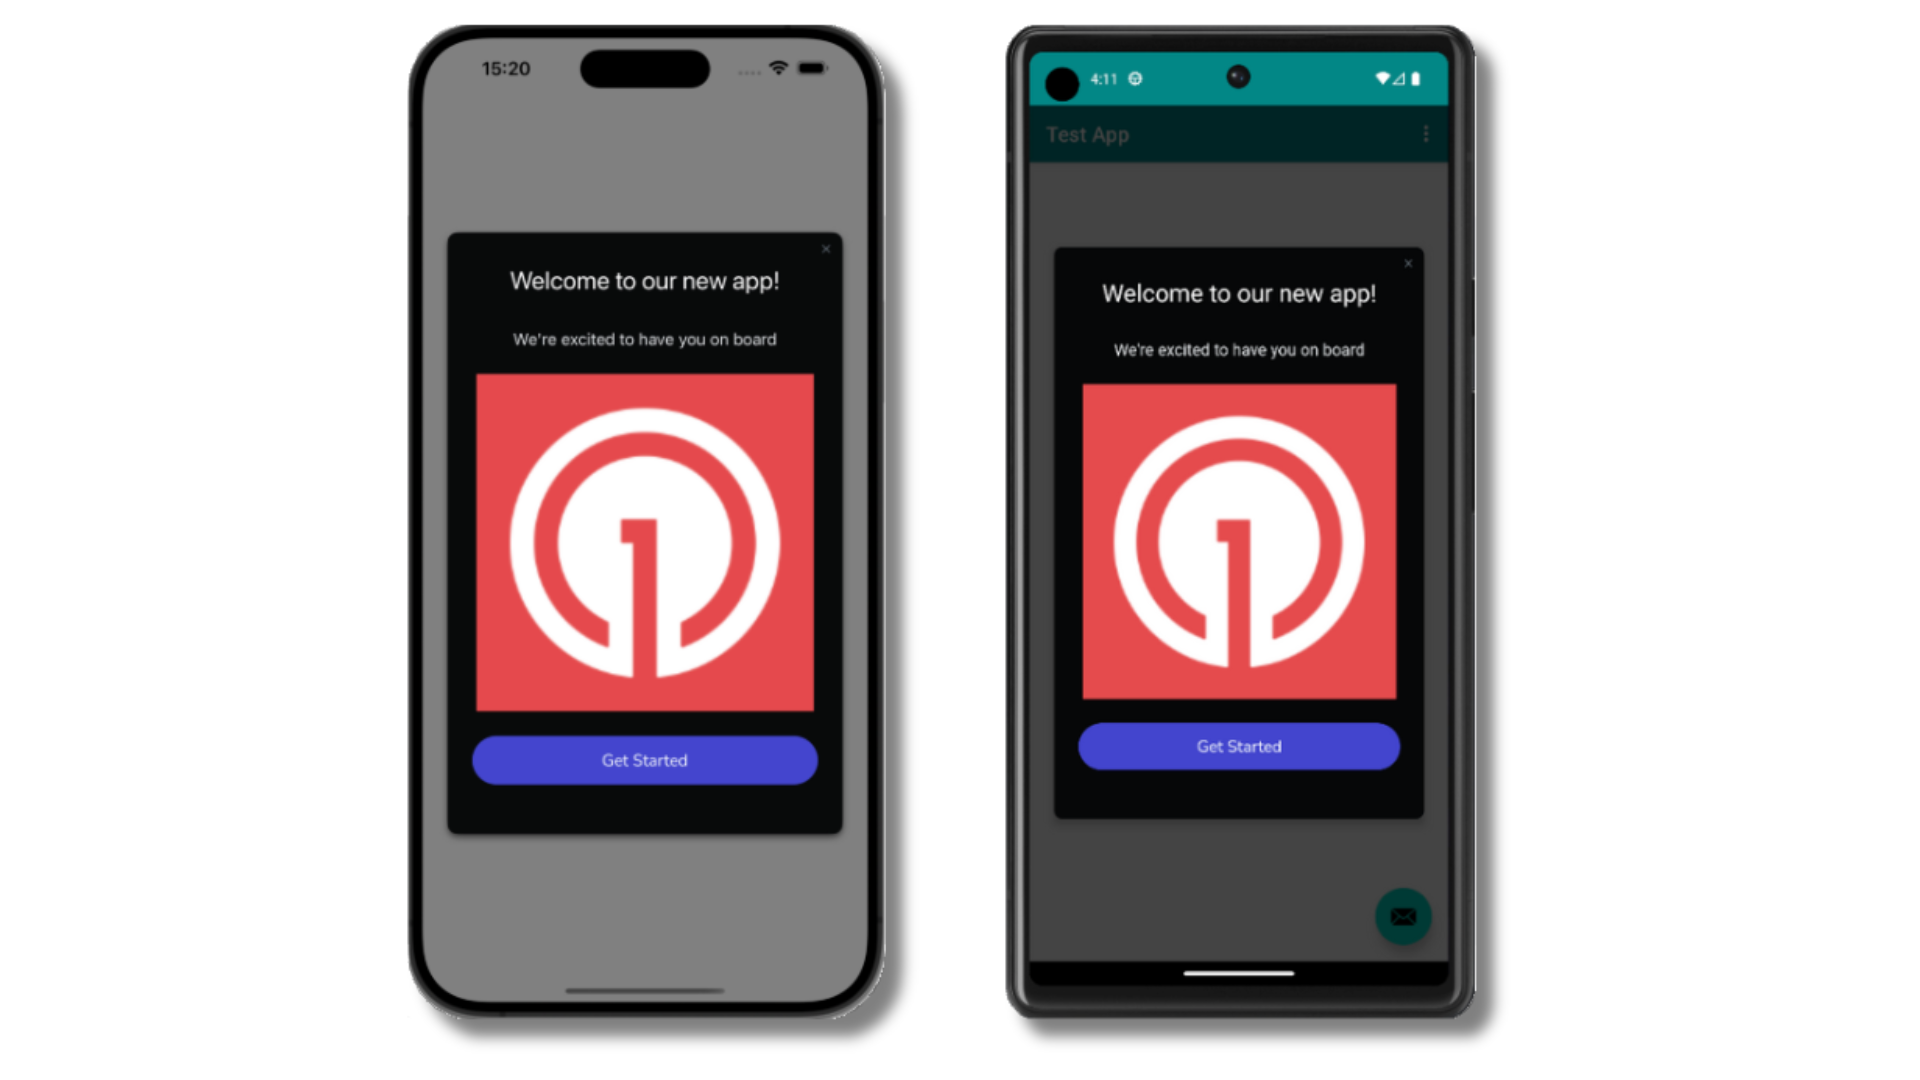
- Find and select the Welcome message.
- Set your Audience as the Test Users segment we used previously.
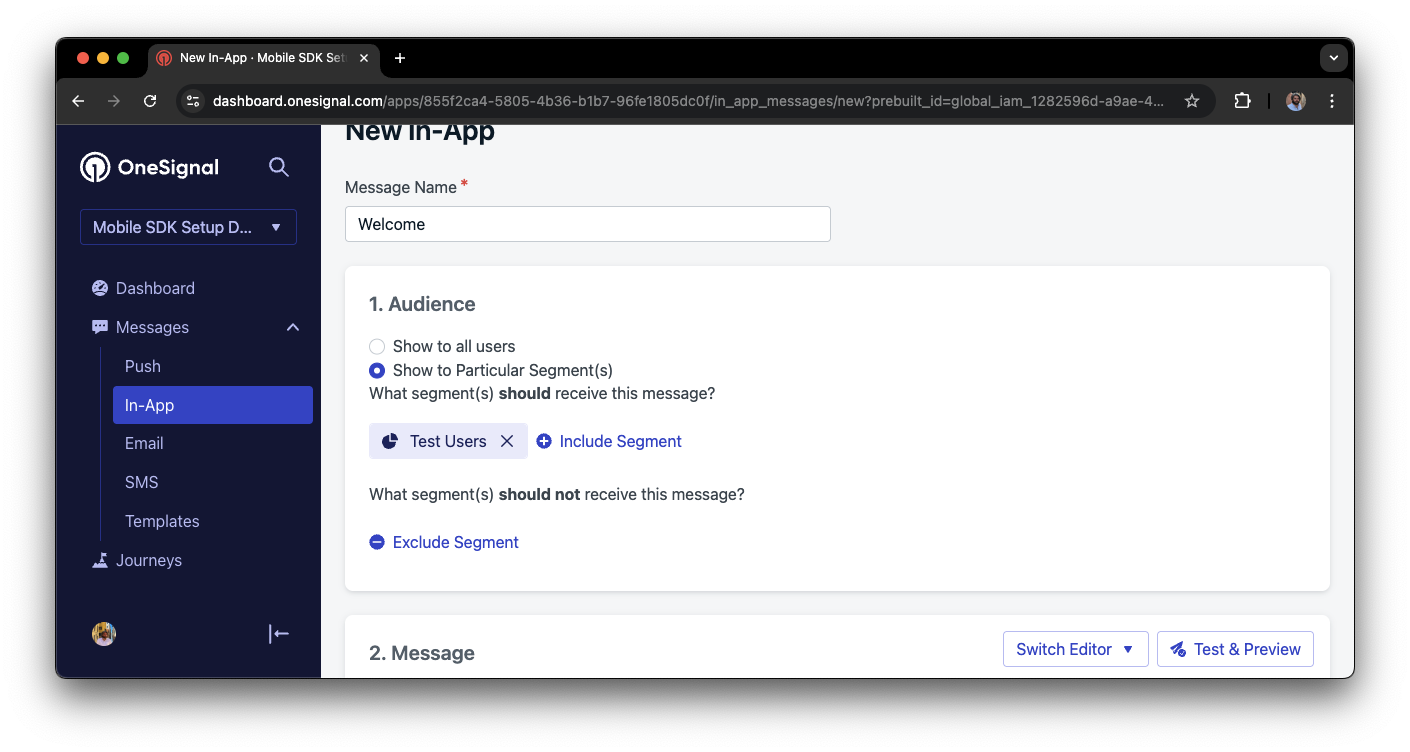
Schedule frequency.
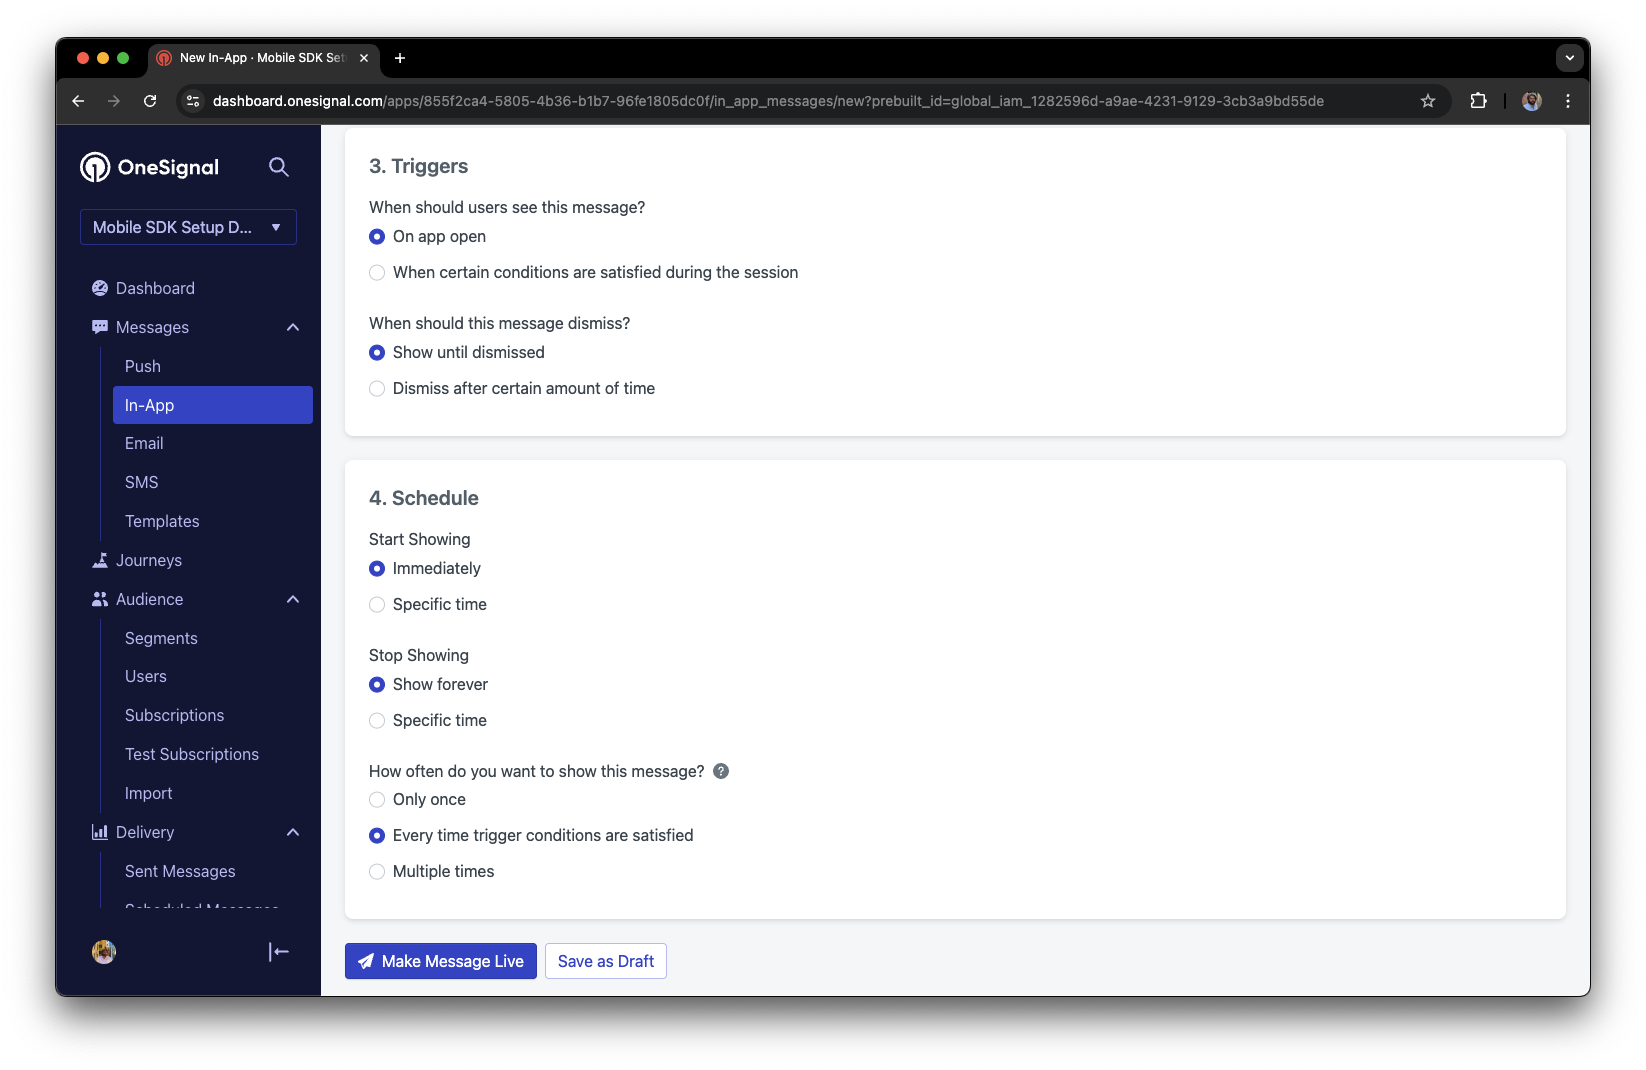
Make message live.
- Gathering Subscriptions, setting Test subscriptions, and creating Segments.
- Sending Push with images and Confirmed Delivery using Segments and our Create message API.
- Sending In-app messages.
User identification
Previously, we demonstrated how to create mobile Subscriptions. Now we’ll expand to identifying Users across all their subscriptions (including push, email, and SMS) using the OneSignal SDK. We’ll cover External IDs, tags, multi-channel subscriptions, privacy, and event tracking to help you unify and engage users across platforms.Assign External ID
Use an External ID to identify users consistently across devices, email addresses, and phone numbers using your backend’s user identifier. This ensures your messaging stays unified across channels and 3rd party systems (especially important for Integrations). Set the External ID with our SDK’slogin method each time they are identified by your app.
Add data tags
Tags are key-value pairs of string data you can use to store user properties (likeusername, role, or preferences) and events (like purchase_date, game_level, or user interactions). Tags power advanced Message Personalization and Segmentation allowing for more advanced use cases.
Set tags with our SDK addTag and addTags methods as events occur in your app.
In this example, the user reached level 6 identifiable by the tag called current_level set to a value of 6.
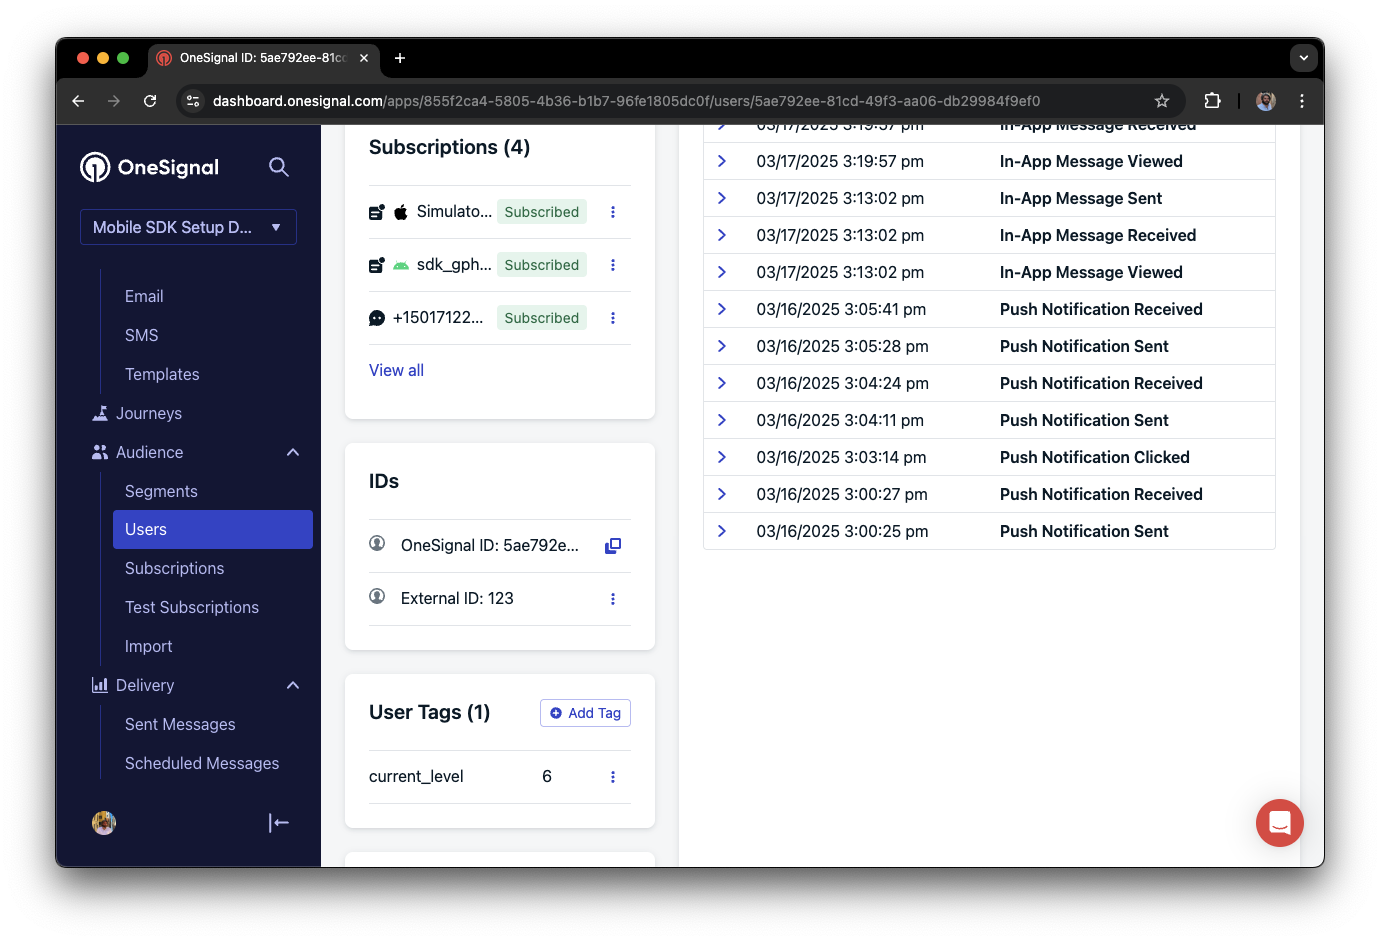
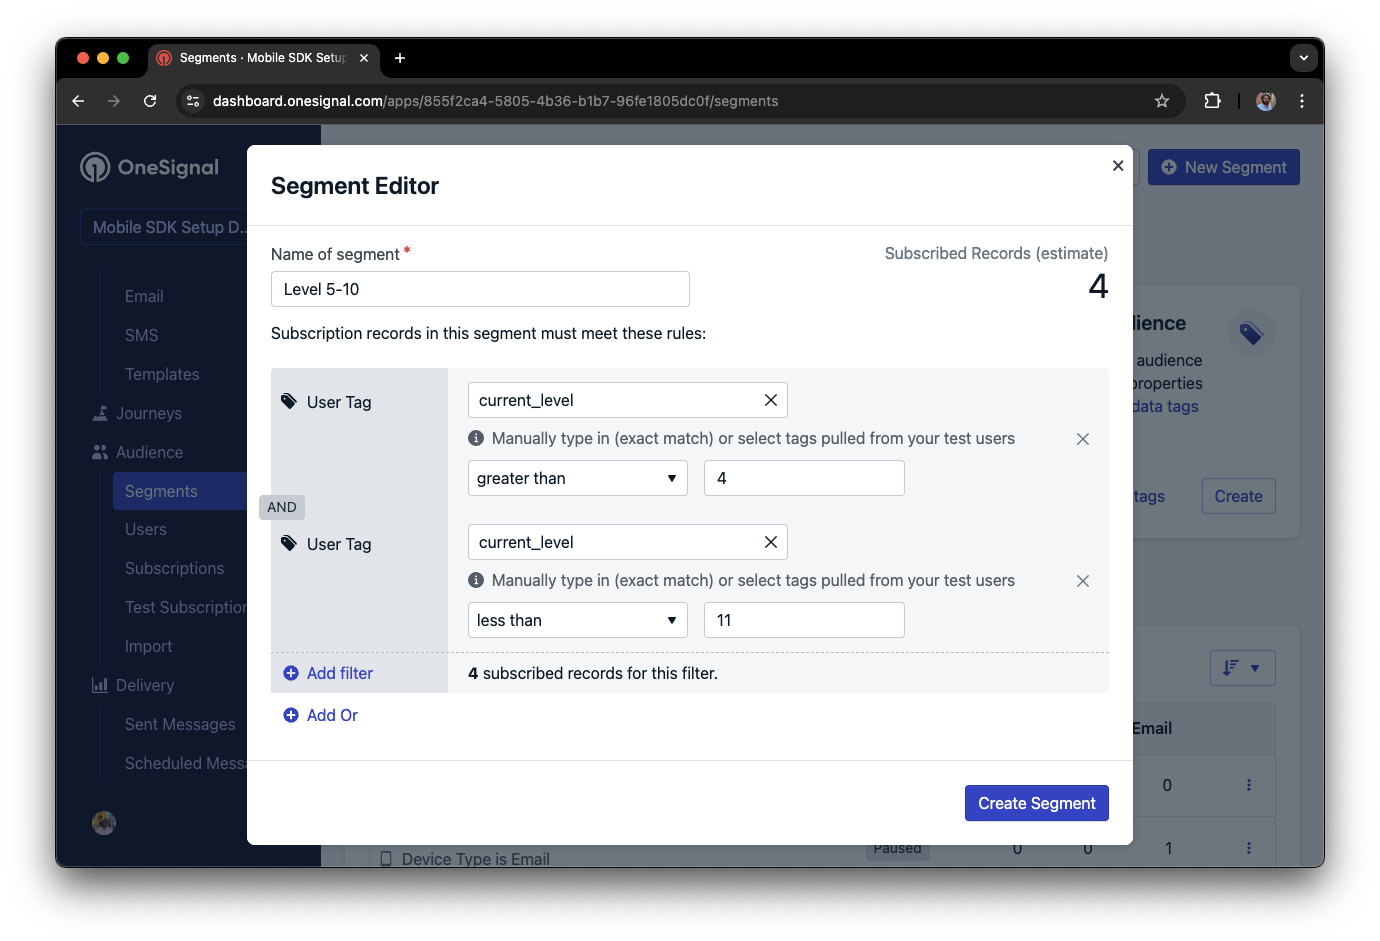
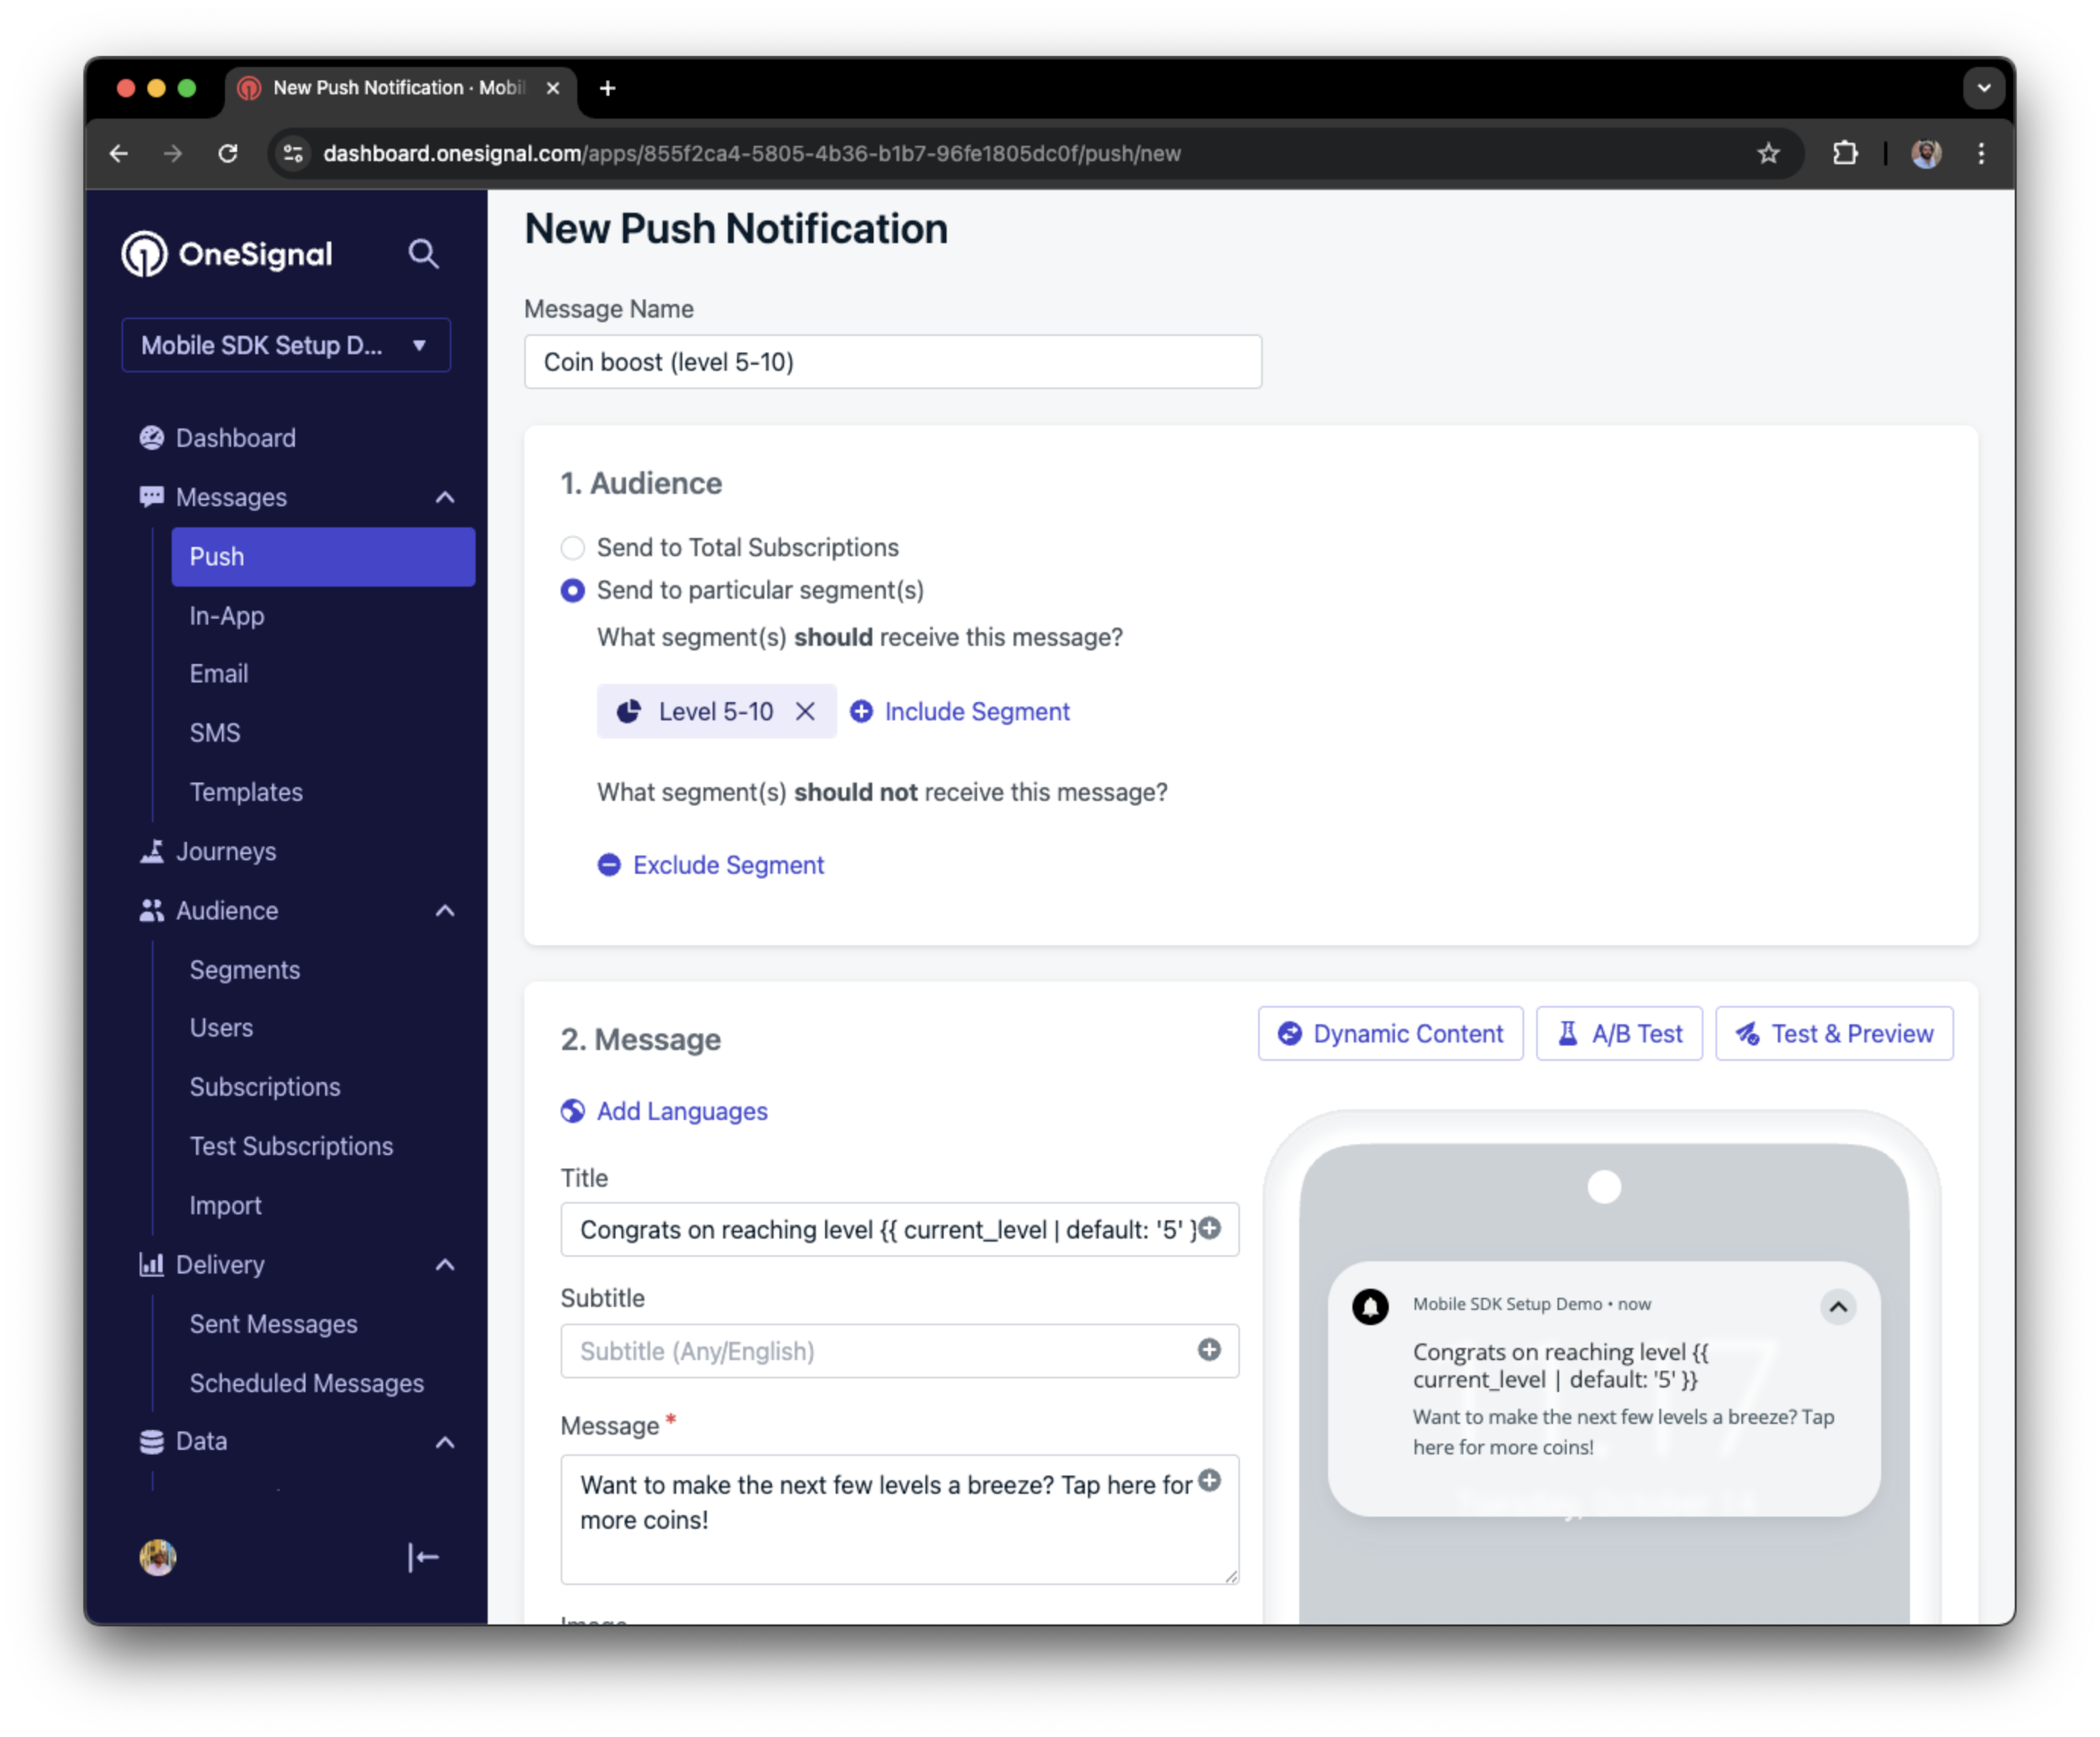
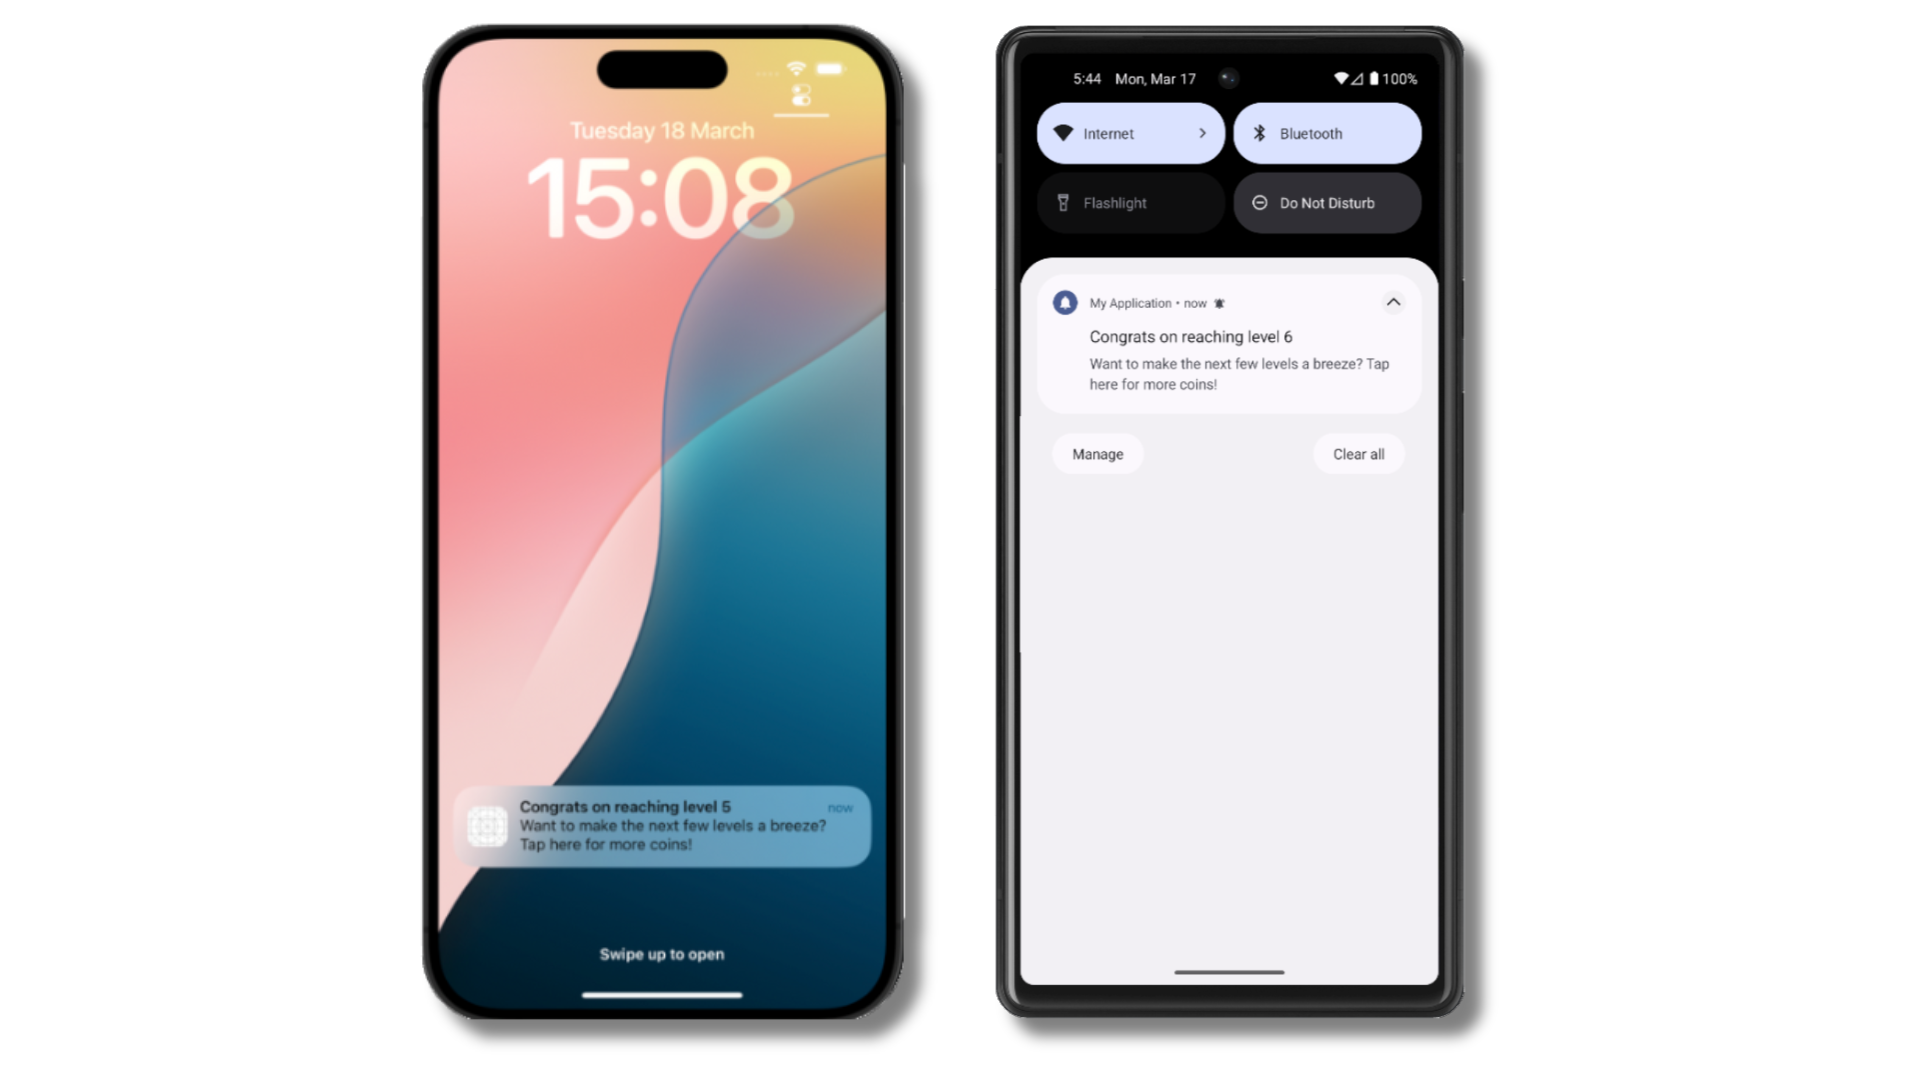
Add email and/or SMS subscriptions
Earlier we saw how our SDK creates mobile subscriptions to send push and in-app messages. You can also reach users through emails and SMS channels by creating the corresponding subscriptions.- Use the
addEmailmethod to create email subscriptions. - Use the
addSmsmethod to create SMS subscriptions.
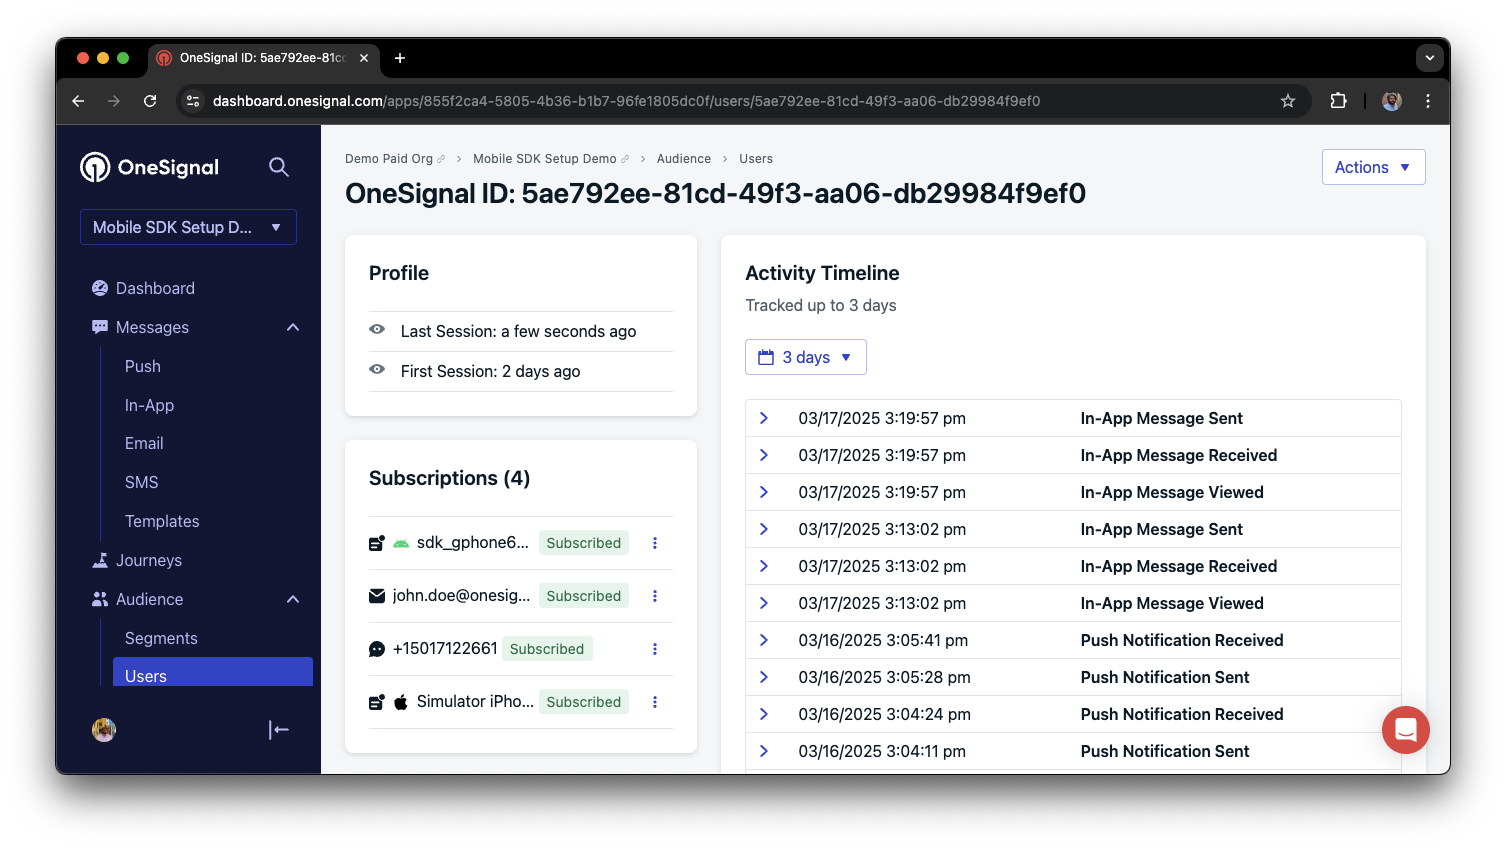
- Obtain explicit consent before adding email or SMS subscriptions.
- Explain the benefits of each communication channel to users.
- Provide channel preferences so users can select which channels they prefer.
Privacy & user consent
To control when OneSignal collects user data, use the SDK’s consent gating methods:setConsentRequired(true): Prevents data collection until consent is given.setConsentGiven(true): Enables data collection once consent is granted.
Prompt for push permissions
Instead of callingrequestPermission() immediately on app open, take a more strategic approach. Use an in-app message to explain the value of push notifications before requesting permission.
For best practices and implementation details, see our Prompt for push permissions guide.
Listen to push, user, and in-app events
Use SDK listeners to react to user actions and state changes. The SDK provides several event listeners for you to hook into. See our SDK reference guide for more details.Push notification events
addClickListener(): Detect when a notification is tapped. Helpful for Deep Linking.addForegroundLifecycleListener(): Control how notifications behave in foreground.
User state changes
addObserver()for user state: Detect when the External ID is set.addPermissionObserver(): Track the user’s specific interaction with the native push permission prompt.addObserver()for push subscription: Track when the push subscription status changes.
In-app message events
addClickListener(): Handle in-app click actions. Ideal for deep linking or tracking events.addLifecycleListener(): Track full lifecycle of in-app messages (shown, clicked, dismissed, etc.).
Advanced setup & capabilities
Explore more capabilities to enhance your integration:- 🔁 Migrating to OneSignal from another service
- 🌍 Location tracking
- 🔗 Deep Linking
- 🔌 Integrations
- 🧩 Mobile Service Extensions
- 🛎️ Action buttons
- 🌐 Multi-language messaging
- 🛡️ Identity Verification
- 📊 Custom Outcomes
- 📲 Live Activities
Mobile SDK setup & reference
Make sure you’ve enabled all key features by reviewing the Mobile push setup guide. For full details on available methods and configuration options, visit the Mobile SDK reference.[email protected]Please include:- Details of the issue you’re experiencing and steps to reproduce if available
- Your OneSignal App ID
- The External ID or Subscription ID if applicable
- The URL to the message you tested in the OneSignal Dashboard if applicable
- Any relevant logs or error messages
