Send VoIP push notifications on iOS using OneSignal with PushKit token registration and a VoIP certificate, plus Android alternatives for call-style behavior.
VoIP push notifications let your app receive incoming call alerts even when the app is in the background or terminated. Apple handles VoIP pushes differently from standard push notifications — they use a separate certificate type, a separate token (via PushKit), and different delivery rules.OneSignal supports sending VoIP pushes, but the OneSignal SDK does not handle VoIP token registration. You are responsible for:
Registering VoIP tokens in your app using Apple PushKit
Creating a dedicated OneSignal app with a VoIP Services Certificate
Registering tokens and sending pushes through the OneSignal REST API
On iOS, VoIP notifications use Apple PushKit and follow special delivery rules that differ from standard push notifications. Because Apple treats VoIP pushes differently, OneSignal requires a separate app configuration for VoIP.
Before you start — these are the most common VoIP setup mistakes:
Not creating a separate OneSignal app for VoIP. Apple requires a different certificate type for VoIP, so OneSignal needs a dedicated app to send VoIP pushes. Your existing push app cannot be used for both.
Uploading the wrong certificate. You need a VoIP Services Certificate (.p12), not your standard APNs push certificate. Using the wrong one causes silent delivery failures.
Forgetting test_type in sandbox. When testing with a development build, you must include "test_type": 1 when registering the token. Without it, the API call succeeds but pushes never arrive.
1
Register a VoIP token using PushKit
Use Apple’s PushKit framework to register for VoIP notifications and receive a VoIP token.
Implement PushKit in your app
Store and refresh the VoIP token as Apple rotates it
Follow Apple’s VoIP policies closely
Example: PushKit delegate implementation
import PushKitclass AppDelegate: NSObject, PKPushRegistryDelegate { func registerForVoIPPushes() { let registry = PKPushRegistry(queue: .main) registry.delegate = self registry.desiredPushTypes = [.voIP] } func pushRegistry(_ registry: PKPushRegistry, didUpdatePushCredentials credentials: PKPushCredentials, for type: PKPushType) { let token = credentials.token.map { String(format: "%02x", $0) }.joined() // Pass this token to OneSignal — see Step 4 }}
This is standard Apple PushKit code. OneSignal does not provide a PushKit SDK — you register the token yourself and pass it to OneSignal in Step 4.
Apple VoIP pushes require a different certificate type than standard push notifications. A single OneSignal app can only use one certificate type, so you must create two separate OneSignal apps:
Main Push App: Uses your APNs certificate for standard push notifications
VoIP Push App: Uses a VoIP Services Certificate for VoIP-only notifications
Both apps must use the same iOS bundle ID and be associated with the same native iOS app. You do not need to initialize the OneSignal SDK twice — the VoIP app is only used server-side to send VoIP pushes via the API.
The bundle ID (e.g., com.yourcompany.appname) is found in Xcode under your target’s General tab.
3
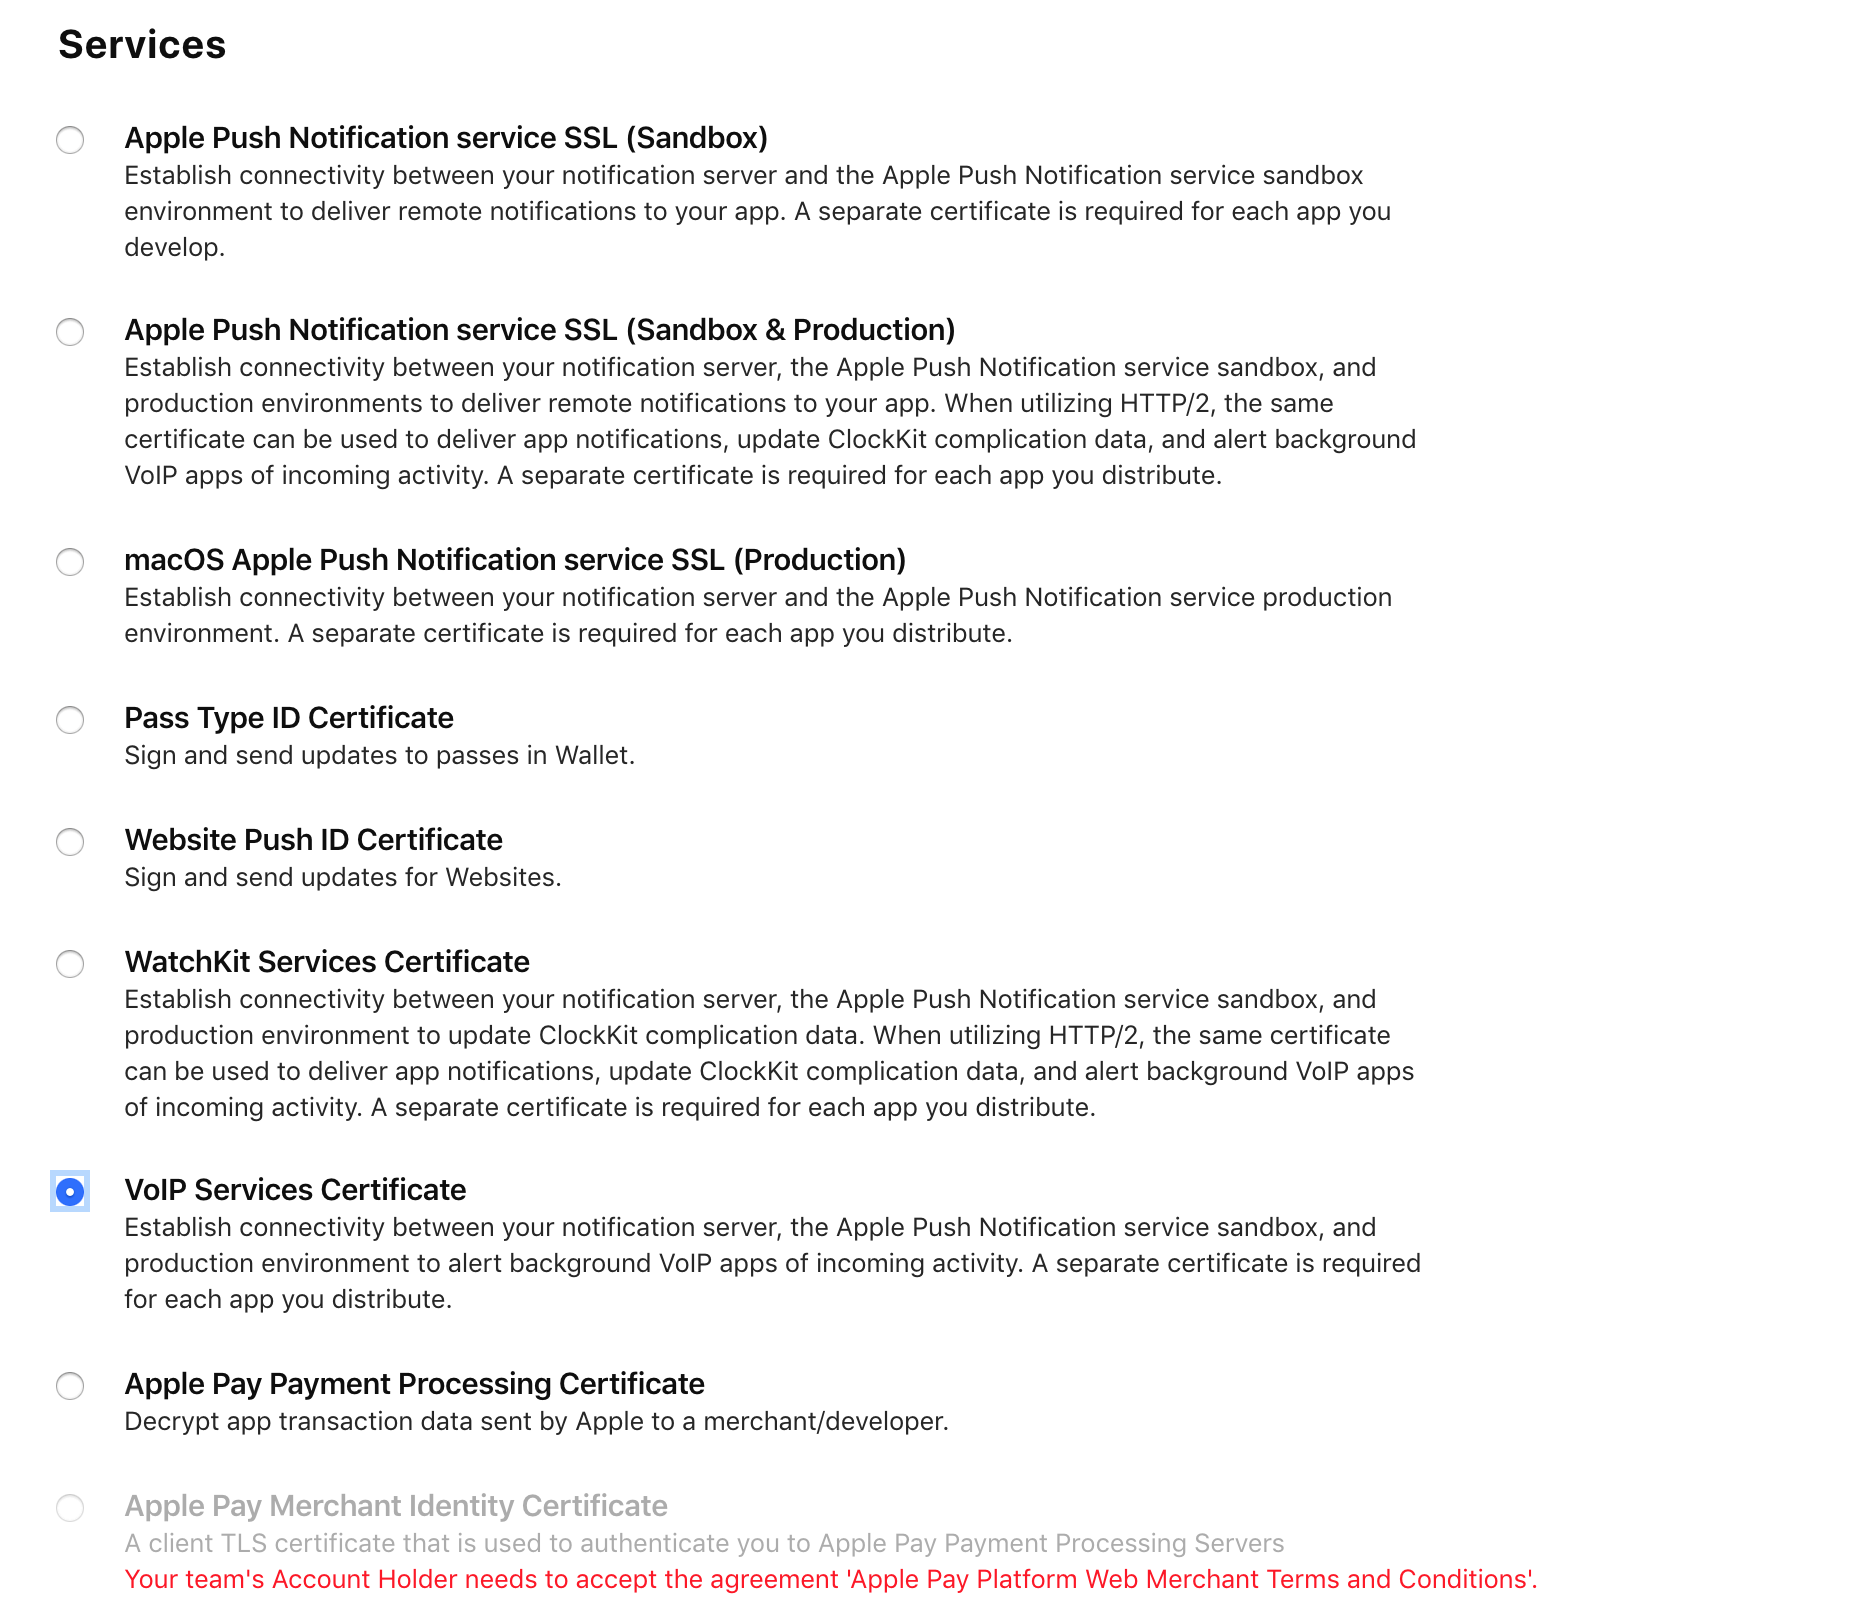
Upload a VoIP Services Certificate
In your VoIP OneSignal app, upload a VoIP Services Certificate (.p12). This is a different certificate type than the standard APNs push certificate you use for regular notifications.To create one:
Follow the prompts to generate and download the certificate
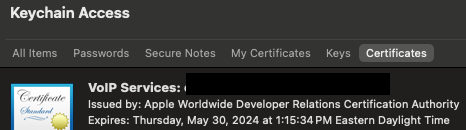
Open it in Keychain Access and export it as a .p12 file
Upload the .p12 file to your VoIP OneSignal app’s iOS settings
Do not upload your standard APNs push certificate to the VoIP app. If you use the wrong certificate type, the API will accept your push request but Apple will reject it and the notification will never arrive.
VoIP certificate in Keychain Access
VoIP certificate uploaded in OneSignal dashboard
4
Register the VoIP token with OneSignal
Use the Create User API to register the VoIP token with your VoIP OneSignal app.
Sandbox/development builds require "test_type": 1. If you omit this field, the API call succeeds and returns no error, but Apple treats the token as production and silently rejects every push sent to it.
A valid VoIP token is a 64-character lowercase hex string (e.g., a1b2c3d4e5f6...). PushKit does not work on the iOS Simulator — you must use a real device to obtain a valid token.
No. Confirmed Deliveries are not tracked for VoIP pushes. Confirmed Deliveries rely on the Notification Service Extension, which does not trigger for VoIP notifications.Instead, track receipt via the native iOS PushKit event:
Can I send VoIP notifications from the OneSignal dashboard?
No. VoIP notifications must be sent via the Create Notification API with "apns_push_type_override": "voip". The dashboard does not support this parameter.
VoIP pushes can fail without any error from the OneSignal API. Work through this checklist:
Are you using a sandbox/development build? You must include "test_type": 1 when registering the token via the Create User API. Without it, the token registers as production, Apple rejects the push, and it silently fails.
Did you upload the correct certificate? The VoIP OneSignal app must use a VoIP Services Certificate (.p12), not a standard APNs push certificate. Both look similar in Keychain Access — verify the certificate name starts with “VoIP Services”.
Are you sending to the right OneSignal app? The app_id in your send request must be your VoIP app, not your main push app. The REST API Key must also come from the VoIP app.
Is the VoIP token valid? Tokens expire when the app is reinstalled or the device is restored. Check that the token is a 64-character lowercase hex string and was recently registered.
Does your app call reportNewIncomingVoIPPushPayload? Starting in iOS 13, Apple terminates apps that receive a VoIP push but do not report a call to CallKit. This is an Apple requirement, not a OneSignal limitation.