Video: Introduction to Journeys
What you can do with Journeys
Journeys allow you to automate lifecycle messaging based on user behavior, time delays, or profile attributes. Common use cases include:- Onboarding sequences to guide new users to their “aha” moment and ensure early success.
- Re-engagement campaigns that target users who haven’t returned after a certain period.
- Abandoned cart flows that remind users to complete purchases and recover lost revenue.
- Upsells, cross-sells, and announcements to increase feature adoption and promote new offerings.
- Behavioral followups that trigger messages when users perform specific actions or meet criteria.
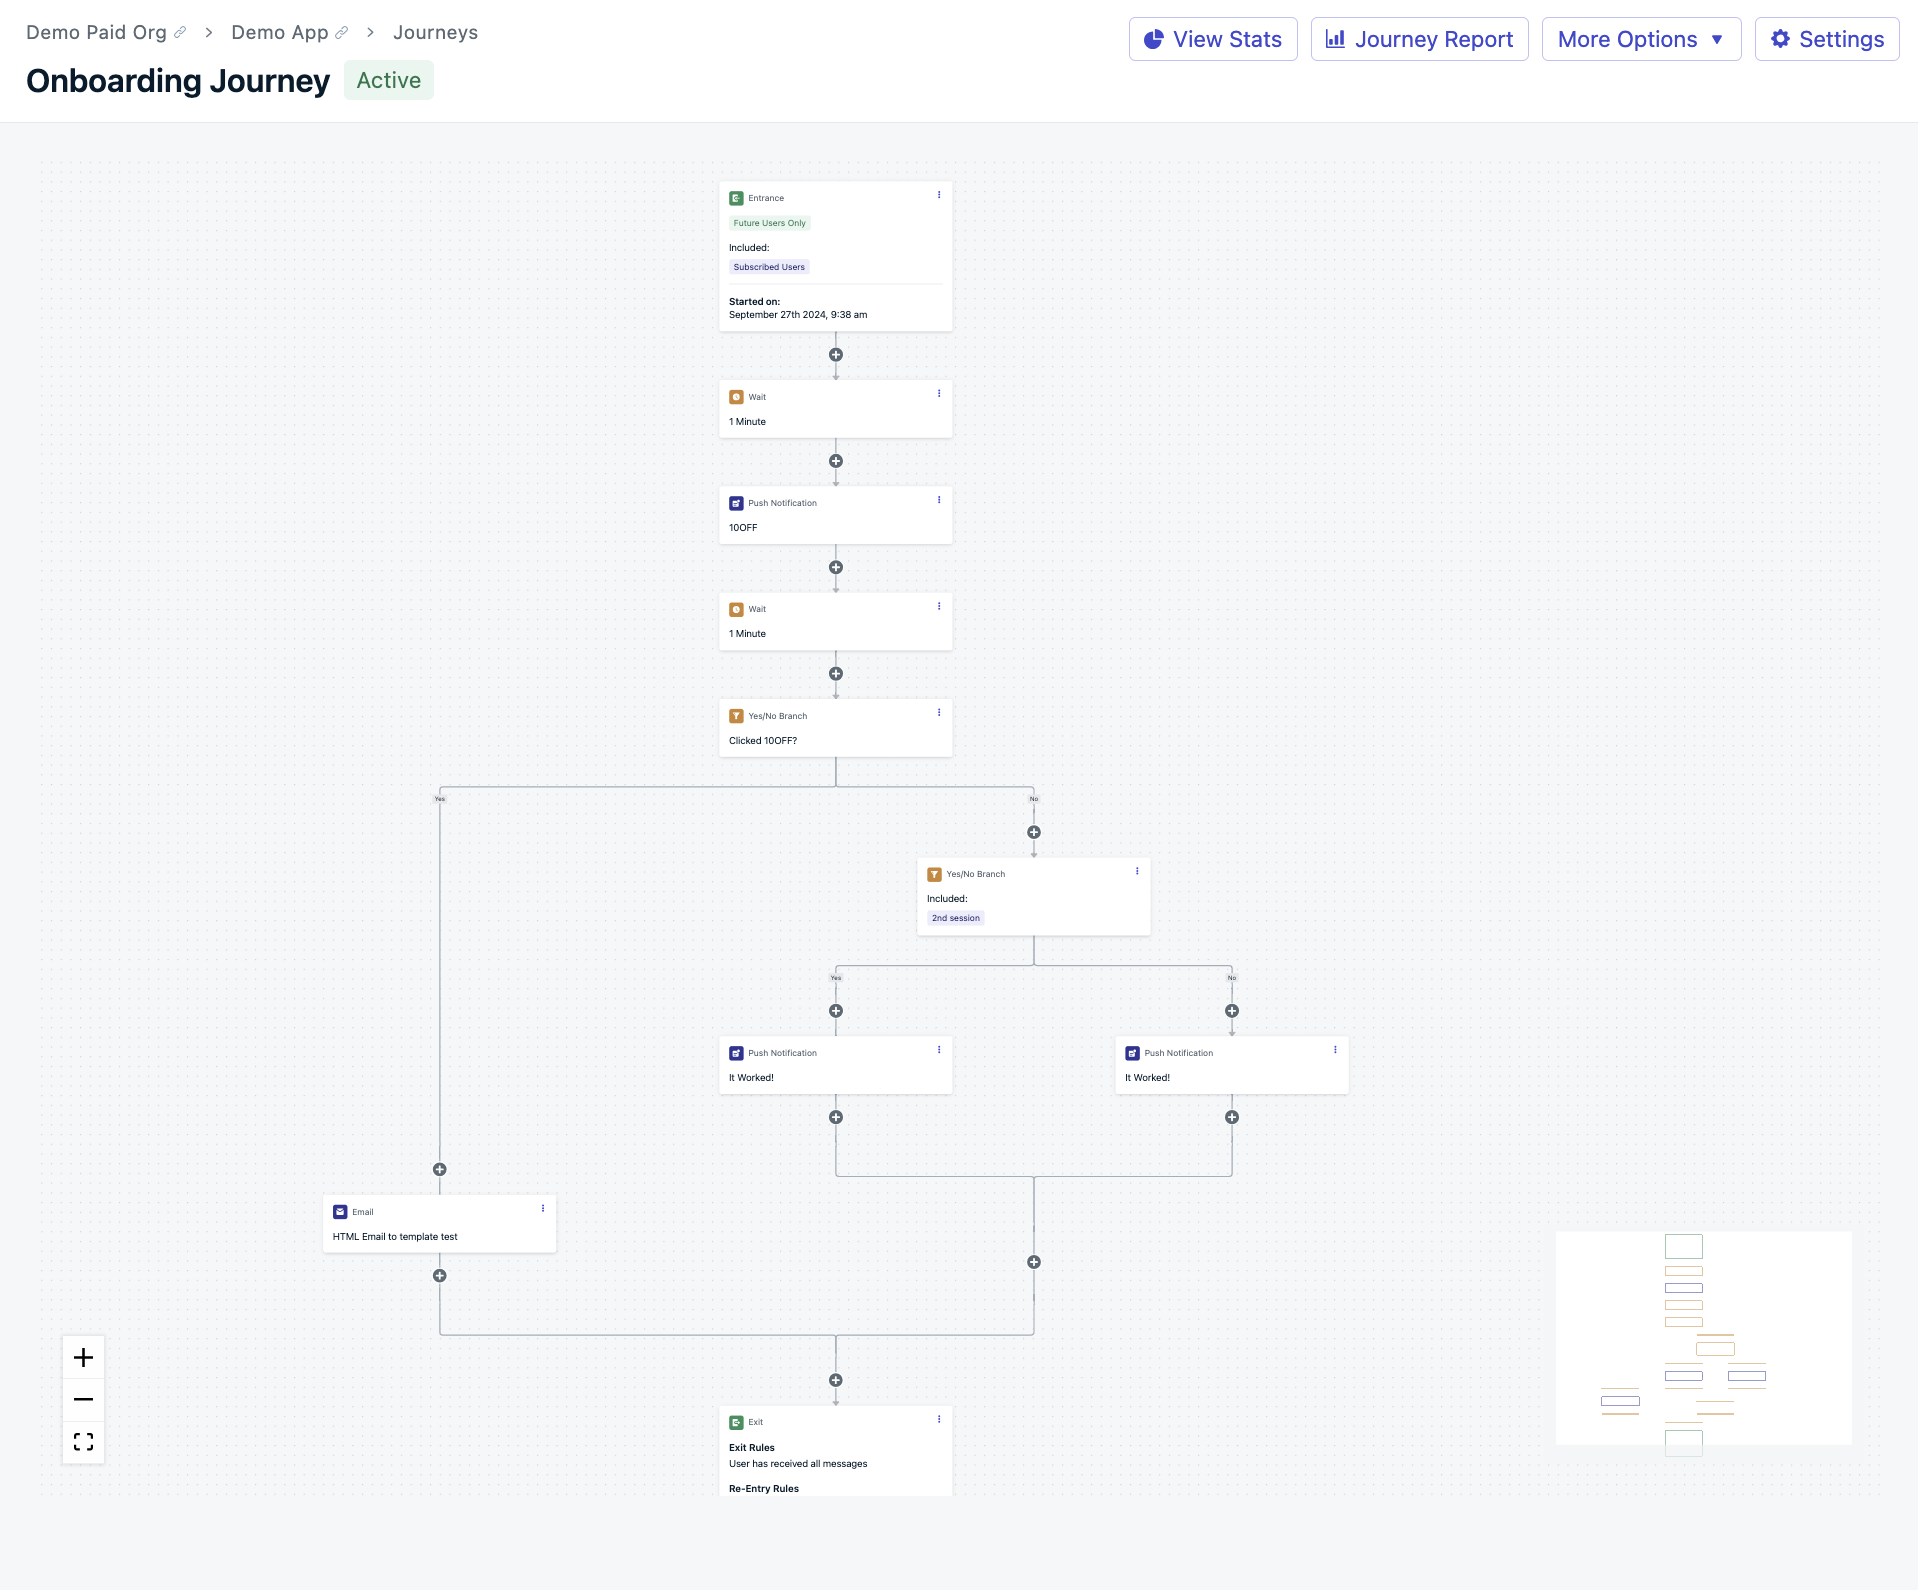
Example Journey
Best practices for multichannel journeys
Journeys work best when you combine multiple channels so each message reaches the user through the most effective format.Mix channels for maximum engagement
Use different messaging types strategically:- Start with a welcome email
- Follow up with a push notification
- Announce promotions via in-app message
- Send time-sensitive reminders through SMS
Use External IDs to unify your users
To avoid sending confusing or duplicate messages across channels, assign an External ID to every user. If an External ID is not set:- Each subscription (email, device, SMS number) is treated as a separate user
- You may over-message or confuse your users
- OneSignal links all subscriptions to a single user profile
- You get accurate targeting and smoother Journeys
Users
Define and manage users, assign External IDs, and track engagement across channels.
Subscriptions
How OneSignal tracks activity across devices and channels and ties it to unified user profiles.
Journey components
Journeys are made up of modular components that give you complete control over who enters, what they receive, and when.Journey settings
Configure entry and exit rules, re-entry logic, and scheduling for your Journey.
Journey messages
Add push, email, SMS, and in-app message steps with personalized content.
Journey actions
Add branching logic, wait steps, split paths, and delays to build conditional flows.
Journey webhooks
Send real-time updates to CRMs, analytics platforms, and other external tools.
Journey analytics and management
Understand how your Journeys are performing and keep them optimized over time.Journey analytics
Monitor completion rates, conversions, drop-offs, and per-message performance.
Managing Journeys
Pause, edit, duplicate, archive, and version-control your Journeys.
Journeys examples
Need inspiration or a quick-start template? These examples walk through common Journey flows you can adapt for your use case.Journeys examples
Step-by-step walkthroughs for onboarding, re-engagement, abandoned carts, and more.
If you previously used Automated Messages, Journeys replace that feature with more powerful cross-channel orchestration. Migrate your existing automations to Journeys for branching logic, multichannel support, and analytics.