OneSignal Email Setup
Send Emails with OneSignal instead of bringing a third-party ESP
OneSignal email is a quick and easy way to get started sending emails. Sending emails with OneSignal instead of bringing your own email service provider (ESP) reduces the number of platforms your business needs to use and make payments to.
Simple setup requirements:
- Your own domain
- Access to your DNS Provider
- Start sending 🎉
Step 1. Enable Email Messaging
In OneSignal, navigate to Settings > Platforms > Email and Active.
Select OneSignal and Continue.

OneSignal is shown as the selected email provider option on the Email Configuration screen.
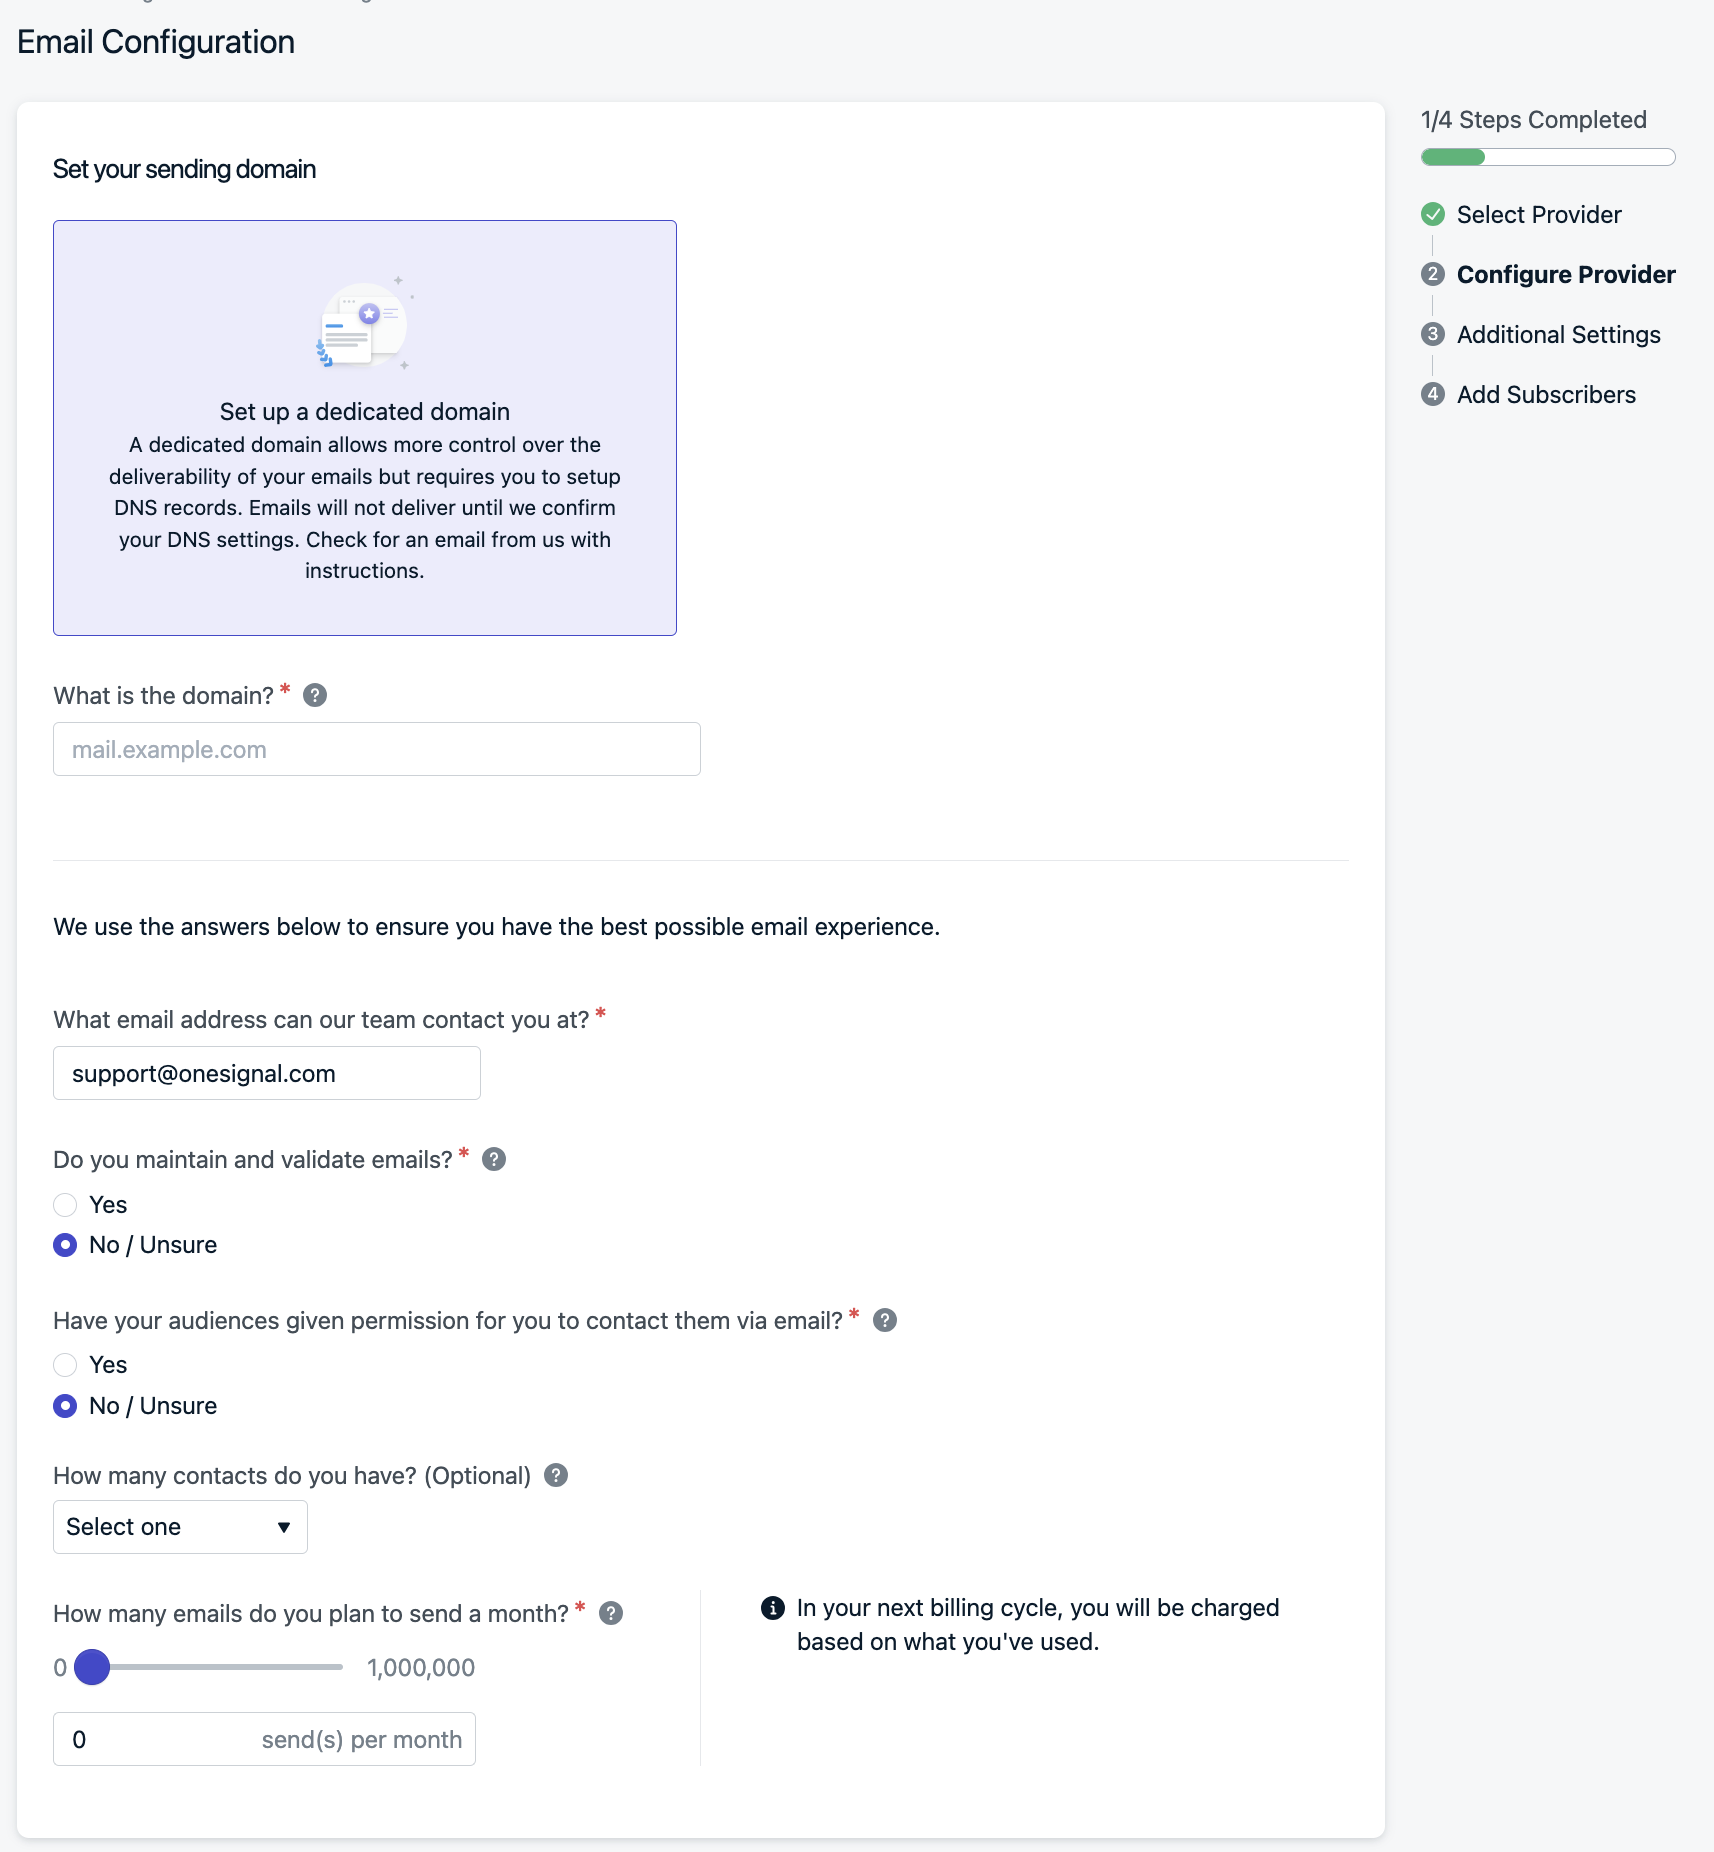
Step 2. Configure Email Settings
Fill out the provided details and our Support team will be in touch with your DNS Settings within 24 business hours.
See Sender Domain Setup to learn more about bringing your own domain.
Benefits of using your own domain to send through OneSignal include:
- Branding and Presentation - Recipients will see your branded domain as the sending domain on emails you send via OneSignal.
- Added Security - Allows you to add additional DMARC configurations, which may prevent others from spoofing your emails.
Bringing your own domain means that you will hold additional responsibility regarding delivery and sender reputation. See our Email Best Practices guide for tips to ensure deliverability of your email campaigns.
Selecting the option to allow OneSignal to provide a sending domain when setting up OneSignal email.
Additional Questions
We ask a few questions during the setup process.
Email Validation
It’s a good idea to validate email lists before sending emails to a segment. This ensures that email addresses are real, spelled correctly, and won’t result in a bounce. It helps improve your deliverability.
User Consent
You are responsible for ensuring that the recipients of your emails have consented to receive that email. How you collect and manage your marketing subscriptions and consent is up to you.
Estimated Email Contacts Volume
The number of email addresses you plan to upload.
Expected Send Volume
A monthly estimate of your expected number of email sends. Charges are based on usage (number of emails sent). For those planning to send 500k emails a month or more, please reach out to a sales representative.
Default Sender Details
On the next screen, provide your default From Name and From Email. This name is what your recipient will see in their inbox. You can change these settings at any time.

Configuring the default sending name and email address on the Additional Settings screen.
Only send from email addresses that you own
If you are sending from an email address you do not own, or the From Address has DMARC settings configured. Emails may fail to send or end up in SPAM.
If you are noticing your emails are failing to send, either update the email's DMARC configuration or configure your own domain.
Step 3. Add Subscribers
If you have a list of emails ready, select Upload CSV to Import Email Addresses. You can always do this again later.
If you have a website and want to prompt users to provide their email, select Add Web Prompt to use OneSignal's Email Web Prompt.

The Add Subscribers step with options listed to upload a CSV of subscriber email addresses or add a web prompt to collect emails.
Step 4. Send a Test Email
Send yourself a test email by going to OneSignal > Messages > Email. Select New Email.
Add your test subject line, and click Send Test Email. Input your email and click Send Test Message.

The OneSignal email editor with the Send Test Email button highlighted.
Troubleshooting
If you're running into issues, see our Email FAQ.
If you're stuck, contact support directly or email [email protected] for help.
When contacting support, for faster assistance, provide:
- Your OneSignal App Id
- Details, logs, and/or screenshots of the issue
- Steps to reproduce
Collecting New Email Addresses
Emails can be added into OneSignal using the following options outlined in our Import Email Addresses guide.
| Option | Description |
|---|---|
| Dashboard Upload | Upload a csv of emails and user data or manually add emails. |
| Server API | Programmatically add emails server side. |
SDK setEmail method | Add emails using our client side SDK. Recommended if using our SDKs for push or in-app messaging. |
| Email Web Prompt | A web prompt that allows user to include their own email address and phone number. |
Setting Custom User Properties
OneSignal creates channel-level device records under a unique Id called the player_id. A single user can have multiple player_id records based on how many devices, email addresses, and phone numbers they use to interact with your app.
If your app has its own login system to track users, call setExternalUserId at any time to link all channels to a single user. For more details, see External User Ids.
All other event and user properties can be set using Data Tags. Setting this data is required for more complex segmentation and message personalization.
Setup Complete!
Visit Email Tutorials for next steps.
What are the expectations of acceptable use?
We expect customers using OneSignal email to retain a good sending reputation. We closely monitor sending activity. If an app is found to be sending emails with high rates of delivery failures or spam complaints, we may suspend the ability for that app to continue to send email as a corrective action for violating our Acceptable Use Policy.
Please refer to our Acceptable Use Policy for more details.
Updated over 1 year ago