Import email addresses
How to import email addresses to use OneSignal Email Messaging
This guide explains how to upload a CSV list of email addresses through the dashboard or manually add emails if needed. Other options include:
- Mobile and web SDK
addEmailmethod. - Create user or Create subscription APIs.
- Email & Phone Number Web Prompt - Allows a user to include their own email address through your website.
Duplicate email addresses
OneSignal will automatically remove duplicate email addresses (email subscriptions). If the email subscription is marked as unsubscribed, it will continue to be marked unsubscribed unless updated.
Dashboard CSV upload
Details on uploading a CSV of email addresses and other data.
Requirements
- Must have
emailcolumn with lower-case spelling. (All property headers need to have the same case as indicated on the import page. e.g., must usetimezone_idand nottimezone_ID). - Limited to UTF-8 encoding.
- Columns must be unique.
- No quotes.
- Commas only, no semi-colons.
- If an existing data tag key is also a property, double curly braces
{{key}}must be used to update the data tag. Not using the braces will result in updating the property.
CSV header options
These are the available properties you can set in the first row of your CSV.
email
emailRequired The email addresses to be imported. See Subscriptions for details.
external_id
external_idRecommended The user ID for identifying the owner of the email address. See Users for details.
subscribed
subscribedWhether the email address is opted-in to receive emails. Values can be yes or no. If column is not present, all email addresses default to being opted-in (yes).
country
countryThe ISO 3166-2 country code of the user. 2 characters, all caps.
timezone_id
timezone_idThe timezone of the user in IANA TZ format (e.g., America/Los_Angeles. See the TZ identifier column).
language
languageThe language code of the user in ISO 639-1 format.
Data tags
Tags are custom key : value pairs that can be unique per user. It is recommended to review the Data Tags guide before implementation.
If you want to set any of the above header options as a tag key, you will need to wrap the tag key in double curly brackets (e.g {{country}}). Do not wrap all tags in double curly brackets.
Example CSV column headers
email,external_id,subscribed,language,{{language}},timezone_id,country,{{country}},first_name,group,status,level

CSV upload steps
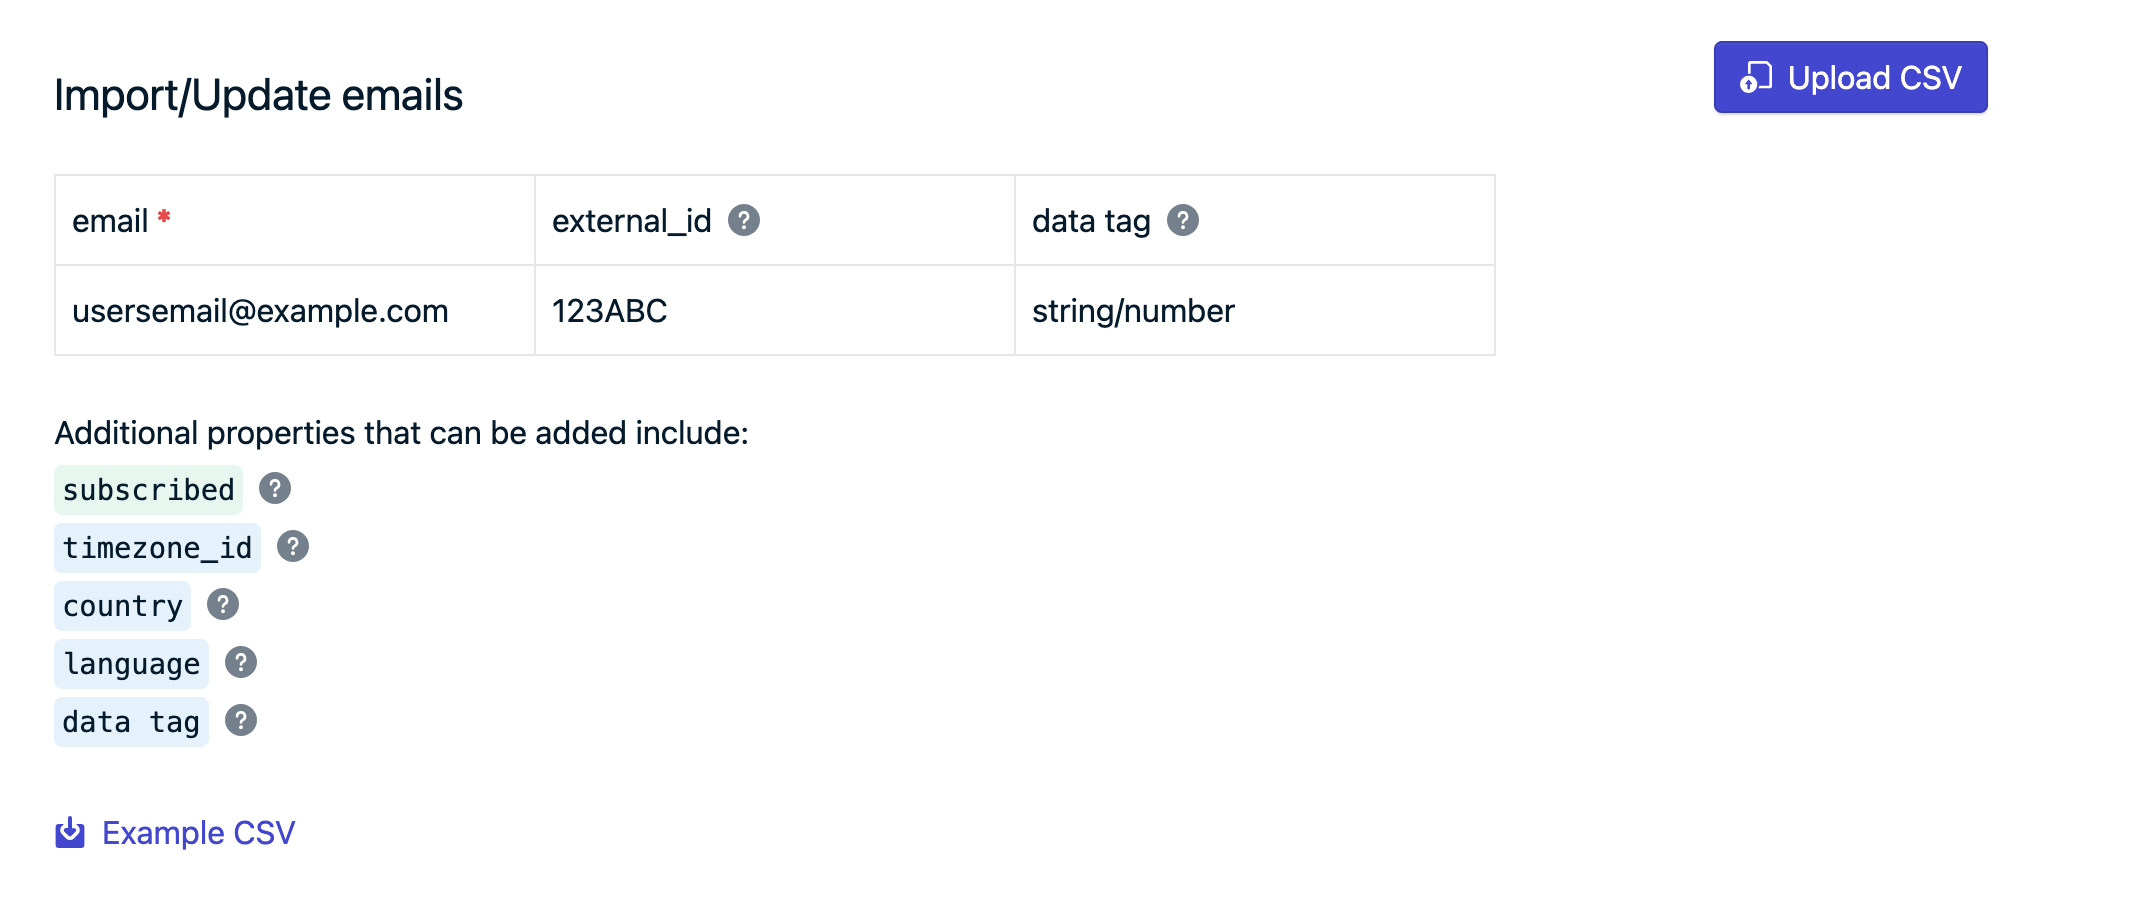
Navigate to Audience > Import.
Under "Import/Update emails" select Upload CSV. There is also a CSV Template you can download to check your format.
After uploading check for any errors. You may need to fix the CSV then upload again if you have any errors.
Select the column(s) that are a data tag
Checked columns will be imported as tags. Uncheck the columns you do not want set as tags.
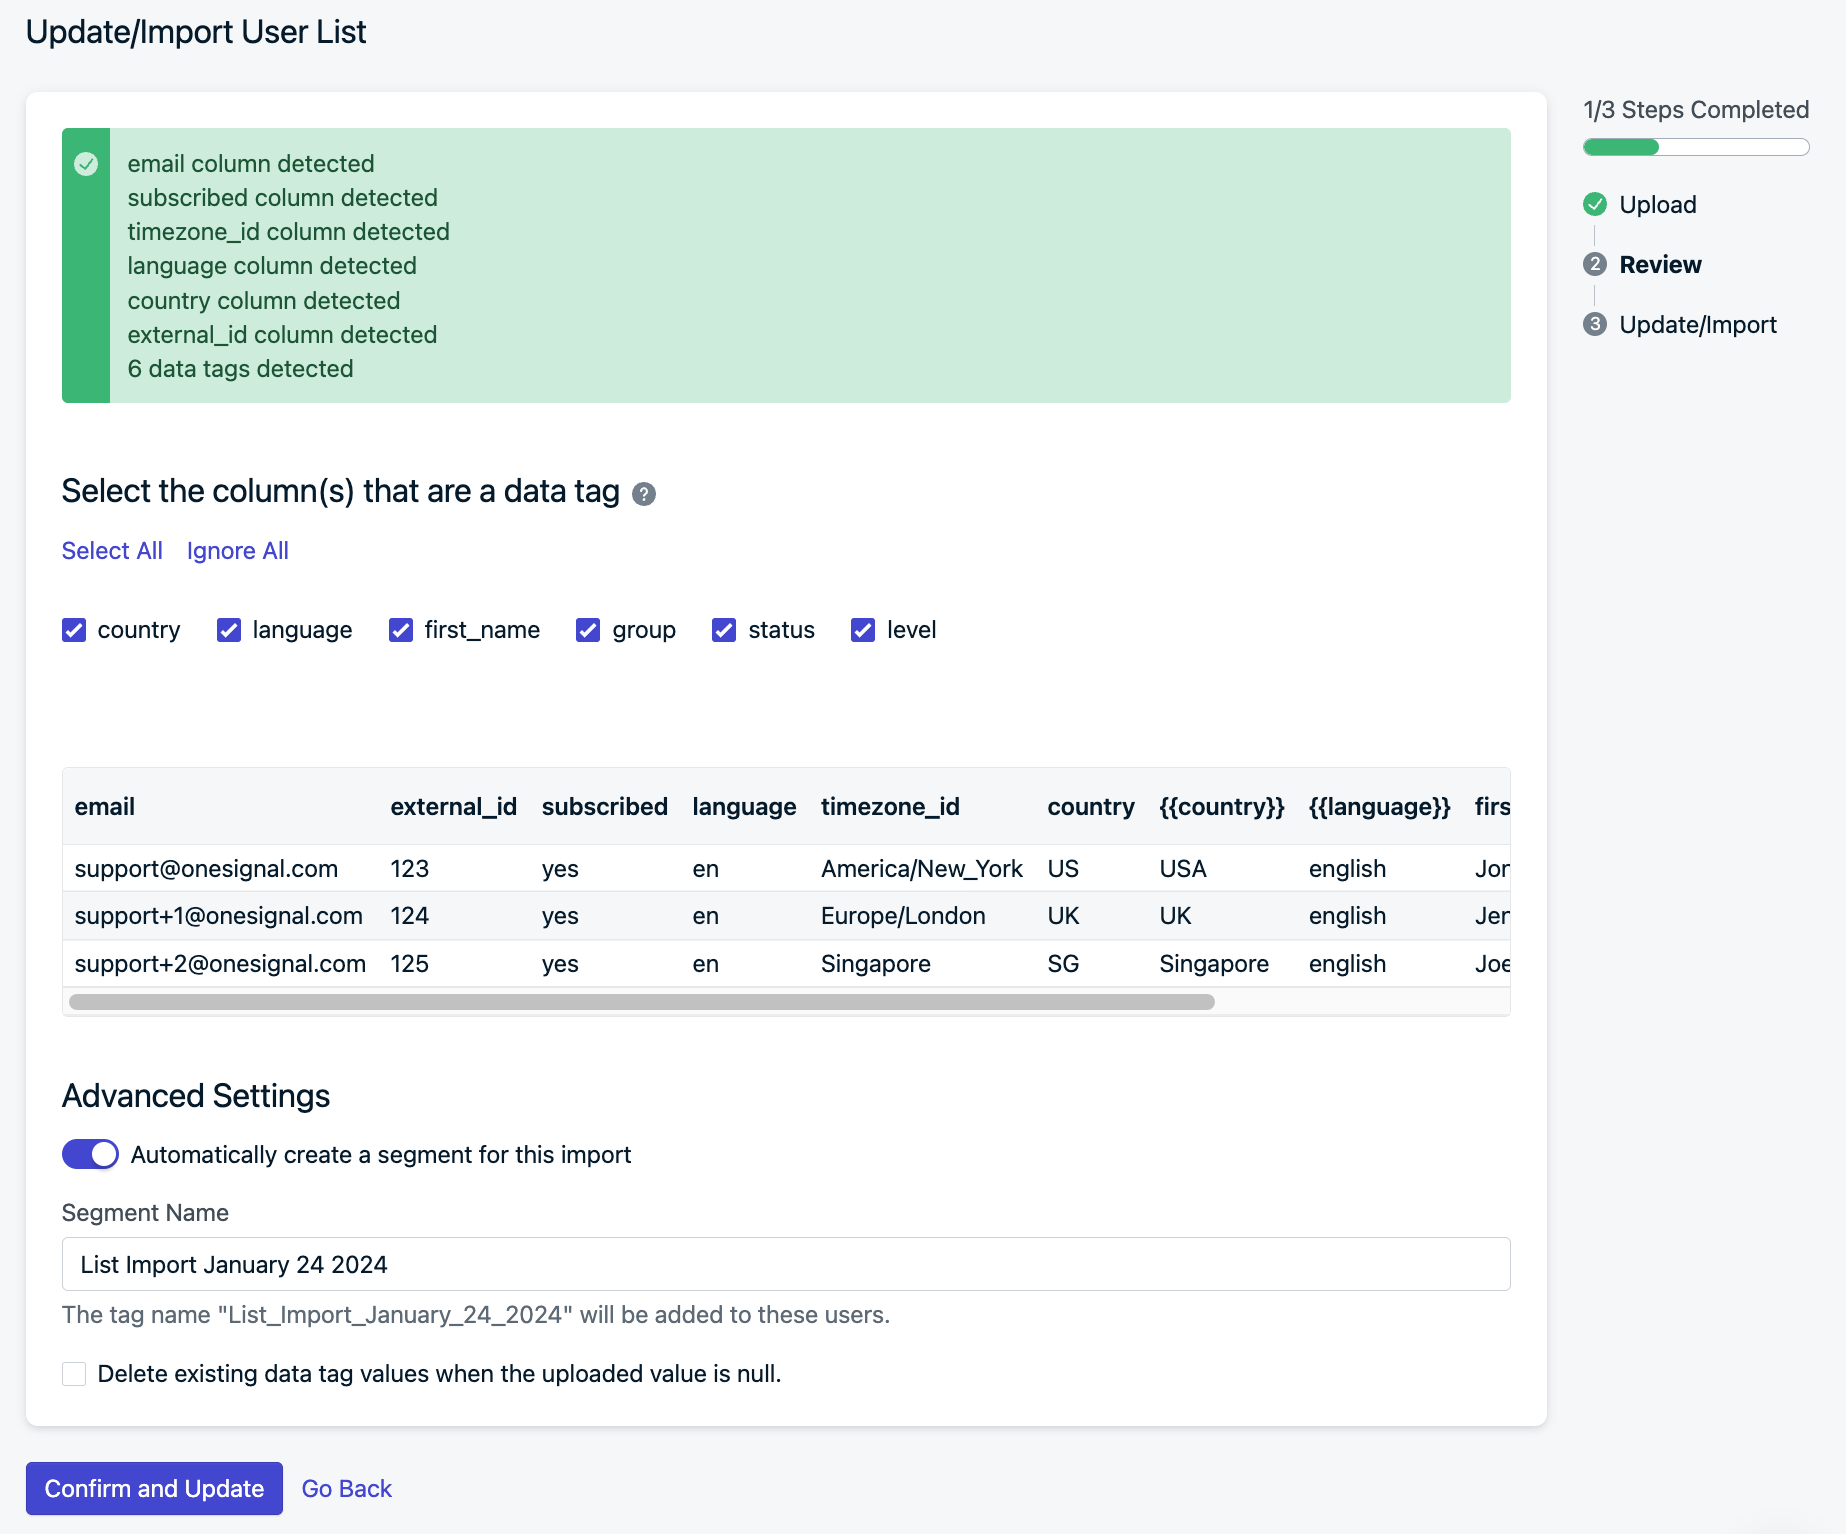
Advanced settings
If you want to create a segment to send messages to this list, toggle on the Automatically create a segment for this import to set a new tag and create a segment for these users.
Delete existing data tag values when the uploaded value is null
Check this option if you want to delete the tag on the user if the key is present on the user and no value set in the CSV.
Review and click Confirm and Update when ready to import. You will get an email to the current address when the upload is finished.
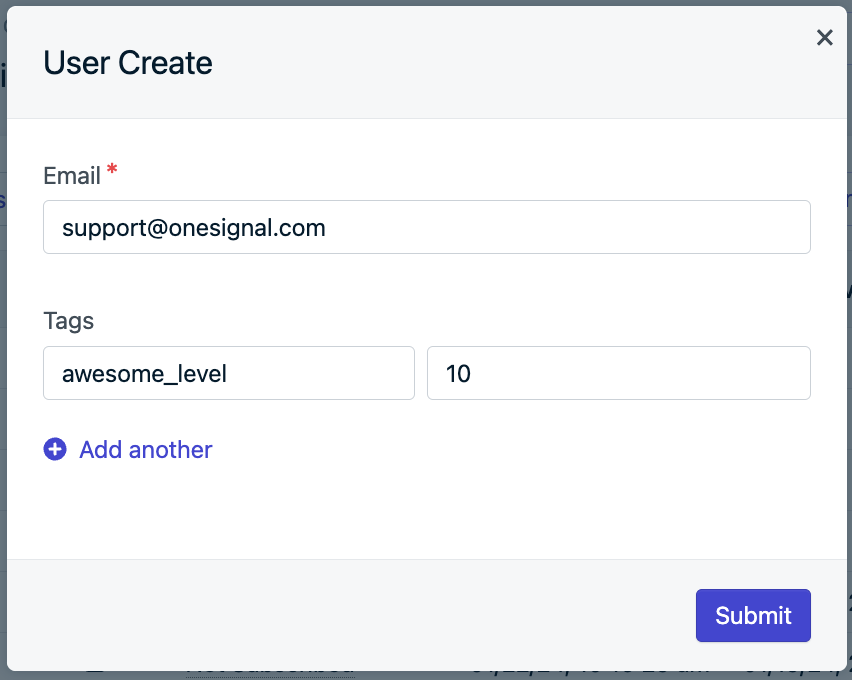
Manually add emails
Navigate to Audience > Subscriptions > Arrow next to Update/Import Users > Manually Add Emails to open a new modal where you can add an individual user's email and tag data.

Done!
Once you've imported your emails, go back to Email setup to determine if you have any steps left.
Updated about 2 months ago